
|
Re: painting the 51 200
|
||||
|---|---|---|---|---|
|
Home away from home
|
Thanks for the comments guys. During the winter, you can only drive in a small portion of the park, and you have to have four wheel drive, so no Packard runs this month. Maybe this coming summer!
I'll be posting some photos later today of the rubber parts - some from Steele and some from Restoration Specialties. The fun project will be making the fender skirt gaskets from a sheet of masticated rubber (1/16" thick).
Posted on: 2013/1/11 9:55
|
|||
|
||||
|
Re: painting the 51 200
|
||||
|---|---|---|---|---|
|
Home away from home

|
A good colour combination David, it looks very smart and quite authentic 50's which really suits.
I'll be interested to see how you go with the rubber on the fender skirts. I have to do the same work on mine soon. There were heavy staples used on mine, so I'm thinking of getting some the same if possible and just bending them into original holes. They must have had quite a 'heavy duty' stapler to punch them through 18g metal back then. Reckon I'll use some adhesive also which will have the added benefit of stopping any road water seeping through the joint.
Posted on: 2013/1/13 7:30
|
|||
|
1951 Packard Club Sedan | [url=ht
|
||||
|
||||
|
Re: painting the 51 200
|
||||
|---|---|---|---|---|
|
Home away from home
|
I bought some masticated rubber (rubber sheet with fibers) from Restoration Specialties. It is supposed to be 1/16" thick, but it sure looks thicker than that. The smallest sheet they sell is a 12x48" piece, which you have to cut into strips in the shop. I plan to cut the rubber, glue it to the skirt, using as little cement as possible, and then drill holes in the rubber using the old holes in the skirt as a guide. I'll then insert some stainless steel wire and bend it over to replicate the staples. Sure is a bunch of work, but I'm sure it will look good.
I detailed the hood hinges yesterday, spraying them with aluminum color after a through cleaning and sanding. I removed the springs using channel locks and a large screw driver to pry them off the hinge pins. After painting them with a satin black paint, I reinstalled them by hooking the rear pin, then used a brake tool as a pry bar. Put the end of the tool by the hinge pin, hook the spring over the tool and pull back. I had anticipated lots of cussing, bleeding and pain. Much to my surprise, it popped right on, both times. I'll shoot a photo of the tool tomorrow. The interesting thing on the paint is that the Imron had lots of orange peel in it right after spraying, but now, three days later, it has continued to dry and has really smoothed out nicely. We will sand it lightly with 600 grit paper prior to top coating it with clear. I'll color sand it with 2000 grit and buff it out this spring when it gets warm enough to do this outside without the water freezing! (it is presently up to 9 degrees from 5 this morning).
Posted on: 2013/1/13 11:21
|
|||
|
||||
|
Re: painting the 51 200
|
||||
|---|---|---|---|---|
|
Home away from home
|
Well, I forgot to shoot the brake tool, but will try and do that later. Here are some more progress photos, showing the true color of the ivory. We opened the door to the outside in order to get a sunlighted photo rather than the florescent. It had warmed up to 22 degrees, so we didn't freeze while shooting the pictures. The top has two layers of clear coat; still have to sand the body before putting three coats of clear on it. Hope to take it home Friday, as long as the weather man cooperates.
Attach file:  (60.31 KB) (60.31 KB)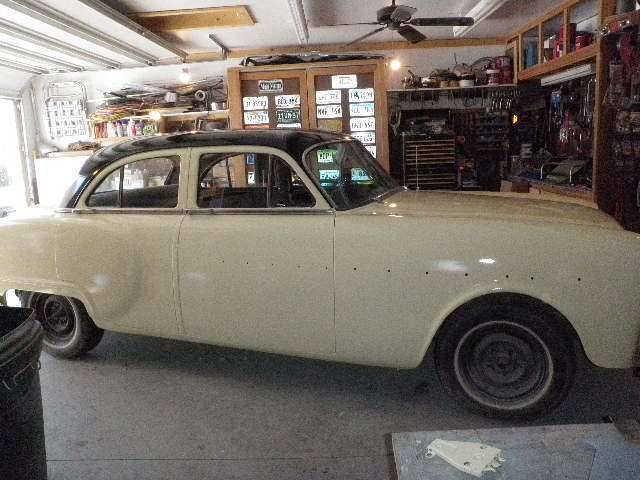 (38.66 KB) (38.66 KB)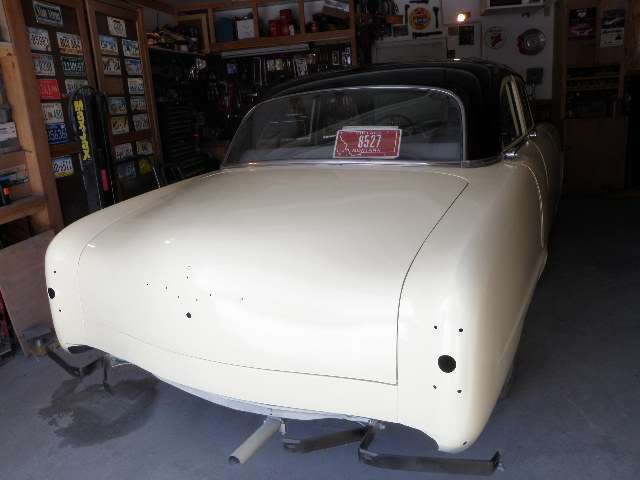
Posted on: 2013/1/15 18:53
|
|||
|
||||
|
Re: painting the 51 200
|
||||
|---|---|---|---|---|
|
Home away from home
|
There was a question of what I use to seal the welds that I didn't answer earlier. The ones on top of the rocker panel were sealed using a paint on/smear on product we got from the paint supply store. The bottom of the rocker panels were sealed by drilling two equal spaced holes in the bottom of the panel, then using Eastwood's rocker panel sealer, squirted into the cavity by use of a plastic tube. The sticky greenish yellow stuff coats the metal and prevents rust. Just don't apply it without having newspaper under the entire length as it will find any gap and drip thru it. You leave the holes in the rocker panel for drainage. The original panels had V shaped holes, which can be mimicked by sticking a phillips screwdriver in the hole and pulling the screwdriver back to push the metal up and down. Just make sure the "scoop" faces to the rear.
Posted on: 2013/1/16 8:49
|
|||
|
||||
|
Re: painting the 51 200
|
||||
|---|---|---|---|---|
|
Home away from home
|
That's helpful David - especially the bit about the 'V-shaped holes'. My rockers were so rotten there was no sign of the holes (- well, there were plenty of holes(!) but couldn't tell if there had been any drain holes or the shape of them originally).
Posted on: 2013/1/16 17:21
|
|||
|
1951 Packard Club Sedan | [url=ht
|
||||
|
||||
|
Re: painting the 51 200
|
||||
|---|---|---|---|---|
|
Home away from home
|
I'll pick the car up tomorrow and bring it home to let it cure in the heated garage for a while. The painter needed to get the car out of the way so that he can paint the wheels, fender skirts and splash pans on the bumpers. Should get them later next week. The three coats of clear will need to be color sanded to take care of the mild orange peel, dust bits etc. as soon as it warms up enough to turn the hose bibs back on and sand the car outside. This could be next week or May!
Lots of work left to do on the trunk, weatherstripping, rubber bumpers etc. More photos to follow.
Posted on: 2013/1/16 21:06
|
|||
|
||||
|
Re: painting the 51 200
|
||||
|---|---|---|---|---|
|
Home away from home
|
Well, picked the 51 up today and drove it home over snow packed roads. Really makes you appreciate ABS and traction control! Anyway, got it home without problems, uphill thru the snow both ways. The wheels and fender skirts come next week. Plenty left to do.
I also attached a photo of the brake tool. The scooped end of the tool just fits nicely over the pin that holds the spring on the hood hinge, making it easy to put it back on. Also attached is the sealant I got from Eastwood for the rocker panels. Attach file: (35.72 KB)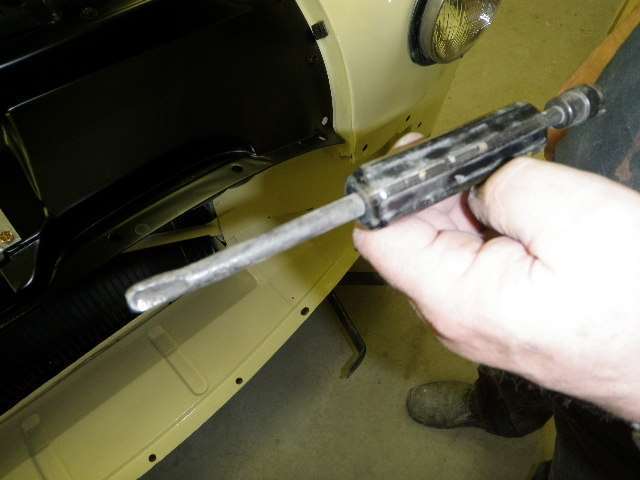 (40.19 KB) (40.19 KB)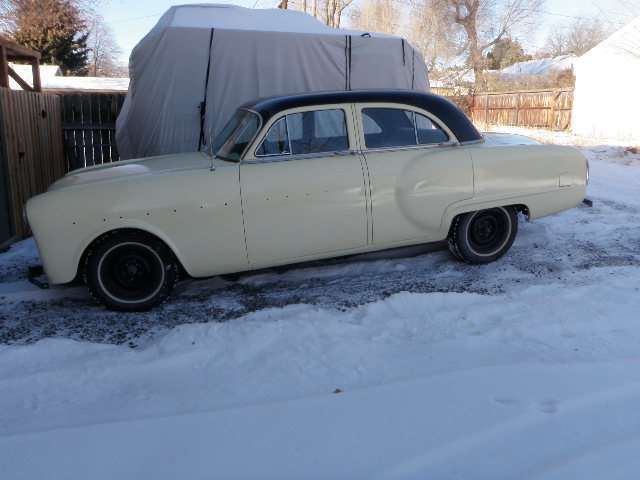 (33.90 KB) (33.90 KB)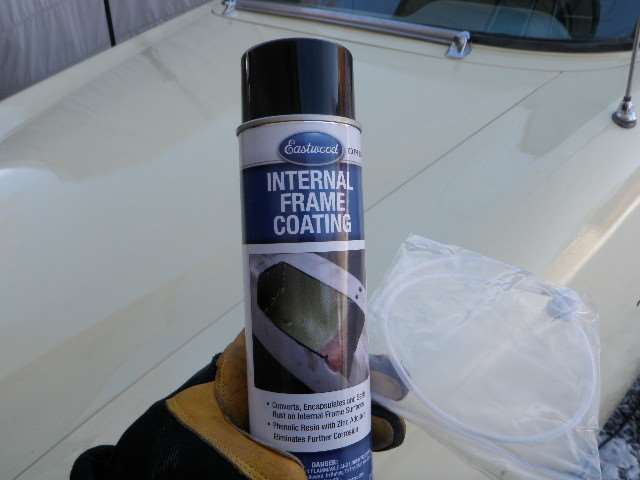 (53.76 KB) (53.76 KB)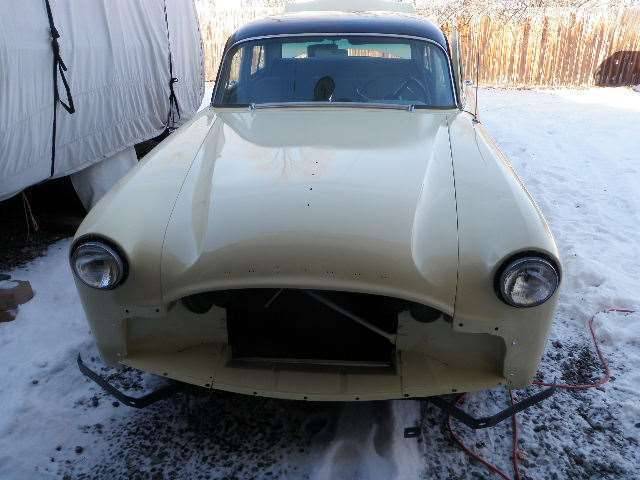
Posted on: 2013/1/17 21:44
|
|||
|
||||
|
Re: painting the 51 200
|
||||
|---|---|---|---|---|
|
Home away from home
|
Ok - some lessons learned.
1. If you are painting the door jambs, remove the weather stripping on the doors (did that). 2. Remove the rubber bumpers on the door sills (missed those) as when you replace them with new, they will be slightly smaller than the old ones. There is one at the front of each door. Murphy is alive and well.... 3. If you are replacing the rubber weather stripping, remove the door striker plates (three large phillips head screws, easy to remove) as when you install the new weather stripping, it is going to be thicker than the old stuff, which will leave a line around the strike plate. Also, the plate is so thick, that the spray gun will leave a shadow behind it, where the paint won't hit. 4. Adjust the hood and trunk prior to painting and removal of rubber items. Drill a small hole thru each hinge and into the hood or trunk. This will allow you to insert an awl, drill bit, 8 penny nail or other instrument of your choice to align the hood and trunk after you've messed with it. My painter told me this after we scratched the paint around the hinges..... 5. Order the rubber parts before you paint. I had about 3/4 of what I needed and had to spend several weeks researching and ordering the rest. 6. Bag and tag your bolts, fasteners etc. You will forget where some of them went! I'm sure I'll find more as I put everything back together.
Posted on: 2013/1/20 21:51
|
|||
|
||||


