|
Re: Eric's 1956 Patrician STS Restoration Project
|
||||
|---|---|---|---|---|
|
Home away from home

|
Well, I found a pic of the O/D unit I'm planning on using for the AOD-T/U project, so here ya all go! This is the early Packard O/D unit, from 1951-1954, (I'm assuming, this pic is off E-bay) I just wanted everyone to get an idea of the length of the o/d unit, as compared to the V8 version, which is at least 6" longer.
Attach file:  (22.61 KB) (22.61 KB)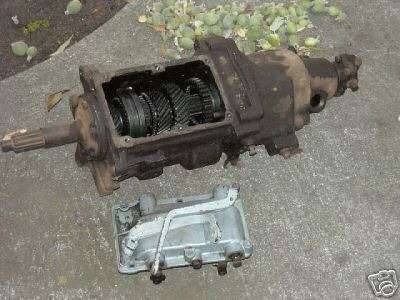
Posted on: 2007/2/24 10:50
|
|||
|
||||
|
Re: Eric's 1956 Patrician STS Restoration Project
|
||||
|---|---|---|---|---|
|
Home away from home
|
For some of you new members who haven't seen my supercharger setup on the Pat, here ya go:(notice that it all fits under the hood, and retains a total stock appearance from the outside.)
Attach file: (48.90 KB)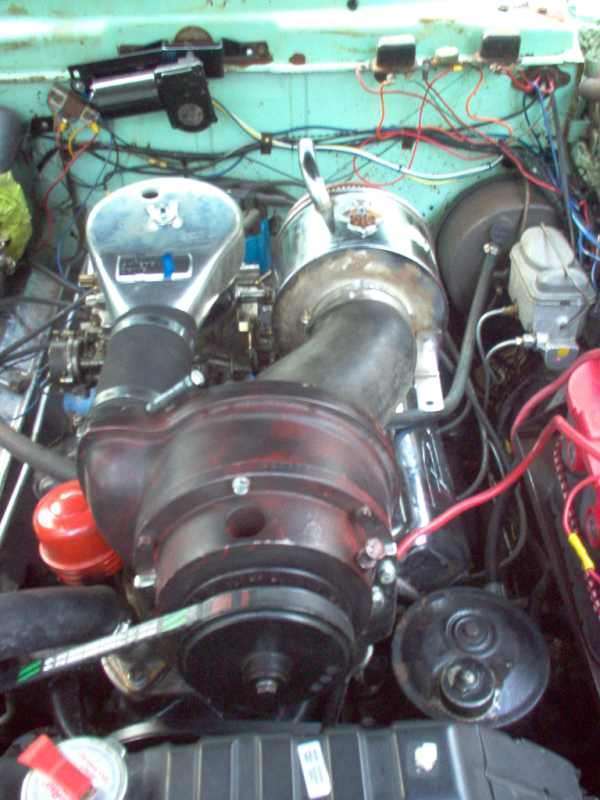 (31.08 KB) (31.08 KB) (48.18 KB) (48.18 KB)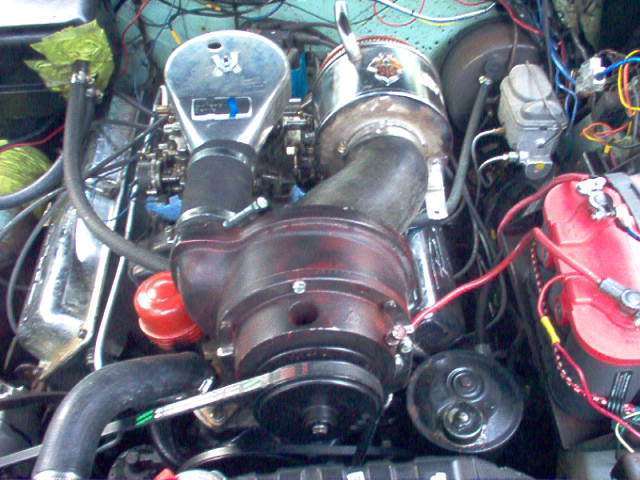 (41.08 KB) (41.08 KB)
Posted on: 2007/3/7 18:37
|
|||
|
||||
|
Re: Eric's 1956 Patrician STS Restoration Project
|
||||
|---|---|---|---|---|
|
Home away from home

|
I call that a sleeper. Slick Eric very Slick.

Posted on: 2007/3/8 7:05
|
|||
|
||||
|
Re: Eric's 1956 Patrician STS Restoration Project
|
||||
|---|---|---|---|---|
|
Home away from home
|
Thanks a lot, Tom. That's my plan, to look stock but have a "sleeper"
This weekend, I did another modification to the Pat, I went from 1955 looks to 1956 looks. Too bad the grille's broken on the driver's side, and the piece is missing. I still think it looks better than with that '55 grille and bumper on it. Attach file: (41.08 KB) (41.16 KB) (41.16 KB)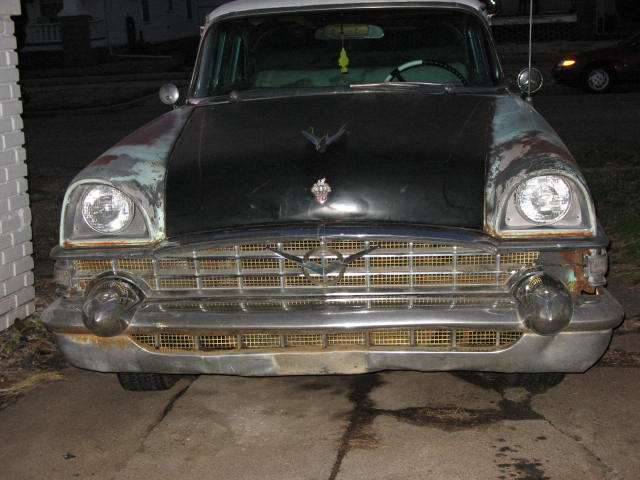
Posted on: 2007/3/12 19:52
|
|||
|
||||
|
Re: Eric's 1956 Patrician STS Restoration Project
|
||||
|---|---|---|---|---|
|
Home away from home

|
What kind of wiper motor is that???
Posted on: 2007/3/12 20:33
|
|||
|
||||
|
Re: Eric's 1956 Patrician STS Restoration Project
|
||||
|---|---|---|---|---|
|
Home away from home
|
That's the $200 '55-'57 Chevy repo. I presently have an original '55-'57 Chevy one on there now, saving the new one for emergencies. If you buy one, make sure you get the CAR version, not the truck. The truck will not work at all.
Posted on: 2007/3/12 20:50
|
|||
|
||||
|
Re: Eric's 1956 Patrician STS Restoration Project
|
||||
|---|---|---|---|---|
|
Home away from home
|
Something new for you guy's: You already know my difficulties with harmonic balancers, so this last weekend, I decided to try and find out the source of my oil leak. I now have a new timing cover seal on the front cover, and I don't have a leak there. So, I was thinking that since it's high up on the engine, it must be either the valve cover or the valley pan. I took the car to the car wash, cleaned off the engine with degreaser and a nice high pressure wash, and decided to drive it for a while to see if I could locate the source....
So, after driving at highway speeds for about an hour, I arrived at a friends house for a BBQ. I got out, popped the hood, and guess what? about 1/2 a quart was on the top of the engine! (I figure this by the dipstick reading) I start looking around, the valve cover's dry, the valley pan is drenched, and then I notice it: the oil filler tube.... Now, I had to shorten my oil filler tube about 3" to clear the supercharger, but this shouldn't matter. (And it did this before I cut the tube and put on the S/C) I pulled the tube out, and siliconed up the bottom end of it where it goes in the block. (the sides, NOT the end where the oil goes through!!) then drove it home.... Same thing when I got home, oil all over the tube!! This has got me wondering, and looking pretty hard, then it hits me like lightening! The tube, is on the passenger side of the engine... the tube has NO baffle of any kind to restrict oil from flowing UP through the tube, it's just a straight tube. I found the old oil filler tube from the 374 that came out of the Pat, and low and behold, it has a baffle! So, when you have a straight tube above a spinning timing chain that's throwing oil UP the tube, you get one heck of a mess that's taken me quite a while to figure out what was causing it. My reason for posting this is, if you notice oil on the valley pan area, take a flashlight and look down the oil filler tube, if you can see all the way through, there's the cause of your mess. OR, you can take your dipstick and stick it down there, if it goes down more than the height of your tube, you might need to find the baffled version. I don't know if this is a running change from '55 to '56, but my '55 Hash engine didn't have a baffle, while the '56 Packard engine did. One thing is for sure, I don't have any oil consumption anymore, and it was all because of that dang tube!
Posted on: 2007/3/20 11:49
|
|||
|
||||
|
Re: Eric's 1956 Patrician STS Restoration Project
|
||||
|---|---|---|---|---|
|
Home away from home
|
For those of you who were reading my list of "to do's" to the Pat, and can't figure out how I was going to put an independent rear suspension under it, here's a teaser to get your juices flowing:
Attach file: (17.63 KB)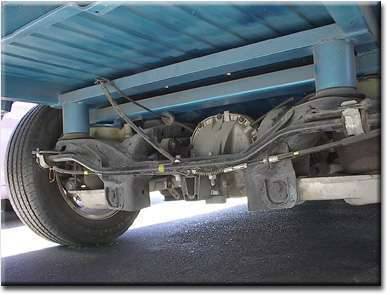
Posted on: 2007/3/26 15:16
|
|||
|
||||
|
Re: Eric's 1956 Patrician STS Restoration Project
|
||||
|---|---|---|---|---|
|
Home away from home
|
You'll notice the two air bags... This is where I plan on attaching the rear load arms of the T/L suspension to. I plan on modifying the arms extensively, however. It's too bad that I can't park my car for a while to do this, as I could trade my arms to KevinAZ for his old ones, as I'll be cutting off the ends to make this work. I'm not giving all my secrets up just yet, but from all sides this appears to be an easy job.... (and I'll eat my words later, I know!)
Posted on: 2007/3/26 15:20
|
|||
|
||||


