|
Re: 1924 Sport 136
|
||||
|---|---|---|---|---|
|
Home away from home
|
After applying the epoxy primer, the problem that I had previously described became clear in one place... sanding the rims instead of sandblasting or dipping them. In the area of the recess of the air valve, the layers of paint were difficult to sand down by hand. So I sandblasted this small part in my sandblasting cabin. It was now clearly visible how deep the rust scars were in the visible external surface. Filling this with spray filler and then sanding everything down again to achieve a smooth surface and prevent the paint layer from building up too thick would have required countless additional hours.
Karl Attach file:  k-P1040458.JPG (82.67 KB) k-P1040458.JPG (82.67 KB)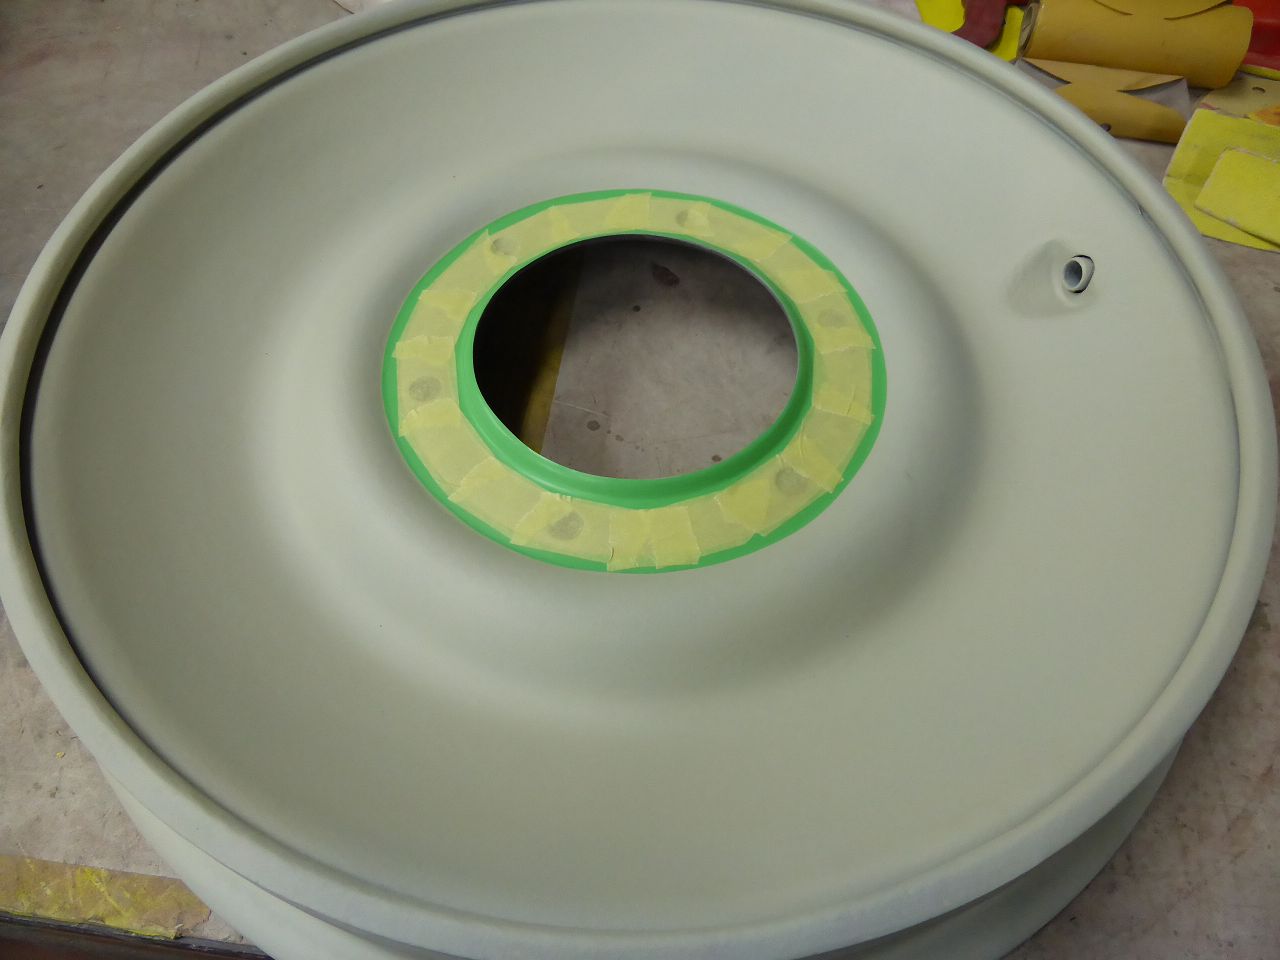 k-P1040456.JPG (79.40 KB) k-P1040456.JPG (79.40 KB)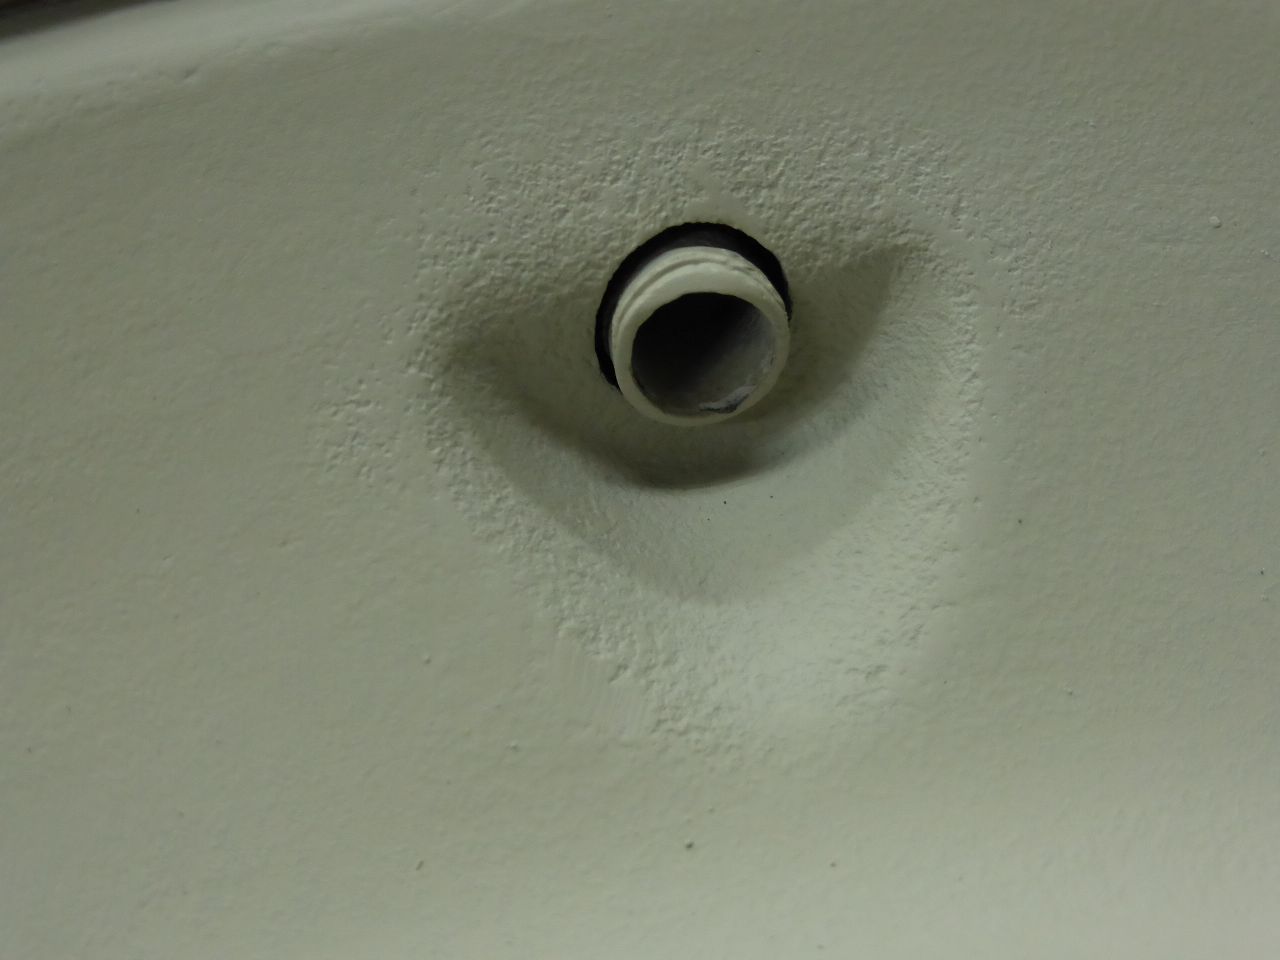 k-P1040459.JPG (83.42 KB) k-P1040459.JPG (83.42 KB)
Posted on: Today 14:06
|
|||
|
||||
|
Re: 1924 Sport 136
|
||||
|---|---|---|---|---|
|
Home away from home
|
After the final grinding the problem was solved.
Attach file: k-P1040455.JPG (156.40 KB)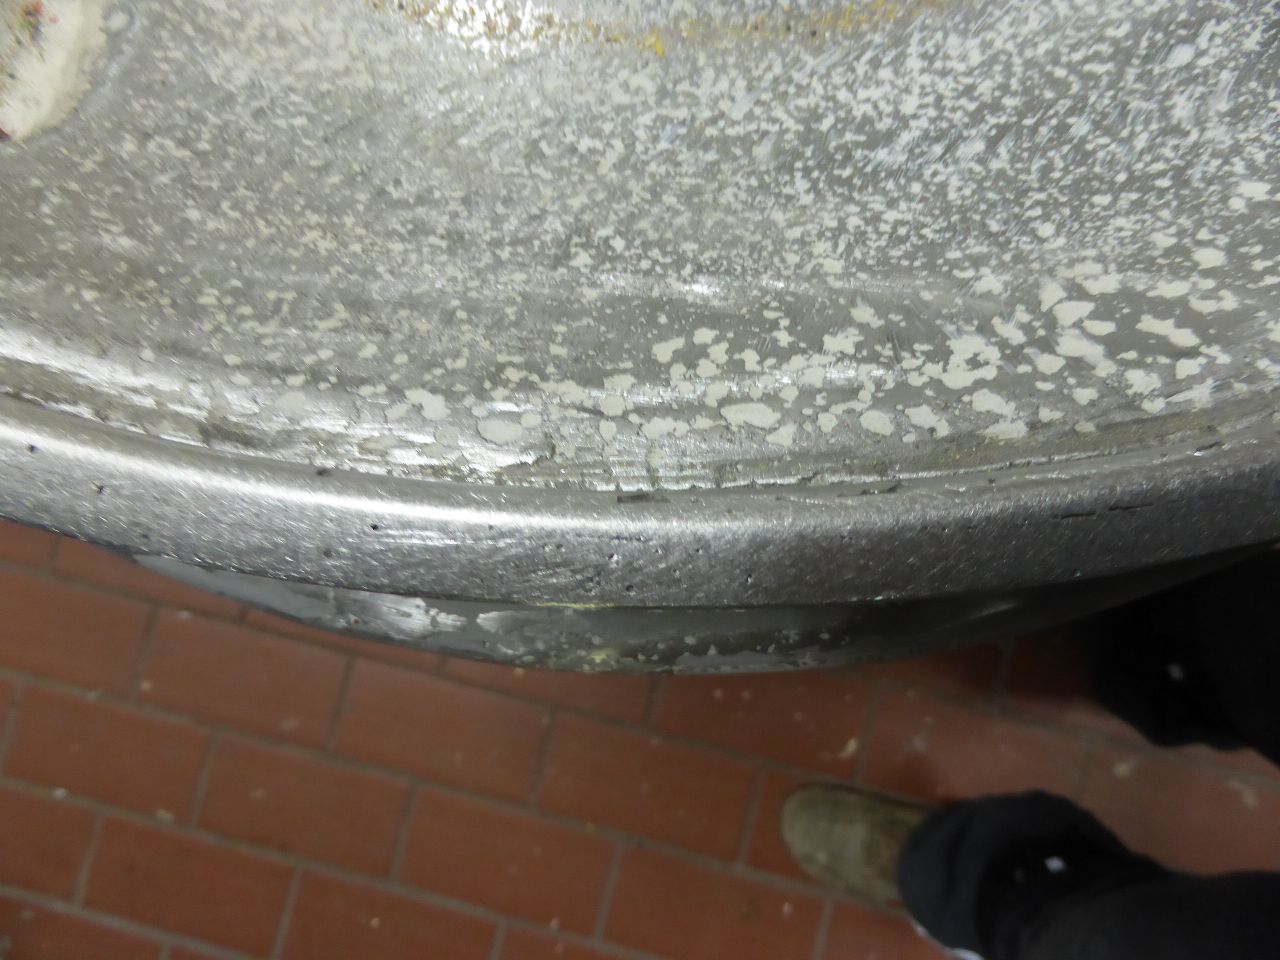
Posted on: Today 14:04
|
|||
|
||||
|
Re: 1924 Sport 136
|
||||
|---|---|---|---|---|
|
Home away from home
|
While grinding the replacement rim, it was discovered that the edge of the rim was so damaged in one place that only a weld repair was the correct solution to correct this problem.
I cleaned this area with a cup wire brush on an angle grinder... ... underlaid with a 2 mm thick copper sheet to fill the rust spots and holes without burning through to the area of the snap ring holder. Then fill this area step by step with Weldingpoint by Weldingpoint. After an initial intermediate grinding, this defect could then be completely remedied through further welding work. Karl Attach file: k-P1040448.JPG (121.08 KB) k-P1040451.JPG (145.40 KB) k-P1040451.JPG (145.40 KB)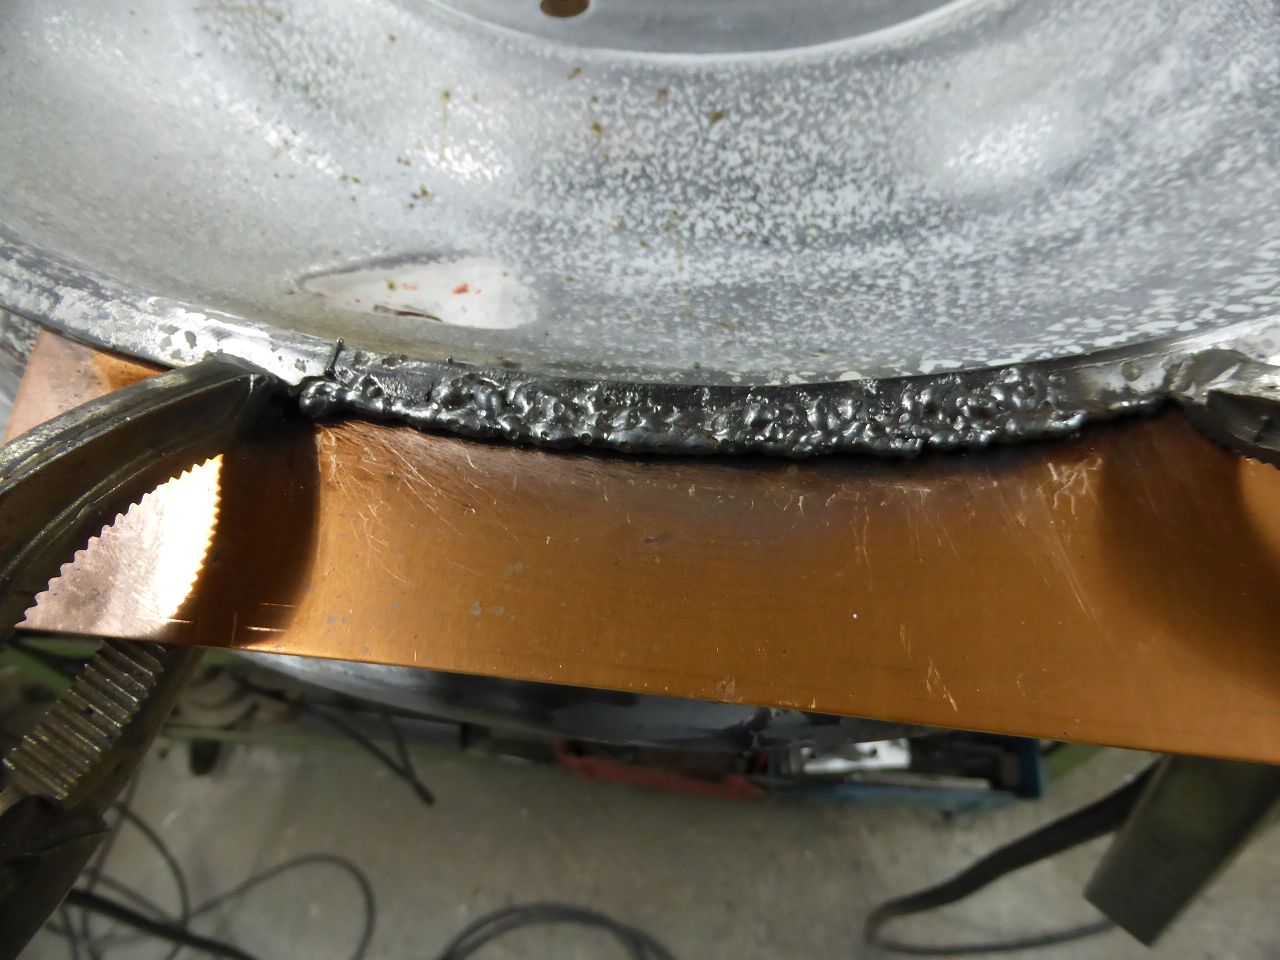 k-P1040453.JPG (171.39 KB) k-P1040453.JPG (171.39 KB)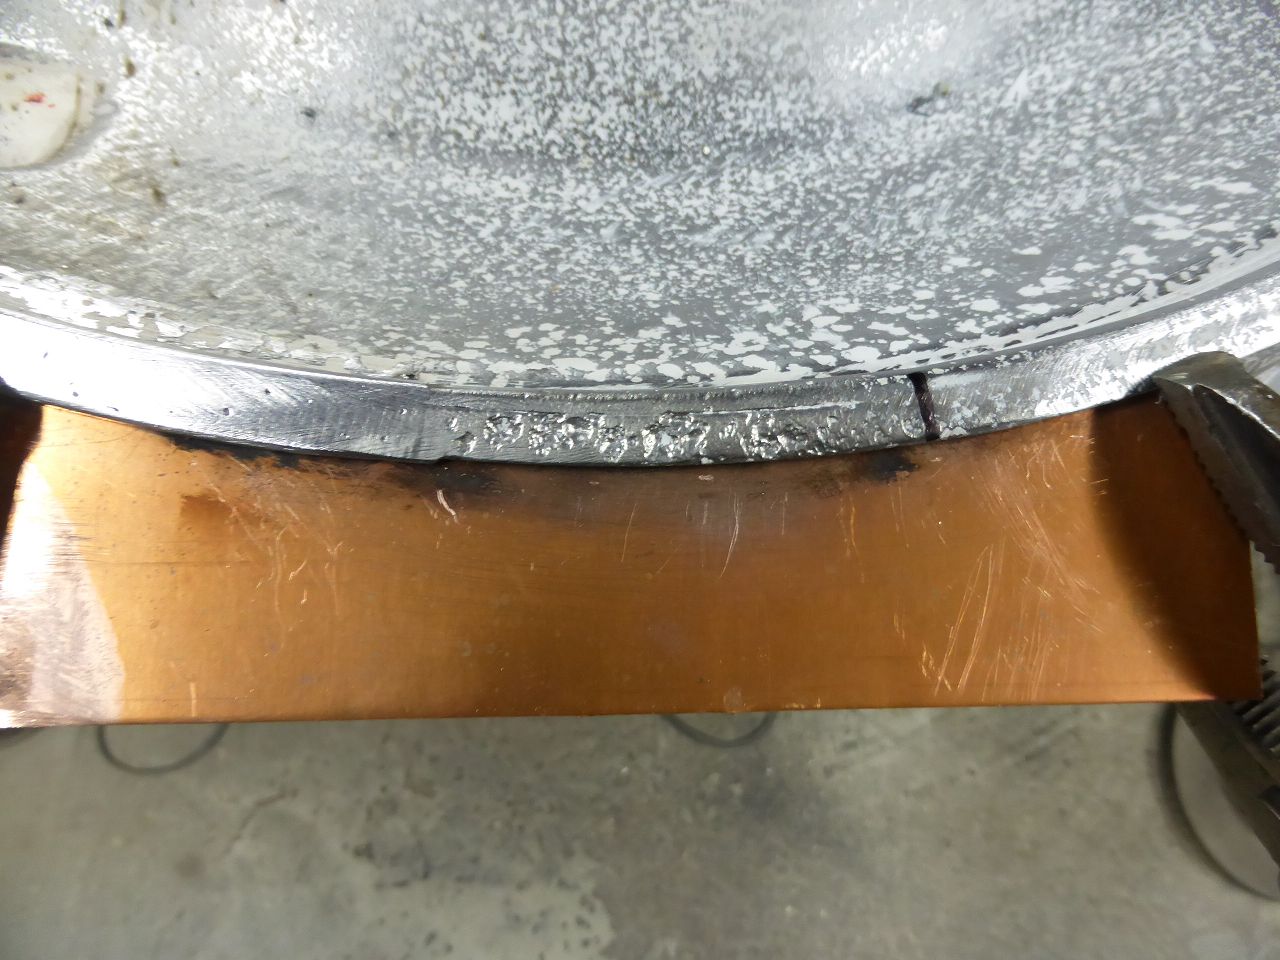
Posted on: Today 14:03
|
|||
|
||||
|
Re: 1924 Sport 136
|
||||
|---|---|---|---|---|
|
Home away from home
|
.... to correct 2 errors in this Google translation… the place where the snap rings sit will not be painted with “putty knife”…. but with “black filler” and Babinsky’s Sport is a 1924… sorry !
Karl
Posted on: 5/8 12:32
|
|||
|
||||
|
Re: 1924 Sport 136
|
||||
|---|---|---|---|---|
|
Home away from home
|
I continued working on the rims... after removing all the layers of paint, I was able to answer a question I had about the color. Apparently the rims were painted two-tone in 1924. I think that this was the case not only with the Sport model, but also with all other types in this series. I would like answers to this if anyone knows more details. The original “Vermillion Red” was only painted on the front visible surface. And possibly the edge of the rim over which the snap ring has to be levered was not painted in “Vermillion Red”, but rather in black like the rest of the rim, as you can see on Steve Babinski’s 19024 Sport. If you look closely at the photos of this sport and enlarge them, you can see that this edge shows clear signs of assembly. That's why I'll also paint the rear rims in black satin, as well as the remaining parts that belong to the frame. This creates a harmonious and appropriate image when you look at the visible areas of the chassis, suspension and frame.
I made a few suitable aluminum adapters for the rims, which were necessary to clamp the rims onto the balancing machine. In order to give the pipes a smooth surface to rest on the rims, I applied the deep rust scars in this area with a very strong and hard spatula. It is a 2-component epoxy filler with a very high tin powder content. After curing... I wait 24 hours at 20-24°C... I apply black powder “Dry Guide Coat” to locate missing spots or final holes. “Image….447”. In the next step, a not very thick layer of spray putty is applied to the entire rim area using the paint gun. However, I am leaving out the area where the snap rings need to be placed. I cover this area with an 8mm foam rubber cord and also tape it off with painter's tape. You can also use a suitable old electrical cable. The area where the snap ring is located will later only be painted with a black putty knife before the final top coat is applied. This ensures that the snap rings fit optimally on the deep and sharp edges in the joint. Pictures of that later. Maybe someone will recognize the car in the background. It's my everyday car over here. Karl Attach file: k-P1040430.JPG (146.51 KB)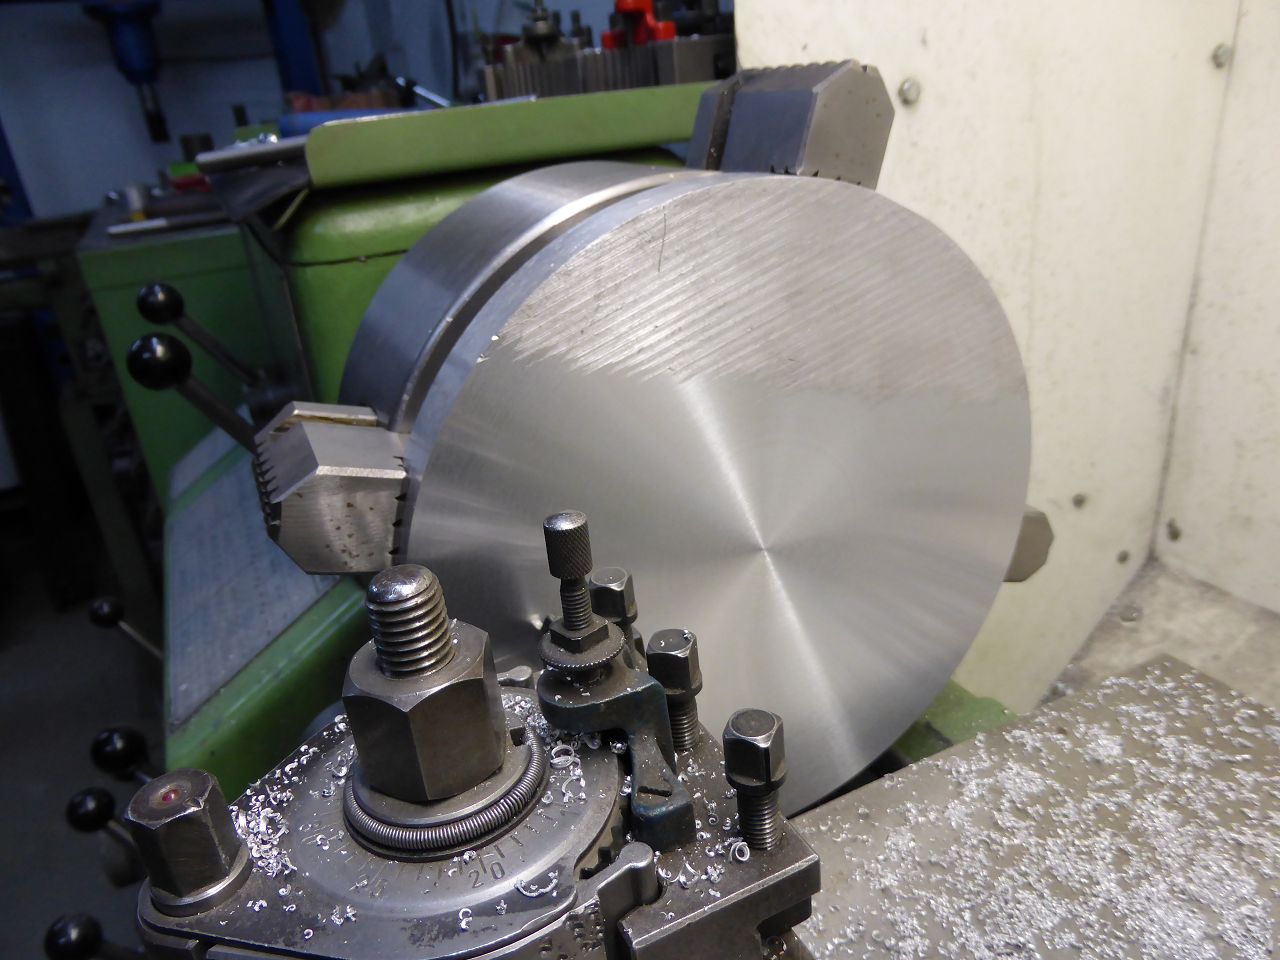 k-P1040443.JPG (120.96 KB) k-P1040443.JPG (120.96 KB) k-P1040439.JPG (184.42 KB) k-P1040439.JPG (184.42 KB)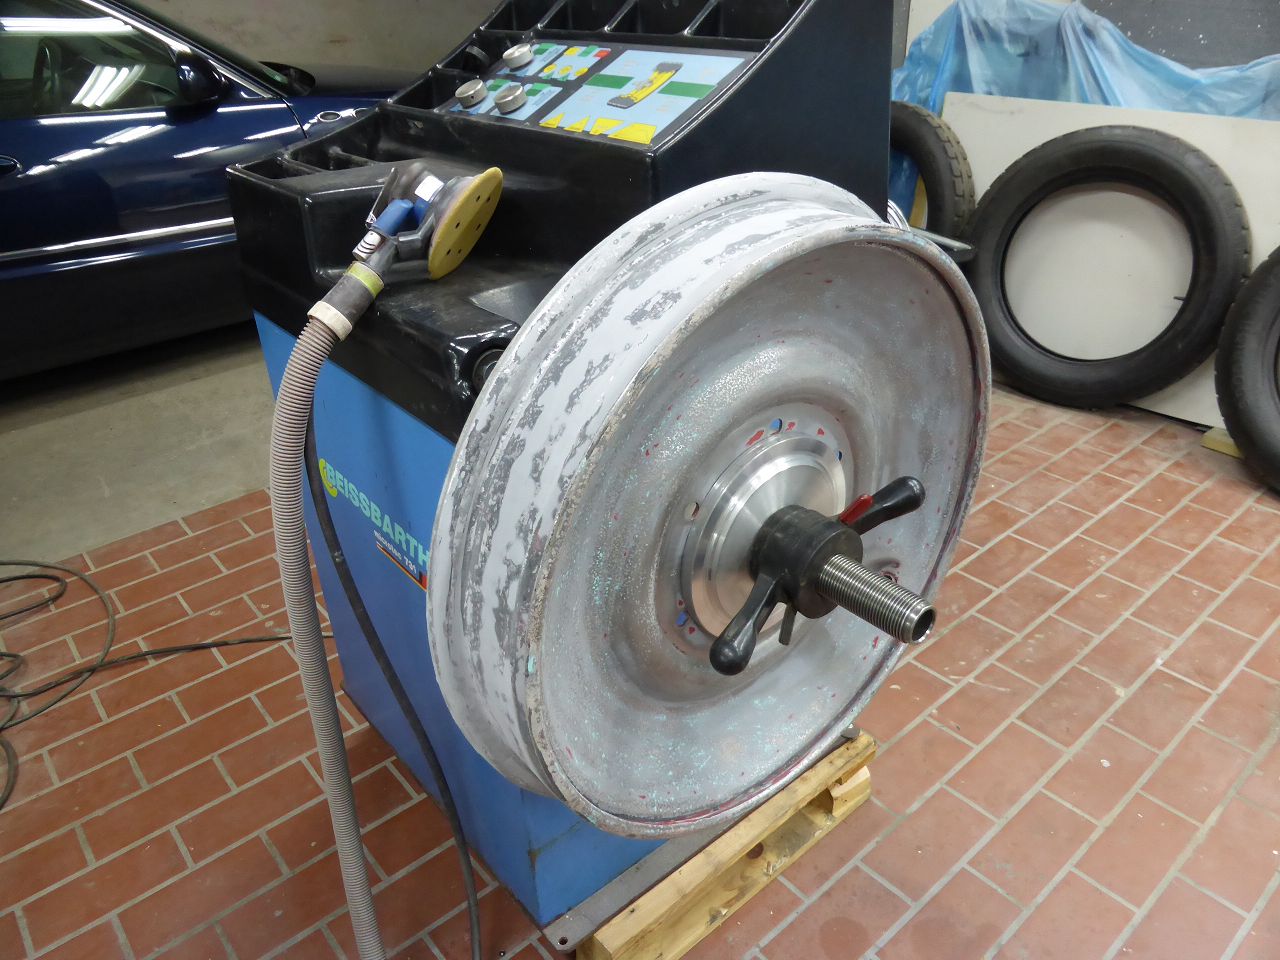 k-P1040440.JPG (124.48 KB) k-P1040440.JPG (124.48 KB)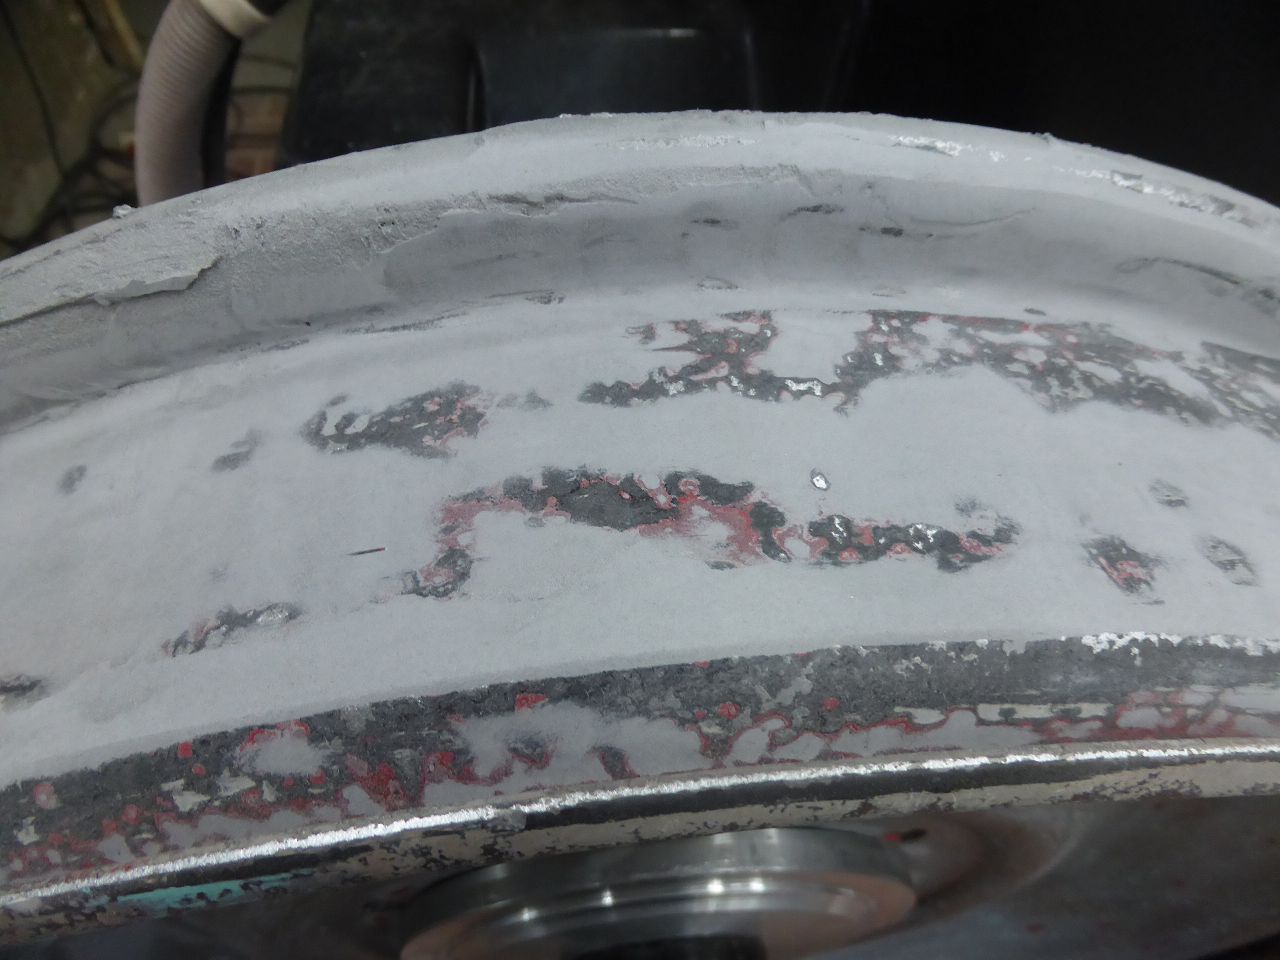 k-P1040446.JPG (149.67 KB) k-P1040446.JPG (149.67 KB)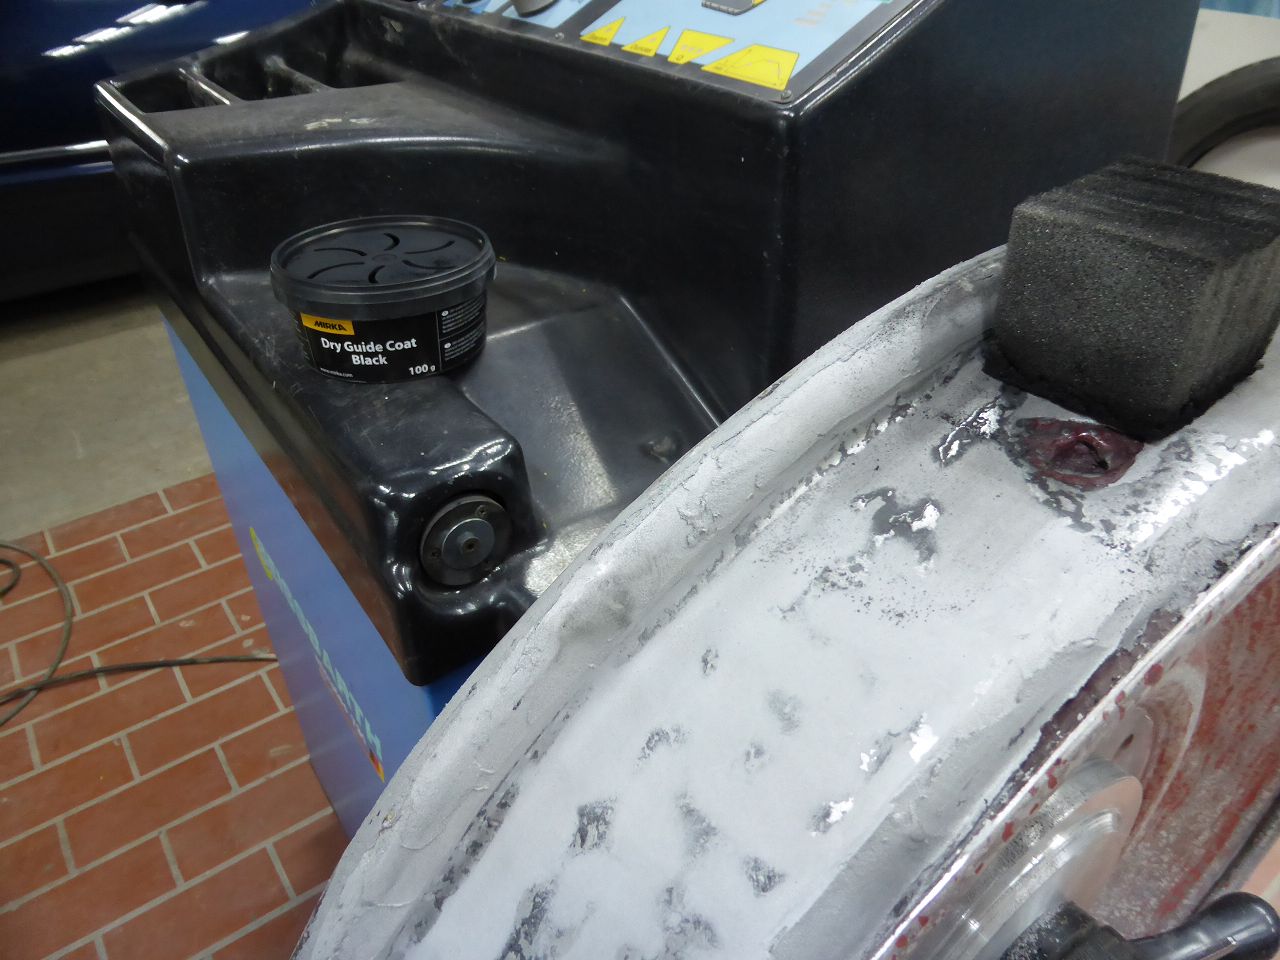 k-P1040447.JPG (120.64 KB) k-P1040447.JPG (120.64 KB)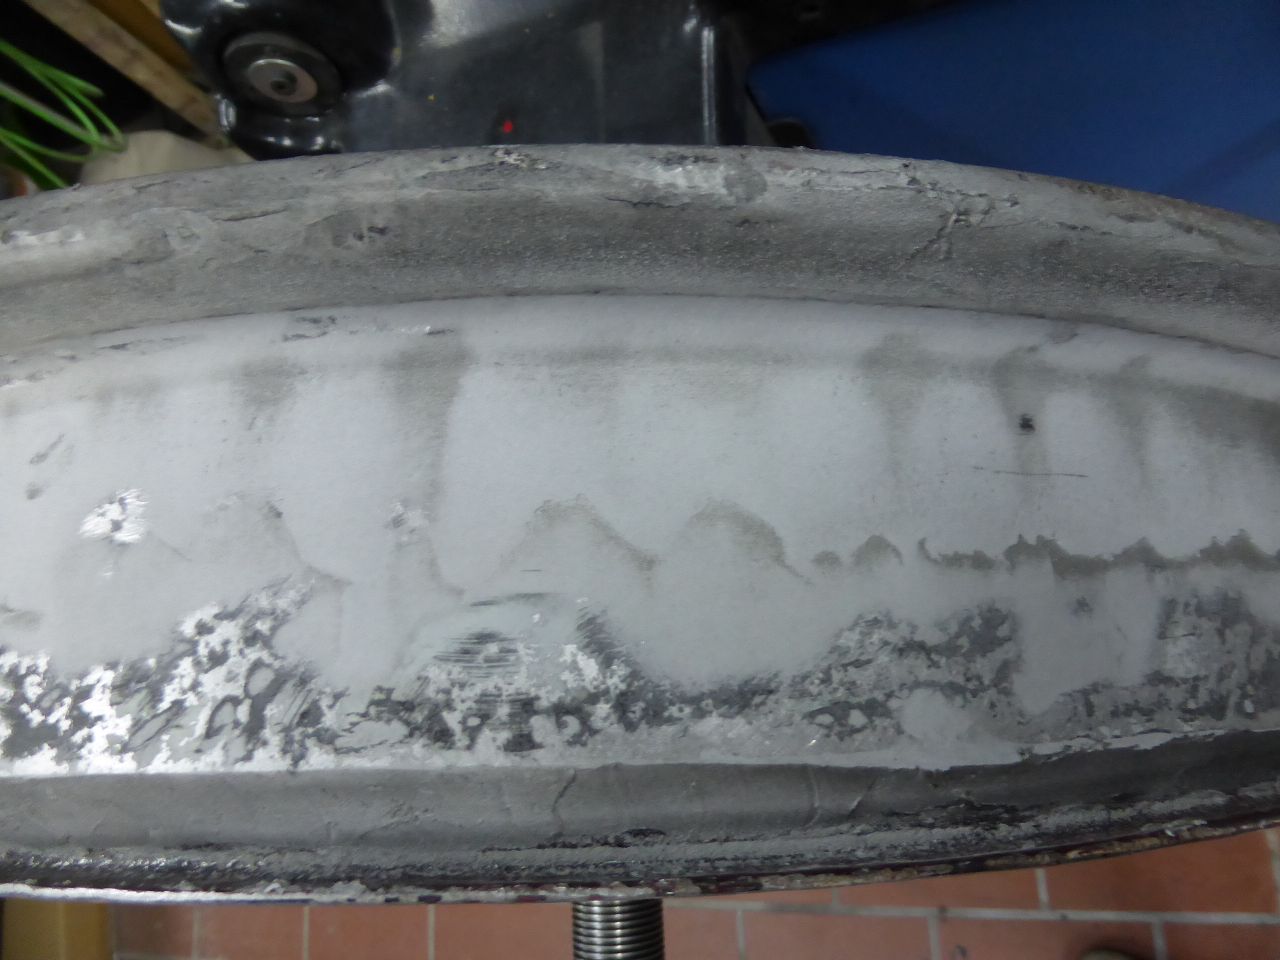
Posted on: 5/8 12:10
|
|||
|
||||
|
Re: 1924 Sport 136
|
||||
|---|---|---|---|---|
|
Home away from home
|
In between...here are a few pictures showing the application of the individual layers of putty and paint. It becomes clear that these rims, along with the frame, probably spent a long time somewhere in a junkyard or in the forest. Some of the rims have very deep rust holes. And there was putty in uneven layers. And...surprisingly, the original "Vermillion (?) Red" can be seen in the final layer of paint.
By the way, in some cases (such as in this case) I was never really able to understand the colors chosen and the color taste of the designers at this time. Karl Attach file: k-P1040424.JPG (223.98 KB)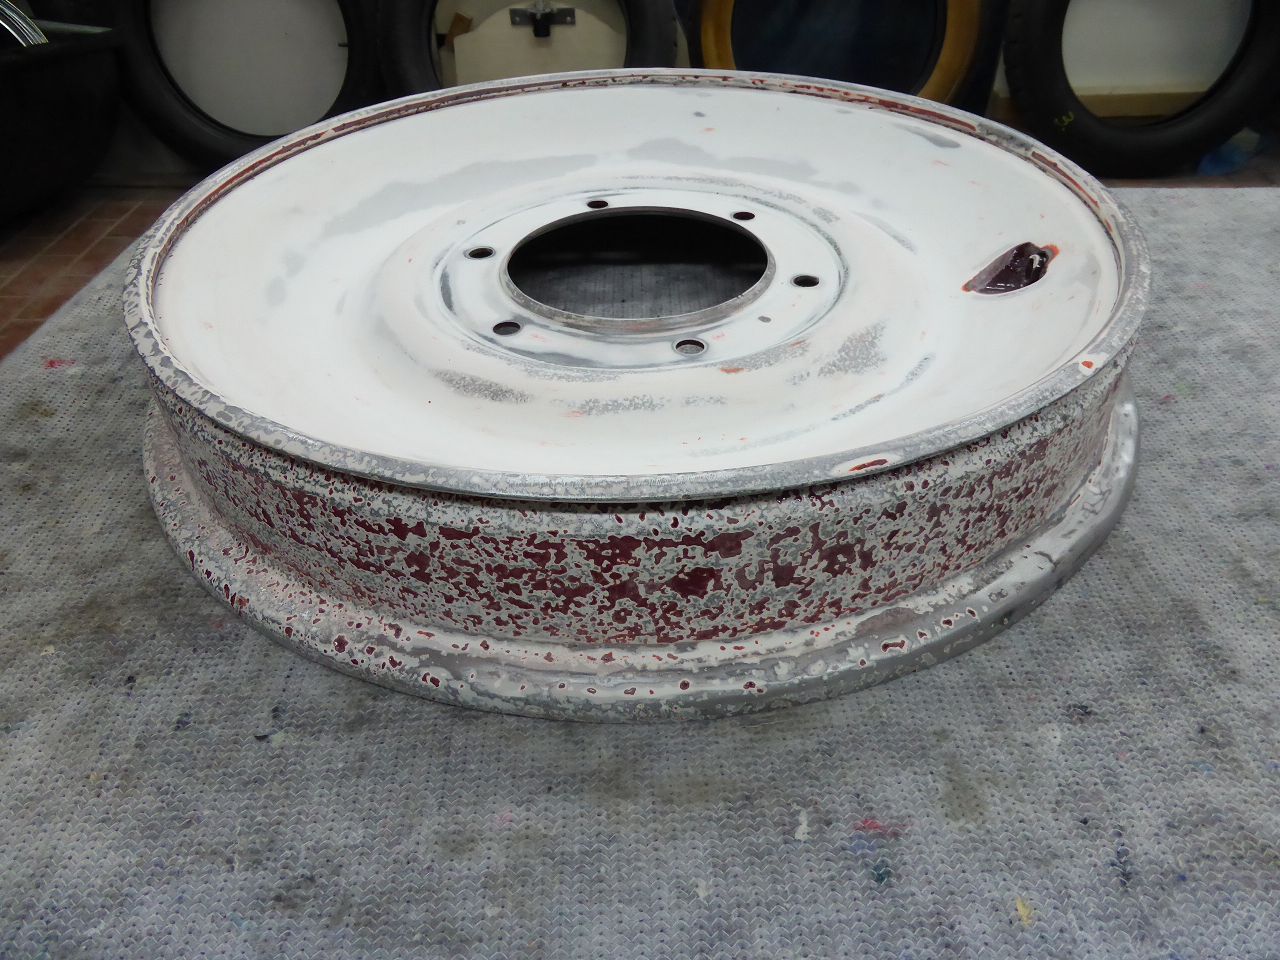 k-P1040425.JPG (192.98 KB) k-P1040425.JPG (192.98 KB)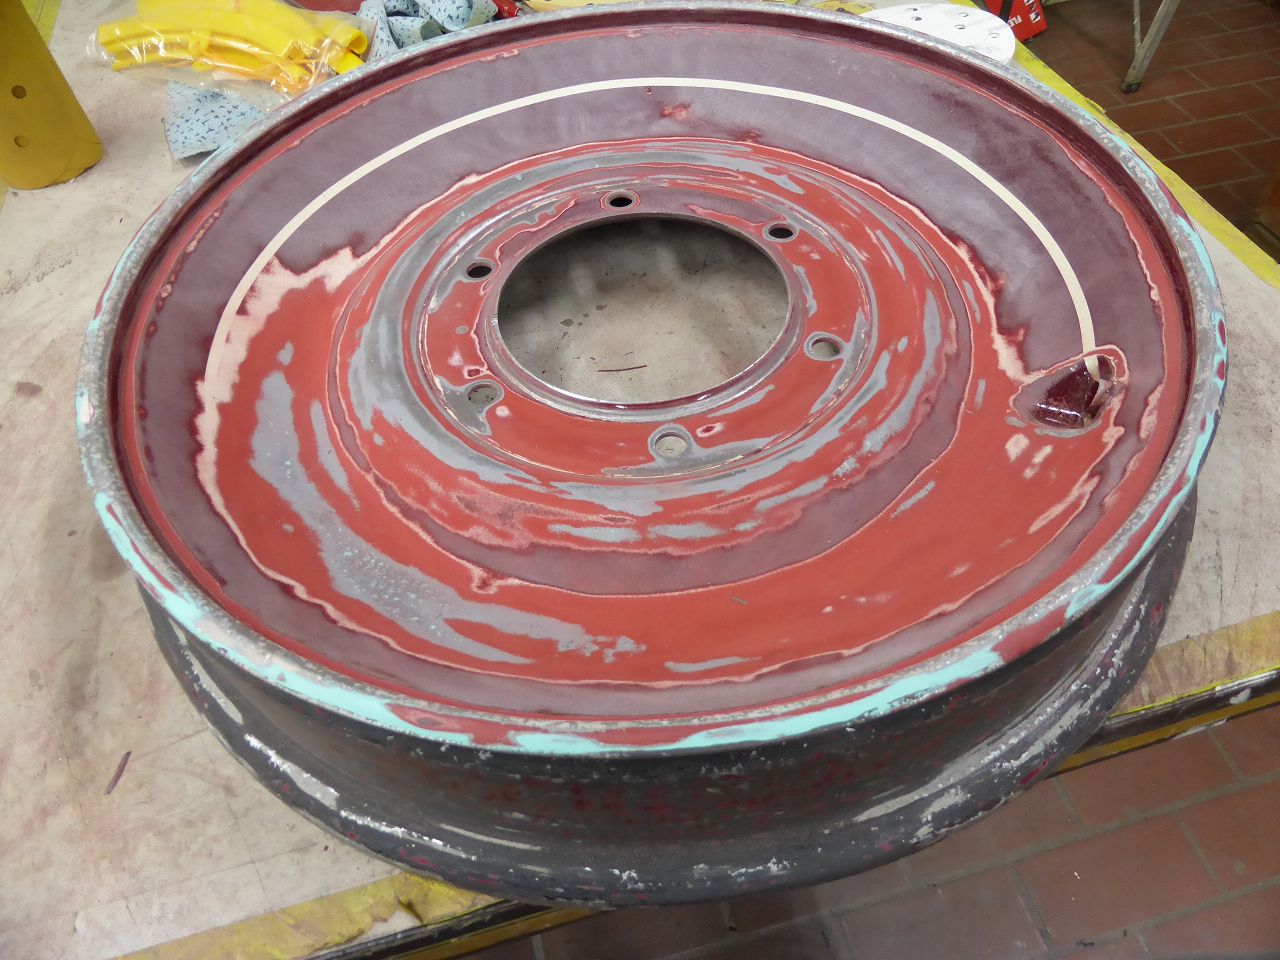 k-P1040426.JPG (170.91 KB) k-P1040426.JPG (170.91 KB)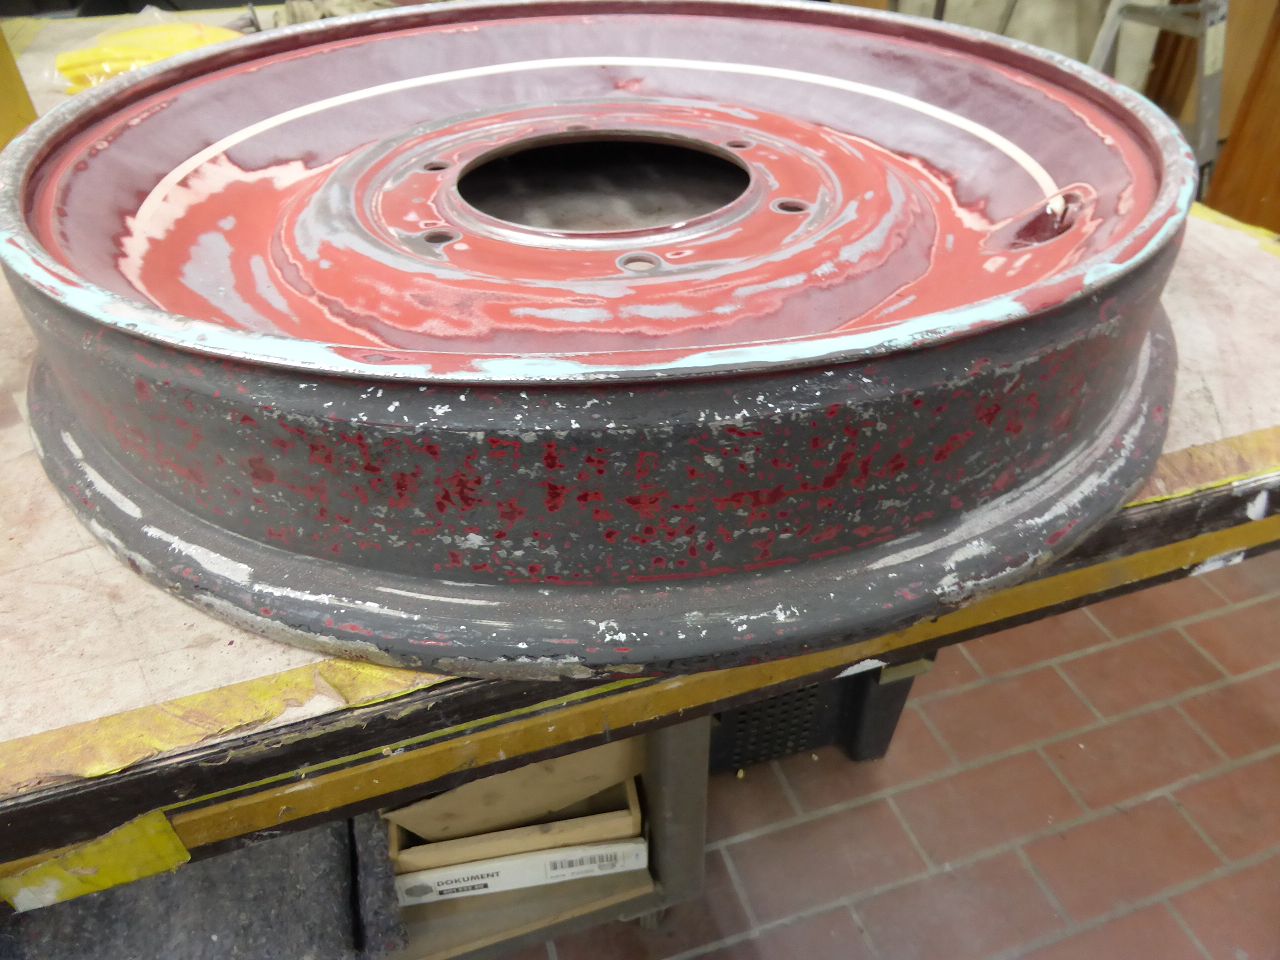 k-P1040429.JPG (198.78 KB) k-P1040429.JPG (198.78 KB)
Posted on: 4/29 12:13
|
|||
|
||||
|
Re: 1924 Sport 136
|
||||
|---|---|---|---|---|
|
Home away from home
|
After completing the work I will show it here with photos and a description with a hopefully successful result.
Karl
Posted on: 4/28 5:31
|
|||
|
||||
|
Re: 1924 Sport 136
|
||||
|---|---|---|---|---|
|
Home away from home
|
After the unpleasant experience of having a professional tire service remove the snap rings from the rims, I tried to find answers through intensive internet research that could help solve the problems when the rings are levered into the joint with the usual tire irons. There is a risk that the paint on the edges of the rim will chip off. Little by little I found some answers, but never a completely unproblematic solution. I found some of the options through guys at AACA. Surprise .... and by the way, the same bad experiences with the “professionals” that I had were described there. Here in Germany, too, today only the companies that deal with snap ring wheels are mounted on trucks, possibly also on agricultural vehicles or other special vehicles such as forklifts, etc. ... Gross motor skills are sufficient for these tires. “Fine” snap rings can become a problem, as the boss of one of these companies explained to me.
My research has shown..... yes, there can be problems when attaching these snap rings. The spring steel of these rings, which is now 100 years old, is most likely showing material fatigue. In addition, the chrome plating and the acid required may have led to an unfavorable hydrogen enrichment in parts of these rings, which could have made the steel even more brittle. Even after so many years, these rings should be levered over the edges of the rim with a lot of sensitivity and suitable tools/assembly aids and should be stretched as little as possible. But enough for them to get into your seat/joint without damaging the edges. I also decided to do this work myself. After I had freed the rims from all the generously applied layers of filler and paint, I carefully removed all rust, paint and other deposits from the joint in the rim where the ring must then sit. To do this, I prepared a narrow rotary brush for the flex and cleaned and then sanded these important joints. All of this is important because this snap ring is the only component that needs to hold the tire on the rim after inflation (55-60 psi) -!!! …. and to do this it must definitely find the intended hold in the groove/joint. I didn't have the rims sandblasted or dipped because I don't want the paint that sat in the deep rust pits for years to be removed and the new Putty/Paint to get back into the rust pits and shrink then again, creating new imperfections in the surface. This creates a good basis for the new paint structure. This required many additional hours of work, but the paint on the rims also had to have the same surface quality as the other components, because the rims are also an essential part of the overall picture. In order to achieve an optimal new paint build-up, I bought an older balancing machine that I can use to rotate the rims to achieve an even surface when sanding. I would also like to see how far the rims are warped and how big the imbalance is in the rims alone. After mounting the tires, I would like to compensate for most of the resulting imbalance by gluing in lead plates. Just like David Mc described in an article I read a while ago. As I recall, he did this with the tires on his sedans. Given the speed the vehicle can reach, that should definitely be enough. The rotation of the balancer also helps mark the positions for pin striping. I only had to manipulate the balancer slightly electrically to keep it running continuously and avoid the pre-programmed stop when balancing after 4-6 seconds. Once this work is completed, the machines will be put back on the used market. Maybe it will cost me €100 in the end, but I can save myself the long trip to the assembly companies for appointments, transport and costs. And ultimately the hassle because damage or other inexplicable damage has to be complained about again. I have now purchased some tools and assembly aids that I think could be crucial in attaching the rings without causing damage. I will show and describe the work when the painting of the rims is complete. But that will still take some time.
Posted on: 4/28 5:23
|
|||
|
||||
|
Re: anybody know proper tire pressure on a 1929 6.5-20 tire?
|
||||
|---|---|---|---|---|
|
Home away from home
|
..... sorry for intervening here... but since it's on topic......
Does anyone know the specific tire pressure for the 33x5 Goodrich Silvertown Cord? My Packard service manual generally says 50 psi for front tires and 55 psi for rear tires. Does this apply to all tires that were on the market at the time?
Posted on: 4/19 6:44
|
|||
|
||||
|
Re: BigKev's 1937 115-C Convertible Coupe
|
||||
|---|---|---|---|---|
|
Home away from home
|
... by the way, since the question of the correct diameter and material of the Fender Welting will arise for me in the near future... does anyone happen to know what the welting should be for the mid-20th vehicles?? …. as far as I know, the inner material at this time was made maybe of twisted paper cord and the cover was possibly made of leather??
Karl
Posted on: 3/31 13:02
|
|||
|
||||


