|
Re: '40 160 ignition mystery
|
||||
|---|---|---|---|---|
|
Home away from home

|
Thank you, Howard, once again. It started right up just now. One of the contacts in the OD relay must have been stuck. In the morning I'll test the OD.
Guess I'll save the other coil. Maybe next time a rubber mallet to the relay housing?
Posted on: 2012/7/1 0:41
|
|||
|
||||
|
Re: '40 160 ignition mystery
|
||||
|---|---|---|---|---|
|
Home away from home
|
Photos of upper relay on firewall attached.
When I opened the lid, it smelled like an old movie projector, 16 mm. I had cleaned the solenoid contacts with electrical parts cleaner and 2000 sandpaper. The OD operated just fine prior to yesterday. Attach file:  (48.64 KB) (48.64 KB)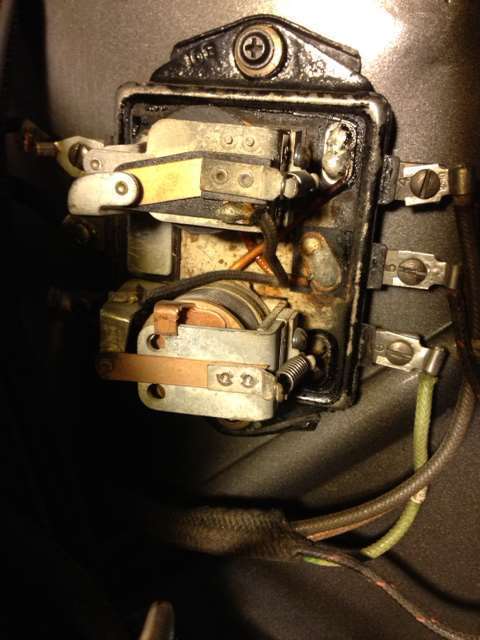 (49.80 KB) (49.80 KB)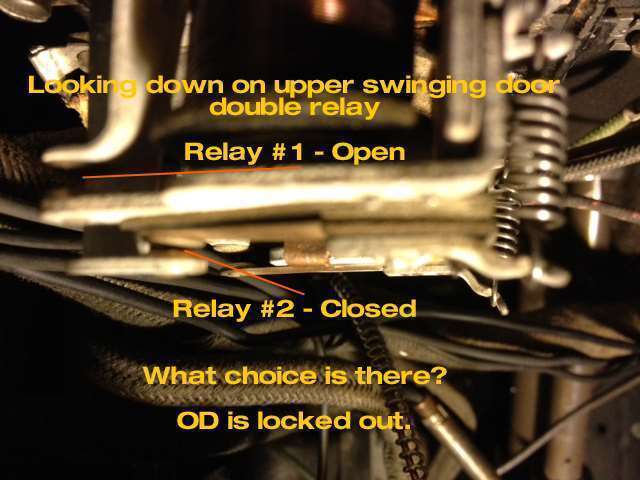 (37.15 KB) (37.15 KB)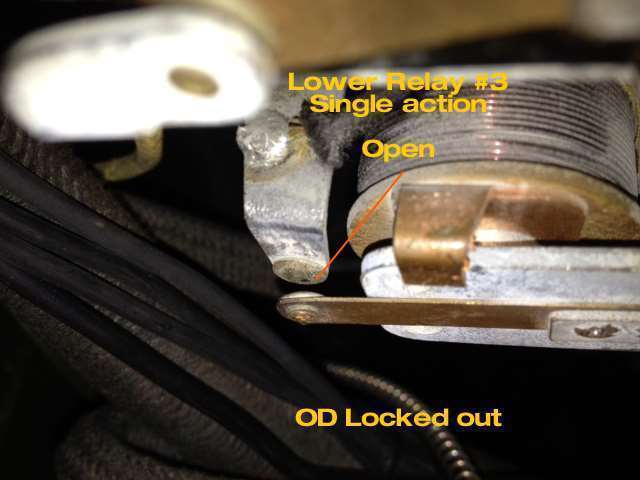
Posted on: 2012/7/1 0:29
|
|||
|
||||
|
Re: '40 160 ignition mystery
|
||||
|---|---|---|---|---|
|
Home away from home
|
Howard and Dave,
If carbon wires don't spark, and everything else is new between the ignition and the distributor, the points are the next step. I'll pull the cap and look. They would be closed whether on a flat or a bump, if that's the problem, is what I understand. But if they were closed all the time, wouldn't there be spark all the time? Never mind explaining. I'll check on what it's doing. Photos seems to show it's ok. Points closed on a flat. Open on a bump. Attach file: (106.16 KB)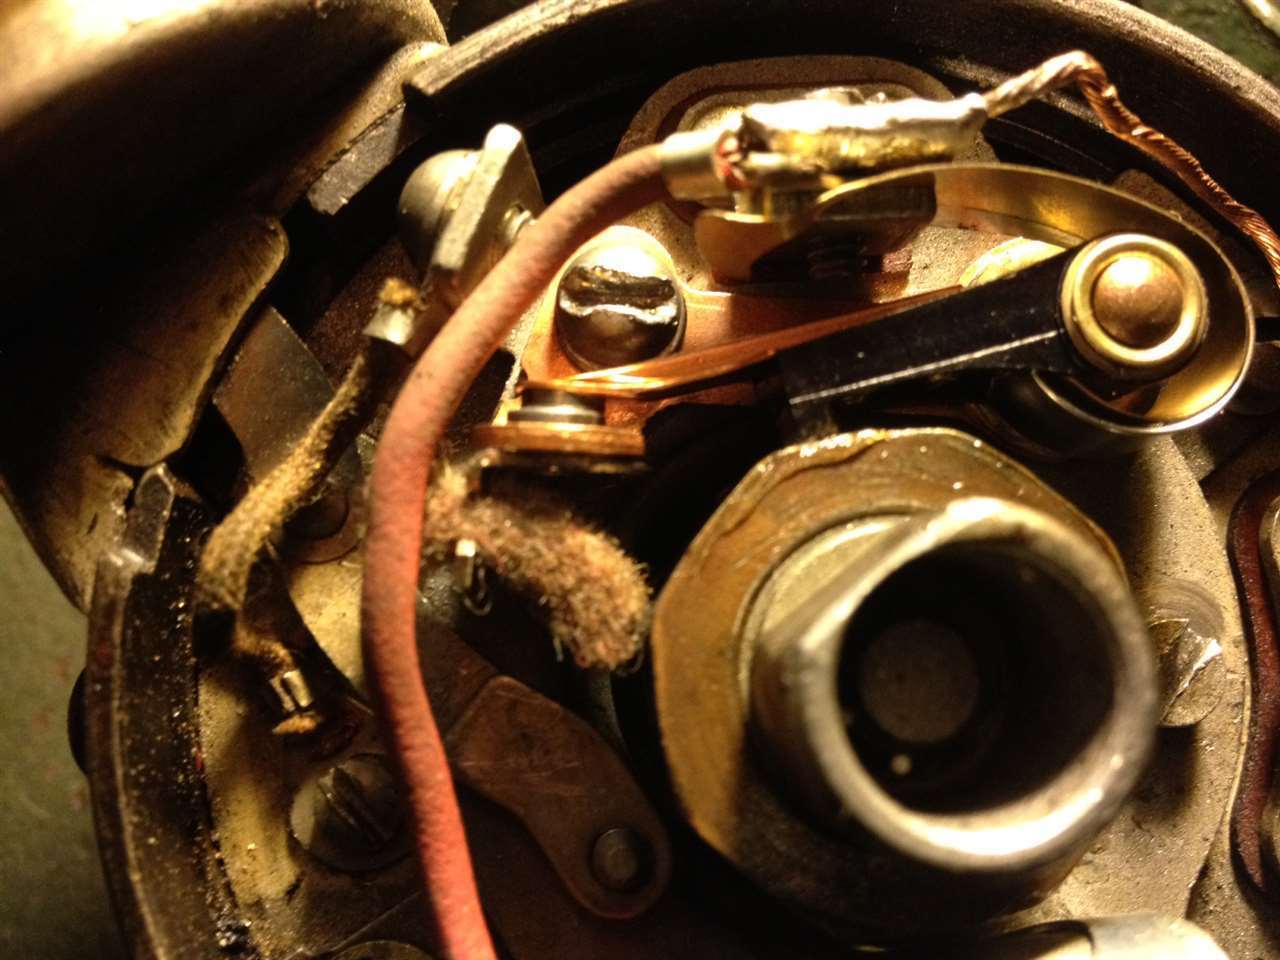 (110.83 KB) (110.83 KB)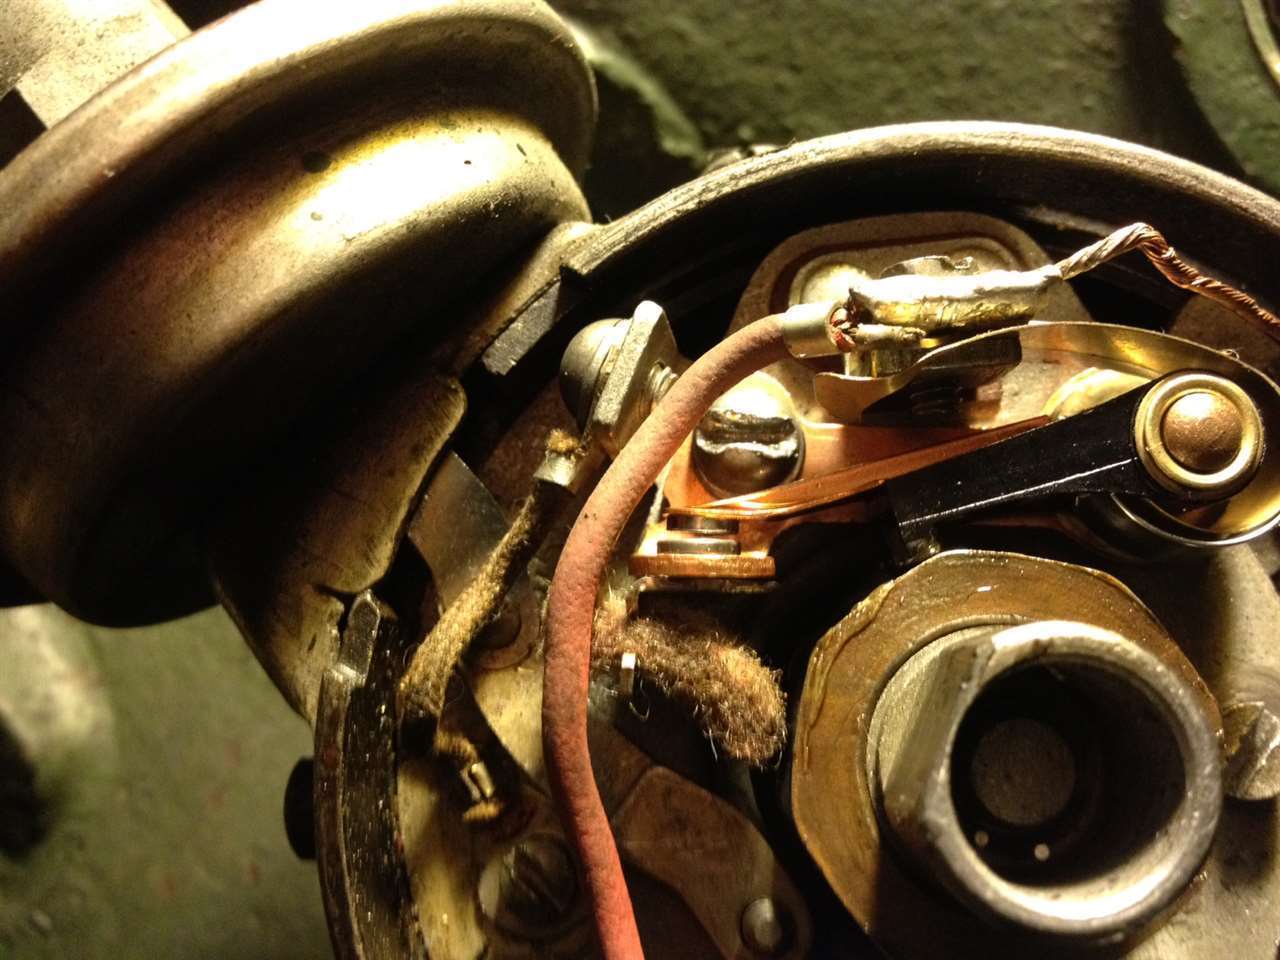
Posted on: 2012/6/30 23:12
|
|||
|
||||
|
Re: '40 160 ignition mystery
|
||||
|---|---|---|---|---|
|
Home away from home
|
The plug wire is carbon, because the "wire" is black. So that's why I'm not getting spark. I thought that coming out of the coil that distributor wire would blow the grille doors open when I grounded it.
There are two regular wires on the distributor, on the side. One to the Positive terminal of the coil (the ignition wire is attached to the negative terminal of the coil), and one to Overdrive terminal #2....Aha!...it has something to do with the overdrive. Wire 55. That #2 terminal screw had been a little loose. I tightened it up earlier this evening. Does the overdrive have the power to shut down ignition if it isn't hooked up right? Gads. There should be a restraining order on how close I can get to the functional mechanics of this car. Attach file: (41.65 KB)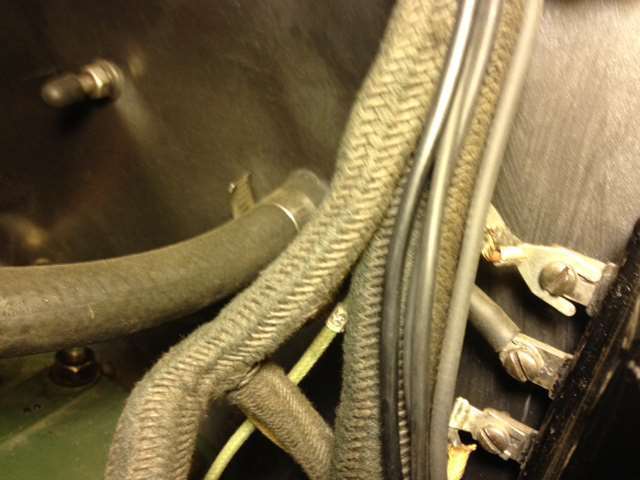
Posted on: 2012/6/30 23:03
|
|||
|
||||
|
'40 160 ignition mystery
|
||||
|---|---|---|---|---|
|
Home away from home
|
It's a mystery to me, but I know you'll be thinking How dense is this guy?
The day before yesterday I removed and replaced the overdrive solenoid. In the process I discovered a loose wire topside under the dash on the overdrive plunger switch. So I think that was the cause of my problems with the overdrive. However I'd already made a new gasket, put some silicone on the edges and reinstalled the overdrive. I test drove it. It worked great. Yesterday, while it was hot and muggy, I used the overdrive into town, coasting down the hill into town much of the way. The ignition cut out, but as I was freewheeling through the tunnel, I was able to start it again. Then, when I arrived at the Hilton to pick up my daughter's friend, The Duchess just quit, no ignition while idling. After a couple of tries it started again, and we drove to the airport to pick up my daughter. No problems restarting there after parking and cooling down a bit. Last night, after putting the car on jacks to check the overdrive, the car wouldn't start. No ignition. That little wiggle of the ammeter when you have spark was nonexistent. I checked the wires under the dash and they felt tight. This morning I disconnected the ignition wire from the coil, turned the key, touched the wire to ground. Sparks and half. Turned off the key. I reconnected the ignition wire to the coil and disconnected the coil- to- distributor wire. I put on some leather gloves, got some insulated pliers, turned on the key and touched the wire from the coil to ground (the shift levers on the steering column).... nothing. No spark. I called my friend Vaughn. Most likely the coil. Before removing it, I pulled out the distributor to coil wire, attached one end to the ignition wire, and touched the other end to ground. Nothing. Yes I touched the ignition wire on its own to ground again and it was hot. I connected a test wire to it and touched the other end of the test wire to ground, and it sparked. So then I thought it might be the wire only. Shouldn't a spark plug wire conduct electricity? Shouldn't it spark like the test wire did under the same setup? Maybe not, because I had an old coil to distributor wire, tried that, and no spark there either. So I thought that one was bad. I bought a new coil-to-distributor wire. I bought a new 6V coil. I connected everything and no spark to the plugs. No spark from the coil to ground. So I am at my wit's end. So I hope you have some wit left to help me. I will take some photos and attached them in a few minutes. Attach file: (36.78 KB)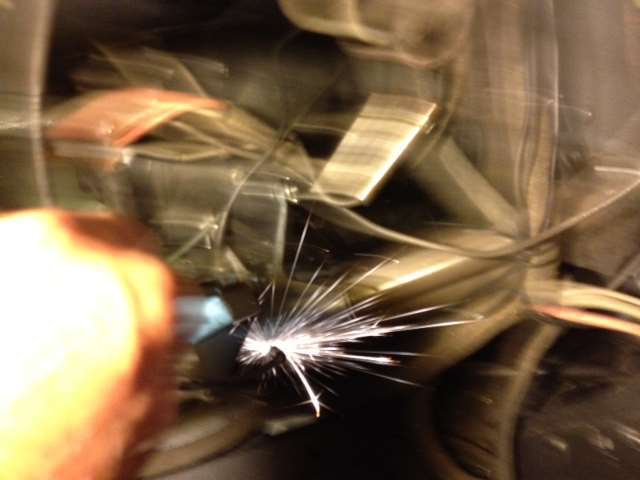 (41.83 KB) (41.83 KB)
Posted on: 2012/6/30 22:22
|
|||
|
||||
|
Re: 1941 Stabilizer / Roll Control Bar
|
||||
|---|---|---|---|---|
|
Home away from home
|
Thanks, Roger.
In the course of my own attempt at restoration I found dissatisfaction with vendors who just don't think through the problem to a smarter (meaning a better way to match the truly original) solutions, this case being an exception as far as the original solution goes. I think if Packard had to correct something, like these links or the height of the oil filler tube and cap opening, then it's ok to change over to that. I have the newer tube and cap, but I'm too proud of the restoration of the original 1940 version that I found in a pile of mostly Buick parts for $10 at the Portland swap meet and brought back from dirt using battery charger, washing tub and soda electrolysis, to use it. Some guys suffer from cruiser creep, which starts by adding a 6v fuel pump, radial tires with skinnier white walls, then 15 in wirewheels, zoot-suit metallic paint jobs, lots of chrome in the engine compartment and finally to something that only retains the feeling of a Packard grille. I'm not criticizing. There are better ways to experience luxury, like a 450 hp Rolls. If my OD fails to engage because my battery or transmission fluid is low, believe, I see their point. There's lots of enthusiasm for pulling the straight 8 and dumping in a Chrysler hemi. Just watch My 'Classic' Car. This sway bar issue is different. I applaud your efforts to cling to the original while developing a reasonable facsimile of better quality. You have my blessing.
Posted on: 2012/6/20 20:50
|
|||
|
||||
|
Re: 1941 Stabilizer / Roll Control Bar
|
||||
|---|---|---|---|---|
|
Home away from home
|
Not sure if this helps, Roger, but Ron Carpenter repairs the links.
Here's a photo of what you get (you have to provide your own urethane) when you provide your original beat up links. Here are the instructions from Ron. What to do is: THE VERY FIRST THING IS TO PUT ON SME RUBBER THROWAWAY GLOVES 1. Put a squirt of sealer in the bottom of the opening and put the first rubber in the hole. 2. Put some more sealer in the opening. 3. Put the link in the vice and holding the sway bar force it in to the opening and turn the swaybar sideways so that the ends of the sway bar are now flat against the rubber. 4. Put another squirt in the hole on top of the sway bar flat part and install another rubber. 5. Compress the freeze plug against the rubber until it is fully inside the end of the link and then drill a 1/8 hole thru the end of the cap and install the cotter pin to hold it all together. I use a big clamp that I have modified the end of the clamp so that it goes around the shaft of the link and the flat end of the clamp holds the freeze plug in the end of the link and squeezes the unit together so that I can drill the end of the link where the freeze plug is being held in. Hope that this helps. Gary Brinton charged $125 for a sway bar that has links.The one he sent is at the top in the photo and does not fit my 40 1803. The bar has a flat section in the middle, which mine doesn't. I therefore decided to have Ron rebuild my links which I haven't installed yet. If that's the shape of your bar Gary may still have it, or David Moe might. EDIT In the second lightened photo of the links you can see what Ron's repair looks like. Attach file: (115.71 KB) (16.60 KB) (16.60 KB)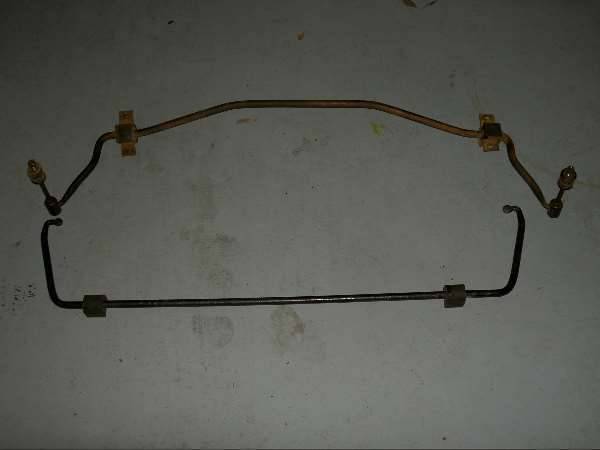 (72.25 KB) (72.25 KB)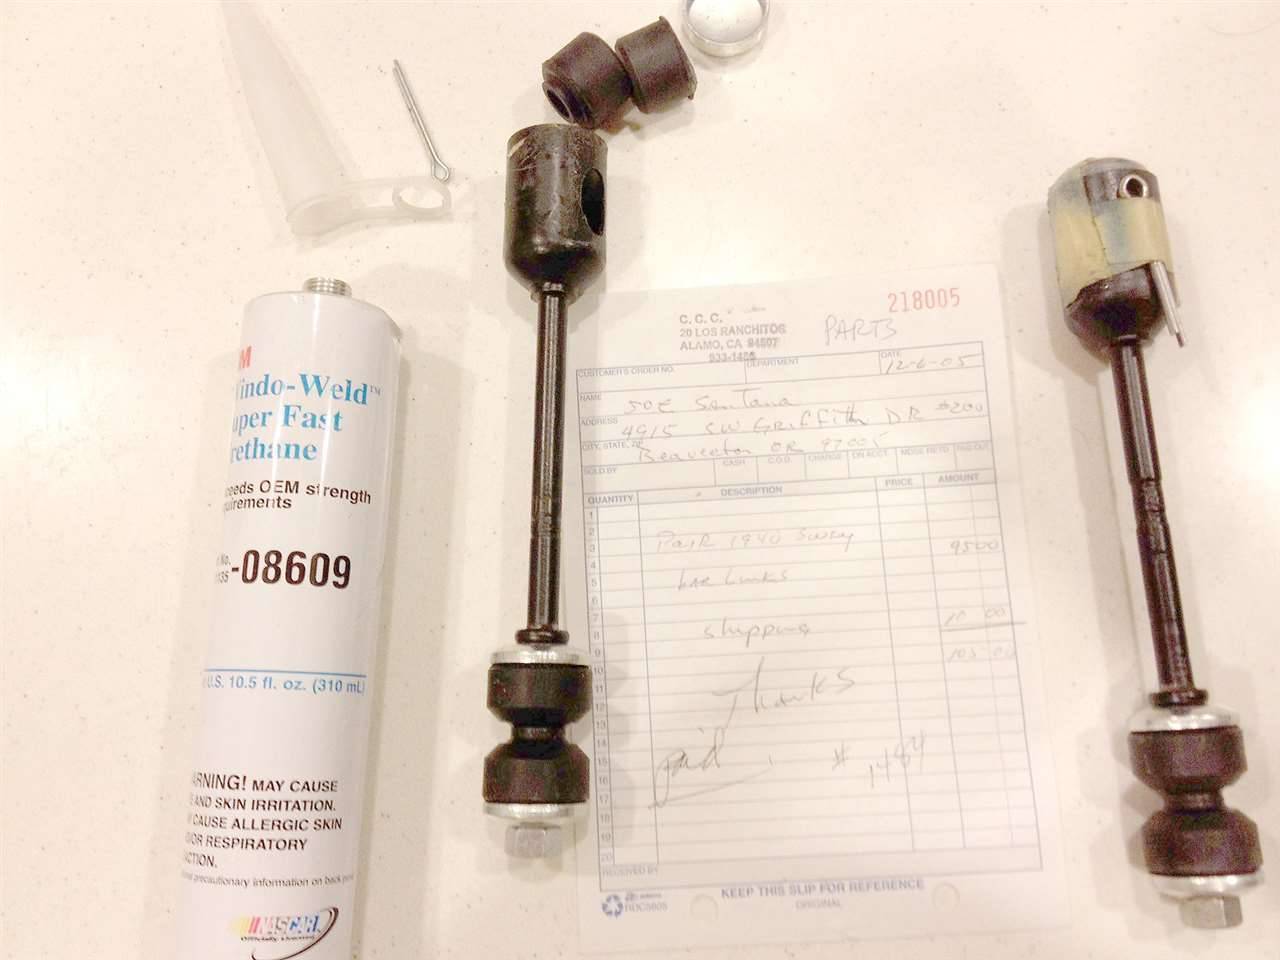
Posted on: 2012/6/20 0:22
|
|||
|
||||
|
Re: Henry's 55 Constellation
|
||||
|---|---|---|---|---|
|
Home away from home
|
This place can coat most anything including different coatings for the inside and outside of pistons. On 55 or 56 T-birds, the manifold is blue. They can coat it blue and it stays looking new permanently.
http://finishlinecoatings.com/ They coated the manifold of the Duchess as cast-iron. It looks brand new after 2000 miles. And the exhaust system as steel, that doesn't burn up or rust. Attach file: (60.16 KB)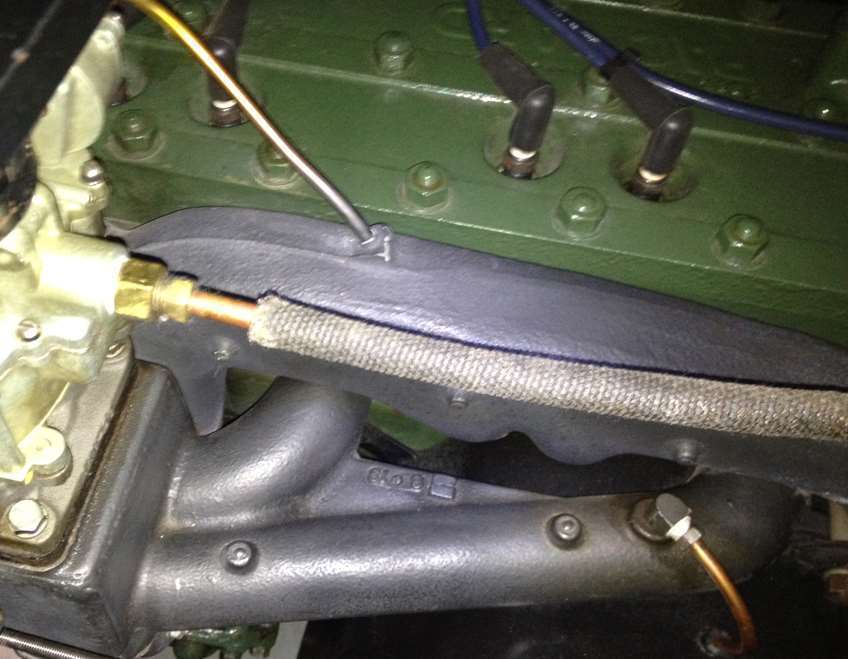
Posted on: 2012/3/27 9:03
|
|||
|
||||
|
Re: missing shifts - loose set screw
|
||||
|---|---|---|---|---|
|
Home away from home
|
I didn't realize this was a political forum. Is that the purpose?
Posted on: 2012/3/26 9:46
|
|||
|
||||
|
Re: Cost of Chrome Plating Guide?
|
||||
|---|---|---|---|---|
|
Home away from home
|
First of all I want to say that I posted my invoices so someone with a 1940 or parts similar to 1940, or someone with a convertible, could see what an individual part MIGHT cost.
Budgeting $25K-35K if you want decent re-plating may be true for certain cars. It's not specific enough to give you a level, but it's a great heads-up. I didn't find that to be so with my cost, though my hood vents and ornament had been done and wrapped 25 years ago, those beautiful script hub caps came from Kanter, and belt molding from Max Merritt. Re-chroming my belt molding which had already been done in 1971 would cost about $1200. The stainless belt molding from Max was $600, you just have to polish it. Those items would be added to the $5,800. Besides getting a heavy duty buffing/grinding machine and polishing any stainless, you can get a set of needle files and work on your parts to preserve the original lines. I did that for my door handles. It was a lot of hours and I stabbed my fingers several times before I handed them back to the plater. There's was more work on them to be done. I just didn't have the skill or maybe the patience to do any more. What I gained what a respect for the prep work platers do for the money. Secondly, I wasn't providing a commercial or even a testimonial for Oregon Plating, other than it is my LOCAL shop, and I believe that's an important piece of advice, choosing a local resource. As Randy mentioned, soon or later... I my case it was the horn ring. You know how horn ring in the center is split. That caught on a buffing wheel after it was plated. It twisted it. But they showed me and then they sent it out to a metal repair shop and re-plated it. But again, eyeball to eyeball makes a difference. Also, you can tour, as I did, the local shop. Meet the people face to face, see how they inspect your parts, point out what's needed. I mean, deep down you know when it's in fairly good shape, few if any pits, and when it's a mess. 1. Your parts will be stripped to bare metal, etching the part a bit, exposing mostly good old pot metal, the metal odds and ends off the factory floor thrown into a melting pot and used to make ornaments, door handles, and similar heavy parts. 2. It's glass beaded to clean out crevices and sanded to a finish. Now you see the pock marks and pits. 3. If they are big, it's silver (check market prices) soldered. If small it's plated with copper. Acid copper is better than cyanide copper. Sanded until smooth. If the pits are not filled, then copper plated again. 4. Then it's nickel plated, and flashed with chrome, which goes to the outside. This is triple-plating...3 different metals...not three platings of chrome. If the chrome is on too thick, it's actually dull. Chrome is hard and thin. My manual says keep it clean, wipe it with kerosene, and wax it. I thought I was paying a very healthy price for re-chroming. There were times when I thought, forget the show quality and do the daily driver version. But I didn't. The chrome on the Duchess is like jewelry. So I'm glad I stuck with it, and now it appears I didn't pay too much at all, maybe less than elsewhere. I wouldn't have known that if it weren't for this place to share info.
Posted on: 2012/3/25 12:58
|
|||
|
||||


