|
Re: R4GC carb rebuild tips?
|
||||
|---|---|---|---|---|
|
Home away from home

|
That ring detail on the piston is referred to as a labyrinth seal. In that application the groove allows the pressure to equalize around the circumference of the piston and center the piston in the bore. At constant operating clearance, more grooves result in less leakage. So, the grooves are one means to have smooth low operating force pistons while maintaining low leakage flow.
dp
Posted on: 2023/9/10 19:38
|
|||
|
||||
|
Re: Electronic ignition
|
||||
|---|---|---|---|---|
|
Home away from home
|
RICZ1953
I use Pertronix ignition modules in my ’48, Autolite (7 years), and ’54 Delco (10 years) equipped Packards, both are 6+ systems. I think we have to go back to the recent discussion on the size of battery cables. Ultimately something will limit the ability to start an engine, and voltage drop becomes more important if Pertronix equipment is installed. My experience is; if the starting and charging portion of the electrical system is maintained, then the performance of the Pertronix equipment is acceptable. I also have a Pertronix ignition in my ’30 Model A (17 years), but that car has been converted to 12-, so other than system reliability no other comparisons can be made. Our local Model A expert will frequently add that if the car is equipped a Pertronix ignition and an alternator you better know that they isn’t a lot of AC ripple in the DC alternator output, although I have not independently confirmed that concern. I’ve got 34 combined years of use with these ignition systems and have not had an occurrence to question their proper operation . . . but none of this experience is at an outside air temperature where the battery capacity would be in question. It’s a buy, install, and forget item . . . I wish I could say the same about carburetors. I also question whether the industry has a source of reliable condensers for the traditional ignition system. dp
Posted on: 2023/9/10 15:09
|
|||
|
||||
|
Re: Car show boards/posters
|
||||
|---|---|---|---|---|
|
Home away from home
|
I composed 4 laminated side window cards that I place in the rear door windows. Two of the cards are all about the car, while the other two are historic for the year of the car. As an example, for my ’48 I have an entry about the ‘Dewey Wins’ headline, and for my ’54 Mamie Eisenhower christening the USS Nautilus. I notice many people read all 4 cards and will come and make comments . . . mostly about the history content.
dp
Posted on: 2023/9/7 22:22
|
|||
|
||||
|
Re: Battery cables - opinions wanted
|
||||
|---|---|---|---|---|
|
Home away from home
|
Ken_P
I personally use 2 aught welding cables with soldered ends. I’ve yet found a source for a braded ground strap in the same size, so I’ve done the unspeakable and used the ‘round stuff’ for the positive side. I just bought an aught ground strap that may become a second ground path for the chassis, or perhaps I can make the braded cable obvious, and the round one well hidden. As for a disconnect switch, I bought, fortunately long before the price went to the moon, an Eaton/Bussmann unit rated at 400/2000 A. I happen to disconnect the positive side, but that was driven by the available ‘under hood’ space and the proximity to the positive terminal. I suspect each of us will have several opinions on which pole to disconnect when the car is in storage. The battery terminals that attach to the battery itself were bought from DelCity, and are made from a brass alloy. The bottom line is the terminal remains in the elastic range when clamping onto the SAE terminal, that is, as soon as the pinch bolt torque is released the terminal is free of the post. Because of this the extra cost of a disconnect switch may not be needed if you are willing to ‘pop’ the cable free of the battery. I’ve also found that a battery rated between 800 - 900 CCA will provide adequate starting voltage/current if used in conjunction with the above cables. Let’s not forget the other opportunity to undo all of our good intensions, namely the solenoid contacts. I swear I ‘fixed’ a ’54 327 by installing a rebuilt solenoid . . . even though the removed unit did not look all that bad with respect to oxidation/corrosion/pitting. Perhaps I should have soaked the copper washer in solvent for a few days, or used the ultrasonic cleaner. I agree with Ross, in that when these cars were new and driven regularly 1/0 cables were adequate, but it is an industry that notoriously saved pennies on every part. Ross’s experience aside, I don’t used my hobby cars anywhere nearly as frequent as I would prefer and seem to be presented with a car that hasn’t been used for 3-4 weeks. The self-discharge rate of a battery is temperature dependent, and hot storage will maximize the self-discharge rate (I got that factoid from Harley Davidson). I live in Arizona so it’s an up-hill battle of battery voltage that is less than I would prefer, and an empty float bowl . . . which I refill with the auxiliary fuel pump prior to attempting a start. The garages where the cars are stored does not have electrical service, so for me every little bit of voltage drop is important. Knock on wood, I’ve owned these cars for over 10 years (zero experience below 40F), and have never had a case where the engine didn’t start. I believe when Georg Ohm published his work he advanced a slightly more complex relationship than we use today, and his contemporaries didn’t completely believe him. dp
Posted on: 2023/9/7 22:03
|
|||
|
||||
|
Re: Fuel filter location
|
||||
|---|---|---|---|---|
|
Home away from home
|
Here's the method that was used 'back in the day'.
Attach file:  DSCF1177.JPG (159.87 KB) DSCF1177.JPG (159.87 KB)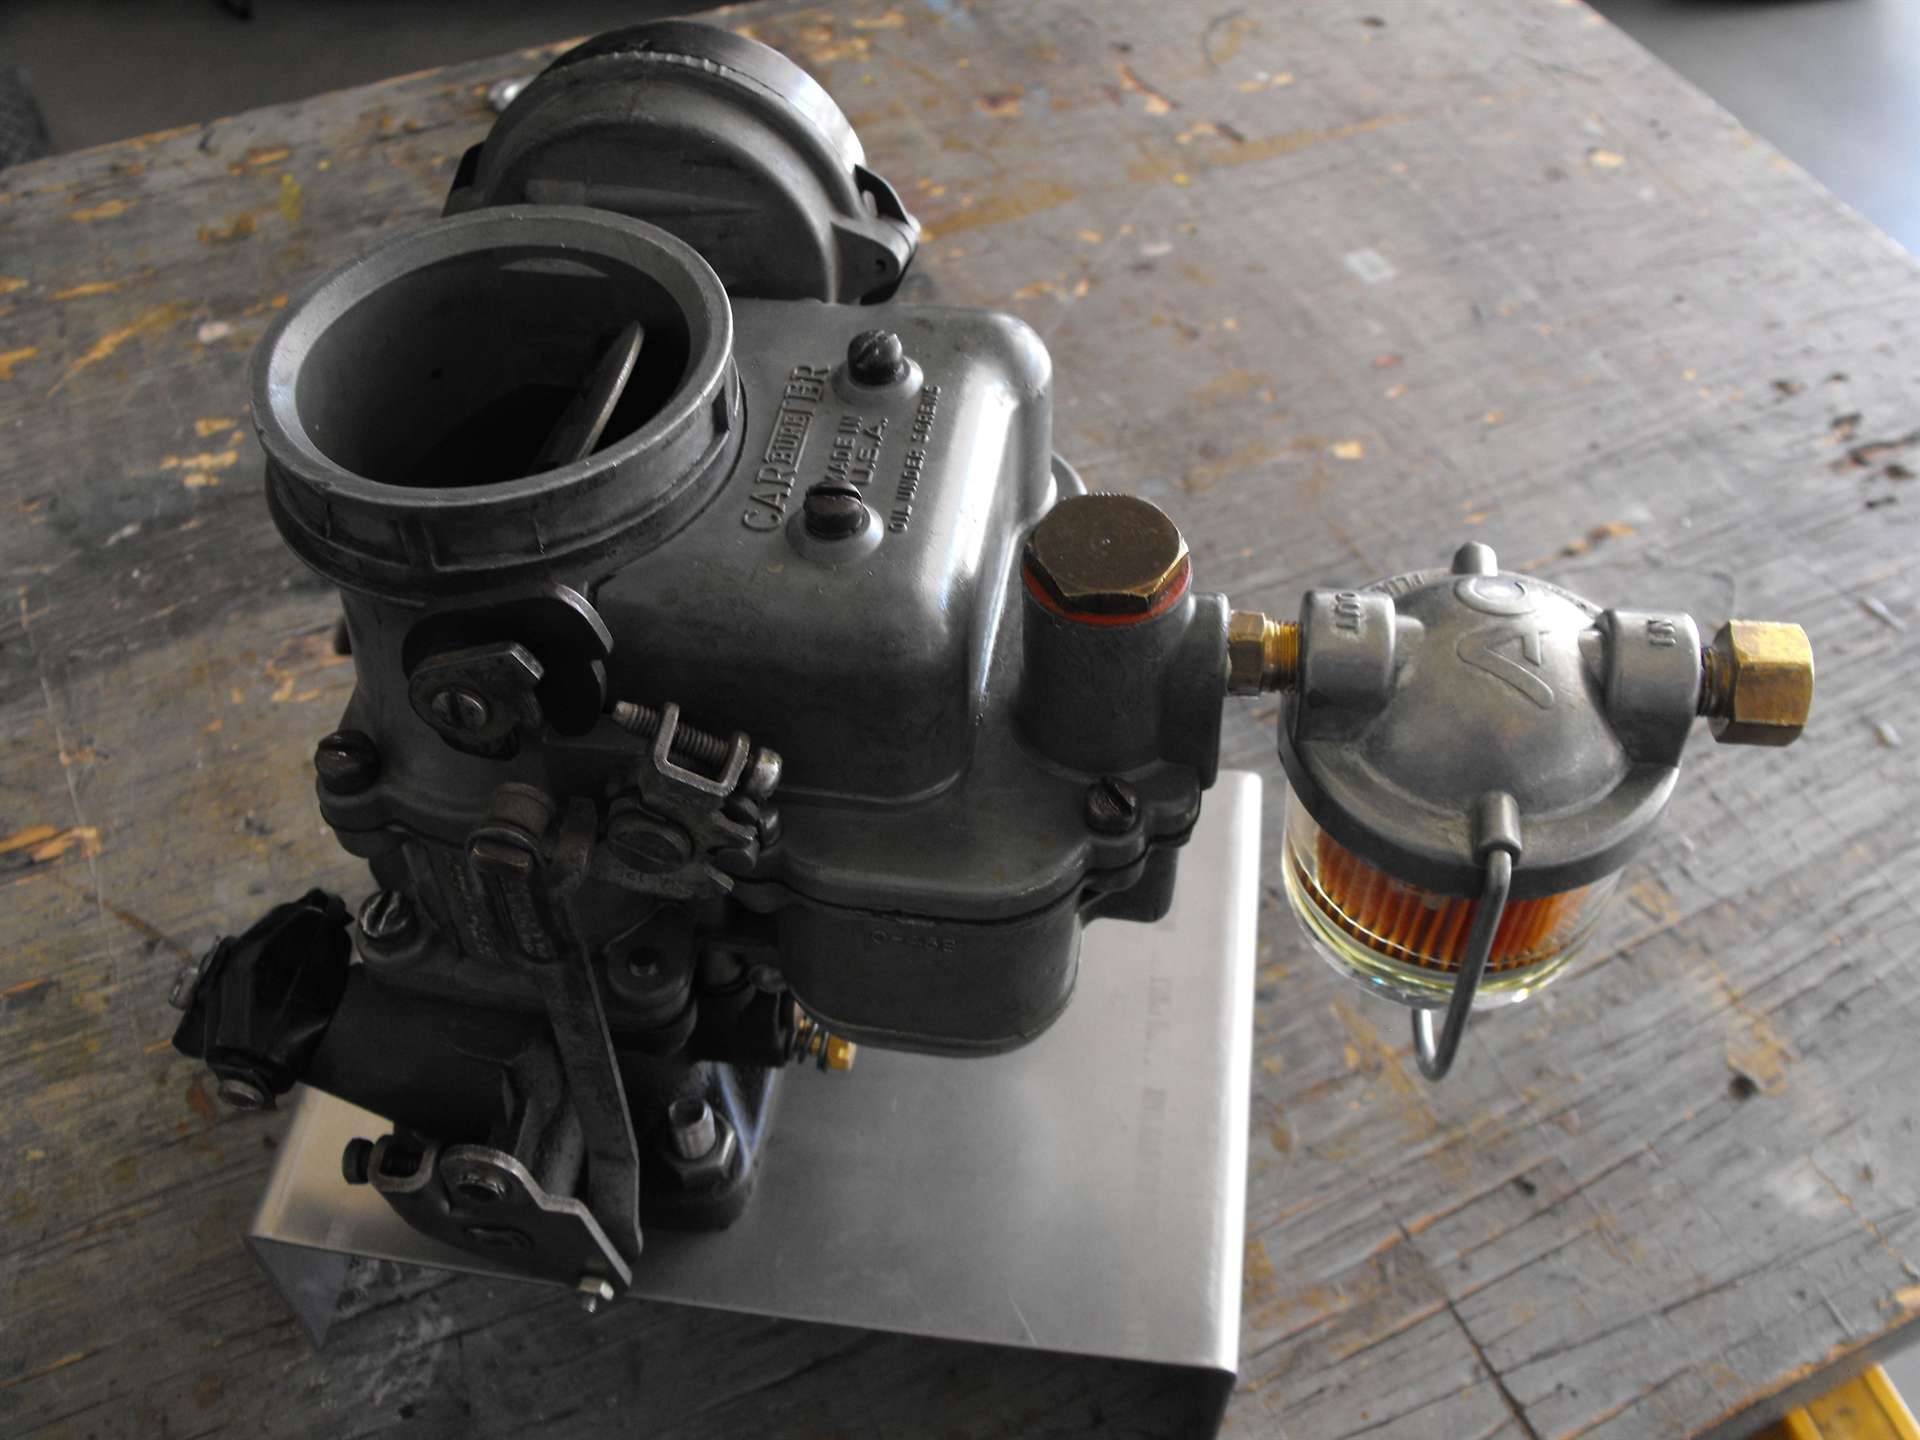
Posted on: 2023/9/2 23:23
|
|||
|
||||
|
Re: 1953 Delco Vacuum Advance
|
||||
|---|---|---|---|---|
|
Home away from home
|
53 Cavalier
Your brother will love this question. I forgot to ask if the dark area on the high stop side of the tang is a wear pattern, or a shadow? I reason I ask is my lack of knowledge on cruise engine vacuum versus the vacuum when the chamber arm first touches the high stop. The test point suggest 11 inHg, so I’m thinking during cruise the chamber spends a lot of time with the arm on the high stop. Add to that a bit more tang/arm contact force if the cruise engine vacuum is more than the test point vacuum, and a bit of vibration if the distributor bushings are worn. All of that will contribute to fretting where the arm touches the tang. Wear in that location is in no way a big deal, but would be a confirmation that the chamber spends some amount of time on the high stop, and hence the importance of the arm geometry (number). dp
Posted on: 2023/9/1 22:07
|
|||
|
||||
|
Re: 1953 Delco Vacuum Advance
|
||||
|---|---|---|---|---|
|
Home away from home
|
53 Cavalier
There are only two possible configurations of shims for the vacuum chamber. First is the type that fits between the vacuum port fitting and the chambers housing. That would be somewhat like the oil drain plug gasket . . . quite visible once installed. Shimming the fitting further away from the housing will reduce spring preload and reduce the amount of vacuum to achieve both test points. There will also be a gasket to seal the chamber in this location, and the shims could be multiple gaskets. Second is the type that positions the shim between the spring and the fitting. This shim would not be visible once installed. Adding shim material in this location will increase the spring preload and increase the amount of vacuum to achieve both test points. The fitting gasket must also be retained when internal shimming. In both cases I’ve included a description of adding shims. If shims are removed the opposite affect occurs. If you think of a plot of applied vacuum versus arm position, shimming will translate the curve up/down or left to right. Shimming will not change the slope of the line. dp
Posted on: 2023/9/1 21:32
|
|||
|
||||
|
Re: Exhaust System Modelling
|
||||
|---|---|---|---|---|
|
Home away from home
|
Bob, did you forward the shop a copy of your pdf? I’m sure the shop would share that knowledge with the next customer that wants to build a ‘custom’ exhaust. dp
Posted on: 2023/8/31 21:58
|
|||
|
||||
|
Re: 1953 Delco Vacuum Advance
|
||||
|---|---|---|---|---|
|
Home away from home
|
1of750 & 53 Cavalier
If either of you has a failed vacuum chamber would you document the total stroke and the number stamped on the arm (assuming there is one)? If the fitting and spring are removed there will be really no force impeding the motion of the diaphragm. When a replacement is available repeat the measurement. I’m just trying to expand the sample size of arm configurations beyond my current limited experience. Bye the way, with today’s octane I’m not sure the engine wouldn’t mind a little more ignition timing at light load. A high vacuum reading, and the throttle open enough to provide full vacuum to the chamber must be a transient condition. dp
Posted on: 2023/8/31 21:48
|
|||
|
||||
|
Re: Exhaust System Modelling
|
||||
|---|---|---|---|---|
|
Home away from home
|
Well done Bob!
Please describe the reaction of the muffler-shop crew when this ‘crazy’ guy walks in with a bunch of lumber. I bet they are still talking about that experience. Were you allowed to watch/participate in the fabrication? dp
Posted on: 2023/8/31 19:26
|
|||
|
||||


