|
Re: Howard's 47 Custom project
|
||||
|---|---|---|---|---|
|
Home away from home
|
I think you're smart to put some thought into maintainability and access. Especially with any R&D effort like this you want to be able to get to the innards easily, and without a lot of extra disassembly of other stuff. I wish more engineers put that effort into how things go together and come apart, on airplanes we always joke about the impossible-to-access part that must have been the first thing on the jig, then they built the airplane around it.
Posted on: 2014/2/22 21:53
|
|||
|
1952 Model 200 Deluxe Touring Sedan
HA's 52 Grey Ghost "The problem with quotes on the internet is you never know if they're true" - Abraham Lincoln |
||||
|
||||
|
Re: Howard's 47 Custom project
|
||||
|---|---|---|---|---|
|
Forum Ambassador

|
It has often been mentioned that when assembling the Volvo 240 model the heater fan was hung by a sting on the assembly line and the car assembled around it. Until you have replaced one of these fans you might not fully appreciate the dark humour of that myth.
Posted on: 2014/2/23 9:41
|
|||
|
______________________________________________
Dave |
||||
|
||||
|
Re: Howard's 47 Custom project
|
||||
|---|---|---|---|---|
|
Forum Ambassador
|
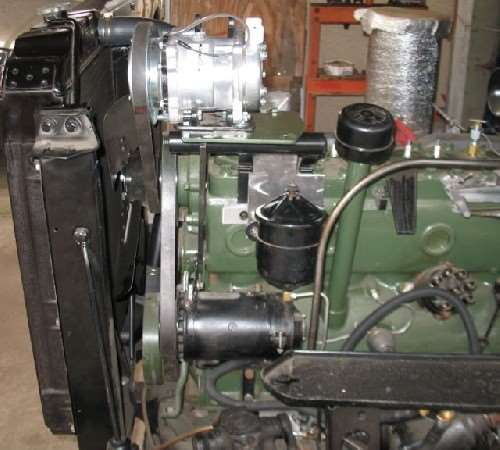
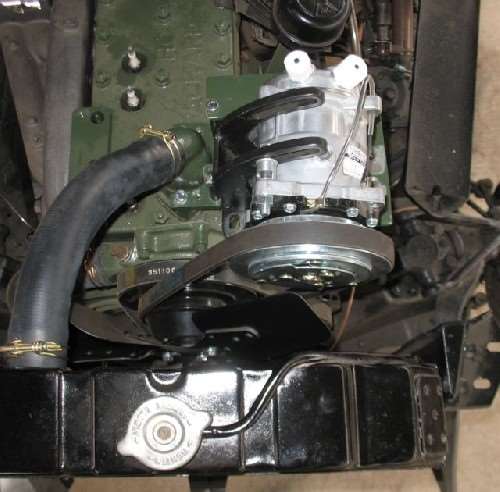
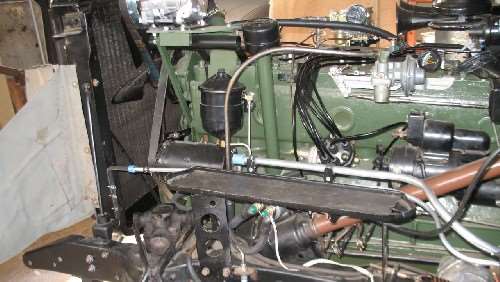
The latest "project" was relocating the AC compressor to the drivers side since it appears Packard saw fit to do it that way on Clippers. Not terribly disappointed to get rid of the large passenger side original style bracket I started with so maybe a good change.
Made a first stab at a compressor bracket. I think it will work -- although not totally satisfied with it yet. It is currently made of repurposed pieces from the passenger side mount and other odds and ends I had left over. Not knowing how Packard did theirs, what they kept or moved and with limited skill set and tools, mine is somewhat lacking in finesse. While it may not be pretty, it is easily removable and does keep the 356 horizontal vent tube. I did drop the filter an inch so one can more easily access the element. Downside is because of the vent tube the compressor is a bit higher than I would have liked. My question for the day concerns the height. I don't think there will be a problem as long as it stays at radiator top height or lower and within the side confines but would appreciate if someone with an intact car can confirm the hood doesn't taper down severely in that area so much that it could interfere. Anything else you might see that looks problematic, a heads up would also be appreciated. If it looks like a go then will finalize the alignment and cut away excess material to clean it up. Debating whether to have it welded or just go with bolts as it is now. If I could weld it would be a no brainer but alas, one of my mental blocks is I can't master heat, speed, material and thickness all at the same time.
Posted on: 2014/3/2 17:36
|
|||
|
Howard
|
||||
|
||||
|
Re: Howard's 47 Custom project
|
||||
|---|---|---|---|---|
|
Forum Ambassador
|
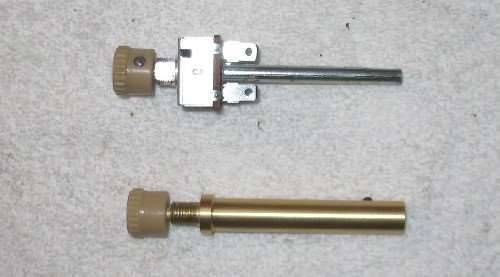
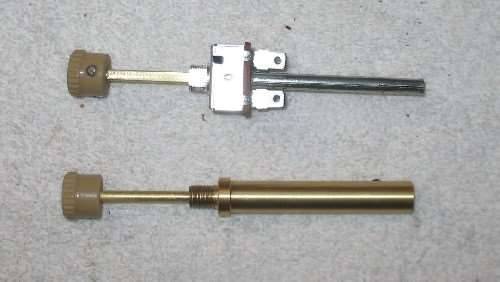
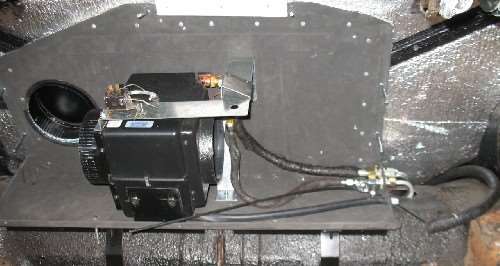
A (very) little accomplished. Have made some adapters for the bowden cable operations. Bought a combination pull and turn switch for the blower and temp control. Unfortunately it only had a 23" cable. Had to modify it so it would accept the long cable running to the rear. Not quite done yet because I need a 4-40 bottoming tap to finish the swivel needed so the switch can turn while cable stays still. Typically, couldn't find one in town. As per usual, if slightly out of the ordinary, has to be ordered. Made another adapter for the cable for vent control and that one is finished.
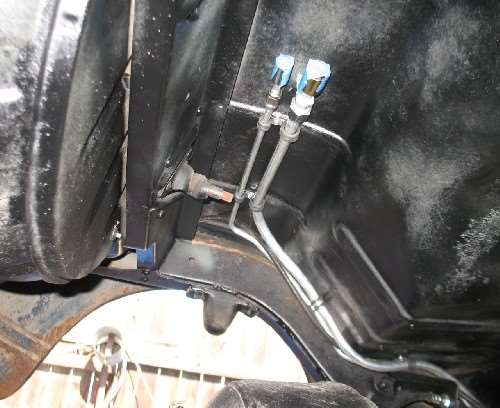
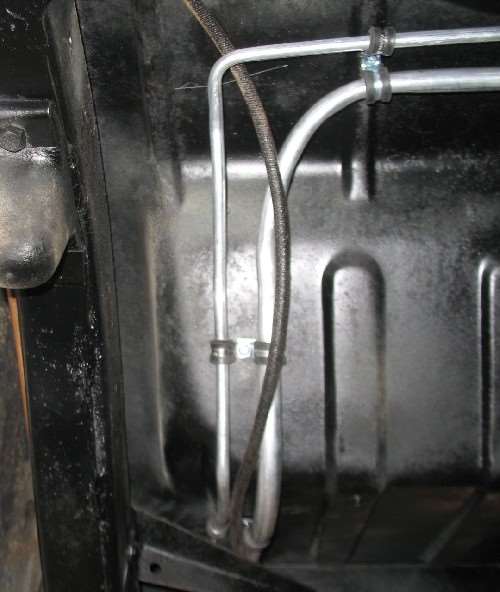
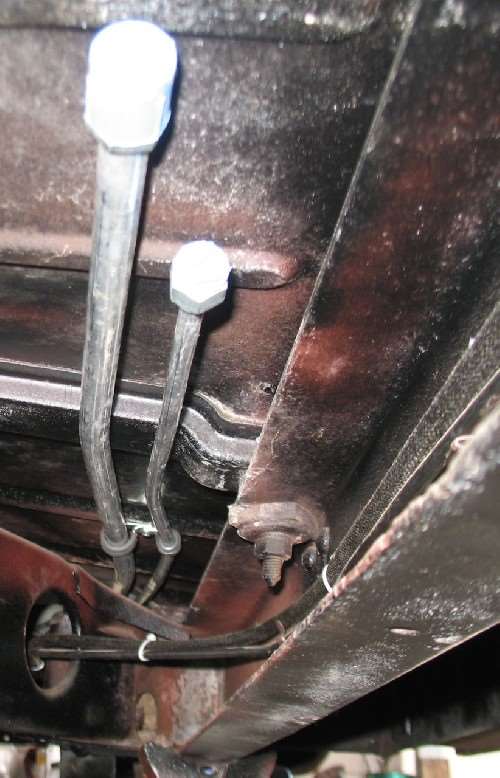
A little work done on the AC tubing today. Thank goodness I had the patience (more a lack of motivation than patience) to not put the driveshaft and shocks in before running the tubes. Too much of a project as it was and that was with relatively nothing in the way. Am fairly committed to the route shown but have been known to overlook the obvious. If anyone sees an issue with route or clearance, would sure appreciate a heads up. Near as I can determine there is plenty of clearance to body structures and nothing is rubbing anywhere. As you can see, will be a combination of hard lines and short hoses. Decided the hoses were needed so the fittings would thread on the unit in the trunk a bit easier. Debating how much slack in the hoses to leave. Not much for sure -- maybe a couple of inches and then clamped so they are flat against the trunk floor. The aluminum tubes are fairly well clamped but could add more or slightly revise them if anyone thinks more are needed. Did manage to get the bends halfway decent looking but there is room for improvement. Have decided to install a horizontal filter/drier under the floor just as Packard did. Not quite the same location though. Mine will be where the tubing presently ends near the floor heater. It should get here next week so will complete the tubing then.
Posted on: 2014/3/14 15:18
|
|||
|
Howard
|
||||
|
||||
|
Re: Howard's 47 Custom project
|
||||
|---|---|---|---|---|
|
Home away from home
|
This is such a worthwhile project. I can't think of any addition/ upgrade that will give the same degree of benefit that aircon does. Great to have a cool classic car! Congrats on the quality of the plumbing and everything else.
Posted on: 2014/3/25 8:12
|
|||
|
1951 Packard Club Sedan | [url=ht
|
||||
|
||||
|
Re: Howard's 47 Custom project
|
||||
|---|---|---|---|---|
|
Forum Ambassador
|
Thanks for the encouragement. Yes, some form of AC has been a must for any car I have ever had since it became generally available for the average joe. Thinking back on it, some of the aftermarket units available then and my attempts to copy them in the late 50's without having any money are downright hilarious now. How that poor 51 Packard I drove then suffered under the attempts. There is a thread somewhere on site with some photos of "unique" low budget AC installations using whatever was handy. I think it is referred to as "hillbilly air". Some of mine would have fit right in.
Still working on the remaining tubing for the 47. I ran the pressure side low and next to the battery box as Packard did before heading into the condenser area. That one will be OK once I figure out how and where they penetrated the splasher assy's. The length for the suction side into the engine compt to the compressor is proving more difficult. Not enough detail in the illustration to see exactly where and how theirs was routed. My first attempt is functional but not satisfactory visually. Am now considering running it parallel to the other tube most of the distance and avoiding the firewall completely.
Posted on: 2014/3/25 9:17
|
|||
|
Howard
|
||||
|
||||
|
Re: Howard's 47 Custom project
|
||||
|---|---|---|---|---|
|
Forum Ambassador
|
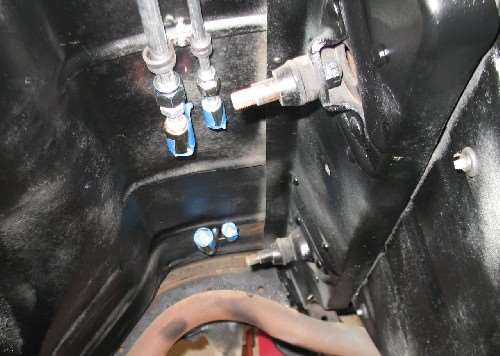
Weather has not been up to California standards the last week but did finish running the hard tubing for AC. Just need to do a few hoses now to complete the lines. As mentioned in my last update, didn't particularly like how my version of the suction tube on firewall turned out. Also didn't have enough detail to know exactly the route Packard took so revised the line to follow the liquid side. Turned out decently but being next to battery, both tubes will most definitely need some protection from any battery "sweat". Also made a condenser bracket and finalized that portion. Next job will be to paint and permanently mount all the line and condenser brackets.
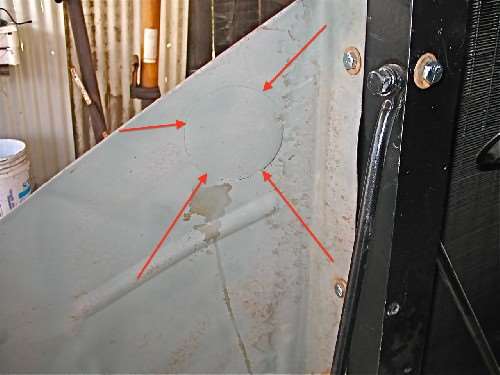
A question arises on the behind the grill box side splashers. Both sides have large round knockouts for something. The passenger side I think might be for the optional heater fresh air kit but am at a loss why there would be something on the drivers side. Any speculation on what might have gone there or does anyone else have the knockout? It is in a fortunate place for me because the AC hoses to condenser will go thru nicely. Just have to make a corresponding hole on the fender portion of the side splasher. I thought it might have been for the prewar AC but there is a separate part number listed for AC equipped Clippers. Speaking of the box splashers, anyone have a pair for a 21st series Super or Custom in decent condition they would like to find a new home for? These look like they might have been in a front end collision. I was going to attempt to straighten them but am thinking my sheet metal skills will be sorely tested so maybe different would be a better option.
Posted on: 2014/4/1 12:54
|
|||
|
Howard
|
||||
|
||||
|
Re: Howard's 47 Custom project
|
||||
|---|---|---|---|---|
|
Home away from home
|
Howard, both sides of my splashers have the knockout. Perhaps there's one on the driver's side for RHD models? Or maybe the knockout was the first procedure before bending the part for left and right? I know just enough to be dangerous.
I tried finding some good splashers to no avail, and finally had mine patched up. I think a lot of them rusted out on the top side. Good luck, Mark
Posted on: 2014/4/1 20:19
|
|||
|
||||
|
Re: Howard's 47 Custom project
|
||||
|---|---|---|---|---|
|
Forum Ambassador
|
Another favor from a 21st car owner please.
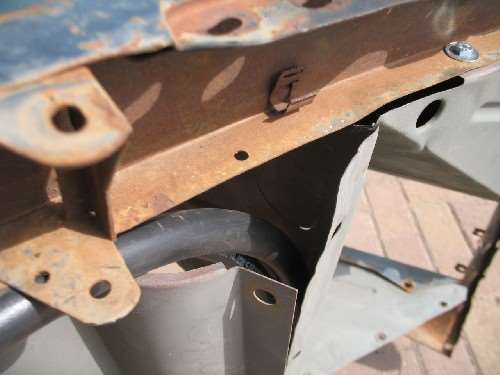
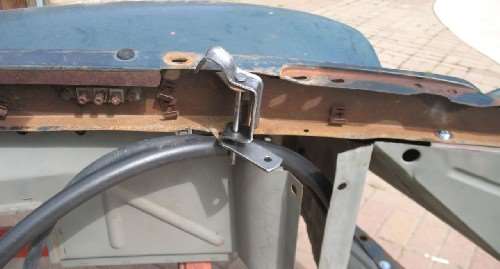
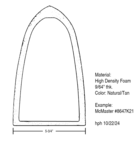
Am trying to make sure there is nothing in the space behind the hood latch and that there is open passage between the pieces of sheet metal. I would like to run hoses thru the area just above the curved portion of the side splasher to get to the round cutout in the box section shown in the photo a couple of posts earlier. Don't have any photos showing that area on an intact car & would appreciate either a photo or a rough guesstimate of how much space, if any, is actually clear. The radiator cradle goes between the two pieces and is straight up so should not be an issue. The headlight wire goes in the clip above the fender ledge so know that area is fairly clear. My metal has been mutilated in a couple of other spots and have discovered the triangular shaped radiator front top splasher is missing so would like to make sure nothing in that particular area is missing too.
Posted on: 2014/4/11 12:53
|
|||
|
Howard
|
||||
|
||||

 (43.85 KB)