|
Re: Stewart's 1955 Packard 400
|
||||
|---|---|---|---|---|
|
Forum Ambassador

|
IIRC, KevinAZ's implementation is for a full flow filter as detailed in this thread and needs some extra plumbing done. Believe the Olds conversion is mostly designed around the partial flow filter and normal oil path in stock Packards and doesn't need a hole. In post 5 of that conversion thread it mentions drilling and tapping the pump for the extra hose and different path needed with the new filter.
Posted on: 2014/9/12 14:27
|
|||
|
Howard
|
||||
|
||||
|
Re: Stewart's 1955 Packard 400
|
||||
|---|---|---|---|---|
|
Home away from home
|
Thank you Howard for your post #10030. That is exactly what I was looking for. Don't know how you keep track of all these post. My searches seldom give me what I want.
TroyT I've only had time to glace at the link Howard provided for now but that is exactly what I was hoping to do with my oil system. Unfortunately I already have the short block assembled. Not sure I want to do any drilling at this point.
Posted on: 2014/9/12 16:14
|
|||
|
Stewart Ballard
|
||||
|
||||
|
Re: Stewart's 1955 Packard 400
|
||||
|---|---|---|---|---|
|
Home away from home
|
There has not been anything major to post about the last few weeks. I have been working off and on in the shop. I had to make a command decision to go without sand-blasting the frame. My local sand blaster is blasting pools and other odd structures now so he isn't interested in doing my frame. Next closes blaster is 45 miles away and expensive.
I have decided to clean off all the loss stuff and grease myself and coat it with either Eastwood rust encapsulater or Bill Hirsh Miracle Paint (or both). I have been experimenting with different tools to clean it and have come up with a good selection. Started with my 4" grinder but that thing will rip your head off if it snags in the edge of anything. The frame is in excellent shape and does not have to be bare, shiny metal for either of those above products to do their job. You guys have any other recommendations? I modified the gate hinges that TroyT recommend for holding the front TL arms in place. I welded a small bolt on the front of each one so that it will actually hook around the arm. I have one in place now, see photos below, but have not removed everything around it yet. Attach file:  (38.48 KB) (38.48 KB)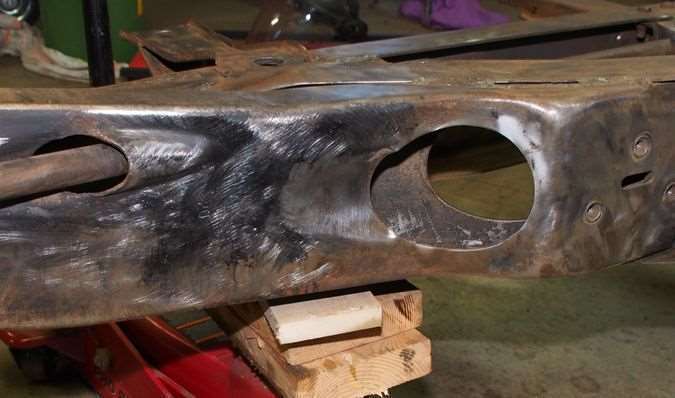 (36.44 KB) (36.44 KB)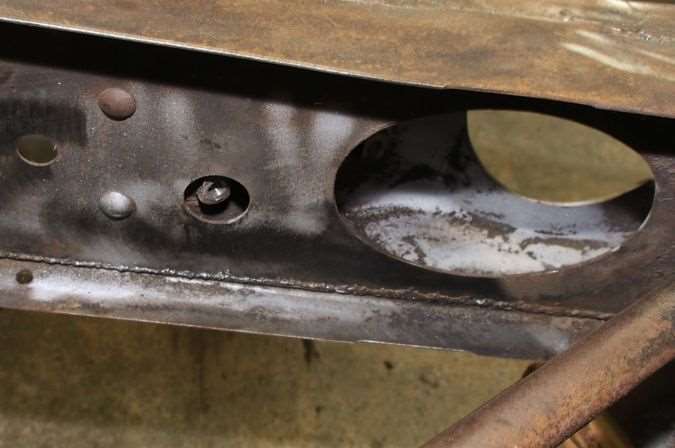 (29.73 KB) (29.73 KB)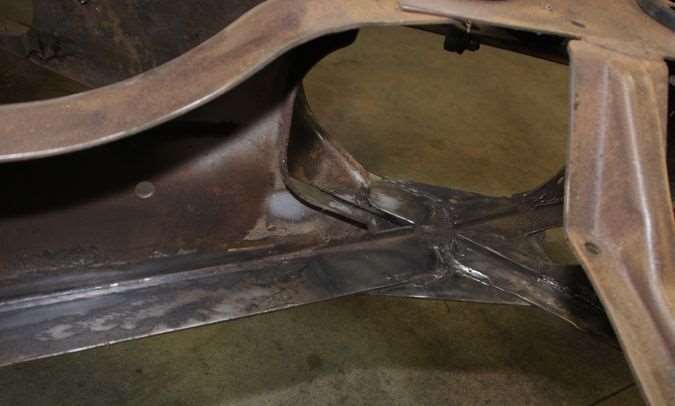 (48.20 KB) (48.20 KB)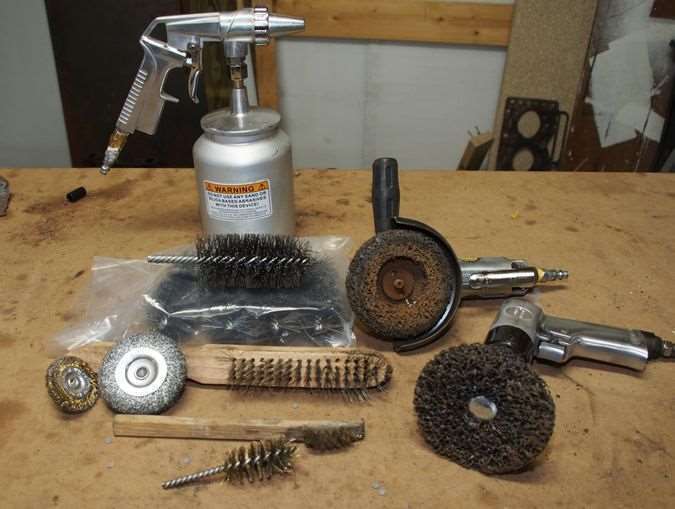 (47.15 KB) (47.15 KB) (40.41 KB) (40.41 KB)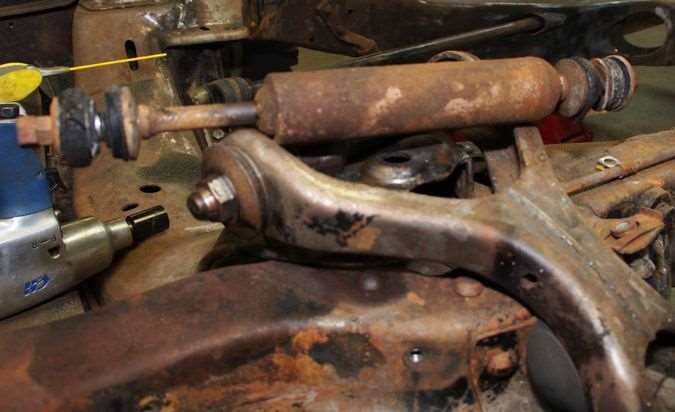 (36.00 KB) (36.00 KB)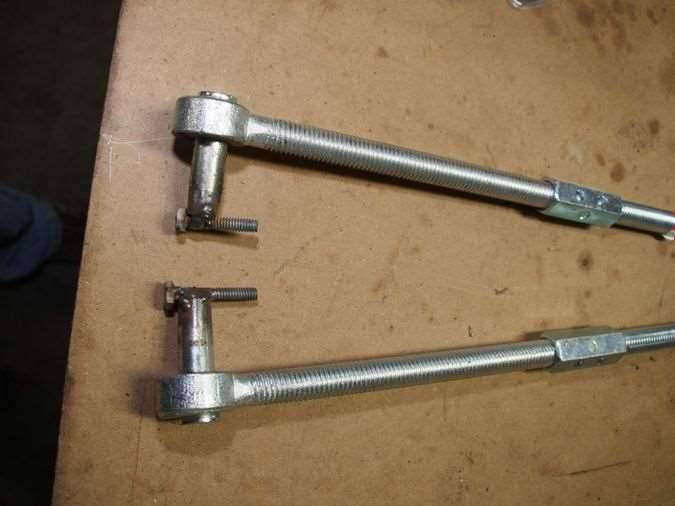 (49.29 KB) (49.29 KB)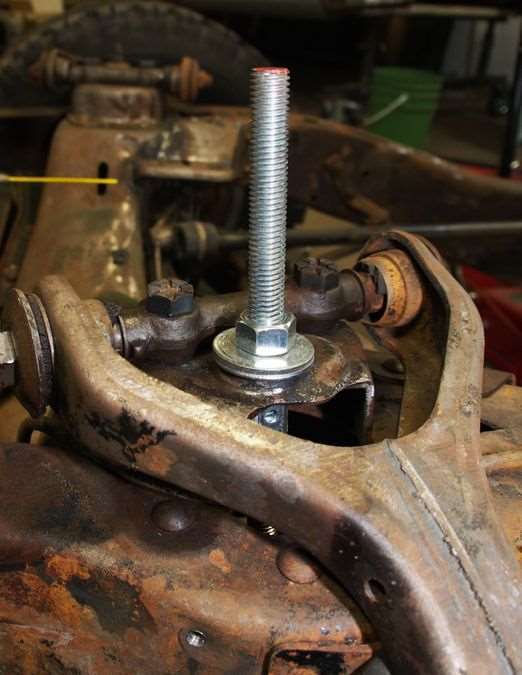 (34.62 KB) (34.62 KB)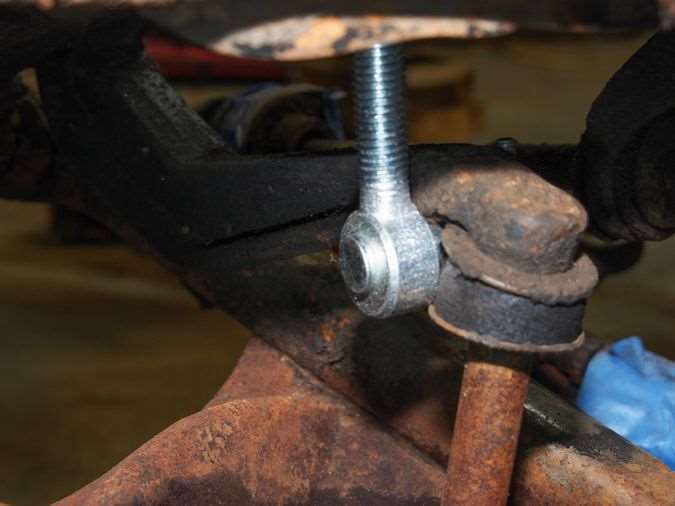 (37.57 KB) (37.57 KB)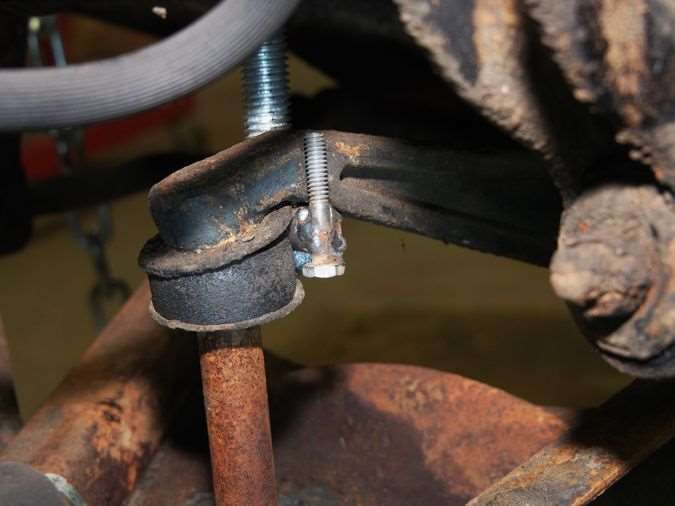
Posted on: 2014/10/3 20:48
|
|||
|
Stewart Ballard
|
||||
|
||||
|
Re: Stewart's 1955 Packard 400
|
||||
|---|---|---|---|---|
|
Home away from home
|
RE: paint recommendations. POR-15. The literature even recommends painting over light rust! Check it out.
Posted on: 2014/10/3 22:07
|
|||
|
||||
|
Re: Stewart's 1955 Packard 400
|
||||
|---|---|---|---|---|
|
Home away from home
|
Awesome, I will be attempting to rewind mine in a few weeks so I will let you know how that goes. My new Torsion bars are due in this Wednesday.
Posted on: 2014/10/4 10:45
|
|||
|
[url=https://packardinfo.com/xoops/html/modules/
|
||||
|
||||
|
Re: Stewart's 1955 Packard 400
|
||||
|---|---|---|---|---|
|
Home away from home
|
That front load arm retaining tool looks like another good option in addition to the J-6065 tool and the grade-8 chain methods.
Craig
Posted on: 2014/10/4 14:16
|
|||
|
Nuke them from orbit, it's the only way to be sure! Ellen Ripley "Aliens"
Time flies like an arrow. Frui |
||||
|
||||
|
Re: Stewart's 1955 Packard 400
|
||||
|---|---|---|---|---|
|
Home away from home
|
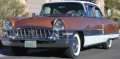
The load arm retaining tool is holding. Its been 7 days since I removed all the car chucks around it. I tightened it up first and took the load off the suspension as I didn't want any nasty surprises.
After a little wire brushing the numbers stenciled to the side of the frame appeared. They are not as clear as what Henry had on his Clipper way back when he did his but that is diffidently what they are. I have a question. Pretend for a minute that I have never dismantled a Packard before. In the last two images below can I remove the bolts without any issues? They are all connected to the torsion bars in one way or another but there are parts that I think need to be removed/cleaned/inspected. Can't find anything that says I can't remove them just being cautious. Attach file: (91.25 KB)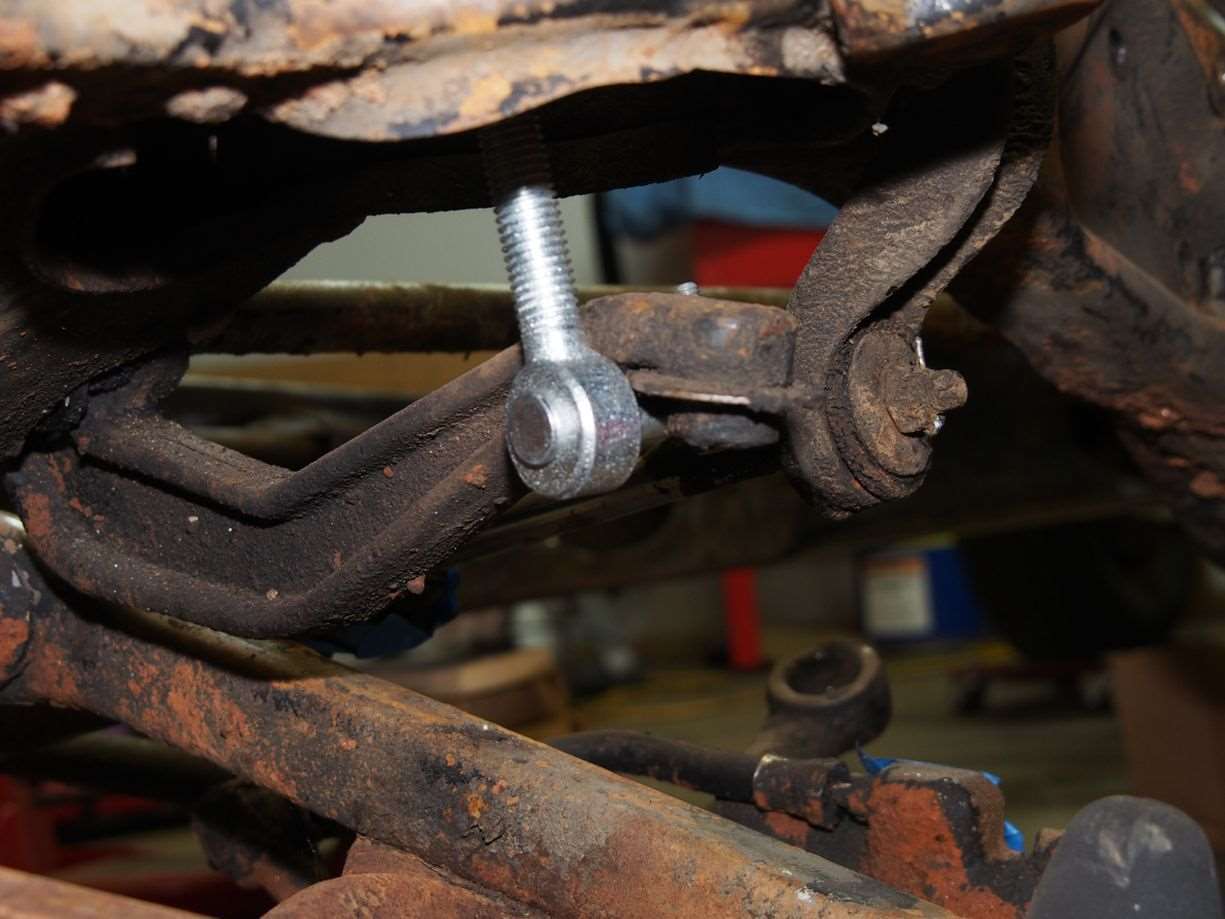 (83.16 KB) (83.16 KB)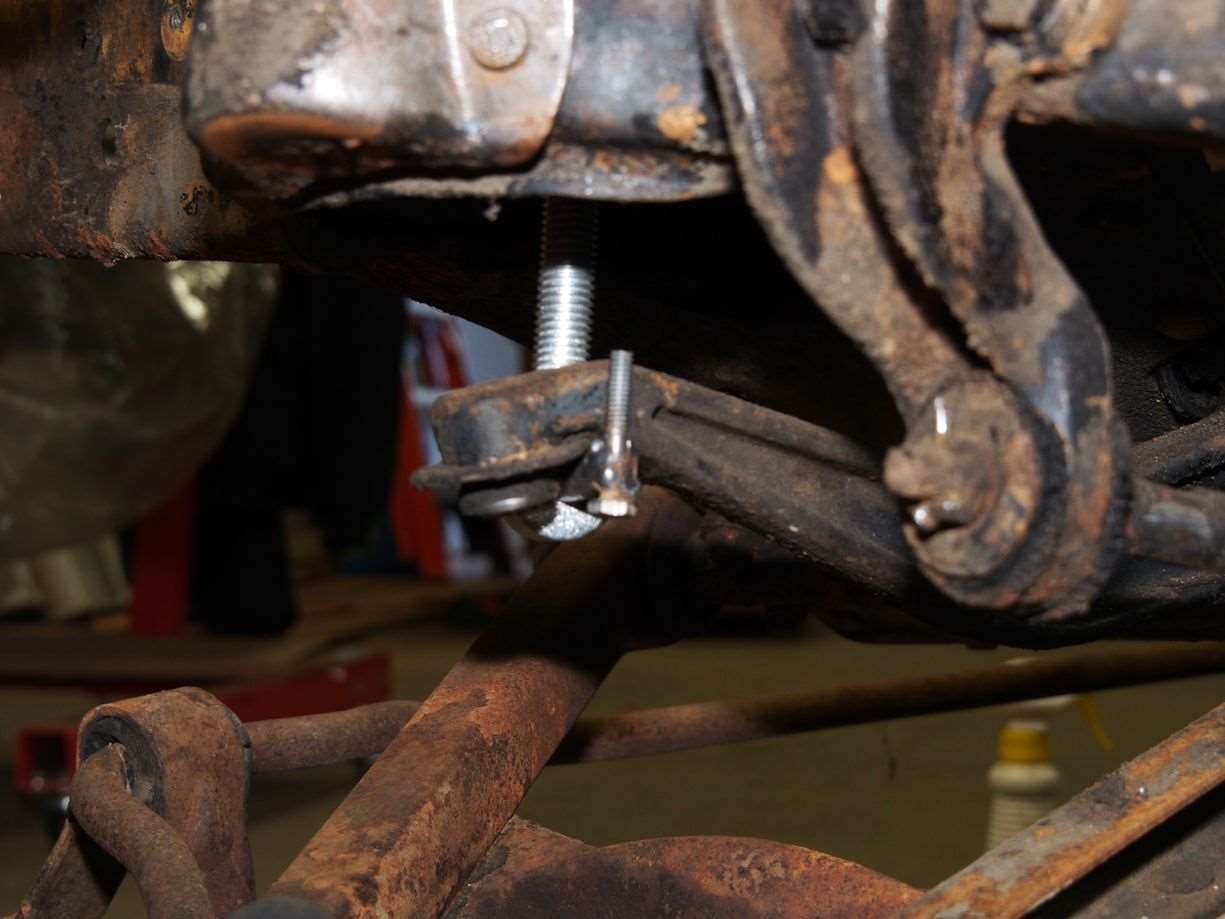 (70.64 KB) (70.64 KB) (104.65 KB) (104.65 KB) (92.06 KB) (92.06 KB)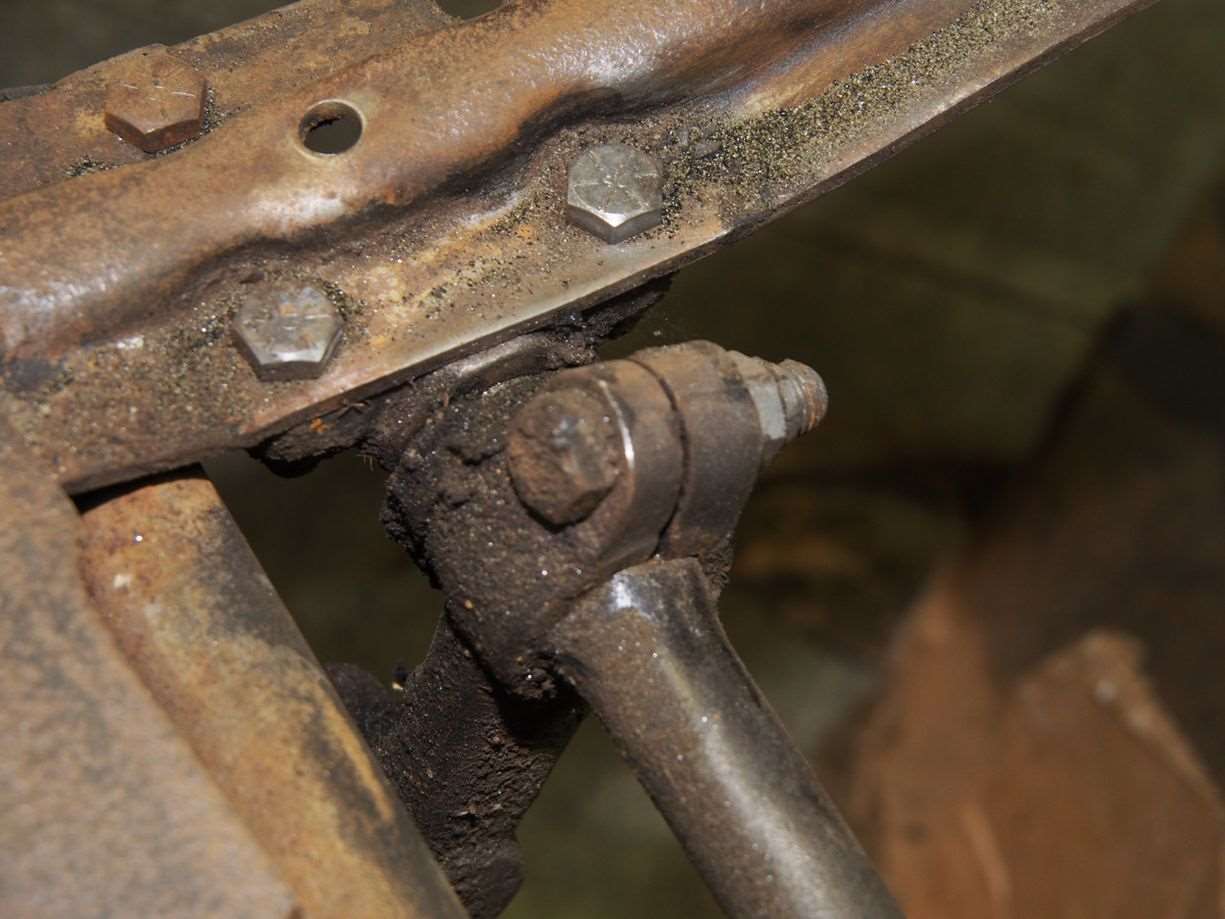
Posted on: 2014/10/11 18:36
|
|||
|
Stewart Ballard
|
||||
|
||||
|
Re: Stewart's 1955 Packard 400
|
||||
|---|---|---|---|---|
|
Forum Ambassador
|
On the bottom photo that appears to be the short bar front mount and the ball arm for transverse bar. If the compensator is positioned so there is absolutely no load on the bar or the transverse bar is removed then the bracket and even the entire short bar can be removed by loosening the clamp in the rear and sliding bar out. If there is load on the short bar then it will have to be relieved first.
On the next to last photo can't see exactly where the bar pivot bracket stops. I can't remember if the bolts are individual for the two brackets or shared. If they are holding the lower A arm only then as long as the load arm is held up with your screw bracket arrangement then A arm bracket can be removed. If they are shared and are also the main bolts holding the bar bracket and pivot pin which inserts into the front load arm, unless there are other bolts holding the pivot bracket I don't recommend it. With the arm held up there is considerable pressure on the bracket and pivot pin. If there is only one side bolt still holding then the pressure might be enough to crack the bracket.
Posted on: 2014/10/11 19:01
|
|||
|
Howard
|
||||
|
||||
|
Re: Stewart's 1955 Packard 400
|
||||
|---|---|---|---|---|
|
Home away from home
|
I have added arrows to the two bolts I am concerned about. The bolts appear to be shared on top and bottom in plate 31G.
Attach file: (116.70 KB)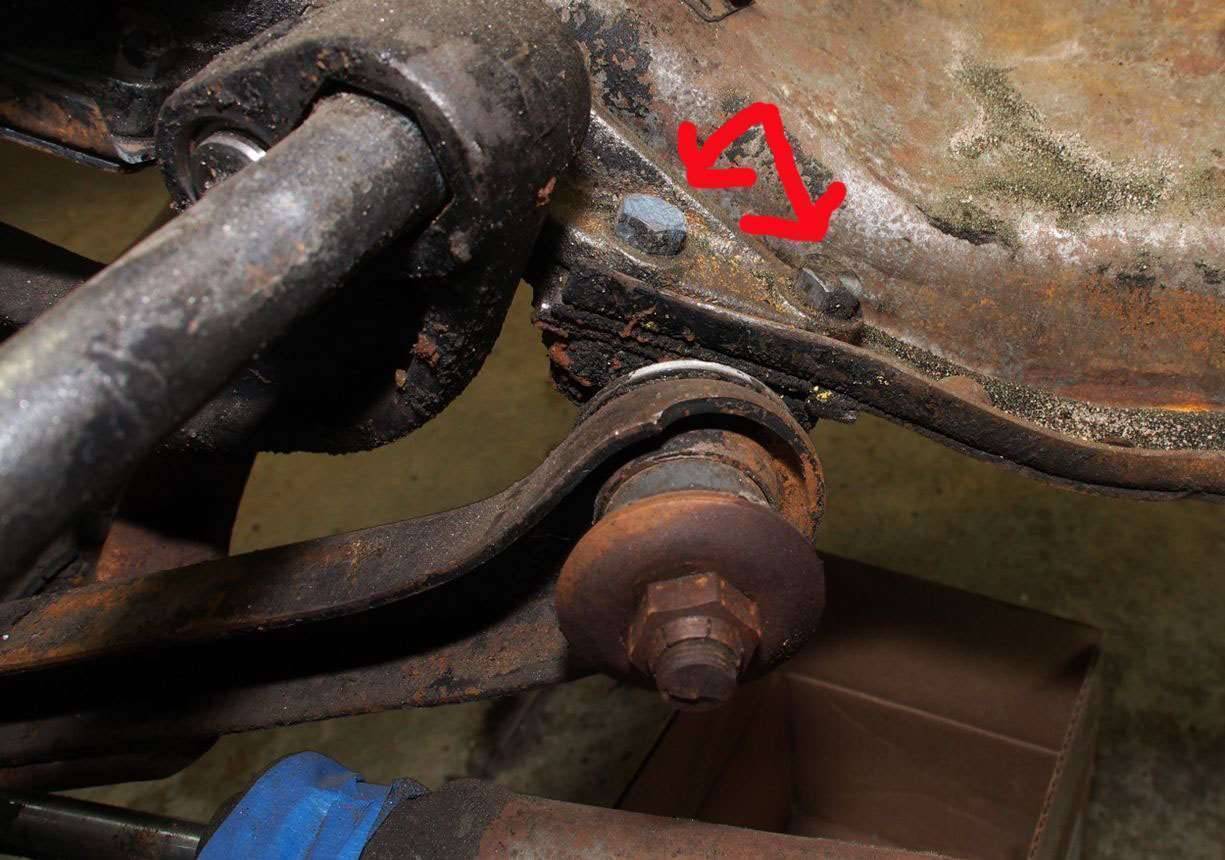
Posted on: 2014/10/11 19:26
|
|||
|
Stewart Ballard
|
||||
|
||||


