|
Re: 56 400 headliner
|
||||
|---|---|---|---|---|
|
Home away from home
|
put this here,
need info ,,how do you install the headliner on the 4 doors?, looks like its a push fit, with those jagged strips; on the sides above doors. thanks
Posted on: 2015/3/7 13:24
|
|||
|
Riki
|
||||
|
||||
|
Re: 56 400 headliner
|
||||
|---|---|---|---|---|
|
Forum Ambassador

|
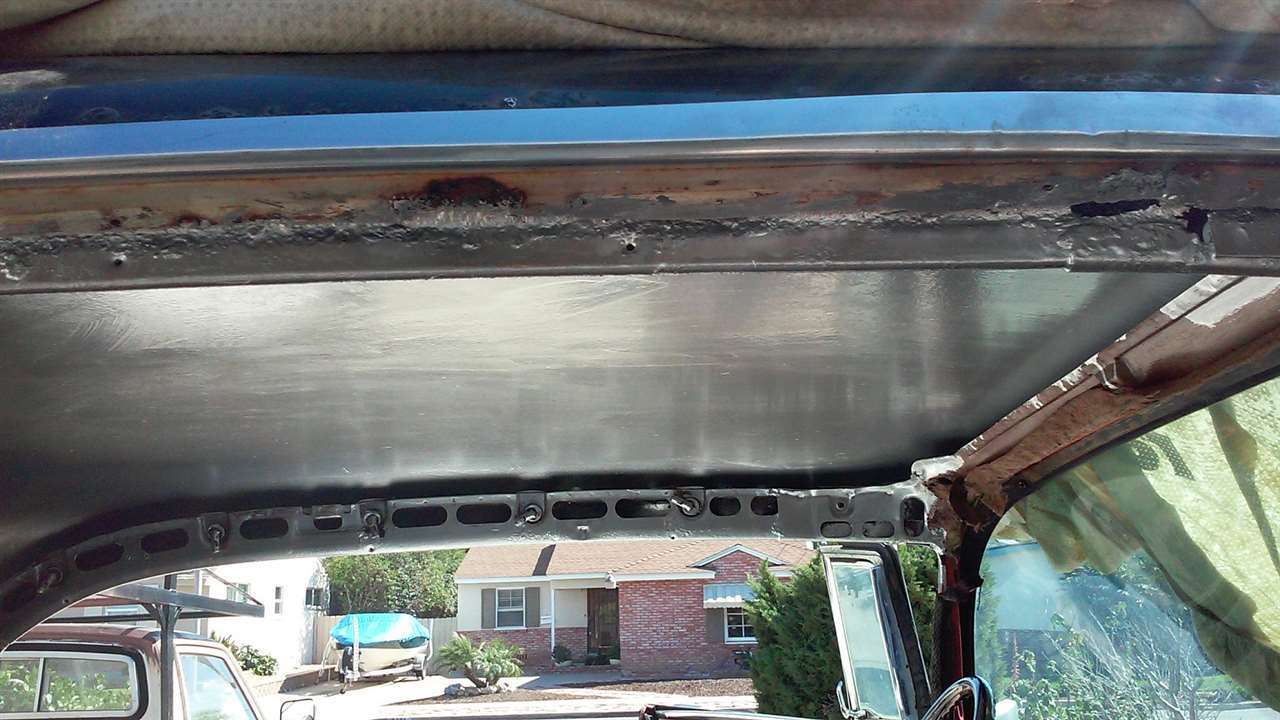
It helps to have a second body but can be done alone. If you are alone you are going to have to figure how to hold the fabric and bows in position while you work. Strong magnets might work for some of the places across the front. I remember using some string tied to the bows and stretched to keep them from falling down -- and they will want to flop down -- almost anytime you touch the headliner.
If you have a 4 door then the windlace has to go on first unless the old is already on and will be reused. The retainers have to be removed to install windlace. If they are not off already, suggest you remove them and clean any rust -- also clean and paint the bows and check the retainers to make sure all the little barbs are exposed and none are bent over. Might also paint the retainers before reinstalling. Install the clean and painted bows into the headliner pockets and make sure the headliner is centered side to side and front to back so there is enough to glue to the windshield header and it will extend down past the rear window and quarters. Don't remember exactly how it fastens in the rear -- glue I think but maybe tacks or staples. A chalk mark at the front and rear on the inside of headliner to match to a center line on the car helps find and keep center. As I said, the bows will want to flop around and fall so can be a general pain. They need to be kept more or less vertical. There is a small curved but dull bladed tool made for the purpose of inserting the headliner in the retainers. As you said, it is just push up past the barbs and let those catch the fabric. -- The tool is not totally necessary but just make sure whatever you use is relatively thin and not sharp or you can tear the headliner. You will have excess material on the sides that has to be trimmed. You will have to decide when to trim and what the best method is for you. The retainers will not handle much bulk though but I would make sure the headliner is straight and where you want it before trimming much. If you are careful you can reposition slightly but once the barbs tear into the fabric then you are committed. Also try hard for no wrinkles because they are hard to remove after the fact. If you have a two door, it is mostly the same except I believe the windlace is mostly not present and the chrome moldings go on after the headliner is inserted in the retainers.
Posted on: 2015/3/7 16:20
|
|||
|
Howard
|
||||
|
||||
|
Re: 56 400 headliner
|
||||
|---|---|---|---|---|
|
Forum Ambassador
|
There is a basic set of instructions in the 51-4 service manual, body section which also gives some pointers.
Posted on: 2015/3/7 16:39
|
|||
|
Howard
|
||||
|
||||
|
Re: 56 400 headliner
|
||||
|---|---|---|---|---|
|
Home away from home
|
thanks,,h,
this headliner is fabric , but will put vinyl in, i mean the stuff with holes. ok i sorta get it, the bows are falling over now,,, so you wrap headliner around the metal strip then place it up, when i take it off i will see more, was not sure how to remove it and get it back up. thanks
Posted on: 2015/3/7 16:39
|
|||
|
Riki
|
||||
|
||||
|
Re: 56 400 headliner
|
||||
|---|---|---|---|---|
|
Forum Ambassador
|
Not sure what you mean by wrap around the metal strip. There are some muslin pockets sewn into the headliner -- whether vinyl or fabric -- that the bows slide into. The headliner is actually suspended an inch or so below the bows.
I don't know how successful you will be in reinstalling an old one. If the barbs have done their usual job, it will be extremely difficult to get the headliner off the barbs and then back on in the exact position as it was before so any damage the barbs did to the material on the first installation and removal won't show.
Posted on: 2015/3/7 16:43
|
|||
|
Howard
|
||||
|
||||
|
Re: 56 400 headliner
|
||||
|---|---|---|---|---|
|
Home away from home
|
The 4 door 55 clippers are held with spray glue all the way accross the front and rear areas and are held on the sides just as described above. Not sure on the 400- assume its probably the same. What material is your liner? There is foam back cloth and the perforated cloth . As stated prior all retainers and bows should be cleaned and prepd. i marked all the bows so they went back in the same order and if you test fit the bows they should be a snug fit. I glued small bits of foam to the roof in 2 places at each bow to take up the areawhere the orig roof pad had occupied and this allowed the bows to " bed in" when installed and not move i had no issues with the bows flopping and the headliner was quite steady during the install. Do not trim the sides until the very end. You will use the excess ends to " hold on to" with one hand as you push the liner and stretch it for a tight fit and hook it up on the teeth with your plastic tool. ( plastic bondo squeegies ?) if you dont trim any sides you still have a second chance to grip the loose end and use your tool to push up with the tool and retighten . Then after your all done and satisfied, you trim the loose end as close as poss and tuck it right up behind the retainer out of sight. A word on the spray glue front and rear- the room and the metal have to be at a warm room temp and flash off ( tack up) or you will not get proper adhesion and it cannot react with whatever your paint prep was. Your first diy liner should be foam back cloth not the other materials which are harder to stretch and in some cases require a steemer to get out the wrinkles. Hope this helps.
Posted on: 2015/3/7 17:20
|
|||
|
||||
|
Re: 56 400 headliner
|
||||
|---|---|---|---|---|
|
Home away from home
|
Quote : remove it and getit back up.
I thought we were discussing a new install here. Dont think you will have luck removing an old liner and putting it back up. Quote: wrap the headliner around the bows. I purchased my headliner presewn to my measurements ( space between the bows) with the bow pockets sewn in from a friendly lady who does this from one of the south east states - Ga or SC if i recall and she would do the visors if you sent them to her. A few years ago when i did this there was no 55 clipper liner available and i asked her to leave the material behind the last bow very long and wide so as to cover the long c pillars in this car and she did and I was able to cover all with no seams. If you are a novice and you are attempting this with perf vinyl- good luck. Post a description of how it turns out Attach file:  (41.16 KB) (41.16 KB)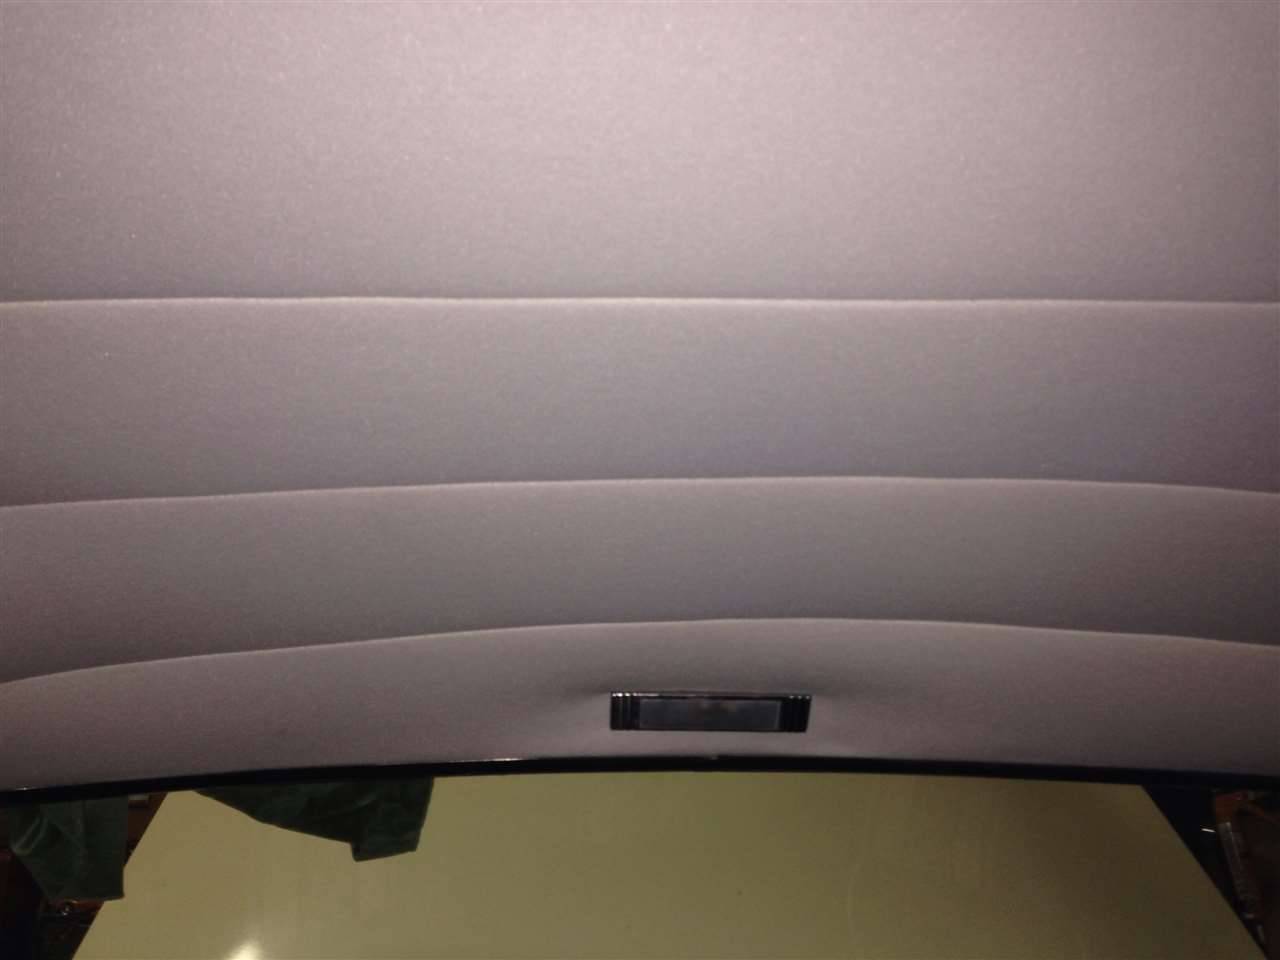
Posted on: 2015/3/7 17:59
|
|||
|
||||
|
Re: 56 400 headliner
|
||||
|---|---|---|---|---|
|
Home away from home
|
55 clipper custom highly optioned - headliner
Attach file: (42.58 KB) (42.80 KB) (42.80 KB)
Posted on: 2015/3/7 18:03
|
|||
|
||||
|
Re: 56 400 headliner
|
||||
|---|---|---|---|---|
|
Home away from home
|
55, thanks,
i put the 4 dr here ,, so not to start another topic, i am putting in new headliner..but am not sure how to remove it,,,over the doors. trying to keep headliner together as much as possible,,,,,can't pull it ,,,it tears...its shot, do you remove the strips?,,,or cut along windlace.? nice work on yours. my 400 should go ok, its all glue..then add the trim. thanks
Posted on: 2015/3/8 2:17
|
|||
|
Riki
|
||||
|
||||


