|
Re: Carl's 1952 Packard 300
|
||||
|---|---|---|---|---|
|
Home away from home
|
Successful day - got the fuel pump rebuild kit installed. I purchased it from Then and Now for 59 dollars, it originally came with the wrong vacuum diaphragm, they sent the new one at no cost to me and everything fit fine. Getting the diaphragms to hook onto the pump arm was difficult, but persistence always pays off.
I painted the starter, installed the water pump, installed the fuel pump, and installed the oil pan. Those bolts between the cross member and the engine are tough to get to, but I got them! I didn't raise the engine, but that sure would have helped. Attach file:  (112.54 KB) (112.54 KB)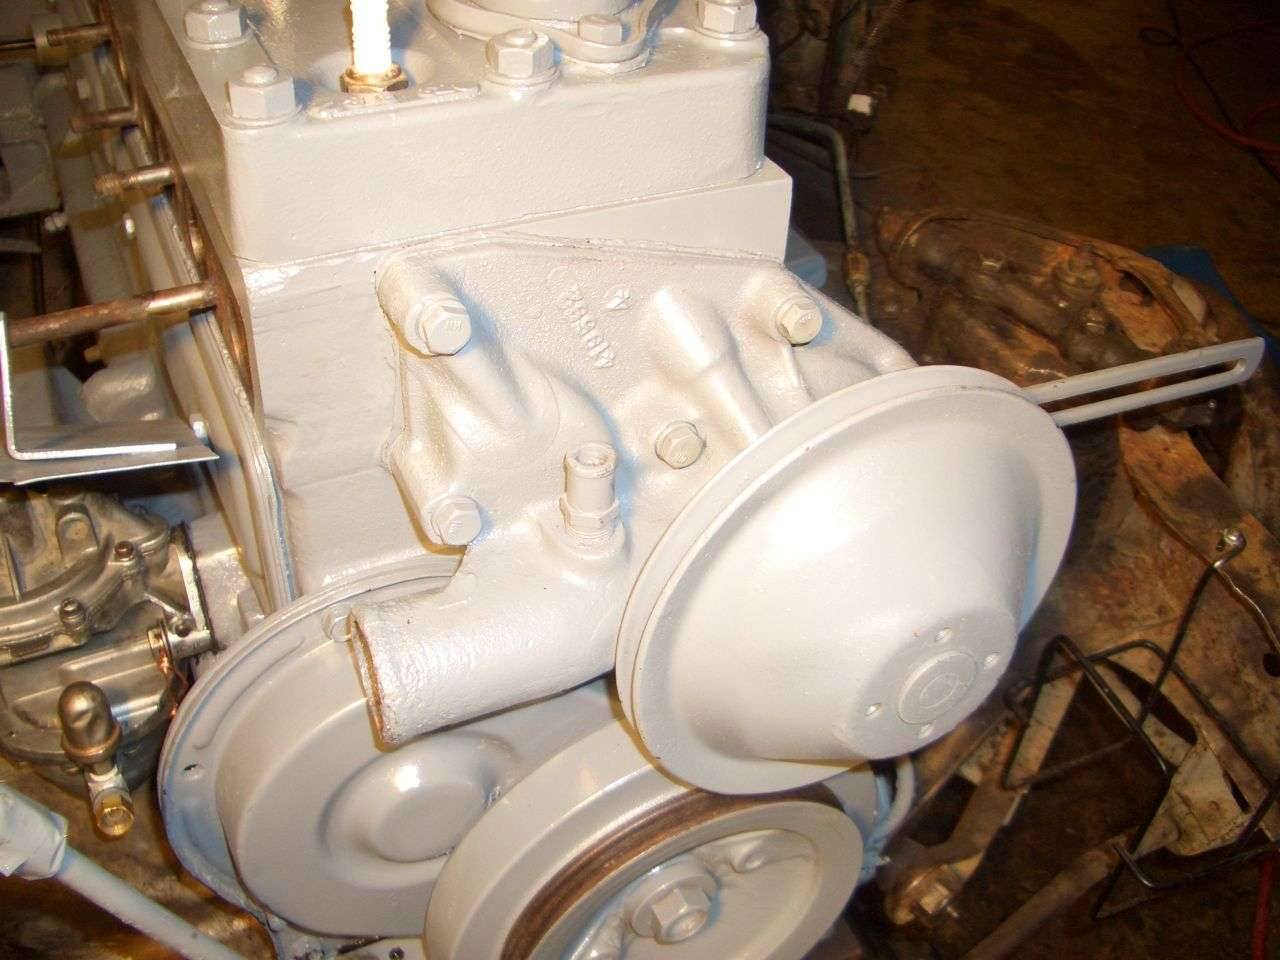 (117.21 KB) (117.21 KB)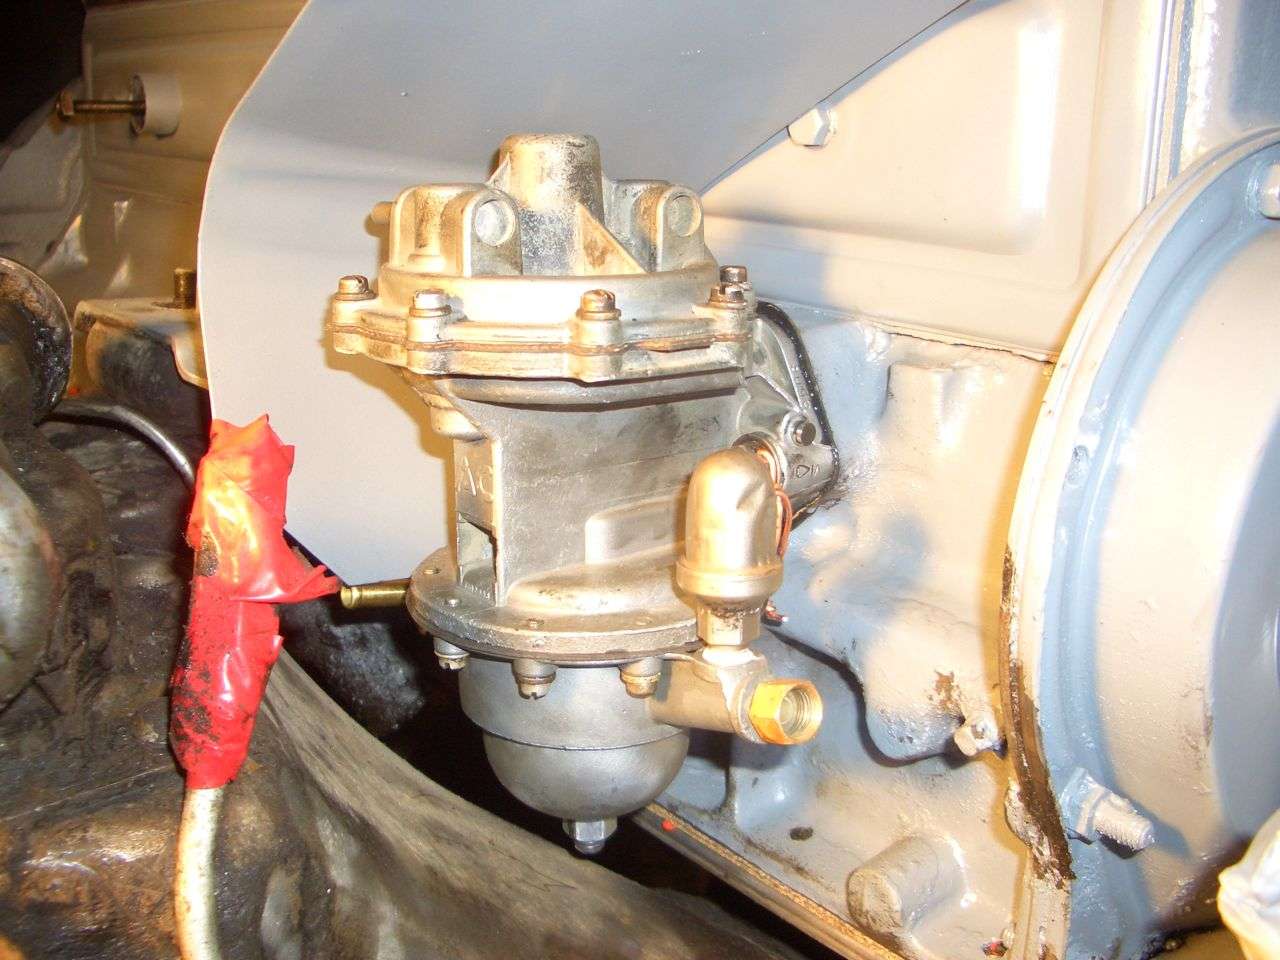
Posted on: 2009/6/14 21:17
|
|||
|
-Carl | [url=https://packardinfo.
|
||||
|
||||
|
Re: Carl's 1952 Packard 300
|
||||
|---|---|---|---|---|
|
Webmaster

|
Carl,
Looks like your moving ahead at light speed! Also if you have any questions about what on the engine should be paint what, let me know as I have the PI Engine Judging guide. Also all the painted items currently on my engine in my Project pics are painted to what was specified in the judging guide and should be exactly the same for your engine. BTW, Dan Yocum says hello. I saw him at the Swap Meet on Sunday.
Posted on: 2009/6/15 17:23
|
|||
|
-BigKev
1954 Packard Clipper Deluxe Touring Sedan -> Registry | Project Blog 1937 Packard 115-C Convertible Coupe -> Registry | Project Blog |
||||
|
||||
|
Re: Carl's 1952 Packard 300
|
||||
|---|---|---|---|---|
|
Forum Ambassador
|
Attaboy Carl! I admire your perseverance. Keep Plugging away - you will make it.
Posted on: 2009/6/15 17:33
|
|||
|
||||
|
Re: Carl's 1952 Packard 300
|
||||
|---|---|---|---|---|
|
Home away from home
|
Help!
My parking brake cable that goes from rear brake to center to rear brake is seized in the cable jacket. 57 years of rust. Max Meritt and Kanter want over $100 and there's no guarantee they have them in stock. I am soaking them in kerosene and have doused both ends with PB Blaster. I'm trying leverage with a bumper jack. I have a MAPP Gas torch, which I haven't tried yet, and a cherry picker/engine hoist which looks tempting. Ideas? BigKev- Dan's a great guy. I thought his name was Don. Good to know. In general, these items I painted gray: block, support for coil, dip stick handle, engine mounts, tube for oil, fuel pump heat shield, water pump, timing cover, oil pan, flywheel cover, water inlet, bracket for generator. The intake/exhaust and header pipe are going to be Eastwood Manifold Silver (500 degree brush on paint made for manifolds). The rest I painted black, except for the firewall. How close am I? Attach file: (52.01 KB)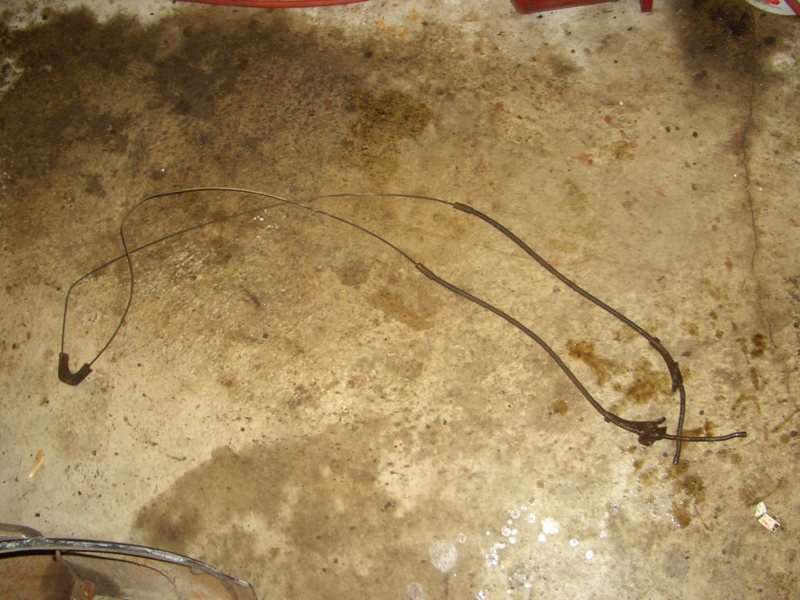 (62.75 KB) (62.75 KB)
Posted on: 2009/6/15 21:30
|
|||
|
-Carl | [url=https://packardinfo.
|
||||
|
||||
|
Re: Carl's 1952 Packard 300
|
||||
|---|---|---|---|---|
|
Webmaster
|
Pretty close. Here are a few things I noticed:
The fan, and fan pulley should be black. The coil bracket is black. Also the manifolds should be natural, I used Eastwood Cast Gray for those. The generator brackets should be black. Road draft tube and dipstick should be black. Other than that, I think you have a pretty good handle on it.
Posted on: 2009/6/16 0:55
|
|||
|
-BigKev
1954 Packard Clipper Deluxe Touring Sedan -> Registry | Project Blog 1937 Packard 115-C Convertible Coupe -> Registry | Project Blog |
||||
|
||||
|
Re: Carl's 1952 Packard 300
|
||||
|---|---|---|---|---|
|
Home away from home

|
For the frozen parking brake cable, try soaking the complete jacketed section with PB Blaster and flexing back and forth by hand to help break the inner cable free. You mentioned using a bumper jack so I am assuming that was with the cable installed in the car with the outer jacket held by the brake backing plates and frame brackets. If you can get it to break loose then working the jacket back and forth on the cable with more penetrating oil should gradually get it working properly.
Good luck!
Posted on: 2009/6/16 1:26
|
|||
|
||||
|
Re: Carl's 1952 Packard 300
|
||||
|---|---|---|---|---|
|
Home away from home
|
Looking good carl!I agree with Bdeb.But My personal favorite is Kano Aerokroil. I have used them all. They all seem to work.(Except wd-40).But for me nothing is as good as the kroil.Put the soak bucket in the sun as well.(let the sun warm it up.)Then start working it. Good luck. Brian
Posted on: 2009/6/16 5:32
|
|||
|
||||
|
Re: Carl's 1952 Packard 300
|
||||
|---|---|---|---|---|
|
Home away from home
|
Got the frozen parking brake cable free! I lot of pulling pressure applied by a rope and the bumper jack did the trick, after I soaked it in PB Blaster like Brian and BDeb recommended. Happy days!
Posted on: 2009/6/16 10:40
|
|||
|
-Carl | [url=https://packardinfo.
|
||||
|
||||
|
Re: Carl's 1952 Packard 300
|
||||
|---|---|---|---|---|
|
Home away from home
|
I finally got the heli-coil installed. Since there's no back wall for it to sit against (the back of the stud is in the water jacket) I have to try and capture the end bit (the tang) of the heli-coil when I break it off. I may just leave it on, I'll see tomorrow.
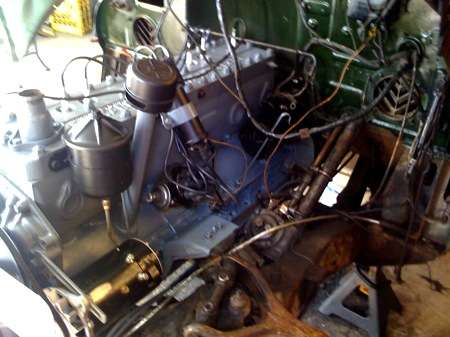
The fender went on without too much work, and I got the manifold back from the machine shop. He got most of it down, but since it was so far out of level not all of it is perfect. I painted it today and will install it tomorrow. The antenna does not work when I applied 6v, so I need to dissect it. I created a wrench to remove the chrome trim with a piece of 1" electric conduit, tapping 6/32 threads 1/4" from the end and threading in a bolt that fits into the hole. Turning the entire unit was simple, made for easy removal of the chrome trim on the antenna. Now I have a large oval hole in my fender. I roughed in the radiator so I can bend the tranny cooler lines and mount a new bracket in front of the radiator to hold the new tranny cooler. I removed the factory one, which leaked, and replaced it with a single piece of hose designed for Packards with manual transmissions. I'm routing the new lines from where the original ones ended around the passenger side of the radiator, placing the new tranny cooler radiator 1" in front center of the main radiator. Tower was unable to get me the correct color for 1952 from the Paint Chip files I send them. I have scrapped off some original paint chips from my car body, hopefully there is enough for them to recreate the color. This is the color combination I want: 
Posted on: 2009/6/16 20:49
|
|||
|
-Carl | [url=https://packardinfo.
|
||||
|
||||


