|
Re: Battery Tray "J" Bolts
|
||||
|---|---|---|---|---|
|
Home away from home
|
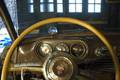
Here is the photograph. Do you need more points of view or is this enough?
Attach file:  (27.29 KB) (27.29 KB)
Posted on: 2010/5/31 14:38
|
|||
|
Stephen
|
||||
|
||||
|
Re: Battery Tray "J" Bolts
|
||||
|---|---|---|---|---|
|
Home away from home
|
Will have for you tomorrow if you still need it.
Also, a while back someone was asking about paint color on oil filler tube, decal location on oil filter bucket and tubing color, and (I think it was you)correct routing of the ground cable. Could you please move to the correct threads? Note that on the filler tube there appears to be black factory paint at top of tube. Two tone paint job? Attach file: (44.10 KB)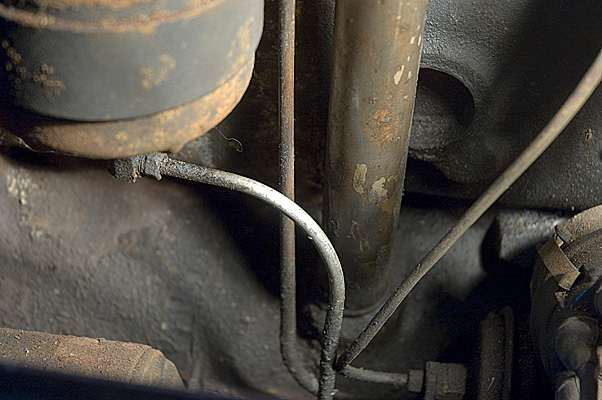 (48.37 KB) (48.37 KB)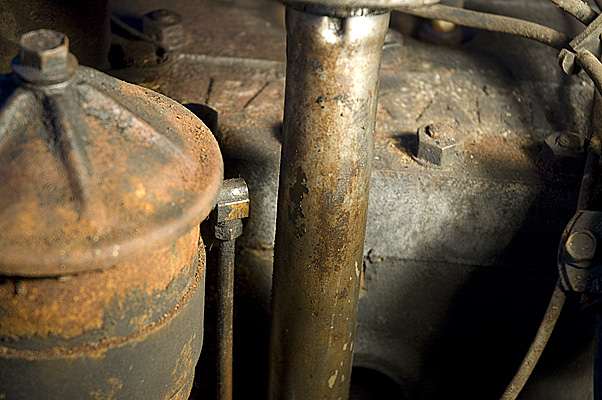 (46.64 KB) (46.64 KB)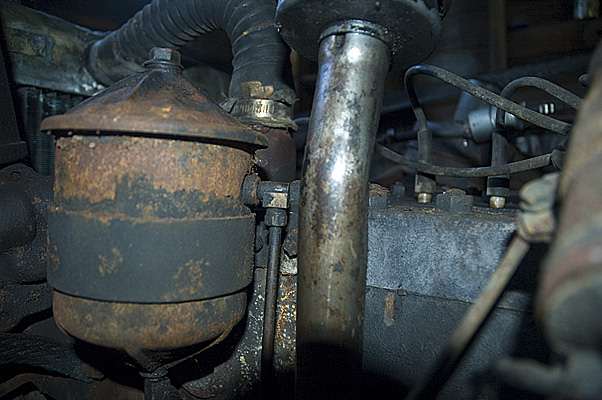 (38.41 KB) (38.41 KB) (44.31 KB) (44.31 KB)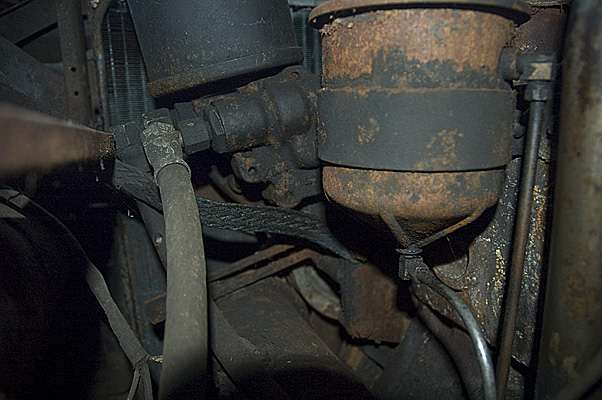
Posted on: 2010/5/29 23:52
|
|||
|
Stephen
|
||||
|
||||
|
Re: Bakelite question
|
||||
|---|---|---|---|---|
|
Home away from home
|
I would strongly recommend using TSP Substitute. You can buy it at Home Despot for around eight bucks and will make two or three gallons of cleaner/stripper. I originally found out about in an article in Old Home Journal. Also is water soluble. None of the fumes associated with strippers so I don't have to worry about losing more IQ points
I am currently working my late grandparent's 1832 house and this stuff will take anything off down to the original finish and not harm the original surface. Japanned lacquer, brass, plating, etc. Have used it on Bakelite light switch and plug plates, really cleans them up. Then I shoot the stripped pieces with clear lacquer to keep them from becoming tarnished. Also works good for mold removal, etc. I have been thinking about putting it in a parts washer. Check it out.
Posted on: 2010/4/19 21:41
|
|||
|
Stephen
|
||||
|
||||
|
Re: BigKev's 1954 Packard Clipper Deluxe Sedan
|
||||
|---|---|---|---|---|
|
Home away from home
|
Congratulations Kev. Was nice to hear it crank and start.
Posted on: 2010/4/19 21:21
|
|||
|
Stephen
|
||||
|
||||
|
Re: Congratulations to David Czirr
|
||||
|---|---|---|---|---|
|
Home away from home
|
Good article, nice writing. Congratulations.
Posted on: 2010/4/16 18:39
|
|||
|
Stephen
|
||||
|
||||
|
Re: Oil filter decal
|
||||
|---|---|---|---|---|
|
Home away from home
|
I was cleaning up and photographing the Derham today after I saw this thread earlier today
I will post some photographs of the filler tube later tonight if anyone would like to see them. The oil filler tube on the 53 Derham, a 327 Thunderbolt, is black, what's left of the engine paint is gray. I touched the oil filter bucket where the label is and it disintegrated. The outline of where it was should help. If anyone needs photographs of the engine compartment let me know what you want.This car is original.I do not have a macro lens form my dSLR, closeups would have to be shot with my film Nikon and will need a bit of turn around time for processing and scanning/ converting through Photoshop. O_D, you wanted interior images?
Posted on: 2010/4/14 16:26
|
|||
|
Stephen
|
||||
|
||||
|
Re: 4th Anniversary
|
||||
|---|---|---|---|---|
|
Home away from home
|
Hey Kev,
Congratulations and my admiration for conceiving this great website. Everyone has been a great help. Regards, Stephen
Posted on: 2010/4/8 22:13
|
|||
|
Stephen
|
||||
|
||||
|
Re: Work On the 1953 Derham Formal
|
||||
|---|---|---|---|---|
|
Home away from home
|
Quote:
If this was my car I would be disassembling it. I am doing this for the widow of the late owner as it will be for sale soon. This is the first Packard I have had the opportunity to work on and I am loving every minute of it. It really hurts that it isn't my car especially on what I have done to identify the car and its history. Ah, well.
Posted on: 2010/3/18 21:37
|
|||
|
Stephen
|
||||
|
||||
|
Re: Work On the 1953 Derham Formal
|
||||
|---|---|---|---|---|
|
Home away from home
|
Yes, that is it. I had posted some info and an image of the building back when at the Packard dealers section.
Here is some info from December 09. The building has been rehabbed into apts. http://www.buffalorising.com/2009/12/packard-building-brings-award-to-regan-development.html http://www.buffalorising.com/2009/06/packard-apartments-ribbon-cutting-today.html and Packard Cleveland, though not that well thought out. At least the building was saved. http://maps.google.com/maps?hl=en&ie=UTF8&ll=41.500759,-81.62168&spn=0,359.98455&z=17&layer=c&cbll=41.500672,-81.621676&panoid=qVWYwqyEmyKC_dVgZv5iig&cbp=12,61.88,,0,-16.56 The Derham as it sits in the owner's garage is about two miles from its originating dealership.
Posted on: 2010/3/18 17:52
|
|||
|
Stephen
|
||||
|
||||
|
Re: Work On the 1953 Derham Formal
|
||||
|---|---|---|---|---|
|
Home away from home
|
I had realized a while ago that trying to spray the Deep Creep into the plug holes at an angle wasn't getting it to the bore. At least the valves have gotten a good soaking.
So first I tried using a angle straw and the DC blew back because of the flex elbow in the straw. I stopped at a hardware store yesterday and bought three feet of clear plastic 1/4"hose. To get it pliable enough to snake into the bore, I put the hose next to a quartz work light and got the hose hot. I then "intubated" the cylinders and have been able to get DC into the bores excepting #2 and 8. How have other folks approached getting the penetrating oil into the cylinder bore? Otherwise I am getting more moving parts moving with the Deep Creep with notable exception of the trunk lock and brake pedal. Also cleaned and arranged the garage more to my liking for working on the car and took the tarp completely off of it. Will post some new images tomorrow at some point.
Posted on: 2010/3/17 23:31
|
|||
|
Stephen
|
||||
|
||||


