|
Re: BigKev's 1954 Packard Clipper Deluxe Sedan
|
||||
|---|---|---|---|---|
|
Home away from home

|
Fantastic job, Big Kev!
 You really brought your Packard back from the dead. Since I'm pretty new to Packard Info, I got to see it all happen very quickly instead of in real time. My favorite item on the '50's Clippers is the way they did the tail lights. Super-cool. I need to thank you for your tip to use PB Blaster to get the clock working. Back in my younger days I ruined two Borg clocks trying to make them work. I had read an article that said to put some kerosene in a jar and suspend the clock in the top of the jar to allow the kerosene fumes to lubricate the clock mechanism. I tried that, and it didn't work, so I then attempted mechanical "adjustments" to make the clocks work, which didn't do them any good. On the Packard I used the PB Blaster method, and not exaggerating, the clock came back to life the instant the spray of PB Blaster hit the mechanism. I cleaned up the points, and now it works like new. Jeff
Posted on: 2013/10/11 1:03
|
|||
|
||||
|
Heater valve capillary tube
|
||||
|---|---|---|---|---|
|
Home away from home
|
One of the items that has escaped my memory and doesn't appear in any of the photos that I took is the heater valve capillary tube. I'm hoping someone can tell me the correct routing of the tube.
Thanks, Jeff Attach file:  (84.59 KB) (84.59 KB)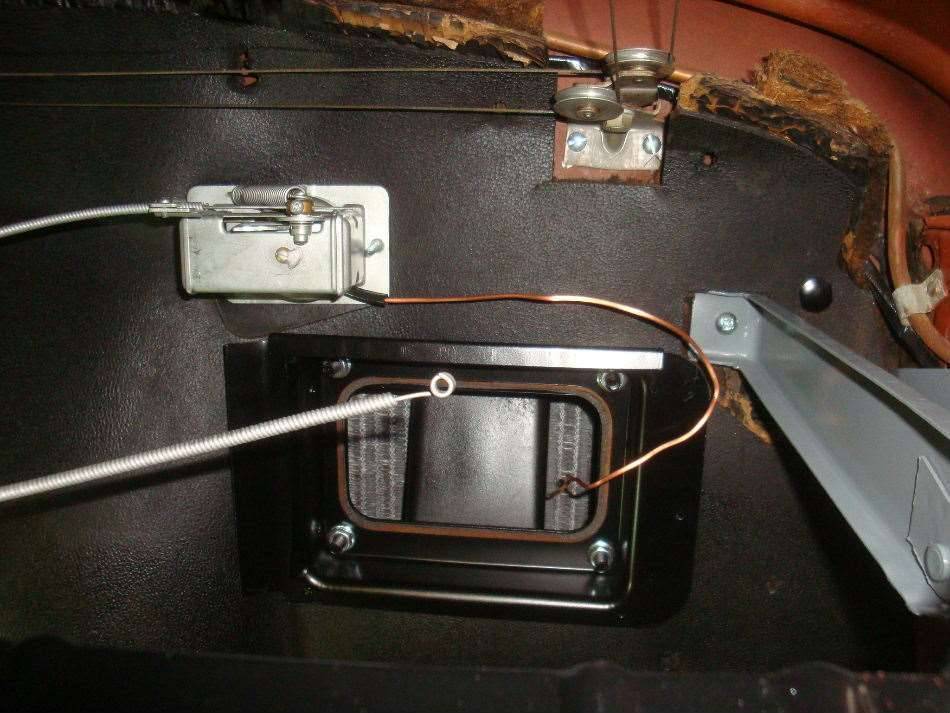
Posted on: 2013/10/10 23:33
|
|||
|
||||
|
22nd series door latches
|
||||
|---|---|---|---|---|
|
Home away from home
|
Does anyone know if a door latch from any other body style will work on a convertible? My parts book lists a different part number for convertibles, but i was wondering if maybe the convertibles had chrome plated latches and the closed cars didn't. My driver side latch is pretty beat up. I have an early production door on the left side with the outside handle that's only held on by one screw. Someone snapped the handle off some time in the past, and i found out why when I installed a new handle. The door doesn't want to open when you pull the handle from the outside. I'd like to replace the latch, but if it's convertible only, I'm sure it will be tough to find and expensive if I do find one.
I was also wondering if it is common to have problems with these latches, as the passenger side doesn't seem to work all that well either. The door opens great using the inside handle, but the latch seems to drag when using the outside handle. The latch on the passenger side is in much better shape than the driver side, and I lubed it up real good to see if that would fix the problem, but it didn't. Thanks, Jeff Attach file: (67.46 KB) (75.37 KB) (75.37 KB)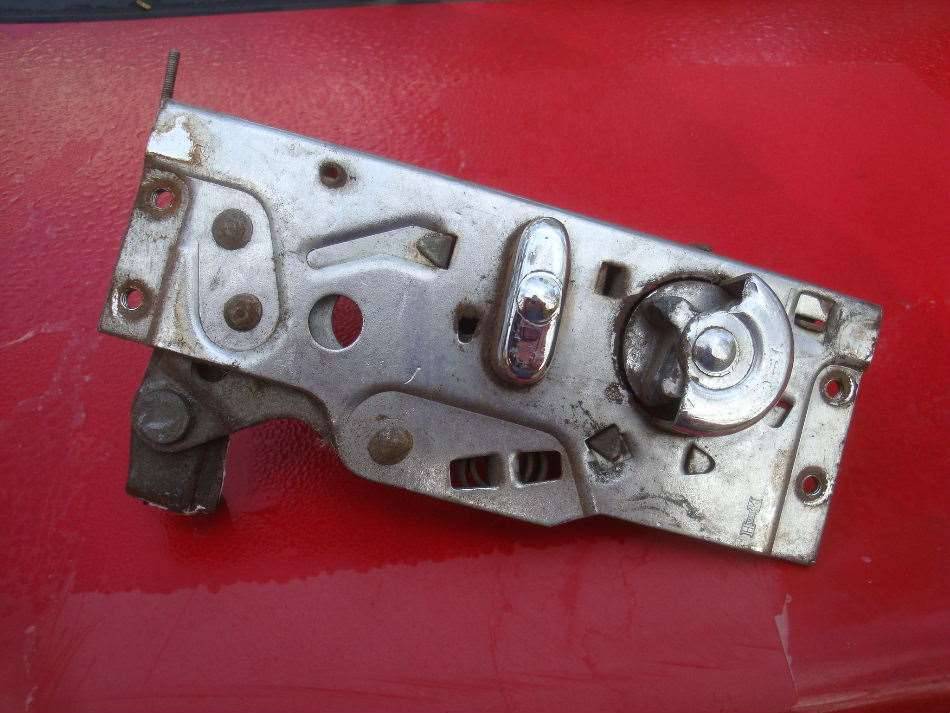 (73.54 KB) (73.54 KB) (84.62 KB) (84.62 KB)
Posted on: 2013/10/10 23:19
|
|||
|
||||
|
Aluminum strap clamps
|
||||
|---|---|---|---|---|
|
Home away from home
|
I have to admit that these clamps have me perplexed. To make it somewhat work I have to bend one end opposite the way it was bent before, but it really doesn't get all that tight. Does anyone know the correct way to tighten these clamps?
If you blow up the 2nd picture, you will see that I have the clamp set the way it looks like it should go. The problem is that if I turn the winder piece counterclockwise to tighten the left leg of the strap, it unwinds the right leg. Thanks, Jeff Attach file: (66.23 KB)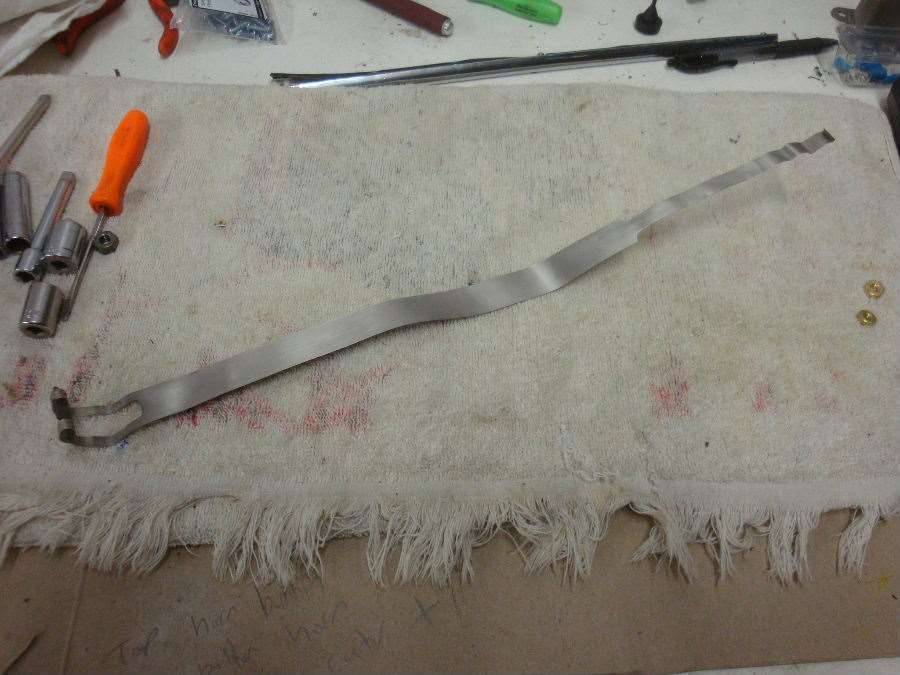 (76.99 KB) (76.99 KB)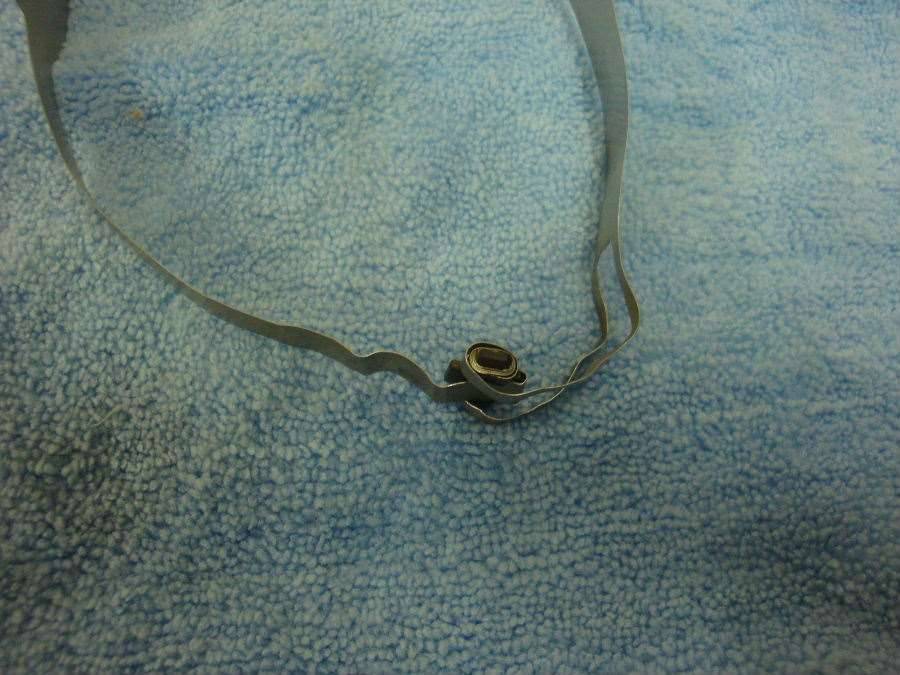 (75.18 KB) (75.18 KB)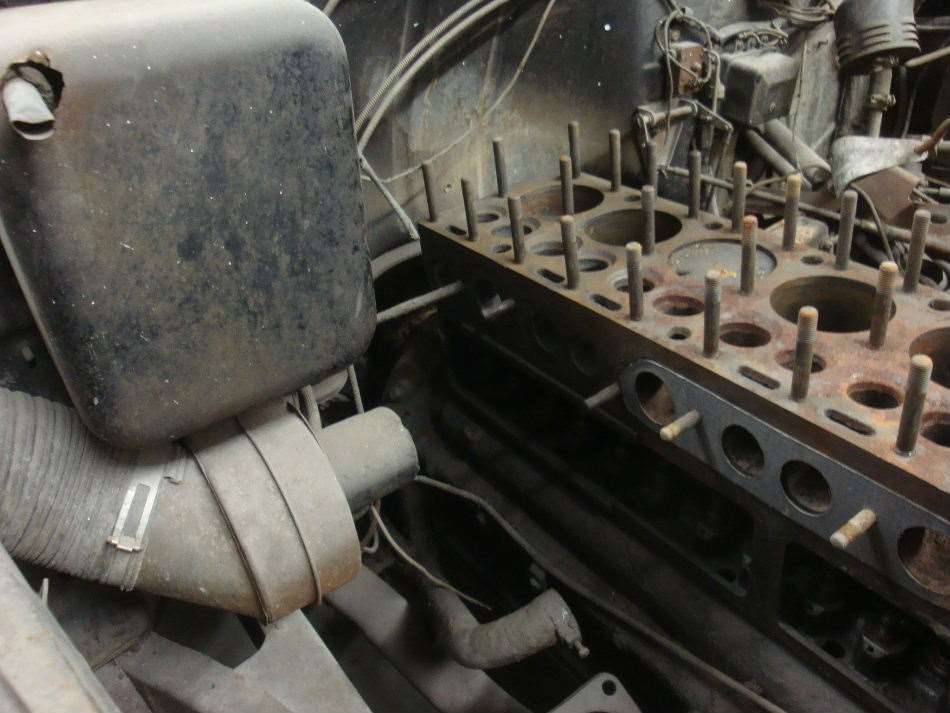
Posted on: 2013/10/10 22:59
|
|||
|
||||
|
Re: Mike's 53 Clipper
|
||||
|---|---|---|---|---|
|
Home away from home
|
Great job so far Mike! It must have felt really good to get the body back on the frame. I'm getting close to putting my engine back in, so that will be a big day for me. I just ordered clamps too. I'm getting them from Dennis Carpenter, who sells reproduction Ford parts. They were fairly cheap, so I hope they are decent quality. $5 per clamp from the Packard dealers wasn't in the budget, but I really didn't want to put the modern worm drive clamps on the car. I'm having similar issues trying to figure out where things go. No matter how many photos you take, there's always a few items that are hidden from view or just outside the edges of the picture.
Jeff
Posted on: 2013/10/10 22:49
|
|||
|
||||
|
Re: Mike's 53 Clipper
|
||||
|---|---|---|---|---|
|
Home away from home
|
JW, I like the idea of the paper element. Do you recall the part number of the filter or the application?
Thanks, Jeff
Posted on: 2013/10/10 22:37
|
|||
|
||||
|
Re: Jeff's 48 Custom 8 Victoria Project
|
||||
|---|---|---|---|---|
|
Home away from home
|
In late June I moved the Packard back onto the lift to finally start the process of putting the car back together. The first new parts to actually be installed on the car were two new axle seals. I figured the grease on the bearings would be pretty well broken down by now, and I was right. Despite the runny old grease, the bearings were still in nice shape. The job was straightforward, though it was tough to get the old seals out of the axle tubes. The old seals certainly look more impressive than the wimpy replacements. It appears that someone did a complete brake job on the car shortly before it was taken off the road, and it looks like they even machined the drums. All I had to do was replace the wheel cylinders and give the drums a quick shot in the blasting cabinet plus a light sanding with 80 grit paper.
I had been very worried about what I would find in the gas tank. There was no gas cap and no fuel door on the car when I got it, and I feared the tank would be full of water and rust, though it didn't smell bad. I was quite pleased to find that the tank is in almost perfect inside, with only a few light rust spots where some drops of water sat on the bottom of the tank. It had over 10 gallons of 1980's vintage fuel in it, and other than a bit of sludge that was at the bottom, the fuel was good enough to use in the lawn mowers when mixed 50/50 with fresh gas. The sending unit didn't fare as well as the tank, but it did clean up nice in the bead blaster, so I'm hoping that it still works. It's one of those oddball King-Sealy units that you can't test with an ohm meter. I dropped the radiator and heater core off at a local radiator repair shop. Other than a big mouse nest in the top tank and a slight leak around the fill neck, the radiator was in good shape. The heater core, not so well. It froze and split apart when the car experienced it's first New England winter. The core needed a new core. That doesn't sound right, but I can't think of any other way to explain it. Attach file: (73.56 KB)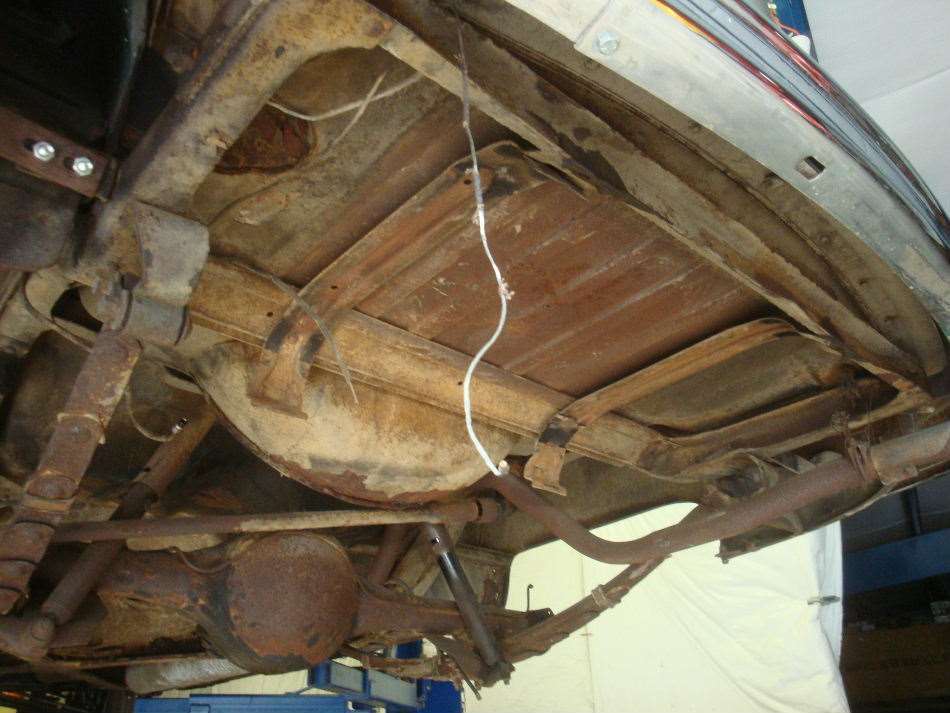 (83.67 KB) (83.67 KB)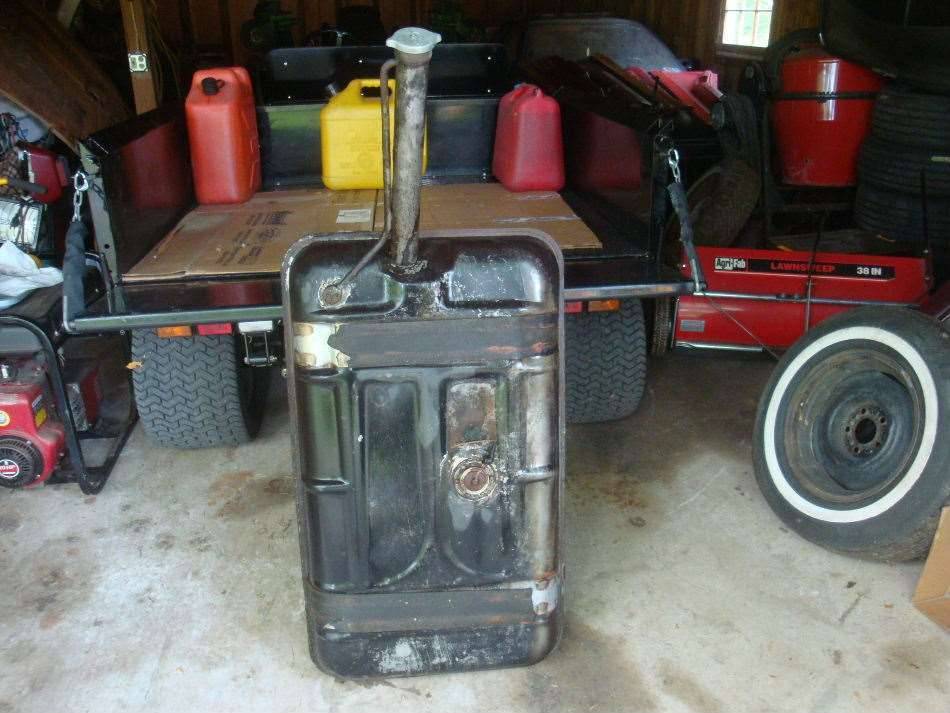 (30.57 KB) (30.57 KB)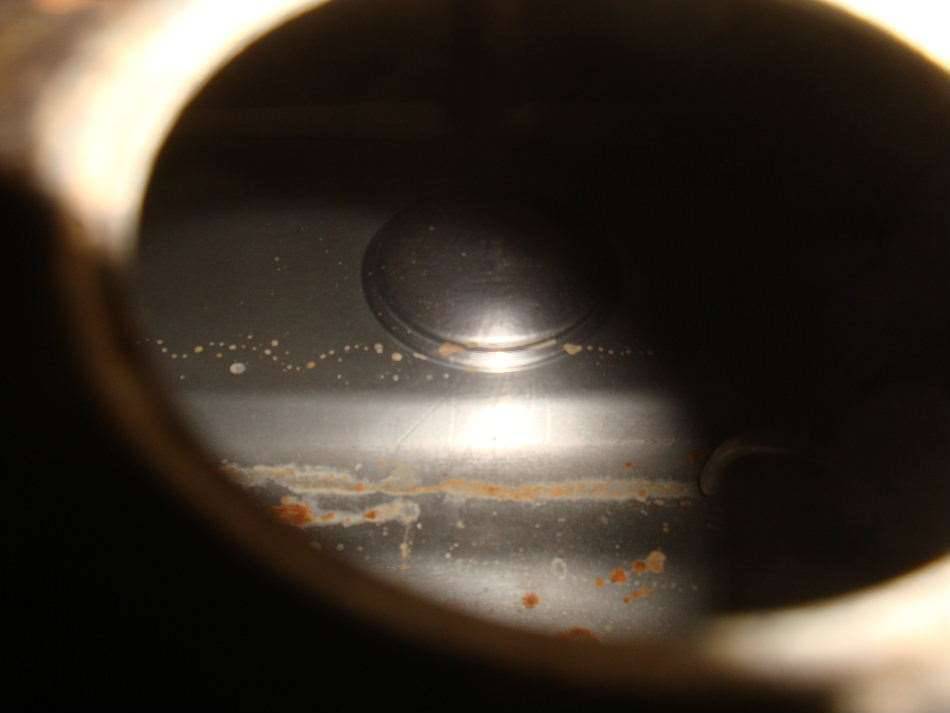 (70.29 KB) (70.29 KB)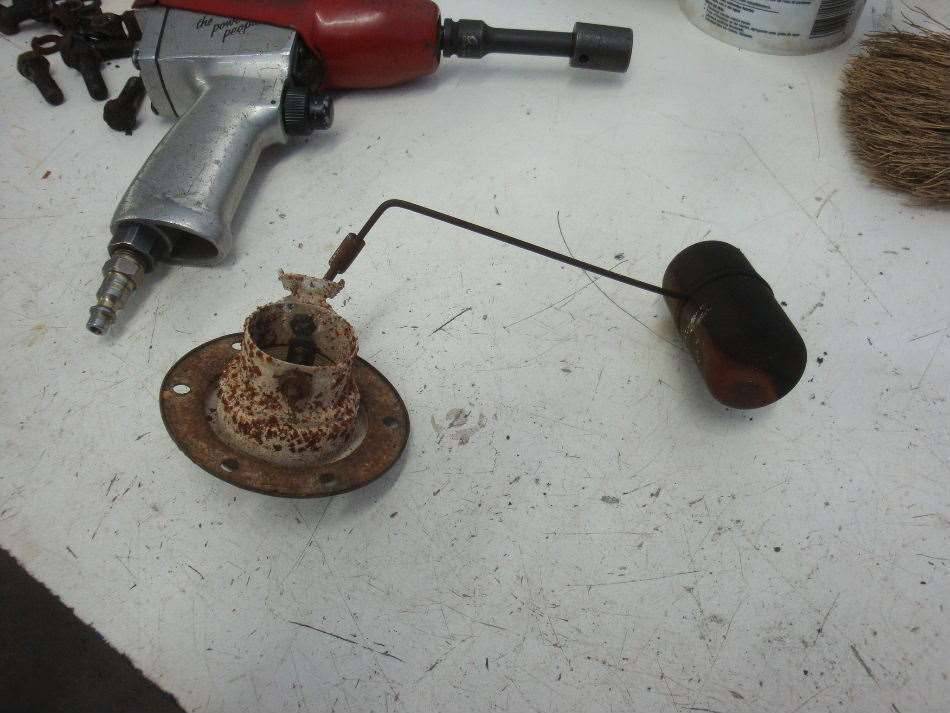 (80.95 KB) (80.95 KB)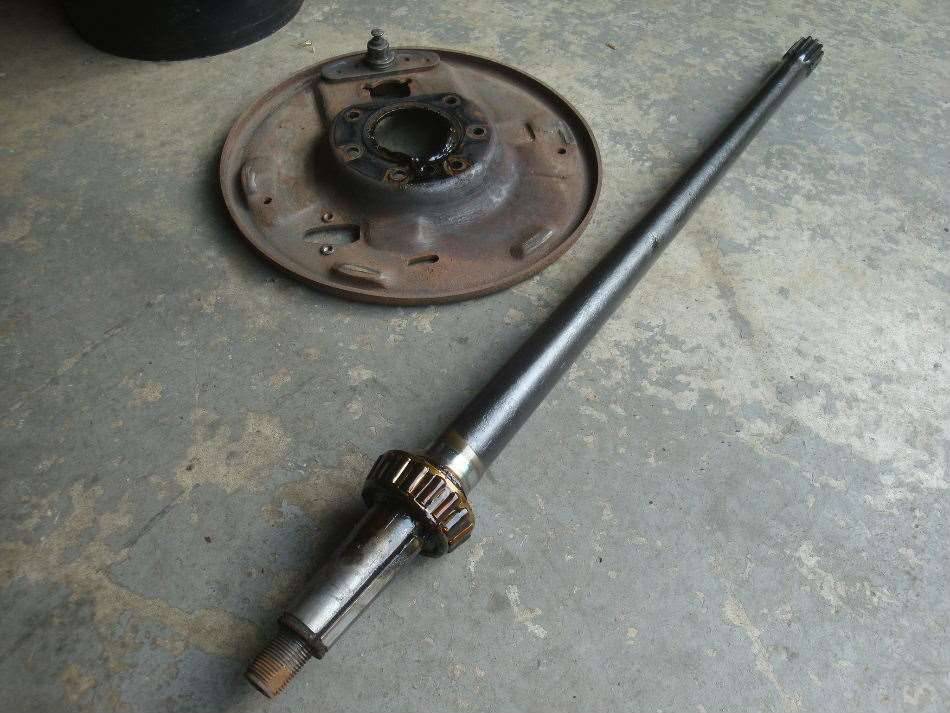 (69.45 KB) (69.45 KB) (66.31 KB) (66.31 KB)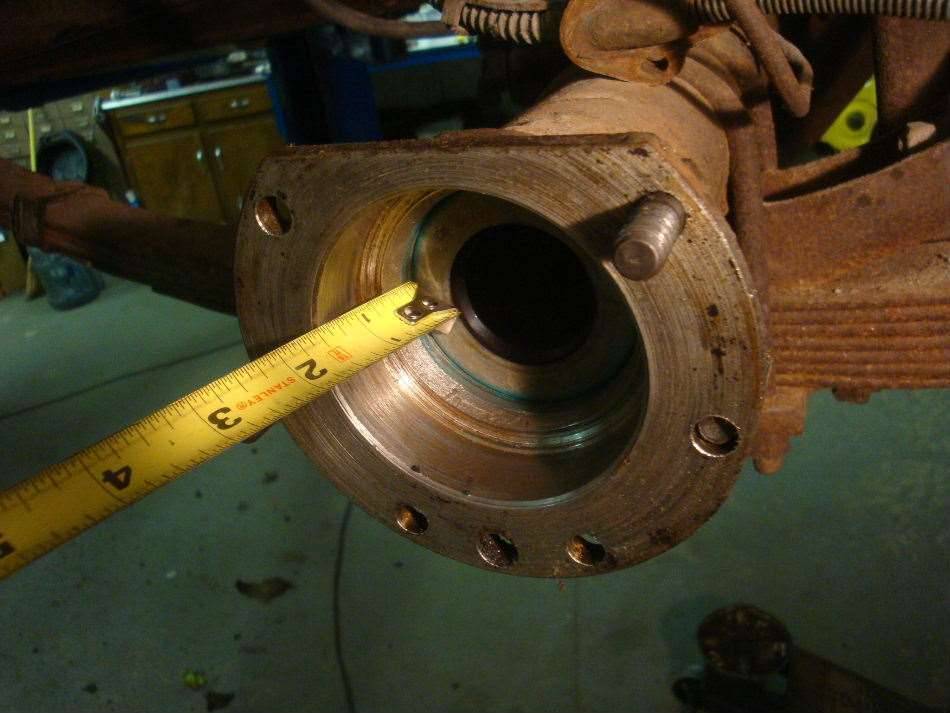 (84.49 KB) (84.49 KB)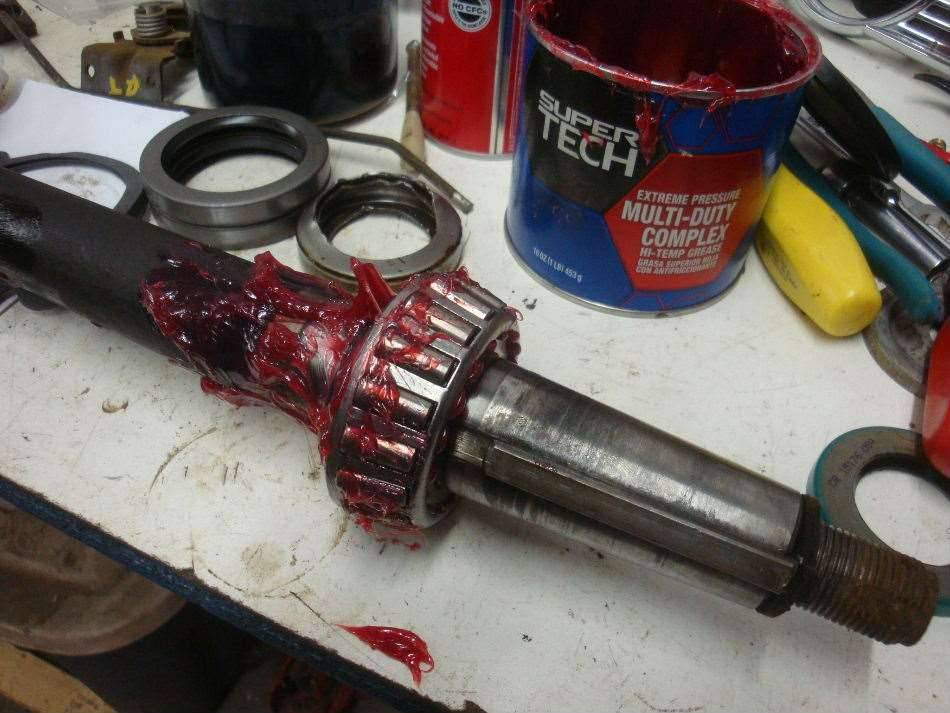 (74.43 KB) (74.43 KB)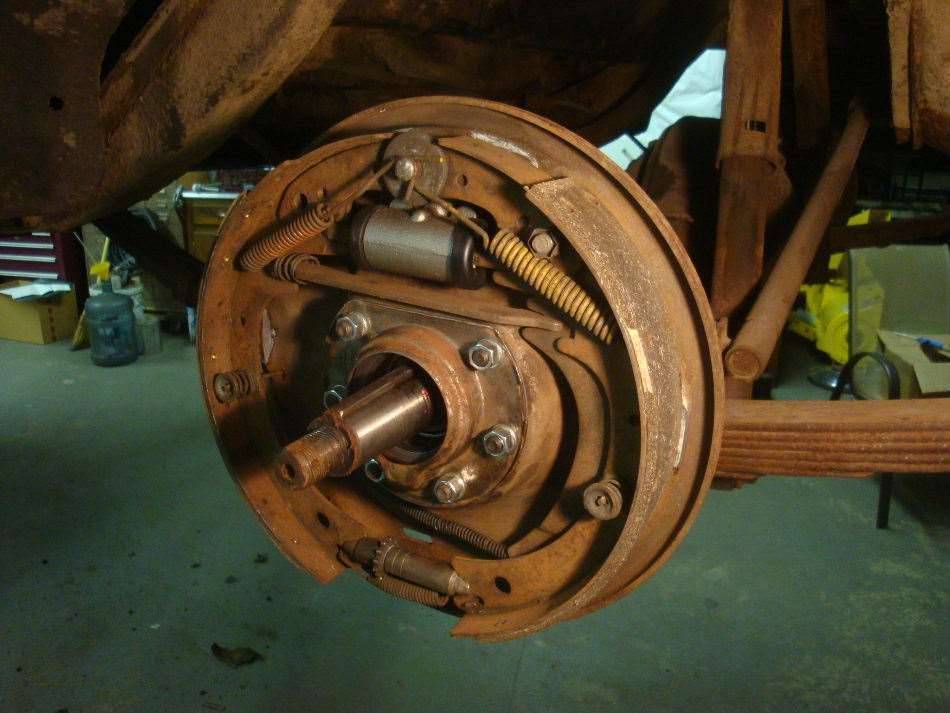 (61.87 KB) (61.87 KB) (97.62 KB) (97.62 KB) (84.54 KB) (84.54 KB)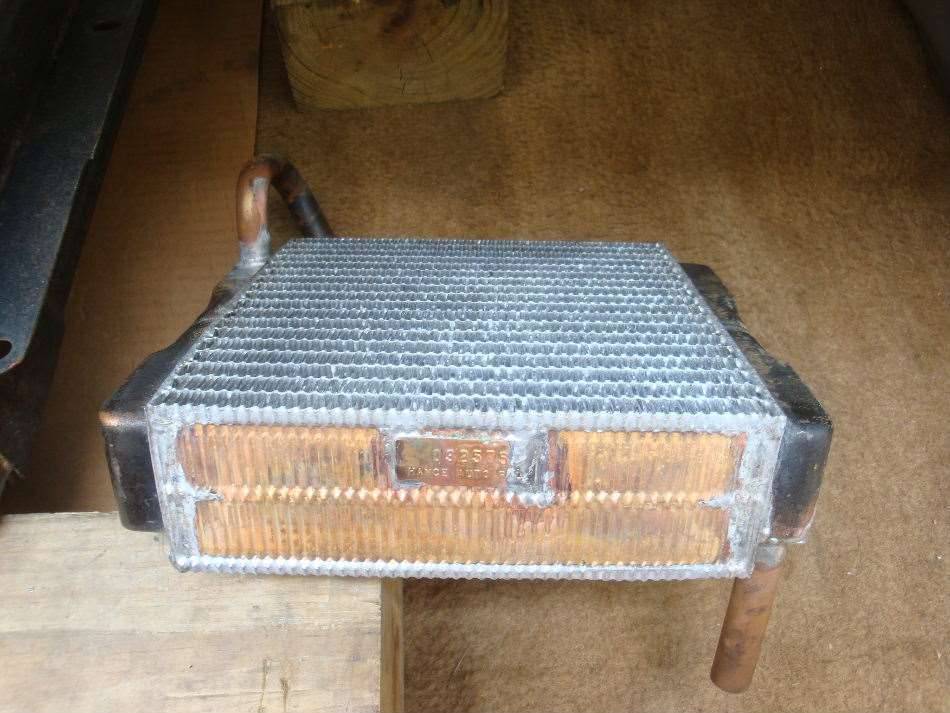
Posted on: 2013/10/6 21:57
|
|||
|
||||
|
Re: Jeff's 48 Custom 8 Victoria Project
|
||||
|---|---|---|---|---|
|
Home away from home
|
Hi Dell,
I had a feeling that the engine should be gray, but the owner wanted green. I like the green better so it didn't bother me to paint it green. I figured that the engine was painted with all the brackets and things attached, which is why I didn't find any paint hidden underneath where they bolted to the engine. I did read the recent green vs. gray discussion, and this car was probably built too late to be one of the green engine cars. Though one guy said that he had seen green 356's in 22nd cars with the old style patent plate, and that's what this car has. It's interesting that it was important to make engines look so beautiful in the 20's and 30's, but by the late 40's they assembled the whole drivetrain sans carb, distributor and generator, then sprayed on about a half of a coat of the cheapest engine paint they could get. By the way, I did figure out what the mystery holes in the cowl were for. They line up with the upper mounting holes in the firewall insulation pad. Since the steel hydraulic lines were installed before the pad, the pad sits away from the cowl. It appears that the pins were omitted by the factory since they were too short to reach the holes, and they filled the holes with small blobs of sealer. I think they may have stopped punching these holes in the cowl later in production, as I looked at pictures of a light colored car for sale on ebay and it didn't appear to have the holes. Jeff
Posted on: 2013/10/6 20:42
|
|||
|
||||
|
Re: Jeff's 48 Custom 8 Victoria Project
|
||||
|---|---|---|---|---|
|
Home away from home
|
As usual, I'm falling behind on my Packard blog again. I'm going to try to get caught up here, since blogs are more interesting if they are about things that are happening now, and not past events. I'm hoping to have the car running by next Sunday, but I make no promises, since it seems that I can't work more than about 30 minutes before I run into another problem.
This chapter is pretty basic: cleaning, de-rusting, and painting parts. Most parts were media blasted in to remove rust and any old paint. Anything that wasn't delicate went into the red cabinet first for a shot of TP Tools "Fast Cut MAX", which is a reddish color abrasive that's more aggressive than sand, and works quite well. The Fast Cut doesn't get into tiny depressions in the metal, so I do a quick second blasting in the black cabinet that contains glass bead. Parts that didn't have significant rust, were non-ferrous, or just delicate-looking were only treated to the glass beads. Most of the hardware and really small items were soaked in Ultra One rust remover. It works really well, though you really have to dry the parts fast to keep them from flash rusting. Even though I cleaned up much of the hardware, I plan to replace the common items with new stuff. I will save the old hardware in case someone wants to do a top notch resto some time in the future. Mostly everything got painted to protect it. I used mainly Rustoleum Professional series paints, along with Eastwood, Duplicolor, Plasticoat, and some odd-balls out of my 30 year spray paint collection. I used a little artistic license to add a bit more color to the mostly black engine compartment. A few items turned out a bit brighter than I expected, and I may have to repaint those later on. I'll see how they look when the hood is back on and it's much darker in the engine bay. May to August 2013. Parts prep and painting. Attach file: (75.37 KB)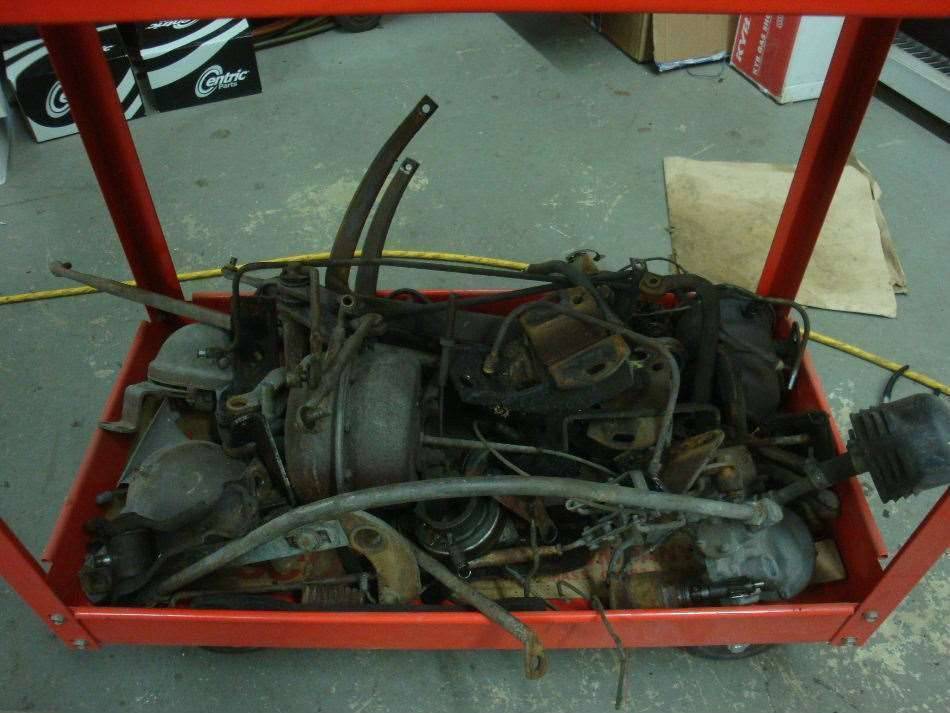 (72.37 KB) (72.37 KB)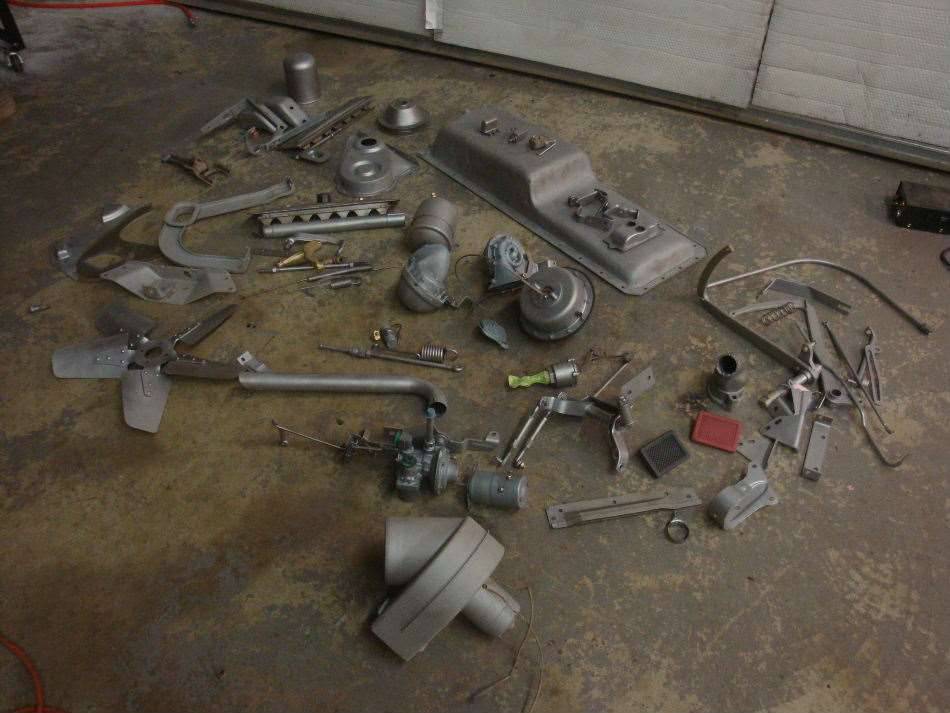 (76.56 KB) (76.56 KB) (53.57 KB) (53.57 KB)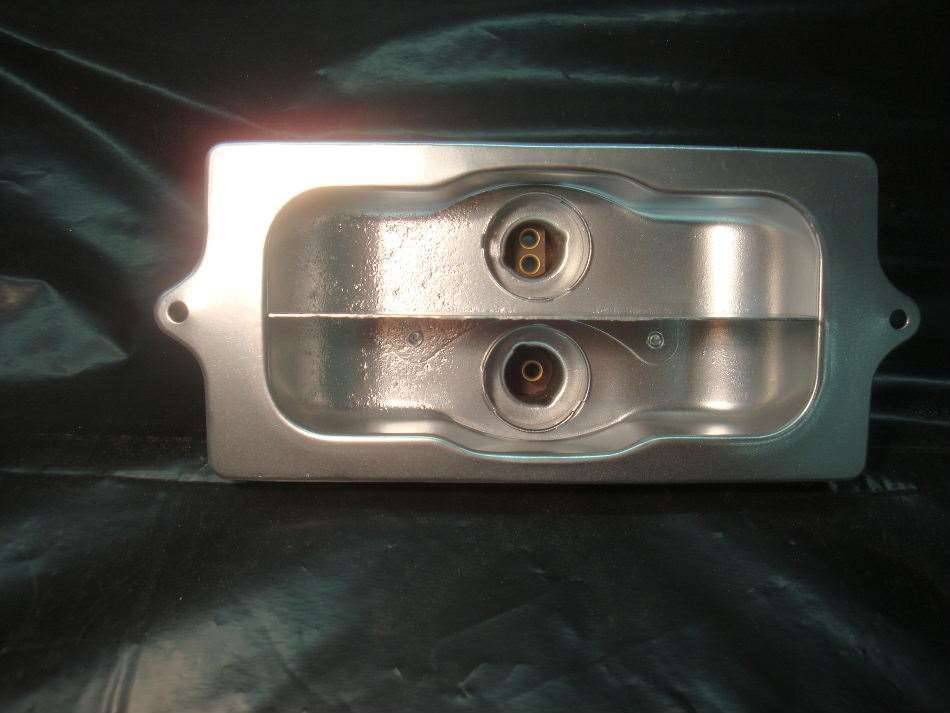 (70.51 KB) (70.51 KB)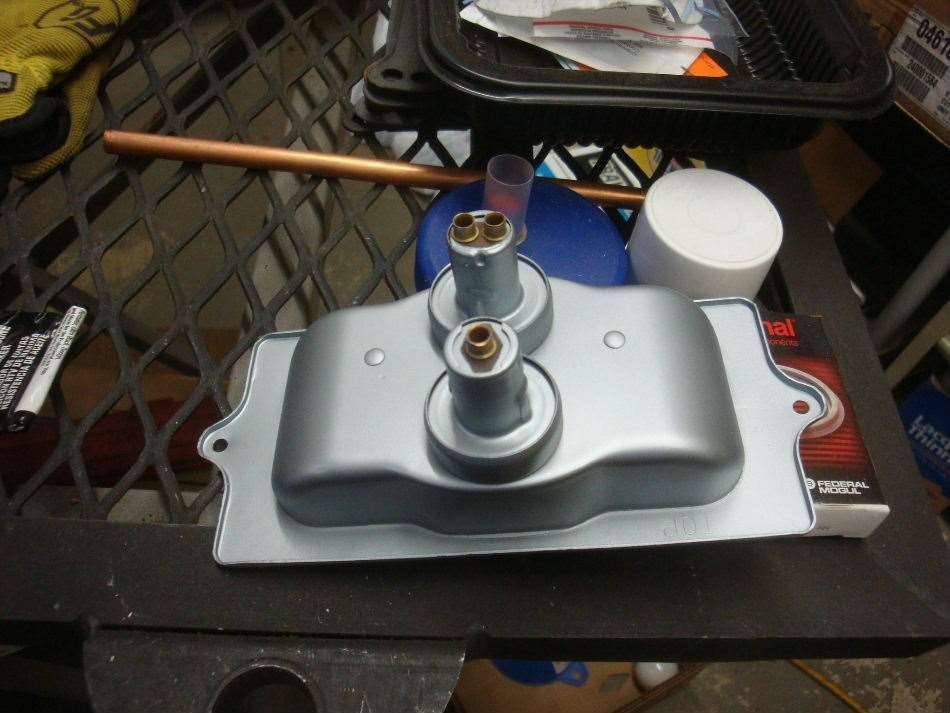 (73.83 KB) (73.83 KB)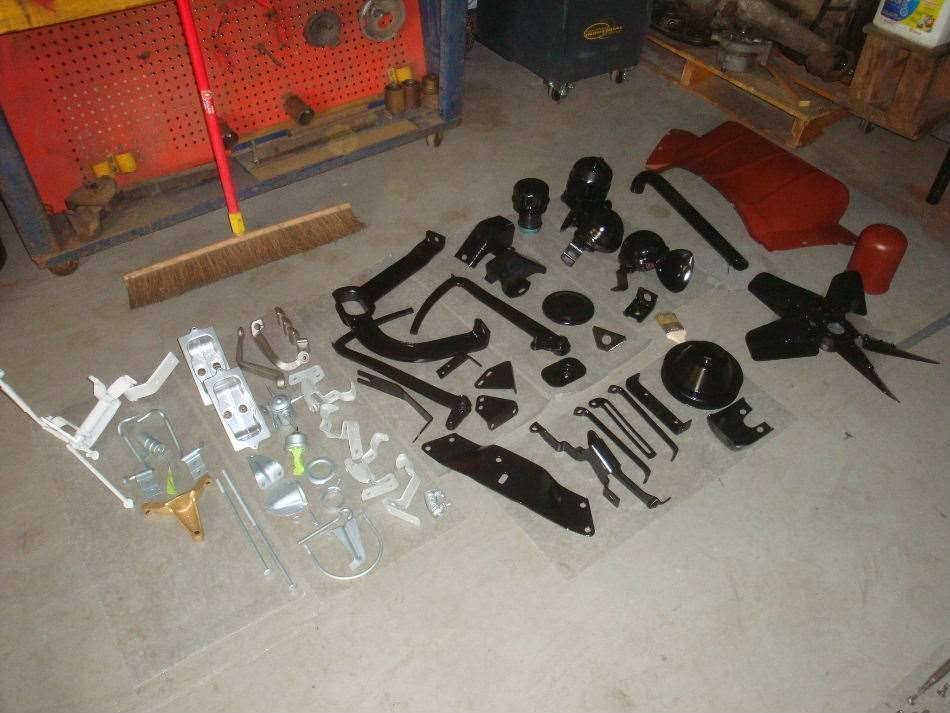 (59.33 KB) (59.33 KB)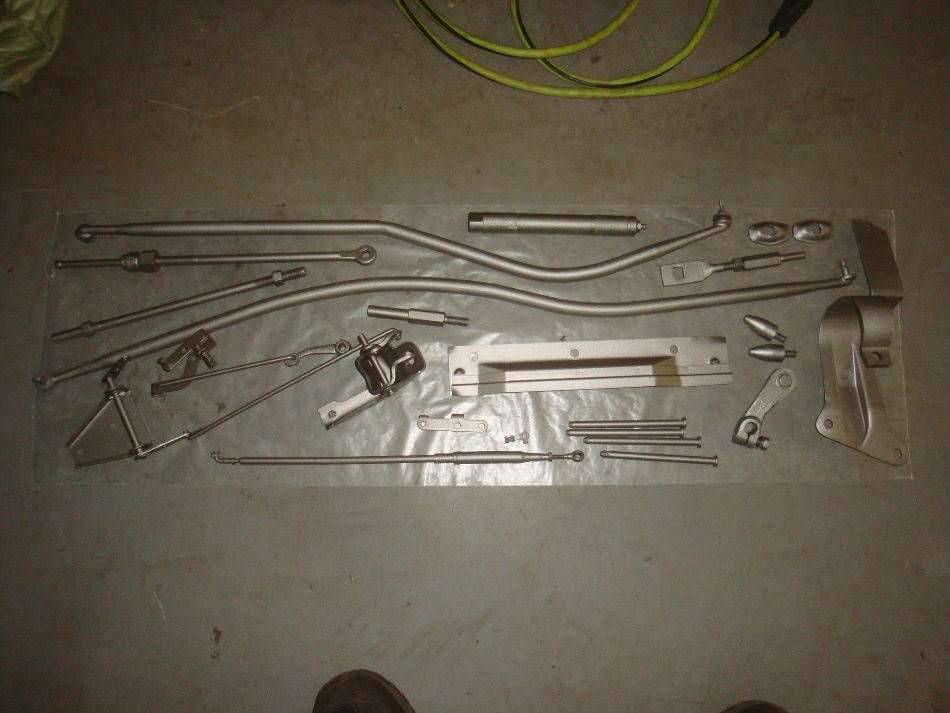 (71.77 KB) (71.77 KB)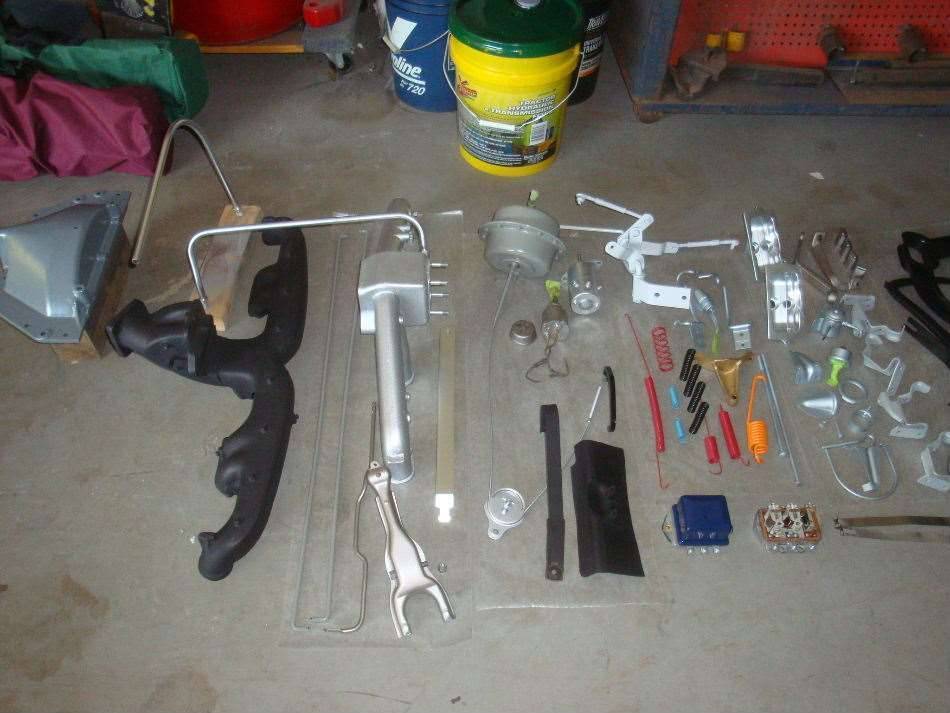 (69.22 KB) (69.22 KB)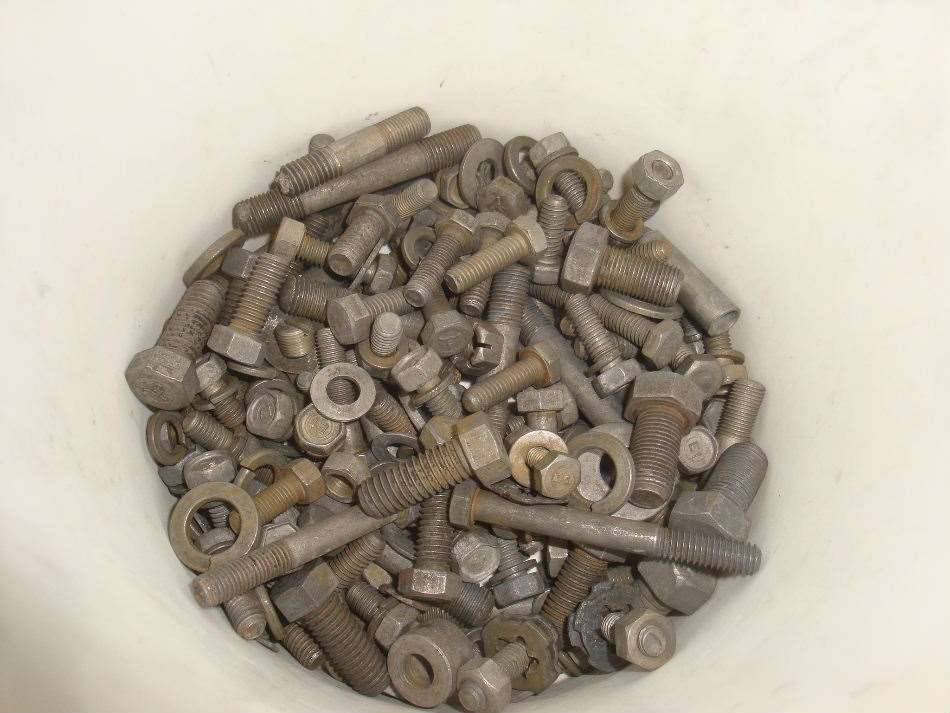 (85.80 KB) (85.80 KB) (93.47 KB) (93.47 KB)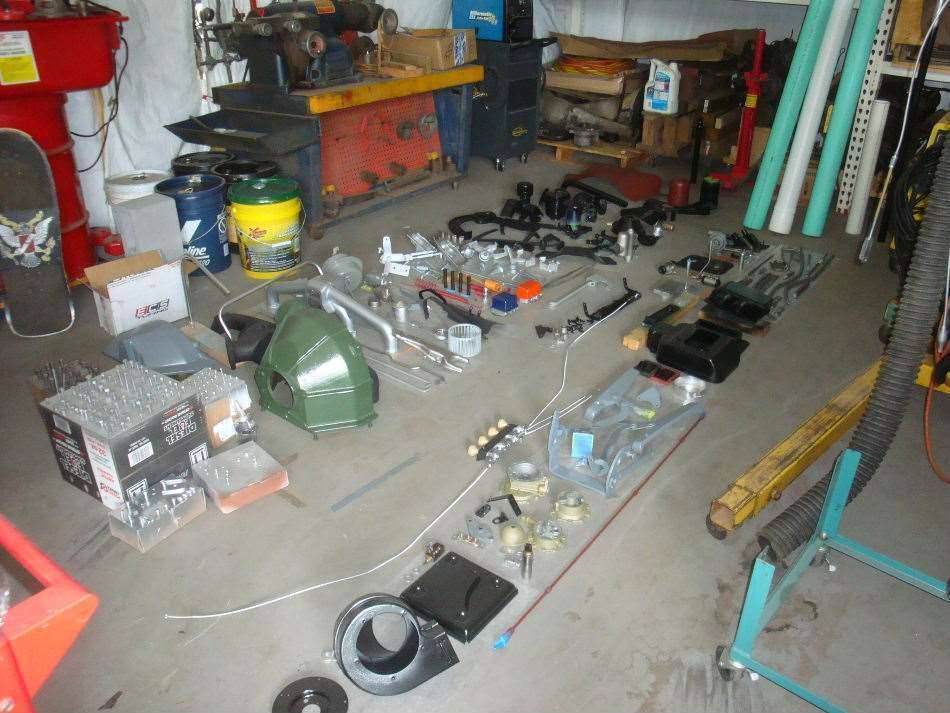 (79.83 KB) (79.83 KB)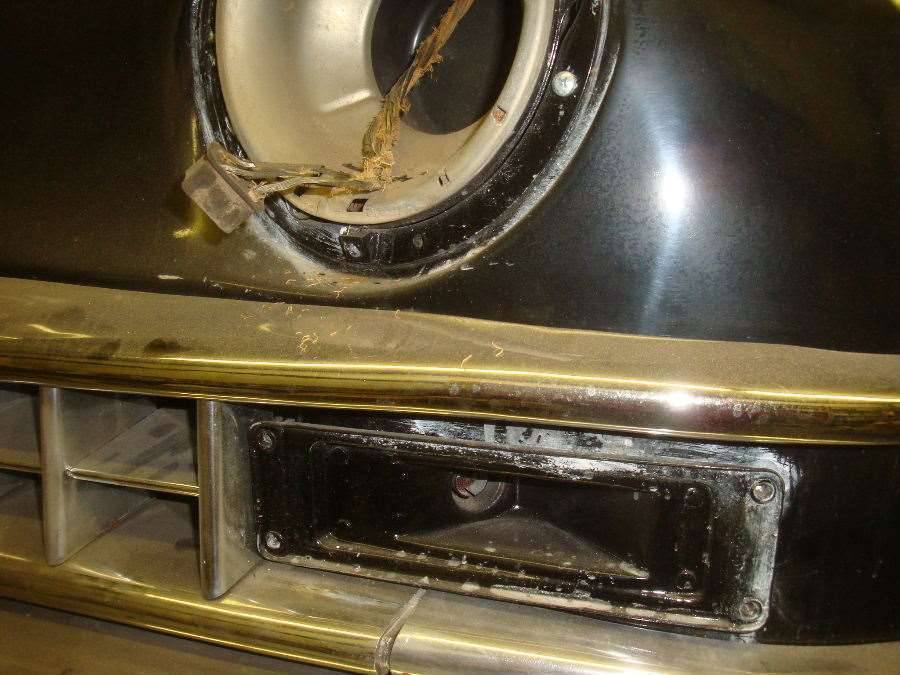 (70.86 KB) (70.86 KB)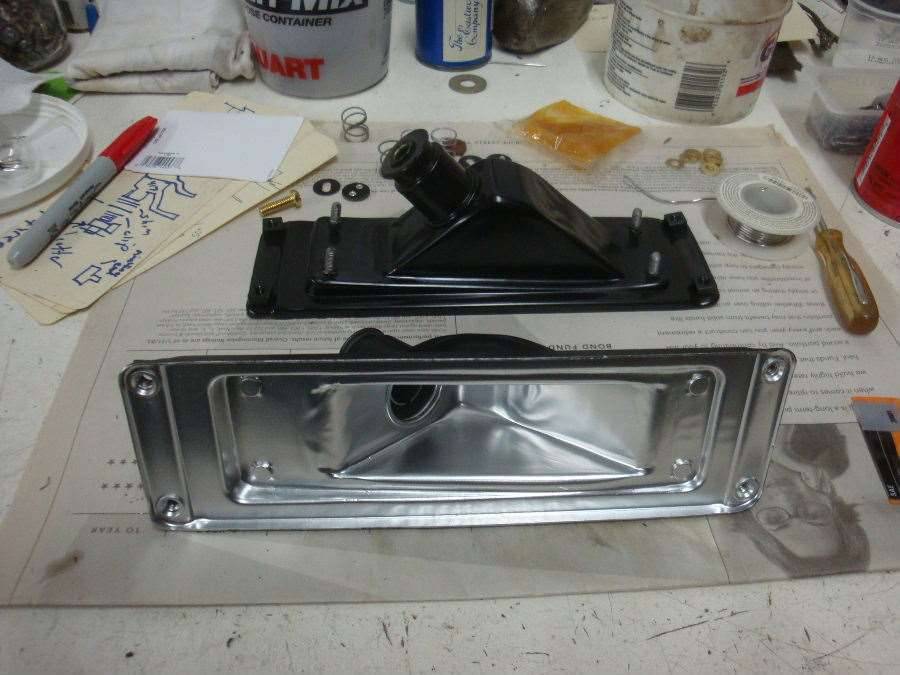
Posted on: 2013/10/6 17:07
|
|||
|
||||
|
Re: Ranco heater valve
|
||||
|---|---|---|---|---|
|
Home away from home
|
Thanks guys, Now I can put the valve back together. I bought my seal kit off of ebay. I think it was listed for mid-50's to early 70's Chrysler products and came with the main seal plus the rubber seat that must only be for the later valves.
Jeff
Posted on: 2013/9/19 0:12
|
|||
|
||||


