|
Re: Factory AC and glovebox.
|
||||
|---|---|---|---|---|
|
Home away from home

|
Thank you for posting your progress Howard - I find it very interesting and not a little inspiring. I'm sort of kicking around the idea of doing a factory set-up in my '55 so I for one am following your postings avidly.
Posted on: 2012/9/18 1:00
|
|||
|
1951 200 Deluxe Touring Sedan
1951 200 Deluxe Touring Sedan (parts ?) 1951 Patrician Touring Sedan 1955 Patrician Touring Sedan |
||||
|
||||
|
Re: Factory AC and glovebox.
|
||||
|---|---|---|---|---|
|
Forum Ambassador
|
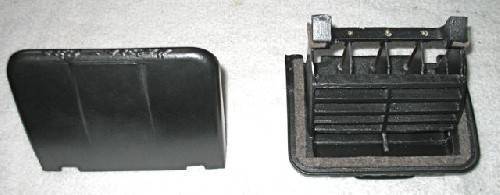
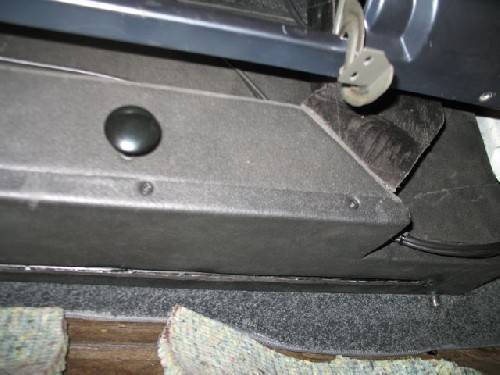
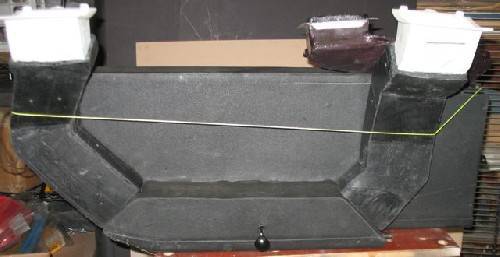
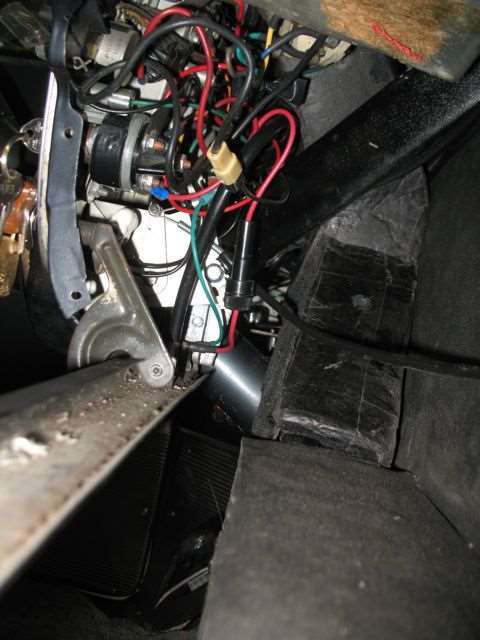
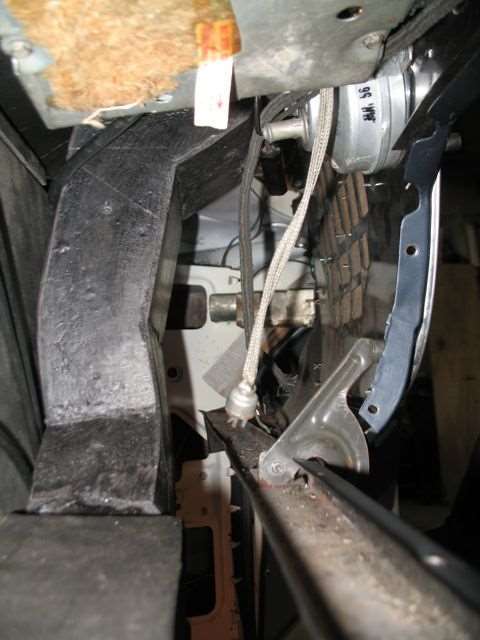
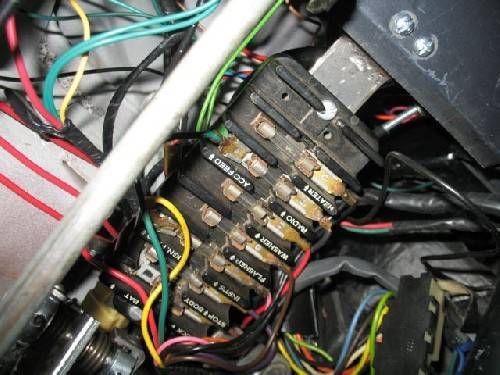
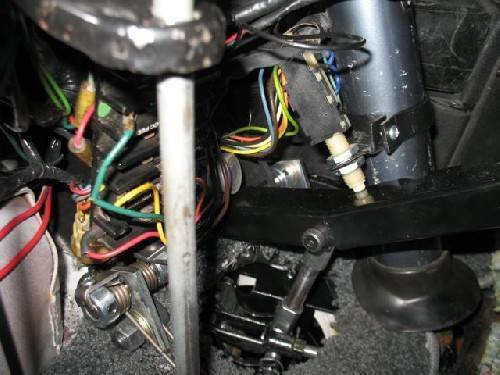
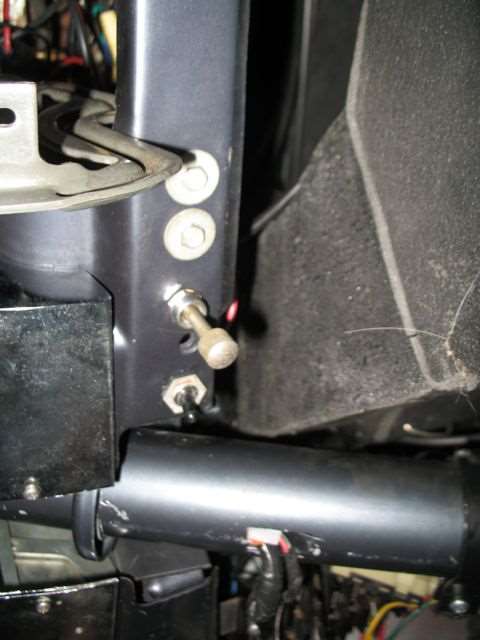
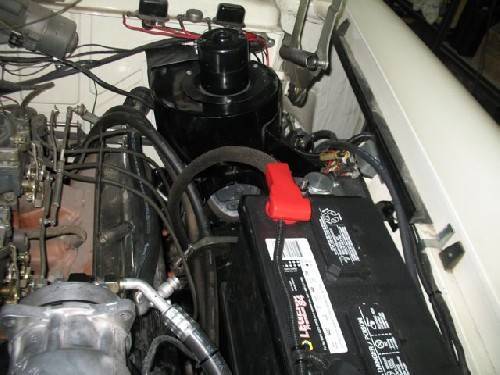
Jim, Thanks for the nice words but here's a few more photos that might change your mind on the factory approach.
One of the bad things about V8 factory AC is it was apparently an afterthought. They crammed this huge box under the dash and a large blower in the engine compt. Pretty much rules out normal access to anything that is located near or under the AC components. Not much serious work can be done or even reached without removing part of the unit first -- which is no small task. You'd almost think it was a modern car where you need to lift the body or drop the engine to change a plug. After wrestling with this redo and finding I don't bend well in needed places anymore, things would change on the next one. Using modern components, there is no reason the box needs to be that big. If I were not trying to maintain a sense of originality and didn't already have large holes in the car, would have made it half the size and reworked the air flow somewhat. On the other hand, while I wouldn't consider adding a trunk unit just on principle, a small under dash hang on unit is looking awfully good.
Posted on: 2012/9/18 10:03
|
|||
|
Howard
|
||||
|
||||
|
Re: Factory AC and glovebox.
|
||||
|---|---|---|---|---|
|
Home away from home

|
Something just occured to me. Could the factory AC blower motro be mounted remotly and the forced air from the remotely mounted blower motor be channeled to the factory AC firewall opening thru a flexible tube?????
That would free up the area enuf to mount a power brake unit similar to my Ford power brake unit mounted at the freshair vent?????
Posted on: 2012/9/18 10:41
|
|||
|
VAPOR LOCK demystified: See paragraph SEVEN of PMCC documentaion as listed in post #11 of the following thread:f
packardinfo.com/xoops/html/modules/newbb/viewtopic.php?topic_id=7245 |
||||
|
||||
|
Re: Factory AC and glovebox.
|
||||
|---|---|---|---|---|
|
Home away from home

|
The underdash units present their problem too. They are noisy due to the blower motor. UNless flexible hoses are routed from firewall to underdash unit the unit becomes a fixed obstacle for under/behind the dash access too.
Posted on: 2012/9/18 10:44
|
|||
|
VAPOR LOCK demystified: See paragraph SEVEN of PMCC documentaion as listed in post #11 of the following thread:f
packardinfo.com/xoops/html/modules/newbb/viewtopic.php?topic_id=7245 |
||||
|
||||
|
Re: Factory AC and glovebox.
|
||||
|---|---|---|---|---|
|
Forum Ambassador
|
A thought but not really easily done with that airflow. The recirc air comes from the L vent opening so that would have to be forgotten about and fresh air only would be available. Mounting the blower would also be an issue since it essentially sits on a T shaped adapter affair like the heater uses.
The R vent couldn't be used because the evaporator box covers that. Finding space for the blower would be another issue. In the L fender space the hood hinge and emerg brake mechanism blocks the route. On the other side the heater box blocks as well as the stuff on the engine near firewall. From below, the steering column, frame and any linkage prevents a route. It's just about there or nothing with that add on design. Ideally the whole system would need to be reworked. As I mentioned, with todays smaller components it could be half the size. Everything including blower might be incorporated under the dash in that or a slightly smaller box. Better yet would be everything placed on the right under the hood in the heater and under fender space like many other cars did. Under dash would then be minimal with just a small plenum on passenger side and a few ducts.
Posted on: 2012/9/18 10:56
|
|||
|
Howard
|
||||
|
||||
|
Re: Factory AC and glovebox.
|
||||
|---|---|---|---|---|
|
Home away from home

|
For those interested in an alternate approach to the factory A/C setup (Howard & others), dealer installed trunk unit (like Paul's 56 Exec in Las Vegas) or underdash unit (Keith & others), here's my plan for my 56 Panther (nee Clipper):
1. Remove tube radio and head tuner. 2. Remove factory heater & underdash ducting. These steps obviously frees up a LOT of space behind the dash. 2. Use Vintage Air combo A/C heater unit for large vehicles such as their "Gen II Magnum": vintageair.com/2012catalog/2012%20Vintag ... 20Final%20WEB%20%28Page%2040%29.pdf 3. Use left & right ashtrays outlets for universal swivel air vents. 4. Use rectangular hole in dash where radio head unit was fitted for center up/down & left/right air outlet. 5. Use holes where radio head tune & volume was fitted for A/C controls. 6. Custom fit VA compressor & condensor as required. Craig
Posted on: 2012/9/18 11:05
|
|||
|
Nuke them from orbit, it's the only way to be sure! Ellen Ripley "Aliens"
Time flies like an arrow. Frui |
||||
|
||||
|
Re: Factory AC and glovebox.
|
||||
|---|---|---|---|---|
|
Home away from home
|
Howard, could you mount the AC blower motor on the front of the air tube behind the grille like is done for the heater-defroster on the RH side? Might make it quieter too.
(o[]o)
Posted on: 2012/9/18 11:09
|
|||
|
We move toward
And make happen What occupies our mind... (W. Scherer) |
||||
|
||||
|
Re: Factory AC and glovebox.
|
||||
|---|---|---|---|---|
|
Home away from home

|
THanks for the explanation.
AS for the original question in post #1 above i'm wondering if a telescoping glove box liner would do the trick. Need 2wo OEm glove box liners. Cut one about 5/8 short from the back side. CUt the other about 5/8 short from the front side. i.e. take 2wo box liners cut in "half" so that the back 'half' slides over the front 'half' about a 2 inches. put a couple xcrews or plastic trim button retainers to hold them together at the final fit dimension. To remove liner: remove screws slide the liner halves together like a telescope makeing it much narrower and slide the assembly out of the dash.
Posted on: 2012/9/18 11:10
|
|||
|
VAPOR LOCK demystified: See paragraph SEVEN of PMCC documentaion as listed in post #11 of the following thread:f
packardinfo.com/xoops/html/modules/newbb/viewtopic.php?topic_id=7245 |
||||
|
||||
|
Re: Factory AC and glovebox.
|
||||
|---|---|---|---|---|
|
Forum Ambassador
|
The Vintage Gen is a good approach and is a great unit. For a bare car with nothing or one whose heater is kaput, probably a good way to go. It is large though and would fill the passenger side. The radio would probably have to go for sure since I doubt it would be removable -- even not using the center for a vent and doing something like the factory top of dash vent setup instead. Get the cable operated or one made by Classic Air for cable operation and a lot of the existing controls could be reworked and repurposed. Classic will take existing levers and rework or custom make a control using them. That way you could also put a modern one piece radio in the top space. If I were not trying to maintain a sense of originality and already didn't have a car full of holes for this unit it would have been considered. I did download all the size and general info before deciding to redo the layout I had.
I bought, fabricated an air duct out of fiberglass to utilize the original blower hole, and almost went with reworked airflow for a smaller indash unit from Nostalgic Air. Ran into a clearance issue & I didn't want to permanently modify the car so decided at the last minute to gut it and put most of the components in the new factory looking box. JW, the blower could be placed in front fairly easily but that brings up the recirc air issue. As PV8 has mentioned several times, hot and humid fresh air is not the best at cooling. For myself, I also don't like the location of the air inlets because they seem to catch all the exhaust from the car in front. Don't even like using the heater but suffer thru because I like cold less than exhaust. Keith, that is a good idea on the box. I may give it a go if my current plan doesn't work out. On the old box, it was thinner cardboard so easier to flex. I had removed a couple of staples and replaced with binding decorative screws. Removing those allowed it to separate and flex to squeeze out. My repro is thicker material so hard to bend. What I plan is instead of stapling edges am going to use "U" channel on them with the outside edge fixed in place. That way the box can be inserted still slightly folded and then expanded and inner back edges pushed into the channels to hold together. Looks stock yet can be unfolded to remove -- at least that's the theory.
Posted on: 2012/9/18 11:49
|
|||
|
Howard
|
||||
|
||||

 (18.78 KB)