|
Re: Resurrecting a 1951 Henney-Packard Parts Car
|
||||
|---|---|---|---|---|
|
Home away from home
|
For those looking at the pictures but who don't want to read all the boring text, I've highlighted a question or two below! I hope someone can answer them.
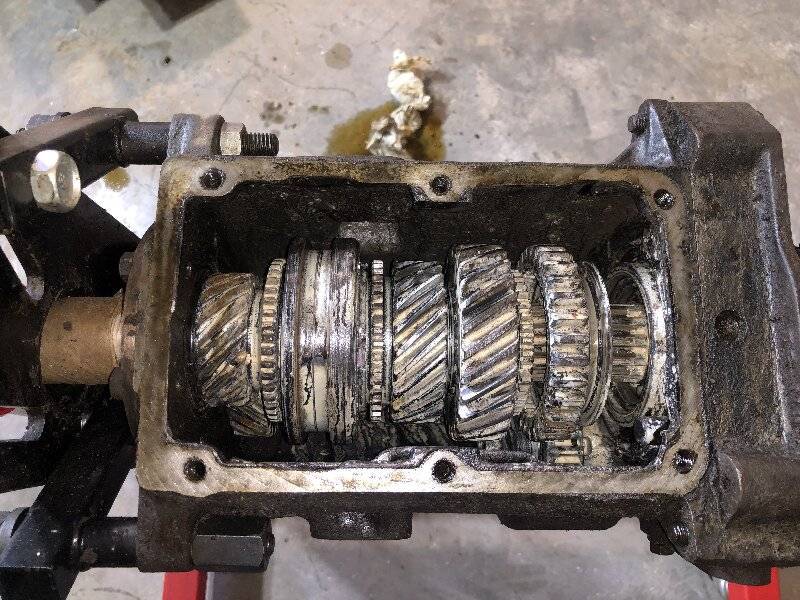
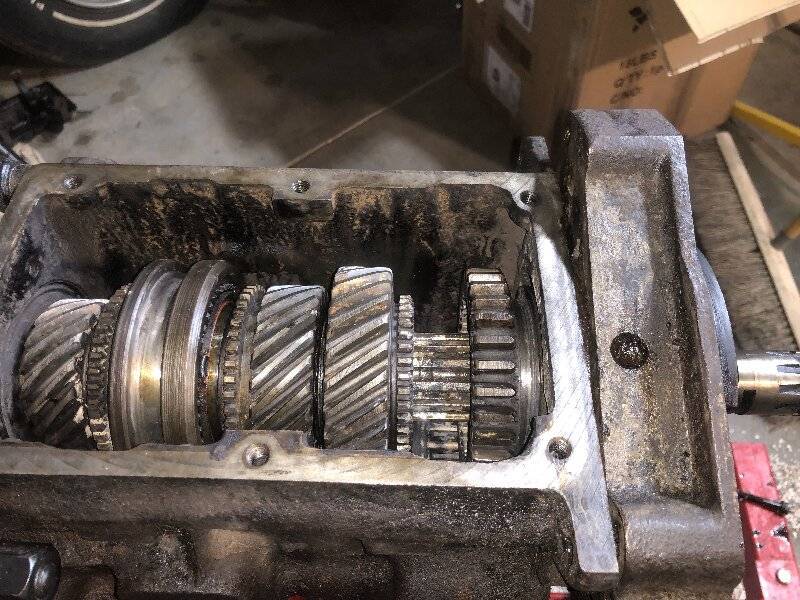
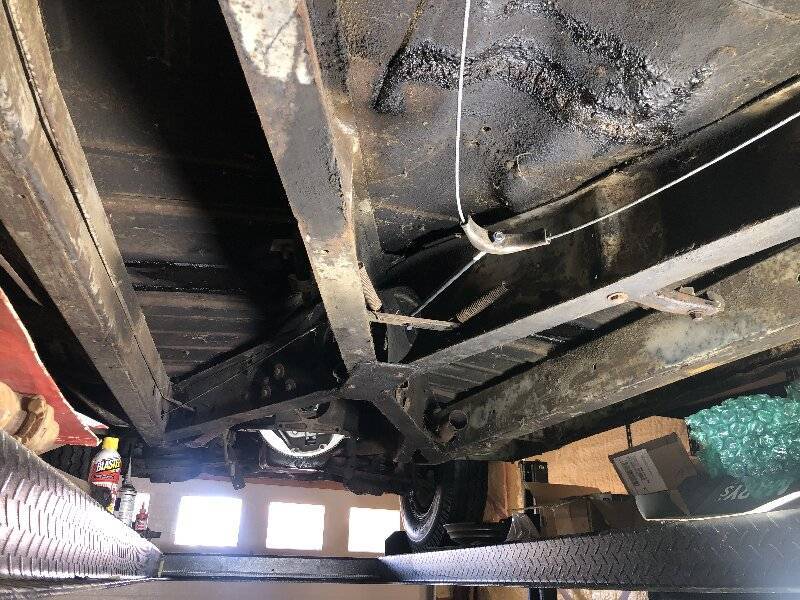
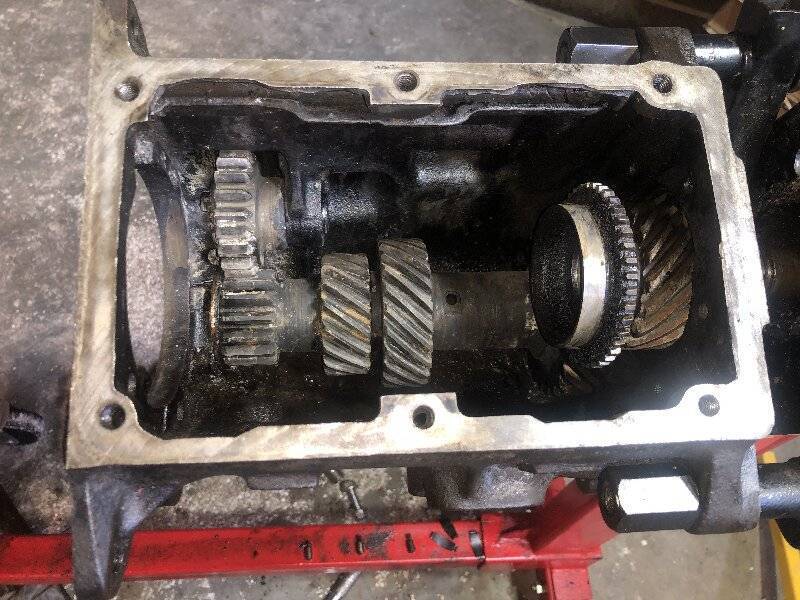
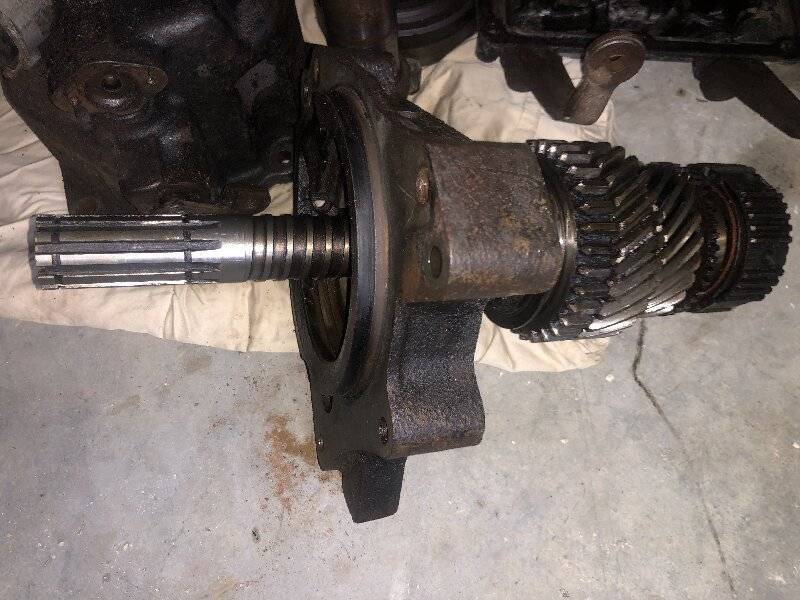
After seeing the blackened parts inside the overdrive unit where it had obviously suffered from poor storage where water got inside, I've been holding my breath about taking off the transmission's top cover. When I drained the transmissions, this one had very little oil in it although maybe it was drained prior to shipment. I finally did it today and see that it isn't as bad but everything was white with what looked like mold! It didn't photograph well and there was a lot more than shown in the photo, covering everything. It seems to come off easily but I can see very subtle and almost imperceptible hints of rust on the gear surfaces. Will these affect it in the long run? I've not gotten down to the cluster gear yet. As for not getting down to the cluster gear yet, I cannot get the housing to budge more that 3/16" or so. What is holding it? The one on the other transmission came right apart with a light prying but no amount seems to want to make this one budge. When I took apart the other transmission, I don't recall removing the little C-clip at the back of the shaft that this one had and didn't even know there should be one until it was apart. The piece behind it was right at the end of the spline already so it wasn't until it was apart that I saw the groove. If you're not yet sick of seeing parking brake cables, I finally got it attached after using heat on the front cable connector to get it apart. Of course there are no rear brakes yet so it's not adjusted. I misspoke about the lower clutch cover. It does indeed have the fifth bolt but if it hadn't, I have a couple more that do, along with some of the stamped steel type.
Posted on: 2022/10/13 21:01
|
|||
|
All generalities are false.
Once I thought I was wrong but I was mistaken. Don Pierson Packard / IMPERIAL page CA DMV Licensed Vehicle VIN Verification 1951 Henney-Packard 3-Door Long Wheelbase Air Force Ambulance The 1951 Henney-Packard is For Sale! 1954 Packard Patrician 1954 Packard Patrician Parts Car 1956 Clipper Custom Sedan |
||||
|
||||
|
Re: Resurrecting a 1951 Henney-Packard Parts Car
|
||||
|---|---|---|---|---|
|
Home away from home
|
Does anyone have any thoughts about why the rear adapter housing won't budge? On the first transmission, it came out effortlessly to more that a half inch before coming all the way out with a little wiggling (of it, not me!) but this one has moved barely a quarter inch.
Until I can get it apart, I cannot proceed with the work on it! Not that there is nothing else to do but I would like to get this done and over with, or at least to be able to see the cluster gear to confirm that it's okay.
Posted on: 2022/10/14 12:41
|
|||
|
All generalities are false.
Once I thought I was wrong but I was mistaken. Don Pierson Packard / IMPERIAL page CA DMV Licensed Vehicle VIN Verification 1951 Henney-Packard 3-Door Long Wheelbase Air Force Ambulance The 1951 Henney-Packard is For Sale! 1954 Packard Patrician 1954 Packard Patrician Parts Car 1956 Clipper Custom Sedan |
||||
|
||||
|
Re: Resurrecting a 1951 Henney-Packard Parts Car
|
||||
|---|---|---|---|---|
|
Webmaster
|
Rust and crud build up? Perhaps generous dousing of penetrator may help.
Not sure about this, but on other parts sometimes a few gentle hits from a slide hammer has helped dislodge a stubborn part.
Posted on: 2022/10/14 13:26
|
|||
|
-BigKev
1954 Packard Clipper Deluxe Touring Sedan -> Registry | Project Blog 1937 Packard 115-C Convertible Coupe -> Registry | Project Blog |
||||
|
||||
|
Re: Resurrecting a 1951 Henney-Packard Parts Car
|
||||
|---|---|---|---|---|
|
Home away from home
|
Thank you, Kev, I’ve been using a long pry bar but I know that the rearmost gear can easily get caught on the edge of the hole so I need to be sure I don’t actually break anything! I’ll watch for that and try to be a bit more forceful in the approach. The transmission is questionable anyway but I don’t want to make it worse!
Posted on: 2022/10/14 14:24
|
|||
|
All generalities are false.
Once I thought I was wrong but I was mistaken. Don Pierson Packard / IMPERIAL page CA DMV Licensed Vehicle VIN Verification 1951 Henney-Packard 3-Door Long Wheelbase Air Force Ambulance The 1951 Henney-Packard is For Sale! 1954 Packard Patrician 1954 Packard Patrician Parts Car 1956 Clipper Custom Sedan |
||||
|
||||
|
Re: Resurrecting a 1951 Henney-Packard Parts Car
|
||||
|---|---|---|---|---|
|
Home away from home
|
An update and more questions!
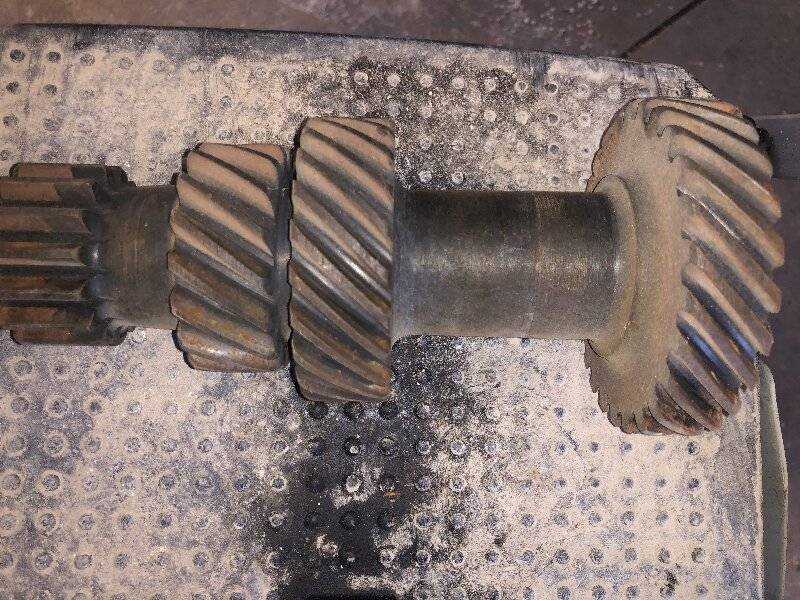
The reason I can't get it out is apparently to do with the cluster gear being stuck and now soaking in PBlaster. Presuming I can't free it up and would probably have to remove it anyway, I have the parts to repair the one with broken gears which I probably should have done in the first place. Question one: what does it entail to replace the cluster gear in the one with broken gears? It seems to me that it requires a cut off shaft to use to keep the needle bearings in place but it's been decades since I've done this and I can't access the online manuals here with my slow WiFi. Question 1 Answer: there was a special tool used to keep the roller bearings in place which was essentially a short section of the shaft as I had surmised. I don't know if it needs to be only as long as the cluster gear although I would presume no longer than that. Question two: the reason I didn't do it in the first place is that the parts I have, while NOS, have not been stored well. Is there a way to clean the polished surfaces? Question three: I can get a transmission in unknown condition from a 1950 Henney which would have the specially hardened gears. However, the Henneys of that era had the 356 with the large input pilot. I also have the proper input so how much of a job is it to replace it by itself? Question 3 Answer: It is necessary to pull apart the whole transmission or at least to drop the cluster gear in order to replace the input shaft.
Posted on: 2022/10/14 15:29
|
|||
|
All generalities are false.
Once I thought I was wrong but I was mistaken. Don Pierson Packard / IMPERIAL page CA DMV Licensed Vehicle VIN Verification 1951 Henney-Packard 3-Door Long Wheelbase Air Force Ambulance The 1951 Henney-Packard is For Sale! 1954 Packard Patrician 1954 Packard Patrician Parts Car 1956 Clipper Custom Sedan |
||||
|
||||
|
Re: Resurrecting a 1951 Henney-Packard Parts Car
|
||||
|---|---|---|---|---|
|
Home away from home
|
I managed to get the second transmission disassembled once I freed up the cluster gear. Lots of PBlaster and working it back and forth finally finally got it freed but then I discovered that the shaft's front roller bearing - the one that is inside the input shaft - was very stuck and no amount of PBlaster seemed to free it. Finally I resorted to a propane torch to heat it up which did the trick.
After only a few hours of work I was exhausted so came back to the house a little earlier than usual. I still need to remove the cluster gear itself and hope that enough oil had remained inside to protect the inner bearing surfaces. Probably not since it was stuck but one can hope! Everything in the bottom was also covered with the white stuff but most came off when sprayed with carburetor cleaner.
Posted on: 2022/10/14 19:01
|
|||
|
All generalities are false.
Once I thought I was wrong but I was mistaken. Don Pierson Packard / IMPERIAL page CA DMV Licensed Vehicle VIN Verification 1951 Henney-Packard 3-Door Long Wheelbase Air Force Ambulance The 1951 Henney-Packard is For Sale! 1954 Packard Patrician 1954 Packard Patrician Parts Car 1956 Clipper Custom Sedan |
||||
|
||||
|
Re: Resurrecting a 1951 Henney-Packard Parts Car
|
||||
|---|---|---|---|---|
|
Home away from home
|
It feels as though I'm making a little headway but not as much as hoped. I had expected to get the transmission work done and installed this time at the shop but it will not be until the next trip or even the one after that that happens!
The problem is the poor condition of the replacement transmission but at least I have a plan now, or rather a new plan to meet the circumstances. Since the replacement transmission wasn't in good condition inside but had unbroken gears, I'm going to use what I can of my better (but stripped gears) original * and put the best parts together into the original case. So to that end, I stripped both down completely except for the reverse idlers as I see no reason to remove those and in the original, here is what I found. Not only the obvious stripped gears but also the front syncro was totally fused to the input gear and no amount of hammering, chiseling or heating would remove the stuck piece. Not that it matters but I was curious if the polished surface had been damaged but clearly it had. I also noticed that the syncro was missing its spring clips and it also was missing two needle bearings from the cluster gear. There was also the little green bit showing up on an earlier photo that turned out to be a piece of wire with connectors on the end and I also found a piece of old electrical tape inside. The white stuff coating everything in the replacement transmission's innards seems to come off readily and the black seems to come off too but not so easily. I spent a couple hours just cleaning up the input shaft to make it good enough to use and even then, it will require the bearing from the original transmission. The surface where the roller bearing goes in the input shaft for the main shaft is not the best but I think it will do just fine. On the replacement transmission, all the needle bearings were accounted for but some are not in good condition. However, if they are the same size as those in the original transmission which were good, then I can use a couple better ones to replace the two missing. It turned out that the bearing surfaces inside the cluster gear are fine, or at least good enough. I'll run it through the solvent tank, then check the teeth again. The bearing races inside seem to clean up reasonably well. Solvent tanking the main housing and doing a little hand and rotary wire brushing, I see red paint under the Packard gray. Presumably that was a primer put on prior to assembly to the engine where it was then painted gray as a unit with the engine. * Just to clarify, this isn't the original transmission to this car. The original went into my 1951 Henney-Packard combination when that original (THIS original now) stripped its gears. Attach file:  IMG_3064.jpg (194.25 KB) IMG_3064.jpg (194.25 KB)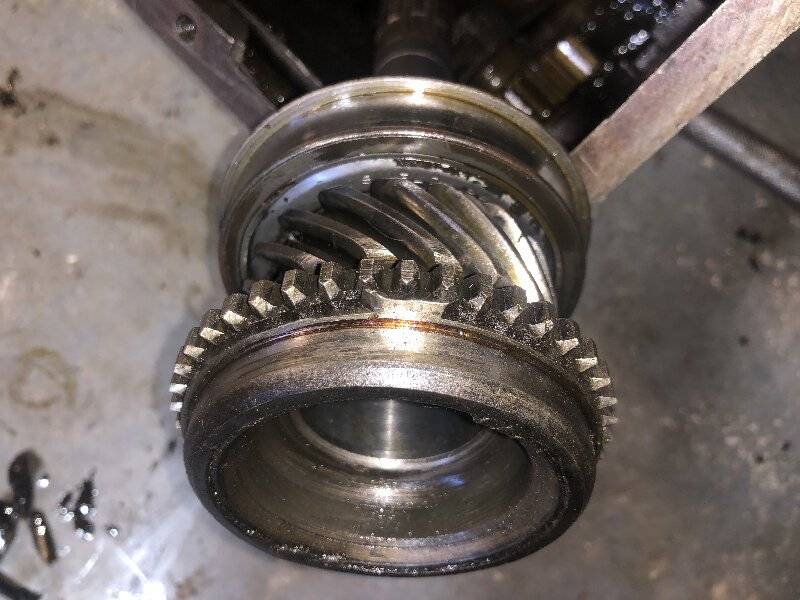  IMG_3060.jpg (172.19 KB) IMG_3060.jpg (172.19 KB)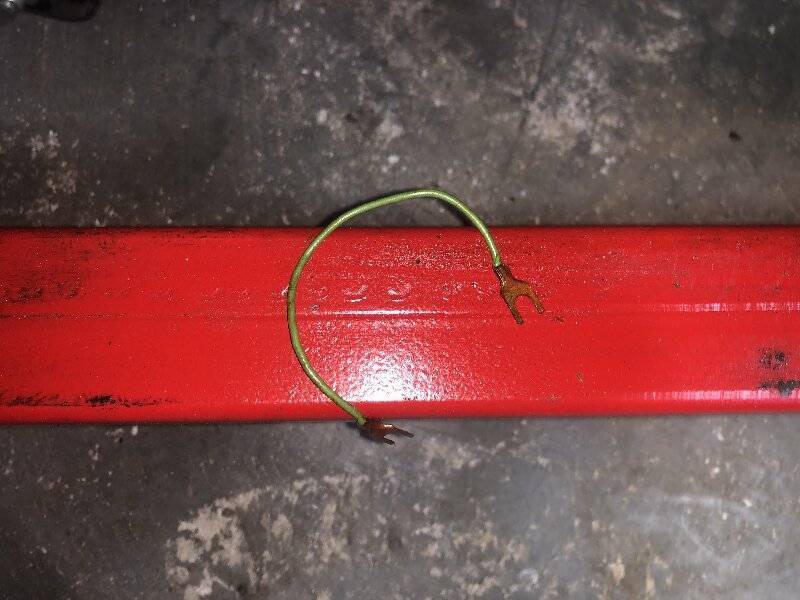  IMG_3058.jpg (482.02 KB) IMG_3058.jpg (482.02 KB)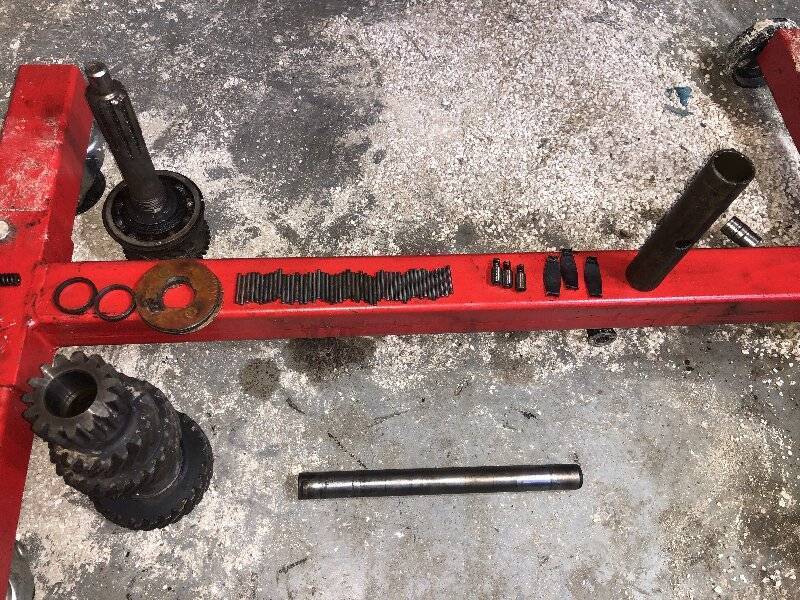  IMG_3068.jpg (346.29 KB) IMG_3068.jpg (346.29 KB)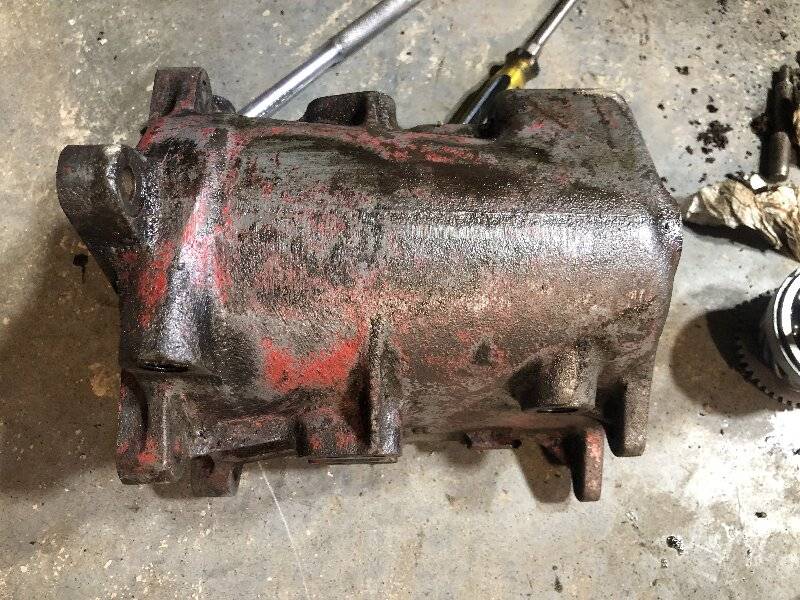
Posted on: 2022/10/15 21:23
|
|||
|
All generalities are false.
Once I thought I was wrong but I was mistaken. Don Pierson Packard / IMPERIAL page CA DMV Licensed Vehicle VIN Verification 1951 Henney-Packard 3-Door Long Wheelbase Air Force Ambulance The 1951 Henney-Packard is For Sale! 1954 Packard Patrician 1954 Packard Patrician Parts Car 1956 Clipper Custom Sedan |
||||
|
||||
|
Re: Resurrecting a 1951 Henney-Packard Parts Car
|
||||
|---|---|---|---|---|
|
Home away from home
|
I didn't go out to the shop until late in the afternoon as a trip to town was needed to try to get a new microwave oven for my mother's house where I am staying. It went out a few days ago but they had to order it for mid-November delivery. Also wanted another small workbench like the one I bought when here in July but none there and none on their Website!
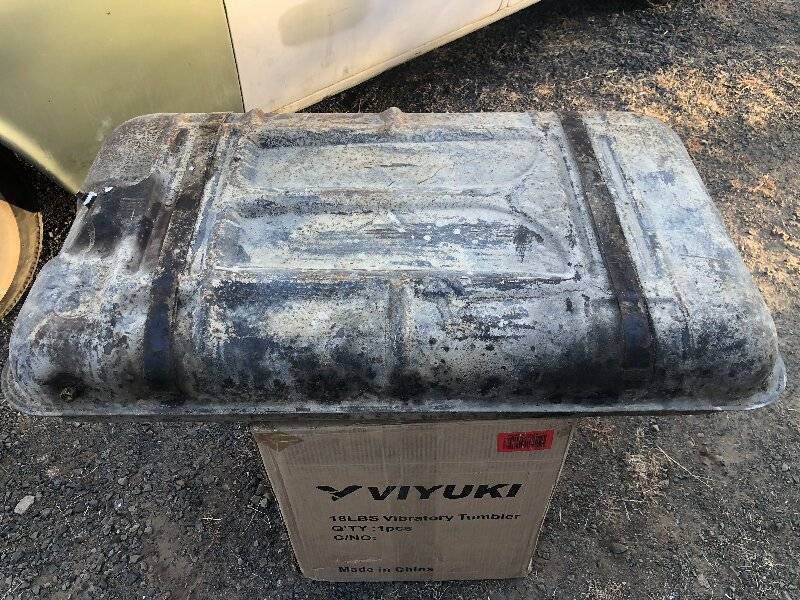
I did finally manage another coat of gas tank sealer and see what appears to be little pinholes missed by the first thin coat so glad I did it! Since most of the pinholes were on top, I am letting it cure upside down and will do a couple more coats too. I got smart this time and did it outside when the last time it took days to get rid of the fumes! It was too hot then to do anything outside but the weather is perfect this time. The original kit used the last time came with a quart of sealer but this tank is large so only a couple tablespoons came out when I drained it. This time I poured in a whole gallon and it and used about another quart with the rest drained back into the can. This is the Hirsch sealer which according to their documents can be saved for future use after the can is open while the POR products apparently cannot be saved.
Posted on: 2022/10/16 20:39
|
|||
|
All generalities are false.
Once I thought I was wrong but I was mistaken. Don Pierson Packard / IMPERIAL page CA DMV Licensed Vehicle VIN Verification 1951 Henney-Packard 3-Door Long Wheelbase Air Force Ambulance The 1951 Henney-Packard is For Sale! 1954 Packard Patrician 1954 Packard Patrician Parts Car 1956 Clipper Custom Sedan |
||||
|
||||
|
Re: Resurrecting a 1951 Henney-Packard Parts Car
|
||||
|---|---|---|---|---|
|
Home away from home
|
I gave the tank another coating today and this time it seemed to use more than before for some reason. I'm not going to give it another so it's either sealed or it's not!
One thing I forgot to show is how I cleaned out the filler tube. My brother builds and owns canons and he had made a special rotary wire brush for the barrel of one of them that was perfect! I'll use it on the rest of the filler too which is still in the car and badly needs it. I decided after all to clean up the outside of the tank and someone had mentioned early in the discussion about the tank some kind on gas tank paint that also provides an extra bit of sealing. Does anyone know what this is or where to find it? The cleaning makes all the pinholes really show. To get back to the transmission, I set up a little bench with a bright LED on the wall above to dedicate to it where I can gather together whichever parts from the two are going to be part of the final one. The problem with building one transmission from two is that there will be an entire transmission's worth of extra parts so I'll have to be very careful to not forget anything! The replacement transmission, as mentioned, had a coating of white stuff over the innards which wipes off easily but does not wash off so must be wiped by hand, including inside all the gear teeth. Worse is the black coating that many parts have which appears to also come off but it takes some scraping and chipping to do so. This is going to be a tedious job just to get it ready to go together and I am using whatever I can from the original transmission because it needs less work. I think the black stuff is a hardened layer of oil as the transmission was empty when I received it but I never saw oil do that. I wish I could take this gear cluster completely apart to wash the components individually but not sure it's worth the effort or even needed. Attach file:  IMG_3077.jpg (379.42 KB) IMG_3077.jpg (379.42 KB)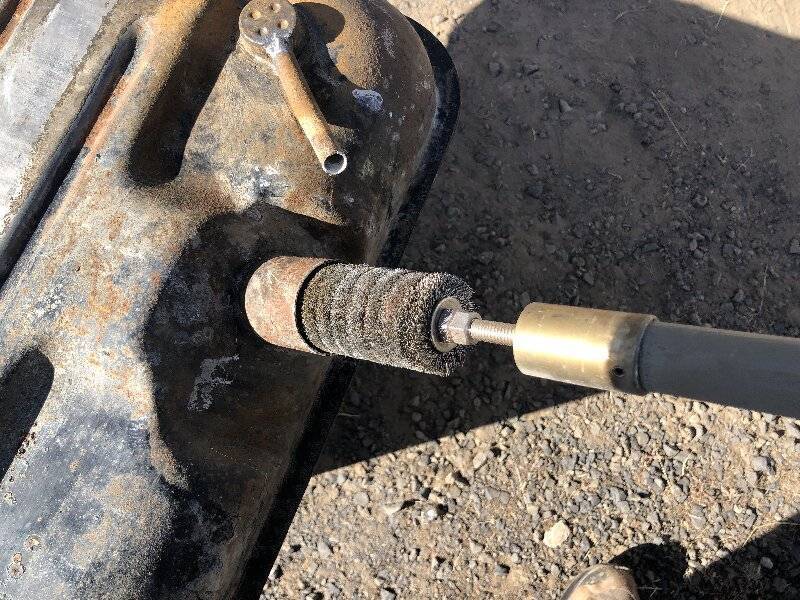  IMG_3078.jpg (415.12 KB) IMG_3078.jpg (415.12 KB)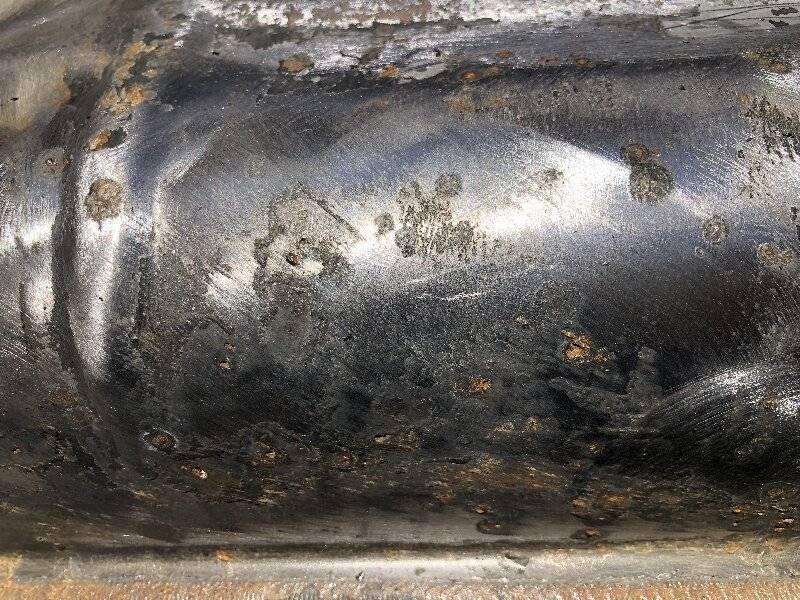  IMG_3083.jpg (314.13 KB) IMG_3083.jpg (314.13 KB)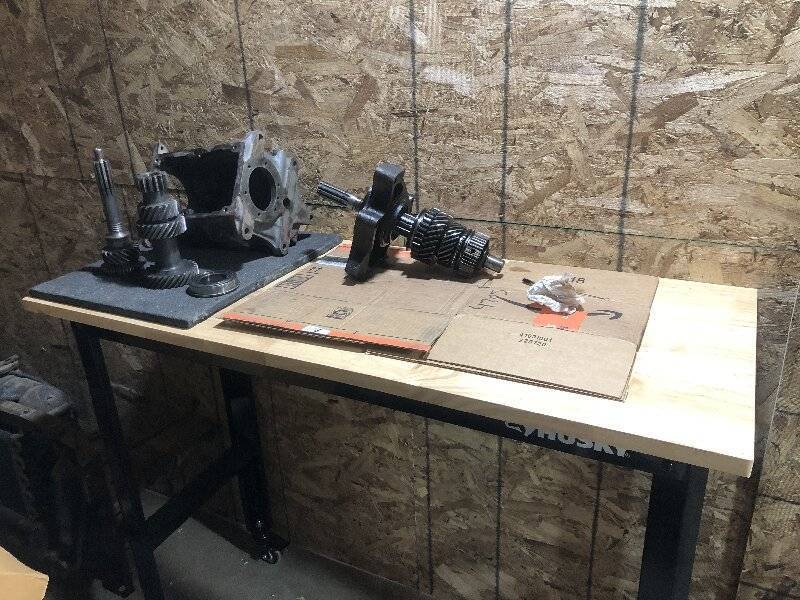  IMG_3084.jpg (309.83 KB) IMG_3084.jpg (309.83 KB)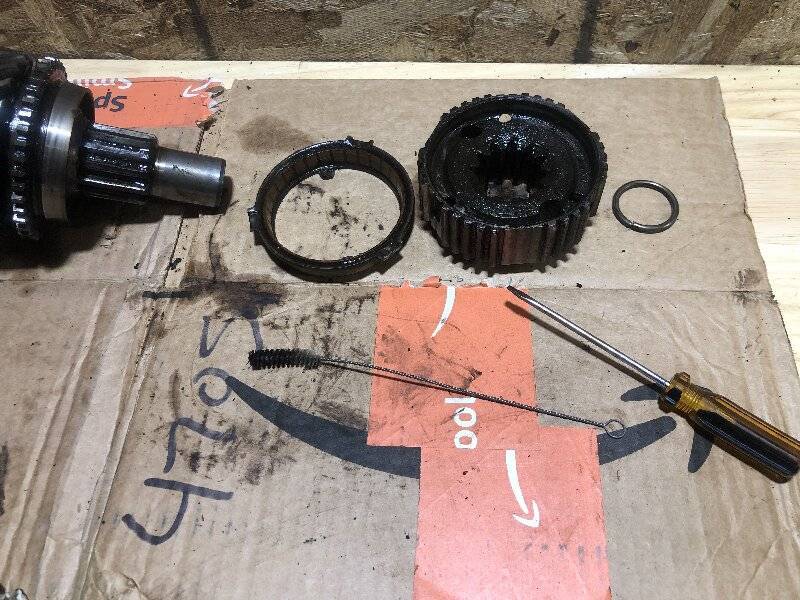  IMG_3086.jpg (221.56 KB) IMG_3086.jpg (221.56 KB)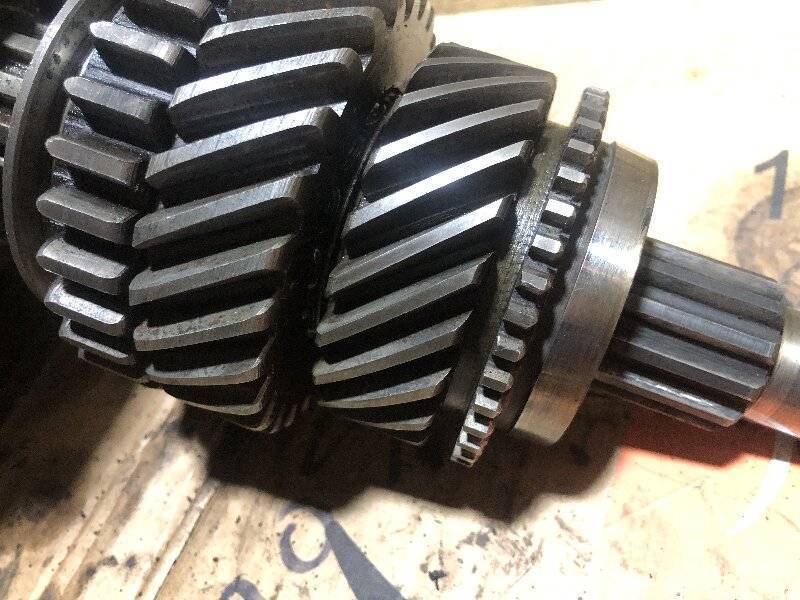
Posted on: 2022/10/17 23:11
|
|||
|
All generalities are false.
Once I thought I was wrong but I was mistaken. Don Pierson Packard / IMPERIAL page CA DMV Licensed Vehicle VIN Verification 1951 Henney-Packard 3-Door Long Wheelbase Air Force Ambulance The 1951 Henney-Packard is For Sale! 1954 Packard Patrician 1954 Packard Patrician Parts Car 1956 Clipper Custom Sedan |
||||
|
||||
|
Re: Resurrecting a 1951 Henney-Packard Parts Car
|
||||
|---|---|---|---|---|
|
Home away from home
|
This replacement transmission was apparently from a 1953 Henney Junior that used the passenger car type transmission but with the specially hardened gears that the Henneys needed. Looking back though this blog, I see that I mentioned that early on but then forgot! I see no markings on any of the gears to confirm, though.
Posted on: 2022/10/18 14:41
|
|||
|
All generalities are false.
Once I thought I was wrong but I was mistaken. Don Pierson Packard / IMPERIAL page CA DMV Licensed Vehicle VIN Verification 1951 Henney-Packard 3-Door Long Wheelbase Air Force Ambulance The 1951 Henney-Packard is For Sale! 1954 Packard Patrician 1954 Packard Patrician Parts Car 1956 Clipper Custom Sedan |
||||
|
||||

