|
Re: Resurrecting a 1951 Henney-Packard Parts Car
|
||||
|---|---|---|---|---|
|
Home away from home
|
Yes, it's pretty special! I could probably put three or four of them into the back of the Henney-Packard with room to spare.
Posted on: 2023/11/3 0:32
|
|||
|
All generalities are false.
Once I thought I was wrong but I was mistaken. Don Pierson Packard / IMPERIAL page CA DMV Licensed Vehicle VIN Verification 1951 Henney-Packard 3-Door Long Wheelbase Air Force Ambulance The 1951 Henney-Packard is For Sale! 1954 Packard Patrician 1954 Packard Patrician Parts Car 1956 Clipper Custom Sedan |
||||
|
||||
|
Re: Resurrecting a 1951 Henney-Packard Parts Car
|
||||
|---|---|---|---|---|
|
Home away from home
|
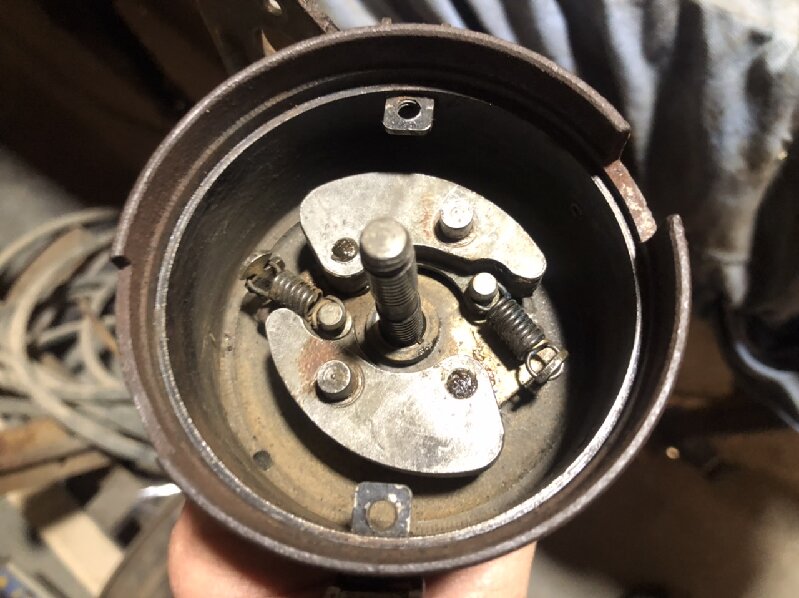
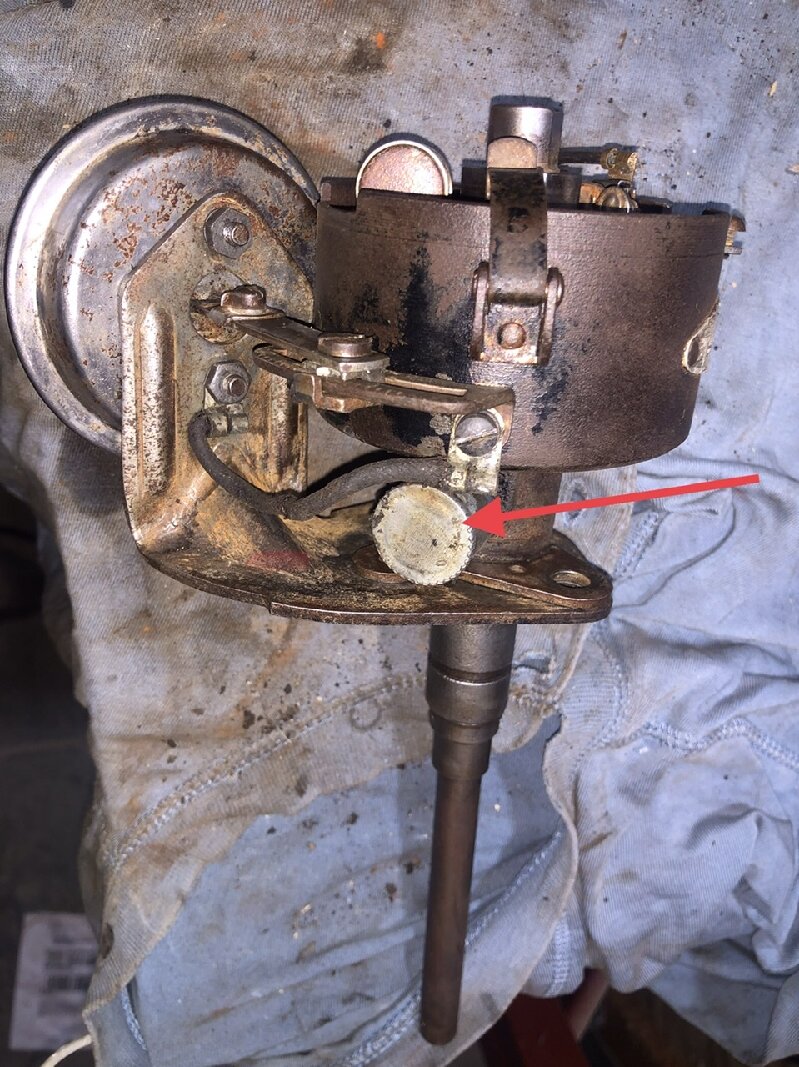
This is an Autolite distributor where the advance turns the whole body rather than simply turning the plate inside and it turned out that the advance was not broken but rather it was loose where it connects to the distributor.
When removing it I discovered that the vacuum line at the distributor was loose because its flare was gone and the line was also plugged a bit. There is probably not enough there to flare even if my flaring tool could handle a tube this small. The fitting on the other end wouldn't rotate on the tube but some heat took care of that. With the cap having been off for decades in outdoor storage, needless to say it was in terrible condition and even a spare I had was nearly as bad but its rust was more superficial. Between the two, though, I should be able to come up with a usable unit once I get a replacement rotor as I have none laying around that I can find other than a broken one from the spare distributor. A new set of points would be great too but not mandatory as neither is in too bad a condition other than cosmetically and one cleaned up nicely. The cam isn’t great either but I’ll see if it can be polished a bit although if not, it will need to be replaced. One thing broken on the one in the car was the points adjustment cam but the other had a good plate that cleaned up reasonably. According to the parts book all 24th and 25th series cars with the Autolite system should have the IGP 4502-C while the one in the car is an ICP 4502-B. Yes, my finger was in the photo on purpose as I was trying to deflect and limit some of the flash in order to get a readable image! Attach file:  ED457AD2-968A-4603-8F4D-B327A528388C.jpeg (354.66 KB) ED457AD2-968A-4603-8F4D-B327A528388C.jpeg (354.66 KB)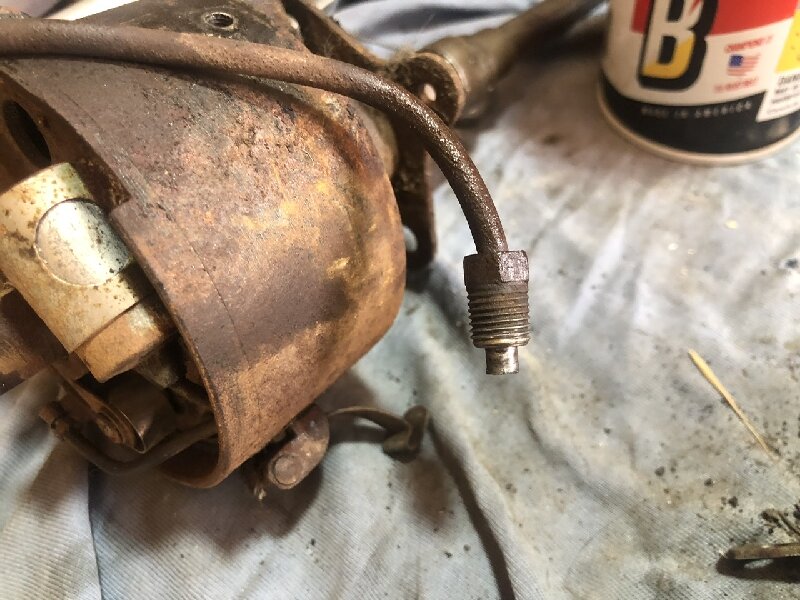  137C8B85-2F23-4C2F-8C9C-0B0D6C030723.jpeg (314.58 KB) 137C8B85-2F23-4C2F-8C9C-0B0D6C030723.jpeg (314.58 KB)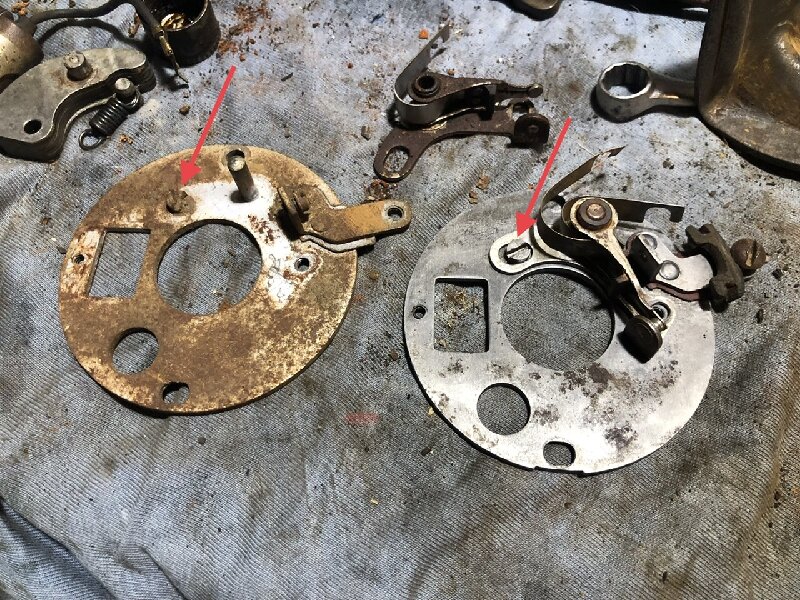  E7CA94C8-7063-4B79-89D7-16EEF1F4067F.jpeg (252.08 KB) E7CA94C8-7063-4B79-89D7-16EEF1F4067F.jpeg (252.08 KB)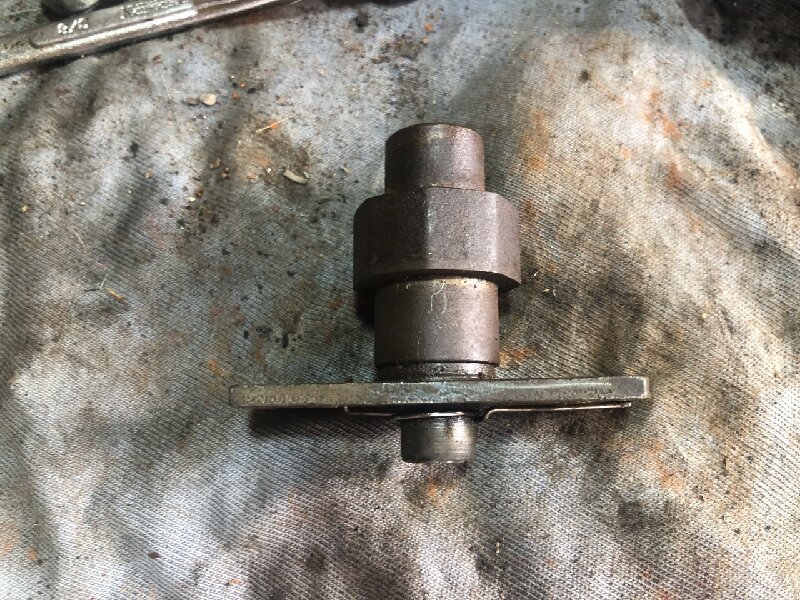  CB564861-6309-4261-983E-0723BC743AC1.jpeg (345.41 KB) CB564861-6309-4261-983E-0723BC743AC1.jpeg (345.41 KB)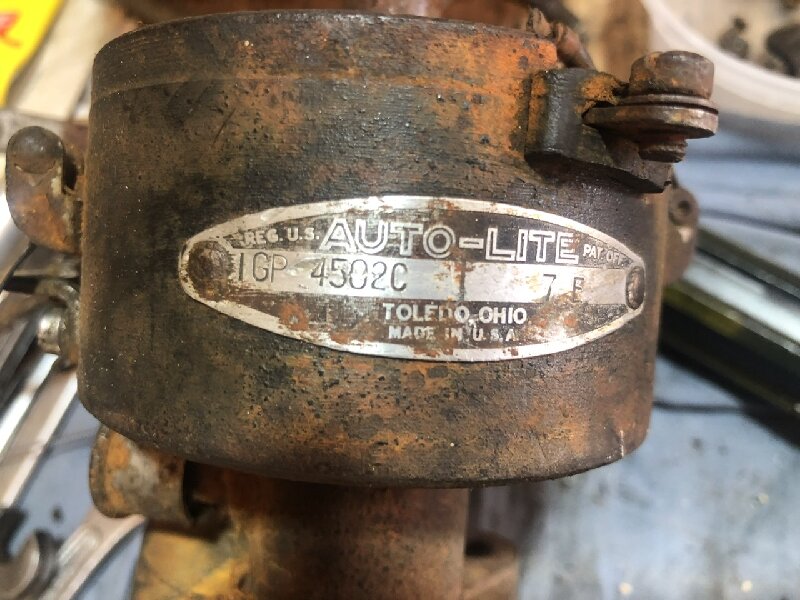  B6C5F729-D651-4022-B2F1-F2227B3C042B.jpeg (281.52 KB) B6C5F729-D651-4022-B2F1-F2227B3C042B.jpeg (281.52 KB)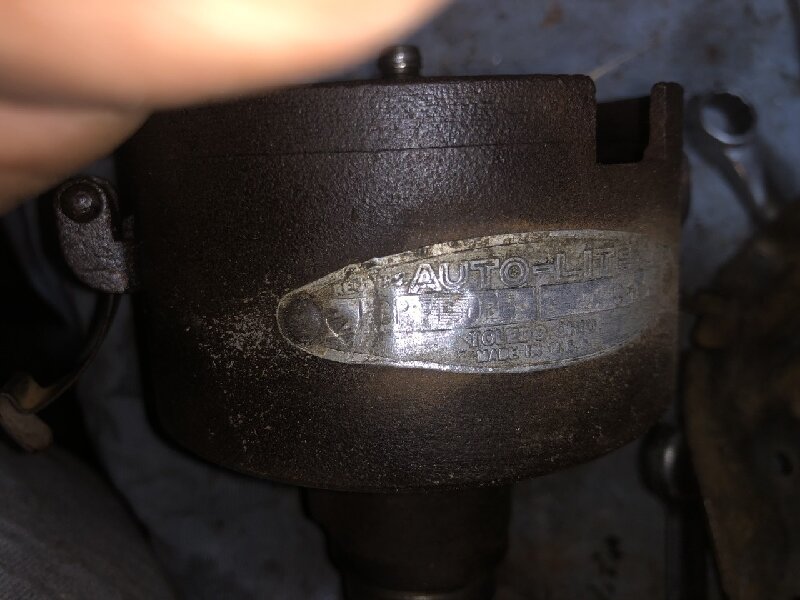
Posted on: 2023/11/3 21:08
|
|||
|
All generalities are false.
Once I thought I was wrong but I was mistaken. Don Pierson Packard / IMPERIAL page CA DMV Licensed Vehicle VIN Verification 1951 Henney-Packard 3-Door Long Wheelbase Air Force Ambulance The 1951 Henney-Packard is For Sale! 1954 Packard Patrician 1954 Packard Patrician Parts Car 1956 Clipper Custom Sedan |
||||
|
||||
|
Re: Resurrecting a 1951 Henney-Packard Parts Car
|
||||
|---|---|---|---|---|
|
Home away from home
|
I just realized that the oil pressure sender that I took out when removing the aftermarket gauge needs to be replaced but with what? I don't recall for sure but I think this car just has a light.
Posted on: 2023/11/4 1:29
|
|||
|
All generalities are false.
Once I thought I was wrong but I was mistaken. Don Pierson Packard / IMPERIAL page CA DMV Licensed Vehicle VIN Verification 1951 Henney-Packard 3-Door Long Wheelbase Air Force Ambulance The 1951 Henney-Packard is For Sale! 1954 Packard Patrician 1954 Packard Patrician Parts Car 1956 Clipper Custom Sedan |
||||
|
||||
|
Re: Resurrecting a 1951 Henney-Packard Parts Car
|
||||
|---|---|---|---|---|
|
Home away from home
|
My brother worked wonders with the distributor cam so it’s all back together now. Even the points are okay although I’ll get a new set along with a new condenser and, of course it needs a rotor which might be available at Napa. Assembled, it looks restored compared to the mess that came out of the car! One little snafu was in the advance diaphragm I was going to use from the other distributor as it was easy to clean up. It turns out to had the wrong arm which explains why it wasn’t attached on the other one. It was about an inch longer.
I was unable to locate the 1951 filter canister that I thought I had sat aside for it so I got the one from my 1954 Patrician parts car. With nothing to compare, I thought this one looked different than I remembered and indeed it is so I’ve sourced the proper one. It appears I would have had to do so anyway as the 1954’s is a mess inside! It will probably clean up just fine but with my limited stays here, I don't have time for that sort of thing, especially if it’s an incorrect part anyway as I am trying to get everything proper and authentic. Photo of the proper one courtesy of Gerry at Southwest Packards. Last but not least, yesterday I pulled off the filter lines from a 1951 300 engine which itself took some heat as the fitting at the T was stuck. However, they are both plugged so I’m trying to clear them out. I was able to run a copper wire through one but can’t get it through the other so I filled it with injector clearer and will try again tomorrow after it sets overnight. Attach file:  4678FFFD-F633-4927-B329-D40AF49E14A3.jpeg (363.58 KB) 4678FFFD-F633-4927-B329-D40AF49E14A3.jpeg (363.58 KB)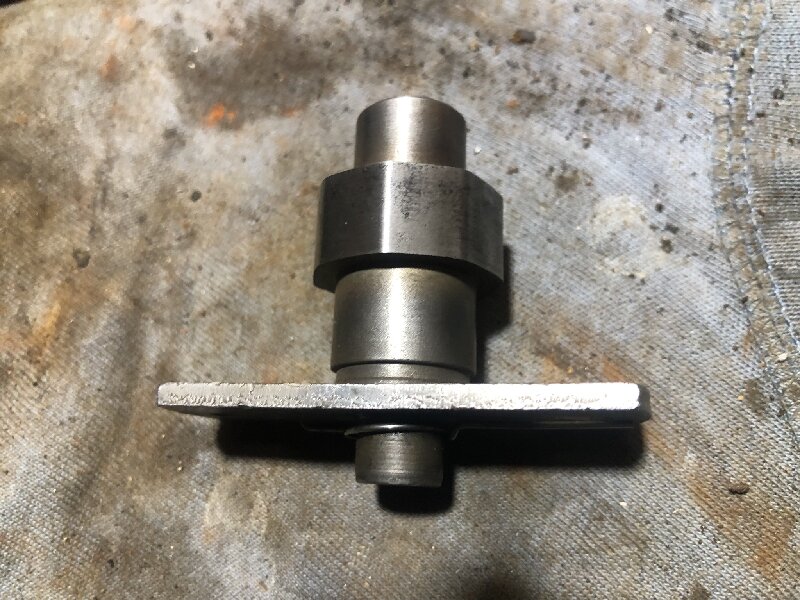  201DDA86-3B95-4420-AAB5-830A02F9879A.jpeg (461.47 KB) 201DDA86-3B95-4420-AAB5-830A02F9879A.jpeg (461.47 KB)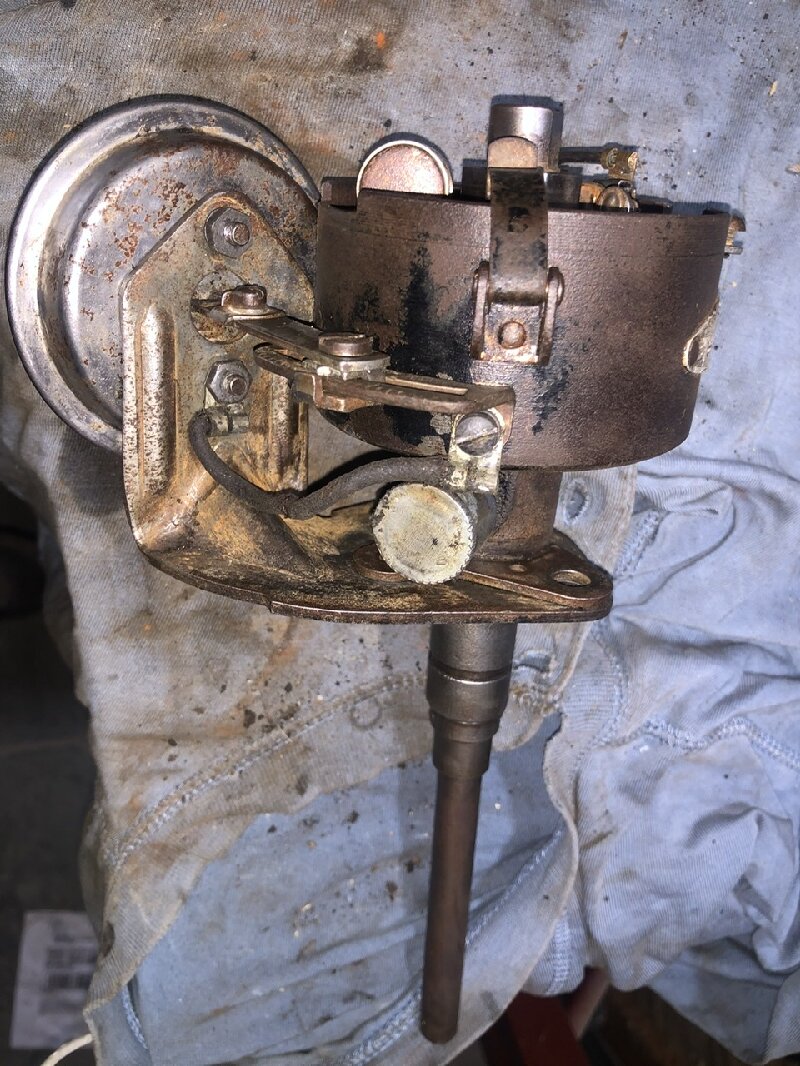  B766E2B9-FA77-49A4-BDA8-B5555F0CE38E.jpeg (354.38 KB) B766E2B9-FA77-49A4-BDA8-B5555F0CE38E.jpeg (354.38 KB)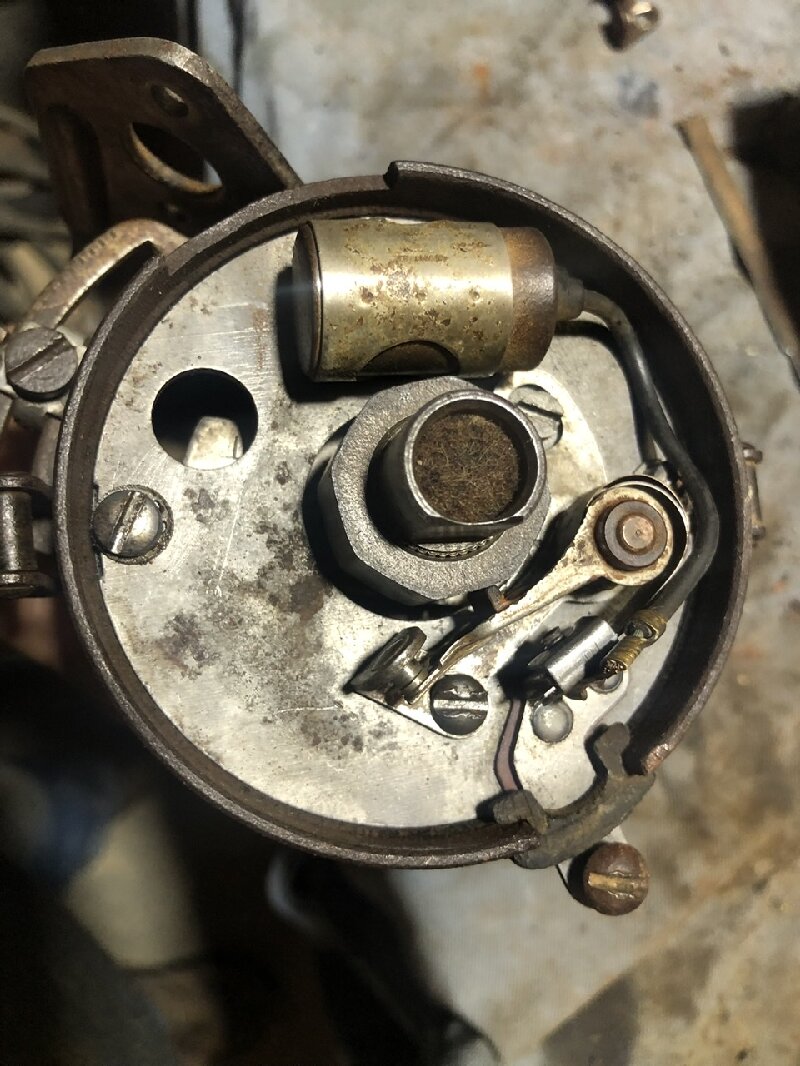  2BAA4F02-AB4A-49A1-9A2D-7C22C2048BF2.jpeg (254.62 KB) 2BAA4F02-AB4A-49A1-9A2D-7C22C2048BF2.jpeg (254.62 KB)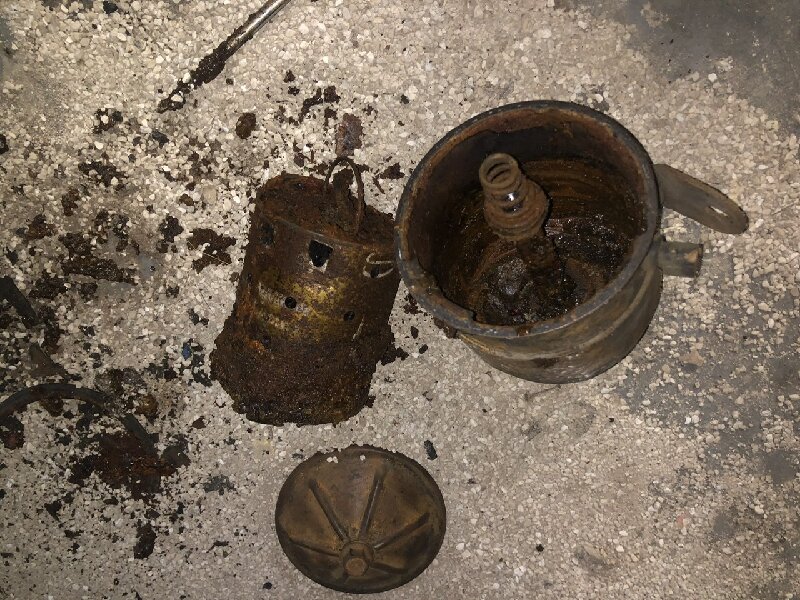  6102CD6A-9CB9-49D7-91E2-9D14E4FFB96E.jpeg (316.57 KB) 6102CD6A-9CB9-49D7-91E2-9D14E4FFB96E.jpeg (316.57 KB)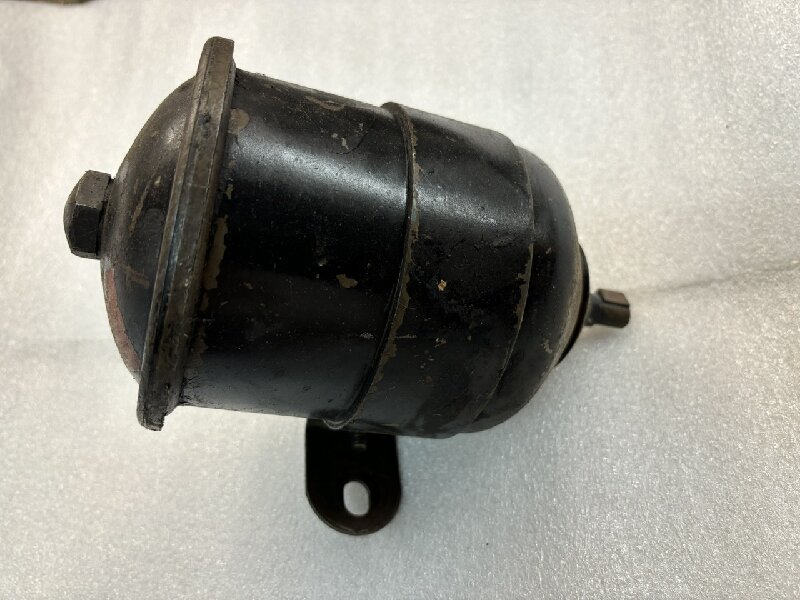
Posted on: 2023/11/4 20:28
|
|||
|
All generalities are false.
Once I thought I was wrong but I was mistaken. Don Pierson Packard / IMPERIAL page CA DMV Licensed Vehicle VIN Verification 1951 Henney-Packard 3-Door Long Wheelbase Air Force Ambulance The 1951 Henney-Packard is For Sale! 1954 Packard Patrician 1954 Packard Patrician Parts Car 1956 Clipper Custom Sedan |
||||
|
||||
|
Re: Resurrecting a 1951 Henney-Packard Parts Car
|
||||
|---|---|---|---|---|
|
Home away from home
|
When I took apart the distributor, I noticed that the centrifugal advance had two different springs. One has fewer windings and appears to be a slightly heavier wire than the other. Also, the one with the stiffer wire was attached to an anchor that was noticeably bent to make it even stronger and it was the same in both distributors. Not a question but just pointing it out in case someone reading this later takes one apart.
Posted on: 2023/11/5 13:27
|
|||
|
All generalities are false.
Once I thought I was wrong but I was mistaken. Don Pierson Packard / IMPERIAL page CA DMV Licensed Vehicle VIN Verification 1951 Henney-Packard 3-Door Long Wheelbase Air Force Ambulance The 1951 Henney-Packard is For Sale! 1954 Packard Patrician 1954 Packard Patrician Parts Car 1956 Clipper Custom Sedan |
||||
|
||||
|
Re: Resurrecting a 1951 Henney-Packard Parts Car
|
||||
|---|---|---|---|---|
|
Home away from home
|
Is there a special grease for the cup lubricator or will general purpose automotive grease do the job?
Posted on: 2023/11/5 13:29
|
|||
|
All generalities are false.
Once I thought I was wrong but I was mistaken. Don Pierson Packard / IMPERIAL page CA DMV Licensed Vehicle VIN Verification 1951 Henney-Packard 3-Door Long Wheelbase Air Force Ambulance The 1951 Henney-Packard is For Sale! 1954 Packard Patrician 1954 Packard Patrician Parts Car 1956 Clipper Custom Sedan |
||||
|
||||
|
Re: Resurrecting a 1951 Henney-Packard Parts Car
|
||||
|---|---|---|---|---|
|
Home away from home
|
I got the plumbing in for the oil filter but am glad I checked first as the lines were plugged solid! It took over an hour to get them cleaned out.
Also, I decided to pull the head so that I can properly address the missing studs. There were two sizes of nuts (3/4 and 11/16) and two sizes of bolt heads (3/4 and 5/8) so what a pain! One bolt is still very stuck but I got the others out. I asked this earlier but no comments so I’l ask again. Should the head nuts have the thick washers? Most have only thin ones now and the thick ones that I‘ve removed over the years from other Packard engines seem far to large and are thick to the point that the nut shows a thread or two above the stud which is obviously not right. I also test-fit the distributor into place but no matter what I tried, I couldn’t get it to engage with the oil pump! I’ve done this countless times over the years and don’t recall it ever being a problem so is there some secret that I’ve forgotten about? Attach file:  49181B49-2048-431E-AB7F-C20CBB7AB034.jpeg (422.87 KB) 49181B49-2048-431E-AB7F-C20CBB7AB034.jpeg (422.87 KB)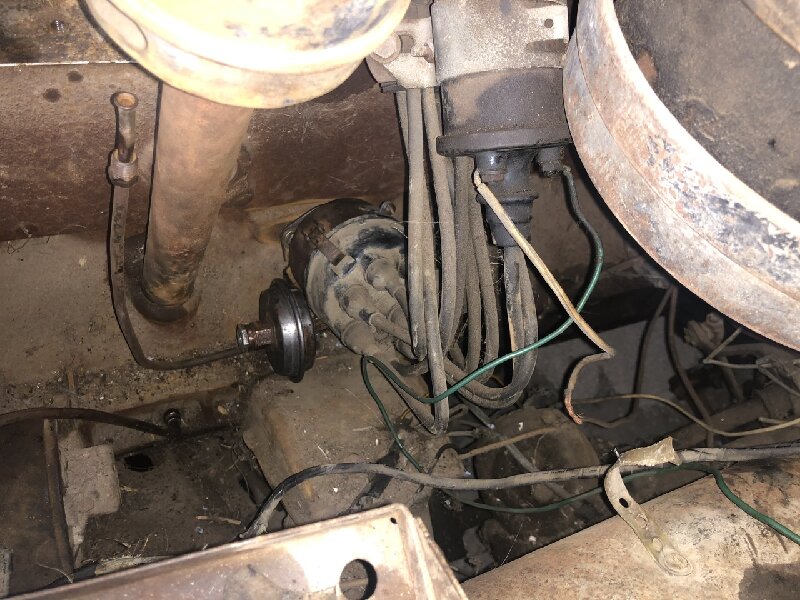  01732A95-CD3A-469B-AD4D-FF21710C5455.jpeg (486.78 KB) 01732A95-CD3A-469B-AD4D-FF21710C5455.jpeg (486.78 KB)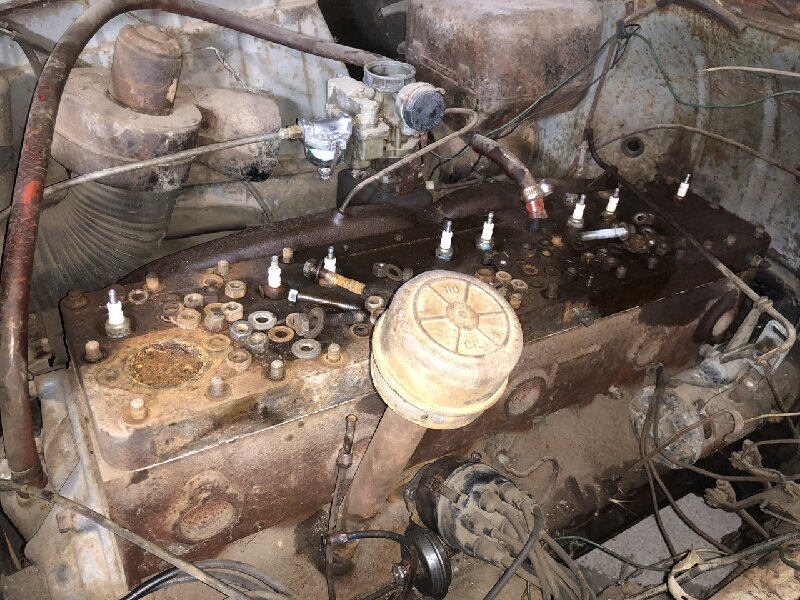
Posted on: 2023/11/5 20:10
|
|||
|
All generalities are false.
Once I thought I was wrong but I was mistaken. Don Pierson Packard / IMPERIAL page CA DMV Licensed Vehicle VIN Verification 1951 Henney-Packard 3-Door Long Wheelbase Air Force Ambulance The 1951 Henney-Packard is For Sale! 1954 Packard Patrician 1954 Packard Patrician Parts Car 1956 Clipper Custom Sedan |
||||
|
||||
|
Re: Resurrecting a 1951 Henney-Packard Parts Car
|
||||
|---|---|---|---|---|
|
Home away from home
|
Never thought of that about the cross blade! I have a pan gasket ordered as I was thinking I should remove it anyway for cleaning.
Posted on: 2023/11/6 11:39
|
|||
|
All generalities are false.
Once I thought I was wrong but I was mistaken. Don Pierson Packard / IMPERIAL page CA DMV Licensed Vehicle VIN Verification 1951 Henney-Packard 3-Door Long Wheelbase Air Force Ambulance The 1951 Henney-Packard is For Sale! 1954 Packard Patrician 1954 Packard Patrician Parts Car 1956 Clipper Custom Sedan |
||||
|
||||
|
Re: Resurrecting a 1951 Henney-Packard Parts Car
|
||||
|---|---|---|---|---|
|
Home away from home
|
Another siren just arrived for parts as the one I have needs the front housing but has a good back housing with the proper rear-facing light. This one is the same model (Federal WL vs WLR) but without the rear-facing light. The mount on this and on the one I have is incorrect for a Henney-Packard but is similar to what most of them appear to have gotten when restored as they are more common and easier to find. I have the proper one already which has been 3D scanned. Hmm. Maybe PackardInfo could have a repository for 3d scans of rare parts!
On the distributor, most of the Cross-Reference parts listed on this site are no longer available but Napa did have some of them with different numbers. Once I’m sure they will work, I’ll post to the list. In the meantime, are there any sources for the rubber seal goes through the housing? I tried the dealers but no luck. I’m not sure how easily rubber can be 3D printed but these may be a job for one if I had one good enough to use as a model. I have two and both are shrunken and brittle. It’s in the photo below but for some reason the editing feature I use to add arrows or circles is gone so look to the lower right of the housing where the tap protrudes. I had to go into town this morning which takes much of the day so haven’t been to the shop yet but when I head out shortly I’ll stick a borescope into the pan to see what’s going on. I suspect that Ross is correct so now it’s a matter on whether it’s easier to change the pump or to pull the pan! The pump is likely not oriented properly anyway as I stuck it in randomly when I first bought the car and was told that the distributor was broken because it could be turned by hand/. Turned out there was no oil pump. Attach file:  7DA15020-36B6-4C32-98F5-D2652565D614.jpeg (321.09 KB) 7DA15020-36B6-4C32-98F5-D2652565D614.jpeg (321.09 KB)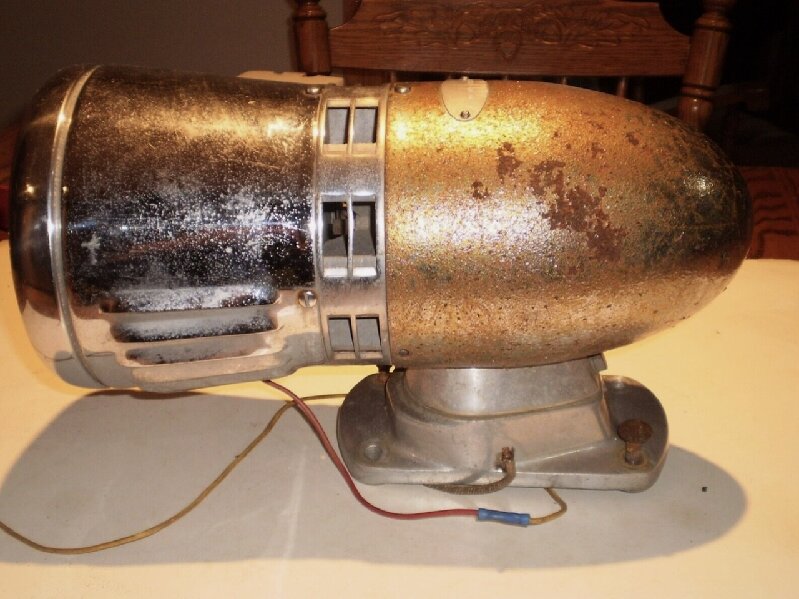  EED2BB27-5E6E-46CE-9EF8-AFBD88FADD1B.jpeg (354.38 KB) EED2BB27-5E6E-46CE-9EF8-AFBD88FADD1B.jpeg (354.38 KB)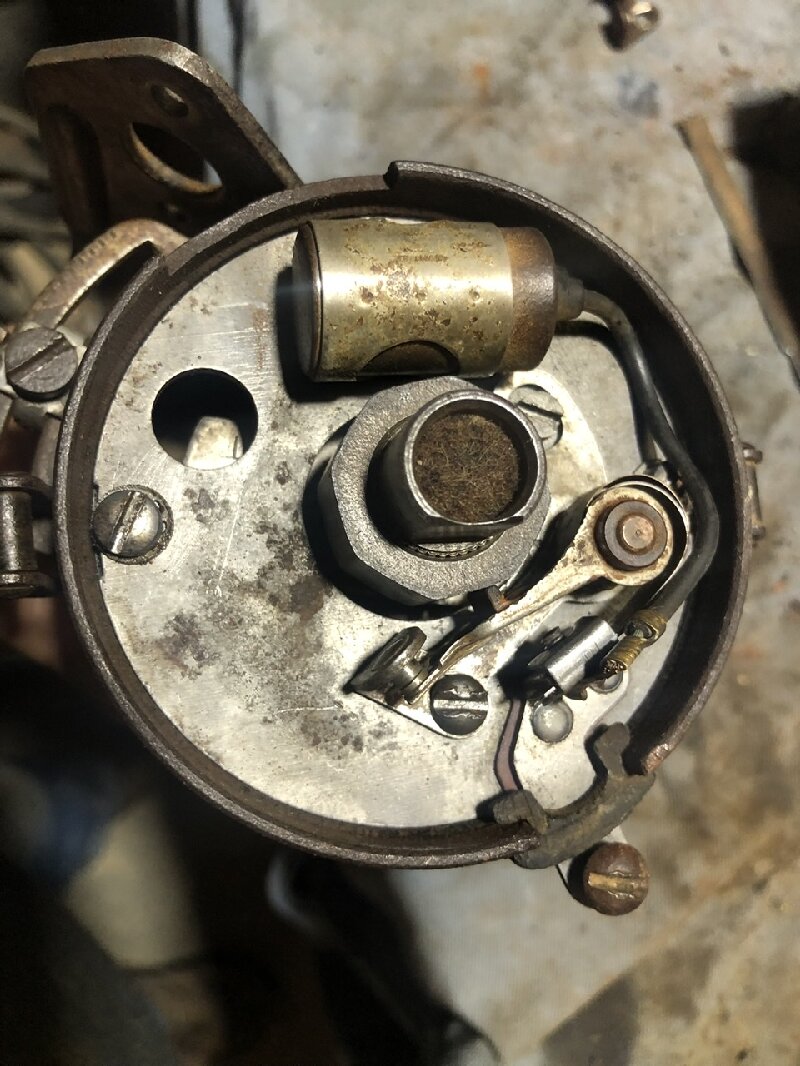
Posted on: 2023/11/6 16:23
|
|||
|
All generalities are false.
Once I thought I was wrong but I was mistaken. Don Pierson Packard / IMPERIAL page CA DMV Licensed Vehicle VIN Verification 1951 Henney-Packard 3-Door Long Wheelbase Air Force Ambulance The 1951 Henney-Packard is For Sale! 1954 Packard Patrician 1954 Packard Patrician Parts Car 1956 Clipper Custom Sedan |
||||
|
||||

