|
Re: 51Packard's....51 Packard
|
||||
|---|---|---|---|---|
|
Home away from home
|
You have to be extremely careful when using a press with a 60+ year old water pump. My friend, an experienced machinist, and I cracked the housing when attempting to rebuild my water pump. Thankfully, Packardtaximan came to the rescue and sent me a core for just the cost of shipping.
Is this a great community, or what?
Posted on: 2012/4/19 22:45
|
|||
|
Joey
(?=#=?) "If chrome got me home, I'd for sure still be stuck somewhere." [url=http://pac |
||||
|
||||
|
Re: 51Packard's....51 Packard
|
||||
|---|---|---|---|---|
|
Home away from home

|
Good point Joey. I think the secret is that when you are pressing something like impeller onto the pump shaft that you use some wood blocks to rest the casing on, so there's some 'give' and not too much pressure on the castings. Sit the pump body on some blocks of hardwood and align everything carefully, if you need to press something (- or 'whack it' with a mallet).
Posted on: 2012/4/26 4:11
|
|||
|
1951 Packard Club Sedan | [url=ht
|
||||
|
||||
|
Re: 51Packard's....51 Packard
|
||||
|---|---|---|---|---|
|
Home away from home

|
6-20-12
Got my care package from Lynn. Car in a box. Or should I say boxes! 140 lbs of additional metal for my car. Lynn did an incredible job. A-1 class act. Really went above and beyond. Pics are attached. Notice how deep Lynn was able to cut into the floor with the rockers. Now I have inner and outer rockers, body mount area, and the complicated bracing underneath. This will make it way easier and a lot less fabricating to get the rust holes taken care of. Unfortunately, we had to cut the rockers in 1/2 for shipping. It lowered the shipping cost almost by 1/2 so it was really necessary. The trunk section is very exciting. Not only is the panel shaped the right way, but I have the trunk section that goes around the body mounts and the rear channel. Again, a lot easier to piece in than what I was doing before. I will also be able to get rid of the wood board acting as a brace under the floor thanks to the collection of frame braces that were also included. Once I finish (if ever), putting a new trans in one of my other cars, I can give the car more attention. A lot of work remains, but days of fabricating have been shaved off. Attach file:  (74.47 KB) (74.47 KB)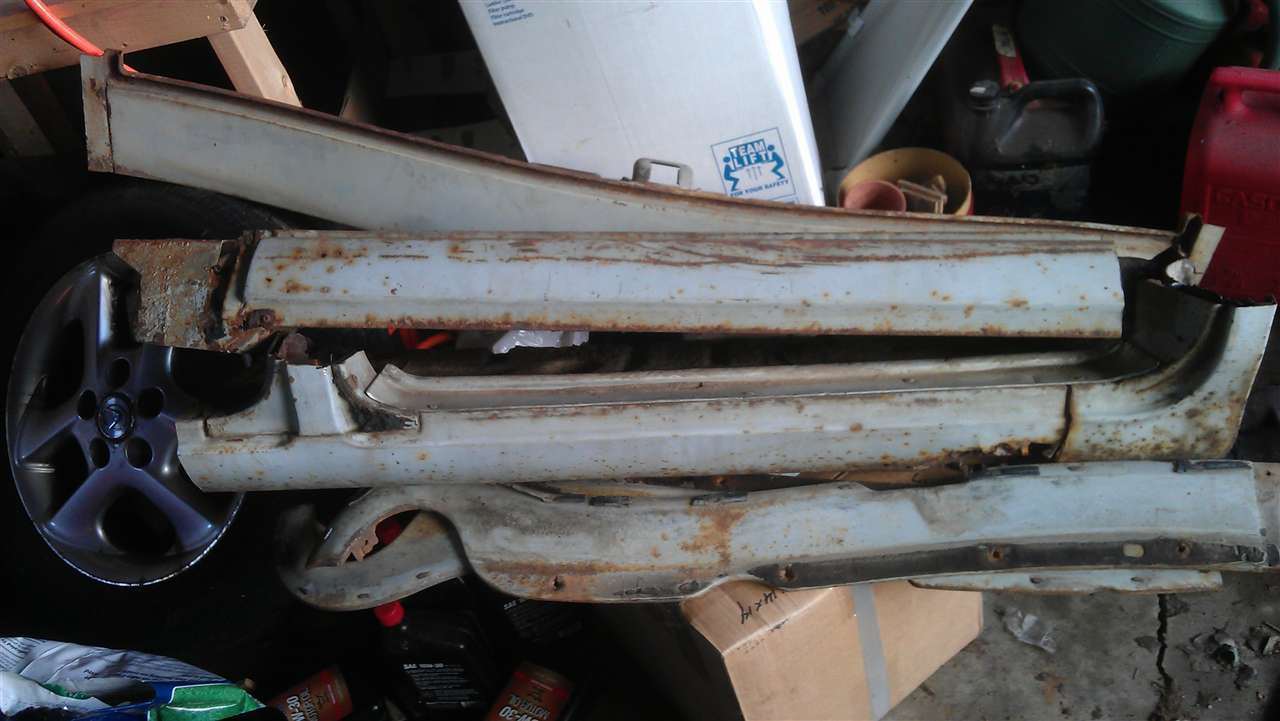 (58.52 KB) (58.52 KB)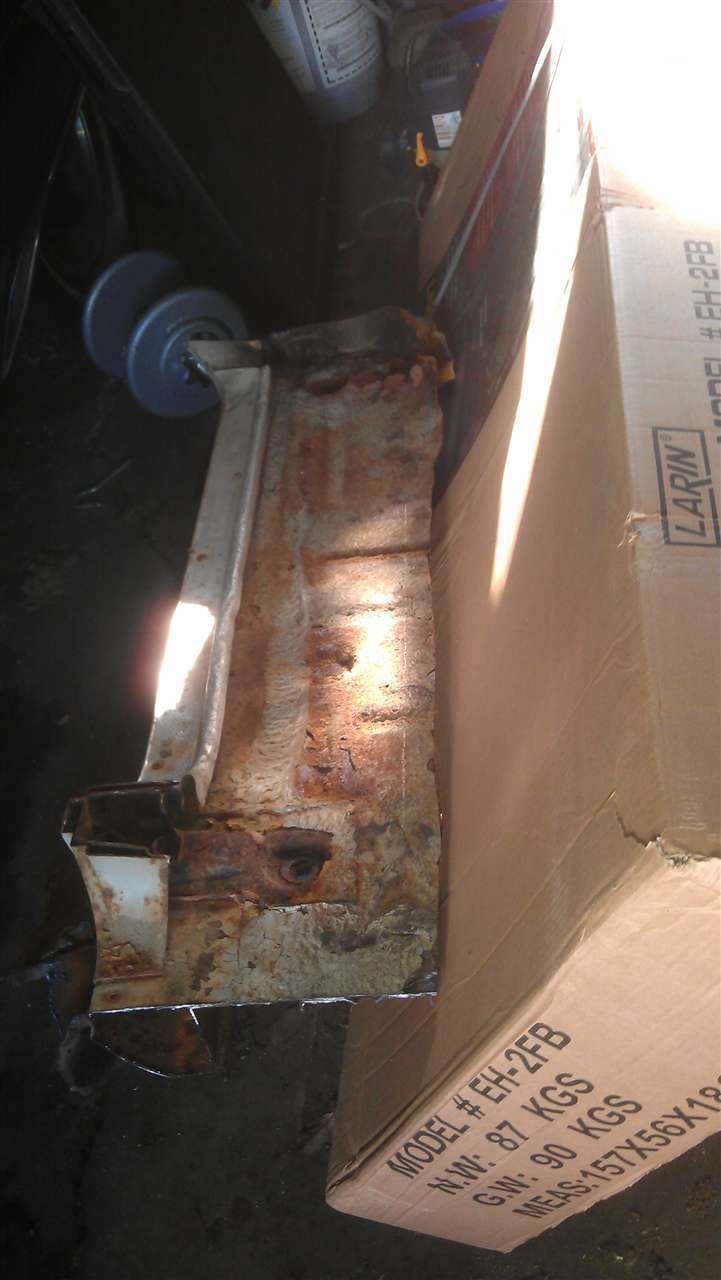 (76.38 KB) (76.38 KB)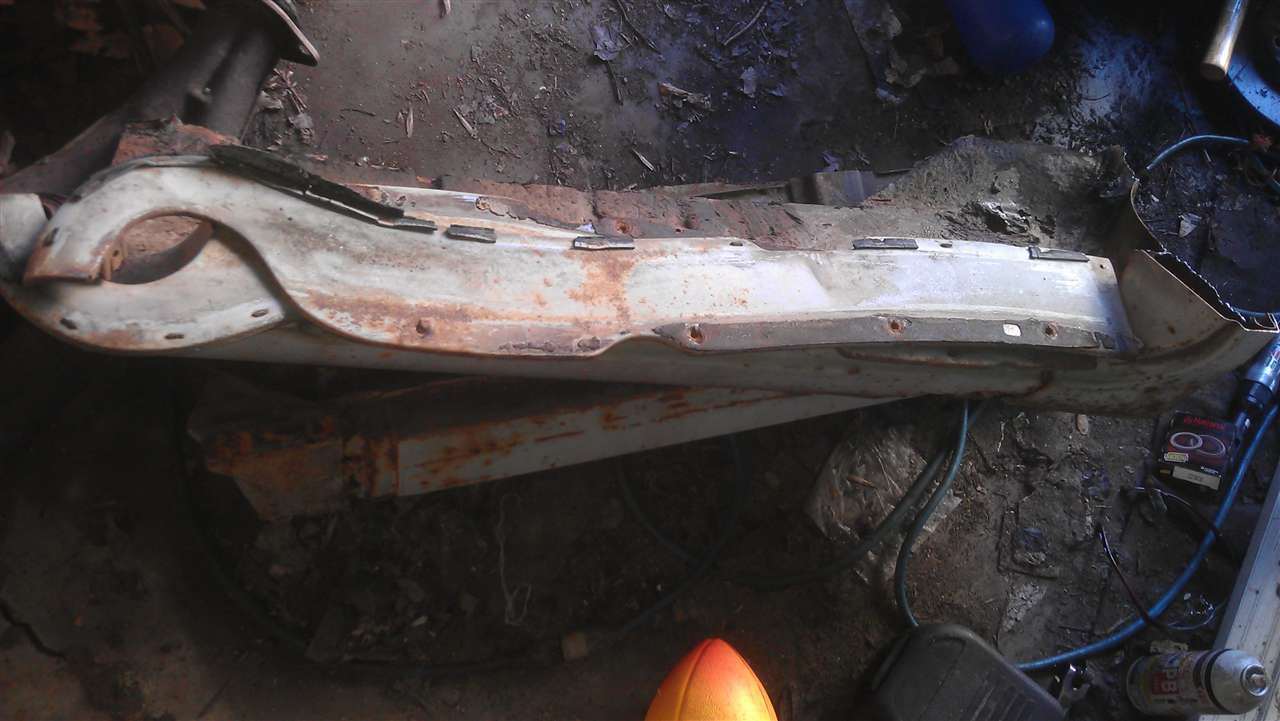 (57.05 KB) (57.05 KB)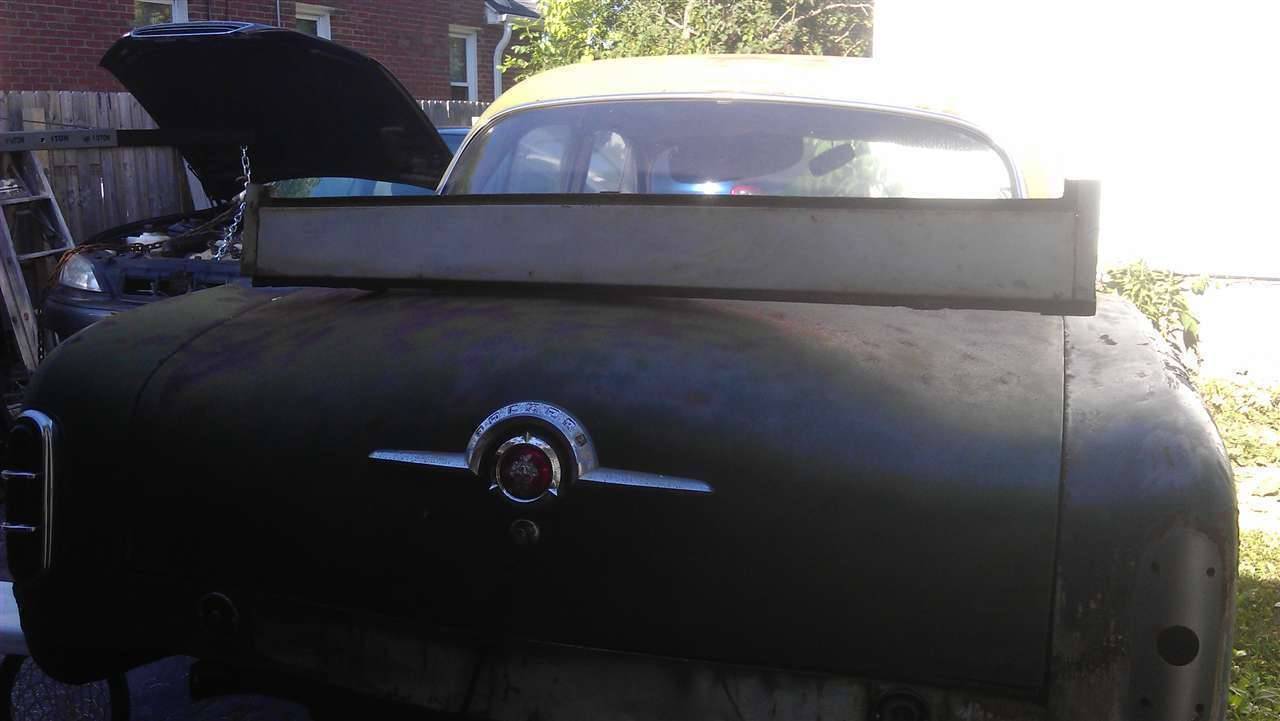 (129.82 KB) (129.82 KB)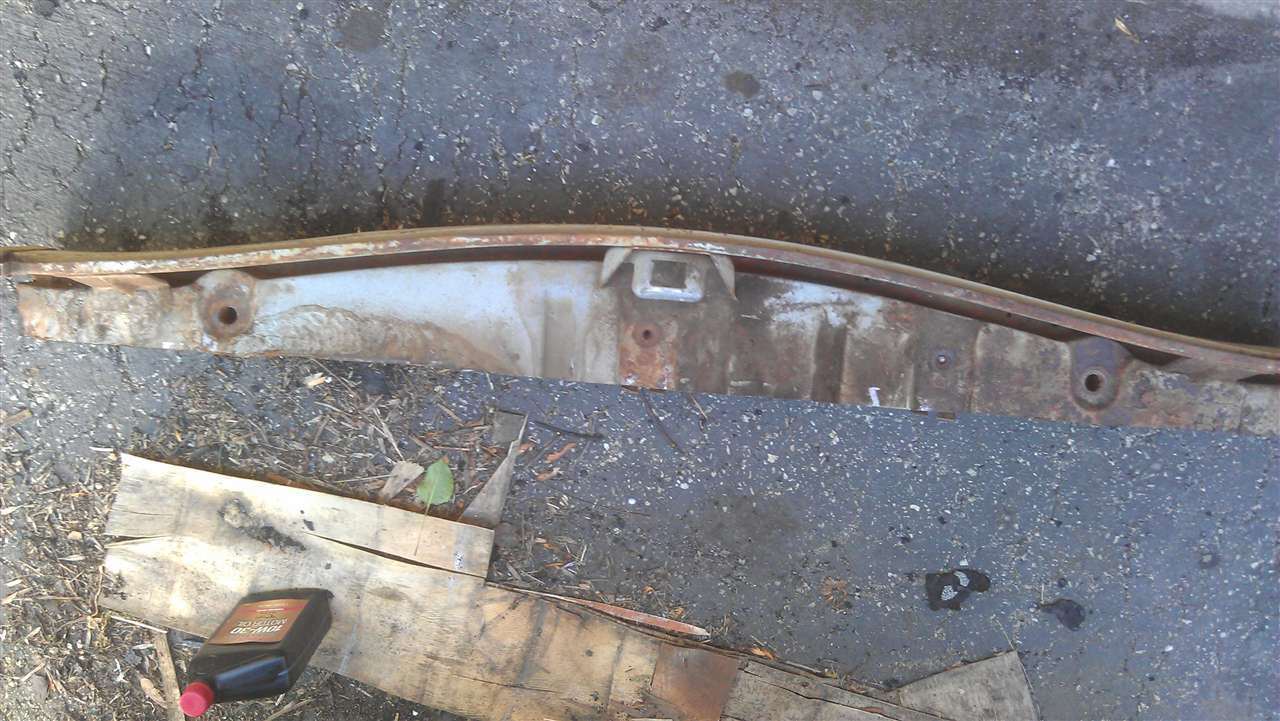 (73.14 KB) (73.14 KB)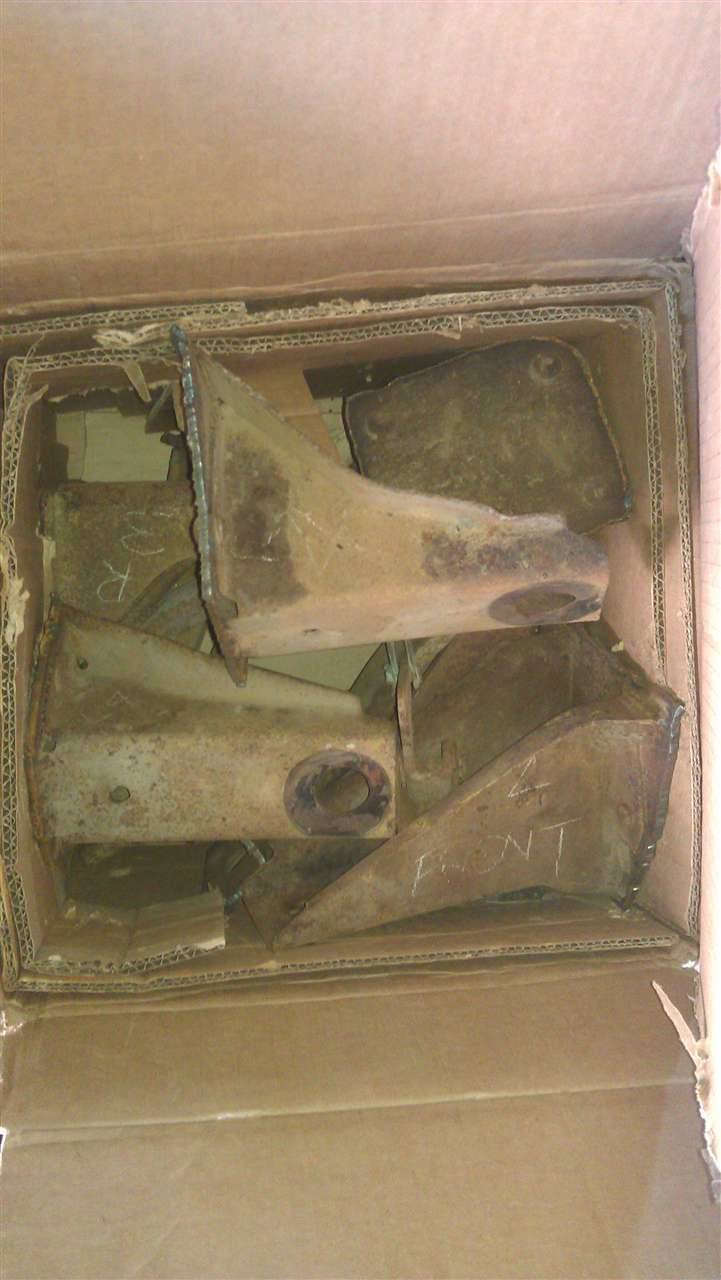
Posted on: 2012/6/20 17:44
|
|||
|
[url=h
|
||||
|
||||
|
Re: 51Packard's....51 Packard
|
||||
|---|---|---|---|---|
|
Home away from home
|
8-28-12
I'm back!!! I can't believe my blog dropped down to the second page! I'm disappointed with myself that I have not worked on the car very long. Most of my time was spent with my Lexus replacing the transmission. It was a big job and I had a lot of setbacks, but in the end, I was successful. Today I cut started to cut out the bad section on the back of the car below the trunk lid. I got a new piece and I am preparing to weld it in. I got the front off and cut the body bolts. the new piece has the mounts intact, although one will require repair. I'm saving a lot of metalworking time using the new patch panels. After cutting out the bad section that I know was bent and distorted, I was disappointed to find that the passenger side rear fender fit better, but not perfectly. There is still a gap between the fender and trunk lid. Maybe putting in the new section with the complete body mounts will fix it or I will need to cut the welds holding in my new trunk floor to give me wiggle room to fix it. Attach file: (79.47 KB)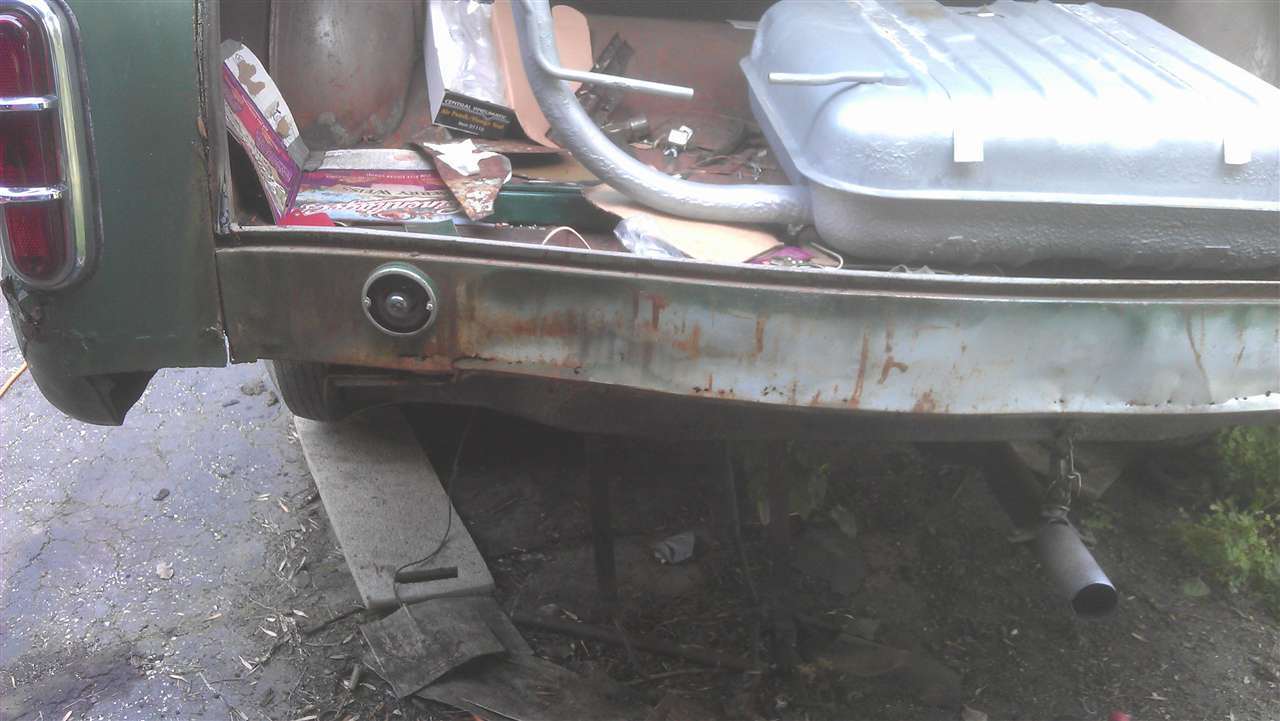 (75.98 KB) (75.98 KB)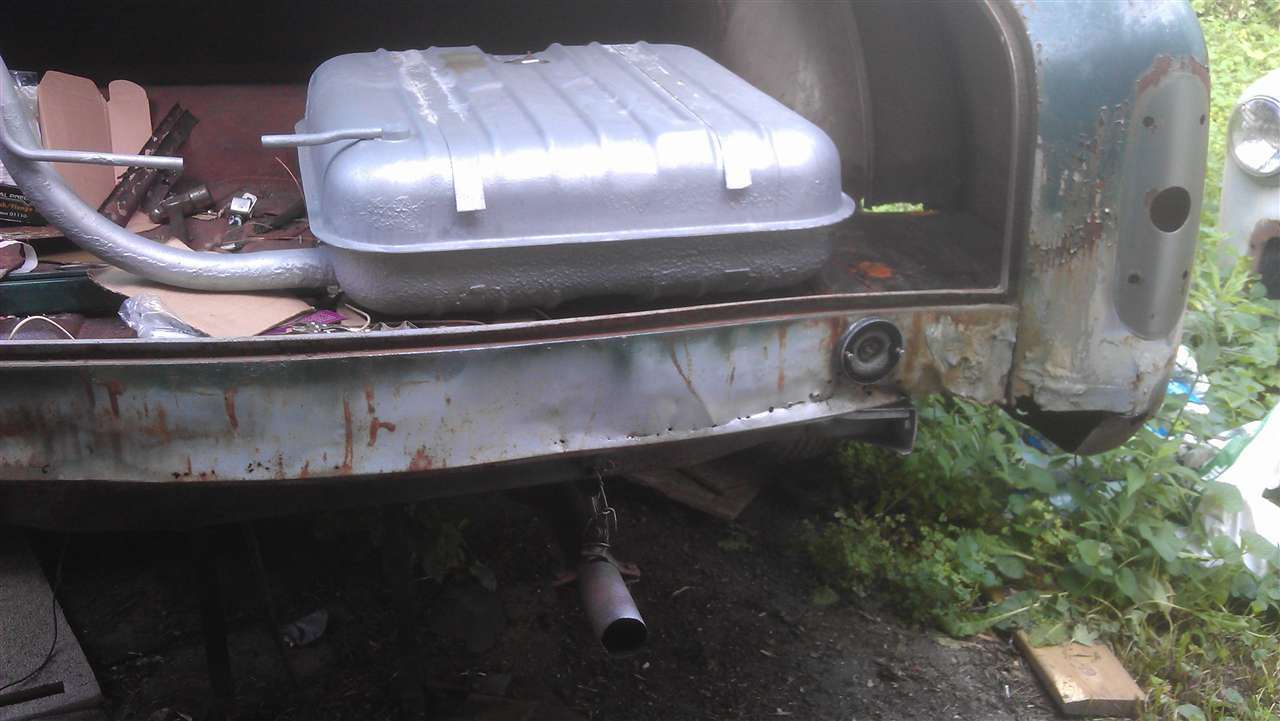 (56.42 KB) (56.42 KB)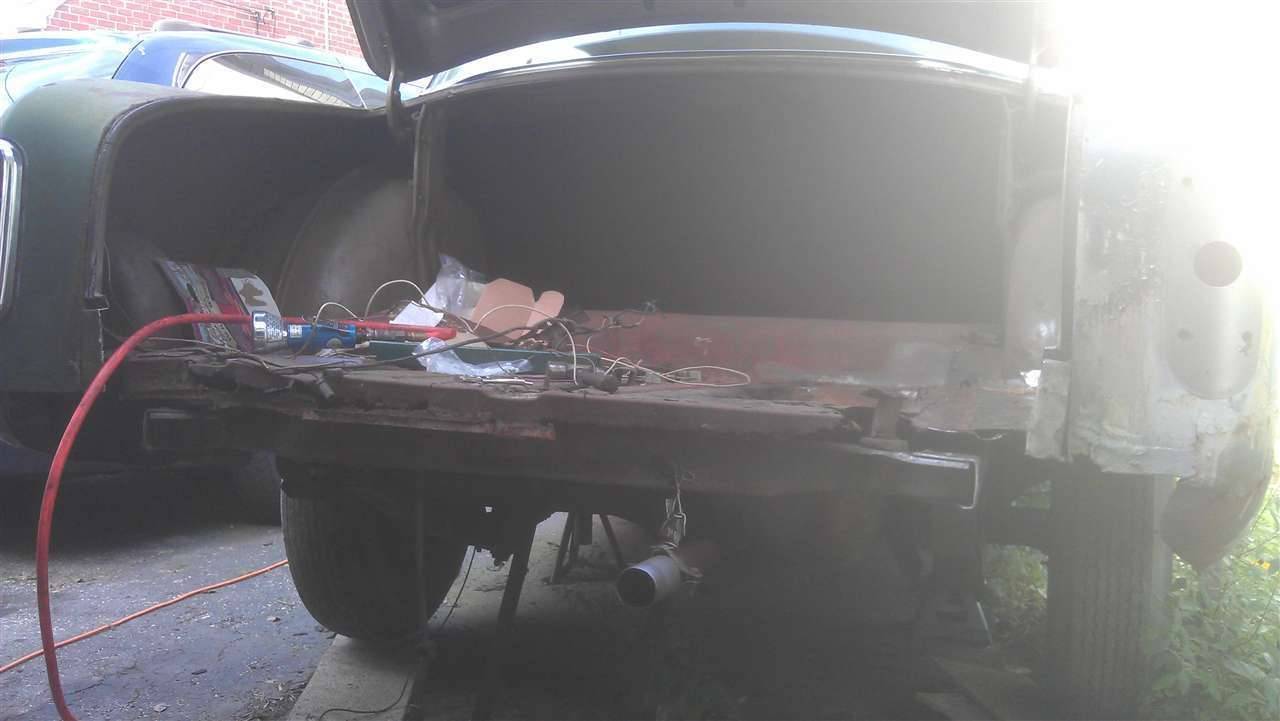 (59.93 KB) (59.93 KB)
Posted on: 2012/8/28 18:13
|
|||
|
[url=h
|
||||
|
||||
|
Re: 51Packard's....51 Packard
|
||||
|---|---|---|---|---|
|
Forum Ambassador

|
51Packard -
You sure are lucky to have landed that care package. Make sure you inspect, cut, and fit the pieces carefully; you may not always need as much as was provided. However, before you go welding any of it up, practice, practice, practice! I only say that because I recall the past problems you had with both the machine and technique, as well as the old material. Take one of the sections you remove from the car, find a relatively solid spot, cut it apart and practice all you want. You can't hurt scrap, but what are the chances of finding another good donor section if it gets chewed up during installation? Not sure if your MIG will handle those frame outriggers. I never had to replace one, but you might have to consider arc welding. Perhaps others can offer some experience. Meanwhile, may the Packard gods speed you to a successful conclusion.
Posted on: 2012/8/28 21:17
|
|||
|
||||
|
Re: 51Packard's....51 Packard
|
||||
|---|---|---|---|---|
|
Home away from home
|
9-19-12
Not much progress to report. I took BH's excellent advice and practiced some welding. Not much change over what I have been laying in the car so maybe I am just terrible at it or I have it dialed in. On the outriggers, I thought they were riveted, but I will have to check again. I actually have an arc welder that I am loaning my maintenance department while I use their MIG. It is wire fed, not a stick so I don't know if that has enough oomph either. I started to cut more off the car and put some layout lines where I will cut the trunk floor. I wanted to take apart the corner seam where the rubber seal goes, but it started falling apart from rust so I cut into the fenders a little to mimic what is on the replacement panel. Whenever I get the new panel in, if the trunk does not close the right way still, I don't know what I'm going to do. Attach file: (73.08 KB)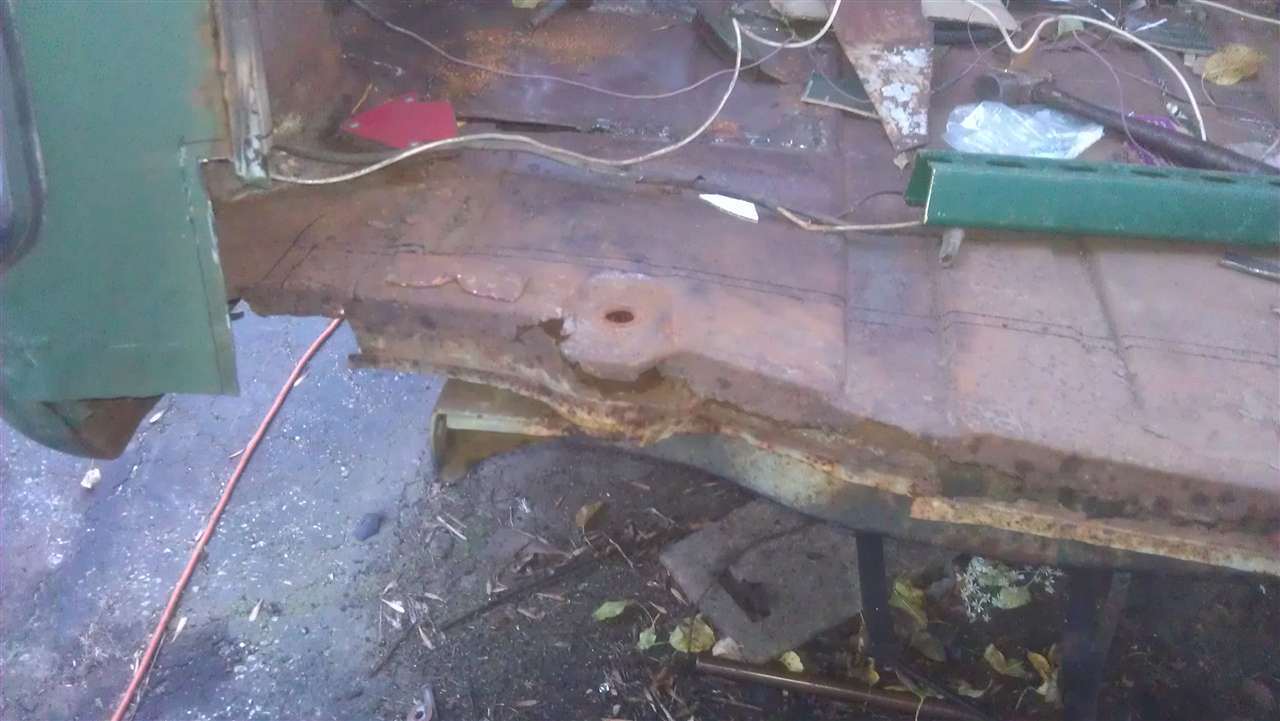 (71.06 KB) (71.06 KB)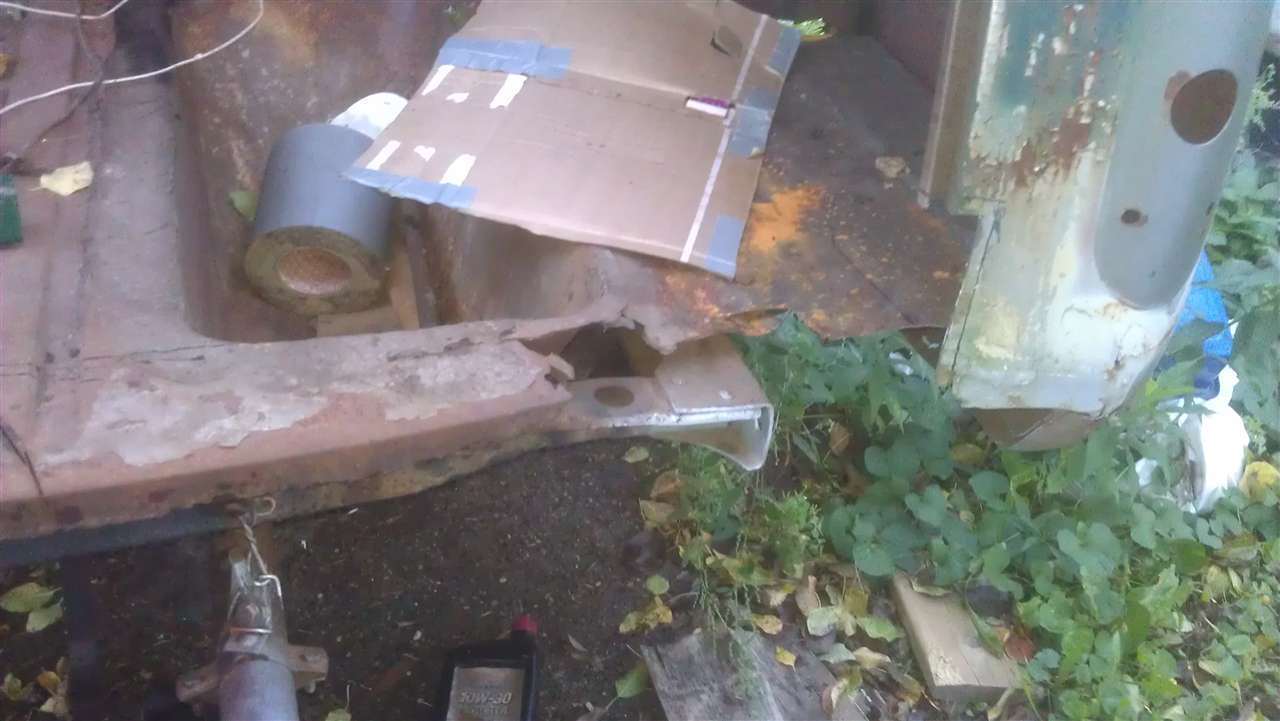
Posted on: 2012/9/19 20:04
|
|||
|
[url=h
|
||||
|
||||
|
Re: 51Packard's....51 Packard
|
||||
|---|---|---|---|---|
|
Home away from home
|
Howdy 51 Packard, welcome back! (No doubt like me, you've had other stuff to do for a while).
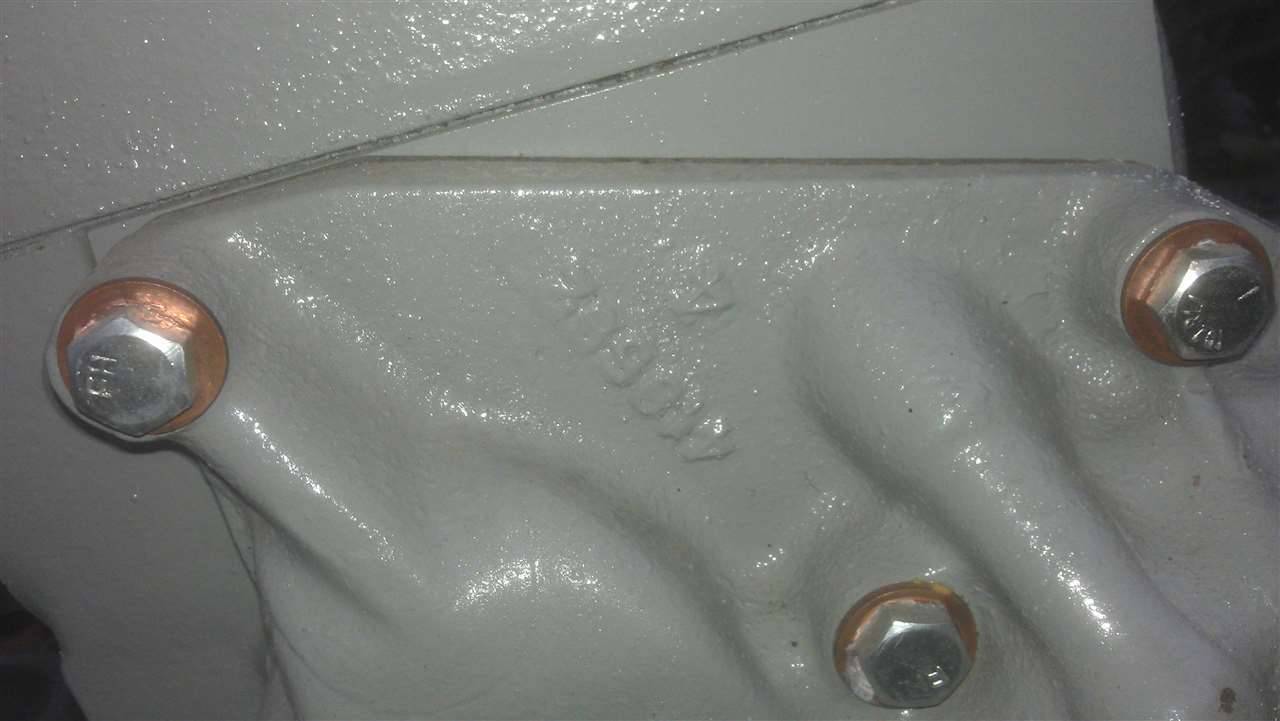
Couple of thoughts . . . You're right, the outriggers are riveted on my '51. I don't know if they're all identical, there might be different sizes, but judging from the photo you have, looks like yours are labeled (?). Also regarding the MIG and whether it might have enough oomph, I have a 130amp gas MIG and it can handle sheet metal to 1/4inch or even thicker (- I've welded 10mm thick gussets using 0.9mm fluxed wire without gas and penetration was ok). Are you welding onto good metal, or is it corroded and a bit thinner that the original stuff? Sure makes a difference if both sides of the weld are on good clean thick metal. It can be nearly impossible to get a good weld on even slightly thinner rusty metal, it just burns through continually. With my '51 there was a lot of rust, and I just didn't have the skill or the time to do the repairs myself, so I paid a metal worker to do most of my rust repairs. There were some difficulties with the trunk lid, and we tried two of them to get a fit. (I think the original one had become distorted owing to the grit blasting having heated it up too much. It seemed to have stretched quite a lot, but maybe the metalworker had also misjudged the placement of the trunk lip when he renewed it). Probably the trick here is that you just lightly tack every new / restored panel in place and check fit before 'joining the dots'. That way things can be jiggled around to get a right fit if necessary. You could even consider temporary pop riveting of some sections until you're sure they fit. Main thing is - whatever you do, enjoy the journey!
Posted on: 2012/9/20 7:30
|
|||
|
1951 Packard Club Sedan | [url=ht
|
||||
|
||||
|
Re: 51Packard's....51 Packard
|
||||
|---|---|---|---|---|
|
Home away from home
|
Thanks Larry51,
I definitely lack the skills for metal work but part of this project was so I could learn new skills. I appreciate everyone's comments. They help to keep me motivated. Larry, your car will be spectacular when done and worth all of your efforts. If mine is 1/2 as nice as yours I will consider it a success! No more progress on the car to report. Household chores need to be done before winter. Hoping to at least get the rear panel tacked in and the wiring upfront buttoned up before it gets too cold.
Posted on: 2012/9/27 18:14
|
|||
|
[url=h
|
||||
|
||||
|
Re: 51Packard's....51 Packard
|
||||
|---|---|---|---|---|
|
Home away from home
|
Never got any farther on the car before winter set in.
Been eyeing the Eastwood website and finally pulled the trigger on the MIG 135 welder. Sale price plus free shipping is the best deal they ever have on it. I also ordered some more window covers for my media blasting cabinet. I'll get a welding cart from Harbor Freight. No more excuses for bad welds! Now that the equipment variable will no longer be an issue, I can concentrate on my technique and practice.
Posted on: 2013/2/19 19:44
|
|||
|
[url=h
|
||||
|
||||


