|
Re: 51Packard's....51 Packard
|
||||
|---|---|---|---|---|
|
Home away from home
|
Lookin' forward to seeing how much better that new MIG welder works for ya! I got a hand me down MIG welder from my old shop teacher not too long ago. Seeing you replacing panels on your '51 makes me want to do the same on my '52. There are a few bad spots on the body, and I've found I "LOVE" metal fab. I know I can't make it look any worse, so why not try? There aren't many better feelings than the one you get after laying down a good weld. Enjoy your new machine!
-Garrett
Posted on: 2013/2/19 23:49
|
|||
|
Garrett
1952 200 Deluxe Touring Sedan " If you don't go when you want to go, when you do go, you'll find you've gone"- Burt Munro |
||||
|
||||
|
Re: 51Packard's....51 Packard
|
||||
|---|---|---|---|---|
|
Home away from home

|
Come on warmer weather! Enough with the snow! Started cleaning out the garage in preparation for the time I will be able to actually do some work on the car. Figured it was time for a cleaning when I put my new welding cart in the garage only to find I couldn't roll it anywhere! Also took the front glass off my media blaster. The lens covers I bought from Eastwood are about 2" too short so I guess I will have to put some duct tape on the glass to protect it where the lens cover doesn't reach. Bummer but I'm not going to return them. Too much trouble.
Posted on: 2013/3/13 18:11
|
|||
|
[url=h
|
||||
|
||||
|
Re: 51Packard's....51 Packard
|
||||
|---|---|---|---|---|
|
Home away from home
|
Move on down to Texas! Spring has sprung here, we are in a drought, but the weather is quite lovely. Clear blue skies, upper 70's for highs and lows in the 50's; need rain though. Hope the weather clears up for ya, I know how frustrating it can be to not be able to work on your Packard.
-Garrett
Posted on: 2013/3/13 19:54
|
|||
|
Garrett
1952 200 Deluxe Touring Sedan " If you don't go when you want to go, when you do go, you'll find you've gone"- Burt Munro |
||||
|
||||
|
Re: 51Packard's....51 Packard
|
||||
|---|---|---|---|---|
|
Home away from home
|
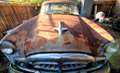
4-6-13
I've given up on thinking a 2 1/2 car garage can actually hold 2 cars. At least I can move around easier and will have room to put the seats in there when the time comes. As long as I keep it straightened up! Still cold around here, but I managed do cut some more cancer out of the car. I cut out more of the trunk floor to make room for the new panel under the trunk lid. Upon removal, I now see I have some frame damage! Great! Just what I need. Really took the wind out of my sails and of course, it started to rain so I stopped. I have no idea how this damage occurred. The trunk floor was not damaged in this area, only the panel. Also the panel was not as messed up on the side that shows the frame bent up! Maybe someone put a chain on it to pull something and bent it. I don't know. Not sure what to do now. Try to smack it down with a hammer? Put the new panel over it and pretend it never happened? The holes in the frame for the body mounts seem like they allow for some "wiggle" room in case the holes have moved from their proper location. Also, the frame damage is on the opposite side of where my fender and trunk lid do not align very well. What a strange and frustrating car! I'm beginning to regret the whole project! Attach file:  (102.18 KB) (102.18 KB)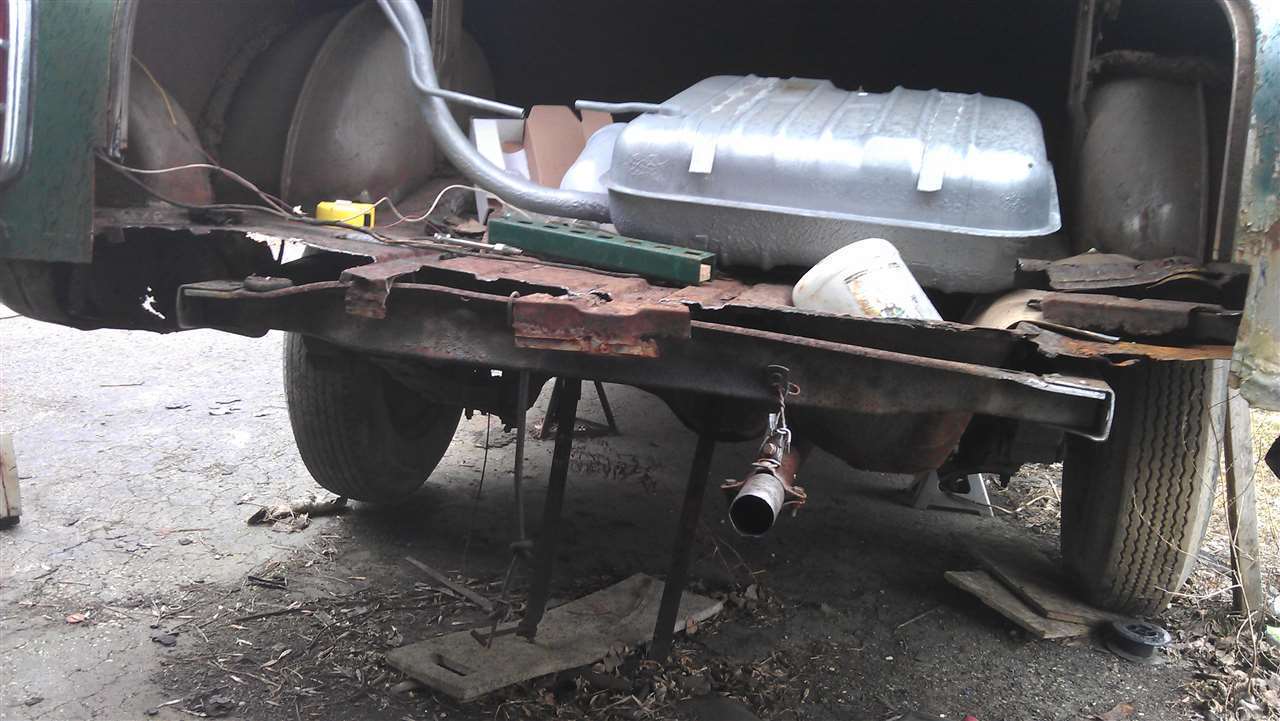 (132.04 KB) (132.04 KB)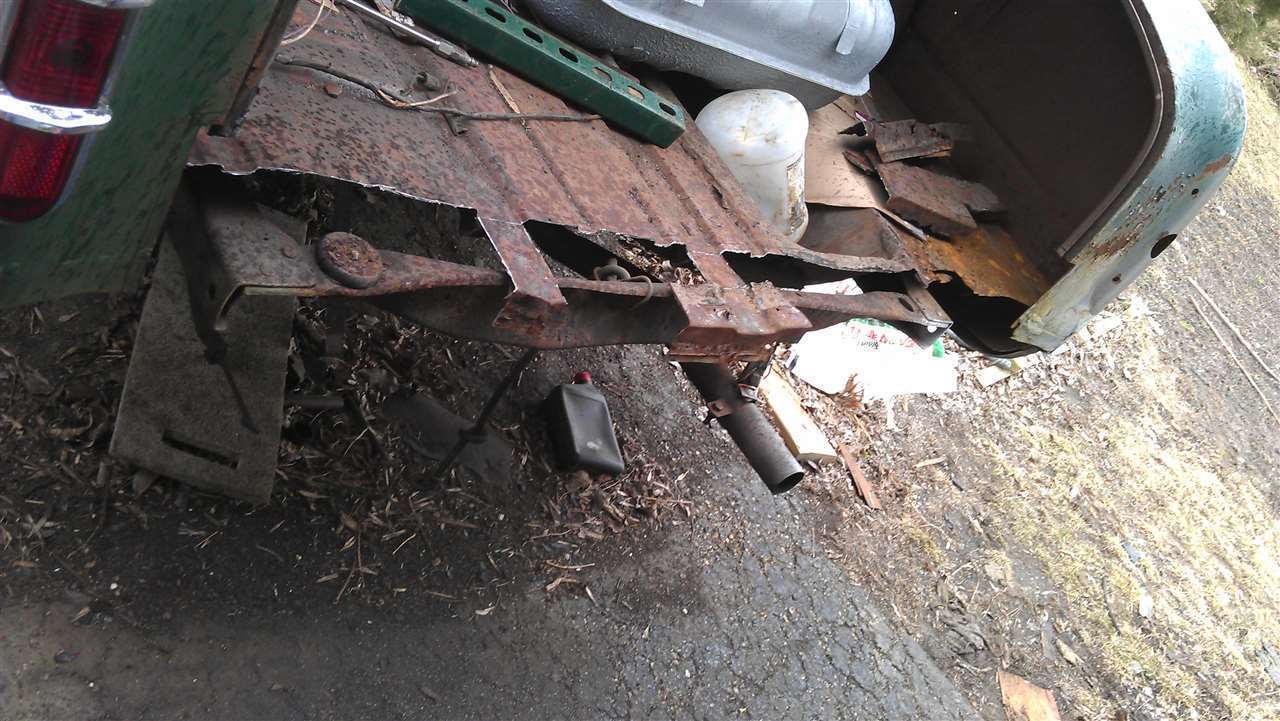 (78.45 KB) (78.45 KB)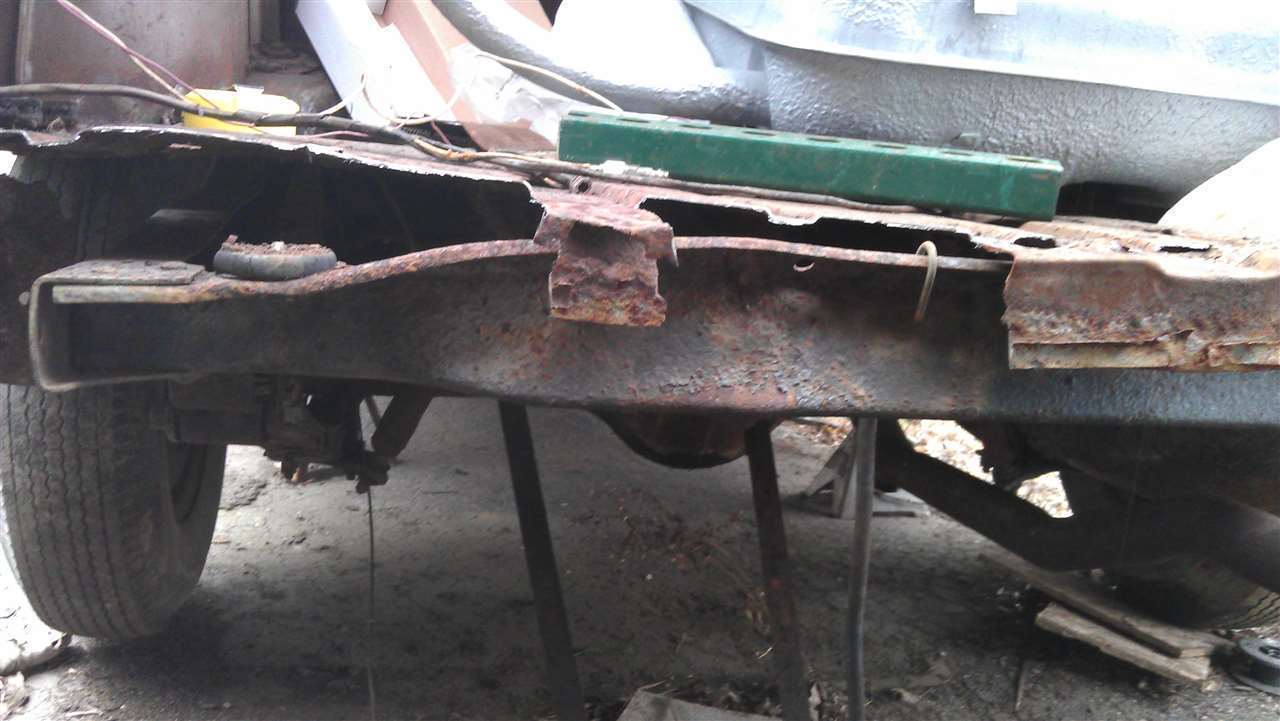 (87.09 KB) (87.09 KB)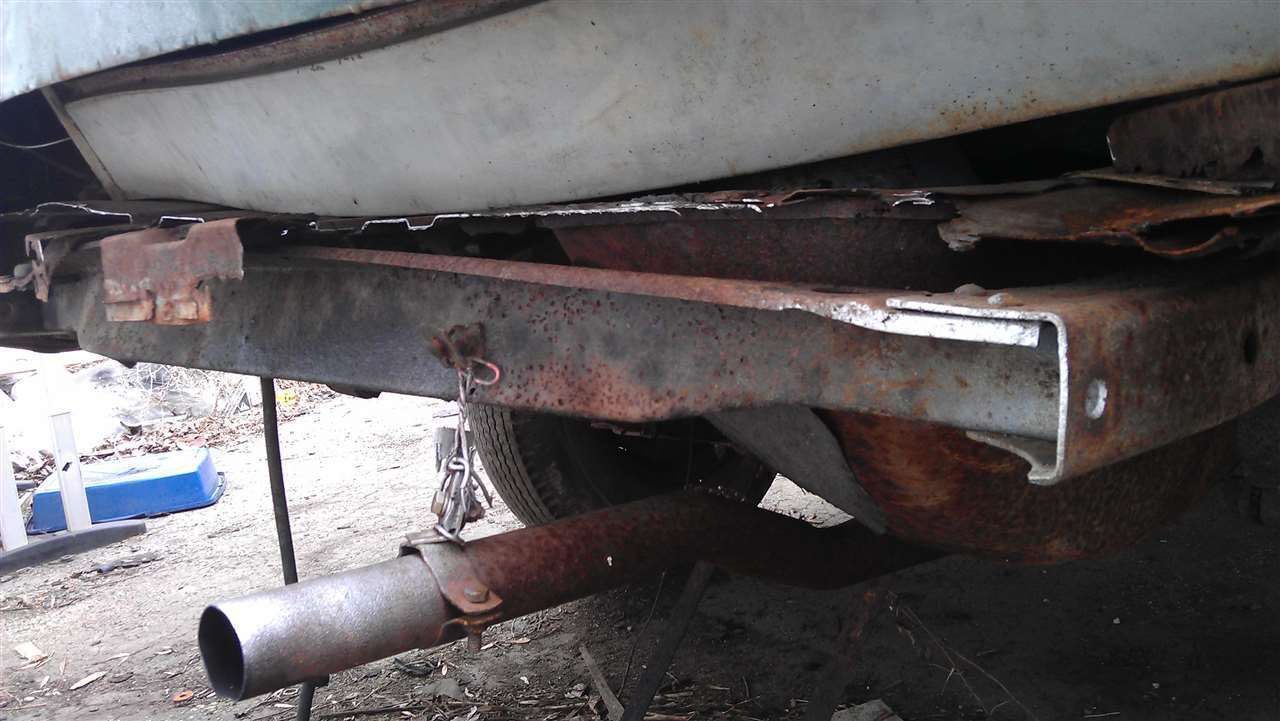
Posted on: 2013/4/6 11:43
|
|||
|
[url=h
|
||||
|
||||
|
Re: 51Packard's....51 Packard
|
||||
|---|---|---|---|---|
|
Forum Ambassador

|
It's kinda hard to tell from your pix, but it doesn't look like the frame rails are bent. Rather it appears that only the rear crossmember is damaged - certainly twisted, maybe pushed in a little.
This is a setback - not a deal breaker. I've seen far worse repaired. Before resorting to a BFH, you might try to lay hands on a huge crescent wrench, wind the jaws down on the lip of the crossmember and give a little twist in the opposite direction of the impact. Patience, and it'll come.
Posted on: 2013/4/6 14:17
|
|||
|
||||
|
Re: 51Packard's....51 Packard
|
||||
|---|---|---|---|---|
|
Home away from home
|
Great suggestion! I was able to use the wrench to take a lot of the twist out of it. It is far from perfect, but not as scary looking! I am pretty surprised how easily the metal moved.
Now there is a bump still on the drivers side right where the mount is that holds the gas tank strap. Also, the "face" of the support is dented in with severe creases along the bottom. I may never get all of that out. I probably need a torch to help soften the metal and of course I do not have one. I tried to pound down the humps on the top of the brace, but the metal was not really moving. In between rain drops, I was also able to finish removing the pieces of trunk floor where the gas tank strap mounts are spot welded. The mounts on my replacement panel were cut in half so I wanted to save the ones on the car instead of trying to cut them in the same spot as the new panel and weld them together.
Posted on: 2013/4/6 16:34
|
|||
|
[url=h
|
||||
|
||||
|
Re: 51Packard's....51 Packard
|
||||
|---|---|---|---|---|
|
Home away from home
|
4-16-13
Last Sunday I had a chance to work on the bent rear brace a little. Used the wrench trick to get it a lot closer to the correct shape. Spent an hour tapping and hammering with a dolly trying to get some of the dents out. Got some out and I think it looks a lot better, but not perfect. I think this is good enough for a part you are really not going to see. Cleaned it up with the wire brush and put a coat of Phosphoric acid on it. Once dry it got a couple coats of primer. While waiting for the acid to dry, I took some scrap metal and practiced welding. My first 3 welds were absolutely perfect! Of course, every weld after that was not as good. Practice makes perfect. The new welder is making a huge difference. I noticed a hiss when I pulled the trigger. On the unit I borrowed from my work, I never heard that. Probably never sent gas to the weld. Today, I painted the brace semi-gloss black. Then I turned my attention to preparing the new trunk panel. I noticed some strange holes that go through the trunk into threaded receivers welded to the bottom. Any idea what those are for? My car does not have these. I think the panel came off a '54. Looking at the mount area, I noted some rusted out areas. Didn't look too bad and certainly better than what I had to work with on my car. After wire brushing, the damage really began to show. Pretty extensive rust through. I do not have the metal skills of Keegan to attempt to make brand new ones so I need to work with what I have. I attempted to fill the wholes with weld, allowing it to burn though until the metal was not as thin. Work my way around both mounts trying to fill in what I could. The drivers side actually came out pretty well. The passenger side is too far gone for this technique to work. I did manage to stabilize the piece so the center portion will not move. This will help keep it from moving when I put some fresh metal in there. Grinding the drivers side really made it look pretty good. Passenger side, not so much. Any idea on what those holes are for? Attach file: (122.35 KB)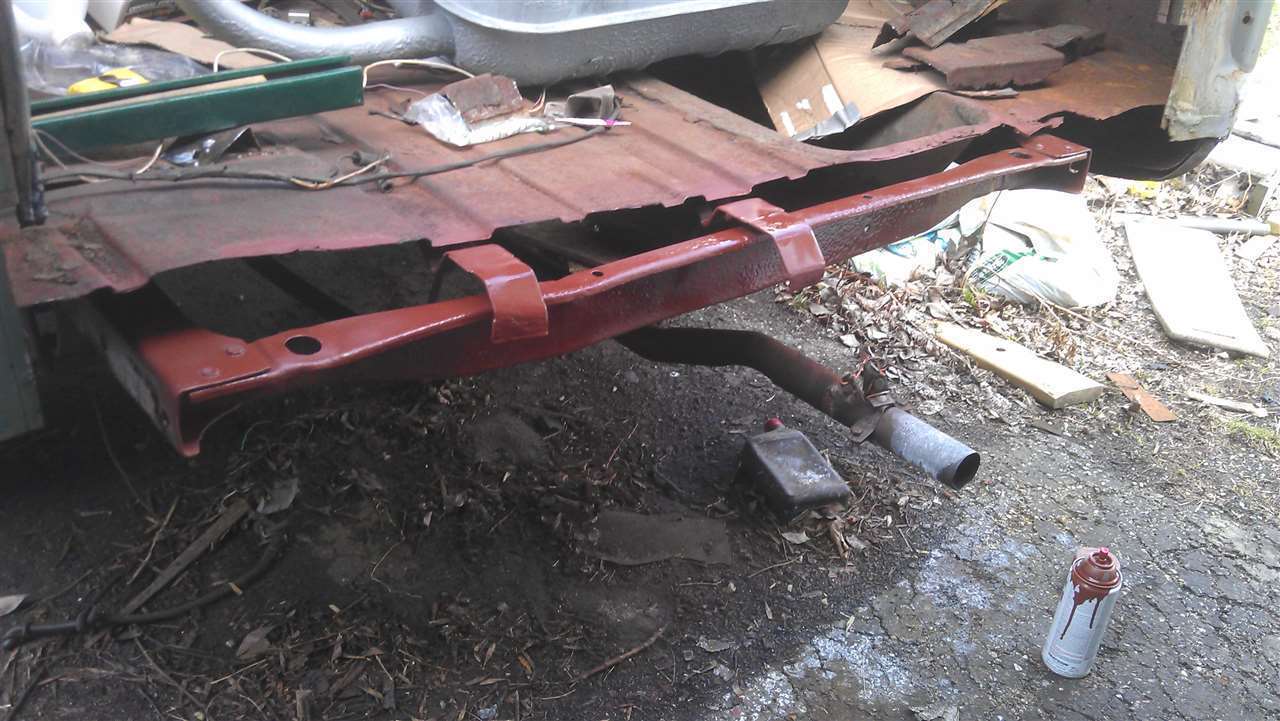 (89.91 KB) (89.91 KB)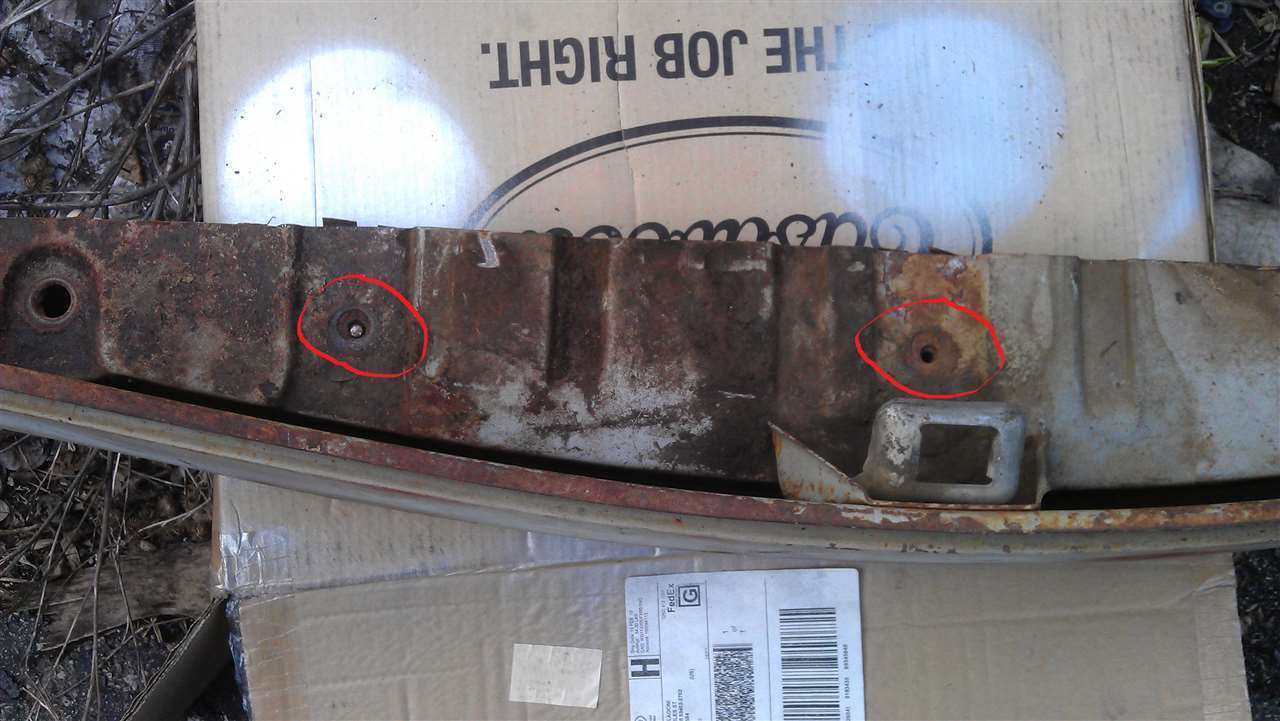 (96.37 KB) (96.37 KB)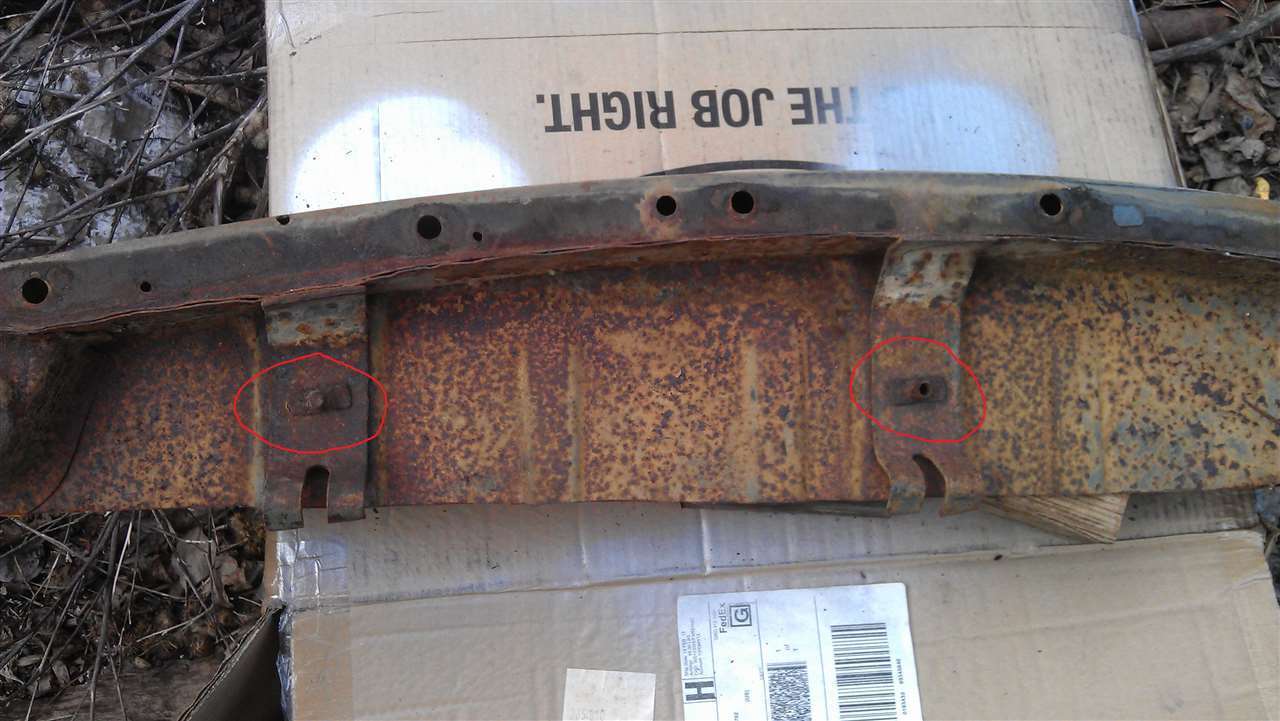 (118.39 KB) (118.39 KB)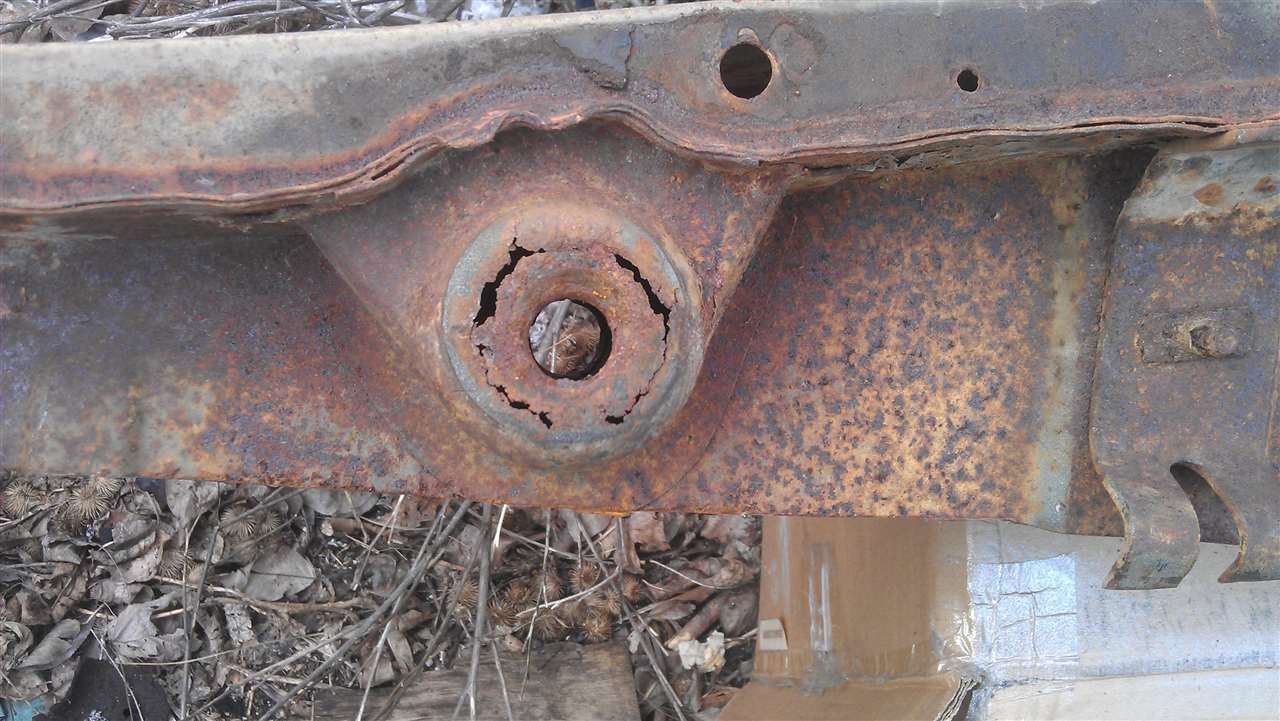 (142.84 KB) (142.84 KB)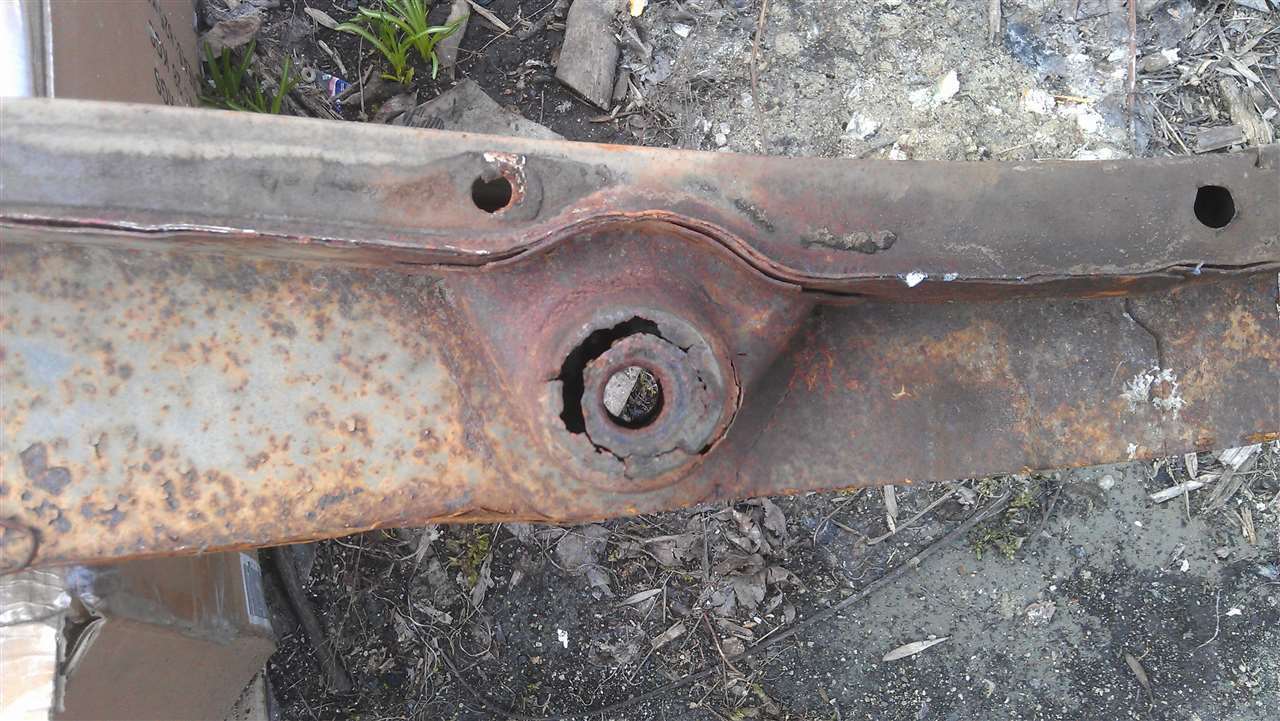 (107.93 KB) (107.93 KB)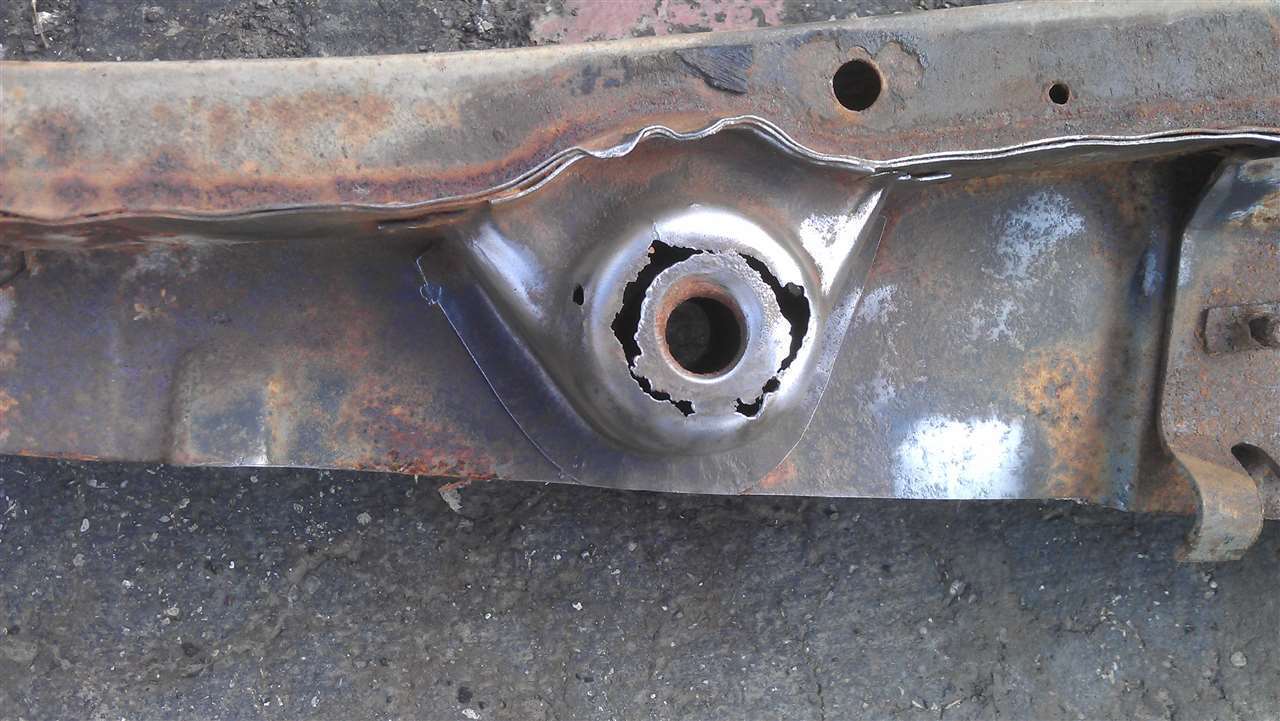 (97.35 KB) (97.35 KB)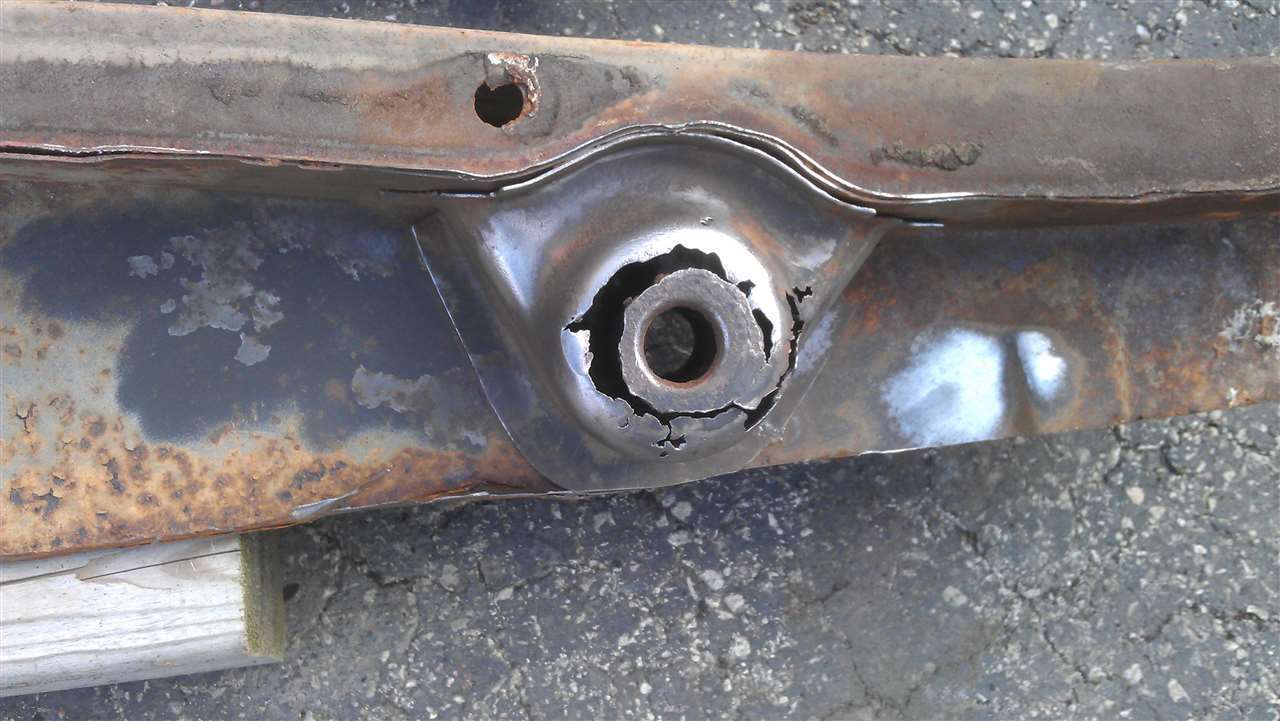 (90.55 KB) (90.55 KB)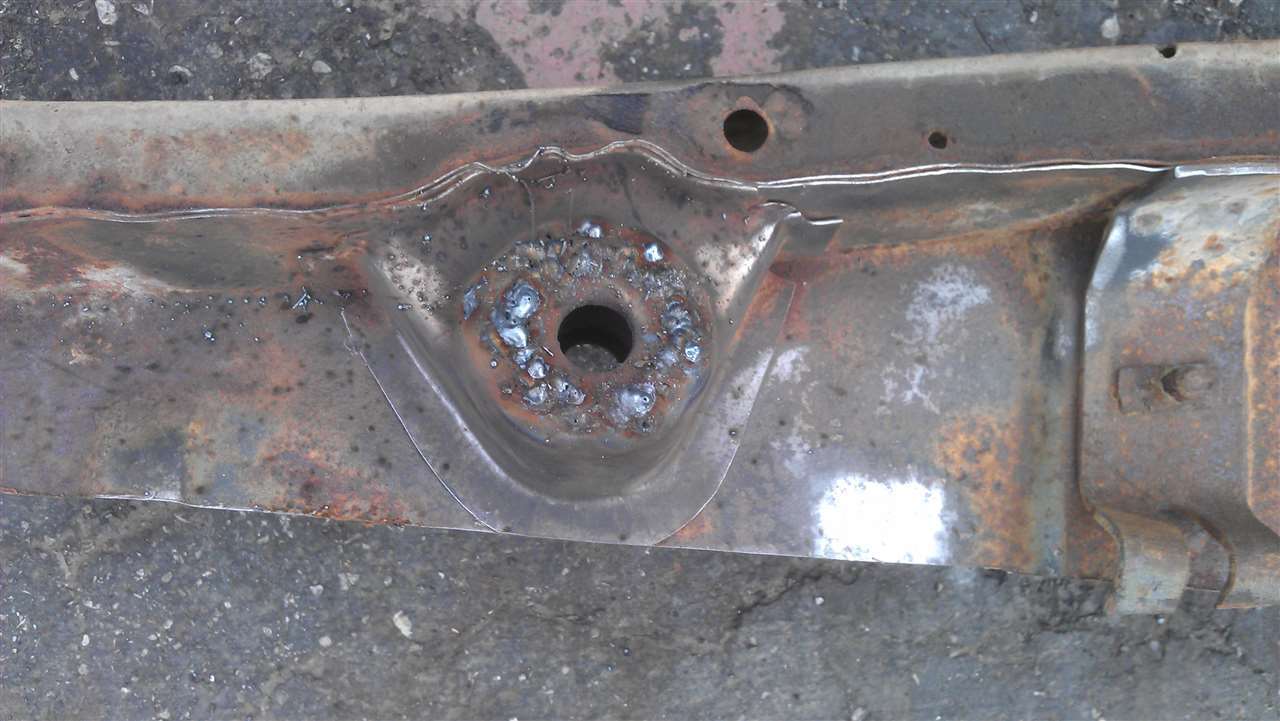 (114.91 KB) (114.91 KB)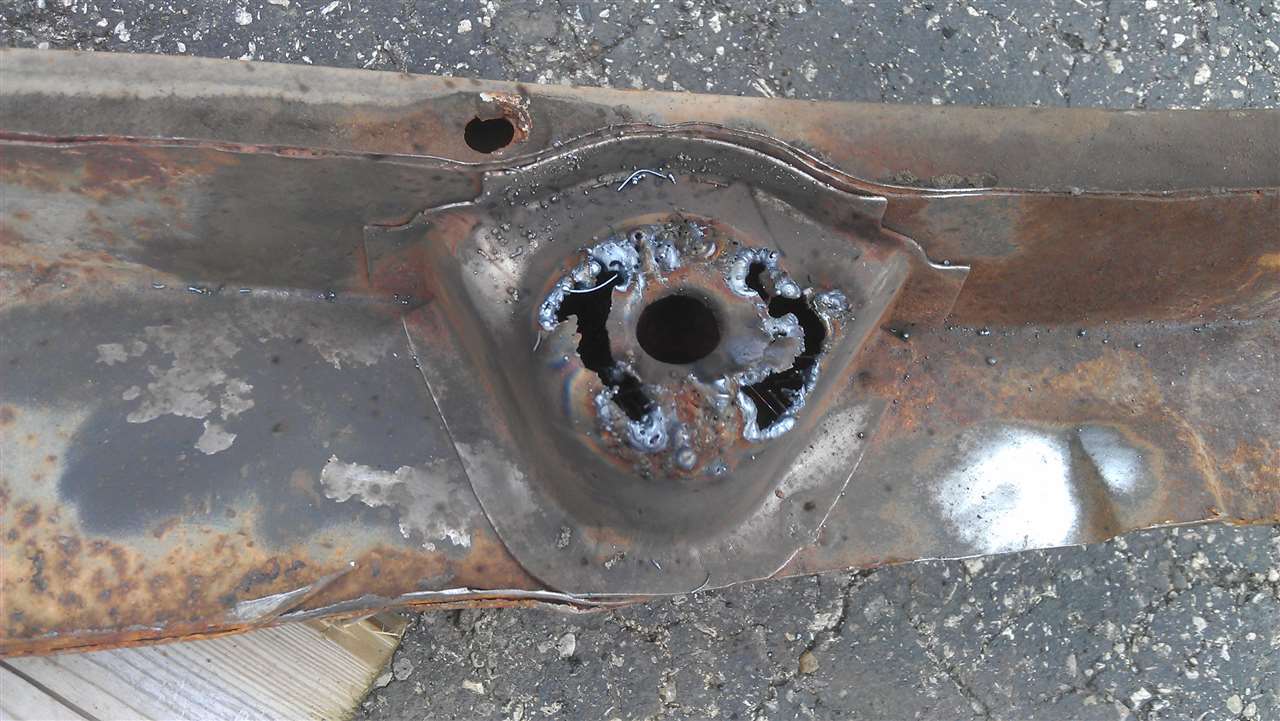 (63.42 KB) (63.42 KB)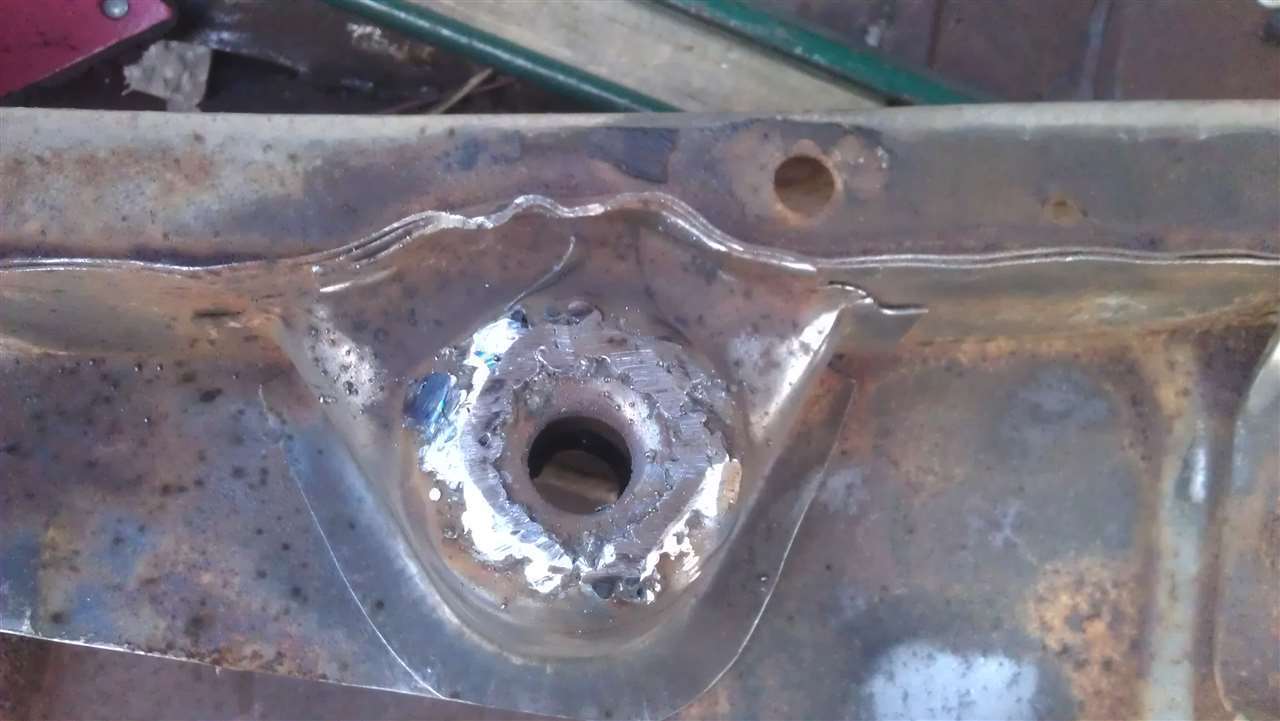 (79.15 KB) (79.15 KB)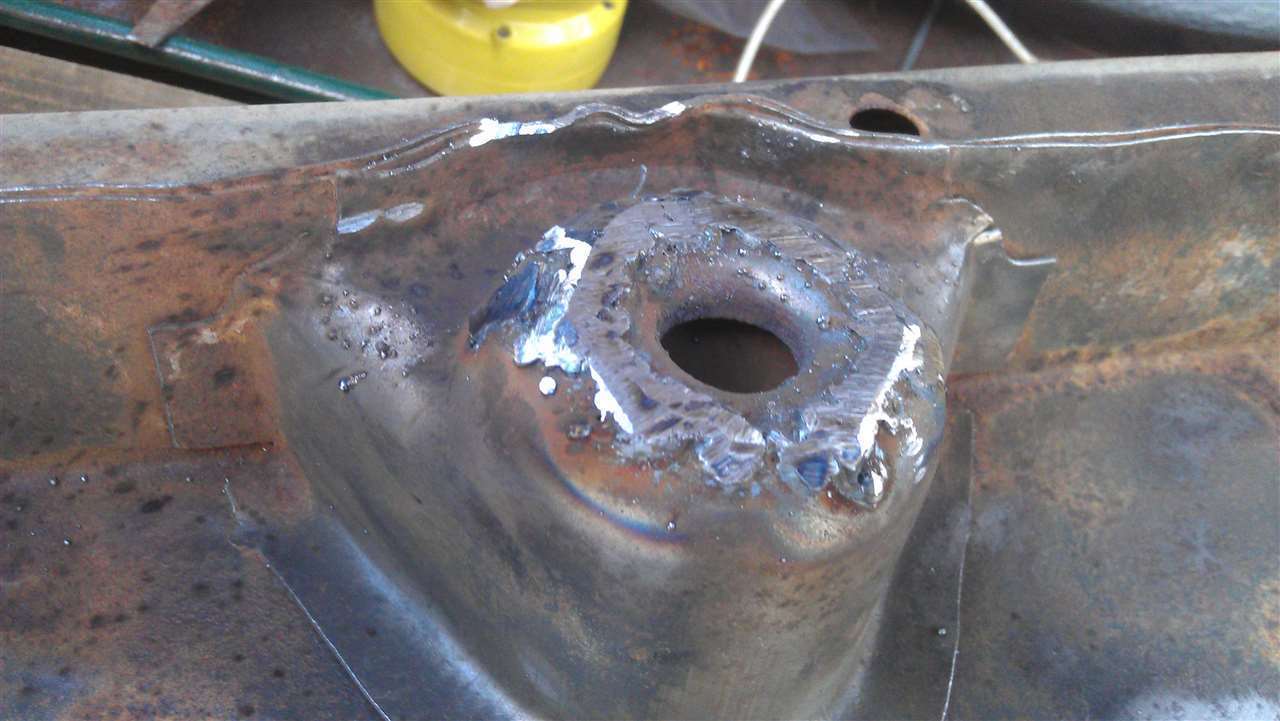 (59.32 KB) (59.32 KB)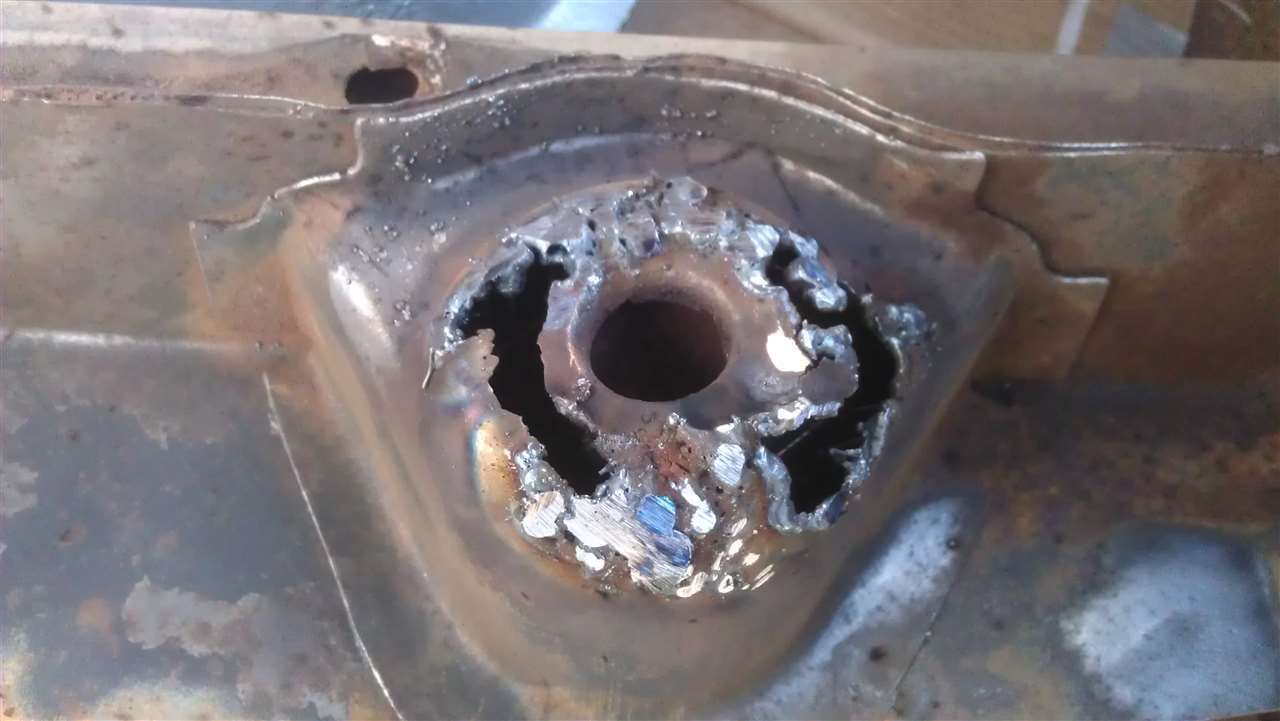
Posted on: 2013/4/16 19:08
|
|||
|
[url=h
|
||||
|
||||
|
Re: 51Packard's....51 Packard
|
||||
|---|---|---|---|---|
|
Home away from home

|
Get yourself a big 'ol fender washer at the hardwars store and weld it the bottom of that mount,
Posted on: 2013/4/16 20:02
|
|||
|
||||
|
Re: 51Packard's....51 Packard
|
||||
|---|---|---|---|---|
|
Home away from home
|
The small holes that you circled in red are for attaching the rear splash panel that spans from the body horizontally to the bumper. It is attached with coarse metal screw, much like lag bolts. Let me know if you need a photo - I just put mine on a few days ago.
Also, try turning down the amperage on the welder a bit. It will help on the burn thru.
Posted on: 2013/4/16 20:11
|
|||
|
||||


