|
Re: BigKev's 1954 Packard Clipper Deluxe Sedan
|
||||
|---|---|---|---|---|
|
Webmaster
|
Well the hose does go up to the reel in the ceiling and back down. The problem I have seen is that generally the water in the air does not condense on the inside of the rubber hose. So that is why I am going to run Black Pipe. That with the water trap should help to remove alot of it. I need this for my paint guns anyway. One of my buddies just runs black pipe up one wall, across the ceiling, and down the other wall, will the pipe slope back towards the compressor side, and he never gets a drop of water at the tool end. I am going to do a similar thing, but put a trap on the tool end side, and also make it so the lowest point in the slope is not the compressor.
TP-Tools has a great diagram on the recommended way to plumb compressor air lines for anyone interested.
Posted on: 2008/8/11 21:56
|
|||
|
-BigKev
1954 Packard Clipper Deluxe Touring Sedan -> Registry | Project Blog 1937 Packard 115-C Convertible Coupe -> Registry | Project Blog |
||||
|
||||
|
Re: BigKev's 1954 Packard Clipper Deluxe Sedan
|
||||
|---|---|---|---|---|
|
Home away from home

|
Kevin,
I was reading with much interest about all the work you have done on your 54. Thought my experience might help someone else. I had the same experience as you did regarding the nuts that hold the intake/exhaust manifold in place. One comment I have is that I had a lot of trouble getting to more than just two of them. I would guess you did the removal and installation with the front clip off the car. I did it over the top and from underneath. I did finally find wrenches that are made to work on those hard to get to bolts or nuts. They are called interference wrenches. They are box wrenches that are shaped like a horseshoe. The box ends are flat to the handel. The offset on regular box wrenches made it all but imposable to get to some of the manifold nuts. No mater which way you put them on the nut the handle would hit something. You are right about only getting something less than 1/4 turn with a regular wrench. With the interference wrenches I could get much more than a quarter turn. BTW, None of the pictures show up anymore.
Posted on: 2008/8/19 22:49
|
|||
|
||||
|
Re: BigKev's 1954 Packard Clipper Deluxe Sedan
|
||||
|---|---|---|---|---|
|
Webmaster
|
Bob,
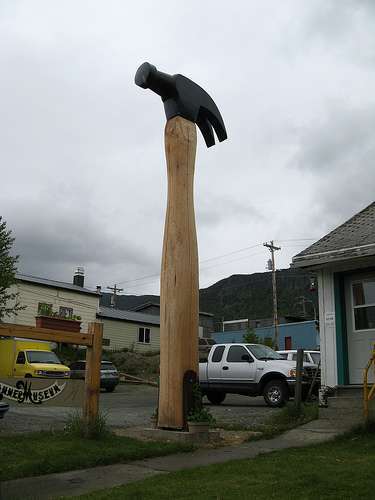
Thanks for the info on those wreches. I will have to pick up a set. Also I fixed the pictures. Just a file access persmission issue on some of the pictures which happened when copied from the old server. Sometimes you just need to use the BIG Hammer! Attach file:  (17.87 KB) (17.87 KB)
Posted on: 2008/8/19 23:18
|
|||
|
-BigKev
1954 Packard Clipper Deluxe Touring Sedan -> Registry | Project Blog 1937 Packard 115-C Convertible Coupe -> Registry | Project Blog |
||||
|
||||
|
Re: BigKev's 1954 Packard Clipper Deluxe Sedan
|
||||
|---|---|---|---|---|
|
Webmaster
|
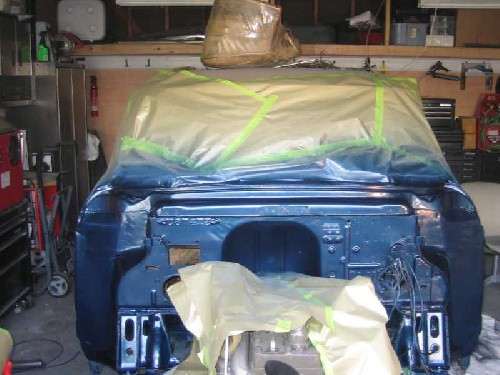
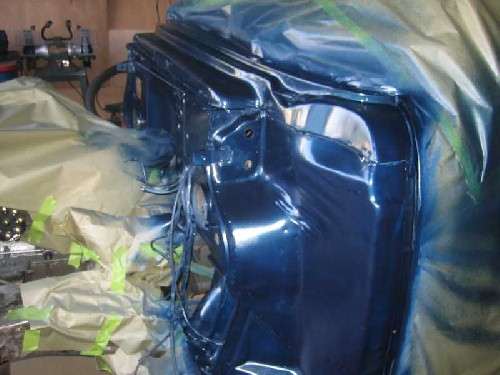
Well I finally got in the paint in for my firewall, and I was able to finish the painting of it. Now I can move on to brush painting the frame!!! Yay...progress!
Posted on: 2008/9/5 23:36
|
|||
|
-BigKev
1954 Packard Clipper Deluxe Touring Sedan -> Registry | Project Blog 1937 Packard 115-C Convertible Coupe -> Registry | Project Blog |
||||
|
||||
|
Re: BigKev's 1954 Packard Clipper Deluxe Sedan
|
||||
|---|---|---|---|---|
|
Webmaster
|
All the wire harness and gromets that are still on the firewall are getting replace. So that is why I didnt bother to mask them off.
Posted on: 2008/9/5 23:41
|
|||
|
-BigKev
1954 Packard Clipper Deluxe Touring Sedan -> Registry | Project Blog 1937 Packard 115-C Convertible Coupe -> Registry | Project Blog |
||||
|
||||
|
Re: BigKev's 1954 Packard Clipper Deluxe Sedan
|
||||
|---|---|---|---|---|
|
Home away from home

|
Looking good. Like the color. Do you have a completion date in mind?
Posted on: 2008/9/6 21:19
|
|||
|
North Hills Packards
2 - 1949 Super Convertibles 1949 Club Sedan 1947 Custom Sedan Completed a book on the 22nd & 23rd series cars |
||||
|
||||
|
Re: BigKev's 1954 Packard Clipper Deluxe Sedan
|
||||
|---|---|---|---|---|
|
Webmaster
|
2 years. Running by the end of winter hopefully. Everything is time and money. Neither of which I have in abundance. Step by Step! Little by Little. I will get the old girl back on the road!
Posted on: 2008/9/6 21:39
|
|||
|
-BigKev
1954 Packard Clipper Deluxe Touring Sedan -> Registry | Project Blog 1937 Packard 115-C Convertible Coupe -> Registry | Project Blog |
||||
|
||||
|
Re: BigKev's 1954 Packard Clipper Deluxe Sedan
|
||||
|---|---|---|---|---|
|
Home away from home

|
Kev,
Quote:
Ah, spoken with true determination! Stay at it, O metallic-blue-fingered-webmaster. (I always get paint on my fingernails, maybe you are better). Thanks for the updates. DanL
Posted on: 2008/9/7 2:21
|
|||
|
[i][size=small]Dan'L in SD
41ParPack [color=000066]First of the Clippers [ |
||||
|
||||
|
Re: BigKev's 1954 Packard Clipper Deluxe Sedan
|
||||
|---|---|---|---|---|
|
Webmaster
|
I actually managed to stay pretty paint free for a change. The firewall was painted with rattle-can paint from Tower Paint. They can mix just about any automotive color for old cars for about $14 a car. Same stuff I used on my rims.
So when I get the rattle cans, I turned a couple of them upside down and put a brick on them and let all the propellant out. Then I stab a hole in the can, and pour all the paint it into my HVLP spraygun. Then I can control the pattern and volume better and it goes on without tiger stripes.
Posted on: 2008/9/7 13:22
|
|||
|
-BigKev
1954 Packard Clipper Deluxe Touring Sedan -> Registry | Project Blog 1937 Packard 115-C Convertible Coupe -> Registry | Project Blog |
||||
|
||||


