|
Re: 51Packard's....51 Packard
|
||||
|---|---|---|---|---|
|
Home away from home

|
Quote:
An update on this. I haven't worried too much about keeping the silicone totally out of sight, since preventing leakage is my main goal. Besides, the caulk dries clear, just looks a little shiny. A closer look at the rubber seals and window gaskets brought to light a couple of things: 1. Pay particular attention to the seal around the handle. Pull the window closed and when you latch the handle, notice how it pulls its the handle seal outward from the glass, leaving a gap where you definitely don't want one. 2. I'm a fan of keeping water out-- the farther out the better. So I put sealant along the gasket next to the chrome trim on the OUTSIDE of the window, along the bottom edge. 3. Looking at the rubber with the wing windows open, note that there are TWO "weep holes" in the bottom channel of the front windows, and one for each back window. I took a piece of solid wire and ran it through these to make sure they are open to wherever they are supposed to drain. The rear one on the front window requires you to poke toward the back to find the opening. 4. If the water doesn't drain to the outside or into the weep holes, it will probably enter through the seam at the bottom edge of the gasket where it rests on the interior door panel. I caulked this tight as well. (Unfortunately, caulking most other inside gasket surfaces would just seal the window shut!) My guess is that another problem area is around the pivot posts at top and bottom of the window, but it would be very difficult to do much about those. I have no long-term test data yet on whether my repairs will work. As always, I expect that water will be likely to just find a new route inside, so rustproofing and regular checks for damp upholstery on doors, damp carpet, or dampness under rubber mats is essential. Unfortunately, rubber mats are probably the worst at trapping water, as the water seeps through the seam and soaks the padding under the mat, trapping the water right next to the floor board. What fun! (I'll stop messing up your thread now, 51 Packard. This whole water leakage/rust thing could be a thread by itself.)
Posted on: 2013/7/16 19:45
|
|||
|
Guy
Not an Expert |
||||
|
||||
|
Re: 51Packard's....51 Packard
|
||||
|---|---|---|---|---|
|
Home away from home
|
That's the way - just use rustproofing in large quantities (like deodorized fish oil), and then when any water gets in it can't do any harm!
Posted on: 2013/7/23 18:31
|
|||
|
1951 Packard Club Sedan | [url=ht
|
||||
|
||||
|
Re: 51Packard's....51 Packard
|
||||
|---|---|---|---|---|
|
Home away from home

|
7-25-13
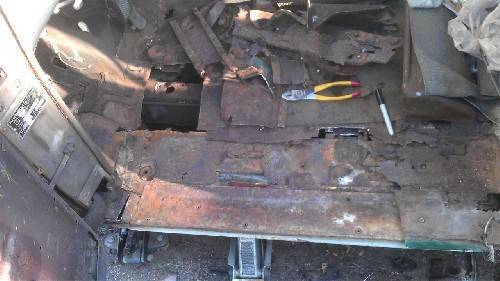
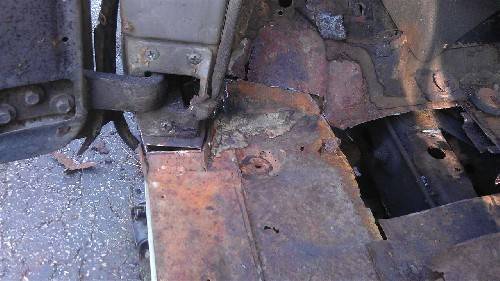
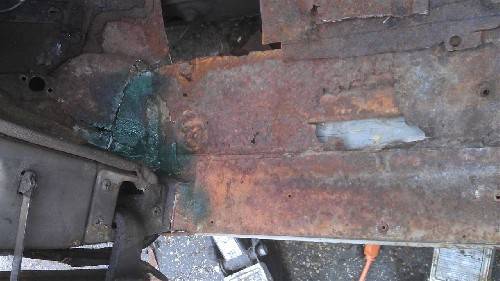
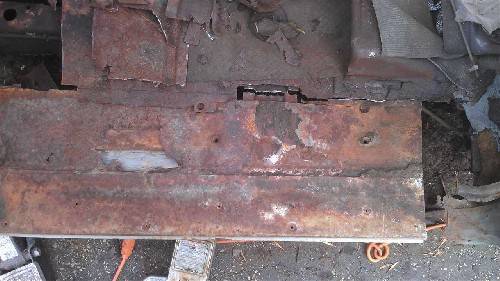
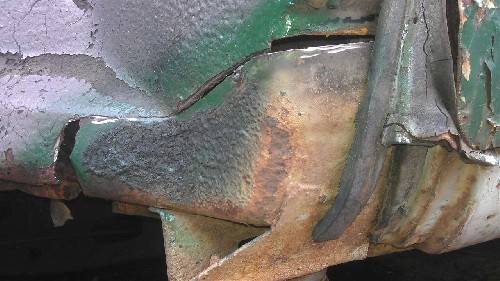
Almost done trimming. Fit is really close. Looks like my trimming got a little out of hand in some spots, but will be easy to patch. My door is bent outward at the bottom which does not help with fitting the rocker. Seems like the part of the door bottom and rocker closest to the front fender should have less of a gap. The gap tapers a bit following the door, even with the floor level with the back floor. I should temporarily bolt up the brackets and test fit again.
Posted on: 2013/7/25 18:07
|
|||
|
[url=h
|
||||
|
||||
|
Re: 51Packard's....51 Packard
|
||||
|---|---|---|---|---|
|
Home away from home

|
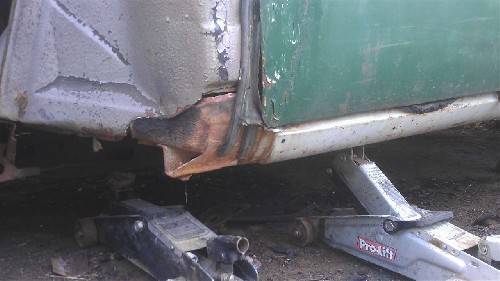
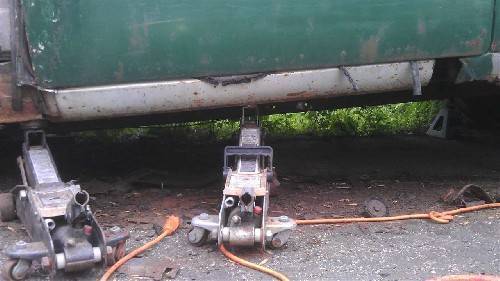
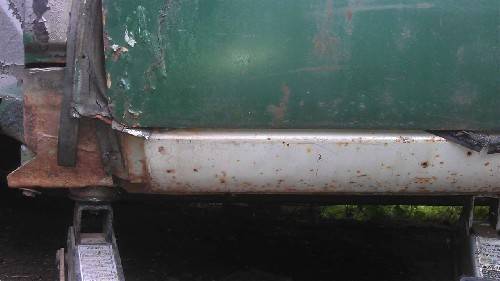
At the point now where I can get a good looking gap across the bottom of the door by jacking up the fender side of the rocker. After doing that though, the door no longer opens! I guess I am pushing the hinge side up into the drip rail. Looks like some more trimming is in order.
The gap at the bottom should have about the thickness of cardboard for a gap. Does that sound right?
Posted on: 2013/7/29 19:52
|
|||
|
[url=h
|
||||
|
||||
|
Re: 51Packard's....51 Packard
|
||||
|---|---|---|---|---|
|
Home away from home

|
I think maybe go a bit wider with the gap . . .
When you look at a '51 from almost any angle you hardly will pick a slightly wide gap down there, below the doors. It just doesn't look obvious or wrong to have a moderate gap there even on a light coloured car because of the angle you're seeing. The worry would be if the gap was just too narrow and door keeps rubbing or won't close . . That's a much worse problem. If you want, could do accurate measurements of the gap say, drip channel to top of sill in a few places on my Club Sedan? I'm happy with door fit and gaps on mine on both sides (- I only have 2 doors though - of course!!). Let me know if you want these, and which measurements would be the most useful. I'll measure gaps as well.
Posted on: 2013/9/2 20:26
|
|||
|
1951 Packard Club Sedan | [url=ht
|
||||
|
||||
|
Re: 51Packard's....51 Packard
|
||||
|---|---|---|---|---|
|
Home away from home

|
Thanks for the offer Larry51. That may be helpful since I am having trouble getting a reference on how much more to trim. I don't want to trim too much as I have in some parts already. The exposed internal part of the rocker where the door seal goes against in my latest picture looks like too much is showing, but the left corner of the door looks like a good fit. Maybe I should do the rear door since that part has a piece of the pillar still attached, but I'm afraid I would be taking too much support off the car and it will sag terribly. I bought some bolts to put the outriggers back on with. Maybe I'll bolt those back on and see if the alignment changes.
Posted on: 2013/9/4 7:18
|
|||
|
[url=h
|
||||
|
||||
|
Re: 51Packard's....51 Packard
|
||||
|---|---|---|---|---|
|
Home away from home

|
OK . . . I will do a few measurements tomorrow and post them with a diagram of some kind.
Posted on: 2013/9/4 7:30
|
|||
|
1951 Packard Club Sedan | [url=ht
|
||||
|
||||
|
Re: 51Packard's....51 Packard
|
||||
|---|---|---|---|---|
|
Home away from home

|
I did the measurements today of the door opening on my '51 coupe. I measured the opening height, from underside of the gutter to the top of the rocker (which is the actual floor level). Plus I checked the gap on the bottom of the doors (both sides).
Problem is that my doors are longer than the ones on your 4-door sedan (48" vs 39"), so there will possibly be a slight difference in the measurements but I think that it will be very small, because when I measured the height of the doors (around the curve) of a sedan door that I have compared with the coupe door they are both the same height at the door handle end (473/4"). That is what you'd expect because Packard would be unlikely to tool up differently for a coupe. I made the measurements at 31/2inches, 15inches and 30inches from the B-pillar towards the front of the car. Can't be totally sure that a coupe will be exactly the same size but when you do your measurements I think you'll discover that they are. Opening at 3-1/2" is 45-7/16" At 15" it's 45-13/16" At 30" it's 45-1/4". Gap at bottom of my doors is 1/8" when the door is at correct height. I think this is a bit too narrow, I'd prefer 3/16". Keep in mind (for later) that the Manual says you can adjust the way the door sits (and adjust any uneven gap) by changing the thickness of some body mounting washers. That's hard work and a bit 'scientific' but something to use when all else fails I guess. The best way to get things right is to hand the doors and line up the body belt 'crease', then weld in the rockers based on making a 3/16" gap. The body belt has to look right so get it aligned well. Hope this is helpful Charles!
Posted on: 2013/9/5 8:10
|
|||
|
1951 Packard Club Sedan | [url=ht
|
||||
|
||||
|
Re: 51Packard's....51 Packard
|
||||
|---|---|---|---|---|
|
Home away from home

|
just wanted to give a thanks to Larry51 for the measurements. Haven't had time to mess with the car lately, but hopefully soon!
Posted on: 2013/9/16 19:25
|
|||
|
[url=h
|
||||
|
||||

 (89.77 KB)