
|
Re: BigKev's 1954 Packard Clipper Deluxe Sedan
|
||||
|---|---|---|---|---|
|
Webmaster

|
Howard, thanks for the info, I will go check that out.
Also I just read the second part of the note that Ross put in the box with the switch were he says that the Antenna switch mounts exactly 5.25 inches to the left of the headlight switch (hole center to hole center). I just want to re-confirm that before I start drilling holes. If you look in this picture I am holding the bezel in the approximate location as specified in Ross's note. Ross is in transit to Kenya for some humanitarian work, so is out of pocket for a little while. Attach file:  (28.73 KB) (28.73 KB)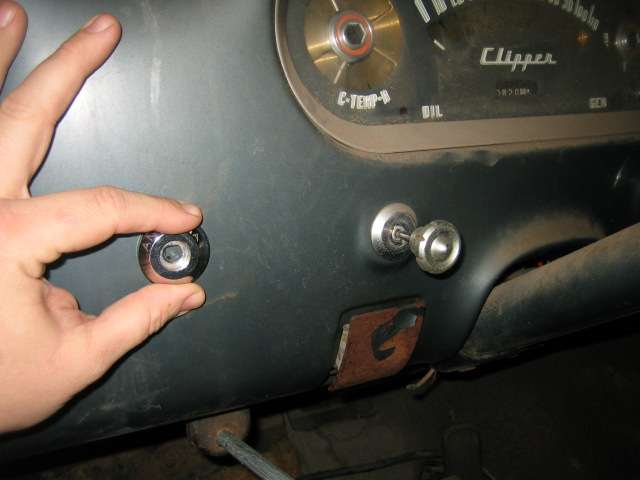
Posted on: 2009/12/22 12:16
|
|||
|
-BigKev
1954 Packard Clipper Deluxe Touring Sedan -> Registry | Project Blog 1937 Packard 115-C Convertible Coupe -> Registry | Project Blog |
||||
|
||||
|
Re: BigKev's 1954 Packard Clipper Deluxe Sedan
|
||||
|---|---|---|---|---|
|
Webmaster
|
Howard,
I think the curved spacer that goes between the bezel and the dash is there to emulate the stamping in the dash as seen in the above picture where the headlight switch mounts.
Posted on: 2009/12/22 12:20
|
|||
|
-BigKev
1954 Packard Clipper Deluxe Touring Sedan -> Registry | Project Blog 1937 Packard 115-C Convertible Coupe -> Registry | Project Blog |
||||
|
||||
|
Re: BigKev's 1954 Packard Clipper Deluxe Sedan
|
||||
|---|---|---|---|---|
|
Webmaster
|
I havent been able to locate and pictures of the '54 Clipper Dash with the Power Ant switch mounted. Perhaps this was a rarer option on the Clippers. This is what my dash layout looks like currently.
Also upon looking through various documents I noticed the wheel covers that appear in the '54 Accessories Brochure are incorrect (smooth design). The '54 Salesmen Fact book shows the correct covers that were standard on the Super Clippers (Fluted Design), and optional on the other Clippers. Goes to show that you always need multiple sources of reference and don't trust what you see in illustrated brochures. Attach file: (62.62 KB)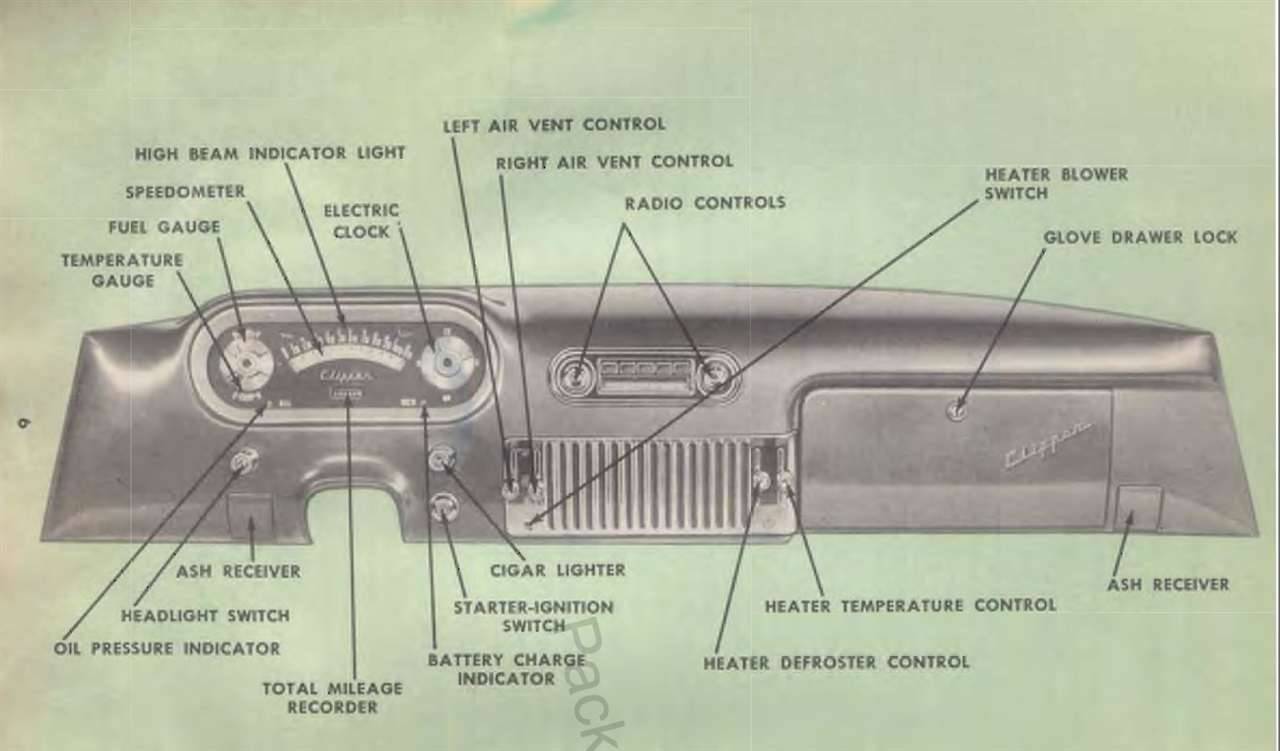
Posted on: 2009/12/22 13:18
|
|||
|
-BigKev
1954 Packard Clipper Deluxe Touring Sedan -> Registry | Project Blog 1937 Packard 115-C Convertible Coupe -> Registry | Project Blog |
||||
|
||||
|
Re: BigKev's 1954 Packard Clipper Deluxe Sedan
|
||||
|---|---|---|---|---|
|
Webmaster
|
Since I took this week off as a vacation week, I figured it was a good time to work in the garage as the days here are in the mid 60s.
I started with mounting the horns back to the radiator cradle. But the first challenge was locating their respective bolts. I remember this being one of the first things I removed from the car when I bought her, and of course back then I failed to take pictures back then. So I finally found what I think are the correct bolts. They were in the bag labeled drivers side fender bolts. I check the passenger side bag, and it didn't have these extra four bolts. So those must be the right ones. I quick trip through the media blaster and they were good to go. I made sure to remove the paint from within the holes on the horn brackets to get a good ground path. But after mounting them and hooking up the battery I got nothing. Then I realized the problem. The radiator cradle is insulated from the frame because of the rubber body mounts it uses. When the fenders are attached, they complete the path to ground. So I just temporarily grounded the cradle using a piece of jumper wire, and the horns work nicely. They actually sound nicer that the horn on my truck. Once the fenders are back on, then I will not need the grounding jumper. I did also manage to get the second fan pulley installed. So now I have all the pulleys in place for the future A/C setup. I also started working on finishing the brake system. First thing was to media blast the master cylinder distribution block and brake switch. It looks much better than before. I also ran over to Kragen to picked up a new crush washer as the old one didn't look the best. The lady behind the counter kept pointing me to flat washers in the misc hardware rack. Finally I said it the same washers you would use for a Banjo Bolt, then she new what I was talking about. So $.99 later I had what I needed. So I reassemble the pieces back onto the master cylinder, and then bolted it back onto the car. Which is a pain on the '54 as the rear bolt is not a bolt, but the pivot shaft for the ultramatic linkage. So you have to use a 3/4 open ended wrench to tighten it as you are using grabbing the shaft by the middle. With the steering column and other things in the way you only have enough space for a 1/4 turn at a time. Then it was on to replacing the front brake lines. The first one was the passenger side line which runs under the steering box and along the back side of the engine crossmember. I unclipped the line from the retainers along the frame rail and then snaked the complete line out through the passenger side. Then using the old line a template I bent up a new line. Then the line was snaked back in and attached at the master cylinder loosely. The I tweaked the bends were needed and clipped everything back down. I also did the same with the smaller drivers side line. Once everything was in place, I snugged down the fittings with flair-nut tubing wrench. Hopefully tomorrow I can get to the rear lines. Attach file: (50.14 KB)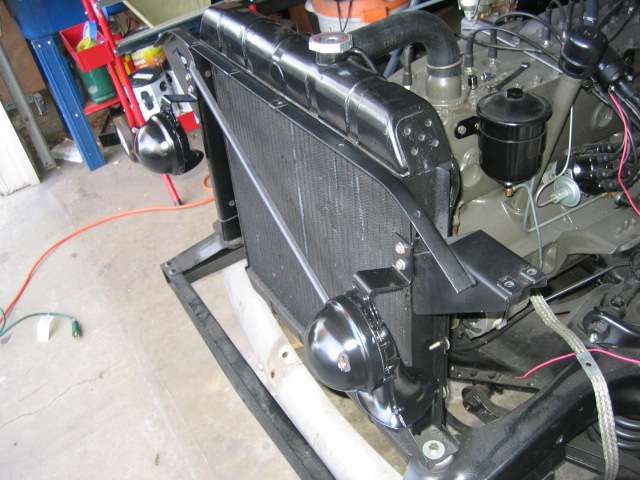 (48.68 KB) (48.68 KB)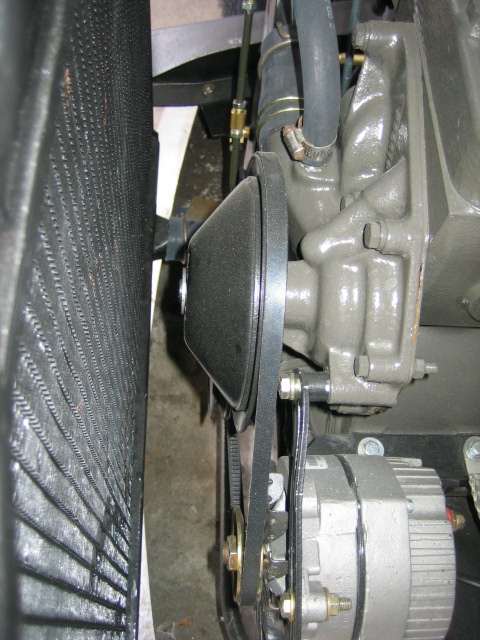 (44.73 KB) (44.73 KB)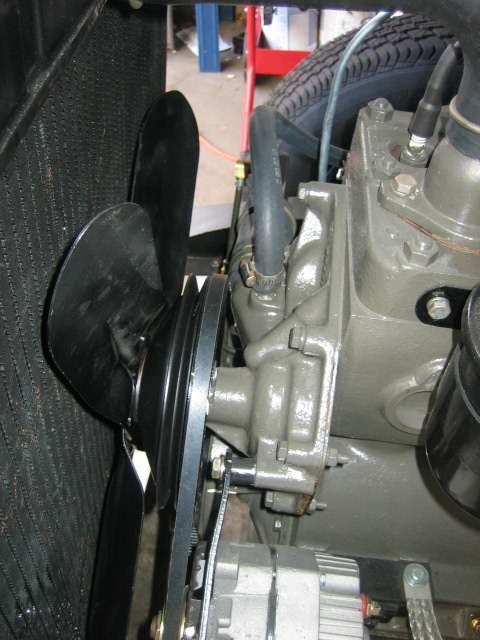 (39.15 KB) (39.15 KB) (87.32 KB) (87.32 KB) (39.12 KB) (39.12 KB)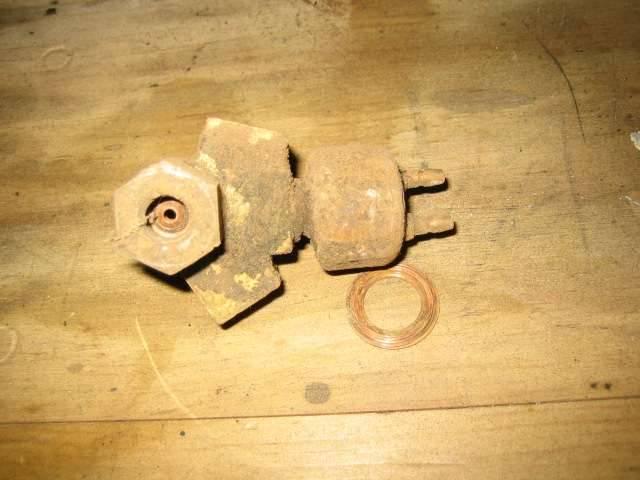 (35.33 KB) (35.33 KB) (32.77 KB) (32.77 KB)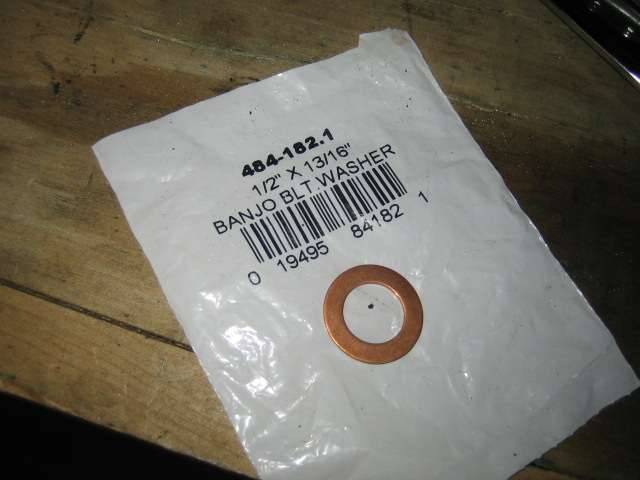 (38.09 KB) (38.09 KB) (38.83 KB) (38.83 KB) (34.23 KB) (34.23 KB) (47.69 KB) (47.69 KB) (43.74 KB) (43.74 KB) (34.51 KB) (34.51 KB) (49.49 KB) (49.49 KB)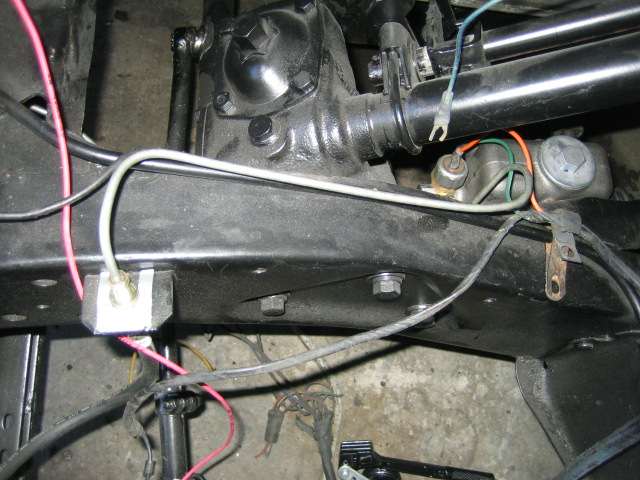
Posted on: 2009/12/28 21:04
|
|||
|
-BigKev
1954 Packard Clipper Deluxe Touring Sedan -> Registry | Project Blog 1937 Packard 115-C Convertible Coupe -> Registry | Project Blog |
||||
|
||||
|
Re: BigKev's 1954 Packard Clipper Deluxe Sedan
|
||||
|---|---|---|---|---|
|
Webmaster
|
I never realized how dusty my frame got from sitting all summer until I looked at those pictures. Crazy.
Posted on: 2009/12/28 21:10
|
|||
|
-BigKev
1954 Packard Clipper Deluxe Touring Sedan -> Registry | Project Blog 1937 Packard 115-C Convertible Coupe -> Registry | Project Blog |
||||
|
||||
|
Re: BigKev's 1954 Packard Clipper Deluxe Sedan
|
||||
|---|---|---|---|---|
|
Forum Ambassador
|
Feels good to get something completed.
 Dust is a real problem for me as the bay I use is next to the bodyshop bay. Even with the door closed I get a lot of dust. Interesting to see the different way they chose to mount the horns. Dust is a real problem for me as the bay I use is next to the bodyshop bay. Even with the door closed I get a lot of dust. Interesting to see the different way they chose to mount the horns.
Posted on: 2009/12/28 22:10
|
|||
|
||||
|
Re: BigKev's 1954 Packard Clipper Deluxe Sedan
|
||||
|---|---|---|---|---|
|
Webmaster
|
Randy, how are they mounted on your 56s?
Posted on: 2009/12/28 22:28
|
|||
|
-BigKev
1954 Packard Clipper Deluxe Touring Sedan -> Registry | Project Blog 1937 Packard 115-C Convertible Coupe -> Registry | Project Blog |
||||
|
||||
|
Re: BigKev's 1954 Packard Clipper Deluxe Sedan
|
||||
|---|---|---|---|---|
|
Forum Ambassador
|
I'll take a pic tomorrow. I owe Al a pic also. I took a week off - my birthday on the 24th, daughter/granddaughter flew in from Minnesota on 25th and had to pick them up, granddaughter got married on the 26th. Took daughter back to airport at 4:00 am 27th. I took a long nap today

Posted on: 2009/12/28 22:50
|
|||
|
||||
|
Re: BigKev's 1954 Packard Clipper Deluxe Sedan
|
||||
|---|---|---|---|---|
|
Webmaster
|
I dug back through some old photos and actually found a couple with the horns still mounted. Looks like I reversed them left to right. But other than that the mounting location is the same as I received it.
This was a good picture to find as it also shows where the wire harness clamps mount. I forgot about those. Man did that engine look gnarly. It's come a long way. Attach file: (115.25 KB)
Posted on: 2009/12/29 1:17
|
|||
|
-BigKev
1954 Packard Clipper Deluxe Touring Sedan -> Registry | Project Blog 1937 Packard 115-C Convertible Coupe -> Registry | Project Blog |
||||
|
||||


