|
Re: 51Packard's....51 Packard
|
||||
|---|---|---|---|---|
|
Home away from home

|
Quote:
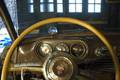
Thanks once again HH56. From your exploded parts diagram, I wonder if I could take the rheostat off the new switch, clean it, and install it on my old switch? Then again, it might be easier to remove the tabs and clean the inside of the new switch, assuming I can get the rheostat clean without taking it apart.
Posted on: 2011/4/5 20:52
|
|||
|
[url=h
|
||||
|
||||
|
Re: 51Packard's....51 Packard
|
||||
|---|---|---|---|---|
|
Home away from home
|
I didn't even think of McMaster Carr. They seem to have everything!
Note on the green paint. Looking closely at my picture, I see a screw protruding through the upper left section of the green area. Maybe the paint is from some previous repair? It looks like it actually goes behind the surrounding metal. I never noticed that before. I'll have to check it out more closely next time.
Posted on: 2011/4/5 21:02
|
|||
|
[url=h
|
||||
|
||||
|
Re: 51Packard's....51 Packard
|
||||
|---|---|---|---|---|
|
Forum Ambassador

|
I wonder if I could take the rheostat off the new switch, clean it, and install it on my old switch?
Problem is the rheostat assy is held on by rivets. I haven't found the proper ones yet and the ceramic is very brittle if the wrong size or too hard a hit to set them is made. That switch that is apart needs new ones because a couple of the terminals are loose on that section & won't tighten. The switch back slide section is not hard to clean--just take note of how things are oriented. The wipers on the rheostat are a bit more of a pain because they corrode badly and you can't get to all the necessary places easily to clean them.
Posted on: 2011/4/5 21:06
|
|||
|
Howard
|
||||
|
||||
|
Re: 51Packard's....51 Packard
|
||||
|---|---|---|---|---|
|
Webmaster

|
One of the t-bolts on my tank twisted out of the slot as well.
Just hold the T end in a vise, clean the threads with a wire brush, and then spray the hell out of the two nuts with PB blaster and let soak. The try to loosen the inside nut by tightening it to separate it from the lock nut. Then remove both nuts. That was what worked for me the first time. The second time I made sure to hold the inside nut with a wrench, while I broke free the lock nut. As long as the straps are not rusted through, you should be able to clean them up and reuse them. Also a floor jack really helps to hold the tank in place when reinstalling or removing.
Posted on: 2011/4/5 21:16
|
|||
|
-BigKev
1954 Packard Clipper Deluxe Touring Sedan -> Registry | Project Blog 1937 Packard 115-C Convertible Coupe -> Registry | Project Blog |
||||
|
||||
|
Re: 51Packard's....51 Packard
|
||||
|---|---|---|---|---|
|
Home away from home
|
Thanks for the tips BigKev. I didn't even realize it was a two nut setup. I'll have to get more of the junk off it and look again. One of my T bolts is pretty bent. I suppose I could try to straighten it, but I don't have a proper torch to help. Otherwise the McMaster Carr ones might work.
Posted on: 2011/4/5 21:33
|
|||
|
[url=h
|
||||
|
||||
|
Re: 51Packard's....51 Packard
|
||||
|---|---|---|---|---|
|
Home away from home
|
4-6-11
Looks like my expectations for how the car is going to come out just went down a couple of notches. Cleaned the stuff out of the trunk and found some surprises. As I suspected, something moved in at some point. Left some feces for me to deal with. Also made a nice bed in the spare tire well. After getting all that out and removing the false galvanized metal trunk floor, reality sunk in. The trunk is in way worse shape than I remember. The big hole on the passenger side was just a start of the problems. There were two riveted panels on the drivers side. What could they be covering? Why two gaping holes of course! Looks like I will be a professional welder after doing this job! I can't worry too much about how it is going to look, as long as it is strong and adds stability to the body. I do not have a lot of metal working tools so I'm not sure how I can put those grooves in the replacement panels to make them more rigid. I'm going to have to think about this for a while. Where is the best place to start? Seems so overwhelming. Maybe the trunk panel from Classic to Current wouldn't be such a bad idea... Attach file:  (150.03 KB) (150.03 KB)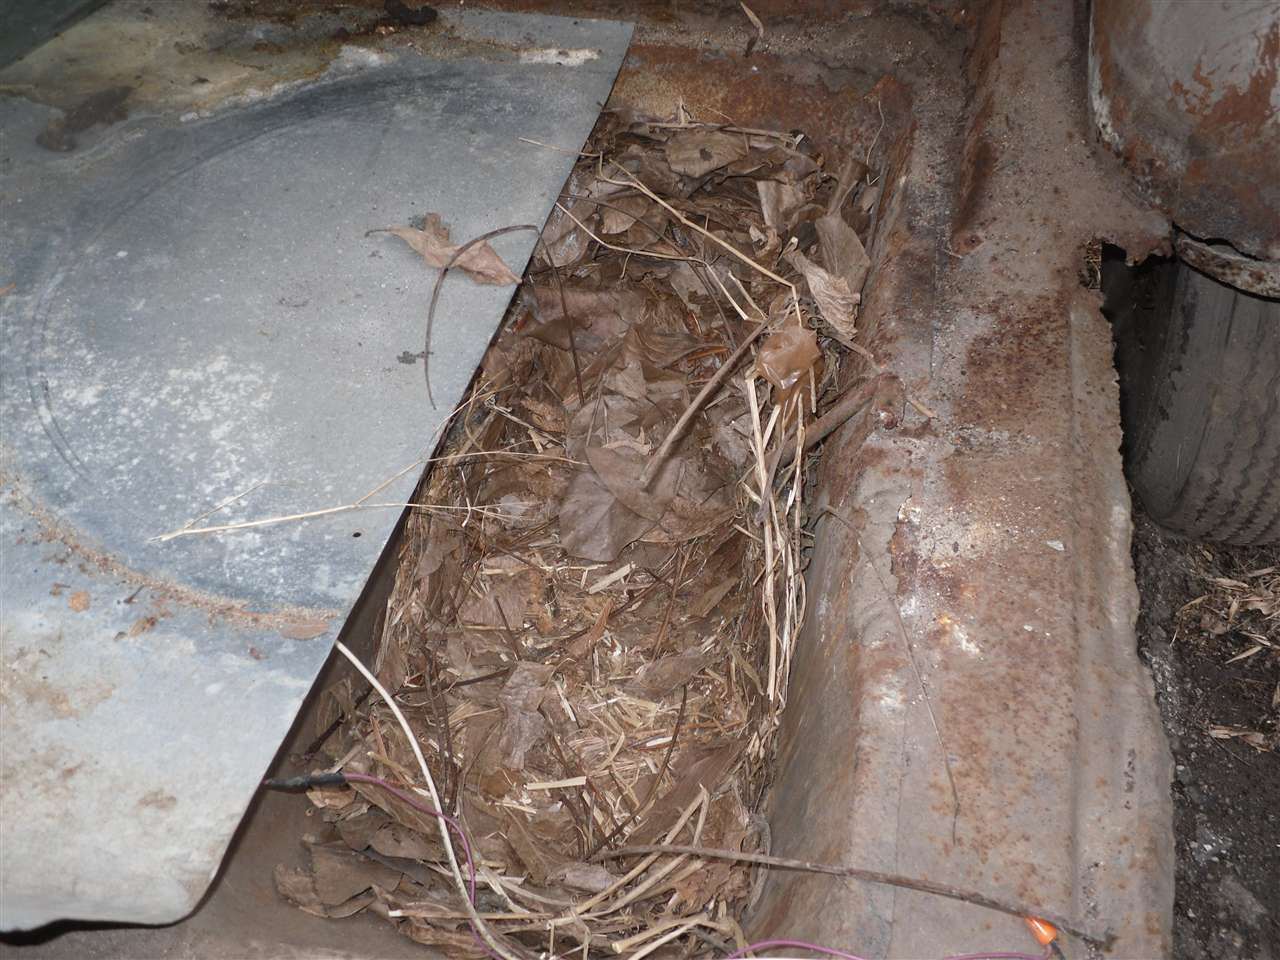 (121.69 KB) (121.69 KB)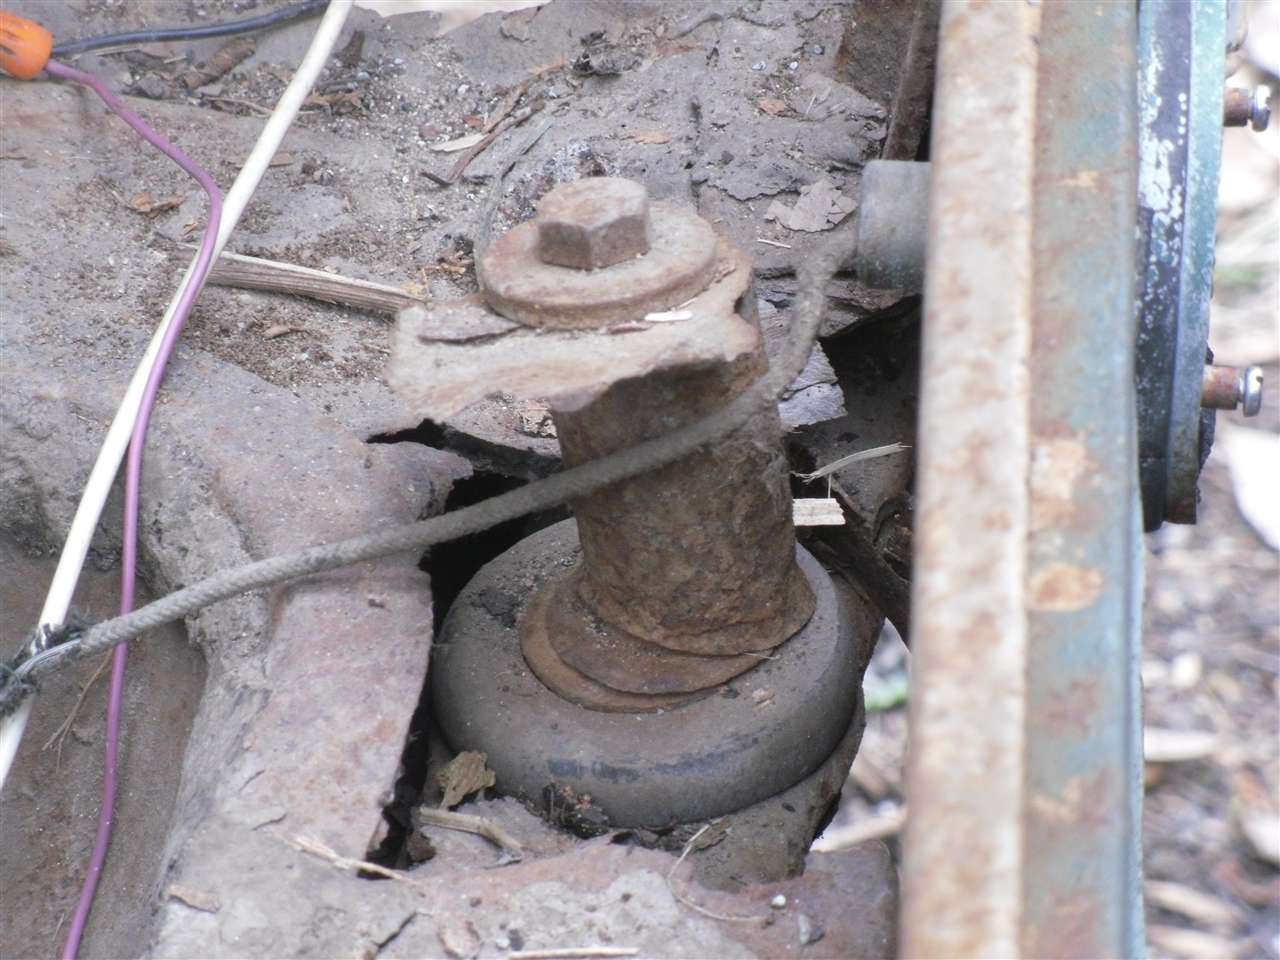 (128.21 KB) (128.21 KB)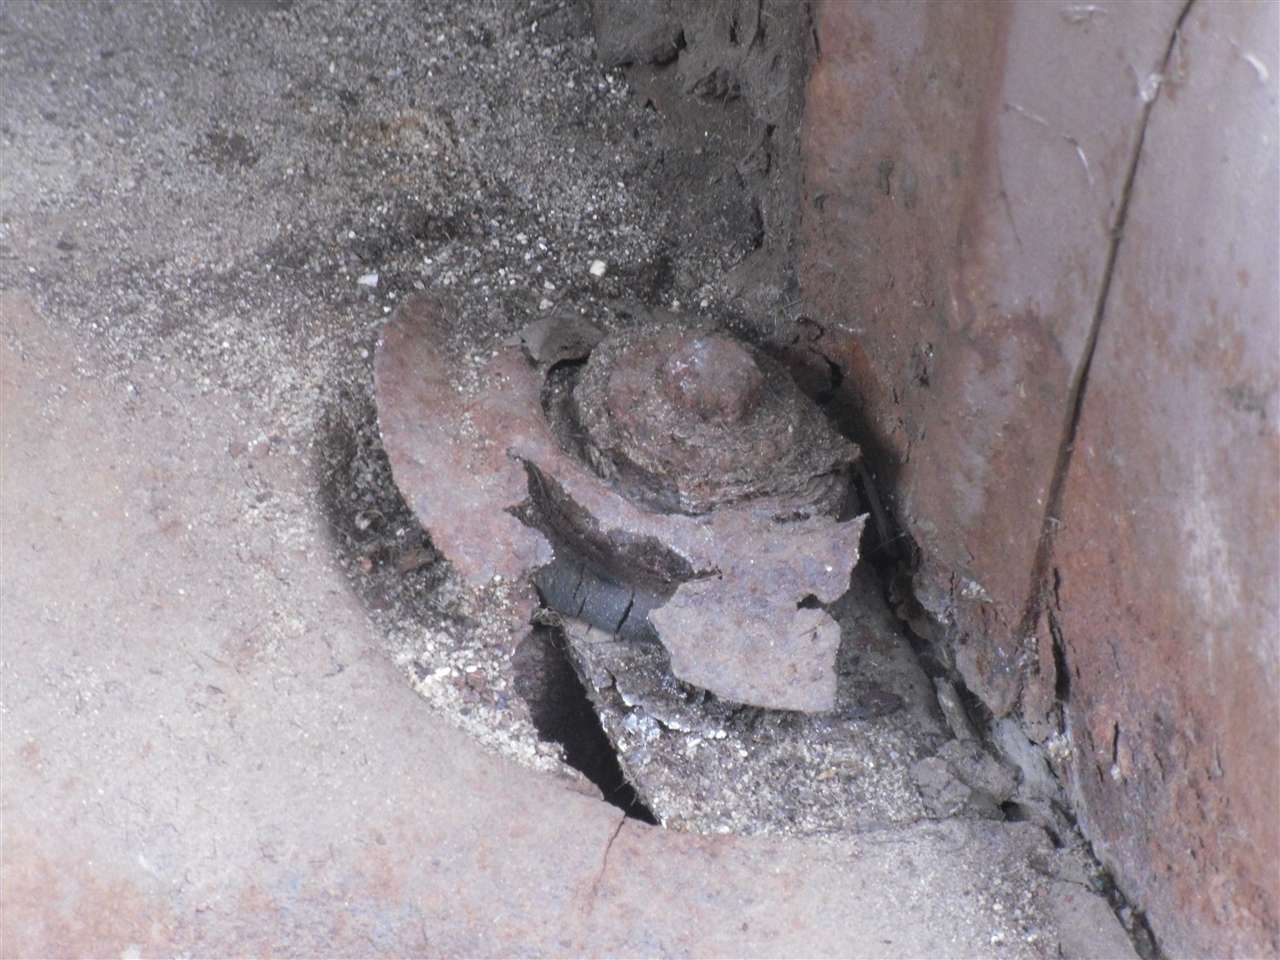 (131.34 KB) (131.34 KB)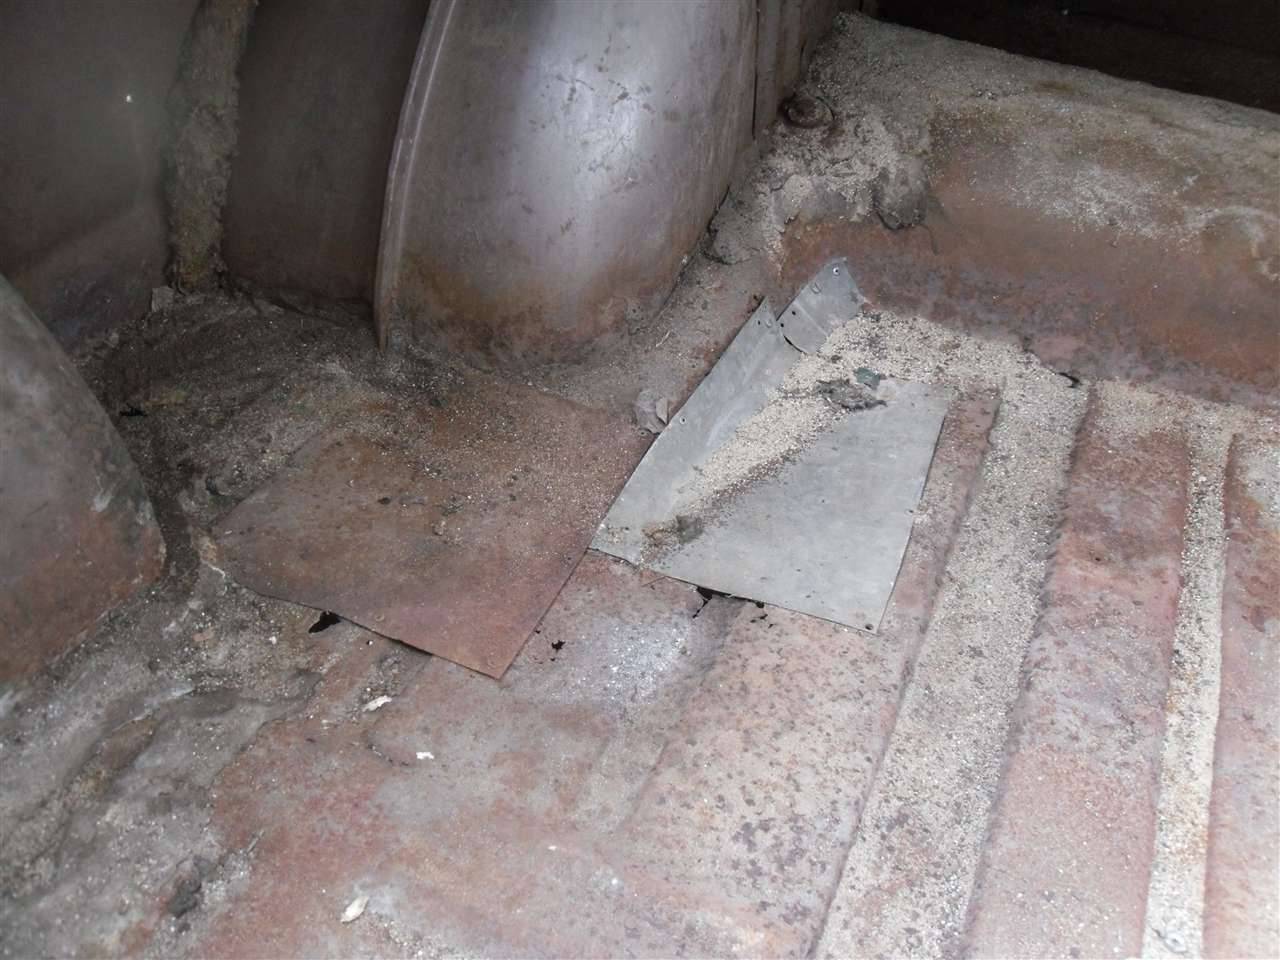 (133.42 KB) (133.42 KB)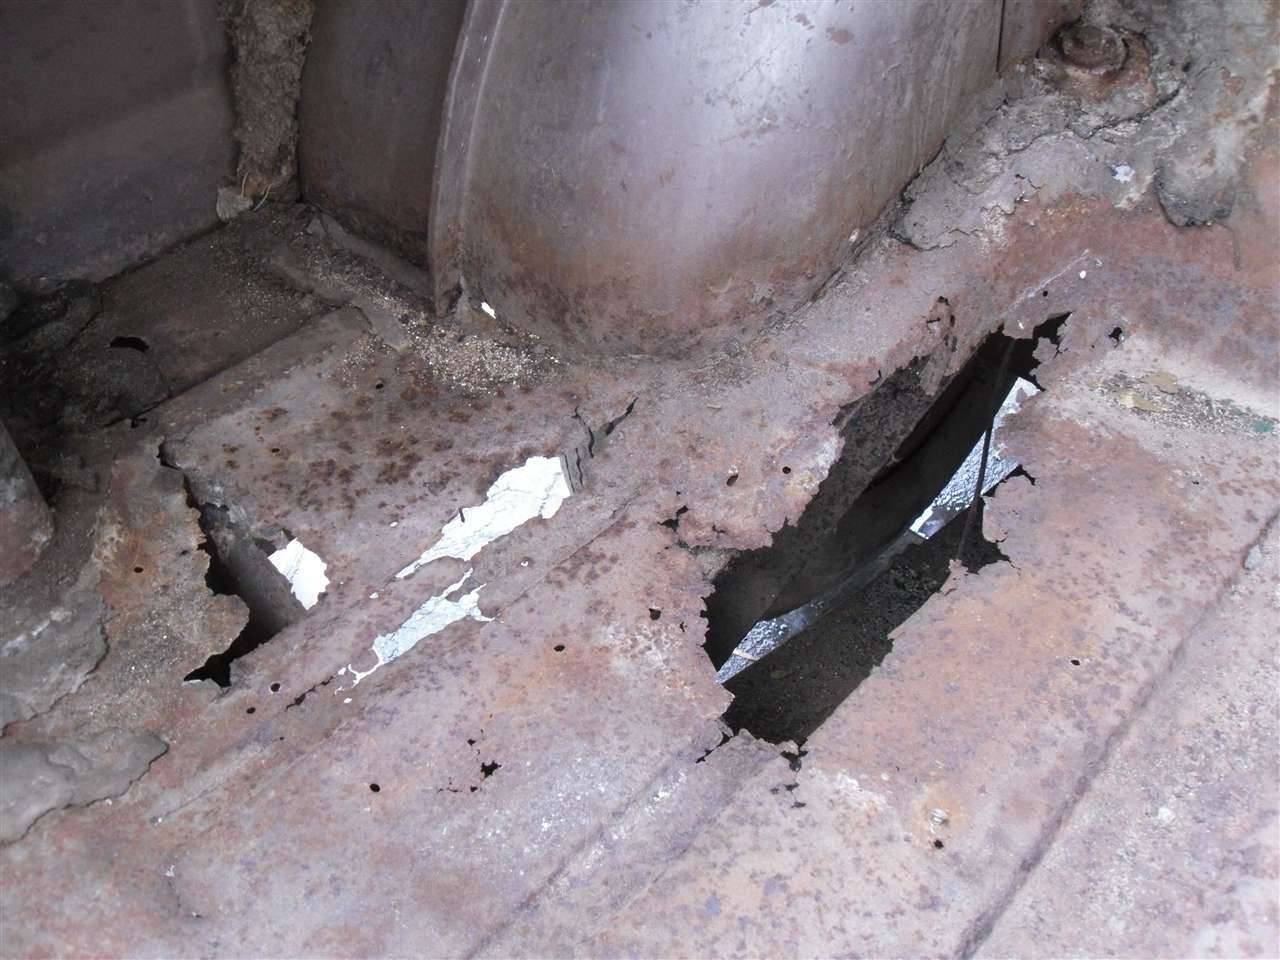 (155.24 KB) (155.24 KB)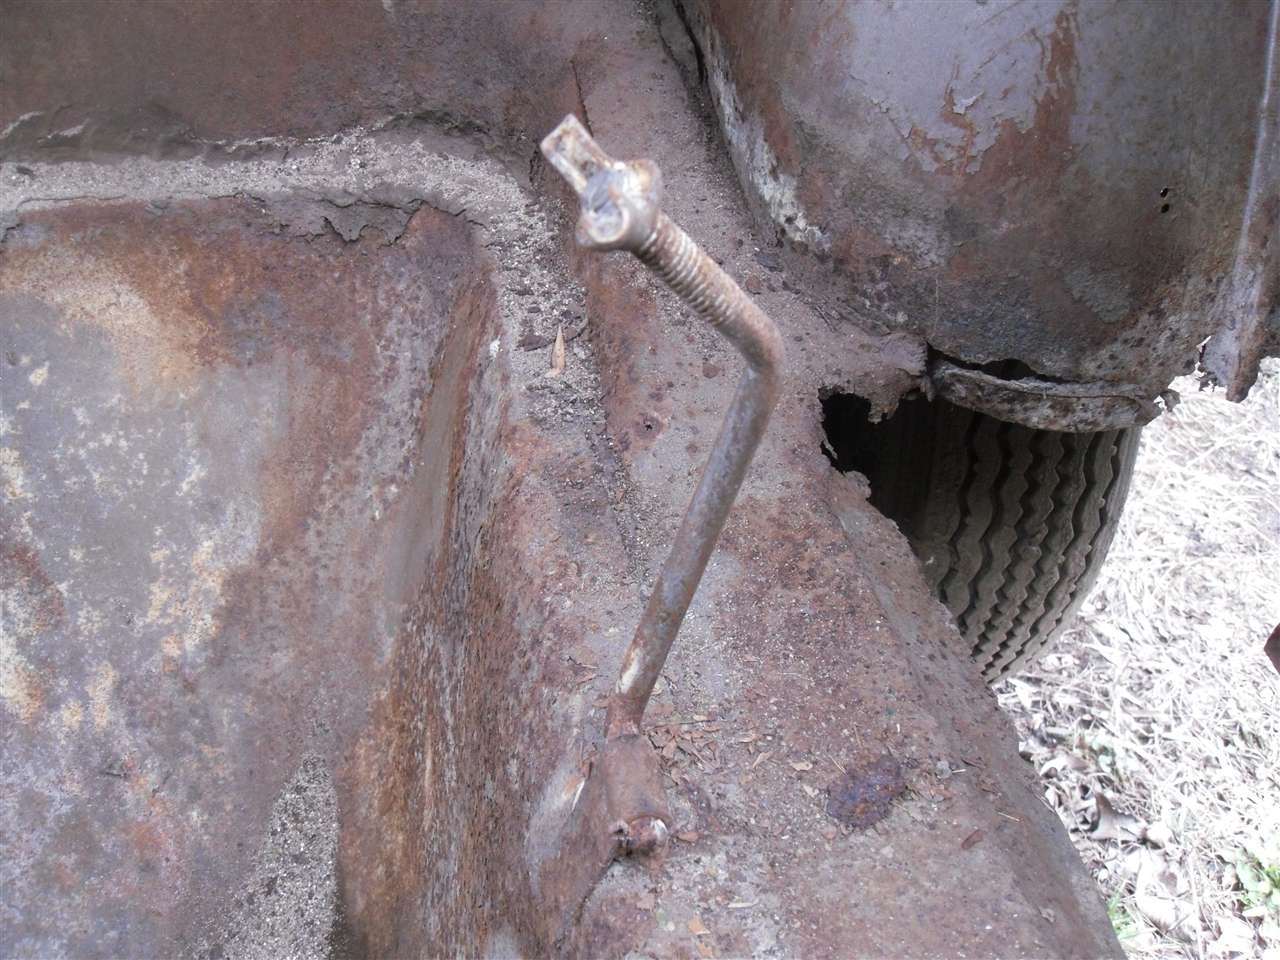 (89.01 KB) (89.01 KB)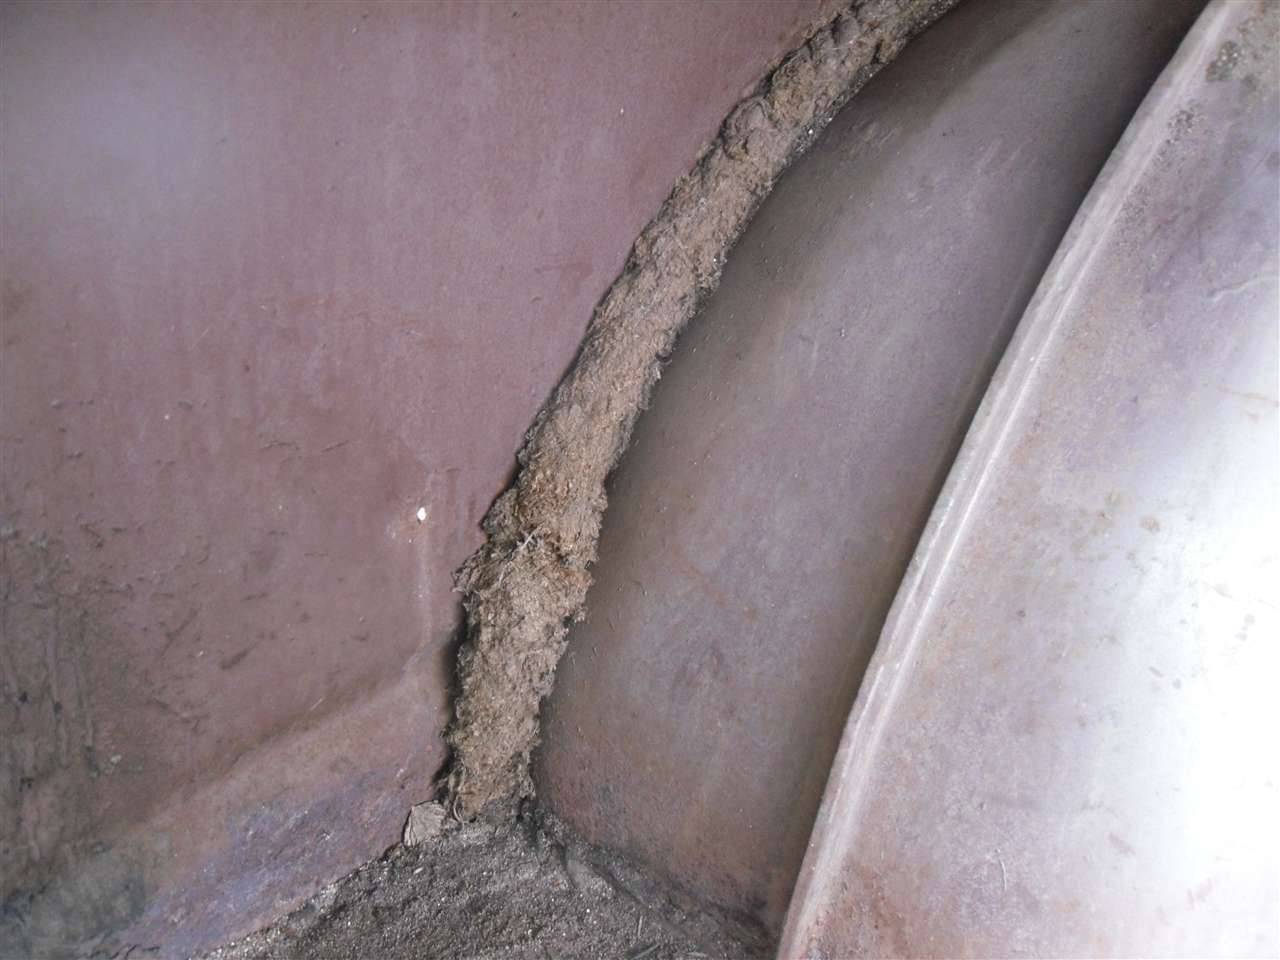 (81.68 KB) (81.68 KB)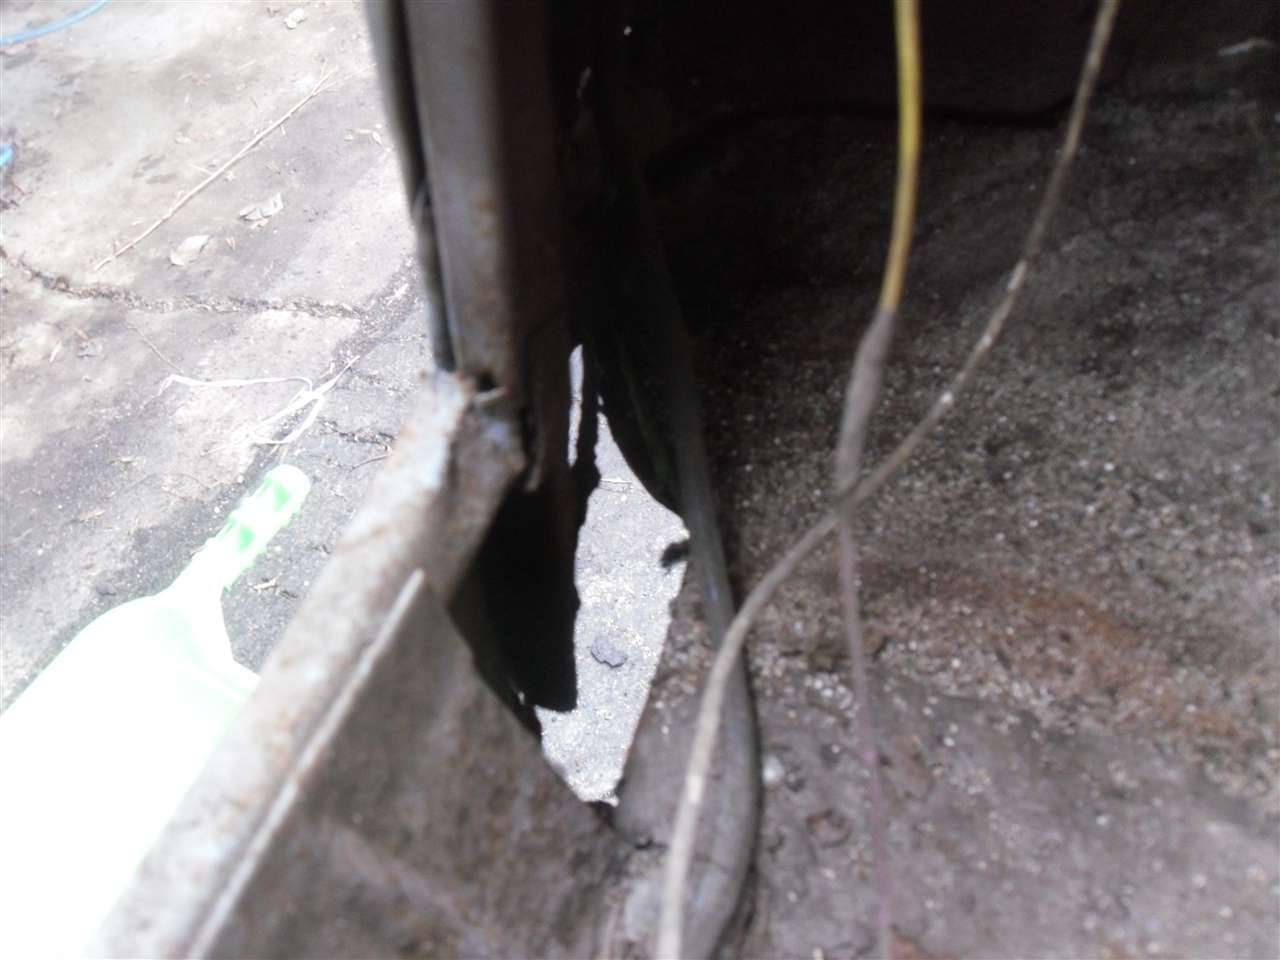
Posted on: 2011/4/6 18:54
|
|||
|
[url=h
|
||||
|
||||
|
Re: 51Packard's....51 Packard
|
||||
|---|---|---|---|---|
|
Home away from home
|
4-7-11
The cancer diagnosis will involve an aggressive treatment. Started surgery on the trunk. Started with my cut off wheel run off of my air compressor. Took a long time so I decided to try my jig saw with a metal blade. Holly cow! Cut through it like butter. Just used the cut off wheel in areas the jig saw wouldn't fit or where the blade would hit the frame. I raised the trunk bottom to be more level with the top of the body bolts. I did this by jacking it up from the spare wheel well bottom. Upon doing that, the metal around the higher body bolt started to split open. I guess I need to do more overall repairs to the floor before dealing with the mount areas. In the pics below, I'm showing the gap between the trunk bottom and the filler panel where the back up lights are. Is this normal? Also, I'm showing a pic of a hole on the drivers side. I'm pretty sure that should not be there but if someone could confirm it, I would appreciate it. Anyone with with pictures of this area of their trunks, if you could post them for reference, that would help me. I'm missing a lot of metal so I'm not too sure how some parts should look. Is the trunk floor welded to the rear quarter panel or should there be a lip under that it welds to? Attach file: (100.62 KB)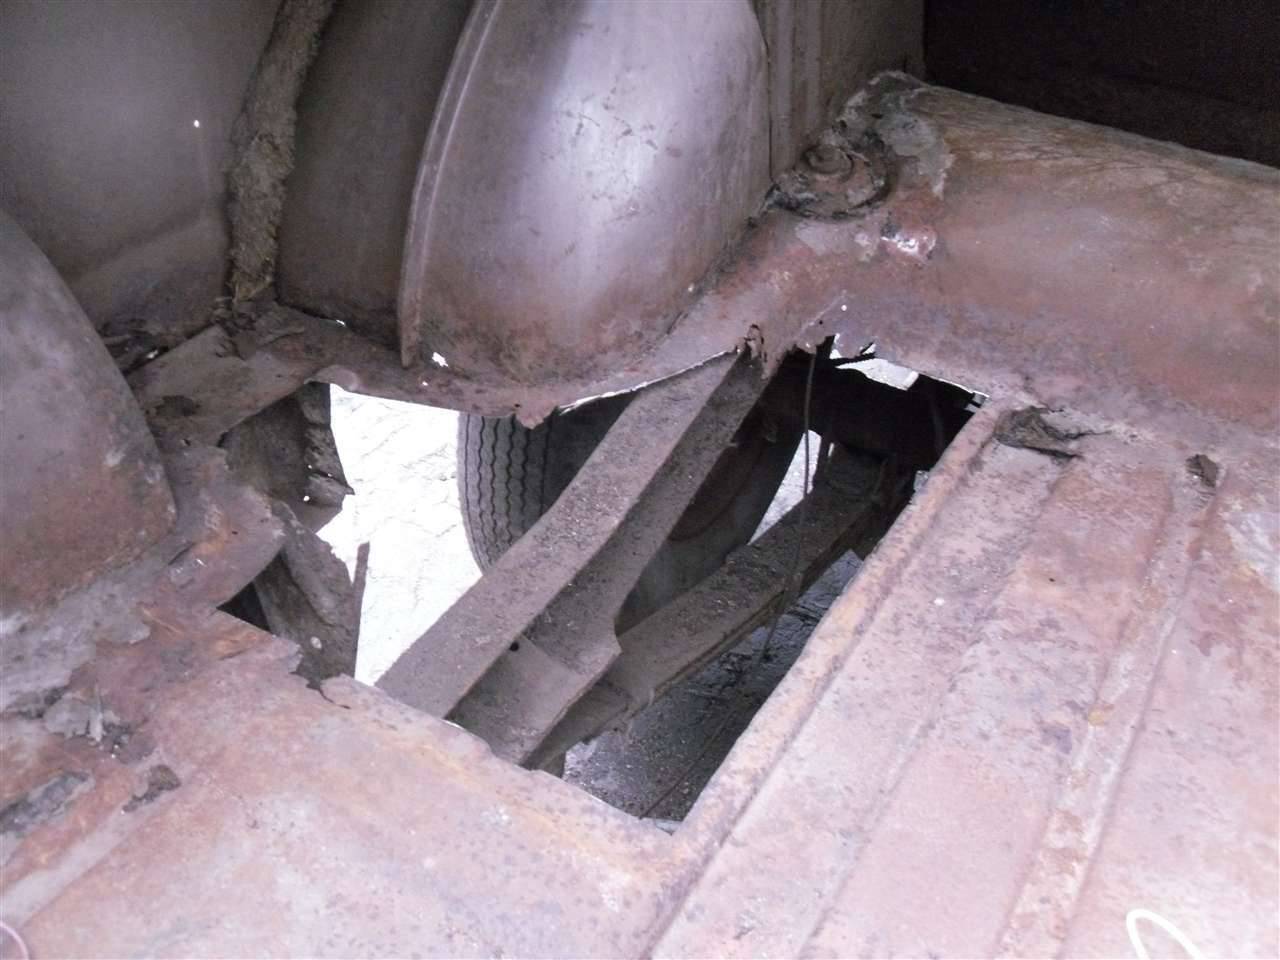 (96.37 KB) (96.37 KB) (77.75 KB) (77.75 KB)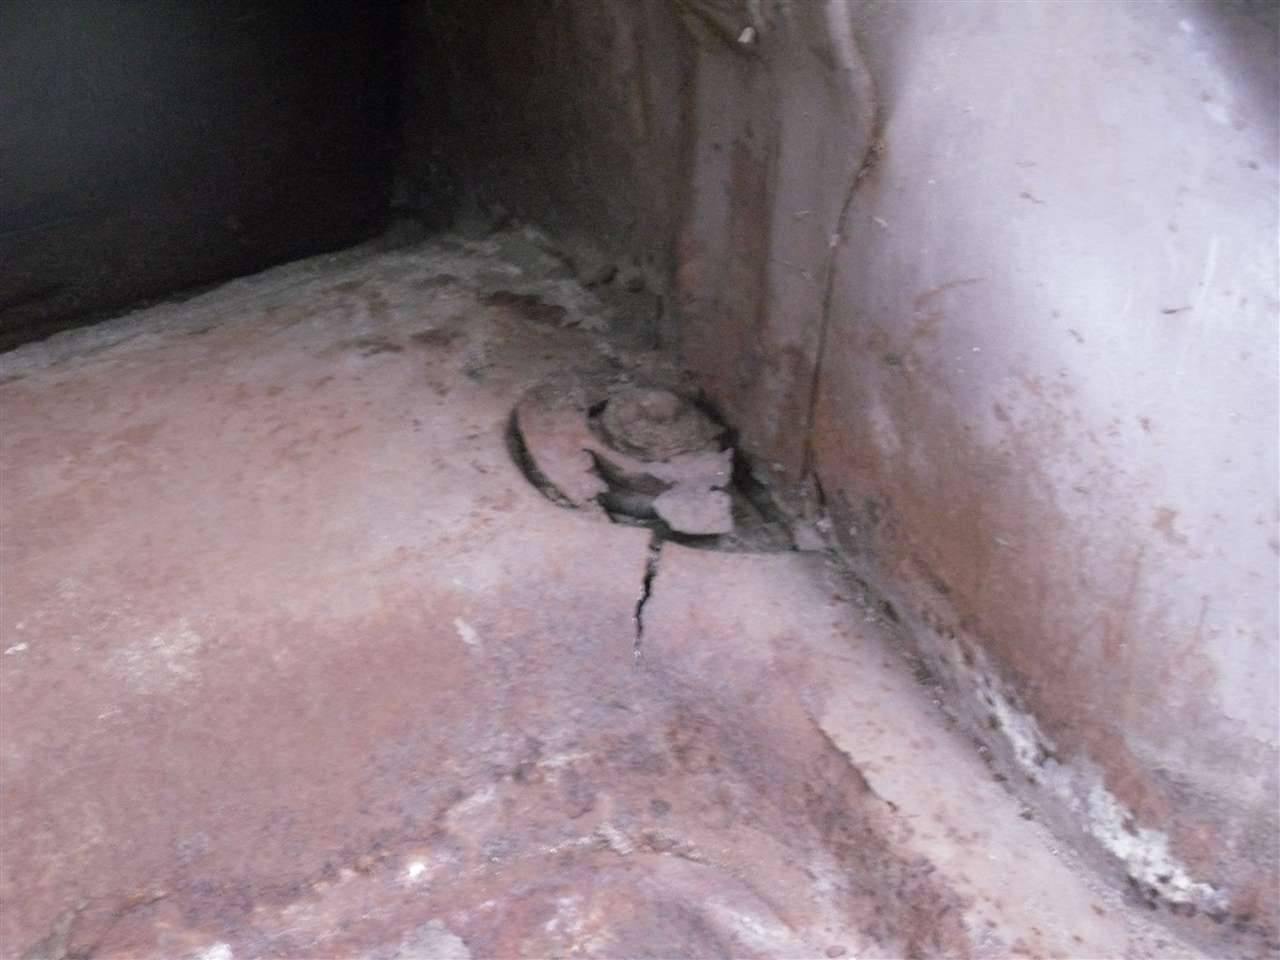 (95.51 KB) (95.51 KB)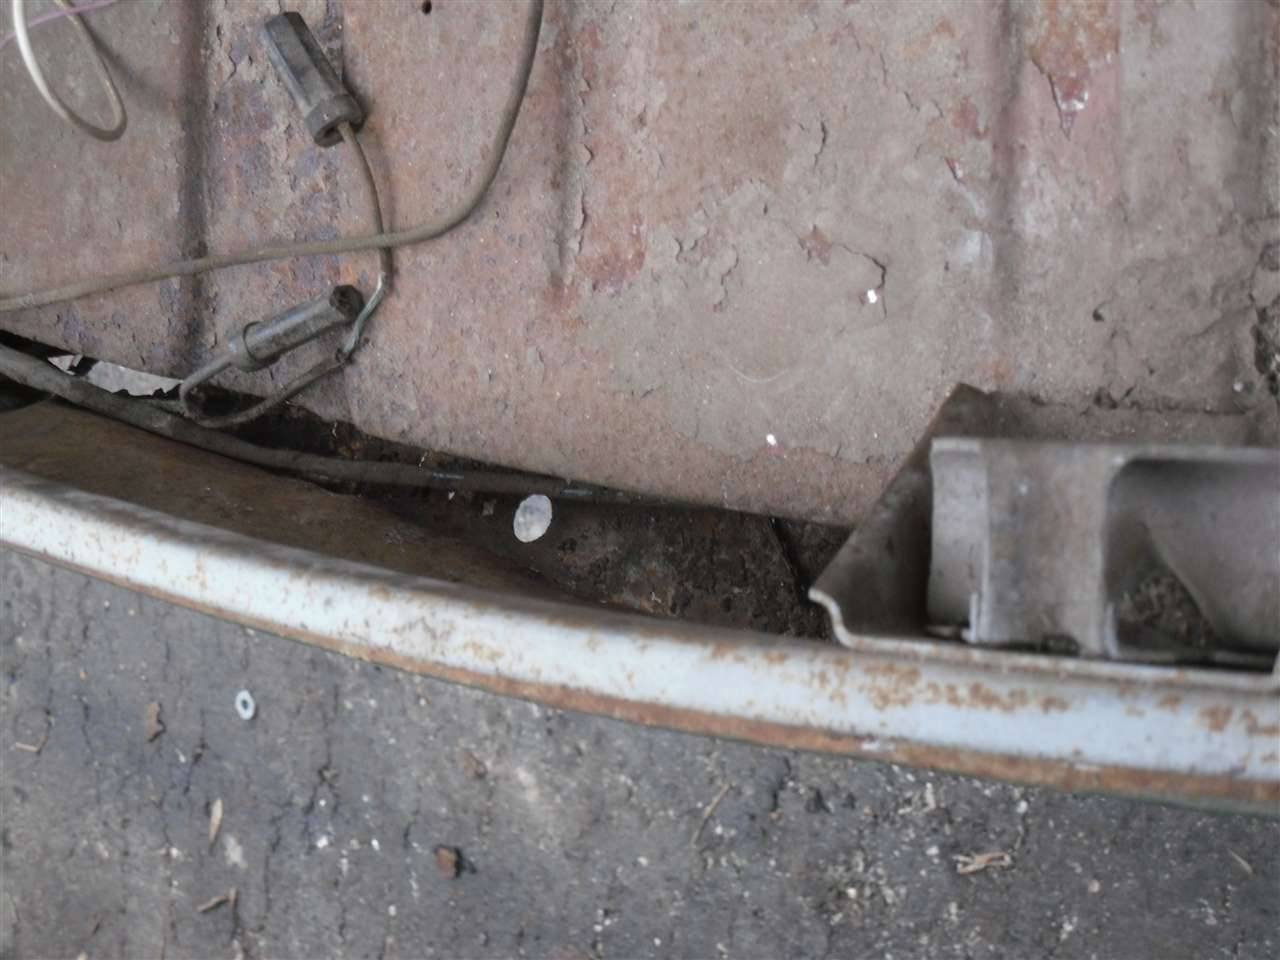 (103.79 KB) (103.79 KB)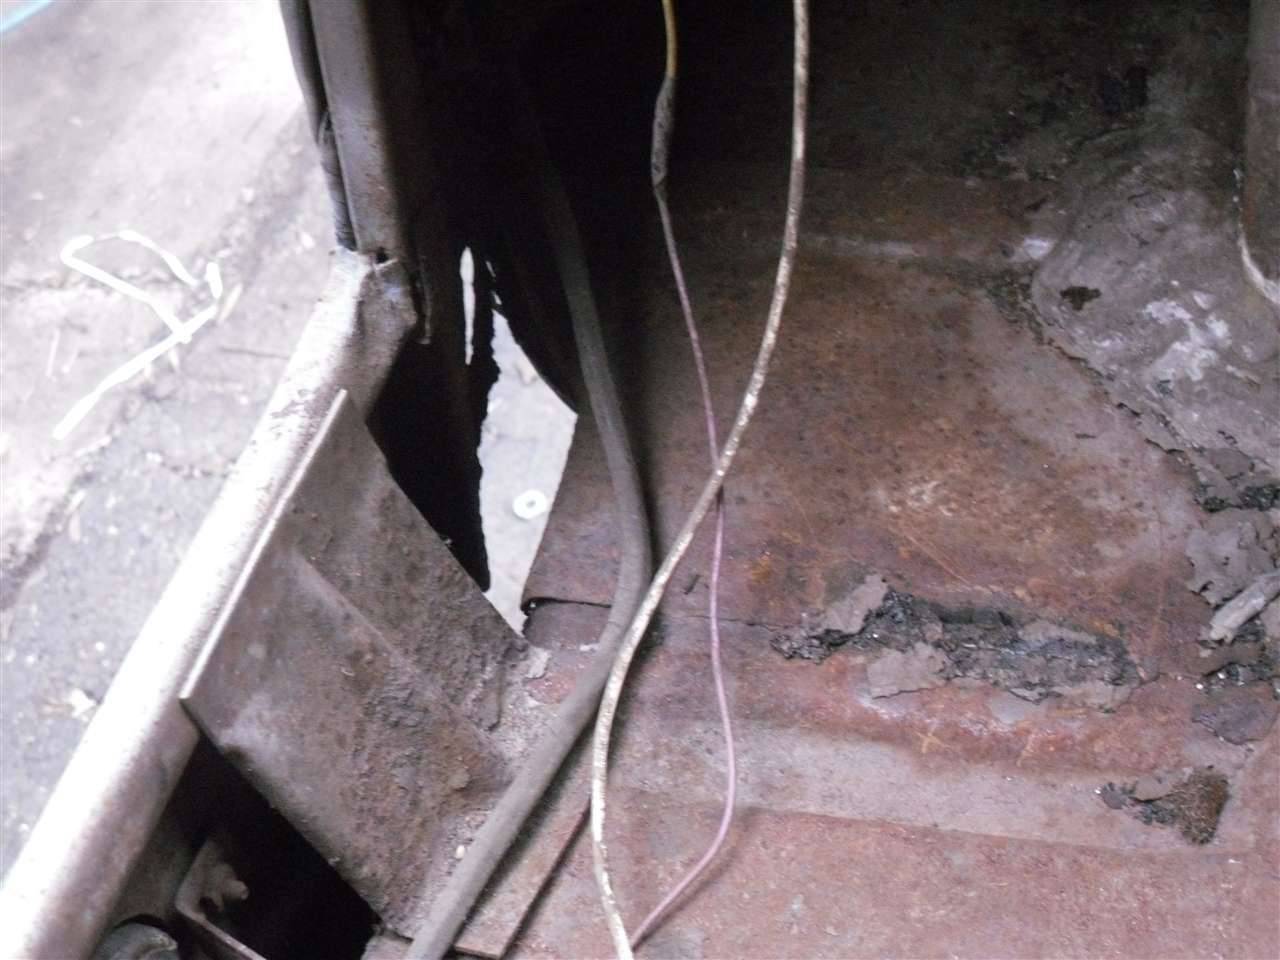
Posted on: 2011/4/7 18:45
|
|||
|
[url=h
|
||||
|
||||
|
Re: 51Packard's....51 Packard
|
||||
|---|---|---|---|---|
|
Home away from home
|
51,
I can photograph the interior of my trunk for you this weekend if you'd like. Somewhat in better shape than yours, same problem areas with the left side behind wheel well. Spare tire well and right side in good shape as I recall.
Posted on: 2011/4/7 19:57
|
|||
|
Stephen
|
||||
|
||||
|
Re: 51Packard's....51 Packard
|
||||
|---|---|---|---|---|
|
Forum Ambassador
|
Might also check out Keegan's blog. He's been fixing a lot of the same and his trunk is virtually identical to yours.
Posted on: 2011/4/7 20:11
|
|||
|
Howard
|
||||
|
||||


