|
Re: Ken's 1937 115C Touring Sedan
|
||||
|---|---|---|---|---|
|
Home away from home
|
So, first of all, I uploaded a photo from Saturday, showing the Bendix mostly disassembled. The yellow arrow shows where the Bendix can be further disassembled. I didn't take it apart that far.
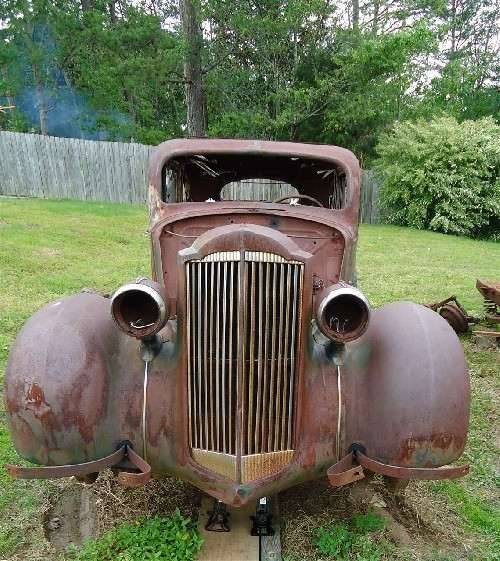
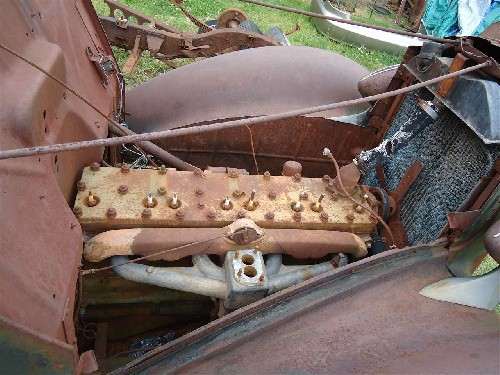
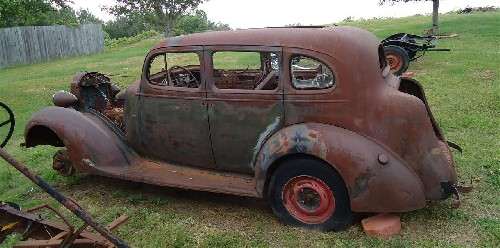
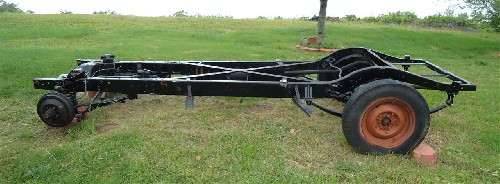
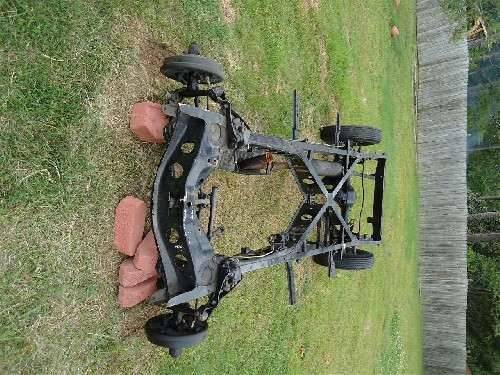
Started thinking about it- the dark blue in the second picture is the original color. We might be painting it blue instead of maroon. Plenty of time to make that decision! I removed the front clip today. Observation: bondo shouldn't be sold without a license! The driver's side running board was attached with 3/8" of bondo and a piece of a license plate pop riveted to the front fender. There was also pot metal bondoed in place where the mounting holes had rusted out. I pulled the front clip off, and found three problems. First issue: the frame is bent on the driver's side. It looks like the car was hit on the driver's side front corner sometime in its history. I think it is only bent forward of the core support, but I'm going to play it safe and take the rolling chassis to a body shop or tire shop to get the frame alignment checked before I bother to get it sandblasted and painted. Second issue: the core support is rusted out. I can weld it, but I might try and buy one from Don37, Flackmaster, or one of the other guys with more Packard parts than I have. Anybody have one of these off of a wrecked frame? Third issue: a lot of the body supports around the radiator are rusted out. Has anyone else run into this issue? Attach file:  (73.03 KB) (73.03 KB)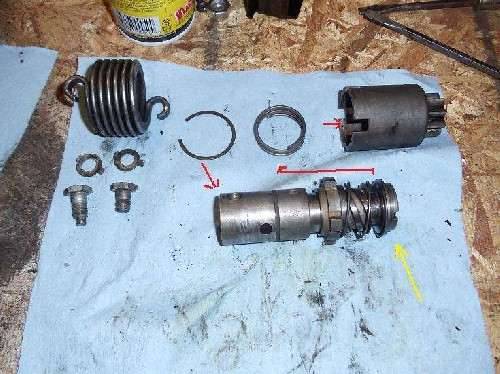  (129.85 KB) (129.85 KB)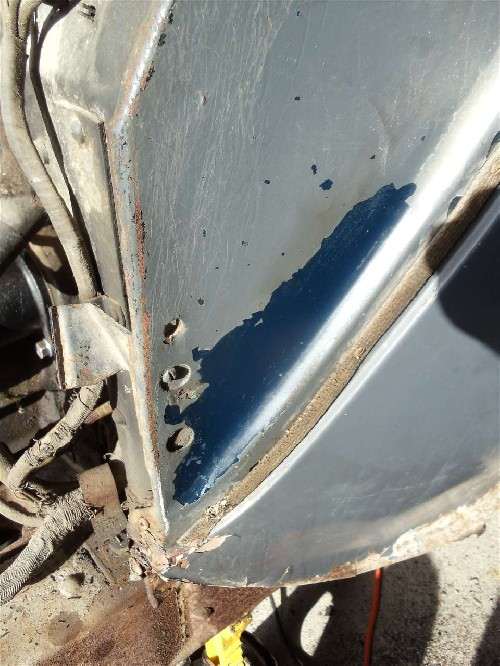  (122.07 KB) (122.07 KB)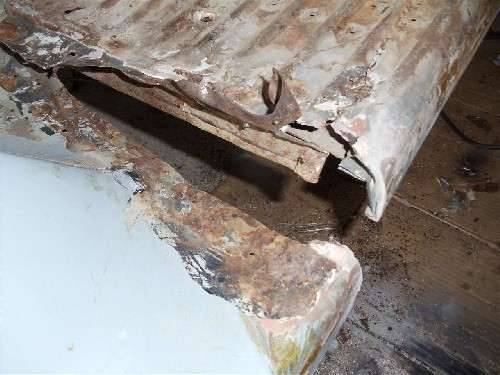  (133.22 KB) (133.22 KB)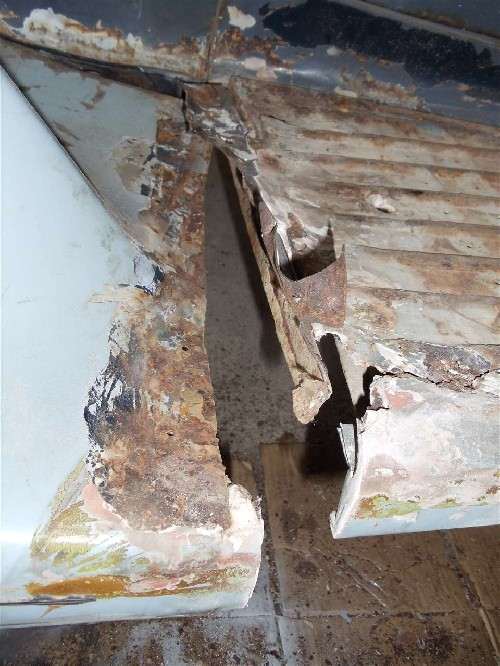  (107.54 KB) (107.54 KB)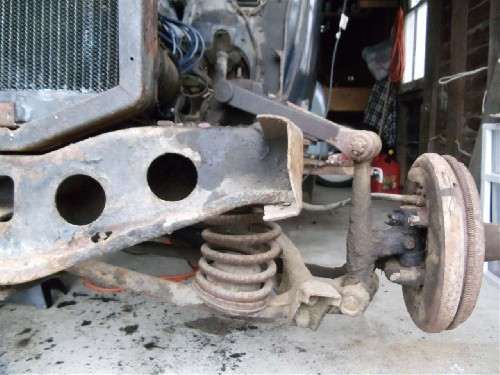  (120.34 KB) (120.34 KB)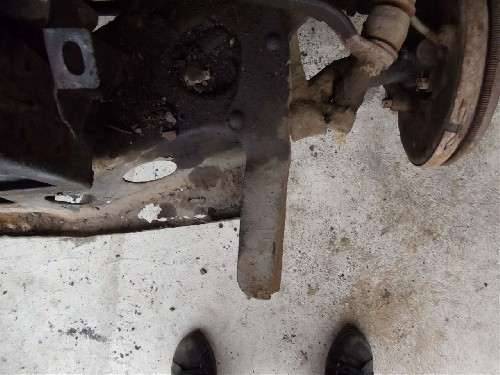  (165.89 KB) (165.89 KB)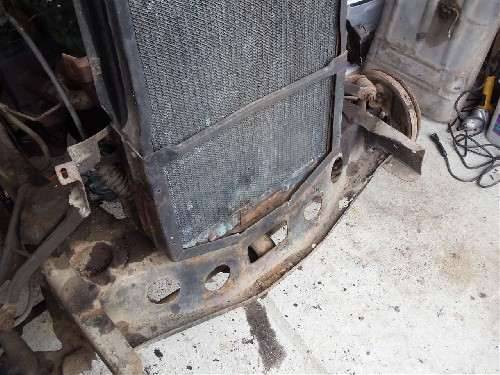  (132.42 KB) (132.42 KB)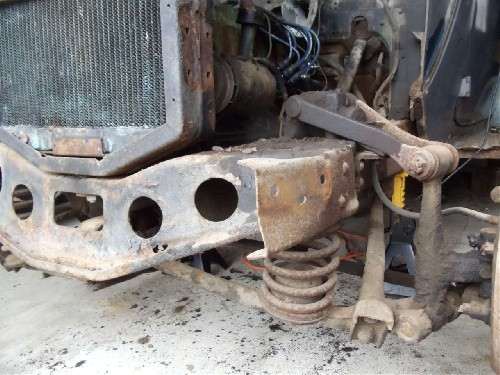  (95.05 KB) (95.05 KB)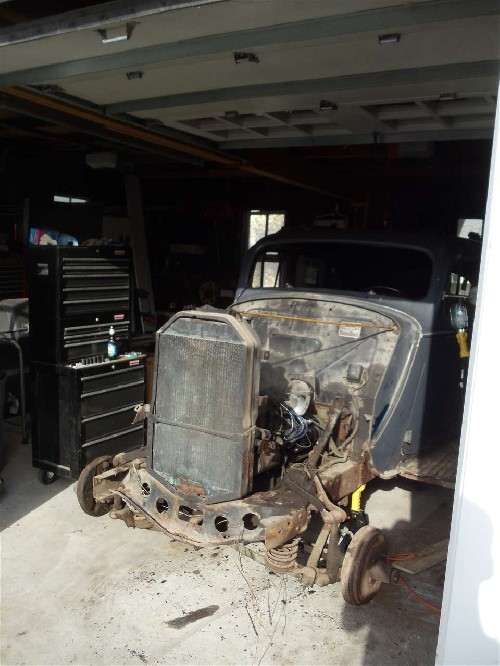  (120.96 KB) (120.96 KB)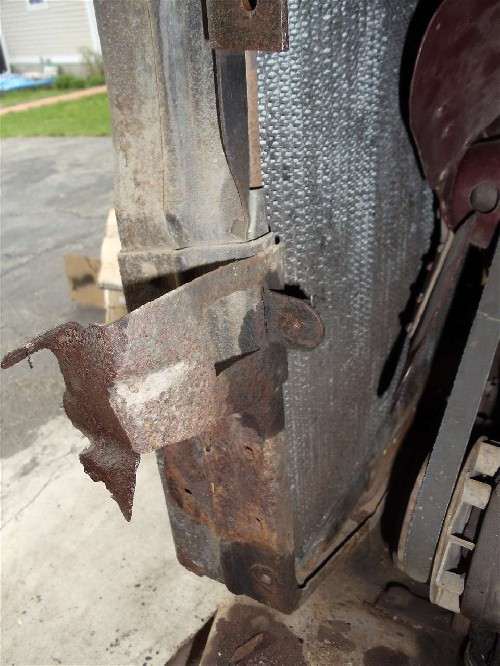
Posted on: 2011/4/26 19:38
|
|||
|
1937 120 1092 - Original survivor for driving and continued preservation. Project blog / Registry
1937 115 1082 - Total basket case, partial restoration, sold Hershey 2015 Project blog / Registry |
||||
|
||||
|
Re: Ken's 1937 115C Touring Sedan
|
||||
|---|---|---|---|---|
|
Home away from home
|
I pulled off the passenger side rear fender tonight, and I'm at a philosophical crossroads, and looking for some advice.
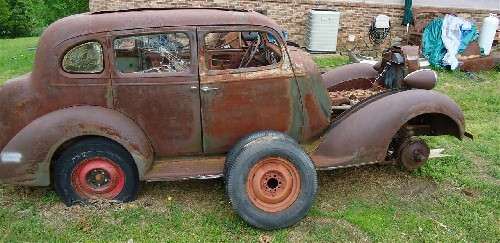
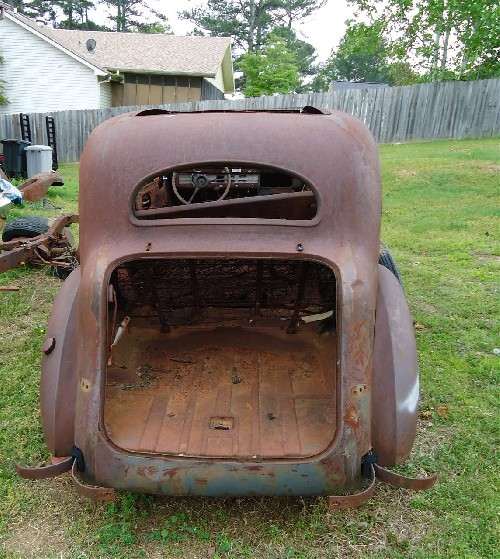
When is a project too far gone based on the elusive combination of skill and available funding? A little bit of background on me for anyone who doesn't want to read the whole blog. I'm 29, and have worked on old cars before but only for offroading. I know how to weld and have some basic metal fab skills, but no bodywork experience. I've always liked old cars, always wanted one, and decided to buy a Packard so I could share my last name with the marquee of my car. The reason for my concern. I thought I was buying a car that was complete and in relatively decent condition. I'm not sure if it was excitement, inexperience, or both, but the body is in much worse condition than I anticipated. When I pulled off the passenger rear fender, most of the area where the fender mounts to the inner fenderwell is missing, replaced with pot metal and bondo. A strip about two inches wide on the innder fenderwell from the bead inboard is missing from the forward corner to the top of the fenderwell. Also filled in with pop riveted pop metal. It actually looks like roofing tin from an old camper. Also lots of bondo. The strips running under the doors will need a lot of work. See my last post for awesome pictures of how the drivers running board attached to the front fender. New running boards will be required, but those are available. I'll need at least three, probably four, new fenders, and at least one door (all sourced). My concern, and where I'm looking for input, is this: how much is too much? For those of you that have restored a basket case, or given up on one, what pushed you over the edge one direction or another? Thanks, in advance, for the thoughts. - Ken
Posted on: 2011/4/27 20:14
|
|||
|
1937 120 1092 - Original survivor for driving and continued preservation. Project blog / Registry
1937 115 1082 - Total basket case, partial restoration, sold Hershey 2015 Project blog / Registry |
||||
|
||||
|
Re: Ken's 1937 115C Touring Sedan
|
||||
|---|---|---|---|---|
|
Home away from home

|
You have no body working experience? This is the perfect project to learn on! Don't give up. Worst case, you lower your expectations for how the car will turn out. Maybe instead of a stock shaped bend, you make it a little different, but it is still functional. No one will know. From your pics, it looks like the car is pretty complete. You can weld, now you just need to learn to shape metal. You have to realize that the overall project will take longer than you expected, but in the end, you will have a nice car and have learned new skills.
Posted on: 2011/4/27 21:38
|
|||
|
[url=h
|
||||
|
||||
|
Re: Ken's 1937 115C Touring Sedan
|
||||
|---|---|---|---|---|
|
Home away from home
|
Guys, thanks for the thoughts. I'll just have to adjust my expectations- looks like it's time to learn some body work, and this project just got a lot more long term!
Posted on: 2011/4/28 19:12
|
|||
|
1937 120 1092 - Original survivor for driving and continued preservation. Project blog / Registry
1937 115 1082 - Total basket case, partial restoration, sold Hershey 2015 Project blog / Registry |
||||
|
||||
|
Re: Ken's 1937 115C Touring Sedan
|
||||
|---|---|---|---|---|
|
Home away from home
|
Well, it has been a while since my last post, so I thought I would provide some updates. Didn't get a lot of work directly accomplished over the weekend, but I did get my bench grinder installed, hand grinder repaired, and picked up/assembled the cherry picker and engine stand my neighbor is loaning me.
I removed the drivers side rear fender, running board, and rear bumper. I'm not going to pull the cab off the frame until I get the new carb installed, so that will have to wait a few days. The carb rebuild kit showed up today, so I tore into my two carbs to make one. I was following the service procedure in a Carter manual I found on the website. All was going swimmingly until... the low speed jet assembly stripped out. I actually had to use a screw extractor to remove it. The jet in my spare carb was also stripped out. So... time to find a new jet! I'm not going to take the carb down quite as far as the book directs. I don't have the special tools, parts, or experience to remove and replace delicate items such as the accelerator pump strainer or the idle port rivet plug. I have all the big pieces soaking in my carb cleaner (autozone.com/autozone/accessories/Berrym ... ounter=4&itemIdentifier=139313_0_0_ ). It has been working great so far. Tomorrow I'll put as much of the carb back together as I can, and then see what I can do while I wait for my unsourced jet to arrive.
Posted on: 2011/5/3 19:48
|
|||
|
1937 120 1092 - Original survivor for driving and continued preservation. Project blog / Registry
1937 115 1082 - Total basket case, partial restoration, sold Hershey 2015 Project blog / Registry |
||||
|
||||
|
Re: Ken's 1937 115C Touring Sedan
|
||||
|---|---|---|---|---|
|
Home away from home

|
I don't know where you got your carb rebuild kit, but the place I got mine, Daytona Parts, lists jets as a separate available item. Maybe they can help...Link to Daytona Parts
Posted on: 2011/5/3 20:54
|
|||
|
[url=h
|
||||
|
||||
|
Re: Ken's 1937 115C Touring Sedan
|
||||
|---|---|---|---|---|
|
Home away from home
|
PackardInfo comes through again. I found a jet that is just slightly larger than mine (thanks, OwenDyneto!), and have started re-assembling the carb. I've been cleaning and polishing as I go along. The carb won't be as clean as a hot-tanked restoration carb, but it will be as close as I can get it. I want to have a nice car when I'm all done, as authentic as I can make it, but I don't think it will be a Concours car!
Posted on: 2011/5/4 20:19
|
|||
|
1937 120 1092 - Original survivor for driving and continued preservation. Project blog / Registry
1937 115 1082 - Total basket case, partial restoration, sold Hershey 2015 Project blog / Registry |
||||
|
||||
|
Re: Ken's 1937 115C Touring Sedan
|
||||
|---|---|---|---|---|
|
Home away from home

|
Ken,
A while back you asked me about a parts car I have. I am including some pictures of it now. Its a 120C 1092. Its body is the same as yours from the firewall on back. The differences in between the 115C 1082 and this one would be. chrome shifter, rearview mirror, and chrome on the dash. gauges are brown on the 115C and grey on the 120C. I do have a gastank from a 1082 I bought 2 years ago. It is a little smaller than a 120. A 115 is 17 gallons and a 120 is 20 gallons. A 120 gastank tank would fit fine in yours.I do have some 115 parts laying around. when you need something shoot me an email and I will see if I have it.
Posted on: 2011/5/7 16:30
|
|||
|
1936 and 1937 120's Are what we like best. But we also like all other Packards too.
Don 37' |
||||
|
||||
|
Re: Ken's 1937 115C Touring Sedan
|
||||
|---|---|---|---|---|
|
Home away from home
|
Don37- thanks for the info. I hadn't forgotten about you, and I'm compiling a list of parts/options that I need. Right now I'm still expecting to move to Hawaii at the end of the summer, so I probably am not interested in your parts car as a whole. I am contemplating a run down to your neck of the woods this summer to buy some body parts.
In other news- curses! Yesterday I finished rebuilding the carb. I primed it with a little bit of fuel down the throat, and it fired right up. I noticed that the throttle linkage wasn't quite right, and I had somewhere to be, so I just disconnected it. It ran continuously for about 5 or 6 minutes, including some (mild) revving. I didn't have time to to tune it, so today I thought that I would get her purring. Went out, adjusted the throttle linkage, and now it won't start again. The carb appeared to be leaking some gas, so I gave all the screws a through going over. Also pulled off the bowl cover (I thought I might have forgotten to put the seal on the new needle and seat) and everything checked out, but I did notice that the gasket was a little misaligned around the accelerator pump hole in the casting. Modified that, and put it back together. I also pulled the plugs and turned it over without them to allow the cylinders to dry out a little bit, in case she was really flooded. I'll have at it again this afternoon, but I'm sort of stumped. Any thoughts? I was hoping to get her running well enough to verify the timing and try to start getting the car tuned up, but it has to fire first!
Posted on: 2011/5/8 10:54
|
|||
|
1937 120 1092 - Original survivor for driving and continued preservation. Project blog / Registry
1937 115 1082 - Total basket case, partial restoration, sold Hershey 2015 Project blog / Registry |
||||
|
||||


