|
Re: Ken's 1937 115C Touring Sedan
|
||||
|---|---|---|---|---|
|
Home away from home
|
Ok, I had what they call in my business a "gross concept error."
I thought that the flex hose ran from the fuel pump to the carb; a little careful reading and application of logic indicates that the flex hose actually went from the hard line on the frame to the fuel pump. I didn't notice that because my fuel pump to carb line was mostly wrapped, so I thought it was a hardened flex hose. Also, sometime over the years, a different fuel tank was installed in the car and rubber hose run from the fuel tank to the fuel pump. I put a new fuel line (rubber, with an inline filter) from the inlet of the fuel pump to a rubber gas can just to get the car running. I don't know how clean the other tank is, and I didn't want to add an additional factor while I was trying to sort things out. I haven't looked along the passenger side frame rail for the original hard line, so I'm unsure if it is completely missing or was just bypassed for some reason. In the future, I will probably have to sort out fuel gage sending unit; right now it reads full when it's empty, so I'm sure the sender is a later, incorrect unit. Not todays problem though, and tomorrow doesn't look good either! I did call Arthur Gould, and they're going to rebuild my pump for $95 plus shipping as soon as I get it to them- the local post office closed early today. Tomorrow it is. ~Ken
Posted on: 2011/4/18 16:12
|
|||
|
1937 120 1092 - Original survivor for driving and continued preservation.
https://packardinfo.com/xoops/html/modules/newbb/viewtopic.php?topic_id=16514&forum=10 1937 115 1082 - Total basket case, partial restoration, sold Hershey 2015 https://packardinfo.com/xoops/html/modules/newbb/viewtopic.php?start=0&topic_id=6550&order=ASC&status=&mode=0 |
||||
|
||||
|
Re: Ken's 1937 115C Touring Sedan
|
||||
|---|---|---|---|---|
|
Home away from home
|
Had some nice weather today, so I thought I'd poke around some more. I'm trying to get familiar with the car and get a feel for where everything is at.
The first thing I did was drop the tank. The hard line was missing, and it's not the factory tank, so I wanted to see what I was dealing with. Also, a rubber line was run from the tank to the fuel pump! Looking at the frame rail, I think I found three hangers for the original hard line on the outside of the passenger frame rail. The third is broken. If it understanding it correctly, the hard line runs along the outside of the frame rail and crosses over behind the rear axle and above the frame? I was planning on using the current (incorrect) tank, but when I pulled it out, there is weepage from around the drain bung (it has been brazed back in), and two pop rivets in the bottom of the tank. Hmm. Any more experienced guys out there recognize my tank? It fits pretty well. Also pulled off the passenger side front brake drum- last picture shows. Drum, shoes, and wheel cylinder look good, as did the wheel bearings. Assuming the drivers side looks the same, some grease and a little paint and it will all go back together for now. I'll probably run a new hard line this weekend, but I have to do some more research first. I think it's 5/16 steel line, but I want to look into the fitting size on the outlet end, and decide how I want to attach it on inlet end before I run it all. Attach file:  (162.10 KB) (162.10 KB)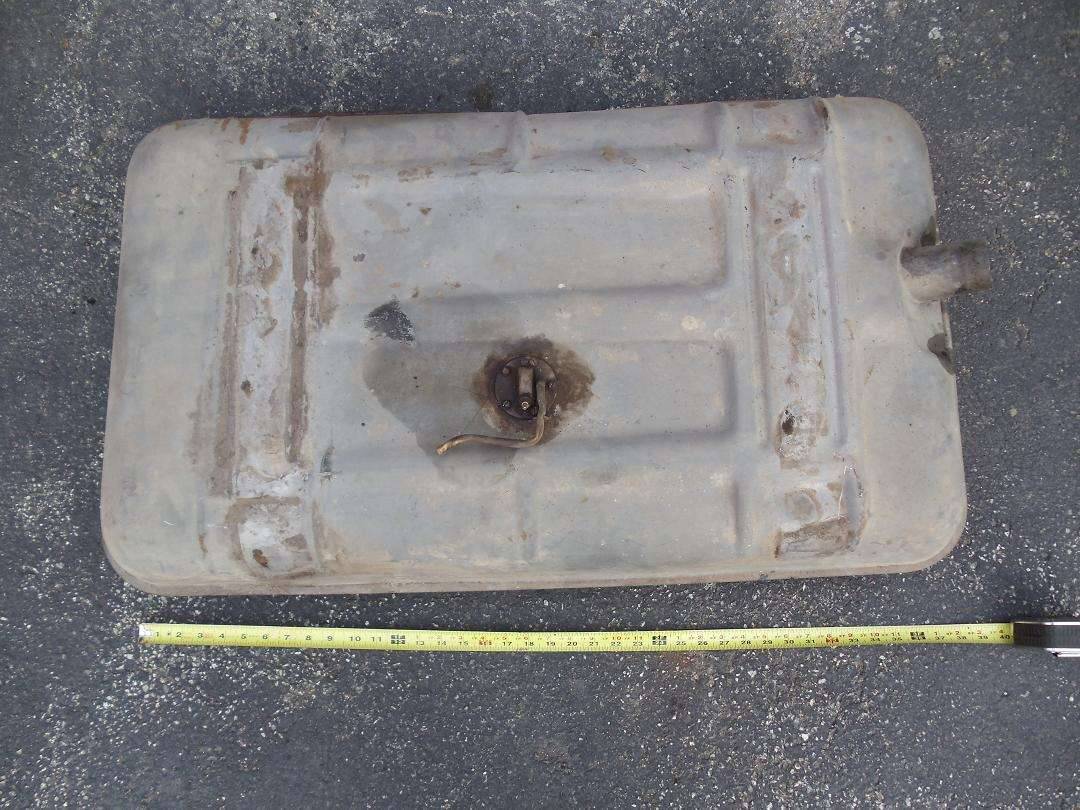 (133.77 KB) (133.77 KB)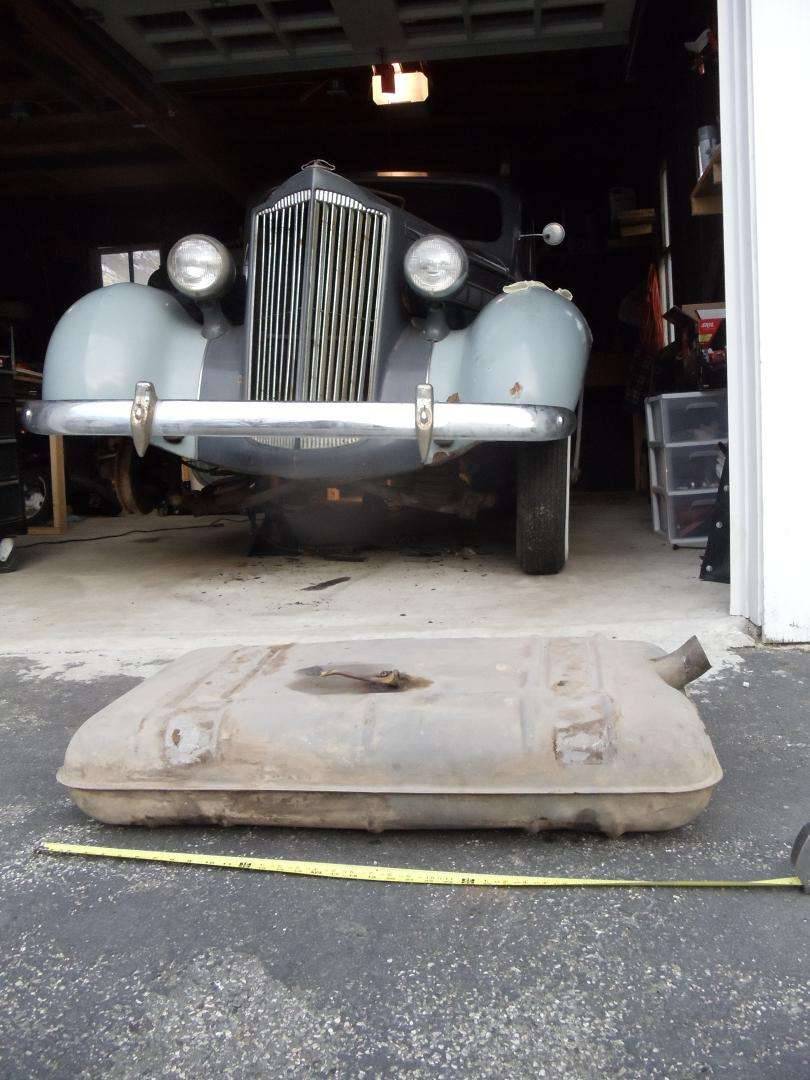 (133.09 KB) (133.09 KB) (104.63 KB) (104.63 KB)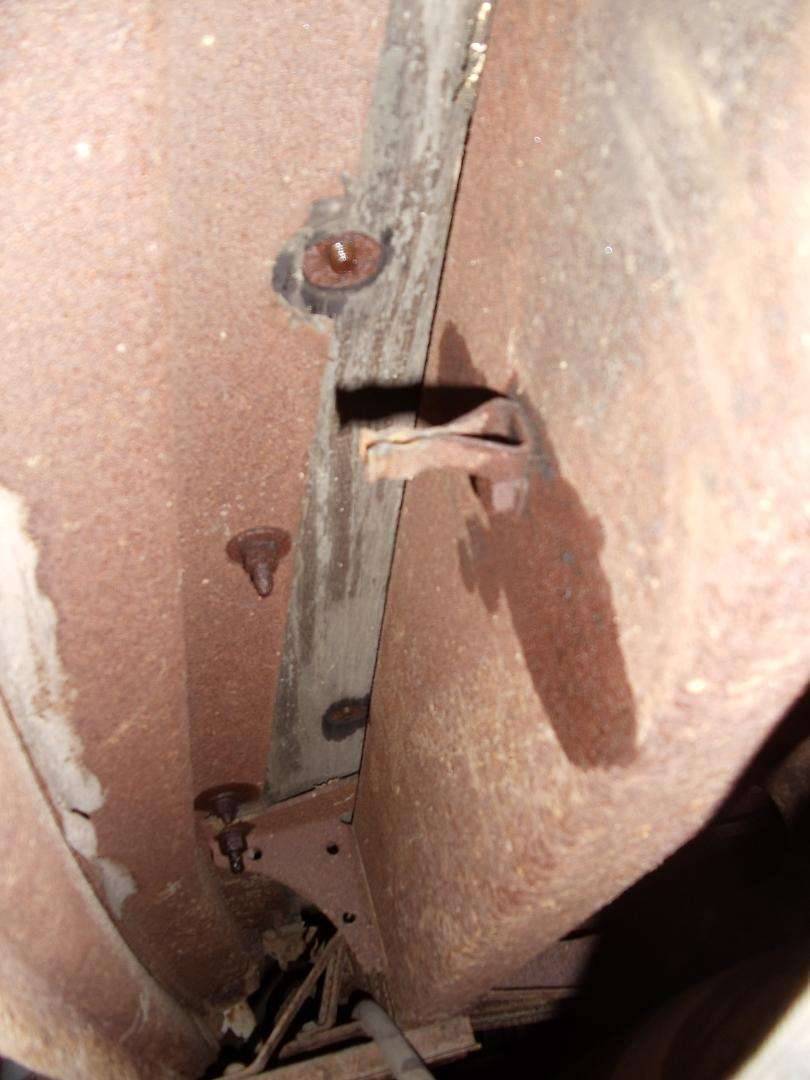 (143.70 KB) (143.70 KB)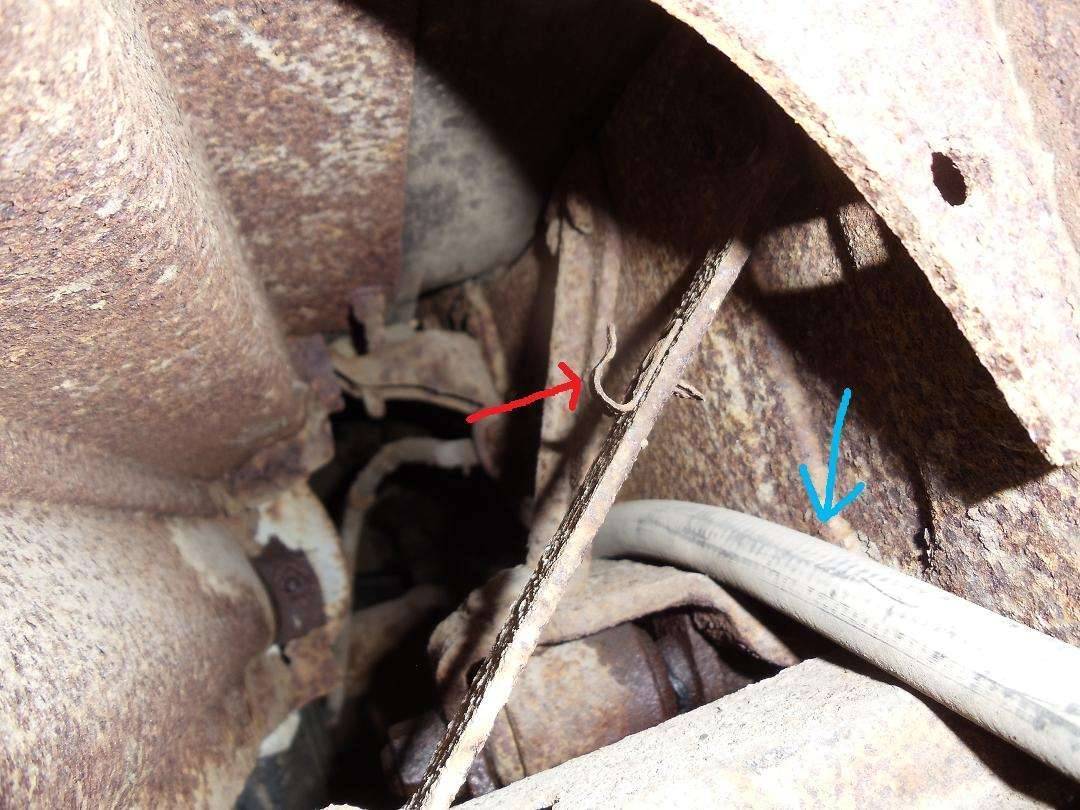 (132.87 KB) (132.87 KB)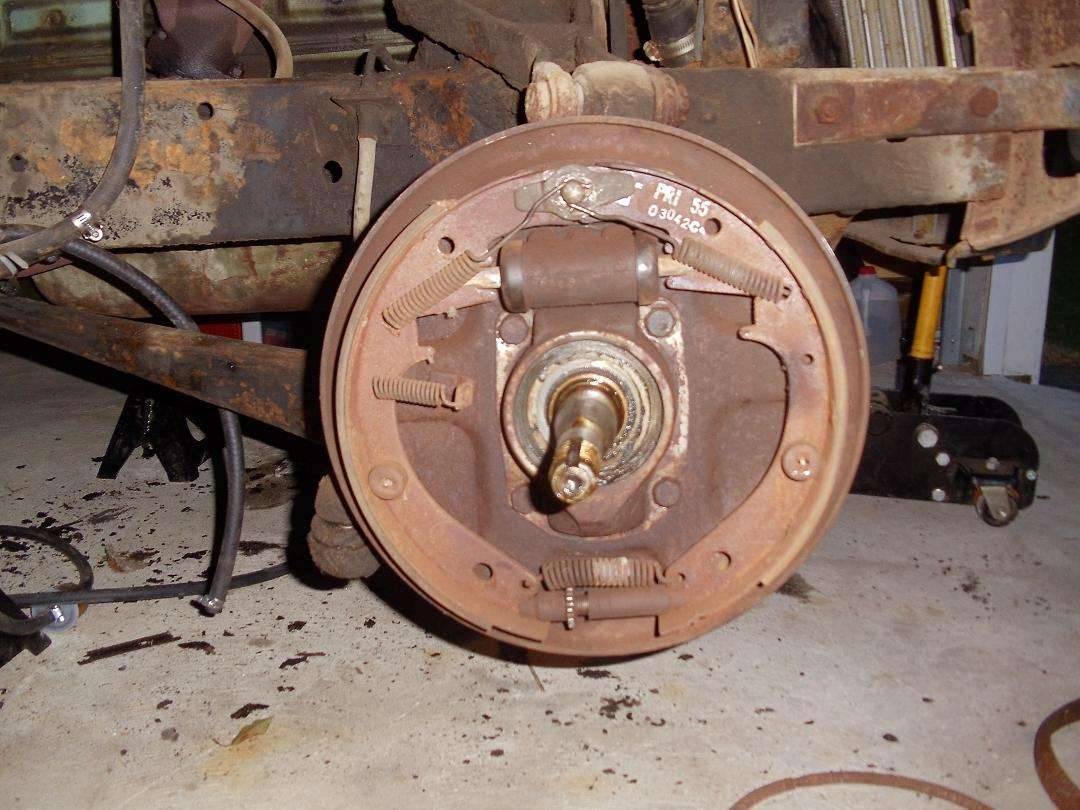
Posted on: 2011/4/19 19:27
|
|||
|
1937 120 1092 - Original survivor for driving and continued preservation.
https://packardinfo.com/xoops/html/modules/newbb/viewtopic.php?topic_id=16514&forum=10 1937 115 1082 - Total basket case, partial restoration, sold Hershey 2015 https://packardinfo.com/xoops/html/modules/newbb/viewtopic.php?start=0&topic_id=6550&order=ASC&status=&mode=0 |
||||
|
||||
|
Re: Ken's 1937 115C Touring Sedan
|
||||
|---|---|---|---|---|
|
Home away from home
|
Will do, thanks for the tip! I've only ever seen a wheel cylinder fail by leaking, so I assumed no leak, no problem.
To disassemble the wheel cylinder, it is simply a matter of unscrewing each end from the body of the cylinder in a clean location, correct?
Posted on: 2011/4/20 18:04
|
|||
|
1937 120 1092 - Original survivor for driving and continued preservation.
https://packardinfo.com/xoops/html/modules/newbb/viewtopic.php?topic_id=16514&forum=10 1937 115 1082 - Total basket case, partial restoration, sold Hershey 2015 https://packardinfo.com/xoops/html/modules/newbb/viewtopic.php?start=0&topic_id=6550&order=ASC&status=&mode=0 |
||||
|
||||
|
Re: Ken's 1937 115C Touring Sedan
|
||||
|---|---|---|---|---|
|
Home away from home
|
Ken,
You mentioned your understanding that the tank was not original; however, if the tank in the photo is from the car, I do think it is correct. I think your car carries the same tank as my 39 six sedan and the photo looks like mine. Good luck, you'll enjoy that car! Pat
Posted on: 2011/4/20 18:45
|
|||
|
||||
|
Re: Ken's 1937 115C Touring Sedan
|
||||
|---|---|---|---|---|
|
Home away from home
|
Interesting. The old gentleman I bought it from told me he slapped a different tank in 15 or 20 years ago. Also, the fill tube looked like it had been cut off. Granted, I know of at least five Packards that he owned, so perhaps it was a Packard tank. I'll look into cleaning it out and remount it for now- thanks for the tip!
On your car, how far does the hard line go inline from the frame? Also, how does it connect to the rubber line running from the tank to the hard line?
Posted on: 2011/4/20 19:34
|
|||
|
1937 120 1092 - Original survivor for driving and continued preservation.
https://packardinfo.com/xoops/html/modules/newbb/viewtopic.php?topic_id=16514&forum=10 1937 115 1082 - Total basket case, partial restoration, sold Hershey 2015 https://packardinfo.com/xoops/html/modules/newbb/viewtopic.php?start=0&topic_id=6550&order=ASC&status=&mode=0 |
||||
|
||||
|
Re: Ken's 1937 115C Touring Sedan
|
||||
|---|---|---|---|---|
|
Home away from home

|
Ken P, no unscrewing needed. Remove the slotted dowel objects that connect the cylinders to the brake shoes by pulling them out through the rubber dust cups. The dust cups fit in a groove in the wheel cylinders and can be easily removed. Once the cups are out you can push the pistons (also known as cups) out of the cylinders and inspect the cylinder bores for rust pits. Note, some fluid may leak out when you remove the pistons.
You may want to get a general maintenance manual to help you with these tasks. The Packard service manual is not that helpful, it is too general and does not describe detail operations needed to complete a job. But, you should still have the Packard manual. I believe it can be downloaded from this site. Enjoy, this is fun - believe it or not. (o{I}o)
Posted on: 2011/4/20 22:34
|
|||
|
We move toward
And make happen What occupies our mind... (W. Scherer) |
||||
|
||||
|
Re: Ken's 1937 115C Touring Sedan
|
||||
|---|---|---|---|---|
|
Home away from home
|
So I got my fuel pump back yesterday, despite not sending it out until Tuesday. Pretty impressed with Arthur Gould rebuilding. The comment from my wife sums it up perfectly, "Wow, that's the same part?"
Installed the fuel pump today and after cranking her over a few times (with one hiccup), the starter stopped engaging. It would click, and I think the motor may have been spinning, because I pulled off the starter and now the bendix isn't engaging. not sure why, everything looks to be in good working order, the spring isn't cracked or anything. I'll probably pull it apart, clean it throughly, and try again. Maybe when I have it apart, the problem will become apparent?
Posted on: 2011/4/23 10:45
|
|||
|
1937 120 1092 - Original survivor for driving and continued preservation.
https://packardinfo.com/xoops/html/modules/newbb/viewtopic.php?topic_id=16514&forum=10 1937 115 1082 - Total basket case, partial restoration, sold Hershey 2015 https://packardinfo.com/xoops/html/modules/newbb/viewtopic.php?start=0&topic_id=6550&order=ASC&status=&mode=0 |
||||
|
||||
|
Re: Ken's 1937 115C Touring Sedan
|
||||
|---|---|---|---|---|
|
Home away from home
|
Well, the bendix appeared to a little gummed up, so I cleaned it throughly and then lubed it with a combination of PB-50 and silicon grease (light applications of both). Worked fine after putting it back together, and the car was trying really hard to start, but wouldn't quite do it. After a few minutes of cranking (with several close calls), the carb appeared to be leaking fuel everywhere. I tore it apart a few weeks ago, and everything looked fine, but it's not the right carb fo rthe car, so I did not put a rebuild kit into it. Tapped the body of the carb with a hammer a few times, suspecting a stuck float, and it stopped spitting gas out of the vent, so that worked.
By that point it was flooded pretty bad, so I removed the plugs, put two squirts of oil in each cylinder, and then cranked it over without the plugs in for several seconds to dry the cylinders out. After that, it fired for a few seconds, but never long enough to stay running or to respond to the accelerator pedal. I also noticed that the spark plugs are Champion UY-6, not the UY-4 that is recommended. Does anyone know if the higher number indicates a hotter plug? I guess a little smoke is a start. The battle will be rejoined tomorrow.
Posted on: 2011/4/23 15:44
|
|||
|
1937 120 1092 - Original survivor for driving and continued preservation.
https://packardinfo.com/xoops/html/modules/newbb/viewtopic.php?topic_id=16514&forum=10 1937 115 1082 - Total basket case, partial restoration, sold Hershey 2015 https://packardinfo.com/xoops/html/modules/newbb/viewtopic.php?start=0&topic_id=6550&order=ASC&status=&mode=0 |
||||
|
||||
|
Re: Ken's 1937 115C Touring Sedan
|
||||
|---|---|---|---|---|
|
Home away from home
|
It's alive! The last thing I did on Saturday was clean the plugs and turn it over without the plugs. Today, I had low expectations, but pushed the choke to full closed (no cable), pumped the cable, and she... FIRED RIGHT UP! It died after a few seconds, so I had my wife come out and manually operate the choke (she's awesome) and it ran for about two minutes before the carb started leaking gas from every orifice.
Flackmaster is shipping me a carb, so once I get that and get it rebuilt, I think she'll run like a top. That's the big news, but I was also doing some strategic thinking. I know I'll be in CT until about the end of August, and then I'll be on sea duty for about three years and anticipate not having any time to work on the car, if I can even be in the same geographic area. Because I don't have any experience doing body work, I'm planning on having the body restored over those three years. If I was going to live in the same area for the next decade, I would try and muddle through it myself, but my career doesn't allow for it. With all that being said, I decided that my goal for the summer is to get the frame portion of the restoration done. I'm going jack the cab up, roll the frame out, have the frame and running gear sandblasted, painted, and then put it all back together while going through everything (running new hard lines as required, rebuild the shocks, new bushings as required, etc). The genesis of the idea was when I priced out getting the brake drums and backing plates sandblasted. $60 for that, or $350 for the whole frame and running gear. Change of direction, but I'm confident it will save my time and money in the long run. Again, if I knew I wasn't going to move and have my work load increase, I might go a little slower and just get it driving well this summer without repainting anything. With that being said, today I pulled off the bonnet, front bumper, and got the driver's side engine splash pan off. I don't have one for the passenger side. I'll probably try to get the front clip lifted off later this week, and then continue disassembling.
Posted on: 2011/4/25 19:34
|
|||
|
1937 120 1092 - Original survivor for driving and continued preservation.
https://packardinfo.com/xoops/html/modules/newbb/viewtopic.php?topic_id=16514&forum=10 1937 115 1082 - Total basket case, partial restoration, sold Hershey 2015 https://packardinfo.com/xoops/html/modules/newbb/viewtopic.php?start=0&topic_id=6550&order=ASC&status=&mode=0 |
||||
|
||||


