|
Re: Don’s 1937 (120) 138CD Deluxe Touring Limo
|
||||
|---|---|---|---|---|
|
Home away from home
|
Oh, come on USPS!!! You had my parts in Kansas City, 30 minutes from my house to be delivered tomorrow.
Now….you sent them to Oak Park, Wisconsin for a tour of the mid-west. Now to be delivered on Monday.
Posted on: 2023/8/25 17:43
|
|||
|
||||
|
Re: Don’s 1937 (120) 138CD Deluxe Touring Limo
|
||||
|---|---|---|---|---|
|
Home away from home
|
Okay…I have conclusively determined the purpose for the stray toggle switch under the dash. That switch controls the FRONT dome light only.
Then, I have a front 3-way switch above the center divider window along with a rear 3-way switch that controls the REAR dome light. This makes complete sense for a limo. Attach file:  IMG_8059.jpeg (233.68 KB) IMG_8059.jpeg (233.68 KB)
Posted on: 2023/8/26 11:01
|
|||
|
||||
|
Re: Don’s 1937 (120) 138CD Deluxe Touring Limo
|
||||
|---|---|---|---|---|
|
Home away from home
|
….and both potentiometers are illuminated and both a have detent before the adjustment. Testing with the heater blower….OFF-High-Variable is how both operate.
Posted on: 2023/8/26 20:25
|
|||
|
||||
|
Re: Don’s 1937 (120) 138CD Deluxe Touring Limo
|
||||
|---|---|---|---|---|
|
Home away from home
|
The missing brake parts showed up today after touring the entire mid-west thanks to the USPS.
I have everything put together. I should have the bolts in the front turned around the correct direction tomorrow. The shorter bolts at the top are already drilled for the castle nuts and cotter pins. I’ll put the castle nuts on those. For the bottom, I’m just going to put on locking nuts, at least for now. I have a trip this weekend to NC to visit our daughter, so bleeding the brakes and adjustments will have to wait a bit longer.
Posted on: 2023/8/28 21:04
|
|||
|
||||
|
Re: Don’s 1937 (120) 138CD Deluxe Touring Limo
|
||||
|---|---|---|---|---|
|
Home away from home
|
Now that I learned that the hole under the starter was to access the timing marks on the flywheel and pointer, I took some time to clean up the marks a bit and paint the pointer and the 7 deg BTDC mark.
At some point, I’ll likely add a pointer and marks to the damper, but that will be for another day. I also installed a plug as recommended by Ken. Works great and low cost. Attach file: IMG_8087.jpeg (237.28 KB) IMG_8096.jpeg (354.29 KB) IMG_8096.jpeg (354.29 KB)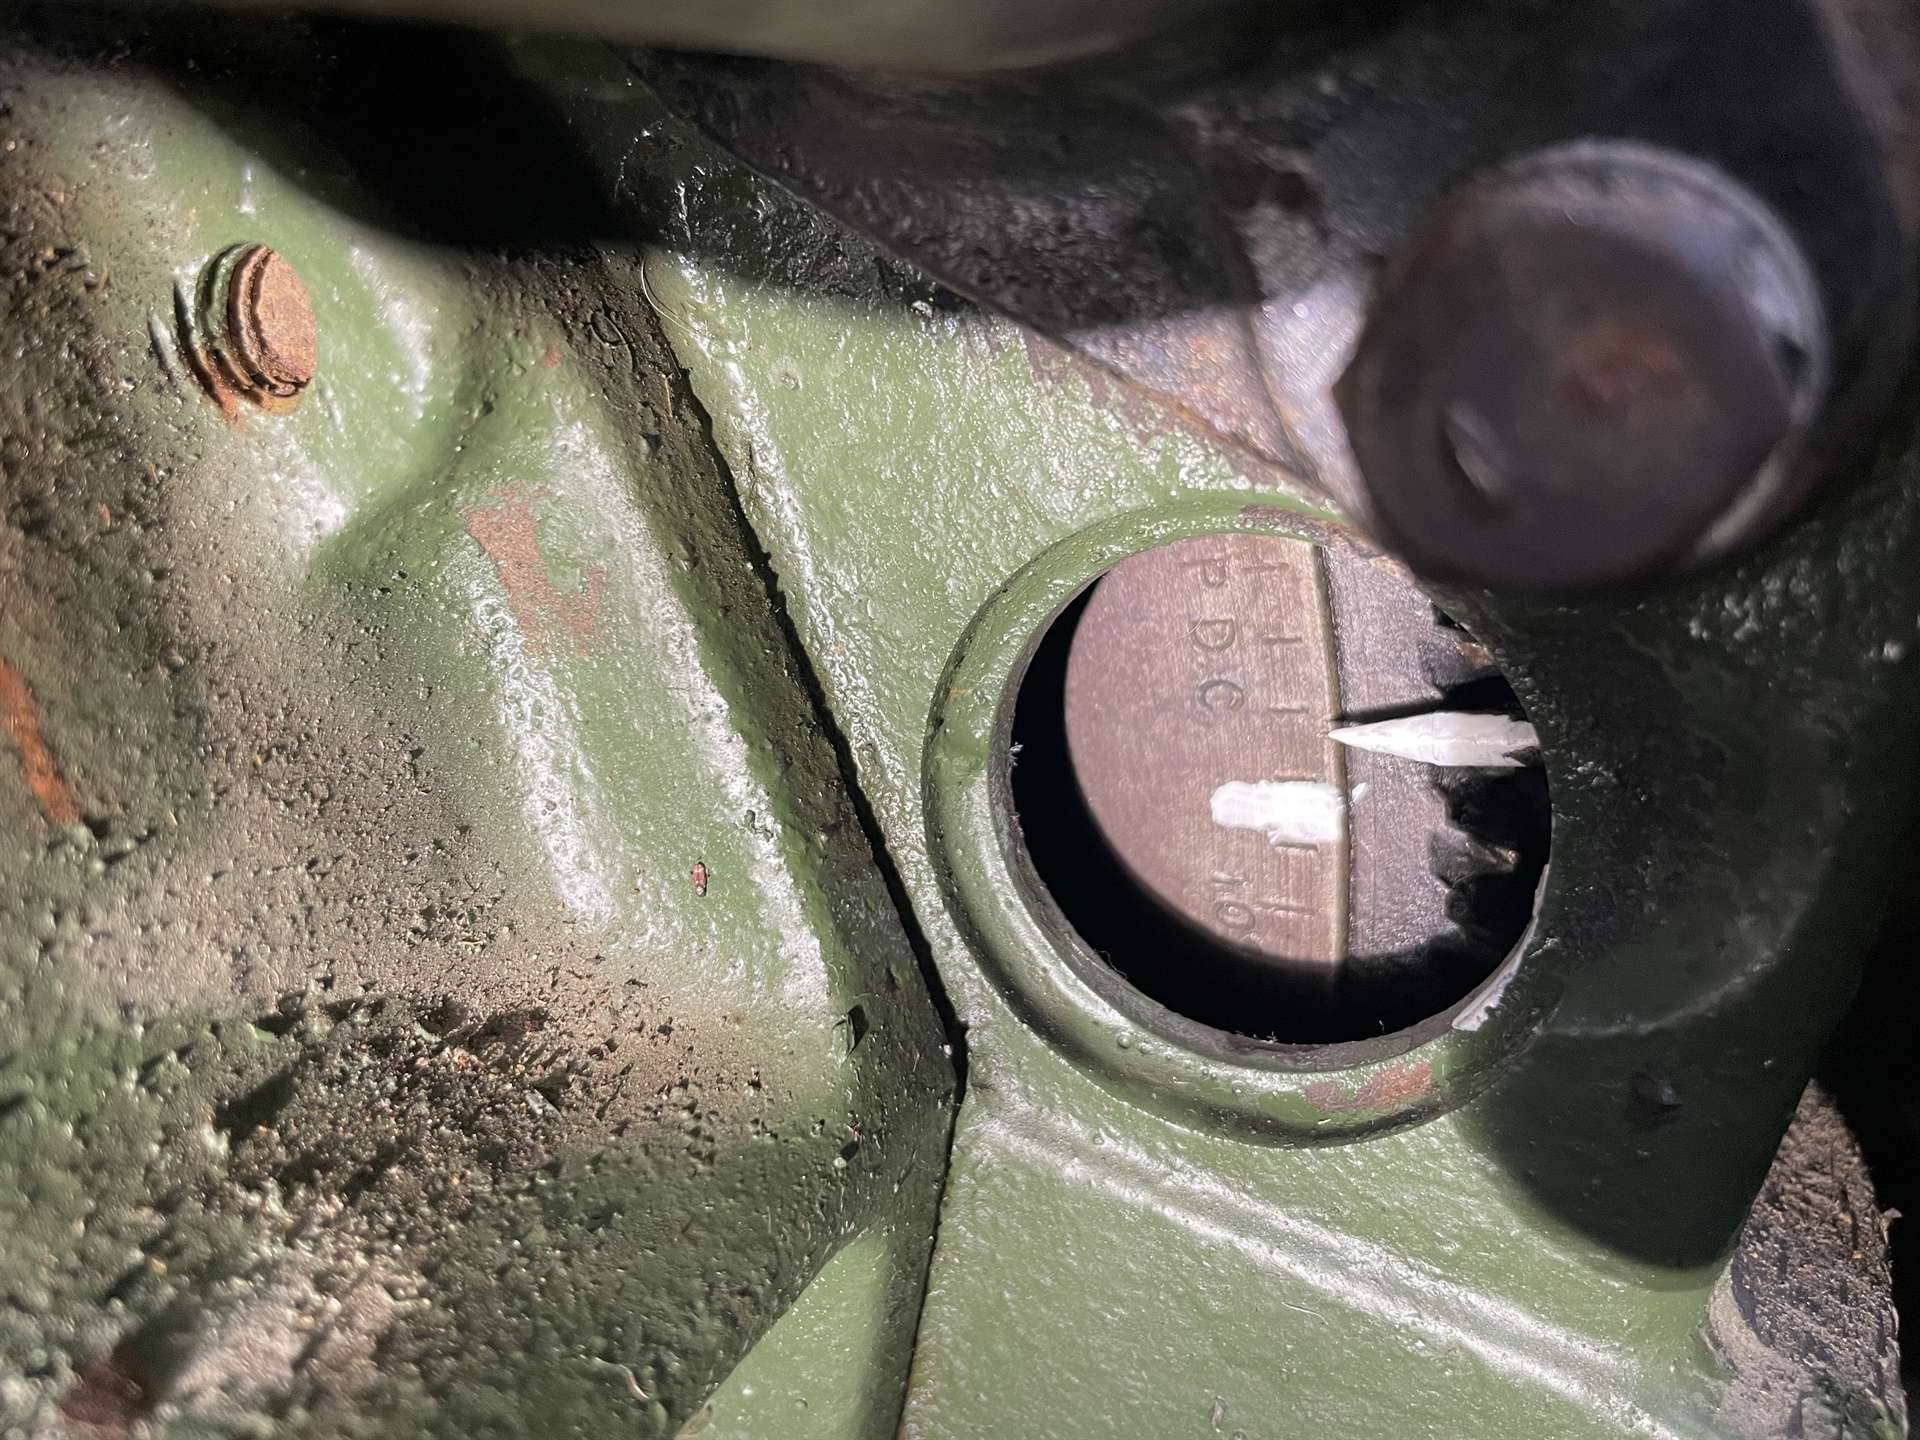 IMG_8099.jpeg (258.59 KB) IMG_8099.jpeg (258.59 KB)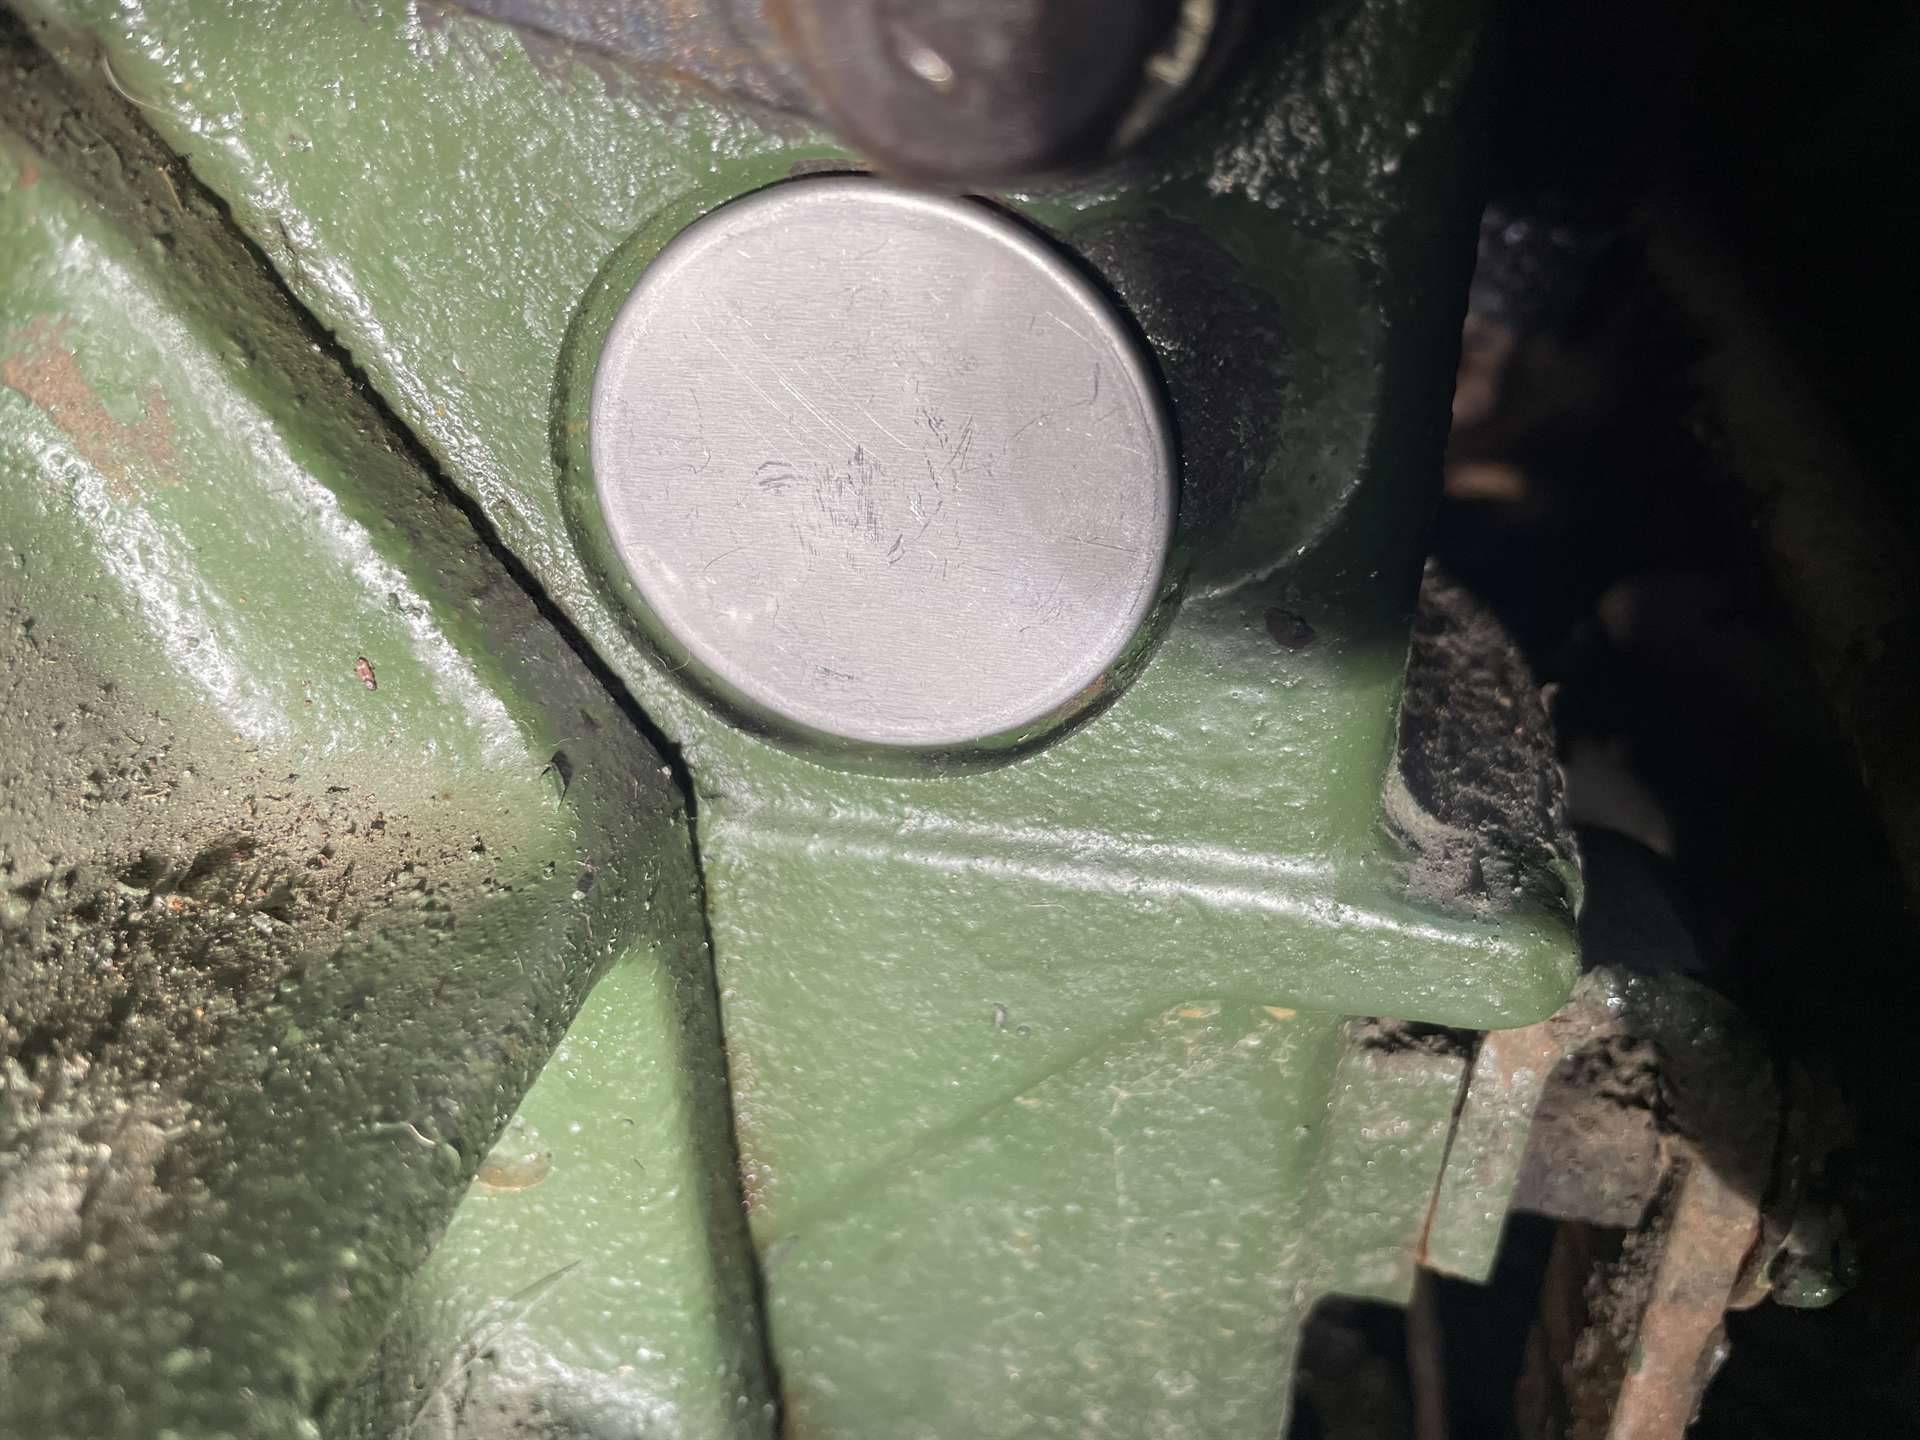
Posted on: 2023/8/30 20:53
|
|||
|
||||
|
Re: Don’s 1937 (120) 138CD Deluxe Touring Limo
|
||||
|---|---|---|---|---|
|
Home away from home
|
Questions below and opinions wanted!
Okay, I’m making some good progress and want to go through things logically. The goal is to get the car on the road as soon as reasonable and then to get it in for body work, paint and interior. I’m trying to put together a clear plan to follow, knowing that things will pop up along the way. I’d would really appreciate any thoughts/comments on my plan of attack. I also have a few questions…. But first, some background… In 2004, my dad had someone “go through” the car a bit and get it running. The problem is that my dad has no idea what was actually done. I’m not sure how he paid someone to work on the car without keeping tabs on what was done, but that’s where I’m at. Here is what I know/believe: 1. Brakes - the brakes had been gone through, but clearly needed that again after 20 years of sitting. 2. Clutch - I believe was replaced 3. Starter - I believe was replaced 4. Tires - had new tires in 2004, but will need replaced 5. Fuel pump - rebuilt, but failed again - electric fuel pump added. Don’t know any details yet. 6. Suspension - was clearly lubed, but I don’t know what if anything else may have been done. 7. Engine/transmission - I don’t believe much was done, but the car was running and driving well in 2004. I do plan to change the oil, transmission fluid, and differential oil….I have what I need on those items from previous posts. I also have new spark plugs and wires. Here is where I’m at today… 1. Wiring - a. a new wiring harness has been installed (mostly). Dad had purchased this back in 2004. All connections are in place except for the sending unit at the gas tank. I’ll deal with that when I drop the tank to clean it. b. I have taken out and serviced the dash switches. I need to re-install them and get them wired. c. Test 2. Brakes - a. replaced master cylinder b. replaced wheel cylinders c. replaced springs/hardware d. cleaned out old fluid e. Still need to bleed the system and then make any needed adjustments….hopefully, that will get done this weekend. I did not replace the shoes since they were in very good condition, having been previously replaced and only driven 20 miles or so after that. 3. Restored and installed horns - the car was missing horns the entire time my dad had it….since 1960 4. Installed new spark plugs and wires. Up next - general plan: 1. fuel tank a. clean, inspect, and service as needed b. check sending unit. service as needed and wire c. re-install tank 2. back flush cooling system and heater. If the heater has a problem, I’ll deal with that in Item 11. 3. Change engine oil 4. Change transmission fluid 5. Change differential fluid 6. Start the car….fingers crossed! It’s quite likely that I’ll need to insert a line that says “rebuild carburetor” before I’m successful with this step. 7. body work/paint 8. glass 9. Interior/upholstery 10. new tires 11. later on - future projects - in order of priority a. Install automatic choke coil - The car currently has a manual choke installed, but I have a NOS choke coil. I just need the linkage for it. b. suspension - front and rear - I think I’ll likely get someone that know much more about it than I do. But, I’m thinking that can be done later. c. Heater - if there are leaks etc..from Item 2. d. dash and interior trim wood graining….what I have is in pretty decent shape for something that was done 86 years ago. I’ll have to decide when I want to tackle all the disassembly and re-wiring when the wood graining is done. e. Sylphon thermostat for radiator louvres- rebuild/replace f. chrome - right now my plan is to just polish up what I have the best that I can. Not sure if I’ll do anything more than that later. Now, this gets me to the questions…. I just discovered and watched all of the old Classic Car Restoration with Mark Lambert working on a 1938 Packard. It was amazing and will be very helpful as I go forward. Especially, considering I’m not a car guy and this is all very new to me. So after watching the episodes, I realized that there are a number of things that I think should be looked at and it seems like now would be the right time to do it (before any body work). 1. Front engine mount - check/replace 2. timing chain - check/replace - to the best of my knowledge, the car has about 85,000 miles on it. 3. Timing cover seal - check/replace 4. cooling system - back flush radiator and block 5. cooling system - thermostat 6. center steering crank bearing These are things that I think I can do. But, I think I would be well off to remove the front clip first. I’ve seen enough other posts that I think I know how to do that. I don’t have a cherry picker, so I’ll need to recruit a few friends to help with the lifting. It appears to me that the front clip has never been removed before. I say this because the car has a substantial undercoating that shows no signs of ever being disturbed (ie parts separated from one another). That get’s me to my questions: 1. Do you agree that the items I listed make sense to do now or should I focus on getting the car at least running first and then remove the clip and do the items above? If were to focus on getting the car running first, I still need to back flush the radiator and clean the fuel tank first. 2. If/when I do remove the front clip, are there any other items I should take a look at while the clip is off? I know some will say the answer to this is “everything”. That’s not what I’m looking for. I will likely add a timing pointer and timing marks on the vibration dampener. 3. For the steering system, I do have a lot of play in the steering wheel. The videos had a great section on this, so I think I can tackle a couple of things like the steering gear box adjustment and center bearing replacement. But, what gear oil should be used in the steering gear box? I would love any and all thoughts on all of this. If I do remove the clip, I’m going to need to get the list of items done pretty quickly as I just don’t have the storage space for the clip. I’ll need to be able to get the clip back on as quickly as possible. I would like to keep the time with the clip off to just a few weeks.
Posted on: 2023/9/7 17:26
|
|||
|
||||
|
Re: Don’s 1937 (120) 138CD Deluxe Touring Limo
|
||||
|---|---|---|---|---|
|
Home away from home
|
Quote:
Don, this is amazing - if you look at my two project blogs, I have done a ton of this work myself, in a disjointed fashion, over the last 12 years. Here are my general opinions, in a somewhat logical order. Others have much more experience than me. 1. On the brakes - do the factory service manual major adjustment, then bleed. I just did that, and it is incredible the difference. 2. Before driving a substantial amount, adjust the clutch. Again, per the book. 30 minute job, huge difference. My overall thought, based on the work you've done: - Finish the brakes. - Adjust the clutch. - Pull and clean fuel tank - Change fluids and try to drive the sucker! Consider it a moral victory, even If you decide to pull the front clip, it is easy. Gather parts in advance and do the following: 1. Pull water distribution tube and inpsect. (no parts) 2. Flush engine with oxalic acid or evaporust. 3. Do the timing chain, and throw a new front motor mount on (can be done with front clip on, but easier with it off). Nothing else on your list needs the front clip pulled. For steering, jack up the car and inspect the center steering bearing, tie rod ends, king pins, wheel bearing, drag link, and steering box. I would expect the center steering bearing to be shot. Can be replaced with two bearings from Napa, etc. - details on my 120 blog. Pulling front clip is not required. Steering box adjustment is easy, if you follow the factory book. It takes 90W mineral oil, just like the transmission, and your 1 gallon from Napa will be plenty for both. Can also get the seal locally from any parts store - again, details in my 120 blog. Your list in general makes sense to me. I say, buy a fire extinguisher (cheap insurance), get it running and driving for the initial victory, then dive into small side projects. I have been sorting my running and driving 120 that purchased as a running, driving car in 2015 in fits and spurts since then, and still working on it. I enjoy the journey! Best of luck, and see you at Hershey!
Posted on: 2023/9/7 18:33
|
|||
|
1937 120 1092 - Original survivor for driving and continued preservation.
https://packardinfo.com/xoops/html/modules/newbb/viewtopic.php?topic_id=16514&forum=10 1937 115 1082 - Total basket case, partial restoration, sold Hershey 2015 https://packardinfo.com/xoops/html/modules/newbb/viewtopic.php?start=0&topic_id=6550&order=ASC&status=&mode=0 |
||||
|
||||
|
Re: Don’s 1937 (120) 138CD Deluxe Touring Limo
|
||||
|---|---|---|---|---|
|
Home away from home
|
Thanks, Ken. Super helpful.
That was my original plan until I watched that series. I think I’ll follow your advice. I’ll clean the tank, flush the radiator, change the fluids and see what I have. I would like to see if I can get that car running this fall. Dad is healthy overall (just major mobility issues), but he’s getting up there. More than anything, I want to make sure he sees progress and sees the car running on the road again. Then, I will almost certainly take the clip off and look at the timing chain, seal and motor mount all before getting it in for body work.
Posted on: 2023/9/7 18:47
|
|||
|
||||
|
Re: Don’s 1937 (120) 138CD Deluxe Touring Limo
|
||||
|---|---|---|---|---|
|
Home away from home
|
Got out tonight to adjust the brakes before bleeding the system (hopefully, tomorrow). I really thought this part would be easy, but there’s always some “easy” thing that doesn’t go quite right.
I was putting the wheels back on as I think it’s easier to adjust the brakes with them on…I can get a better feel. When I got to the right rear, I discovered one hole in the drum with messed up threads. That got me looking at all of my lug bolts. I discovered TWO with messed up threads. Not sure how that math works, but that’s what it is. All of the holes in the other drums were all good. So, off with the drum and off to buy more tools….I didn’t have a tap and die large enough. Then, I fixed the one hole and the two lug bolts. Then, I went ahead and cleaned the threads on all of the holes on all drums and all of the lug bolts. Much better now. While I was at it, I went ahead and cleaned the threads on the rear axle and axle nuts since the new tap and die set had what I needed. It’s all back together now and adjusted. Bleeding the system should be “easy” right? Key words are “should be”. I think it will go well.
Posted on: 2023/9/8 23:17
|
|||
|
||||


