|
Re: Ken's 1937 115C Touring Sedan
|
||||
|---|---|---|---|---|
|
Home away from home
|
One update. I realized that perhaps the shoes I put on the front drums have the thick spot for the parking brake. Will report my findings later.
EDIT: Based on research with Kanter, determined that the front brake shoes will not have a thick spot, as they are the same part number. Long term solution being researched.
Posted on: 2011/7/11 14:43
|
|||
|
1937 120 1092 - Original survivor for driving and continued preservation.
https://packardinfo.com/xoops/html/modules/newbb/viewtopic.php?topic_id=16514&forum=10 1937 115 1082 - Total basket case, partial restoration, sold Hershey 2015 https://packardinfo.com/xoops/html/modules/newbb/viewtopic.php?start=0&topic_id=6550&order=ASC&status=&mode=0 |
||||
|
||||
|
Re: Ken's 1937 115C Touring Sedan
|
||||
|---|---|---|---|---|
|
Home away from home
|
JW, thanks again! I'm trying... first time I've ever tried to restore something.
I'm wondering if there is a difference between nomenclature and intuitive understanding on this axle. On my car, the only oil seal is in the axle tube, inboard of the outer axleshaft bearing, but clearly in the outboard portion of the axle tube. When I dropped the third member (containing the differential), I found an inner bearing for each axleshaft just outboard of the differential spider gears, and a mechanism for adjusting the ring gear laterally- the proper term for this adjustment escapes me. I saw no evidence of what I would term an inner oil seal, but I wonder if the engineers at Packard termed it an inner oil seal because it was inboard of the outer bearing? Does your reference have an exploded diagram? Incidentally, I found a rear axle oil seal at the local parts store for $14. Will put part numbers in the cross-reference next time I'm out in the shop... it was too bloody hot today to do anything except sit back with a beer and a book!
Posted on: 2011/7/11 20:11
|
|||
|
1937 120 1092 - Original survivor for driving and continued preservation.
https://packardinfo.com/xoops/html/modules/newbb/viewtopic.php?topic_id=16514&forum=10 1937 115 1082 - Total basket case, partial restoration, sold Hershey 2015 https://packardinfo.com/xoops/html/modules/newbb/viewtopic.php?start=0&topic_id=6550&order=ASC&status=&mode=0 |
||||
|
||||
|
Re: Ken's 1937 115C Touring Sedan
|
||||
|---|---|---|---|---|
|
Home away from home

|
Quote:
Ken, yes I believe that is a correct description of the inner oil seal. My parts manual shows a cross section of the axle shaft end, wheel bearings, and seals, but it is of a senior car, not a 120C or 115C. (o{I}o)
Posted on: 2011/7/12 13:02
|
|||
|
We move toward
And make happen What occupies our mind... (W. Scherer) |
||||
|
||||
|
Re: Ken's 1937 115C Touring Sedan
|
||||
|---|---|---|---|---|
|
Forum Ambassador

|
word to the wise when using the brown primer....when the black you paint over it gets scratched at some point....you'll see the brown under it. looks horrible to me. i wish i had done a couple of parts of my car different and when i figure this out i switched to just using rust converter/primer. comes out flat black and seals till you can paint.
just my opinion though. Hank
Posted on: 2011/7/12 13:31
|
|||
|
1937 Packard 138-CD Deluxe Touring Limousine
Maroon/Black 1090-1021 [url=https://packardinfo.com/xoops/html/modules/registry/View.php?ID=232]1955 Packard |
||||
|
||||
|
Re: Ken's 1937 115C Touring Sedan
|
||||
|---|---|---|---|---|
|
Home away from home
|
Hank, thanks for the thoughts. What brand of rust converter primer have you been using? I painted the frame with Rustoleum Stops Rust protective enamel in semi-gloss black. On sandblasted parts, I used the Rustoleum clean metal primer, also in the Stops Rust line, which comes out white. For parts I prepped at home, I typically use the Rustoleum rusty metal primer, which comes out brownish-red (like on my pedals) and bonds to oxidized metal.
I like the rustoleum products, because I can buy the same color in spray cans or in regular cans for application with a sprayer. My long term thought was that this will allow me to touch up frame scratches and the like with just a rattle can, plus it simplifies logistics when I am painting smaller parts.
Posted on: 2011/7/12 18:04
|
|||
|
1937 120 1092 - Original survivor for driving and continued preservation.
https://packardinfo.com/xoops/html/modules/newbb/viewtopic.php?topic_id=16514&forum=10 1937 115 1082 - Total basket case, partial restoration, sold Hershey 2015 https://packardinfo.com/xoops/html/modules/newbb/viewtopic.php?start=0&topic_id=6550&order=ASC&status=&mode=0 |
||||
|
||||
|
Re: Ken's 1937 115C Touring Sedan
|
||||
|---|---|---|---|---|
|
Home away from home
|
As usual, the weekend wasn't as productive as I wanted, but it was productive. I got the transmission rebuilt, reassembled, and repainted.
When I was taking it apart, I initially had a hard time driving the counter shaft out. Solution: I bought a brass punch so I could really get after it, and with one firm tap of the hammer, she came right out. Other tricks- when putting new springs in the synchromesh, I didn't have a ring compressor or a big rubber band, so I found a helper for 30 seconds to hold 4 springs, I held two more, and pushed the two pieces together. During reassembly, the service manual calls for a Packard special tool, a tapered dummy counter shaft. I whipped down to the local Packard dealership, but they were closed for the weekend, so I had to improvise. I found a 1/2 drive deep well socket that was the same OD as my counter shaft, and used that in combination with some extensions and voila! With my tools (Craftsmen) the 9/16" was the best socket. I put it in from the front of the case, tipped the transmission up on end, and slid the tool down just far enough to install the rear needle bearings. The taper on the socket made this much much easier, as did the shaft being vertical instead of horizontal. Also, a tab of Vasoline held the bearings in place as I monkeyed around. I then used the actual counter shaft to follow my tool. I then flipped the case, making sure not to drop the counter shaft on the floor, and put a 1/2 drive normal depth 9/16" socket narrow end up in place of my improvised dummy shaft. Put in the other needle bearings, and I was done. Took a few tries to get the process smoothed out, but pretty easy once it was all done. When I'm out of the navy and have a more permanent shop, I intend to try and find some used machine tools. If I would've had a lathe, I could have made my own dummy counter shaft today. So it goes. Also sprayed some Packard green today! I bought two spray cans from Bill Hirsch. It looked a LOT different than what was on the engine. I'll post a picture in the next few days. Attach file:  (93.56 KB) (93.56 KB)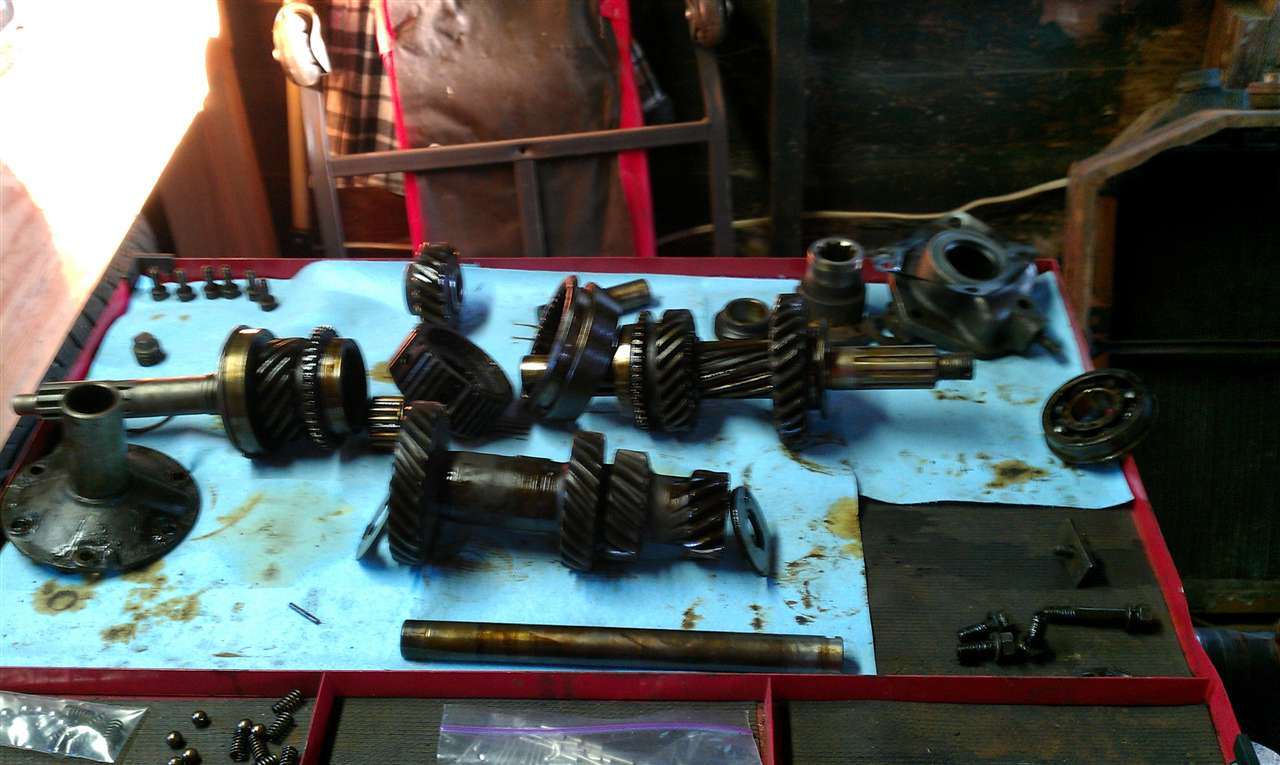 (91.49 KB) (91.49 KB) (128.91 KB) (128.91 KB)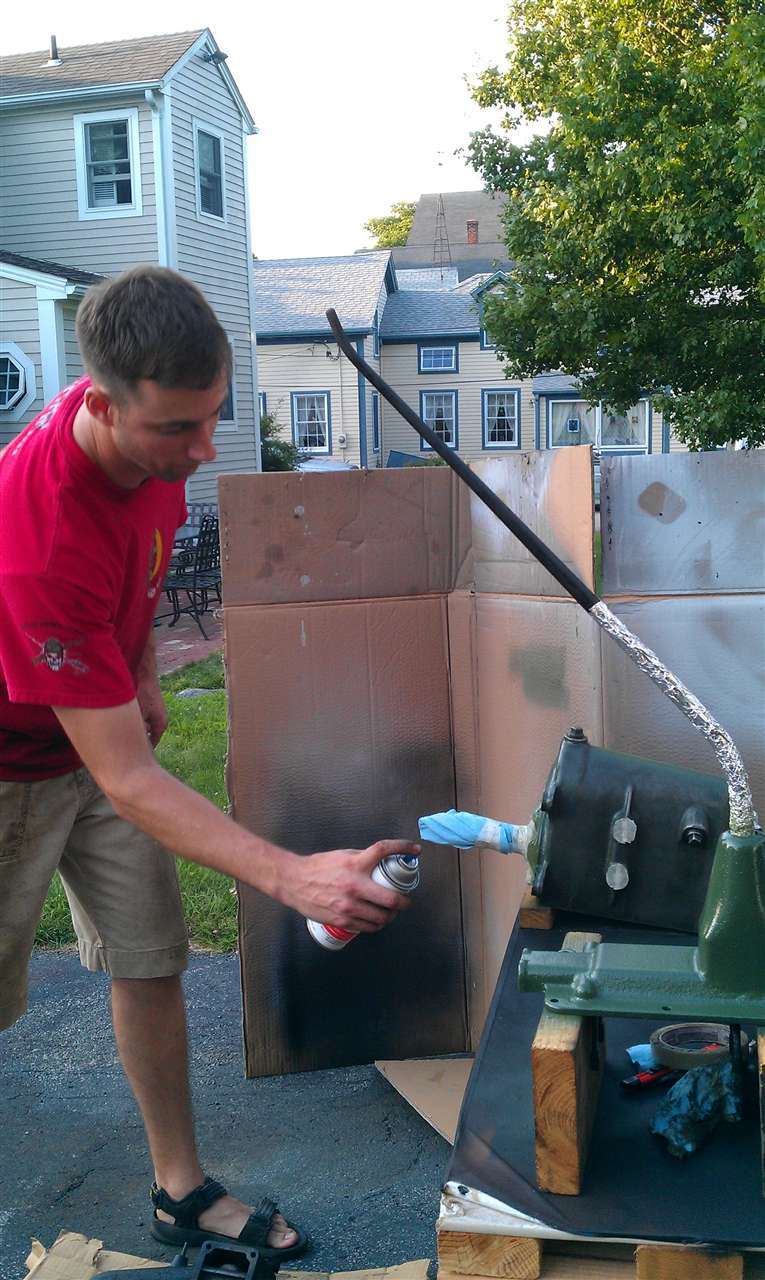 (90.04 KB) (90.04 KB)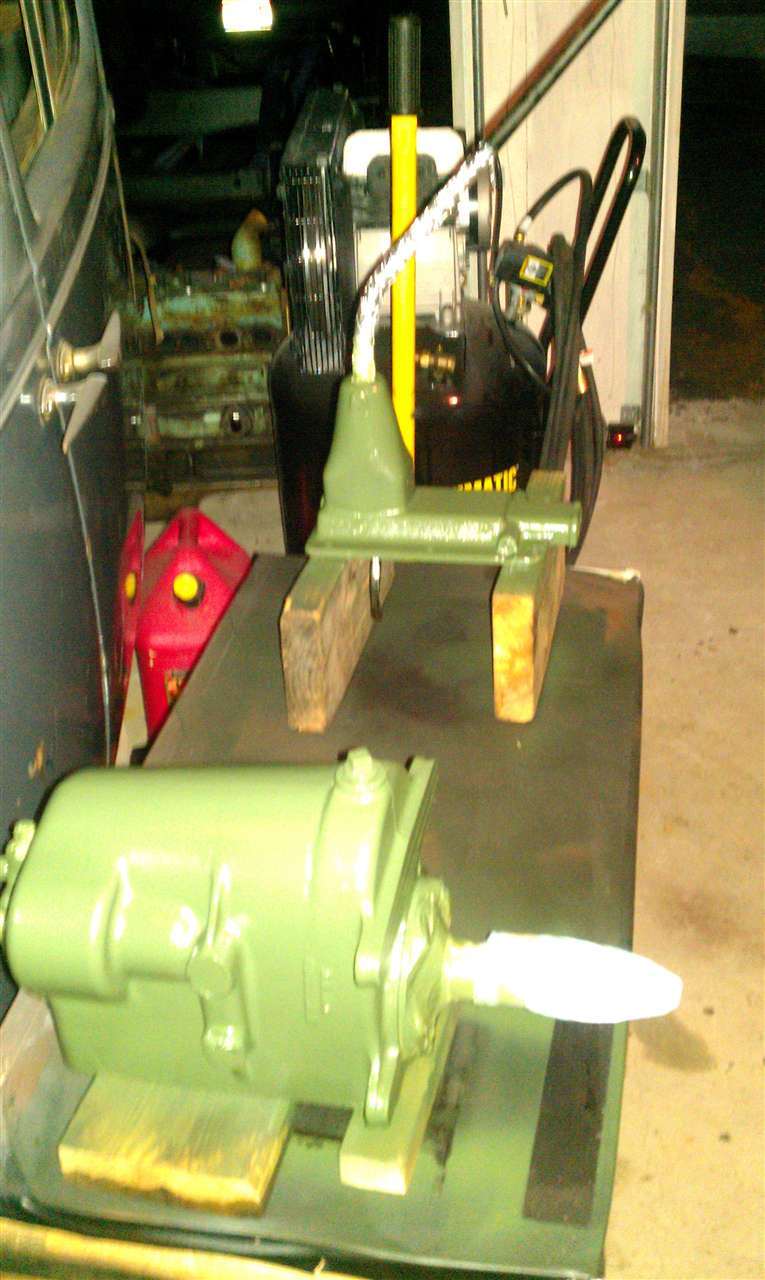
Posted on: 2011/7/17 21:23
|
|||
|
1937 120 1092 - Original survivor for driving and continued preservation.
https://packardinfo.com/xoops/html/modules/newbb/viewtopic.php?topic_id=16514&forum=10 1937 115 1082 - Total basket case, partial restoration, sold Hershey 2015 https://packardinfo.com/xoops/html/modules/newbb/viewtopic.php?start=0&topic_id=6550&order=ASC&status=&mode=0 |
||||
|
||||
|
Re: Ken's 1937 115C Touring Sedan
|
||||
|---|---|---|---|---|
|
Forum Ambassador
|
sorry, didn't mean to ignore your request.
this is what i use to convert rust and to prime at the same time. great stuff and cheap too. i have also put it on not rusty metal and never had an issue with it. http://www.rustoleum.com/CBGProduct.asp?pid=40
Posted on: 2011/7/21 11:37
|
|||
|
1937 Packard 138-CD Deluxe Touring Limousine
Maroon/Black 1090-1021 [url=https://packardinfo.com/xoops/html/modules/registry/View.php?ID=232]1955 Packard |
||||
|
||||
|
Re: Ken's 1937 115C Touring Sedan
|
||||
|---|---|---|---|---|
|
Home away from home
|
No worries! We all have other stuff to do, aside from think apart Packards all the time.
I got some work done today in spite of the triple digit heat index. Pulled everything off of the motor and started wire wheeling it down, in preps for painting. Was going great, found a lot of Packard green under the ugly blue-ish green someone had painted over the grease and grime in the last 75 years, until... I found a crack in the block between #5 and #6 cylinders. Not sure what I'll do about it. For the weekend, I'll probably still paint the motor, put the motor and tranny back in the car, and try to get the body set back onto the frame. Long term, I may be looking for another motor. I don't want to rebuild a motor because this project is going to cost a fortune already, but we'll just have to wait and see what happens on that front. Also may try to get my new fuel tank (thanks Don!) wire-wheeled down and painted. Since I didn't get any feedback on color, I'll probably paint it semi-gloss black like everything else on the underside of the car. EDIT: Also, the center freeze plug on this side of the block is a little cockeyed. I'll probably try to straighten it, flush the block, and see where we're at. Attach file: (134.05 KB)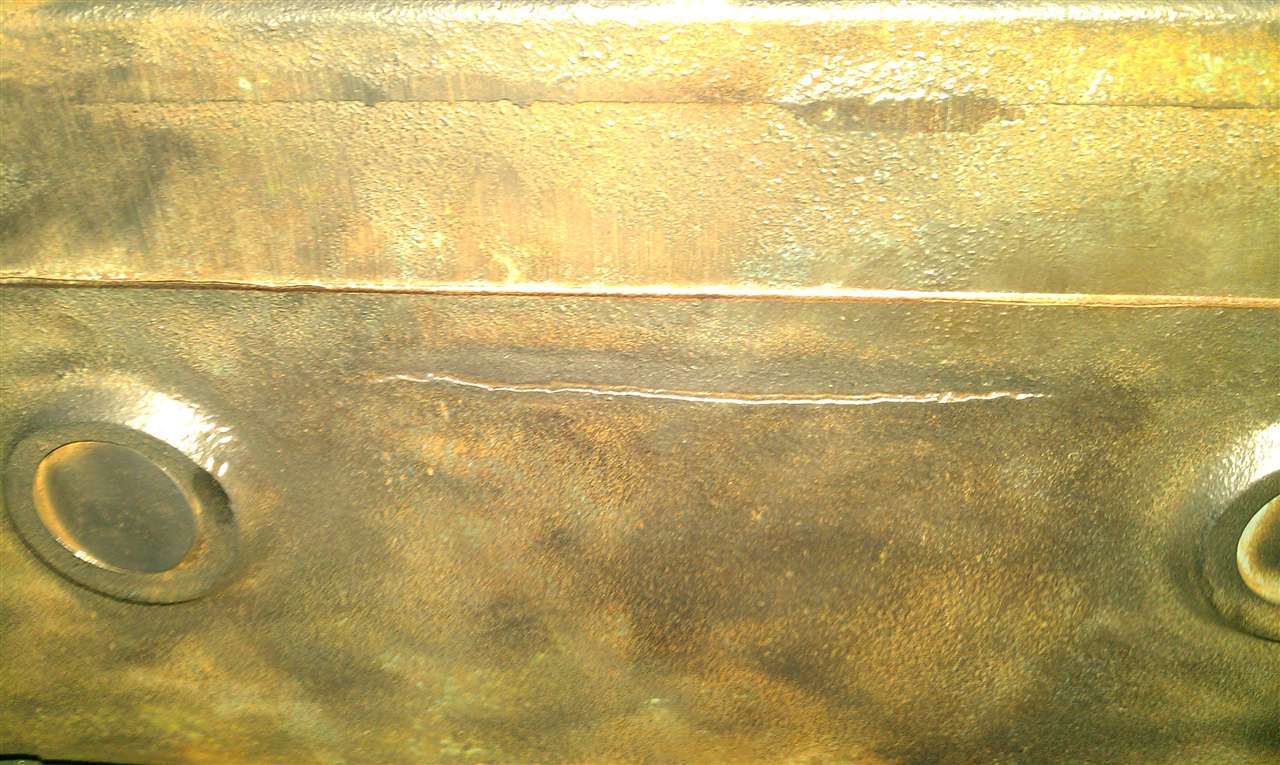 (131.70 KB) (131.70 KB)
Posted on: 2011/7/22 21:46
|
|||
|
1937 120 1092 - Original survivor for driving and continued preservation.
https://packardinfo.com/xoops/html/modules/newbb/viewtopic.php?topic_id=16514&forum=10 1937 115 1082 - Total basket case, partial restoration, sold Hershey 2015 https://packardinfo.com/xoops/html/modules/newbb/viewtopic.php?start=0&topic_id=6550&order=ASC&status=&mode=0 |
||||
|
||||
|
Re: Ken's 1937 115C Touring Sedan
|
||||
|---|---|---|---|---|
|
Home away from home
|
Well, got a lot done today. I spent a LOT of time cleaning off the engine- big wire wheel, little wire wheel, air compressor, big wire brush, little wire brush, pick, brake cleaner, etc. I think it was worth it- got most of the motor painted. I decided to leave the head until the block is in the frame- I didn't have anything to block the spark plug holes with that threaded in and the chain would've interfered anyway. Of course I threw away my old fuel fouled plugs, which would have been perfect to paint over.
I ran out of paint anyway, so the motor won't go in until next weekend. I tried to pull the water distribution tube today, using the bent all-thread trick, but I couldn't get anything to budge. I did take off the thermostat housing and determined there was no thermostat. I flushed both ends out with a garden hose, and didn't get too much out of the block. Is there any other, better means to flush the water jackets? I was kind of thinking of plugging all the holes and using CLR, but that's just a guess. Also looking for tips on pulling the water distribution tube, since my idea (from here) doesn't work. Also started cleaning off the tank. Tomorrow I'll make the fuel line and finish the tank. Probably start painting it too. Attach file: (130.47 KB)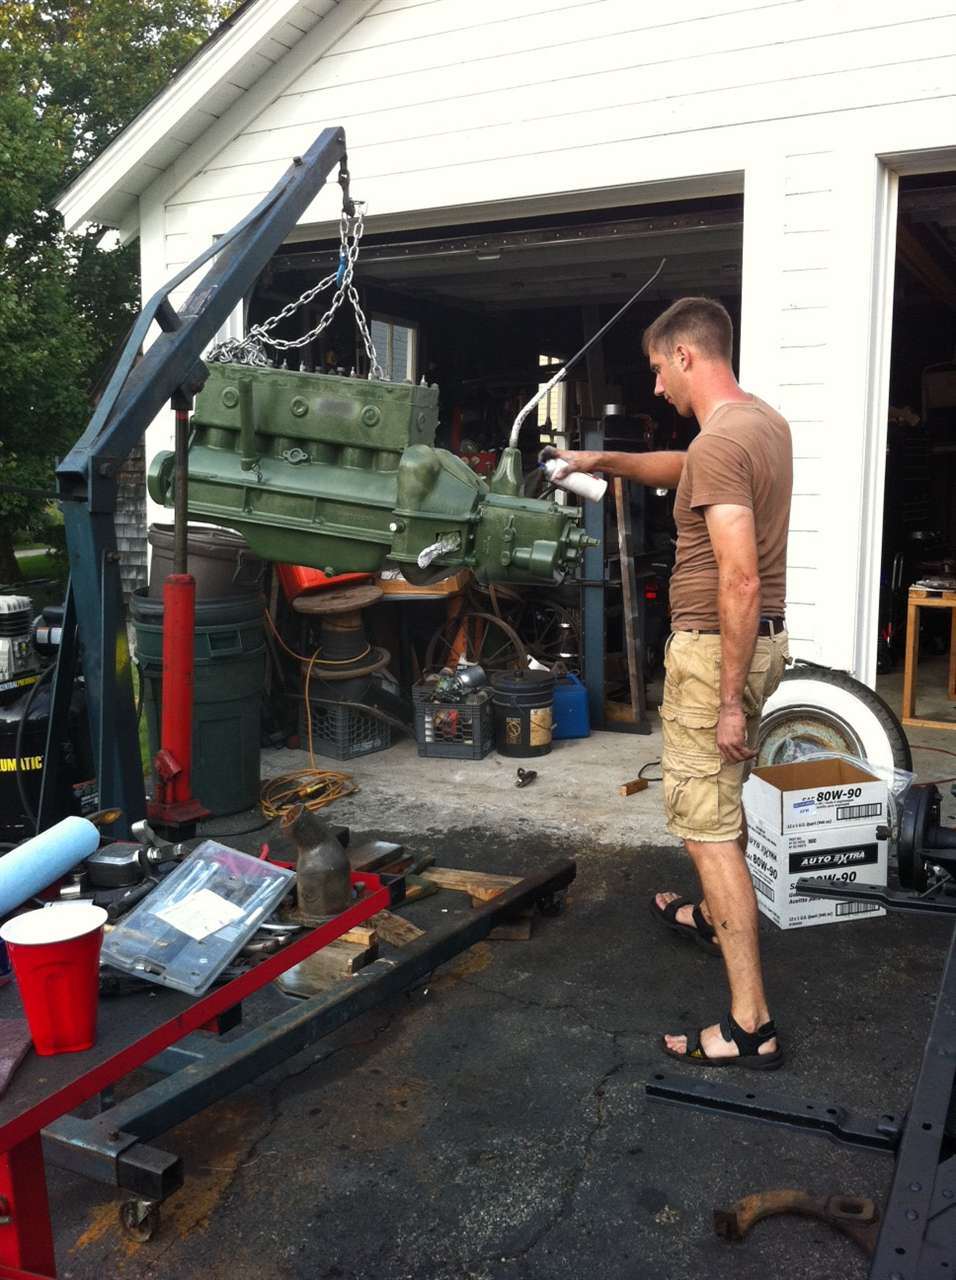 (120.22 KB) (120.22 KB)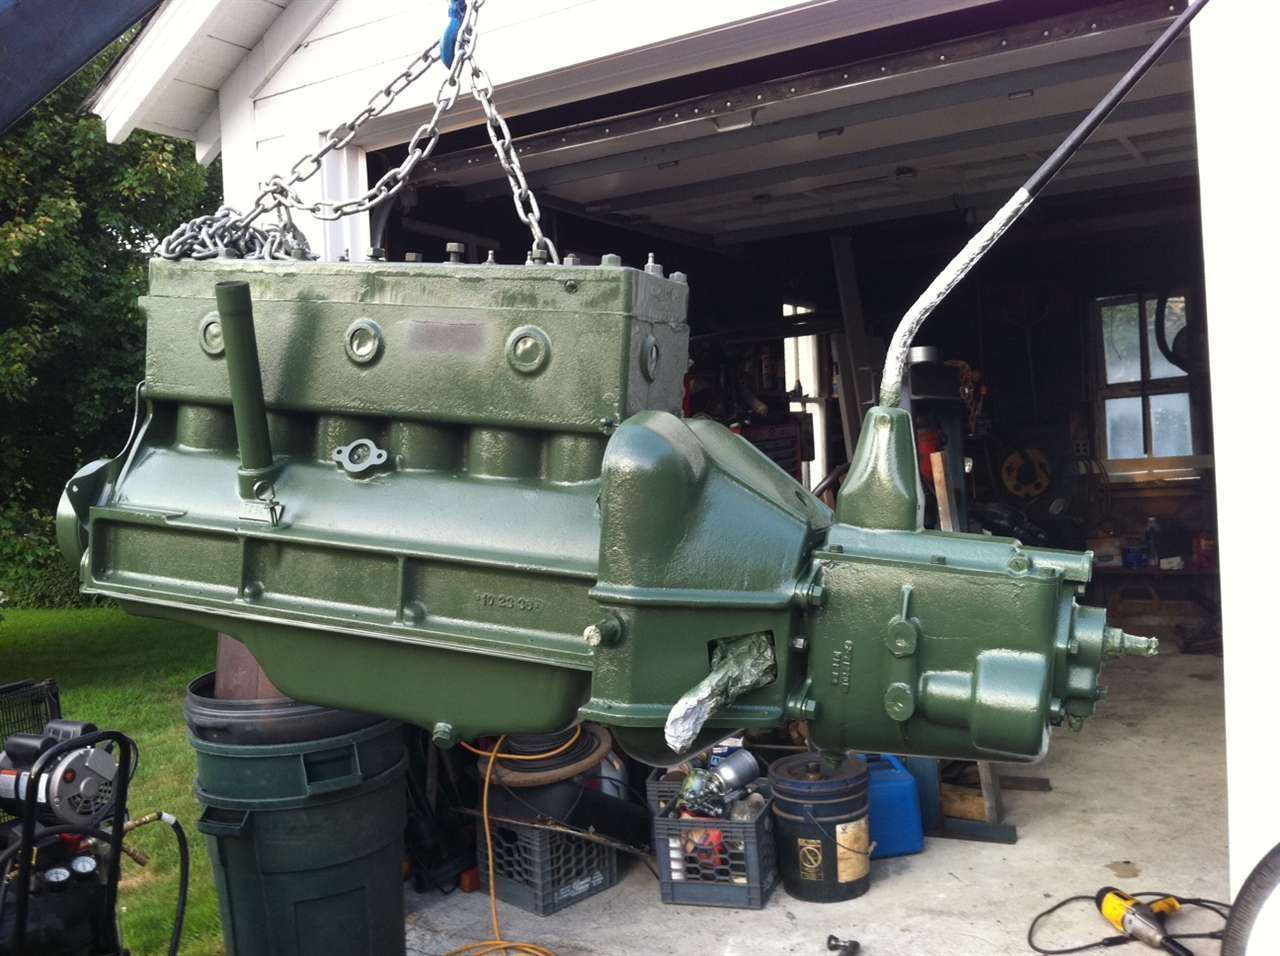 (130.25 KB) (130.25 KB)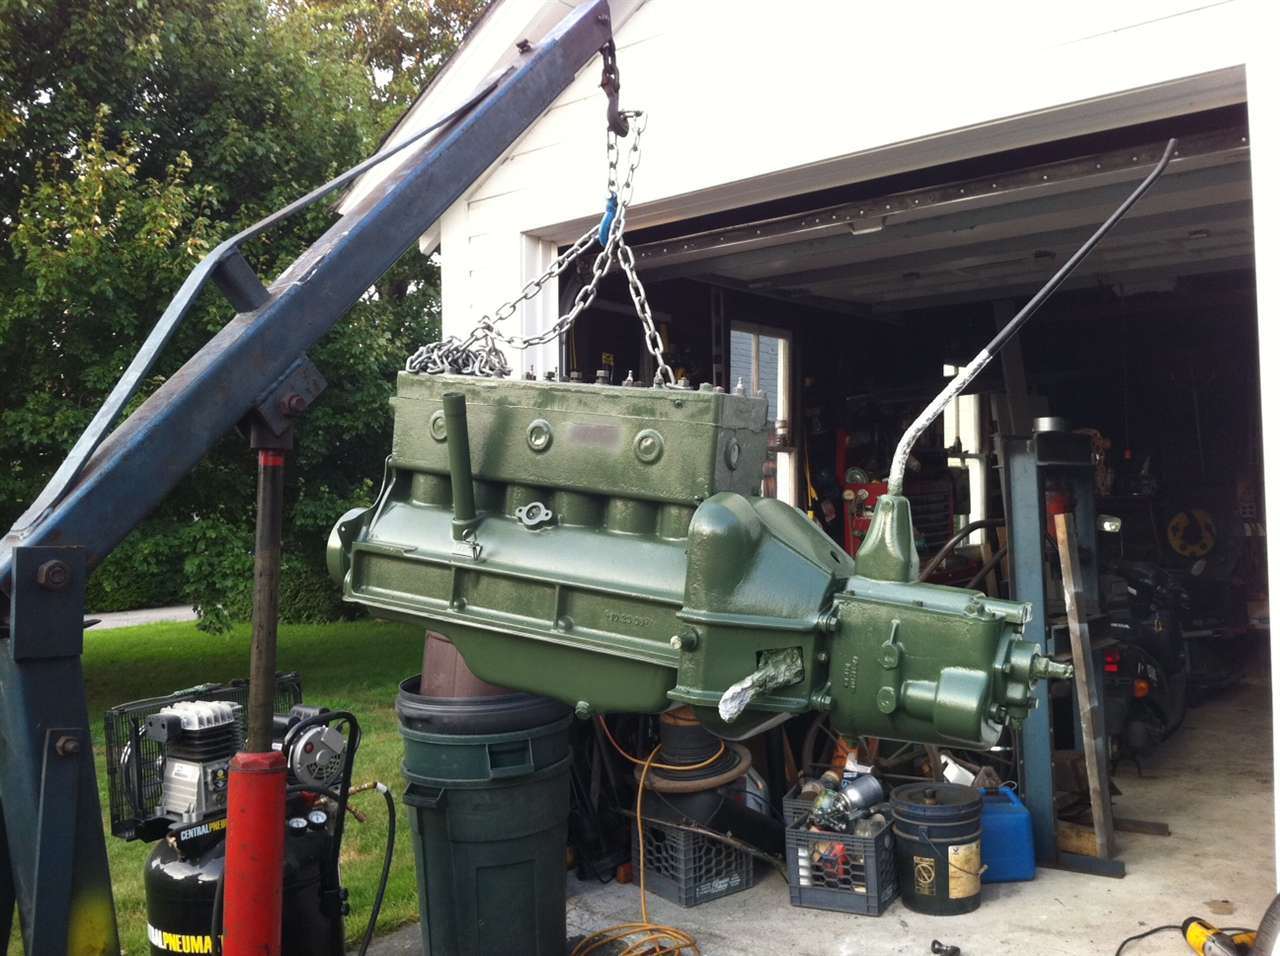
Posted on: 2011/7/23 20:44
|
|||
|
1937 120 1092 - Original survivor for driving and continued preservation.
https://packardinfo.com/xoops/html/modules/newbb/viewtopic.php?topic_id=16514&forum=10 1937 115 1082 - Total basket case, partial restoration, sold Hershey 2015 https://packardinfo.com/xoops/html/modules/newbb/viewtopic.php?start=0&topic_id=6550&order=ASC&status=&mode=0 |
||||
|
||||


