|
Re: Igniion switch bezel
|
||||
|---|---|---|---|---|
|
Home away from home

|
Most clever. Would like to know more. Difficult to tell from the pic how it is made. NOT that it is important but will the light still shine to the key hole???
Posted on: 2008/8/24 14:57
|
|||
|
||||
|
Re: Igniion switch bezel
|
||||
|---|---|---|---|---|
|
Forum Ambassador

|
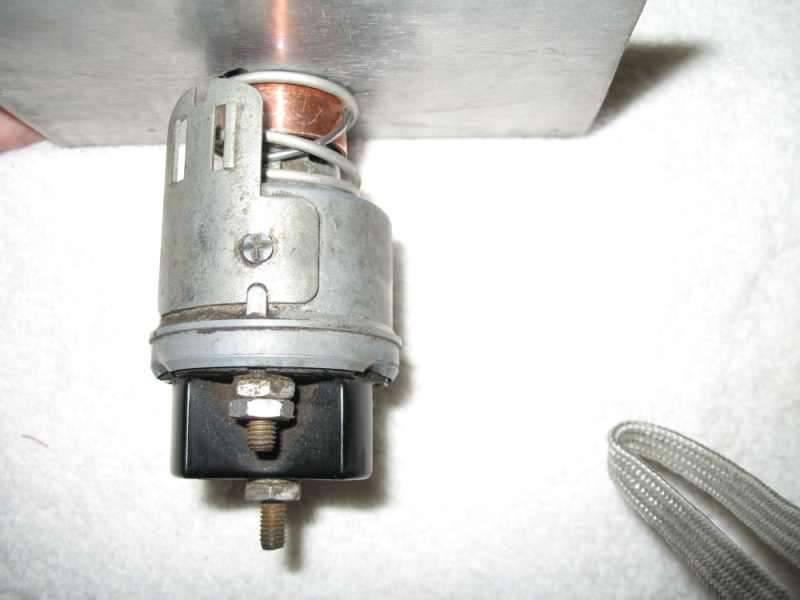
The assembly shown in first post and this piece are of an earlier attempt. Have made a couple of changes and that is what's on car now. The light will still shine and still debating about jig and second attachment pin.
Am trying to keep it simple because of limited work area under dash. My car has fact air and not much room so it took an extra few strong words. Removing glove box made it do able. Cars without air should be much easier. Attach file:  (42.71 KB) (42.71 KB)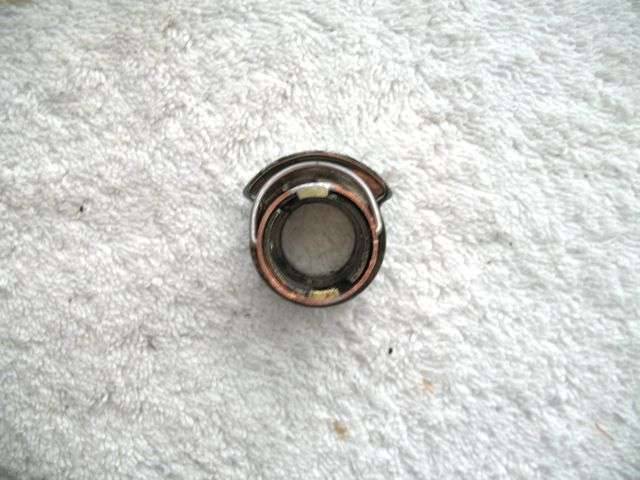
Posted on: 2008/8/24 15:57
|
|||
|
||||
|
Re: Igniion switch bezel
|
||||
|---|---|---|---|---|
|
Forum Ambassador

|
Howard -
It's a little tough for me to visualize since I've not had the switch removed completely from the dash - just the bezel. Yet, after studying your first attempt, I think I see now that you've sleeved the original bezel and are using that wire bail to engage one of the pins on the neck of the ignition switch. That seems like a good workaround when the first ear on the bezel breaks, but I've got one with both ears broken off now. I'd been thinking of somehow making an end with two new ears, but at a loss on how to graft it to the bezel and retain the neat little lighting feature. Alas, there isn't much time for me to give to the hands-on aspect of the hobby right now (and no relief in sight). I may have a spare used bezel somewhere to solve my problem (for now), but this is another example of what a great site this is for picking up where the factory and present vendors have left off!
Posted on: 2008/8/24 18:33
|
|||
|
||||
|
Re: Igniion switch bezel
|
||||
|---|---|---|---|---|
|
Forum Ambassador
|
On most bezels I've seen, both tabs have been broken or bent so I made the sleeve to replace both.
The bezel has at this point, 2 holes drilled into side (am leaning toward 4--two springs) and then the spring connects the pieces. The challenge has been getting something to hold everything together that is strong, simple and can be manipulated in very little working area almost by feel. Right now, I've settled on .062 spring wire which appears to be plenty strong. It's shaped so it can be spread over sleeve beforehand just beside the holes and snap in when persuaded, yet still allow for removal of sleeve if needed. Another challenge has been a way to hold the brass pieces that replace the tangs when soldering. Since the ignition switch has offset pins, the brass pieces have to be pretty accurately located. Also haven't decided if just solder is enough or perhaps a pin should also be inserted. All this has to be in a sleeve small enough in diameter that still allows the original spring to go over it to hold everything in dash yet large enough on inside to allow the ignition switch pins to pass. When I think the thing is easy enough, will publish all the dimensions and materials I came up with. It's almost there. Attach file: (9.56 KB) (37.16 KB) (37.16 KB)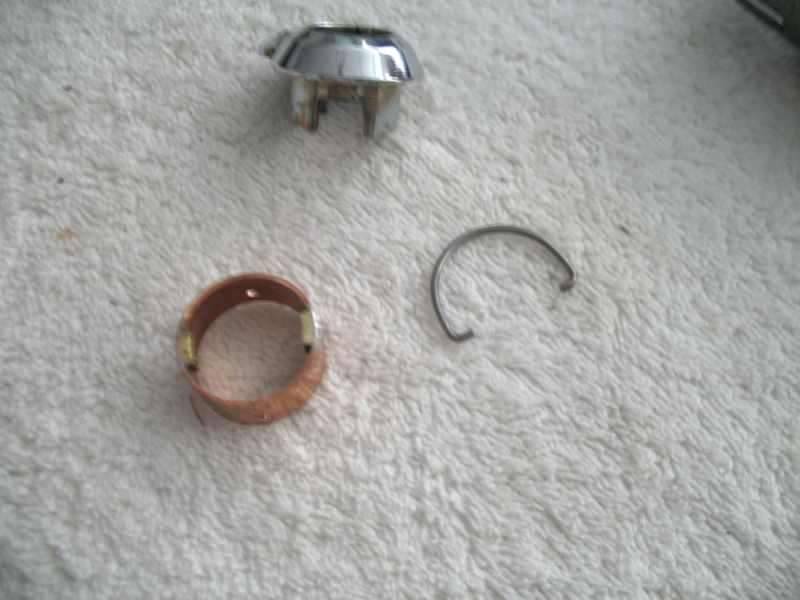
Posted on: 2008/8/24 19:15
|
|||
|
||||
|
Re: Igniion switch bezel
|
||||
|---|---|---|---|---|
|
Home away from home
|
How thick is the wall of the brass sleeve????
I tried that a few months ago using .008" feeler gauge stock and rolled it into the bezel and used JB Weld to hold it in.The problem is that the bore of the bezel seemed to be tapered and the sw would not insert all of the way. I'll dig out and look at it again. Here's a pic. As u can see part of it broke off due to it being so thin. Attach file: (23.97 KB)
Posted on: 2008/8/24 21:48
|
|||
|
||||
|
Re: Ignition switch bezel
|
||||
|---|---|---|---|---|
|
Home away from home
|
"Another challenge has been a way to hold the brass pieces that replace the tangs when soldering."
Not clear to me what it is that u are soldering or why solder is needed. But what ever it is maybe try using tinners paste (tinners solder) and a FLAME instead of roll or wire type solder with an iron.
Posted on: 2008/8/24 22:20
|
|||
|
||||
|
Re: Ignition switch bezel
|
||||
|---|---|---|---|---|
|
Forum Ambassador
|
PV8, I also tried something internal as you did but ran into same problem because anything I felt was strong enough was too thick to allow the cylinder in. Anything external, the pins on cylinder were not long enough to guarantee a good lock when things started vibrating.
The sleeve is copper from hardware store that happened to fit perfectly. Since the tangs are usually broken, or will weaken and break if straightening tried, they were removed entirely. Small pieces of brass are soldered onto copper to replace the tangs. The size used fills the space where the broken tangs would have been so the pins on cylinder lock to them instead. Still debating about the second lock spring to bezel and if the brass should be pinned as well as soldered. Am in the process of re-arranging my shop so it may be a day or three, but will make another of current version so as to get some decent picts and then all should be clear.
Posted on: 2008/8/24 22:59
|
|||
|
||||
|
Re: Ignition switch bezel
|
||||
|---|---|---|---|---|
|
Forum Ambassador
|
OK, I see now that the add-on brass tangs are what replaces the broken ears, and the spring wire is used to retain the sleeve. Brilliant! (As the Guiness boys would say.)
However, could you use a slightly longer sleeve, and then notch back some of the copper to create tabs that could be folded over, rather than soldering brass onto the sleeve? I'm thinking if you could punch these out easily enough, you could sell them as a kit. As scarce and expensive as original bezels are, I bet they'd sell well.
Posted on: 2008/8/25 7:42
|
|||
|
||||
|
Re: Ignition switch bezel
|
||||
|---|---|---|---|---|
|
Forum Ambassador
|
PV8. Interesting idea. Hadn't tried bending because sleeve is hard copper but maybe will bend or can be softened a bit. Will give it a try.
Posted on: 2008/8/25 9:09
|
|||
|
||||


