|
Re: 1940 Super 8 160 Model 1803 Project
|
||||
|---|---|---|---|---|
|
Home away from home
|
I'm really embarrassed about my engine compartment. I put it in cold storage a couple of years ago, the engine was hot, I put a car cover on it, and everything got a coat of surface rust on it. I haven't had a chance to go back and clean anything yet.
Anyway, while the 1941-42 air cleaner is basically the same and will work, the 1940 air cleaner was slightly different in the area directly over the carburetor. The 1940 unit was round, while the 1941-42 and postwar cleaners are flat. If you need any different detail shots, let me know. Attach file:  (86.75 KB) (86.75 KB)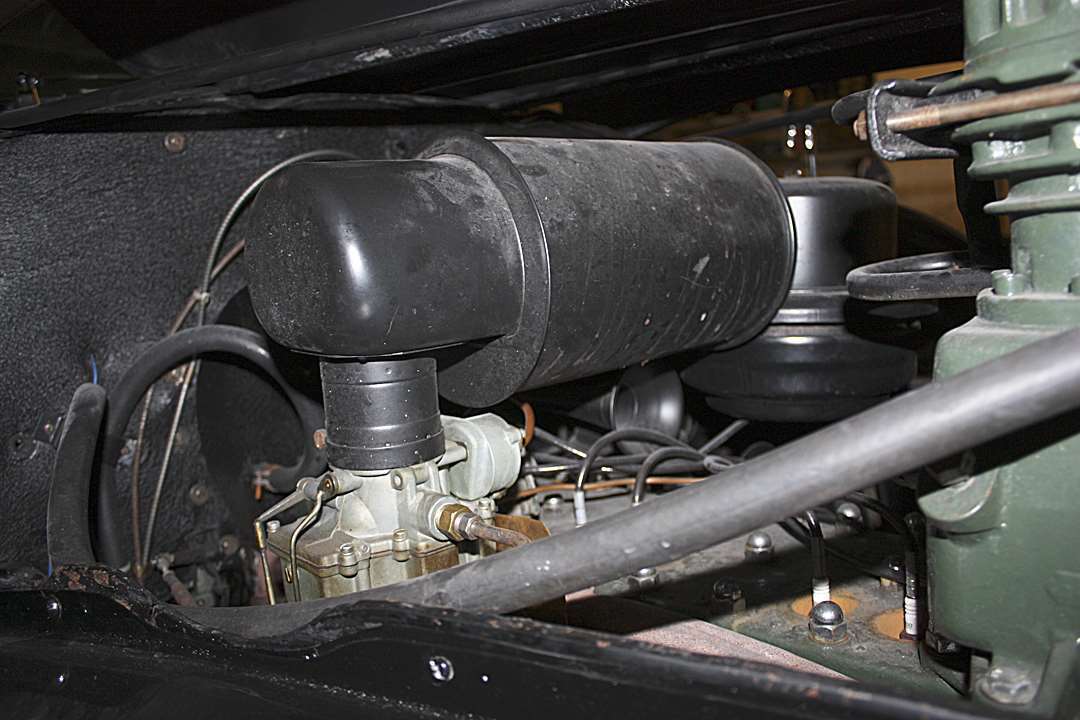 (73.61 KB) (73.61 KB)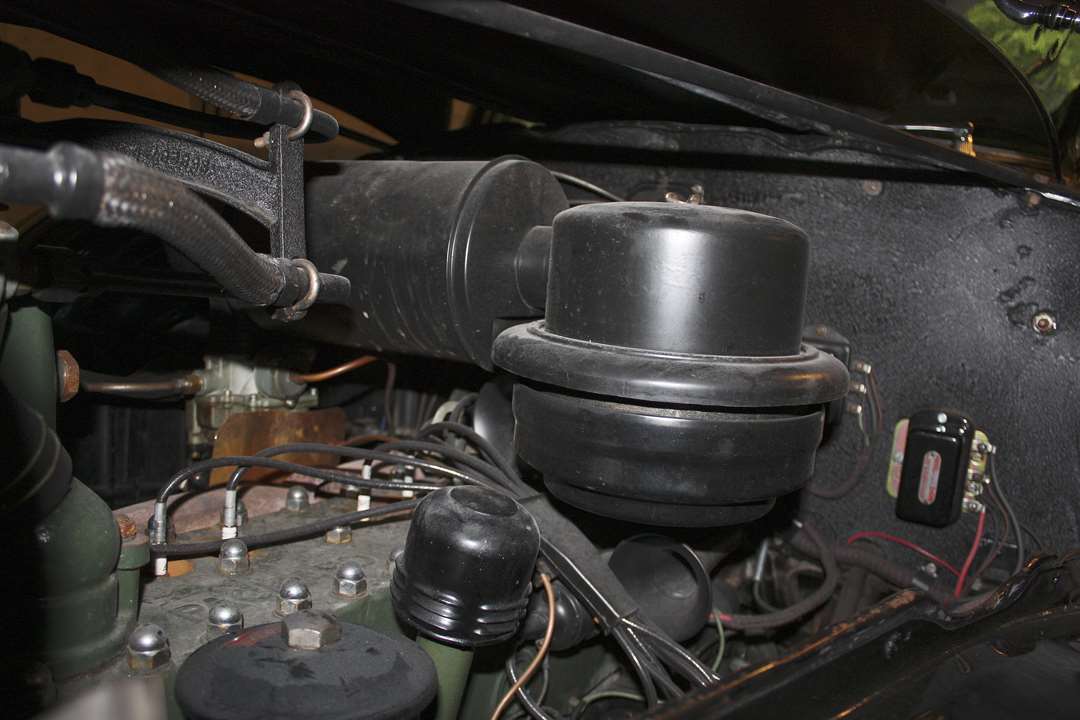 (81.06 KB) (81.06 KB)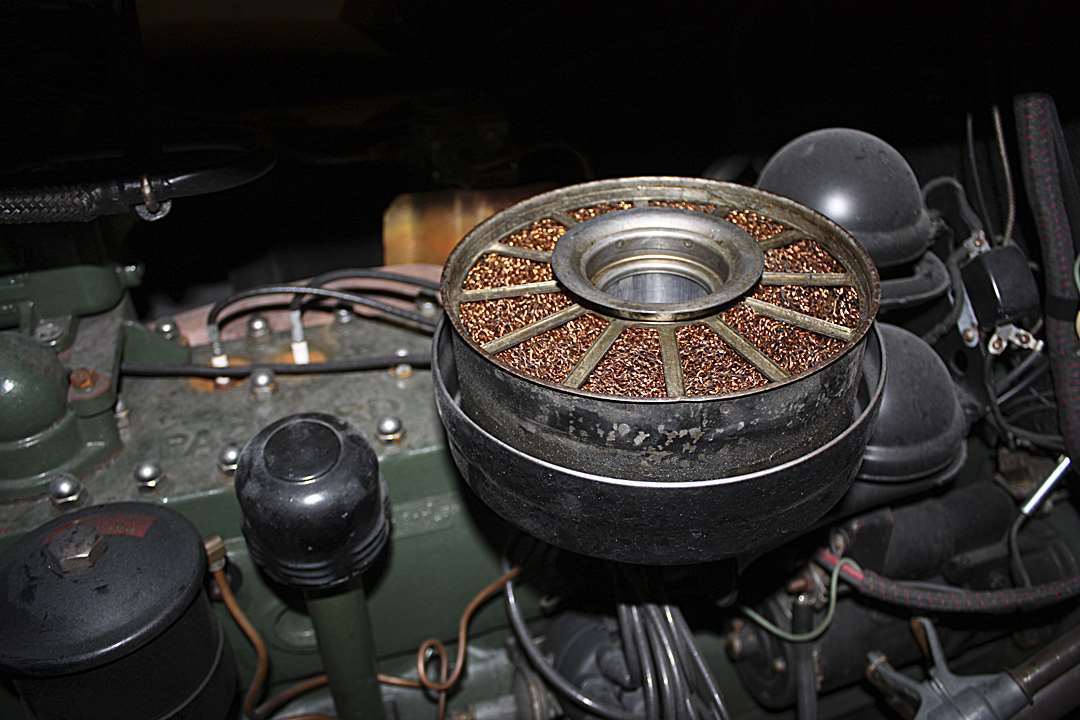 (69.71 KB) (69.71 KB)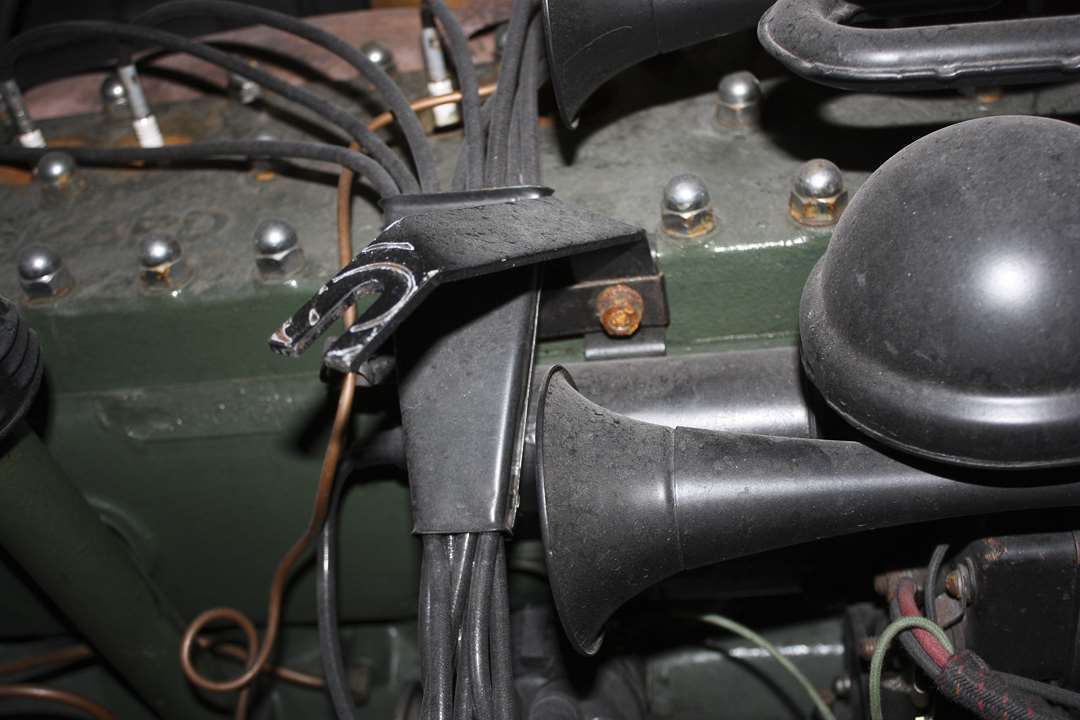
Posted on: 2010/8/3 12:35
|
|||
|
West Peterson
1930 Packard Speedster Eight Runabout (boattail) 1940 Packard 1808 w/Factory Air 1947 Chrysler Town and Country sedan 1970 Camaro RS https://packardinfo.com/xoops/html/modules/newbb/viewtopic.php?topic_id=4307&forum=10 http://aaca.org/ |
||||
|
||||

|
Re: 1940 Super 8 160 Model 1803 Project
|
||||
|---|---|---|---|---|
|
Home away from home
|
That is correct. Both types were available in 1940. I believe the dry type was standard, the oil bath was optional.
Posted on: 2010/8/3 13:05
|
|||
|
West Peterson
1930 Packard Speedster Eight Runabout (boattail) 1940 Packard 1808 w/Factory Air 1947 Chrysler Town and Country sedan 1970 Camaro RS https://packardinfo.com/xoops/html/modules/newbb/viewtopic.php?topic_id=4307&forum=10 http://aaca.org/ |
||||
|
||||
|
Re: 1940 Super 8 160 Model 1803 Project
|
||||
|---|---|---|---|---|
|
Forum Ambassador
|
Hi Peter, thanks for the kind words. I do agree that historic preservation of un-restored cars has a place in the hobby. I will likely collect bits and maintain this car in a state of historic preservation for the foreseeable future. I will keep everyone posted on the state of the lifter. Maybe if I just hope and wish it will pump up
 West, thank you so much for the air cleaner images and explanation. I am really happy to have a visual reference to use for the air cleaner and bracket ID. I am now on the hunt for the correct oil bath unit and bracket. Given the shape on the passenger side it should be fairly easy to discern from the latter variants. Your engine bay looks very tidy. JW, yes as West mentioned both were available. Because of the desert southwest often whipping up wild dust storms without warning, I am going to focus my efforts on an oil bath unit.
Posted on: 2010/8/4 1:39
|
|||
|
||||
|
Re: 1940 Super 8 160 Model 1803 Project
|
||||
|---|---|---|---|---|
|
Home away from home
|
There's a 1941-47 unit on eBay right now. As I said, it will work if you're trying to fool 99 percent of the people out there. Only 1940 Packard nuts would know the difference.
http://cgi.ebay.com/ebaymotors/1941-7-Packard-Su-8-Air-Cleaner-_W0QQcmdZViewItemQQhashZitem2eaee11063QQitemZ200502480995QQptZMotorsQ5fCarQ5fTruckQ5fPartsQ5fAccessories There's also pieces of one listed as 1937-39 (???), that looks like it could be used to modify the later unit. http://cgi.ebay.com/1937-Packard-Air-Cleaner-Assembly-BIG-1938-1939-/200493536519?cmd=ViewItem&pt=LH_DefaultDomain_0&hash=item2eae589507
Posted on: 2010/8/4 8:44
|
|||
|
West Peterson
1930 Packard Speedster Eight Runabout (boattail) 1940 Packard 1808 w/Factory Air 1947 Chrysler Town and Country sedan 1970 Camaro RS https://packardinfo.com/xoops/html/modules/newbb/viewtopic.php?topic_id=4307&forum=10 http://aaca.org/ |
||||
|
||||
|
Re: 1940 Super 8 160 Model 1803 Project
|
||||
|---|---|---|---|---|
|
Forum Ambassador
|
West, thanks again for the detailed images. This gives me an excellent reference for not only finding the correct air cleaner, but also some nice detail of what goes where on the engine. I appreciate the leds on eBay. I am going to be patient and hold out for the correct shape oil bath assembly.
Gerd, that is very good information on the Buick interchange possibility. The complete assembly in your images looks like a dead ringer for the Packard example. I will be glad to watch for a second air cleaner assembly. Not too much progress to report as of late. Flackmaster kindly provided a louvered oil fill cap and a rear trunk medallion. A package from David is always an anxiously anticipated event. A little more cleaning and detailing. Beginning to claybar and machine buff the paint. The only problem is that it's so hot here the compound dries out and chalks up quicker than water can be added to the buffing mop. Put the car up on jack stands to allow greasing and fluid changes and a general going over and familiarity of the underside of car.
Posted on: 2010/8/17 23:45
|
|||
|
||||
|
Re: 1940 Super 8 160 Model 1803 Project
|
||||
|---|---|---|---|---|
|
Not too shy to talk
|
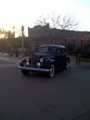
Hi Jim, What a Beauty!!
How on earth do you find a car like that? Is that the original leather and paint? The best advise I was given when I inherited my Dads car was to leave it as it was. I hope you will be able to do the same as it looks magnificent in the photo. Heather
Posted on: 2010/8/18 6:39
|
|||
|
Heather M
|
||||
|
||||
|
Re: 1940 Super 8 160 Model 1803 Project
|
||||
|---|---|---|---|---|
|
Forum Ambassador
|
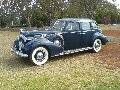
Hi Heather, good to hear from you. Believe it or not, I found it right here on Packard Info. One of our forum members, Tom Laferriere, offered it for sale in the wanted / for sale section. The car looked good in the pictures posted, but turned out to be better than anticipated and remarkably well preserved for a 70 year car.
Much of the paint is indeed original and the interior is in large part still the original leather. Debbie has taken charge of cleaning and treating the leather and after it's third treatment it is coming to life. At this time, we are going to freshen up the car and use as is. Perhaps it will get a proper restoration in the future, but first I would like to sort it out and use as is. The pictures you sent us of your '39 a few years back was an inspiration for our '39 to be preserved as an original example, and will also guide us on the '40. Best to you and your brother John, Jim
Posted on: 2010/8/20 21:48
|
|||
|
||||
|
Re: 1940 Super 8 160 Model 1803 Project
|
||||
|---|---|---|---|---|
|
Forum Ambassador
|
This was a very unusual weekend in that I had two full days to work on the car at my disposal. The plan of attack has been to clean up the car, make the electrical system fully functional, and then a comprehensive chassis service.
This weekend was a perfect opportunity to make the electrical system function. I began with a quick assessment of what worked and didn't work earlier in the week. Also assessed the condition of the existing wiring. To a large extent, the wiring was very intact and very serviceable. My good friend Bob joined me Saturday for an electrical assault on two fronts. Bob took on the taillights while I began trouble shooting the fuel gauge and dash lights. Tail lights amounted to bad grounds, connections, and typical fidgeting normally expected from an inop. vehicle of 40 some odd years. The license plate light was a simple matter of removing the distorted remaining base of a long ago busted bulb. Mean while, I changed a few dash light bulbs, checked the status of the fuel gage, and assessed the period installed turn signal system. The fuel gauge when sender side flashed to ground worked just fine. We got serious about the fuel gauge and decided before pronouncing the sender at fault to do a little ground the wire at the tank trick. Hmm... nothing. Went upstream to the bullet connector under the frame in the front seat vicinity. Probed with a paperclip and grounded. Gauge responded as expected. Strange. Disconnected at both ends and did continuity check. Open!. Did what I hate to do more than anything; abandon the wire and run a new length from plug to plug. All fixed! Gauge reacts when new wire flashed to chassis ground at tank connection. All fixed! Not. No impulse at gauge when key turned on with wire connected to sender. Bob grounded the tank itself and presto! Impulse at the gauge. Great! Dropped straps, cleaned and applied dielectric grease. Hmm... must need gas, I ran it out running it in the garage over the past several weeks. Added gas and nothing more than the gauge coming up to empty dot. Now what! Hmm... Bump the bottom of the tank and the gauge reacts. Sunk float I guess. Dropping the tank will be for another day. Just glad the other problems are corrected so I can concentrate on the sender. Nothing more fun than to trouble shoot multiple issues with a single system. Sunday, on to the headlights and park lights. Had to first diagram the TS wires, Park light wires, and high/low beam connections. Fairly easy. The park lights were nicely converted to dual filament for the park lights to be retained with the add on TS system. The add on TS system was likely done when the car was new. All wire cloth covered and a very old switch. I normally would not retain an add on system, but this has been a part of the car for 70 some years so it stays. The sub-harness to the park / headlamp system had been cut, abandon, and partially replaced at some point. Not sure why, the wires were in above average condition. Basically spent the day creating good grounds and making a new front harness. Success! Concluded Sunday evening with a fully functional electrical system including stop, turn, park, dash, courtesy, and headlamp system with only 30 man hours to accomplish. A very rewarding pursuit and a major step in a first cruise. Next installment, chassis maintenance! Attach file: (51.08 KB)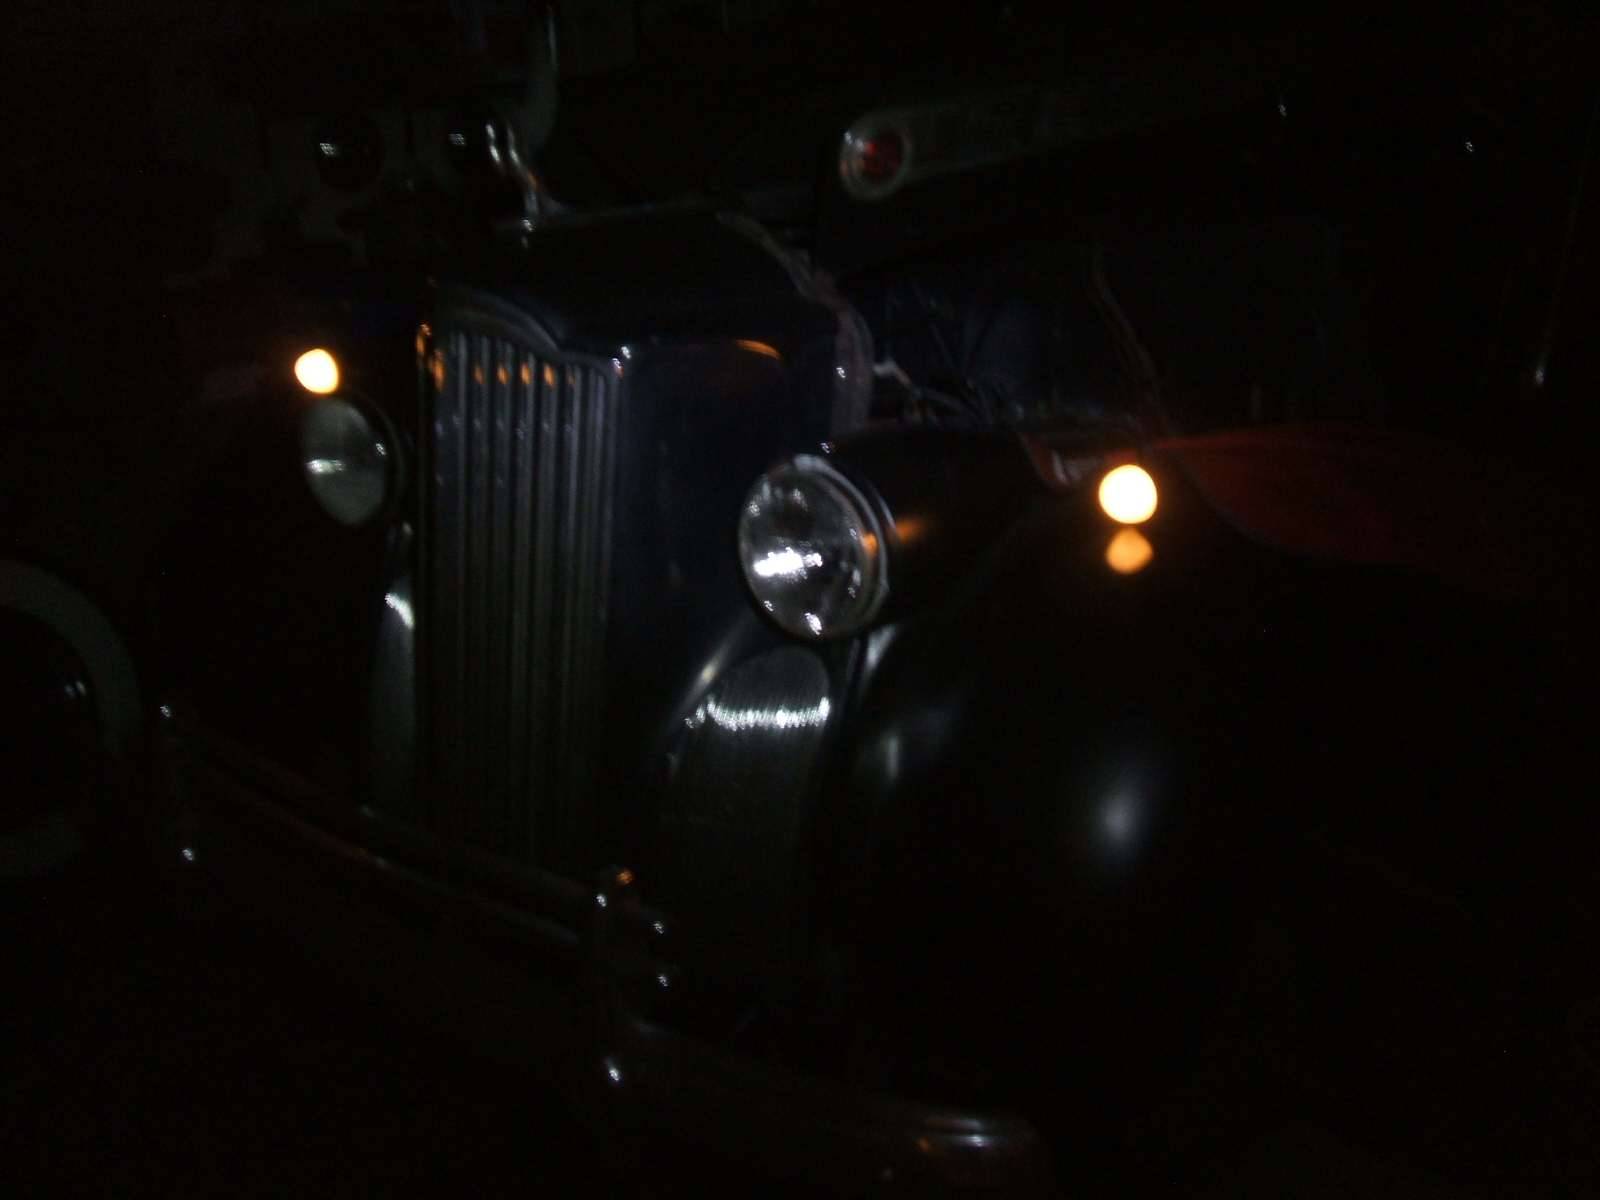 (47.29 KB) (47.29 KB) (29.28 KB) (29.28 KB) (30.19 KB) (30.19 KB)
Posted on: 2010/8/23 0:49
|
|||
|
||||
|
Re: 1940 Super 8 160 Model 1803 Project
|
||||
|---|---|---|---|---|
|
Forum Ambassador
|
Today was fix fuel sender and lube chassis day. Started the morning with good friend Bob returning for another day of fun. Got the tank dropped in time for my other buddy Scott to arrive with a Ford brass float that you replace the Packard cork float with. A direct interchange, just pop the cork float off and pop the brass one on. Not quite! The arm on the sending unit makes a sharp right angle bend and actually pierces completely through the cork float with little tiny wedged washers on either end.
What to do? Well, one could drill either end of the brass float and push a tiny brass tube through, solder and install like the cork float. Option two, leave the float alone, and re-bend the brass sender arm. Did the latter of the two. Had to determine new centerline of float in relation to old centerline. Also had to bend the 90 in the arm straight. The brass was fairly brittle where the bend was, so solder was applied to strengthen the now straight section. Made a slight jog and then bent a circle into the arm to snap the Ford float into place. Turned out pretty dog gone good! Put a gallon in the tank and blew into the pickup to listen for gurgling so it is known that fuel can be picked up on empty. A little more fuel took the gauge up to middle of the empty dot. Another 4.5 gallons took it to quarter tank. Perfect! During all this, I thought I would break the rear axle nuts loose. Asked my buddy Scott to jump in and put the brakes on. He hit the pedal, let up, and then hit it again preparing for me to get after the axle nut. A sudden whuush and the pedal drooped to the floor. Low and behold, a pinhole erupted in an old steel line. One of those invisible situations that you are so very pleased to find out about while the car is on jack stands. The hoses and some hard line had already been replaced. I am going to go ahead and replace all remaining hard line. Did the chassis lube including disassembly of the non-grease fitting equipped u-joints for lubrication. Everything took grease. This car was well maintained during it former years of regular service. It dose need inner tie rod ends. If anyone reading this happens to know the modern parts store part number and/or application, please let me know. The wheel bearings front/rear looked great! Everything washed up and ready for new grease and re-assembly. I am going to have the brake shoes relined and take the drums by a friend's house that has a brake drum lathe. They are in great shape, just want to give them a quick truing / glaze breaking light skim. In preparation for new lining. This was one of those days where patience and preventative maintenance proved prudent over just driving it till it breaks. I am so grateful to have made this discovery while the car was on jack stands in my garage. All and all, things continue to look very good. It is nice to tinker with a well preserved specimen. Sorry, I just didn't have an opportunity to take pics. My hands were continually filthy and I stayed very focused on the work at hand.
Posted on: 2010/8/29 2:07
|
|||
|
||||


