|
Re: Rear wing window removal
|
||||
|---|---|---|---|---|
|
Forum Ambassador

|
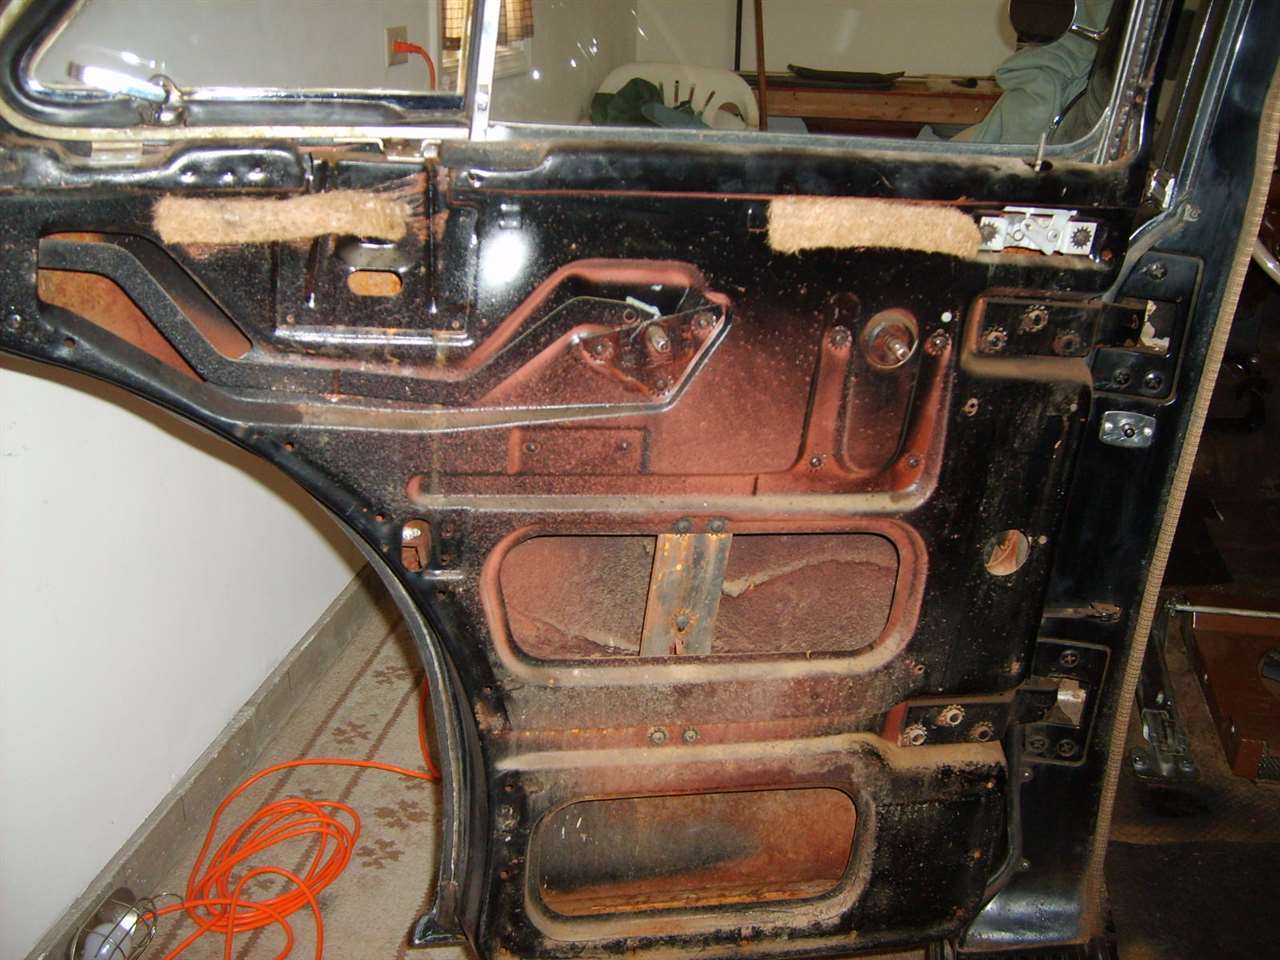
It is a bit involved. There are some instructions in the body section of 46-50 service manual which starts on page 6 with directions for removing the glass. Some of the screws mentioned in that portion need to loosen when removing the vent and then front wing removal directions starts on page 9. The photos are of a 48 but 46-7 cars come out the same way. Basically it is the same procedure for front and rear with just a couple of differences.
IMO, fronts are relatively easy compared to rears. On fronts you can see and get to the nut on the bottom pivot shaft. Once all the weatherstrip retainer screws are removed and the bottom screws on the side runner channels are loose you can tilt the window frame assy away from door frame just enough to get at the top vent pivot retainer screws to remove the wing pivot retainer. Once that retainer is out and bottom nut is off you can pull the vent out of the rubber at the top and then pull the bottom shaft up thru the weatherstrip and remove the vent. When the vent bottom nut and washer is removed the spring will be loose and come off. There is a stop piece with a square hole on the shaft which may need to be gently persuaded off the shaft as the vent raises. Watch the assy order and how the stop piece is oriented so you can replace it without experimenting. If the rubber is hard and brittle then it is a different story. Rubber has to flex some so if it has hardened a lip may crack or a chunk break off. On the rears SM doesn't go into much detail but the pivots are slightly different and in a different spot. Access to the lower nut is blocked. You have to completely loosen the window channels, disconnect glass from regulator, and then tilt and lift the entire window frame assy out away from door frame and up enough to reach the bottom nut. Block the assy with something while you work on removing the nut. The top pivot is a special screw which threads into the top of weatherstrip retainer and extends down into the vent frame. It is just the screw and not a removable retainer piece like the front vent uses.
Posted on: 2016/1/11 14:35
|
|||
|
Howard
|
||||
|
||||
|
Re: Rear wing window removal
|
||||
|---|---|---|---|---|
|
Home away from home

|
Hi, I tackled the front first and found that removing the door glass made things alot easier. I removed all the attaching screws and removed the complete window runway channel and vent window as a unit. The rears will be next. Thanks
Attach file:  (88.56 KB) (88.56 KB)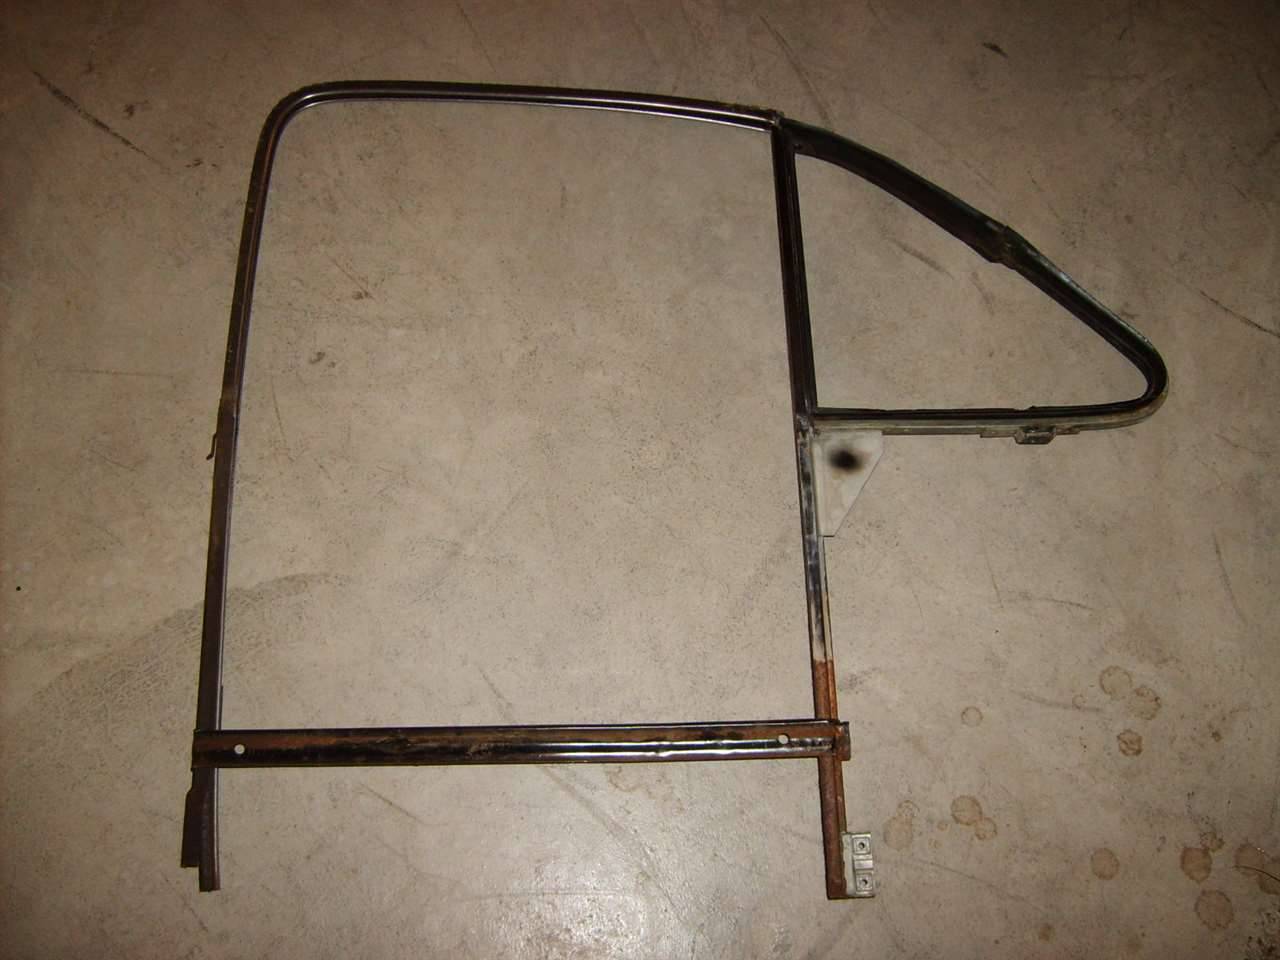
Posted on: 2016/1/11 19:00
|
|||
|
||||
|
Re: Rear wing window removal
|
||||
|---|---|---|---|---|
|
Home away from home
|
I need some assistance with installation of a flexible beaded glass channel run. In removing the rear window assembly I destroyed the glass run channel. I have a replacement which needs to be bent to conform to the window. (See photo above ) Hence my problem. How are the ends of the bead cut in order to allow the channel to be bent? I know there is a wire in the bead but every time I cut the end it burrs. Help? Thanks
Posted on: 2016/1/19 9:52
|
|||
|
||||
|
Re: Rear wing window removal
|
||||
|---|---|---|---|---|
|
Forum Ambassador
|
Not sure what you are calling burred but in order to get straight ends I mostly used a Dremel with a cut off wheel. There may have been a couple of cuts where it was a combination of wheel and snips.
The drilling of holes and actual reattachment of the new channel to the frame was more of a pain since I didn't have the proper hole punch or riveting tools to reach inside the channel. The holes were marked on outside by fitting in place and using the attachment pieces as a template. Done with a drill press with a block of wood inside the channel for support, Not the best way but worked. Once holes were in I used a combination of small flat head screws and nuts plus an occasional pop rivet to reattach. The flat head was to make sure the heads were somewhat buried in the felt and rubber so the glass won't touch any metal. Attach file: (61.30 KB)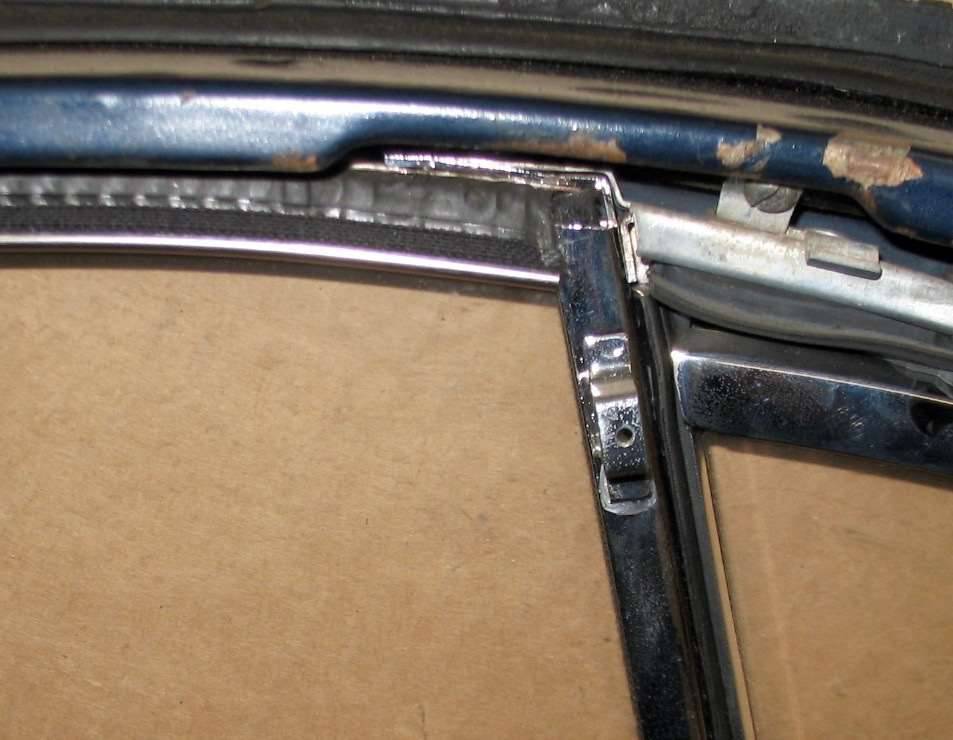
Posted on: 2016/1/19 10:50
|
|||
|
Howard
|
||||
|
||||
|
Re: Rear wing window removal
|
||||
|---|---|---|---|---|
|
Home away from home
|
HH, That looks very nice. Did you have any trouble with the 90 degree bend at the opposite end? I'm kinking the bead when bending ,I believe its because the stainless bead is not moving freely on the wire. I've talked to the folks at Restoration Specialities and they reaffirmed that the ends must be uncrimped to allow the bead to slid, when making a bend. Thanks
Posted on: 2016/1/19 15:37
|
|||
|
||||
|
Re: Rear wing window removal
|
||||
|---|---|---|---|---|
|
Forum Ambassador
|
No problems bending but by having the ends cut with the wheel the wire was free to slide so maybe that makes the difference.
The old channels were laid flat on a table for use as a pattern. Had the new channels cut 2-3 inches longer than needed. Laid the new over the old with a bit extra hanging over one end and took my time just using hand pressure to gently form the new bends. It did take a bit of effort and perseverance and I do remember the thumbs were sore afterward -- but had a smooth bend on all. Once they were formed and looked like a match to the original used the cutoff wheel again to cut the new to exact length. Laid those in position with the rest of the frame and used the holes in the mounting straps or the steel support pieces to mark hole locations. Dumb question but you do have the really flexible channel?? You said Restoration Specialty so probably so. Reason I ask is a friend bought some channel from a local place. That stuff was sold as flexible but was not the same as Restoration sells. Restoration has the small individual rubber coated metal segments and the other stuff had much larger I think plastic segments so not nearly as flexible.
Posted on: 2016/1/19 16:18
|
|||
|
Howard
|
||||
|
||||
|
Re: Rear wing window removal
|
||||
|---|---|---|---|---|
|
Home away from home
|
HH, I have the Restoration Specialties #Y526 which is an exact match to Packard window channel. It is rubber coated with a stainless steel bead. I will use old channel as pattern and take my time. Thanks for quick respnse. Thanks and Happy Packarding
PS--I highly recommend Restoration Specialties--their products and service are great.
Posted on: 2016/1/19 17:23
|
|||
|
||||
|
Re: Rear wing window removal
|
||||
|---|---|---|---|---|
|
Home away from home
|
HH, What size nuts and bolts did you use? The parts book shows 9/64x 9/32 flat head rivets. Thanks
Posted on: 2016/1/20 10:40
|
|||
|
||||
|
Re: Rear wing window removal
|
||||
|---|---|---|---|---|
|
Forum Ambassador
|
The majority of the screws were 6-32. Can't remember for sure but think for clearance there might have been a couple of places where 4-40s worked better and am almost positive I used 8-32s down low on the side where a channel rivet is shared with another piece. I used regular nylon lock nuts when I had plenty of space. A few spots were tight with little clearance for the nut -- either because of how it had to go in or where it landed when installed -- so used Keps nuts on those. Still a lock nut but has a lower profile because of the different lockwasher.
Screws were used on the sides and a couple of places on the top but 1/8 flat head steel pop rivets were used on the majority of places at the top where the channel attaches to the tab extending from the vent frame. When trying to tip the frame back into position I found there is just not enough clearance for a nut between the channel and door frame at most of those locations. It may not have been necessary but I also used reinforcement washers with the rivet. The important part is the rivet body cannot extend much past the tab or washer. The head was inside the channel to be buried in the felt. My install tool fortunately had an extended nose piece which was almost long enough to insert into the channel and pull the rivet. I extended that a bit more by using a short length of 1/4 rod with a hole drilled thru the center. That fit over the draw stem between the tool and rivet to provide the rest of length needed to reach the head. Once the rivet was installed I used a pin punch to knock the remainder of the draw stem back out of the rivet. Used the cut off wheel to shorten the body where necessary and then used a couple of punches -- one inside the channel against the head as an anvil and one outside to flatten the remaining rivet body against the washer. Photos are not the best but might give an idea of the end result. Attach file: (107.12 KB)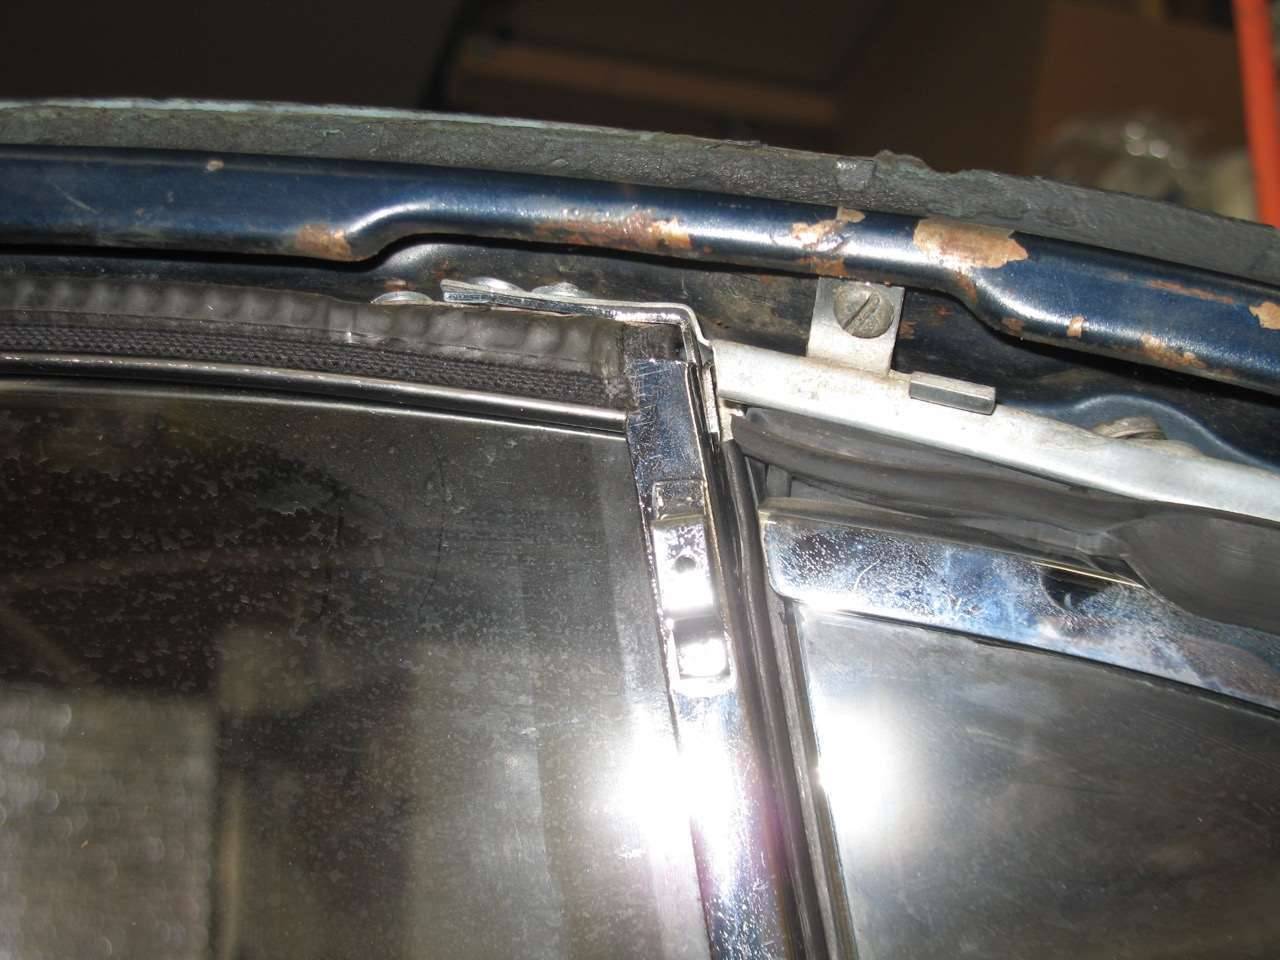 (87.48 KB) (87.48 KB)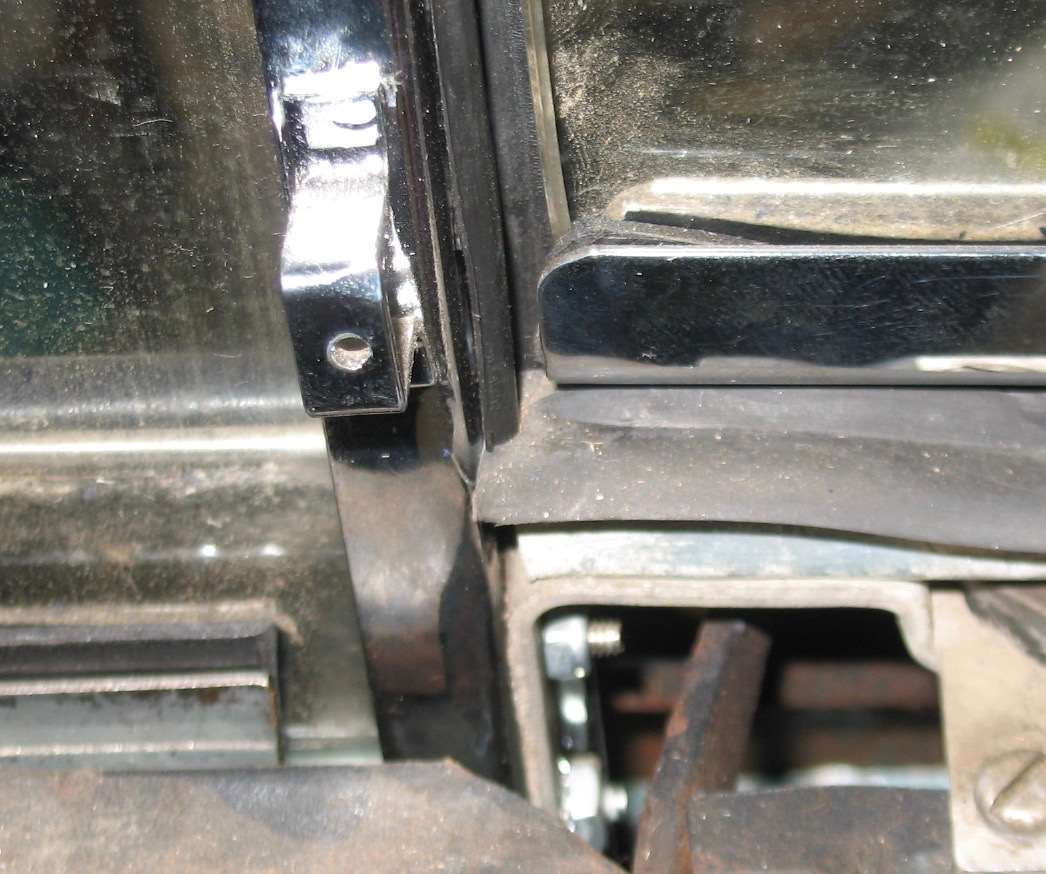
Posted on: 2016/1/20 12:24
|
|||
|
Howard
|
||||
|
||||


