 (722.91 KB)
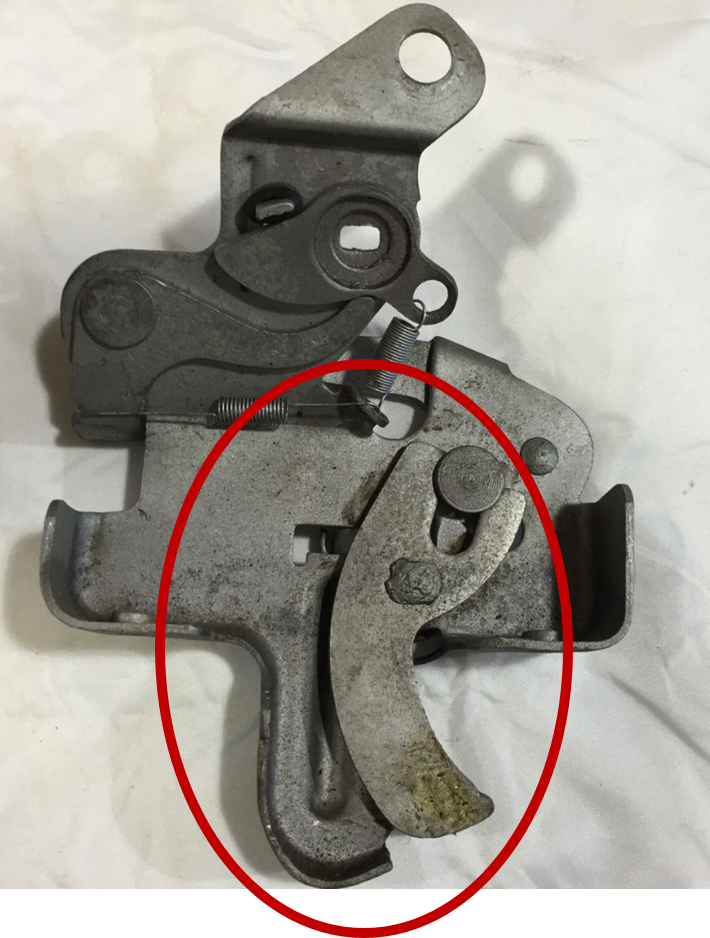
|
Re: Trunk Latch Assembly adjustment
|
||||
|---|---|---|---|---|
|
Home away from home

|
Anyone? Any suggestions?
Posted on: 2016/12/7 9:18
|
|||
|
You can make a lot of really neat things from the parts left over after you rebuild your engine ...
|
||||
|
||||
|
Re: Trunk Latch Assembly adjustment
|
||||
|---|---|---|---|---|
|
Home away from home

|
Sorry no actual experience but if you are willing to climb in the trunk, how about attaching the latch to the striker and install as a latched assembly? With someone holding the trunk closed you can line up the bolts with the holes. Seems like it might work or give light to the reason it was not catching.
Posted on: 2016/12/7 18:28
|
|||
|
[url=h
|
||||
|
||||
|
Re: Trunk Latch Assembly adjustment
|
||||
|---|---|---|---|---|
|
Forum Ambassador

|
this is all I have to offer.
Attach file:  (40.16 KB) (40.16 KB)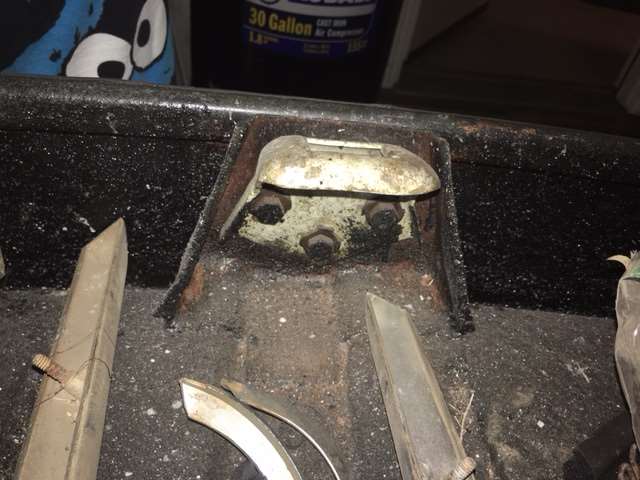 (17.44 KB) (17.44 KB)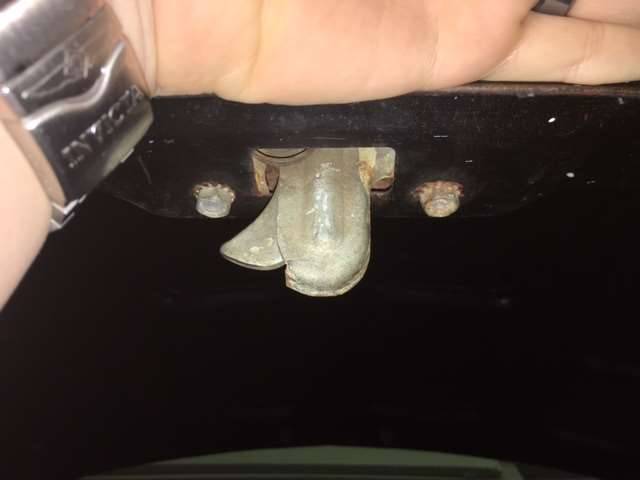 (32.16 KB) (32.16 KB)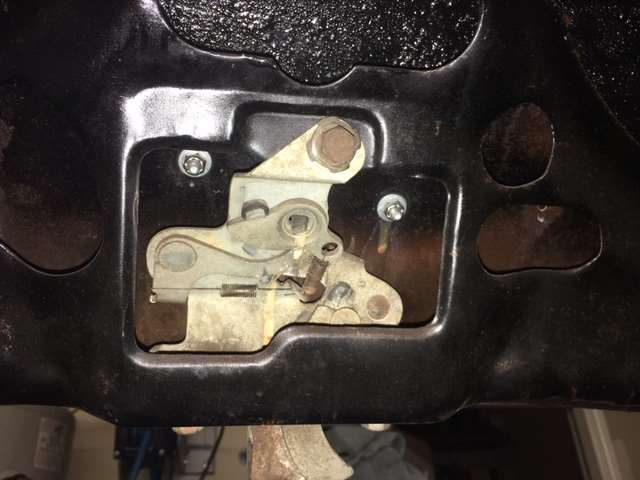 (30.47 KB) (30.47 KB)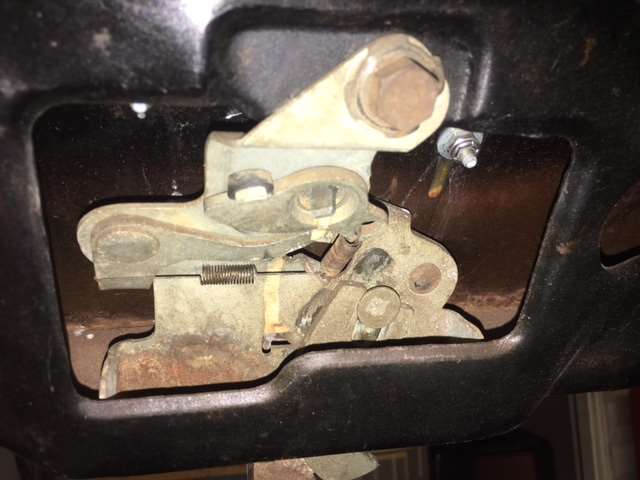
Posted on: 2016/12/7 19:10
|
|||
|
1937 Packard 138-CD Deluxe Touring Limousine
Maroon/Black 1090-1021 [url=https://packardinfo.com/xoops/html/modules/registry/View.php?ID=232]1955 Packard |
||||
|
||||
|
Re: Trunk Latch Assembly adjustment
|
||||
|---|---|---|---|---|
|
Forum Ambassador

|
Quote:
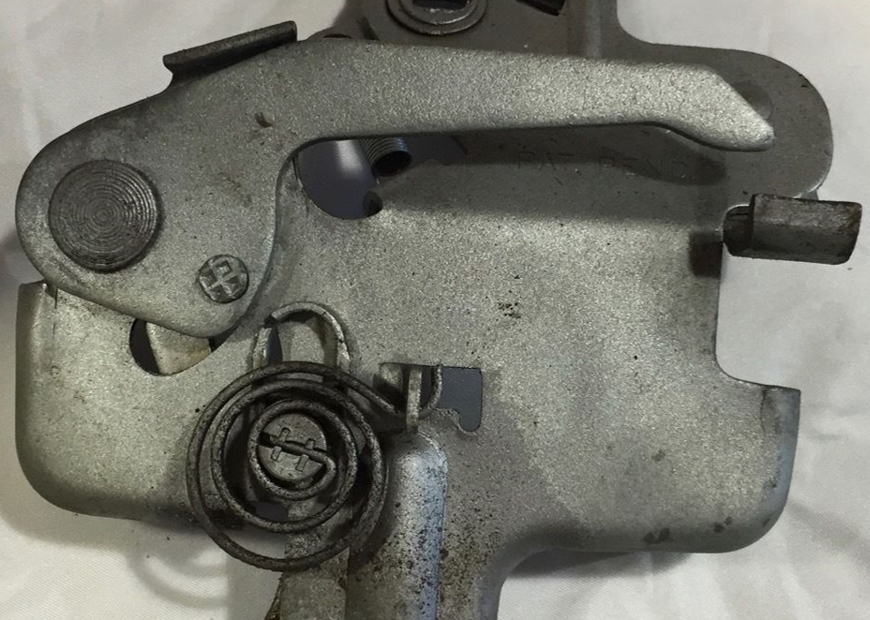
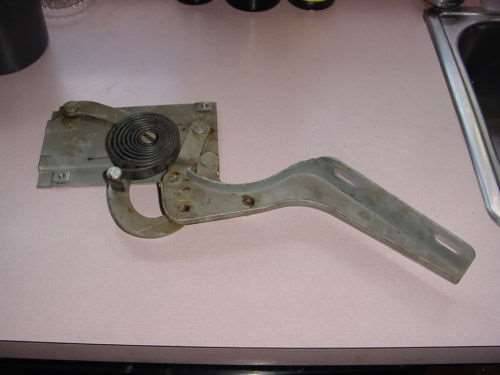
Examining the assembly, we could see that there are two parts to the end that slips between the strike plate loop. One end is stationary and has a sloping end that I believe is supposed to stay inside the loop, while the other, shorter end moves in and up. Working properly, I believe it is supposed to hold the latch down on the loop, locking in place when the trunk is closed. I think you are right but I don't have one and it has been too long since I played with a 54 or 55. The 56 lock assy is quite different. I believe the bolt holes in the striker plate are enlarged so you can move it up/down and side to side a slight amount. I think you can even give it a bit of a twist so the lock part that goes thru doesn't rub or bind on the striker.. Shims if it has to move outward. As to the height, you need to adjust so the rubber weatherstrip is not compressed excessively or else the key will be under strain trying to release the lock. Too loose and it will leak and rattle. It would be nice to have a photo of the assy in the locked position. Maybe there is someone working with a small enough volunteer who could climb in and snap a couple of pictures with the trunk closed. Just make sure he has a wrench to remove the striker in case something doesn't cooperate.
Posted on: 2016/12/7 21:06
|
|||
|
Howard
|
||||
|
||||
|
Re: Trunk Latch Assembly adjustment
|
||||
|---|---|---|---|---|
|
Home away from home
|
Thank you for replying. I did climb into the trunk to try to determine the positioning of the latch to the strike plate.
I have been looking at several photos of the latch assembly and something seems interesting. I notice that the solid piece that extends through the strike plate loop is cut out like a quarter moon. The others in the photos have a solid piece that fits squarely between the sides of the loop. This means that as the key turns, the spring piece will push the latch up through the loop to open the lid. I don't know why my latch assembly is cut out because I can't see any benefit to it, nor can I figure out why my trunk consistently shut firmly despite it! I have purchased a normal latch assembly and I think this will solve my problem. Period.
Posted on: 2016/12/7 21:57
|
|||
|
You can make a lot of really neat things from the parts left over after you rebuild your engine ...
|
||||
|
||||


