|
Re: KPack's 1954 Panama
|
||||
|---|---|---|---|---|
|
Home away from home
|
There is a small piece of metal I made mine from stainless that fits into the cavity it's attached with screw to hold in addition to cement
Attach file:  1000000951.jpg (2,095.39 KB) 1000000951.jpg (2,095.39 KB)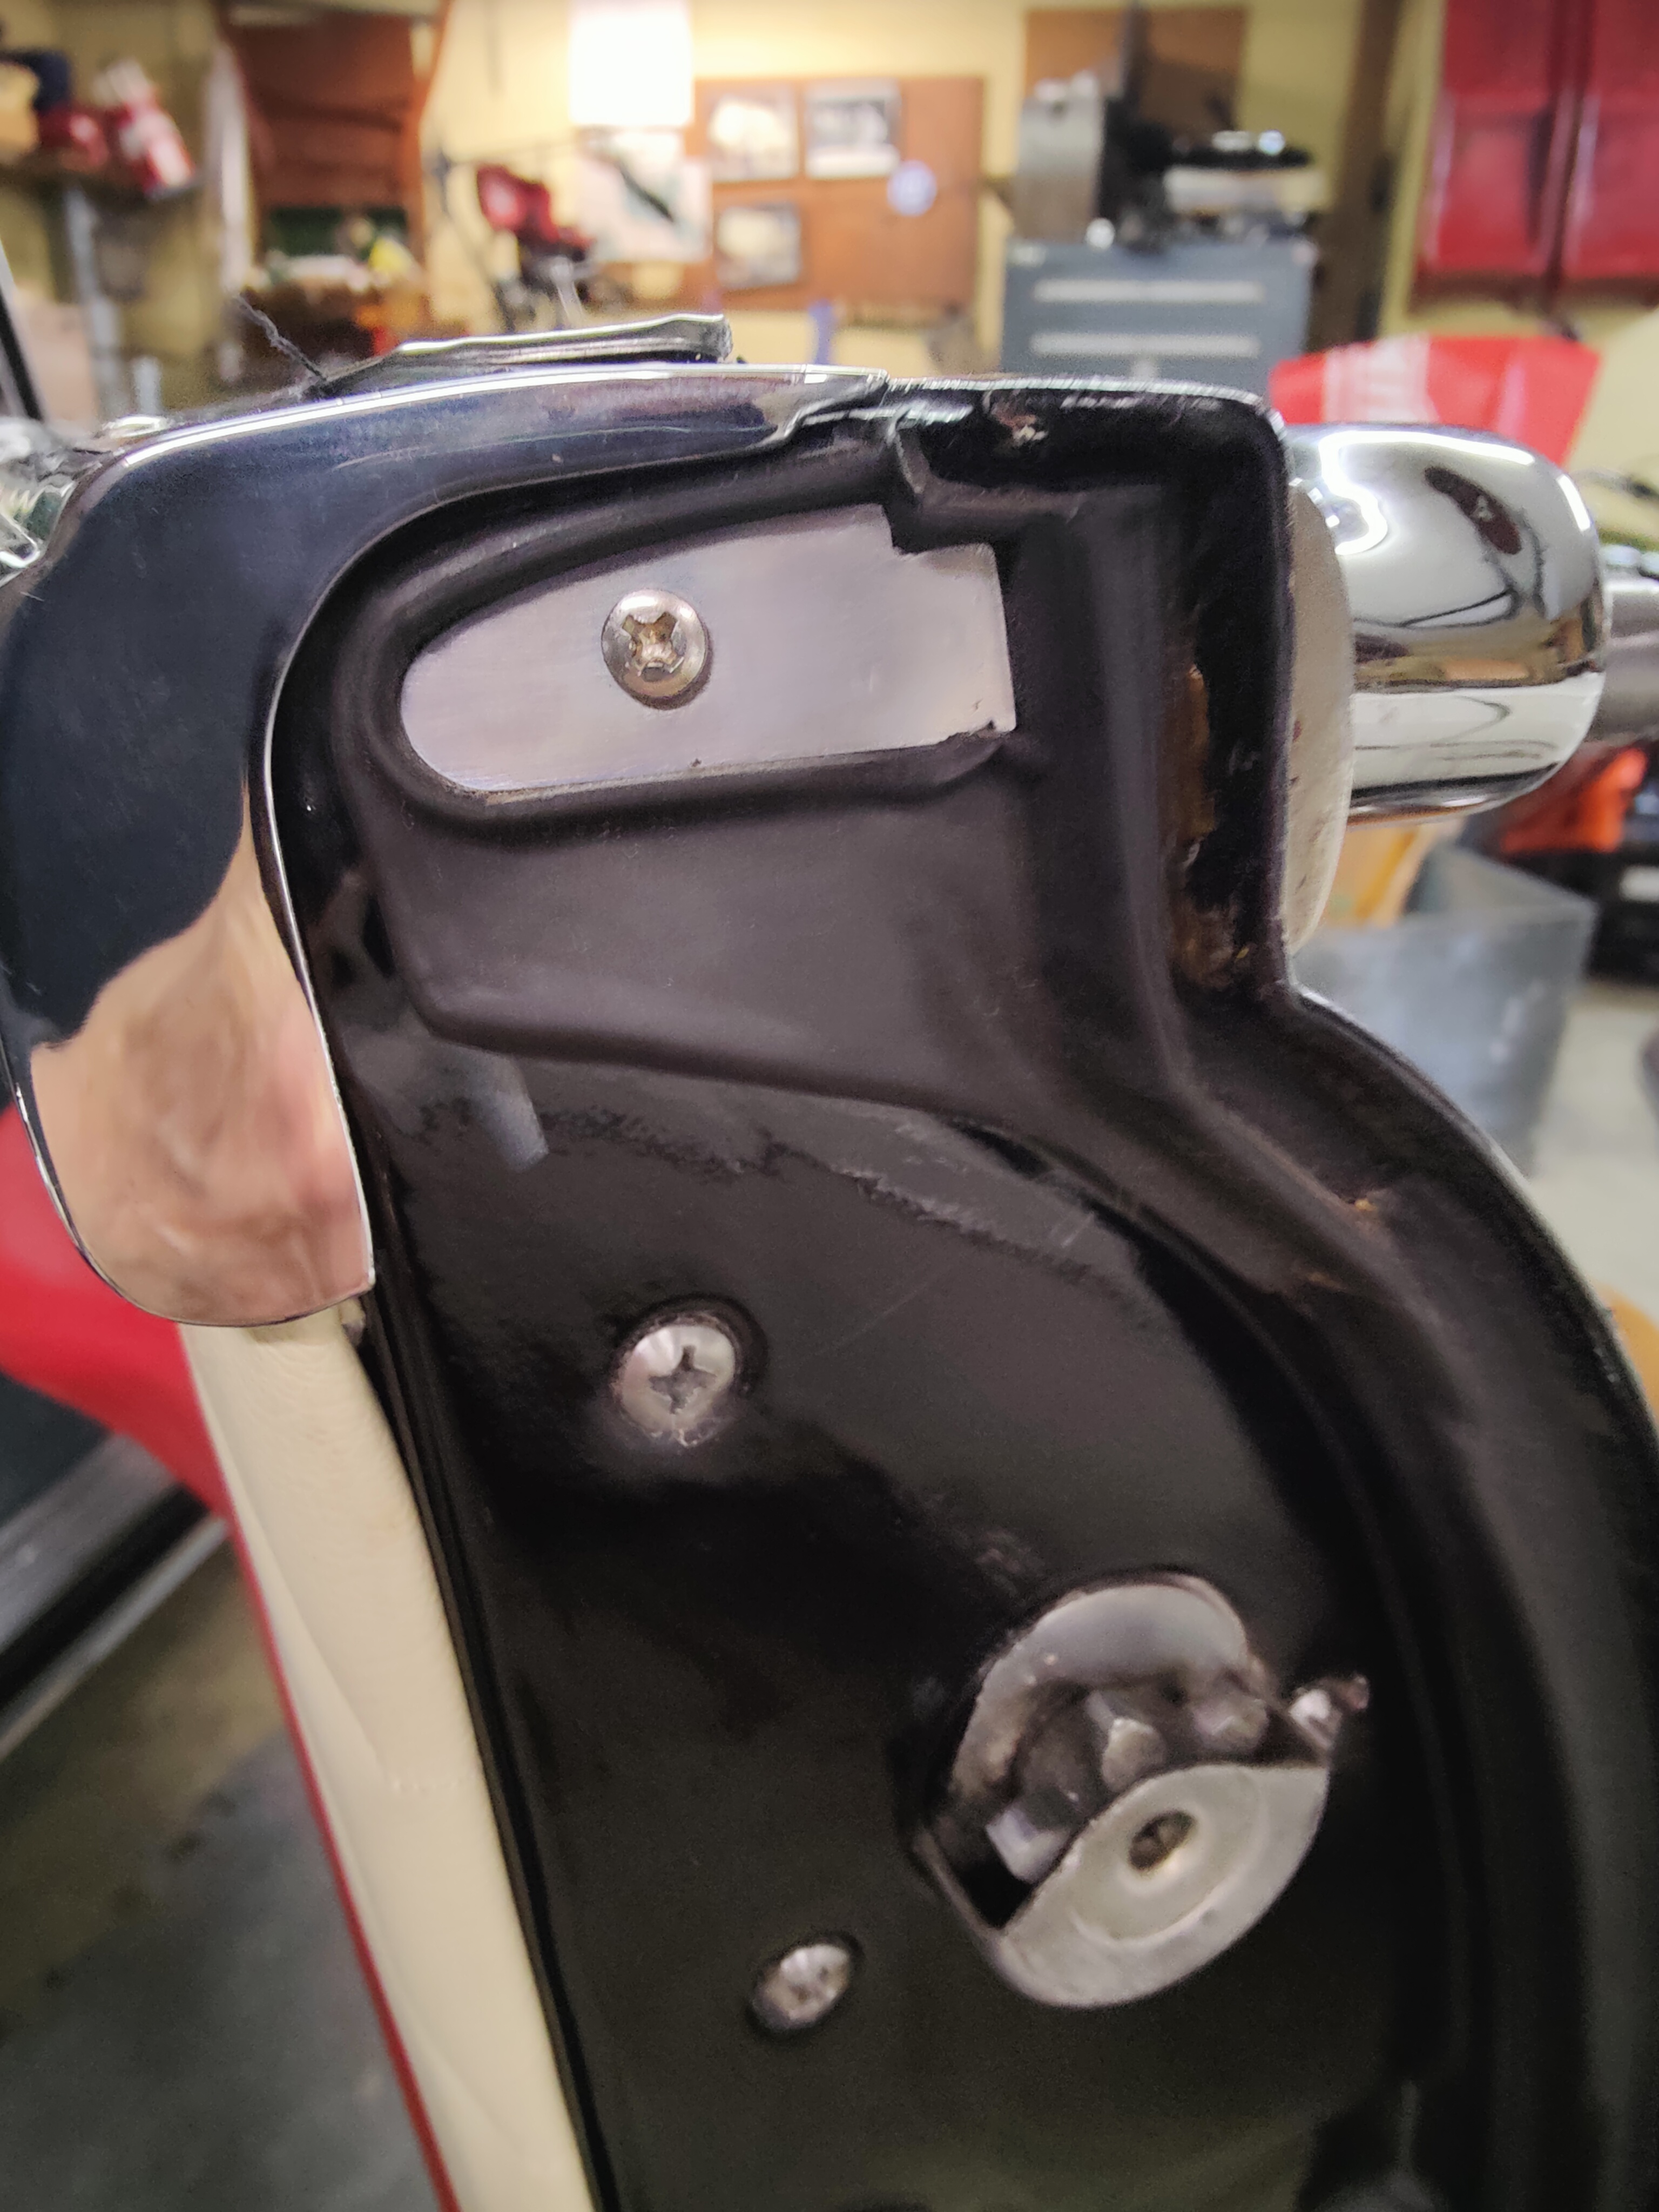
Posted on: 3/26 10:03
|
|||
|
C:\Users\veron\Desktop\New folder\1956 Packard Caribbean\753.jpg
|
||||
|
||||
|
Re: hph's 55 Clipper Project
|
||||
|---|---|---|---|---|
|
Home away from home

|
On my engine there are brass shims under the rocker lever shaft brackets. What is the significance of this?
Posted on: 3/26 7:30
|
|||
|
'55 400. Needs aesthetic parts put back on, and electrical system sorted.
'55 Clipper Deluxe. Engine is stuck-ish. |
||||
|
||||
|
Re: KPack's 1954 Panama
|
||||
|---|---|---|---|---|
|
Webmaster

|
The Steele Rubber seals are firmer than the originals, so they take a little bit to squish down. You have to slam the door for a few months. Some the heat of summer hits, it will tame them quickly.
Posted on: 3/26 6:41
|
|||
|
-BigKev
1954 Packard Clipper Deluxe Touring Sedan -> Registry | Project Blog 1937 Packard 115-C Convertible Coupe -> Registry | Project Blog |
||||
|
||||
|
Re: BigKev's 1937 115-C Convertible Coupe
|
||||
|---|---|---|---|---|
|
Webmaster
|
Thanks, that's very helpful!
I need to pull the window out and see if the glass extends past the metal guide loop on bottom. If it does, then I know the glass is either too wide, or not sitting deep enough in it's frame. Then I can have the glass ground down on that leading edge. If it's even with the loop, then I think the issue is the channel I used. But being able to shift the vent windows forward some will for sure help.
Posted on: 3/26 6:25
|
|||
|
-BigKev
1954 Packard Clipper Deluxe Touring Sedan -> Registry | Project Blog 1937 Packard 115-C Convertible Coupe -> Registry | Project Blog |
||||
|
||||
|
Re: KPack's 1954 Panama
|
||||
|---|---|---|---|---|
|
Home away from home

|
Good job! I doubt that the gap will change on its own as the latch is now pressing against the striker where it should be so some adjustment might be in order to get it flush again.
Posted on: 3/26 0:13
|
|||
|
||||
|
Re: KPack's 1954 Panama
|
||||
|---|---|---|---|---|
|
Home away from home

|
Quote:
It's different than the one on my '54. The '54 has a large loop for the nylon line. No loop that I saw on the '53. I'll check it again tomorrow and see if I can get more info. On a different note, I had another package come in from Max Merritt. This time with some weatherstripping for the doors. There was almost nothing left of the original stuff, and what was there I removed when I painted the door jambs. Never done weatherstrip before but I think it went okay. 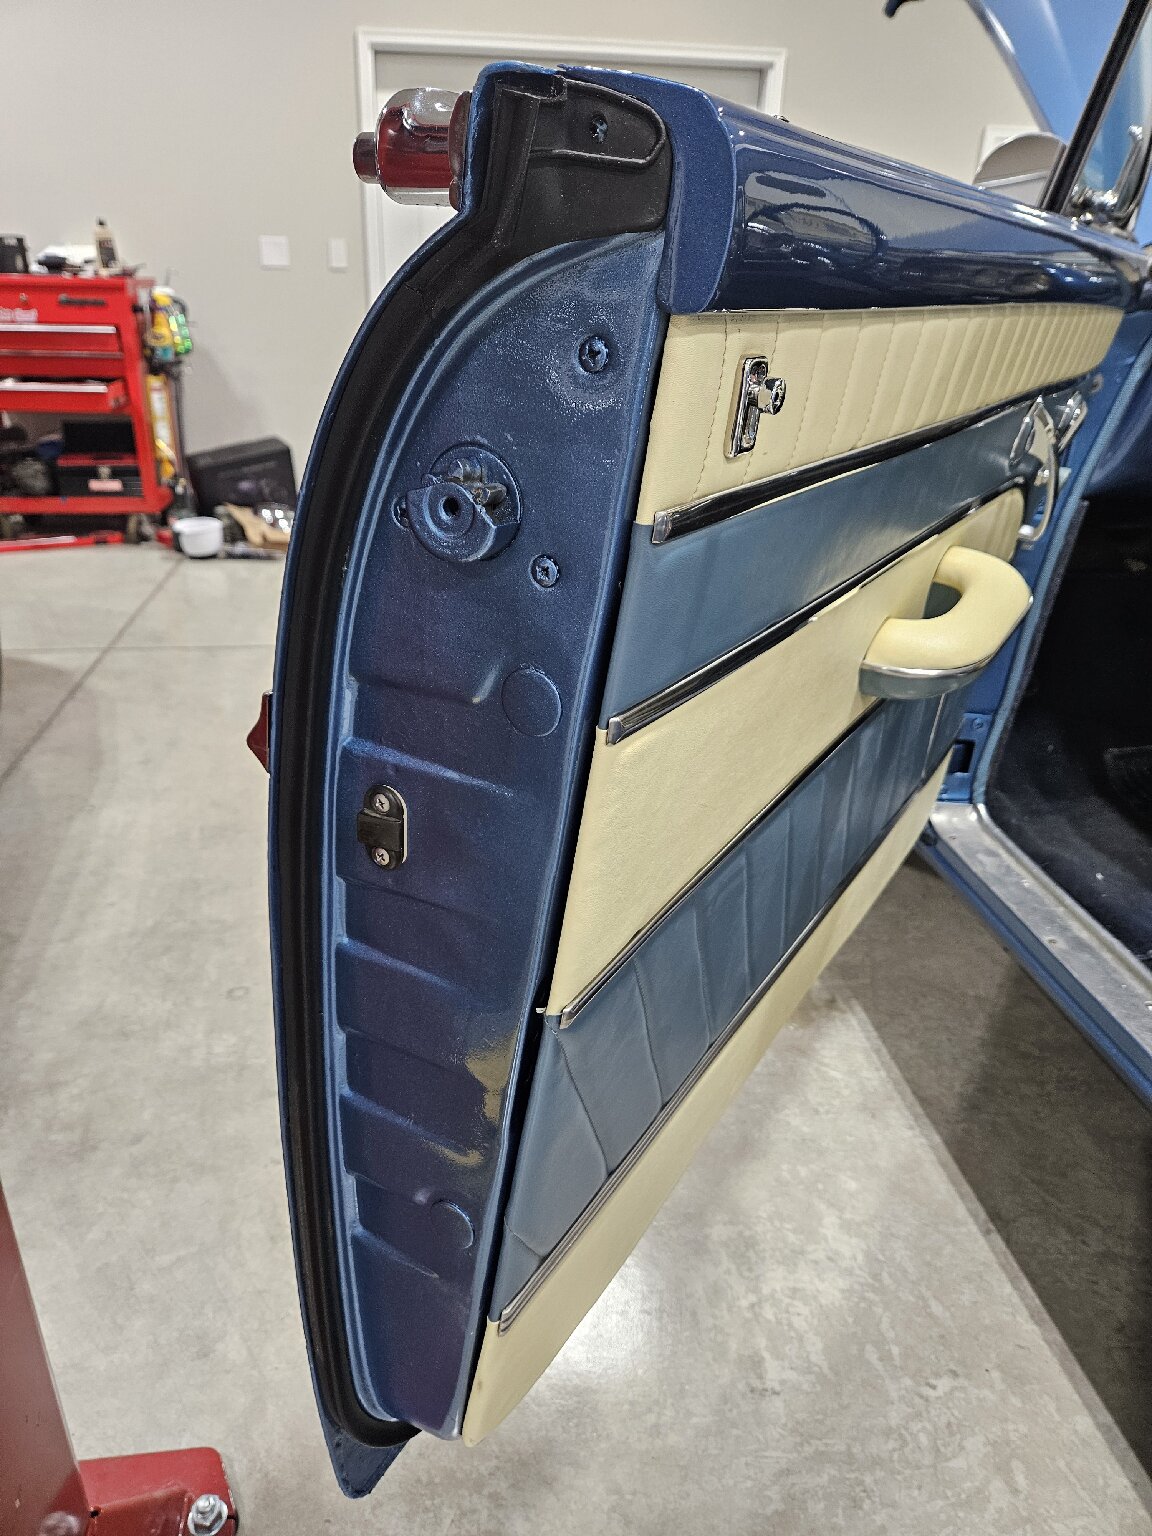 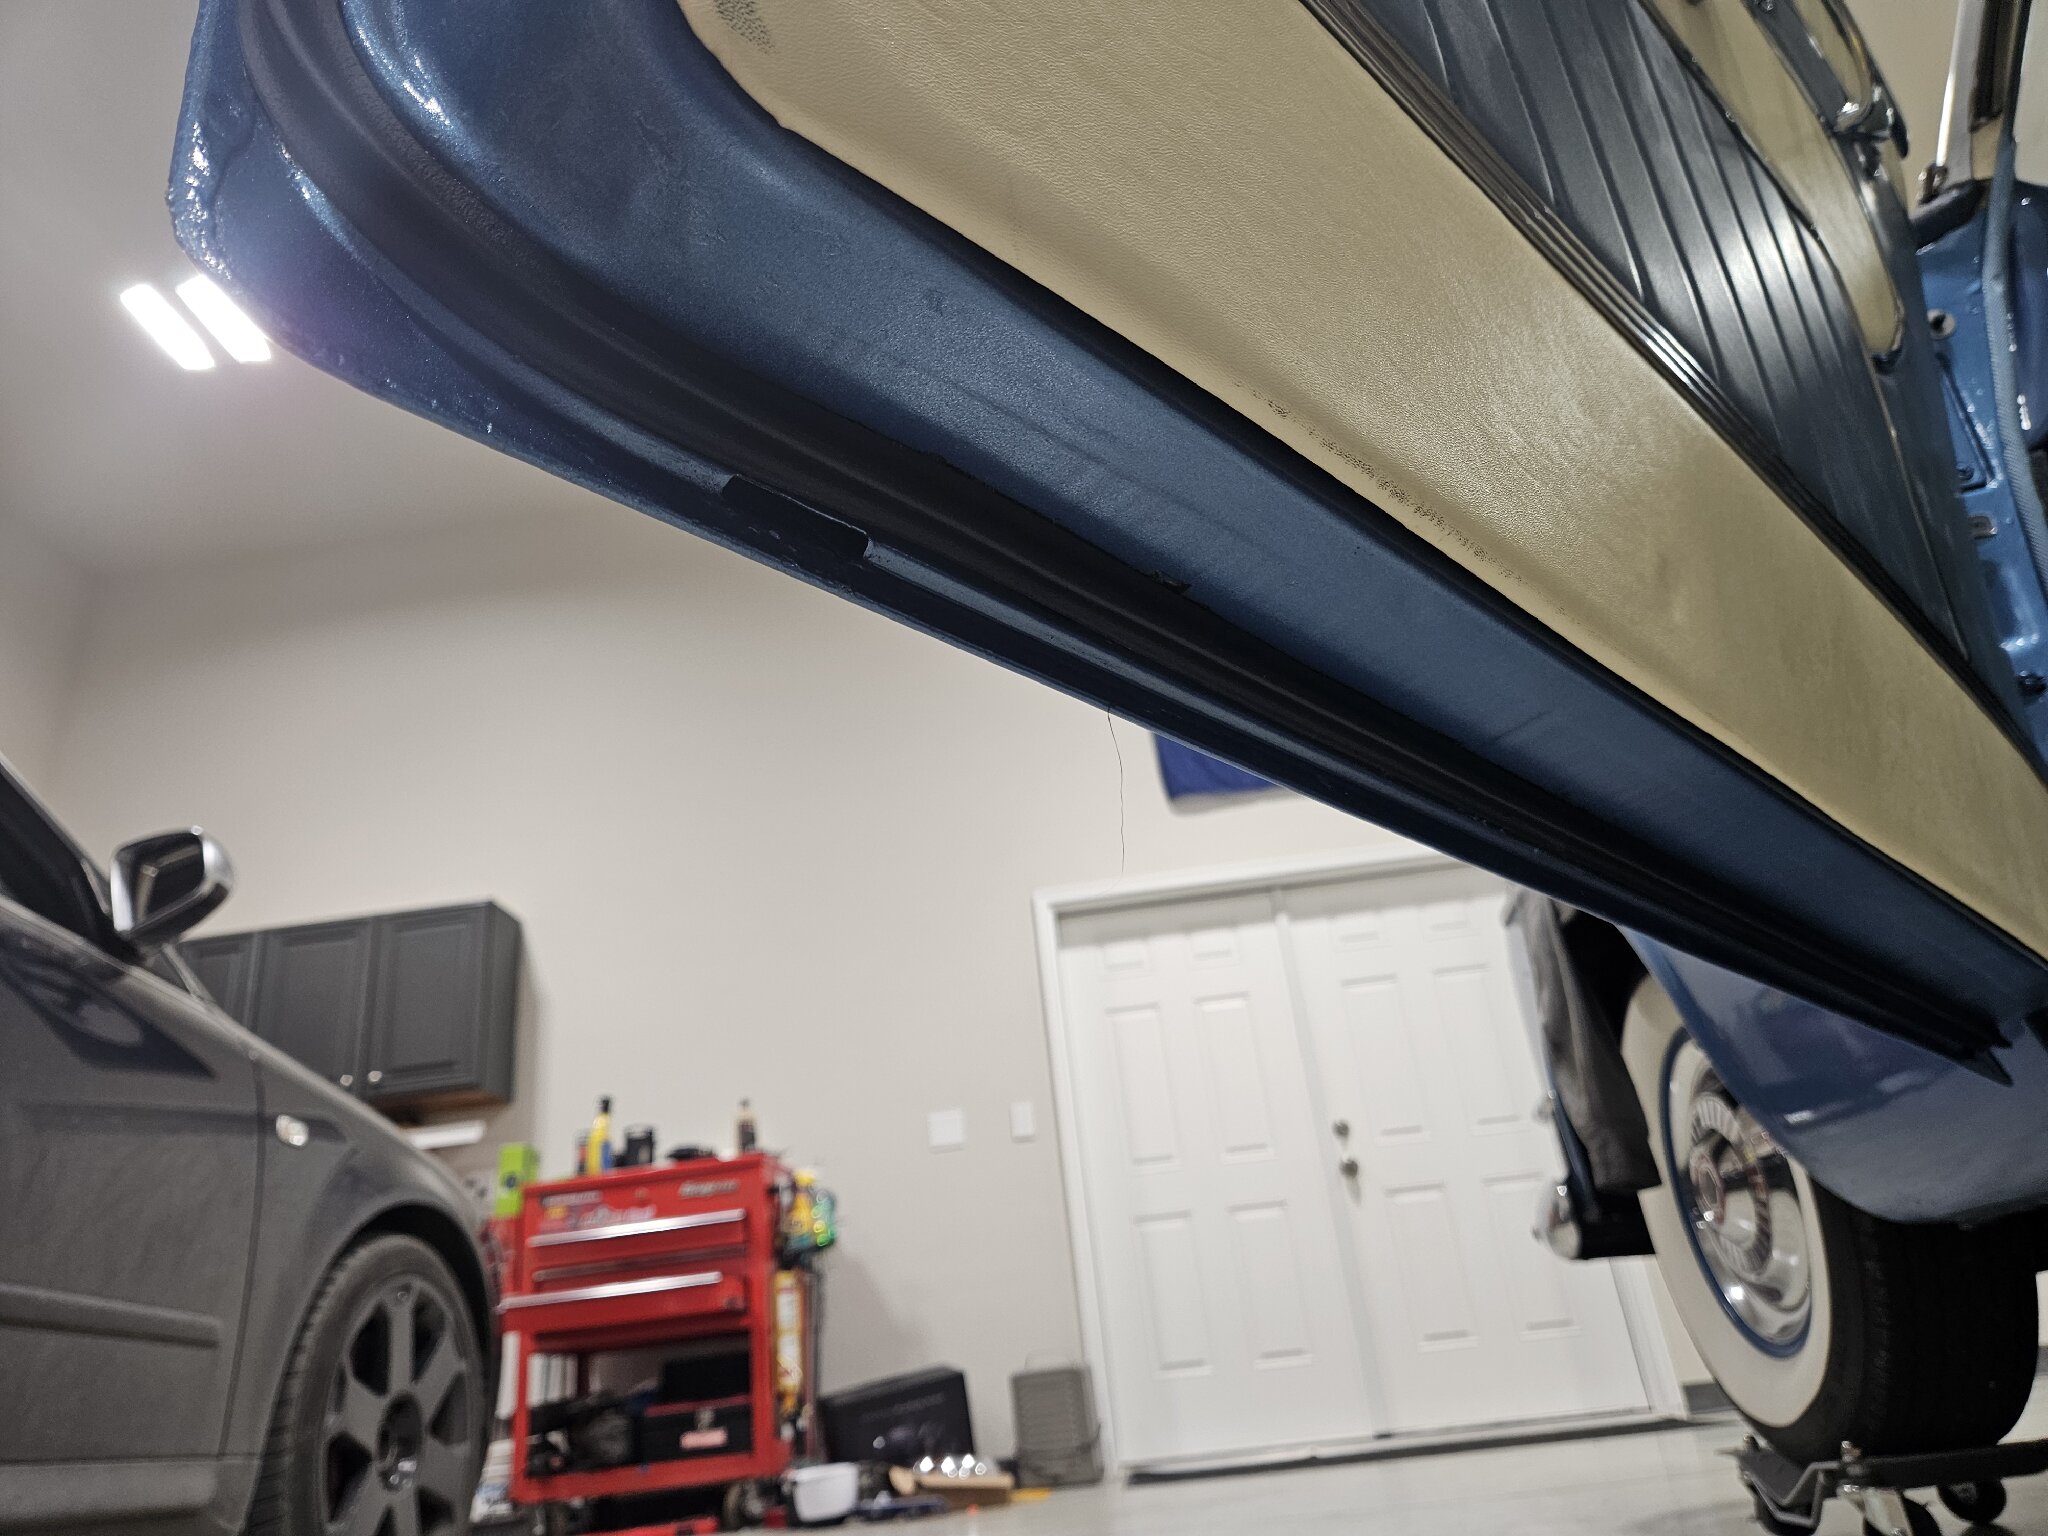 As expected, the doors were very hard to close. And both doors are sticking out now, whereas before the door gaps were pretty close to perfect. I assume this will correct itself over the next couple of days? 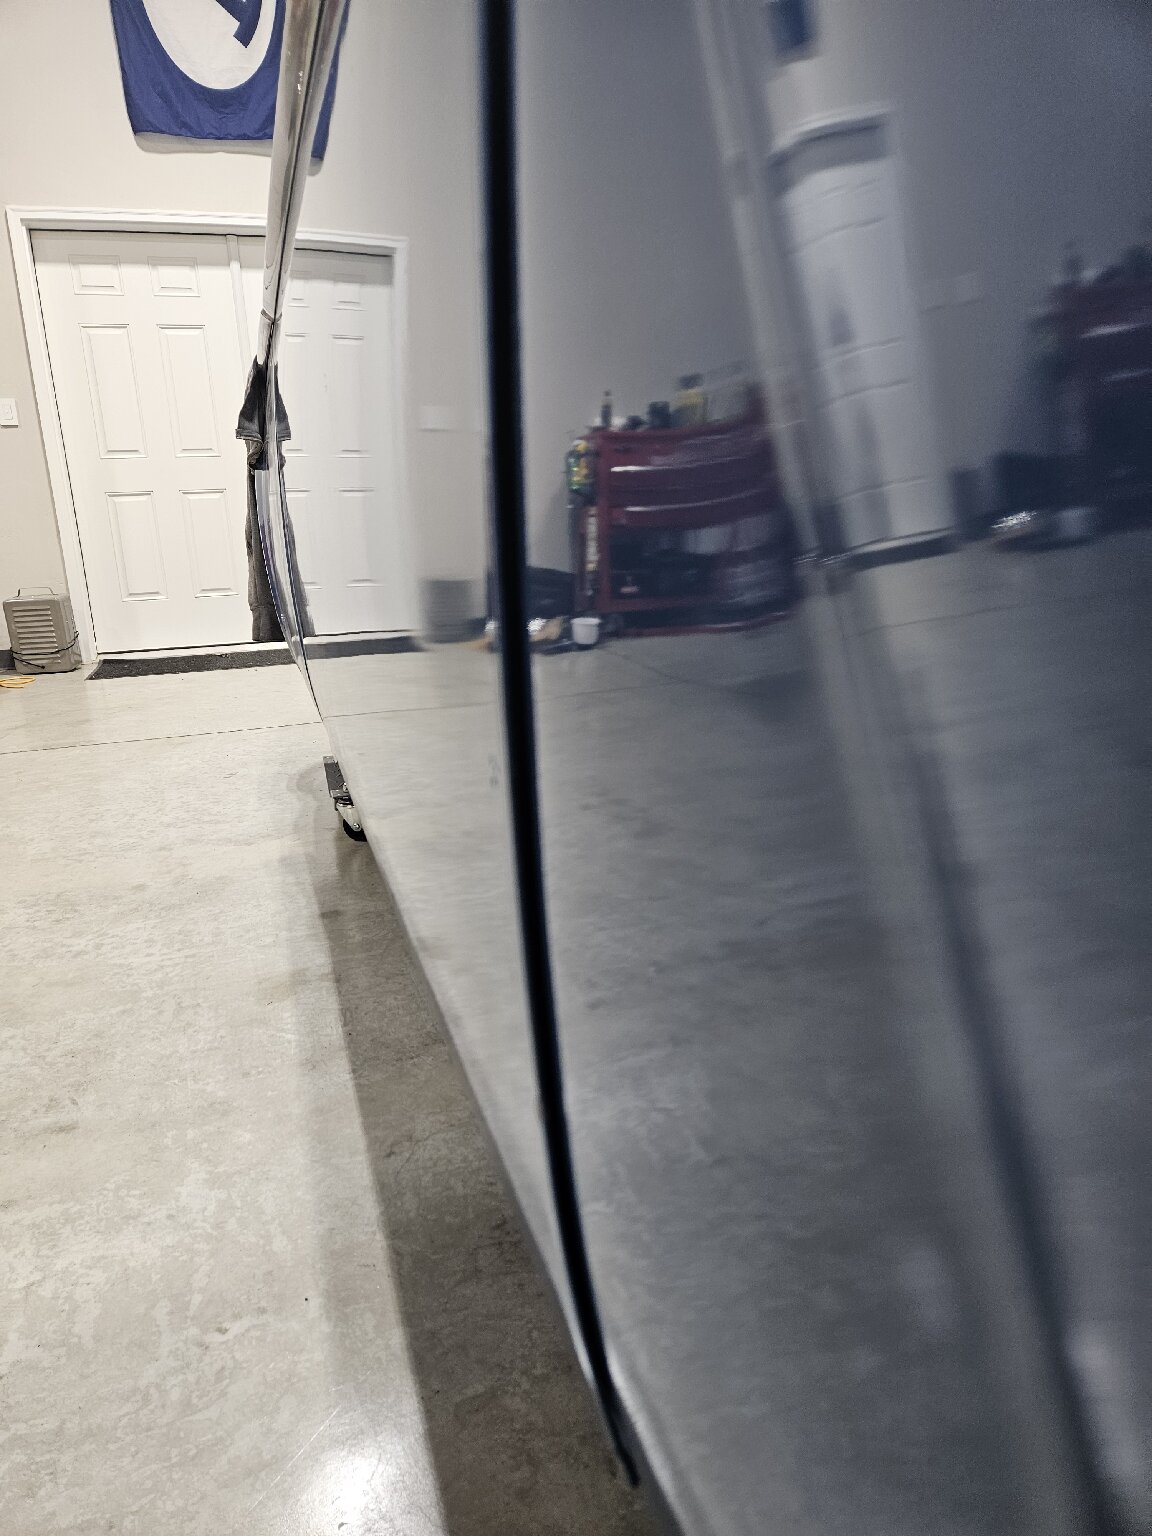 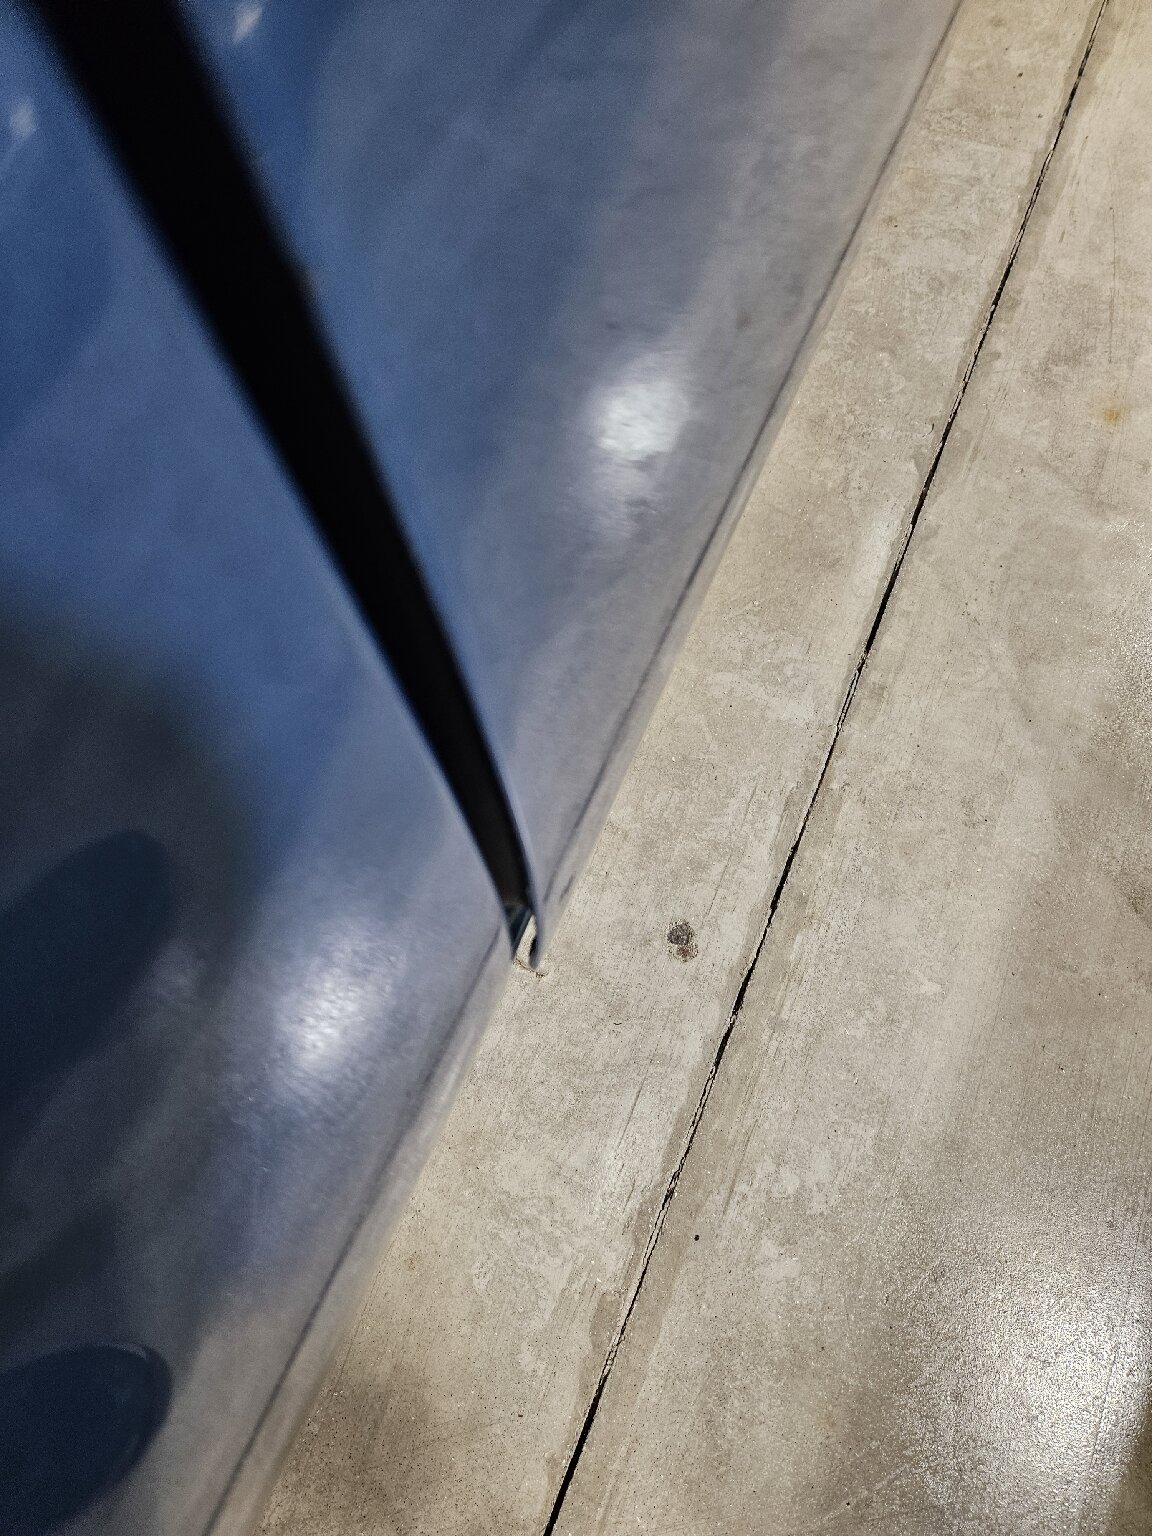
Posted on: 3/25 23:52
|
|||
|
||||
|
Re: BigKev's 1937 115-C Convertible Coupe
|
||||
|---|---|---|---|---|
|
Home away from home
|
Also from what I see. That gap between the door window and vent window is quite significant as you can see compared to my pictures as well. If your side window is rubbing inside that felt channel then you may need to sand that window down some, unless you need to push it into the frame rubber so it bottoms out.
Posted on: 3/25 22:50
|
|||
|
||||
|
Re: BigKev's 1937 115-C Convertible Coupe
|
||||
|---|---|---|---|---|
|
Home away from home
|
I'm having the same problem on my passenger side. The driver side fits nicely. What I did on the driver side which helped and what I attempted to do on the passenger side which did help some but not enough, unfortunately, Was I moved the whole vent window forward towards the windshield pillars just enough to not scrape at the top and drilled new mounting holes in the door where it screws down. This allowed me to be able to position the side window closer towards the front of the car. As you can see in the pictures. It's as close as you can get to the vent window as well. The very top of the vent window frame in relation to where the stainless strip that screws onto the windshield pillar that holds the weatherstrip has a tight gap. There is originally a small indent in the stainless strip up top which allowed the vent frame to not scrape. I also hammered that indent down just a bit to avoid the scraping and being able to get that gap close. This allowed me to move the position of the side window closer towards the front, which I was hoping would create enough space so that piece that screws onto the wooden piece that goes on the convertible rack, and not scrape the side window frame. It worked on the driver's side but not enough on the passenger. I unfortunately had the top material installed before I mocked everything up to for test windows and the such, so I couldn't adjust the rack much. I may end up sanding the wooden piece down ever so slightly so that metal piece that holds the weatherstrip will sit slightly further back. I just need about 1/8". I hope I explained it clearly. If not I'm a phone call away, just DM me of you want to give me a call and I'll pass along my number.
Attach file: 20240325_201034.jpg (2,833.95 KB)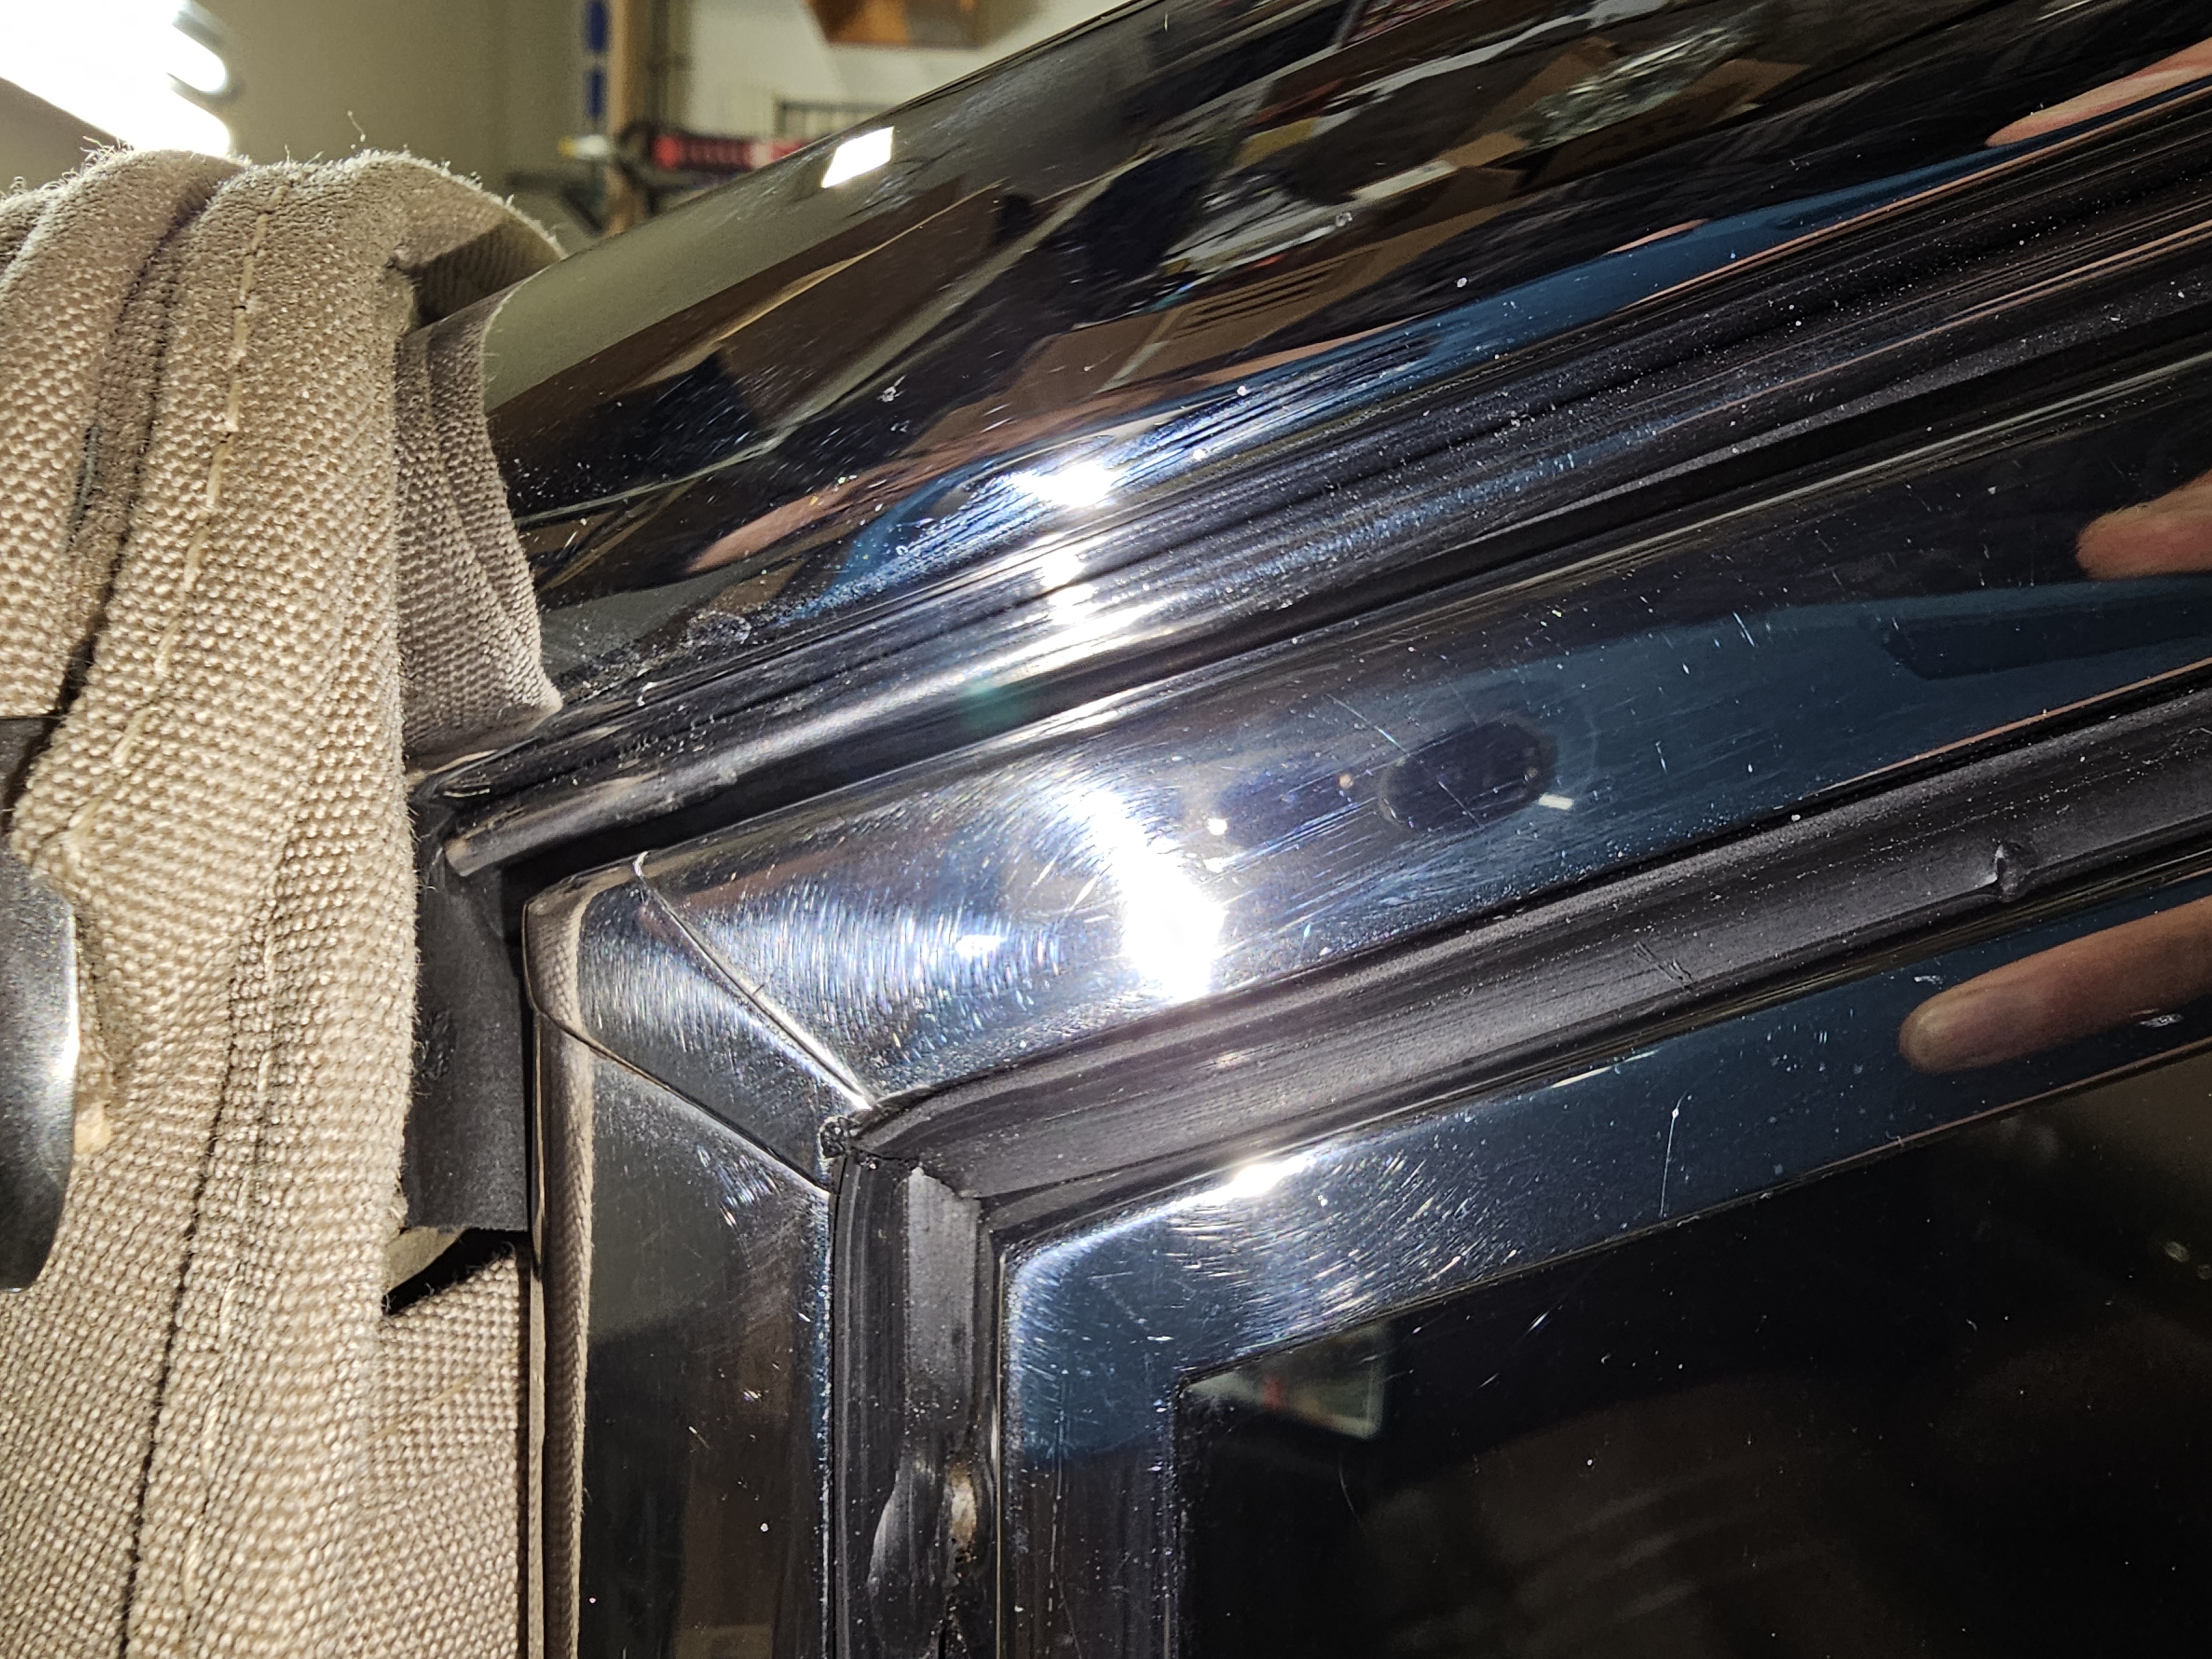 20240325_201119.jpg (2,076.08 KB) 20240325_201119.jpg (2,076.08 KB)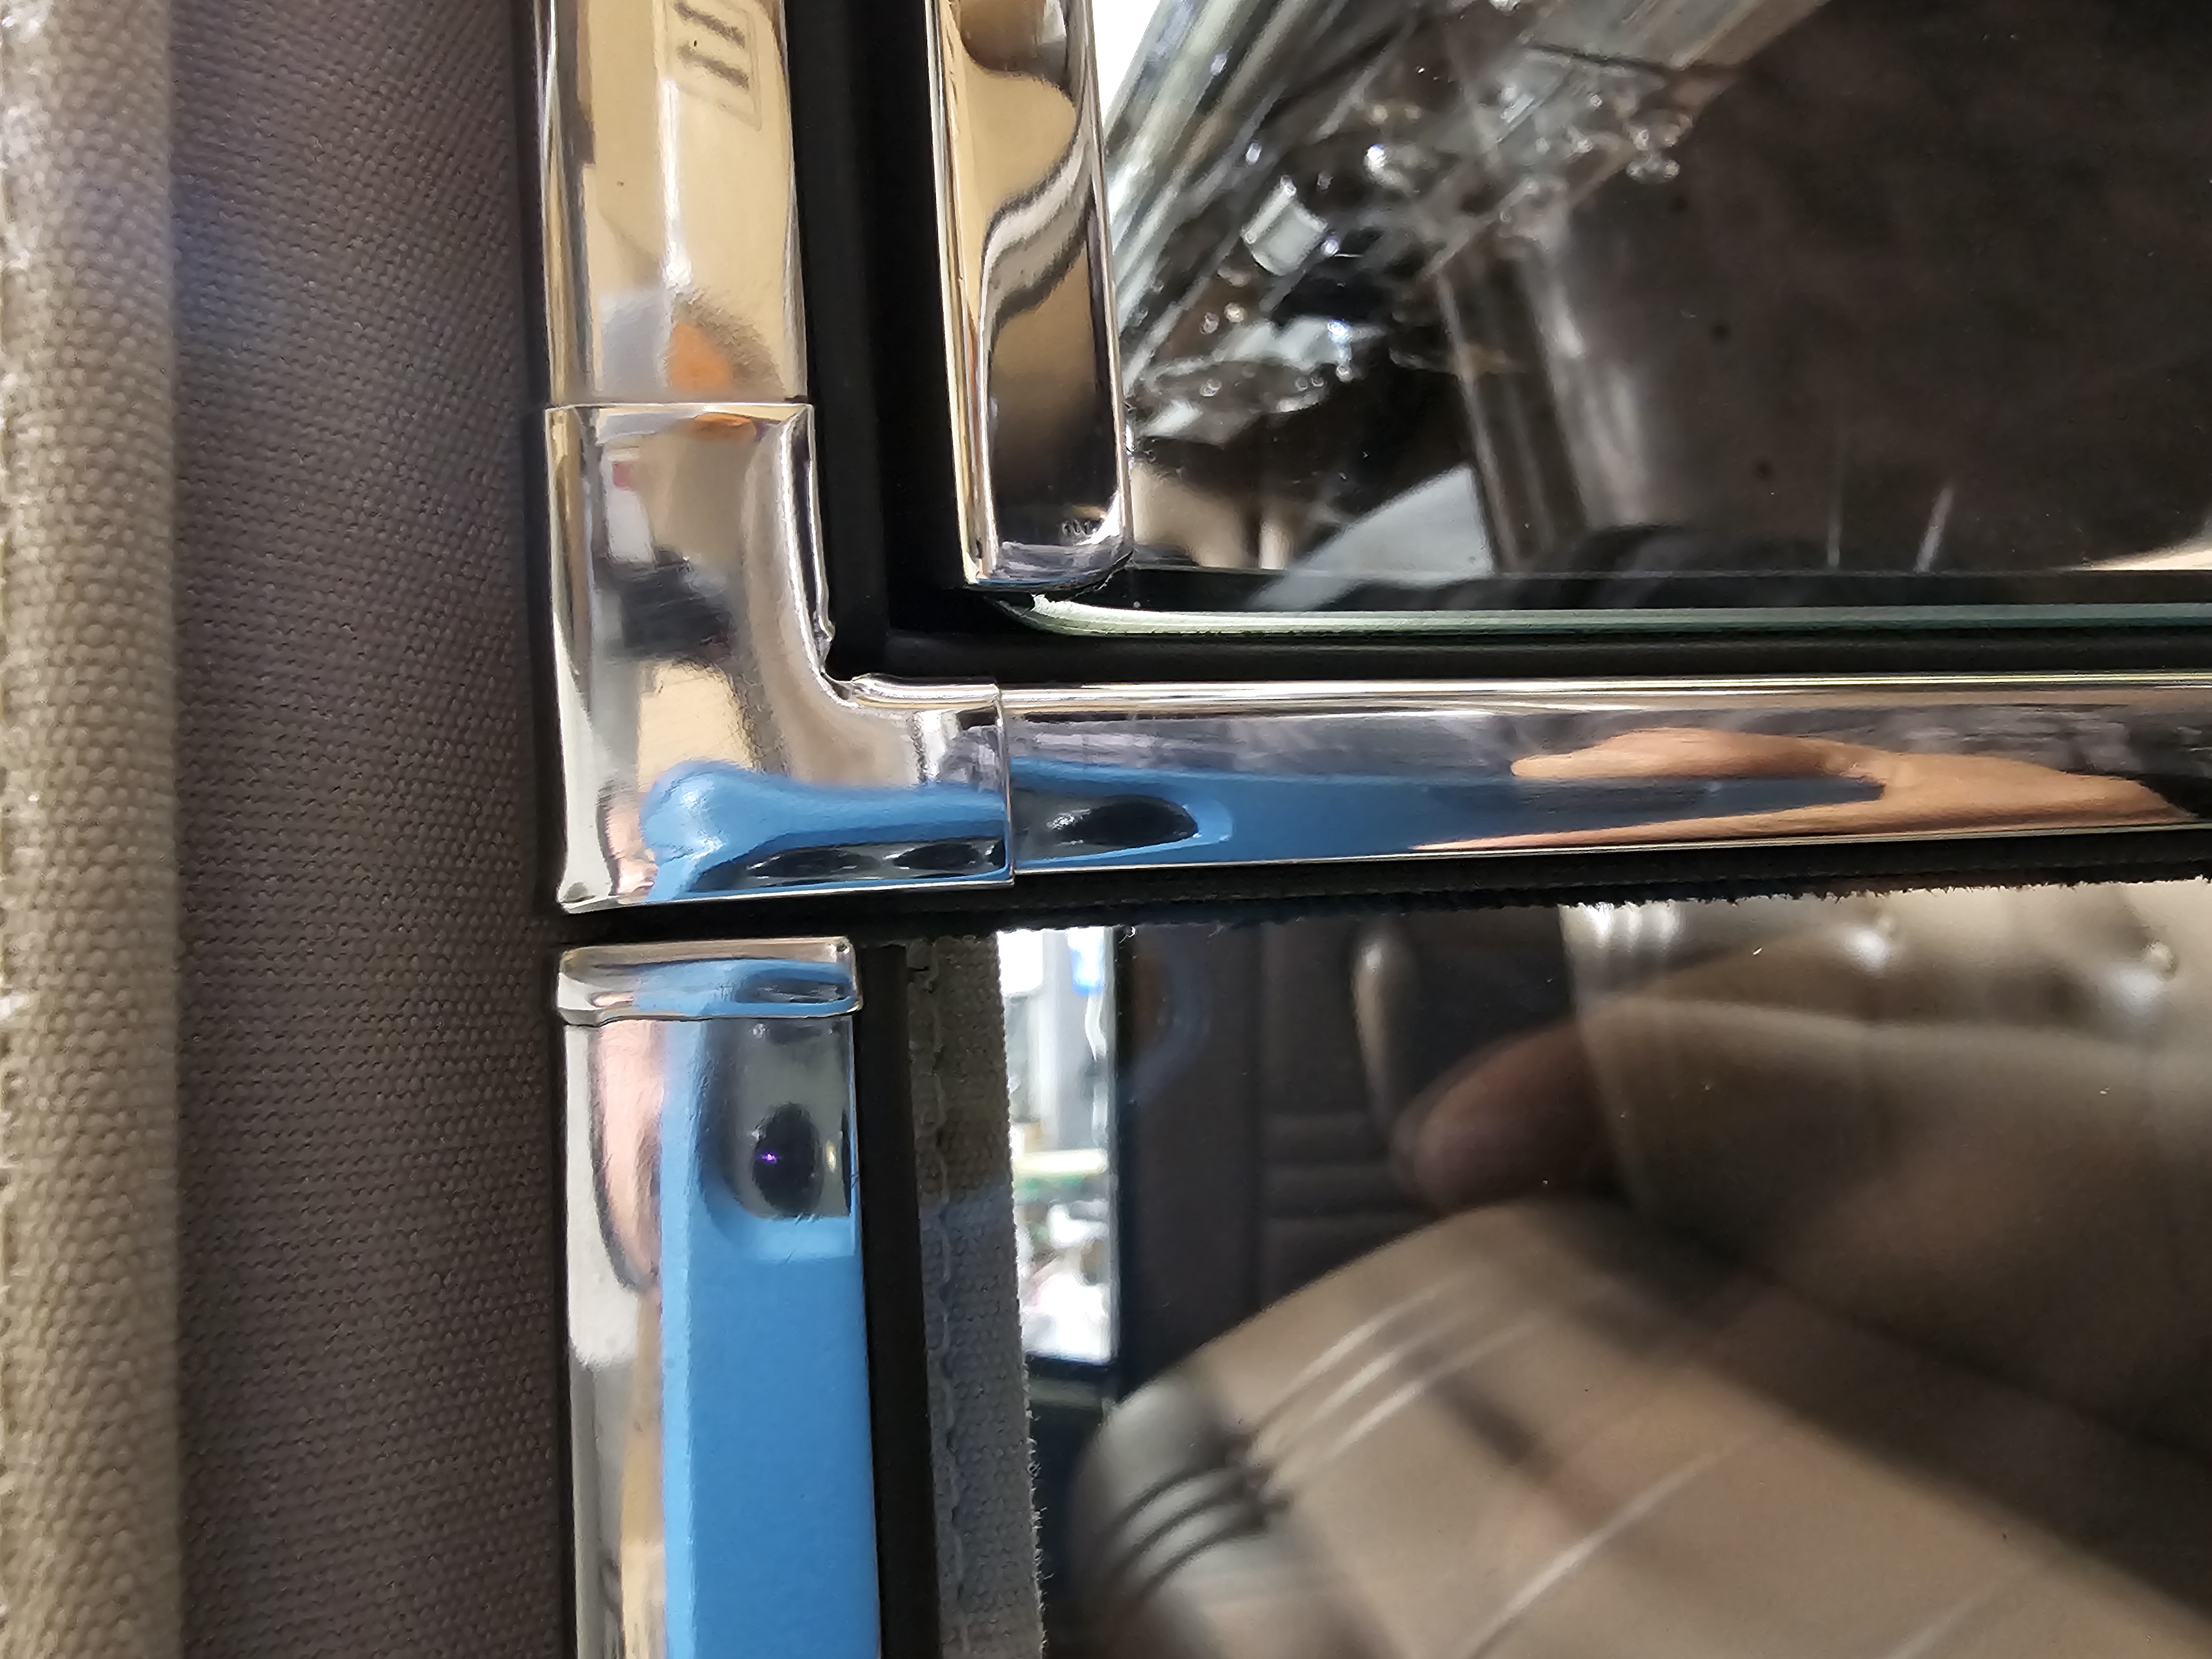 20240325_202226.jpg (2,523.40 KB) 20240325_202226.jpg (2,523.40 KB)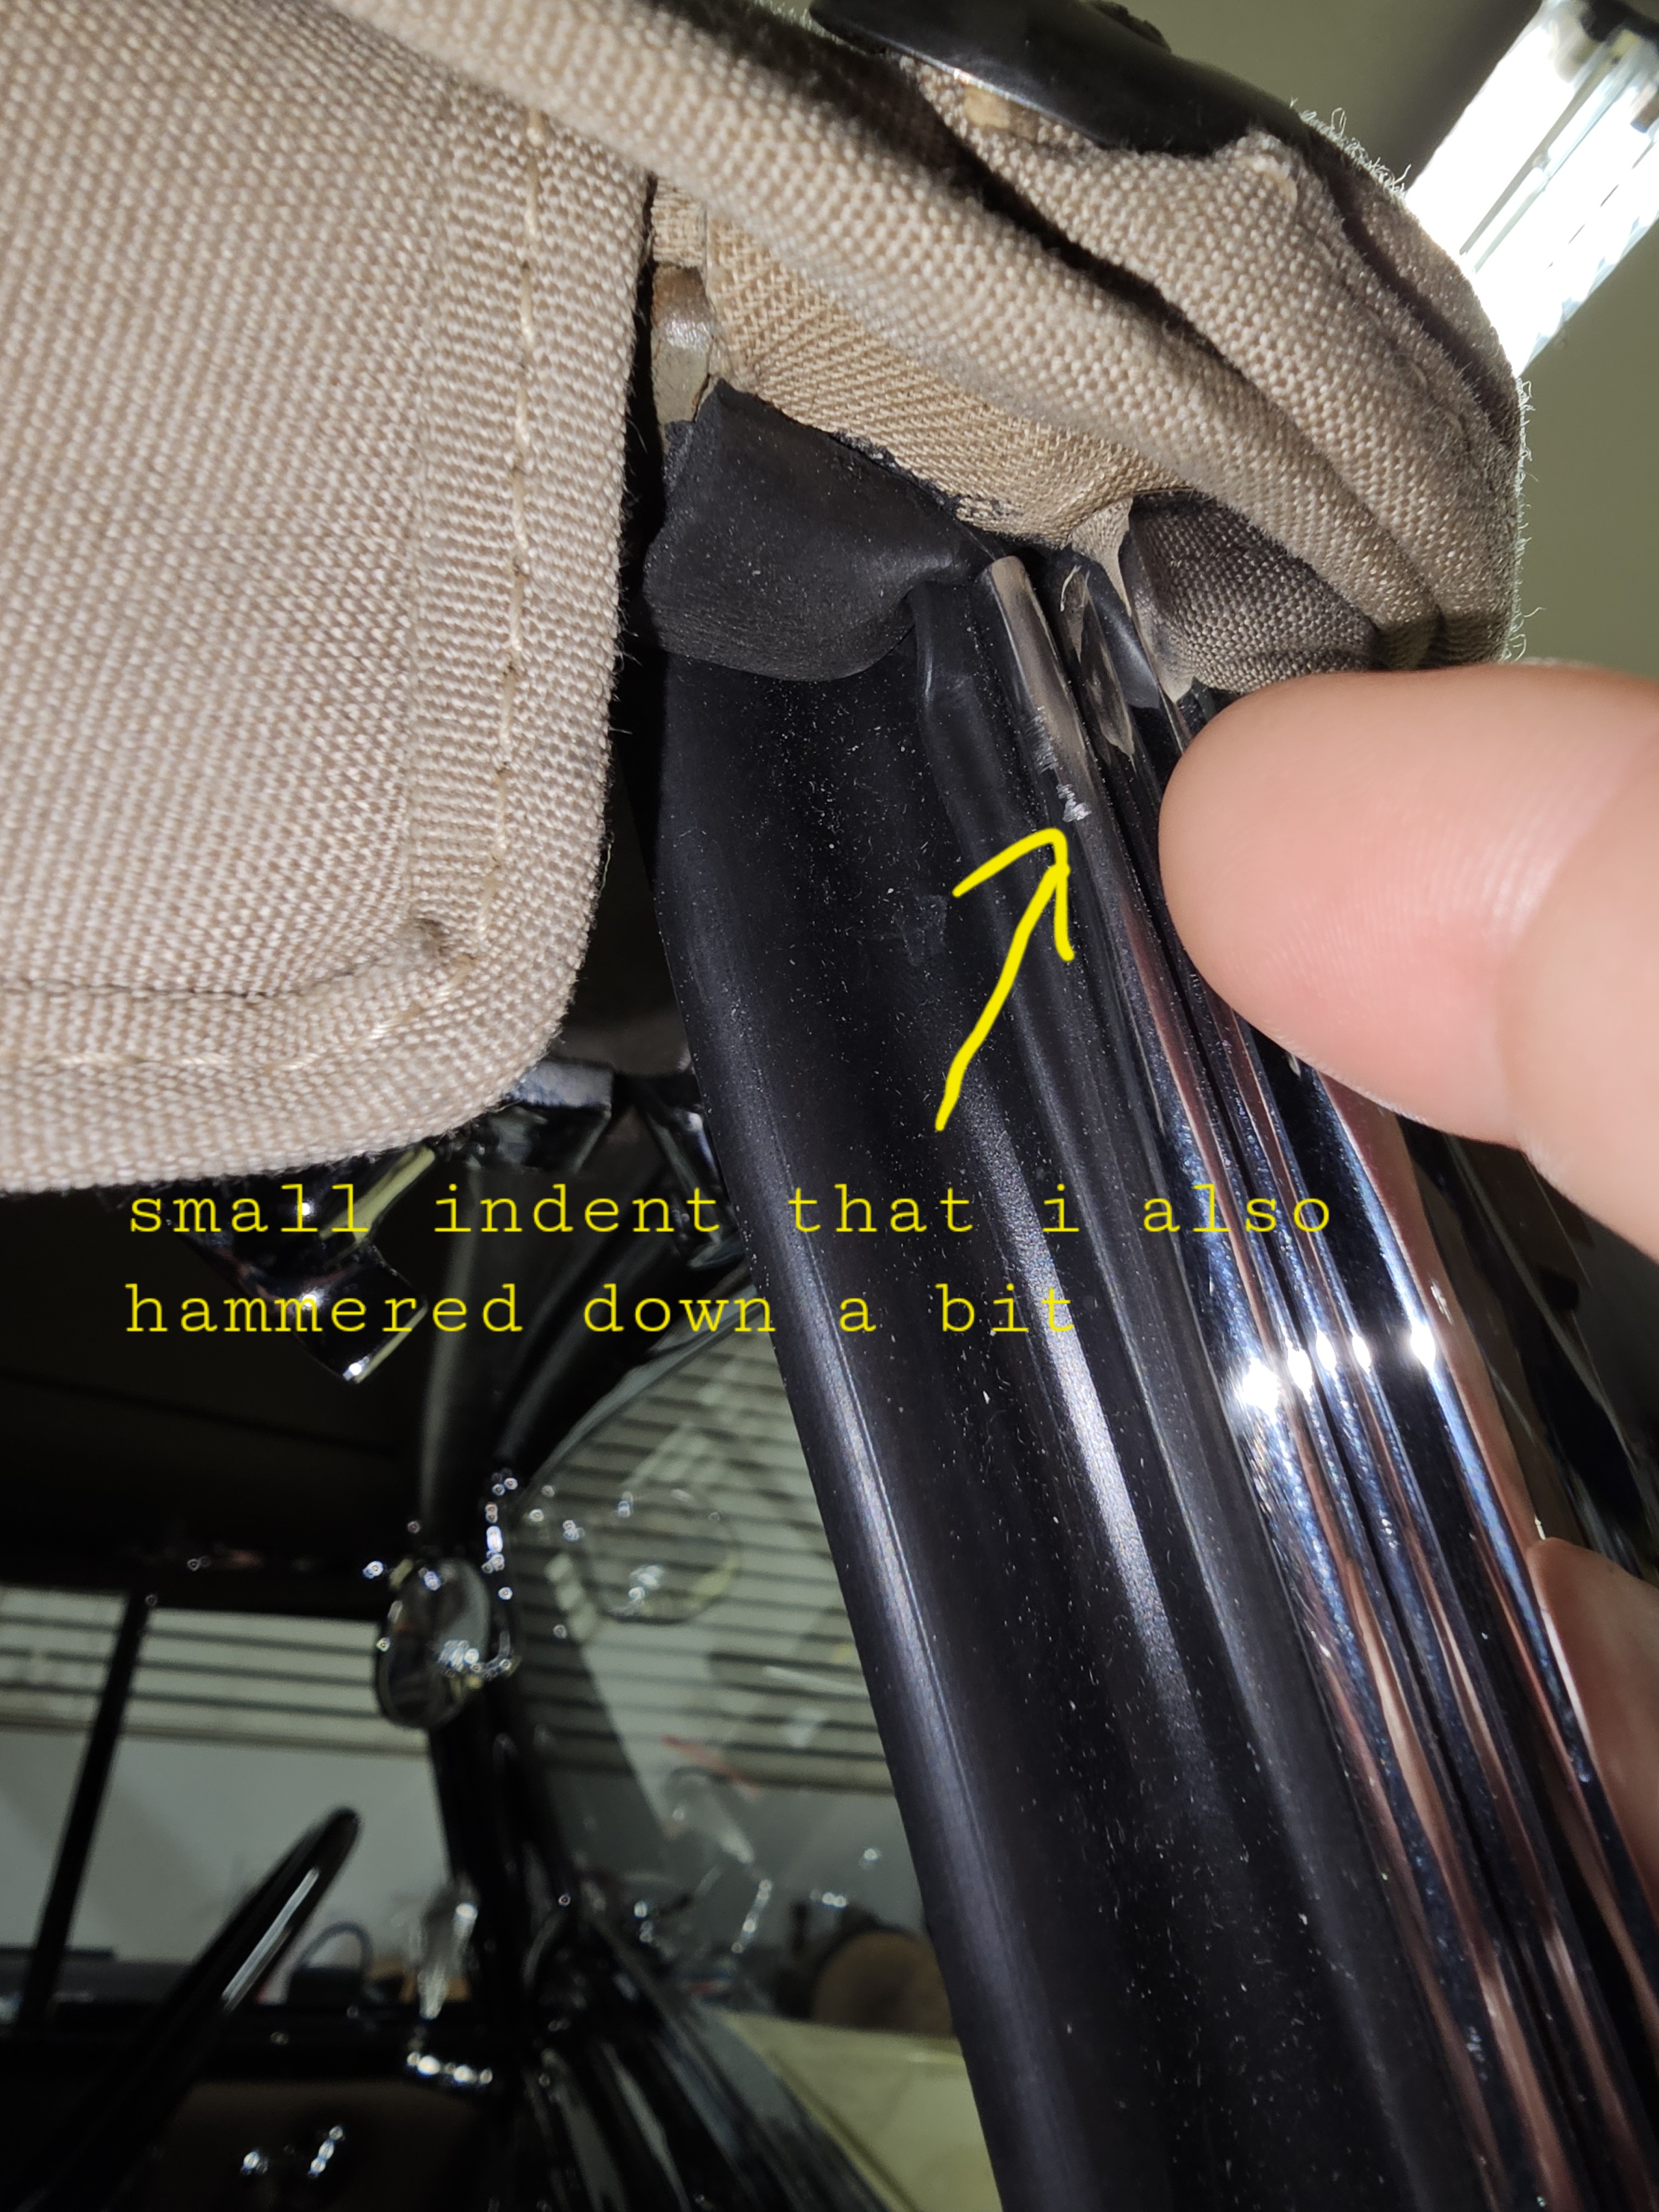
Posted on: 3/25 22:42
|
|||
|
||||
|
Re: Rarest Car Options?
|
||||
|---|---|---|---|---|
|
Home away from home
|
Quote:
As I recall there is a small wire resistance type heating element mounted on the black enclosure positioned so that it sticks up in the airflow. As acolds said, it takes a long time to get much heated air up on the glass. Probably good for a fogged up window and maybe some light frost but I wonder how effective or how large an area it would clear on a glass with a thick coating of ice. I can't speak for the Packard unit but my 1965 Imperial LeBaron's rear defroster worked quite well and had no heating element. I later replaced it with a factory rear A/C unit which not only does the same job but also uses the same dash control switch labeled Rear Air for either option.
Posted on: 3/25 22:05
|
|||
|
||||
|
Re: Manual Transmission Inconsistant Feel with Stickiness
|
||||
|---|---|---|---|---|
|
Not too shy to talk
|
Thanks HH56! I appreciate the reply, the information and the annotated photo. I will keep you posted on how I do. all the Best!
Posted on: 3/25 21:43
|
|||
|
||||


