|
Re: Aftermarket Air Conditioning
|
||||
|---|---|---|---|---|
|
Home away from home

|
Howard I’m sitting here trying to figure out if the gentleman converted from 6 v to 12v, only to drop the voltage back down by running the fan at medium speed (likely to limit the current). I must have been absent from class the day that HVAC blower motor voltage discussion took place. My ’54 Cavalier (6+) has a single 3/8 inch belt aftermarket AC system that works just fine. It’s a long belt installation that uses the power steering sheave. The clutch coil has a resistance of 3.6 ohms, which is the same as a 12 v coil in my ’99 Chevy. My evaporator does not seem to have any voltage converter . . . at least not obvious, and I’ve looked. My current thought is the highest fan setting in my car is providing 7+ volts to the blower motor, and that voltage provides enough air flow to convince me the AC is working just fine. I’ve had no success finding an aftermarket evaporator (or blower motor) specifically for 6 volt cars, but I have found a lot of threads that say a 12v AC can’t possibly work on 6 volts! I haven’t found a ‘wide-belt’ solution yet . . . maybe a double 3/8 system would mimic the look, but I suspect a serpentine pulley could be modified.
dp
Posted on: 2023/7/9 20:53
|
|||
|
||||
|
Re: Aftermarket Air Conditioning
|
||||
|---|---|---|---|---|
|
Home away from home
|
Posted on: 2023/7/9 18:35
|
|||
|
||||
|
Re: Looking for information/individual
|
||||
|---|---|---|---|---|
|
Home away from home
|
I don't go back that far in the club, but there are several that do. Try
https://packardsofaz.club/ The club is located in Phoenix. dp
Posted on: 2023/6/16 19:35
|
|||
|
||||
|
Re: Oil Bath Air Cleaner Element Reconditioning
|
||||
|---|---|---|---|---|
|
Home away from home
|
I seem to remember metallic mesh being used in some oil bath air cleaners . . . a lot like a large scouring pad. I went looking on the web and found 6, 3-inch pads for less than $3 . . . stainless steel no less. If the 3M material degrades, SS scouring pads might be a ‘bullet proof’ option. Your right about keeping an eye on mixture, because if the media is too restrictive the mixture will surely enrich. If you suspect enrichment, it will be more severe at higher air flows, but will affect idle as well. A clue would be a different idle mixture adjustment is needed with and without the filter installed. Both the WDO and the WGD carburetors are vented to the engine compartment, and as such would be sensitive to a change in inlet restriction. Remove a spark plug after a bit of exercise to double check. Who knows, with the amount of alcohol in the fuel a bit of extra restriction might be welcomed.
dp
Posted on: 2023/6/10 15:13
|
|||
|
||||
|
Re: Factory Trunk Finish
|
||||
|---|---|---|---|---|
|
Home away from home
|
53 Cavalier;
I believe the 26th and 54th (perhaps 24th to 54th) series trunks were finished with the following process: All of interior surfaces of the trunk were sprayed with an undercoating material. The amount of material applied likely varied with location, with the inner surfaces of the rear quarter panels receiving the most, and the spare tire well receiving the least (if any). I believe this coating would be identical to the coating used to adhere the interior sound deadening pads. I’m interpreting the entire surface was sprayed, but I can’t tell unintentional over-spray from an intentional light coat. I believe the goal was to provide more corrosion protection than paint alone, so I’m leaning to the entire trunk was intentionally sprayed. Flocking material was then applied to the interior surfaces, with sufficient flocking material applied to those areas with a ‘heavy’ undercoating to completely cover the undercoating. If an area was going to be covered with a mat/pad/carpet then the flocking would not be applied, and hence the thickness of the undercoating minimized. The next obvious question is what currently available materials would produce the same (or close to) the OEM look and feel. I think just about any black in color roofing cement, or automotive undercoating would be close to the original material, which was/is to encapsulate the steel and thus retard rusting, and be a suitable adhesive for the flocking. POR could also be used if the surfaces are corroded, but that product may be too thin for flocking. The key characteristic for this material is the drying time . . . this material cannot dry in the amount of time it takes to flock the surface. The flocking is another subject entirely. The flocking that survived in my ’54 was inspected under relatively high magnification that revealed a multi-color, multi-length mix of fibers. I read somewhere that the material was goat hair, which would explain the variation in both color and length. The colors ranged from white to black with the majority being tan/light brown. There were a few translucent fibers amongst the mix. The lengths varied in the 1/4 to 3/8 inch range . . . mostly, but there were a few longer and shorter. I realize that I had just vacuumed a 60+ year old car, and was sensitive to the problem of how much of the captured material was modern ‘debris’, and how much was OEM flocking. When I went looking for modern flocking I ran into many choices of color and length, so if my sample to flocking is genuine, many lengths and colors should be blended to mimic the OEM material. If the OEM material was goat hair then I would expect some car to car variation, and perhaps some seasonal variation. Given my sample of flocking fibers I would agree that the overall color would be in the tan/light brown category. The trunk floor on my ’54 had a three piece pad made from ‘tar paper’. The pad was comprised of one rather large piece that covered the floor from the spare tire wheel well to the driver’s side of the trunk floor. It also went from the rear of trunk floor to the beginning of the ‘hump’ for the rear axle. This piece had cut-outs for the various reinforcement gussets along the rear wall of the trunk. Another piece of tar-paper went from the other edge of the spare tire wheel well to the right rear fender. IIRC there was a cut-out for the tire hold-down bolt details. The final piece was filled in the gap between the other two pieces. It is roughly the width of the spare tire well, and filled the gap between the well and the aft wall of the trunk cavity. The piece had a curve to match the well. The three pieces of ‘tar-paper’ were stapled together. I have assumed this covering was to provide some protection from moisture and to protect the fiber-mat/carpet from getting mucked-up from the undercoating. I’m assuming based on the die-cut details this tar-paper pad is original. I have never seen an original upper fiber/carpet pad. My car had an unfolded jack box as an upper pad (ugh!). The void between the rear quarter panels and the outer surface of the wheel tubs was filled with ‘fiber ropes’. My ’54 had what I believe are original items. They are approximately 33 inches long, and 1 ½ inch in diameter. While we use the term ‘rope’ they were made of short fiber paper . . . a lot like crape-paper. The paper was formed into the ‘rope’ such that no edges of the paper were visible, which suggests those edges were facing inward. It also looked like many pieces of paper were ‘stacked’ into a pad prior to folding to hide the edges. A double over-braid of thread with a pitch of approximately 1 inch held the paper bundle together while the ‘rope’ was in storage. The over-braid was a double counter wound configuration that produced a repeating ‘diamond’ pattern. While the ropes for my ’54 had the ends wound with a different type of thread, I don’t believe this was the OEM configuration. I envision a dispenser that would hold many yards of material, and upon activation would dispense a piece of material cut to the correct length. The installer would grip the free end of the material inhibiting the thread from unwinding, and in very short order the material was forced into the fender/tub gap. In my two examples I could not find an obvious splice/gap in the length of the crape-paper, suggesting either those details did not exist in my units, the folding technique could hide those details, or the length of the crape-paper established the length of the final product. Tire kicking wisdom suggests the ropes were installed to inhibit small items from falling between the fender and tub. While this is likely true I believe there is also an argument that could be made for quarter panel support . . . but I do lean to the small item explanation. My ropes did not appear to be flocked . . . but if they were installed just after the undercoating step there would be zero adhesive for the flocking to stick to the ‘ropes’. There was little evidence of undercoating along the length of the ropes suggesting the flocking was applied before the ‘ropes’. I’ve included a few photos of the flocking material, and details of the ropes. You are right about a fun/crafty project. EDIT: Make that crepe paper not crape paper. dp Attach file:  Picture 002A.jpg (297.00 KB) Picture 002A.jpg (297.00 KB)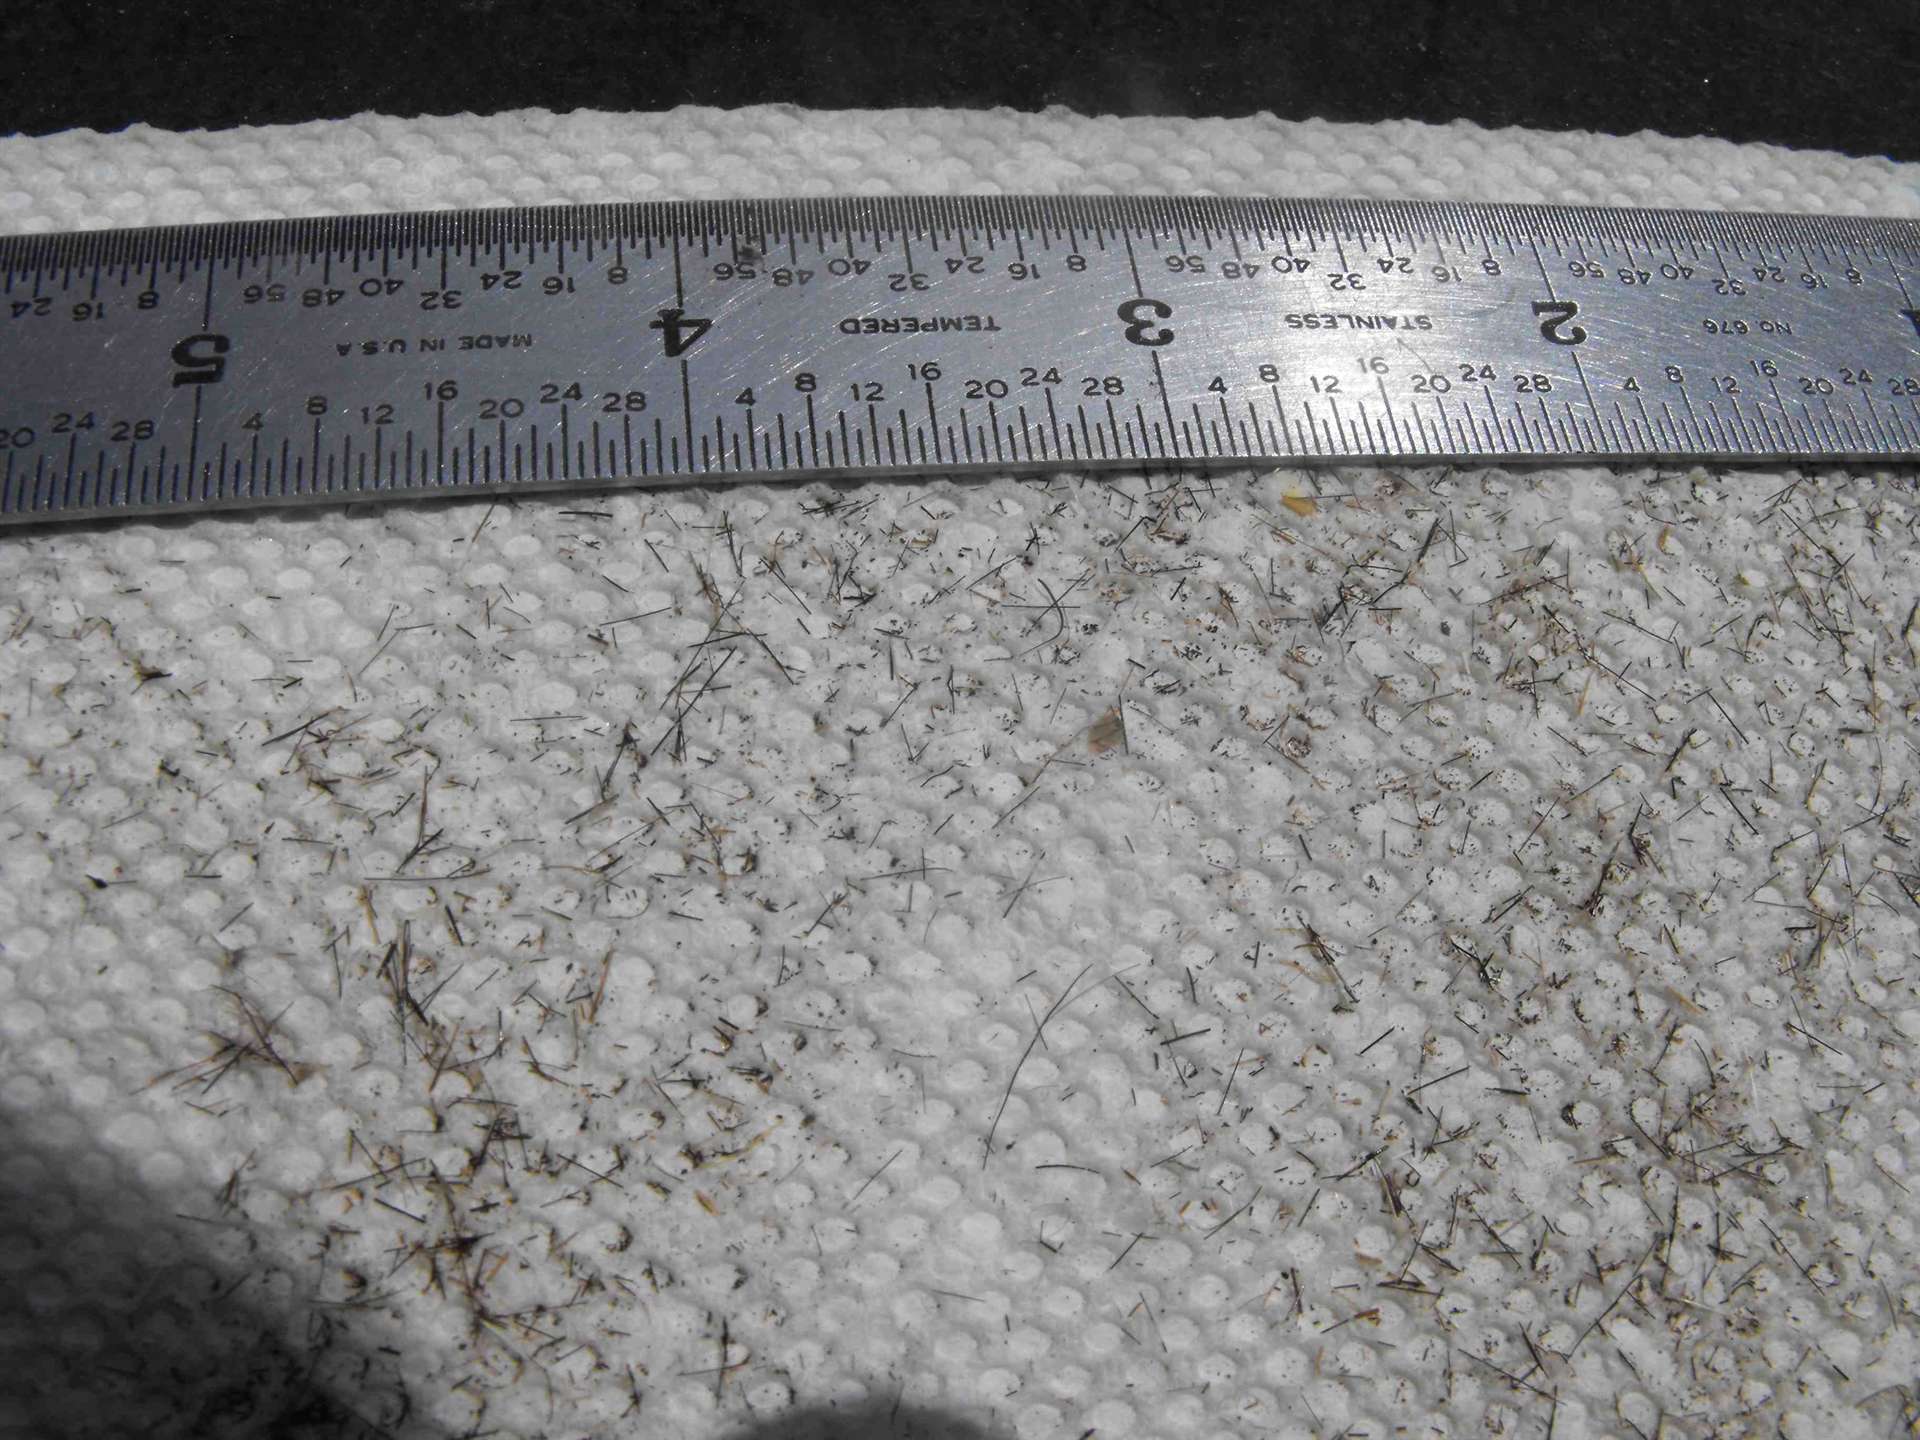 DSCF1003A.JPG (201.37 KB) DSCF1003A.JPG (201.37 KB)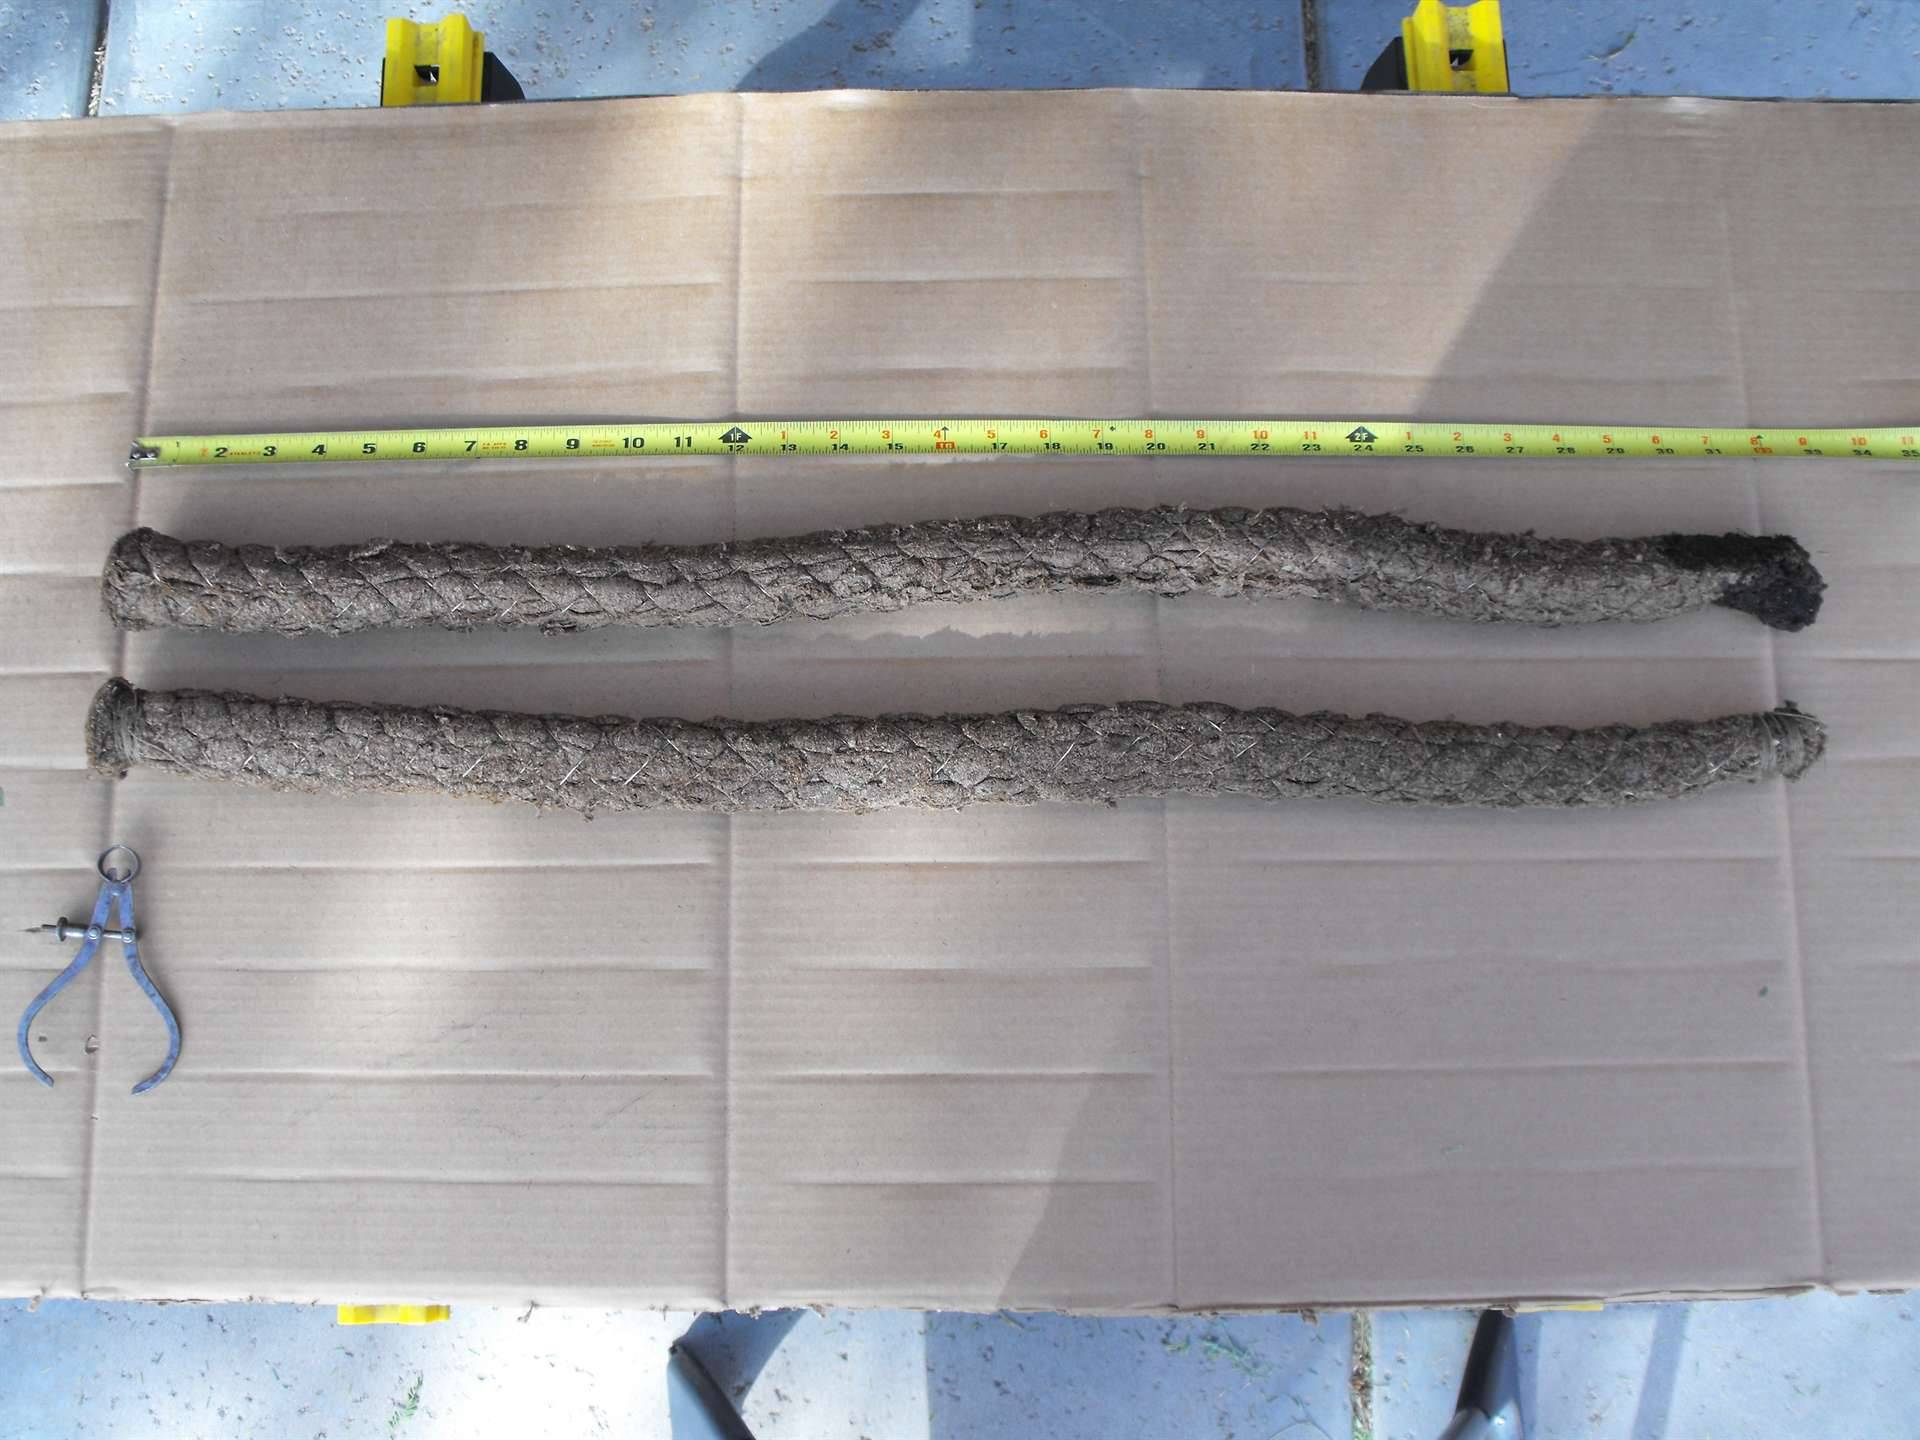 DSCF1011A.JPG (231.69 KB) DSCF1011A.JPG (231.69 KB)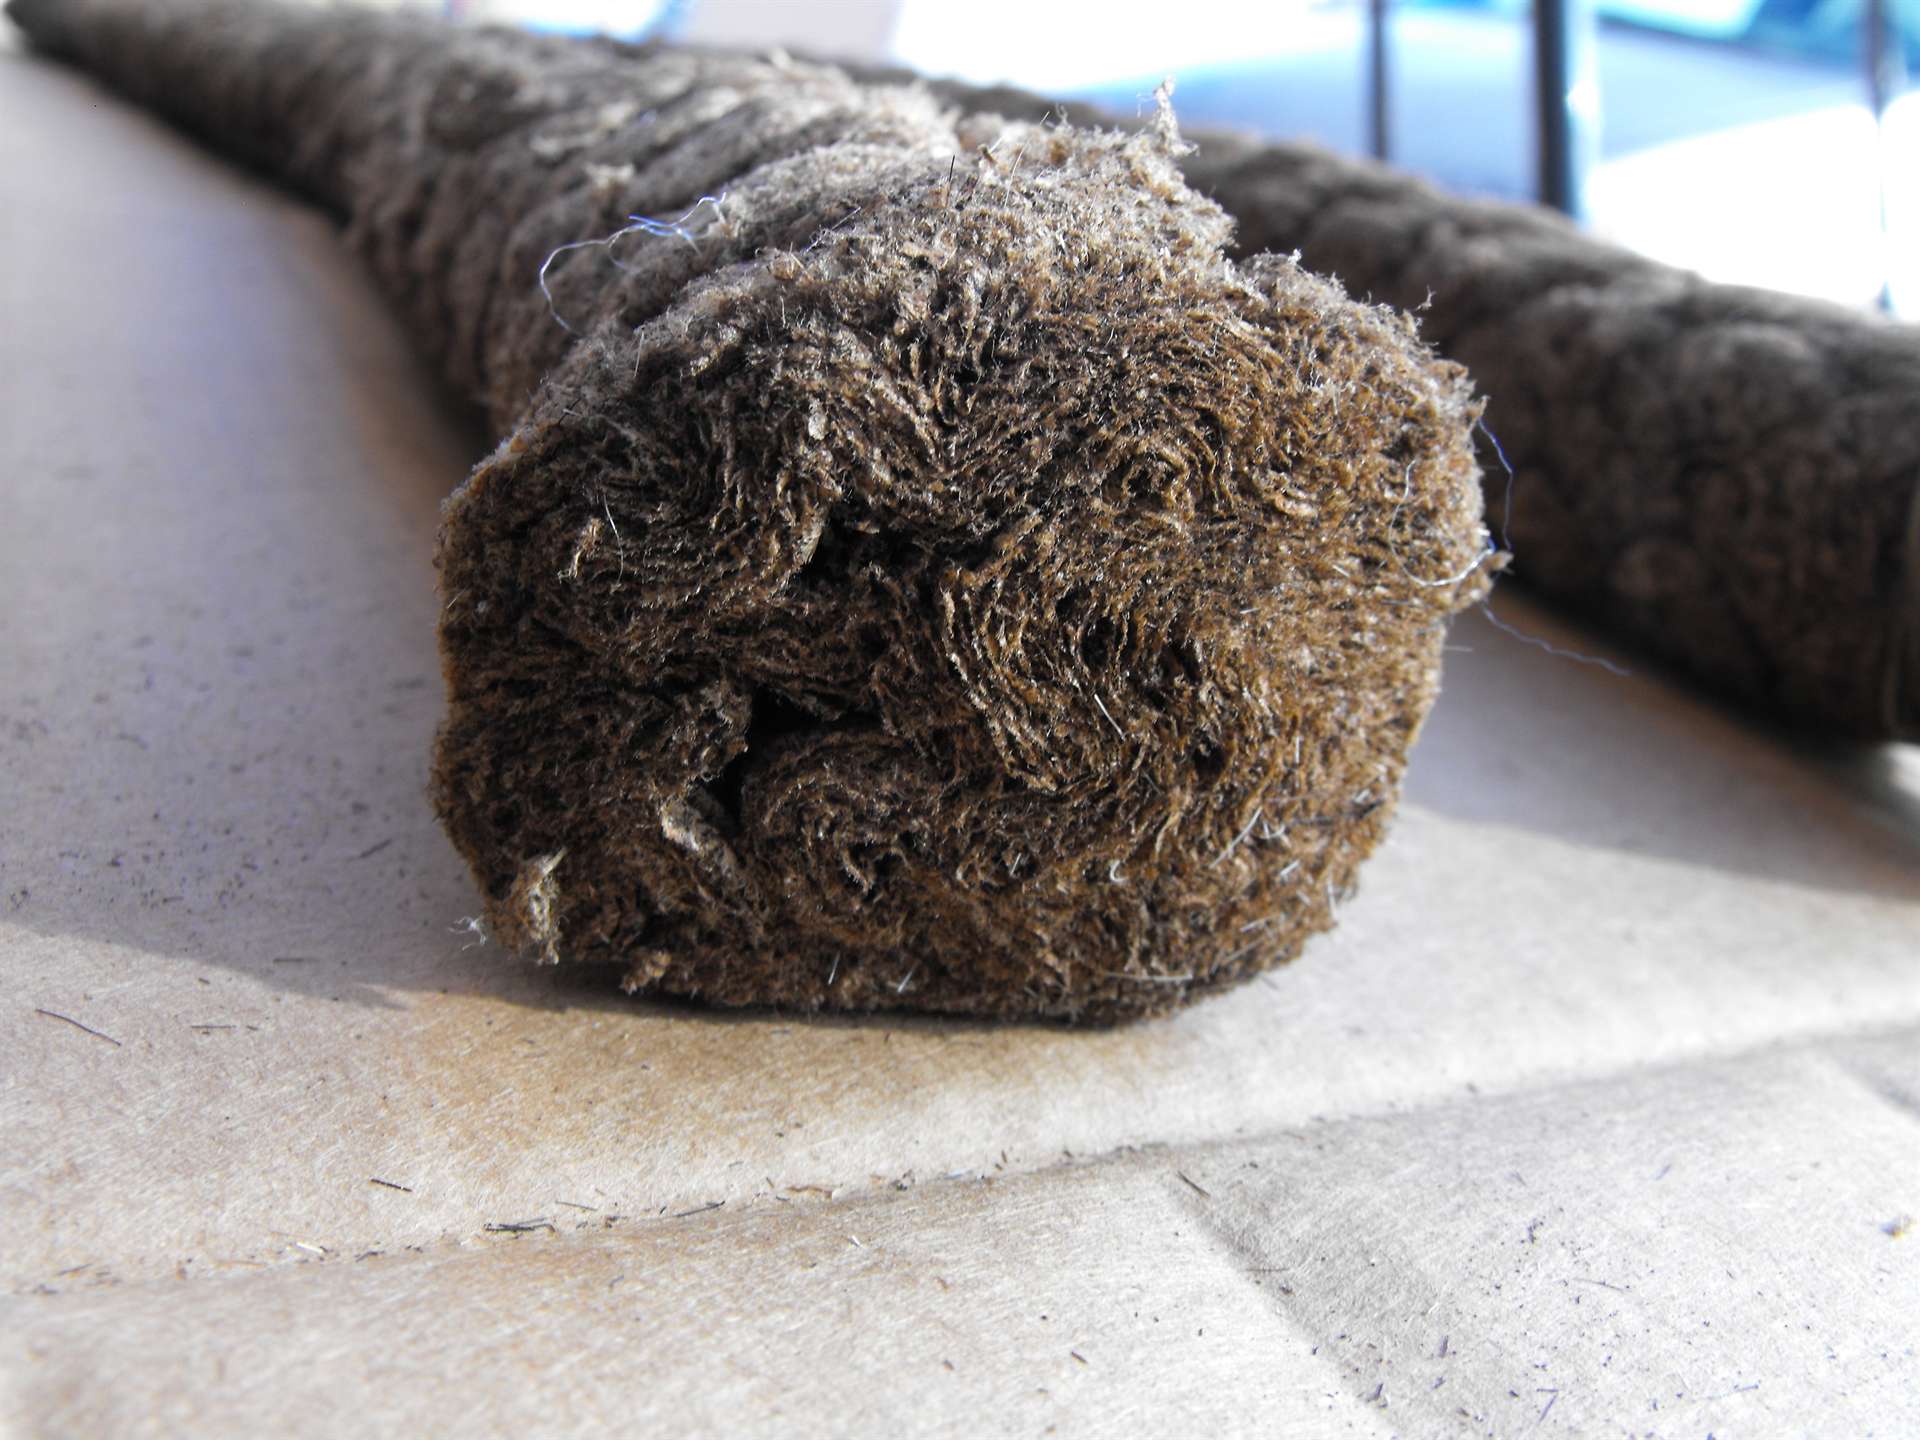
Posted on: 2023/6/1 19:45
|
|||
|
||||
|
Re: Voltage Regulators - What Is Normal
|
||||
|---|---|---|---|---|
|
Home away from home
|
Joe; In the FAQ section of the PerTronix’s website they make a statement “With all PerTronix ignitions we recommend that a suppression style spark plug wire (also called carbon core) be used.” That said, the majority of the answer references electromagnetic interference and how that might be detrimental to ignition systems (i.e. their product).
I did run my 6+ volt ’48 with a PerTronix ignitor module, their 1.5 ohm coil, and ‘solid’ ignition wires. I didn’t have a problem with that set-up, but switched to resistor wires as a trouble-shooting A/B test. The car seems to run just fine with either wire set. The car was left in the resistor wire configuration for the last 3-4 years. I have zero experience with resistor type spark plugs in that car. dp
Posted on: 2023/5/27 14:04
|
|||
|
||||
|
Re: 1939 differential leak
|
||||
|---|---|---|---|---|
|
Home away from home
|
DrMorbius;
This is a reoccurring forum subject. I suggest you use the Advanced Search feature and use 'pinion seal' as the criteria and restrict the search to the forums only. One of those search 'hits' will be a step by step procedure I wrote in response to a question much like yours, see: https://packardinfo.com/xoops/html/modules/newbb/viewtopic.php?topic_id=18059&forum=2&post_id=179582#forumpost179582 As long as the rearend is healthy there is really no intrigue in changing the seal. It does require a good amount of care returning the pinion bearing preload to the same value that you started with, but it has been done many times. Later shop manuals and service documents will have a lot more content than the '39 versions. You might read a few of those documents. There was another posting on the same subject where the question was "How big of an impact wrench should I use?" The answer was "Avoid the use of impact equipment when changing the pinion seal." dp
Posted on: 2023/5/23 22:00
|
|||
|
||||
|
Re: Mike's 53 Caribbean
|
||||
|---|---|---|---|---|
|
Home away from home
|
Mike
I would try a simple ‘stretching frame’ first . . . something thrown together from 2X3 lumber. Then you can stretch the boot a little at a time, versus committing to the entire stretch in one step. My concern is the force, make that the potential extra force, applied to the buttons. dp
Posted on: 2023/5/16 15:54
|
|||
|
||||
|
Re: Mike's 53 Caribbean
|
||||
|---|---|---|---|---|
|
Home away from home
|
Mike;
This is one of many articles on the subject of stretching fabric. https://www.wikihow.com/Stretch-Clothes Seems most include some type of soaking followed by stretching while wet/moist. dp
Posted on: 2023/5/15 19:00
|
|||
|
||||
|
Re: Electricaal issue ..41 Packard no current
|
||||
|---|---|---|---|---|
|
Home away from home
|
Jimmyk;
Two symptoms here: First the possibility of a rich condition as evidence by the spark plugs, second the whistling somewhere in the carburetor throat. I would investigate the choke system first. To conduct the proposed test the entire air filter/silencer will need to be removed. With the engine fully warm and running try rotating the choke plate in the direction of ‘choking’ the engine. Easy does it, just a little bit of force against the bimetal with your finger . . . not enough to alter the mixture. After that try pushing the choke plate to the full open the position . . . hard against the stop. Did the whistle sound change during this test? If it did then let’s start looking at the choke adjustment, especially if the noise stops when the choke is full open. It other words, if the whistling stops when you push the choke full open I’ll go out on a limb and say the choke is not adjusted correctly. Later we might want to investigate the choke vacuum piston condition, but that’s a subject for another day. I’ll be first to admit my experience with your Stromberg carburetor is extremely limited, but some of the design concepts appear to be the same as the later Carter designs. If the choke vacuum piston detail is an area of similarity, I believe once the choke plate achieves the full open position the air flow in that system is blocked by the motion of the piston, therefore the air flow in the choke system should be zero, or near zero with the plate full open. The Stromberg Manual available on this site (see StrombergManual.pdf (packardinfo.com) does not specifically state the cut-off function, but the artwork on page 2 (page 15 of the PDF) suggests air flow cut-off is likely with the choke full open. The integrity of the choke vacuum passage ‘Welch Plug’ should also be inspected. If in doubt a bit of paint along the outer diameter of the plug should seal it well enough for you to determine if that’s an area that will need attention. In the same vacuum passage there appears to be a lead plug, again a bit of paint will seal that area for enough time to conduct the test. The choke circuit might whistle during warm-up but somewhat silent after that. The above testing is only trying to determine if whistling airflow is associated with the position of the choke plate and therefore the piston position. The Welch plug and lead plug if leaking will whistle independent of the choke plate position. dp Edit: I can't seem to get the links to work correctly when using Word as a means to compose the message. Perhaps someone with more savvy will help. https://packardinfo.com/xoops/html/downloads/StrombergManual.pdf It works OK when I paste directly into the posting, but not when using Word.
Posted on: 2023/5/12 18:53
|
|||
|
||||


