|
Re: Wade's Workshop
|
||||
|---|---|---|---|---|
|
Forum Ambassador

|
Saturday, 17th October 2015
More progress , but not fully there yet. But, should be able to go on a test drive tomorrow. First up was a visible inspection for leaks and...... there were none, so good start. Then, once again, was back under the Coupe. First to secure a nut and bolt holding the right side lower inner mudguard(fender) rubber strip to the inner mudguard(fender). This originally would have been a fabric like material but I replaced mine with rubber strips back in 2008. Will never be judged, and if anyone is that close to be able to discern what it is they deserve a poke in the eye for their efforts! Then put the headlight loom cabling back into it's clips. Next was the fan pulley, fan and fanbelt. Last few times doing that I've used a golf tee for alignment of the pulley and fan but used something different this time, a straight plastic rawl plug. The golf tee was a little short for ease of use and in looking around found a 5mm x 37mm rawl plug to be perfect for this task, it's been added to the toolbox. Once the fan was on, the fanbelt was installed and the generator, with the commensurate tension on the fanbelt, tightened up. Then reconnected the wiring, glad I took pictures back in June when it came apart, There were only 6 wires to hook up but, for me, the pic's certainly helped. Oh oh, just remembered haven't hooked up the turn signals! Part of the problem with the wiring is that there's a ground(I think) on the side of the wiring bracket "thingie" on the left inner mudguard(fender) which bolts through to the outside of that panel. Last time had to get Kath to help in undoing this but this time managed to tighten it up on my ownsome, reaches round and pats himself on the back! Still not finished but far enough along to be able to start up and run for further testing. Ran it for over ten minutes, getting up to operating temp and again without signs of leaks. Didn't have time for more with grandkid sitting duties tonight. "Sounds like a dangerous device to me if you don't keep it clean." BDC, You're right in saying that, but it certainly catches debris which would otherwise end up clogging the radiator. Will be keeping a watchful eye on it to ensure it doesn't get clogged itself. Attach file:  (41.17 KB) (41.17 KB)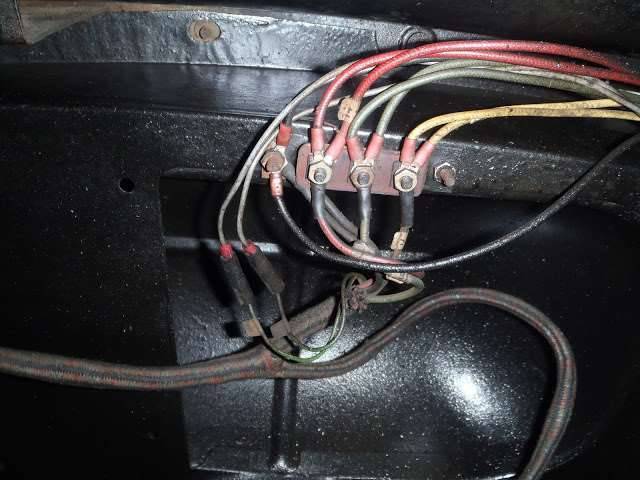 (19.31 KB) (19.31 KB)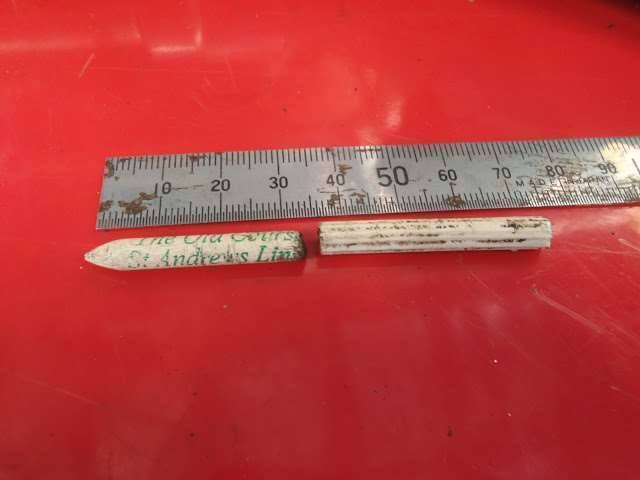 (39.18 KB) (39.18 KB)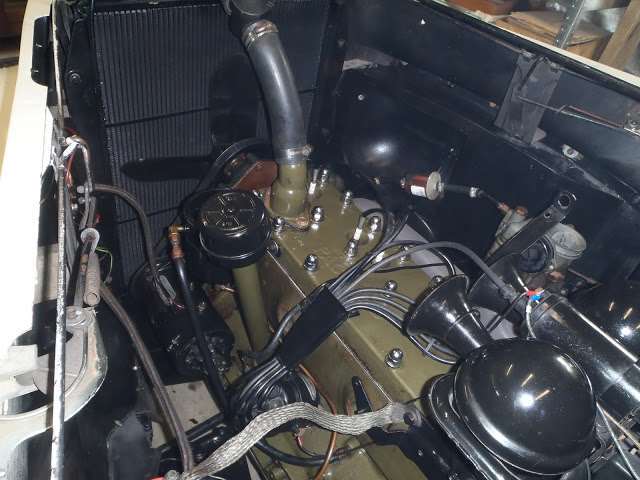 (21.21 KB) (21.21 KB)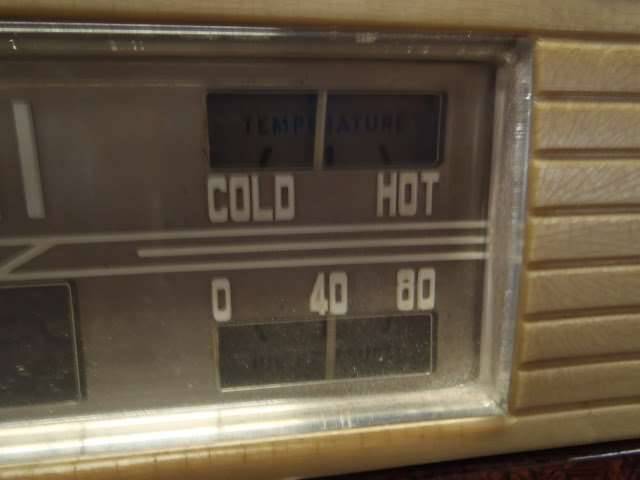 (26.22 KB) (26.22 KB)
Posted on: 2015/10/16 23:46
|
|||
|
Mal
/o[]o\ ====  Bowral, Southern Highlands of NSW, Australia "Out of chaos comes order" - Nietzsche. 1938 Eight Touring Sedan - SOLD 1941 One-Twenty Club Coupe - SOLD 1948 Super Eight Limo, chassis RHD - SOLD 1950 Eight Touring Sedan - SOLD What's this?  Put your Packard in the Packard Vehicle Registry! Here's how! Any questions - PM or email me at ozstatman@gmail.com |
||||
|
||||
|
Re: Wade's Workshop
|
||||
|---|---|---|---|---|
|
Home away from home
|
Looking good! Why didn't you just put the fan on before installing the radiator?
Posted on: 2015/10/17 7:13
|
|||
|
1937 120 1092 - Original survivor for driving and continued preservation.
https://packardinfo.com/xoops/html/modules/newbb/viewtopic.php?topic_id=16514&forum=10 1937 115 1082 - Total basket case, partial restoration, sold Hershey 2015 https://packardinfo.com/xoops/html/modules/newbb/viewtopic.php?start=0&topic_id=6550&order=ASC&status=&mode=0 |
||||
|
||||
|
Re: Wade's Workshop
|
||||
|---|---|---|---|---|
|
Forum Ambassador
|
G'day Ken,
Doing it on my own it was "easier" to do it this way. With the '41, in taking the front clip off and putting it back on, with the new radiator in it's collar, I didn't want to take any chances I'd damage the radiator. Placed 2 layers of cardboard against the radiator as protection during the reinstall process. With the fan on, 1) there'd be very little margin for error in the clip reinstall process, and 2) I wouldn't be able to reinstall the lower radiator hose. Well maybe you could but with the tall sides of the '41's engine compartment, coupled with my decidedly unathletic body I couldn't. I know Packard mechanics, back in the day, must have done that sort of thing routinely and I salute their ability.
Posted on: 2015/10/17 17:30
|
|||
|
Mal
/o[]o\ ==== Bowral, Southern Highlands of NSW, Australia "Out of chaos comes order" - Nietzsche. 1938 Eight Touring Sedan - SOLD 1941 One-Twenty Club Coupe - SOLD 1948 Super Eight Limo, chassis RHD - SOLD 1950 Eight Touring Sedan - SOLD What's this? Put your Packard in the Packard Vehicle Registry! Here's how! Any questions - PM or email me at ozstatman@gmail.com |
||||
|
||||
|
Re: Wade's Workshop
|
||||
|---|---|---|---|---|
|
Forum Ambassador
|
Sunday, 18th October 2015
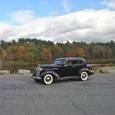
Saturday, 17th October 2015 ".....should be able to go on a test drive tomorrow" And so it came to pass, but took most of the day to be able to do so. Reinstalled the air cleaner, reinstalled the bracing bars between the radiator collar and the firewall. Then started on the front seat, Some time ago I'd pushed the front seat back and it had stuck in that position. Tried numerous times to get it to go forward again, even enlisted Wade's advice, without it moving a millimetre. I'd taken the seat bottom out at the start of this saga back in July, almost three months ago, so today took out the seat structure itself. When I did the same thing back in 2008 it wasn't easy but it was easier back then, having a somewhat younger and stronger body then helped. Now have to employ more "scientific methods" like principles of leverage to make it easier. With the seat structure out it was a perfect time to vacuum the interior, especially under the seat. Then turned to the seat structure, in particular the forward/aft movement mechanism and why it wouldn't work. It was very apparent, the rod with cog gear wheels on each end between the runners on each side had come adrift from it's proper positioning. Closer examination revealed the runner structures on both sides, housing the slots on which the cog gears run, were loose. Tightened the nuts holding the runners to the seat frame and this firmed things up considerably. Again, using leverage rather than pure brute force, got the seat structure back in the Coupe's cabin. Now came the fun part getting everything aligned so that the structure could be bolted in again. Dispensed with reconnecting the large tension spring initially left that to later in the process. Because the seat structure has a propensity to tip backwards, when not secured, had to improvise to keep it in place, or as close to in place as I could manage, started at the left front hold-down bolt. Improvisation meant using a boxed electric lawnmower as a counterweight on the right front bottom of the seat frame, boxes of different sizes and shapes behind either the driver or passenger side seat backs and a length of timber on the right side to push and hold that side back. Initially it was the boxed mower with a box behind the passengers seat while I aligned the left front seat frame, wood mounting pieces(recent thread on this subject) and the captive nut in the chassis underneath all this. Not a really difficult task, is it? Well yes it is, you can't see the holes directly so, thin screwdrivers, various pieces of wire and an allen key were co-opted for alignment assessment purposes. You'll be pleased to know this worked...........but only after 2 hours of trying! Then, after getting the bolt started and moving to the other side of the seat, to get that sides front bolt started found the bl@@dy cog geared rod had come adrift! Removed the left front bolt but, rather than take the seat structure out of the Coupe, left it in situ and found by sliding the bottom of the structure back against the back seat squab could then swing the bottom structure up to work on it, using a prop to hold it up. Moved the cog gear rod back into place on each side and started the seat reinstall all over again. My 2 hours of attempts the first time must have had some effect, I got the left front bolt in first time! But.......the cog gear rod had come adrift again, GRRRRRR!!! Repeated the previous in-car repair process but this time wedged a block of timber between the seat structure and the runner structure on both sides, there was still play allowing side to side movement of the cog gear rod. Repeated the previous reinstall and again a first time success, so it wasn't a fluke! Then installed the left rear bolt before moving the the right(passengers) side. Before starting on that side reconnected the large tensioning spring under the middle of the seat. Did that by pushing the right side forward, there was enough movement available because the left side bolts weren't tight. Still difficult but doable. Then came a fun time getting the right side back against the force of the spring. I think I narrowly avoided breaking my left thumb during one attempt when the rightside seat back tipped back and my thumb was trapped between the metal seat back bottom and the seat frame, phew. However, after a number of attempts, got things wedged, propped and with a bit of persuasion nudged everything into alignment. Both bolts were easy to insert and tighten up. Back to the left side tightened up those bolts then reinstalled the seat bottom. With the end of the working day coming to a close, moved the daily driver out of the way, started up the Coupe, backed her out and went for about a 20 minute drive. No problems, oil pressure and cooling system temperature good and no leaks on inspection on return. Attach file: (25.47 KB)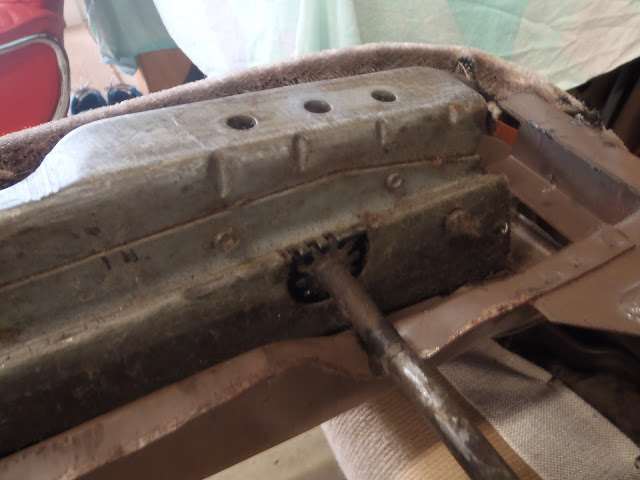 (37.86 KB) (37.86 KB)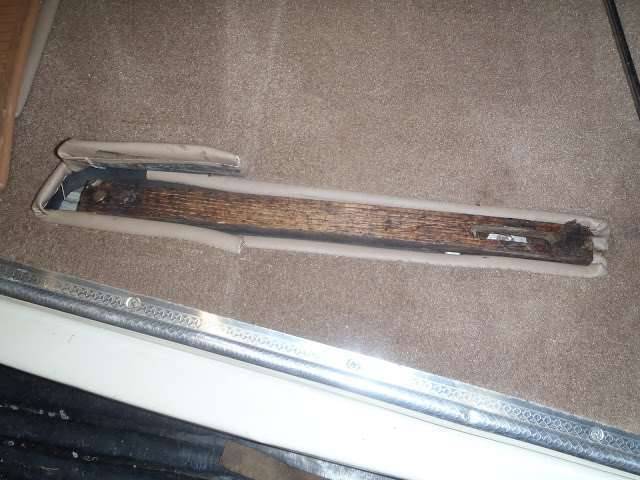 (28.18 KB) (28.18 KB)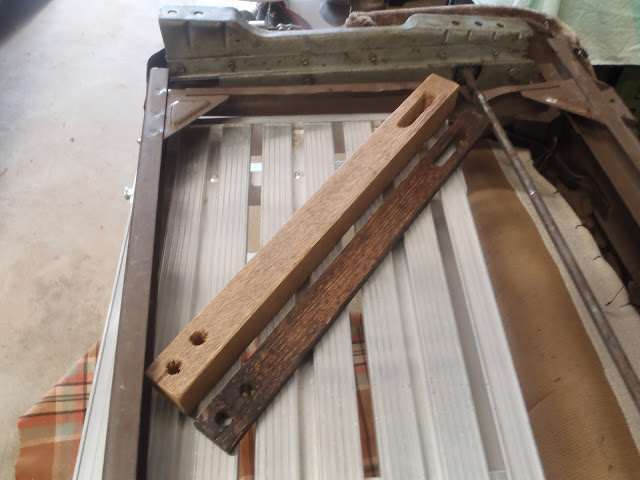 (31.10 KB) (31.10 KB)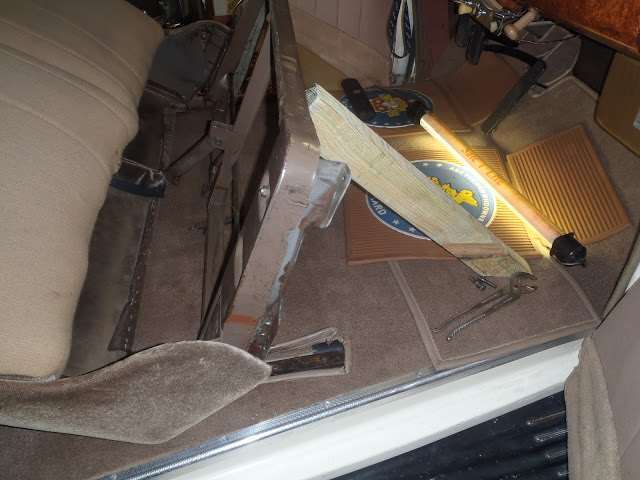 (39.73 KB) (39.73 KB) (38.63 KB) (38.63 KB)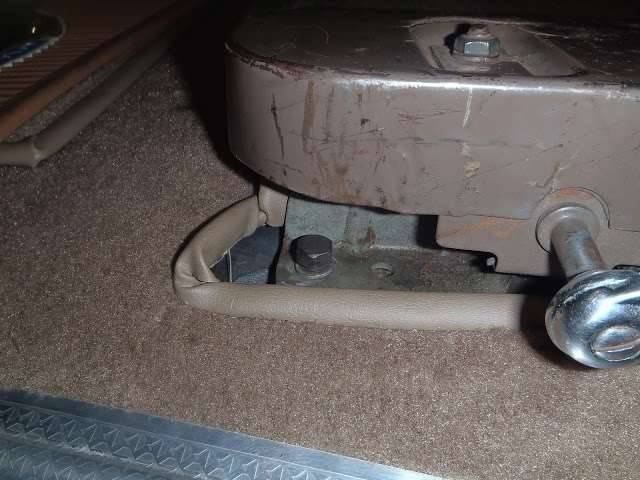 (35.70 KB) (35.70 KB) (30.30 KB) (30.30 KB) (37.58 KB) (37.58 KB)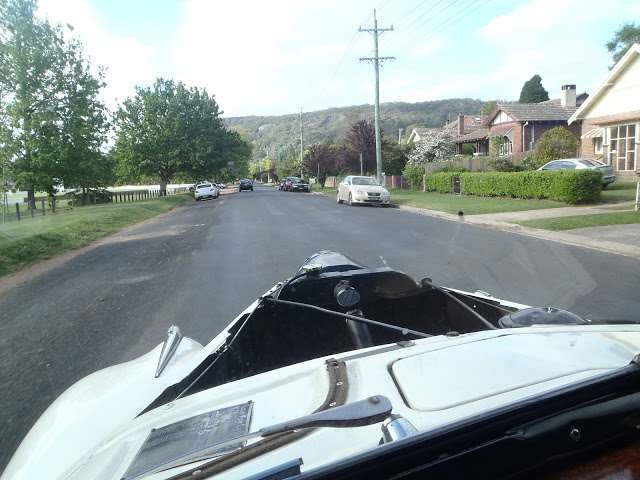 (20.46 KB) (20.46 KB)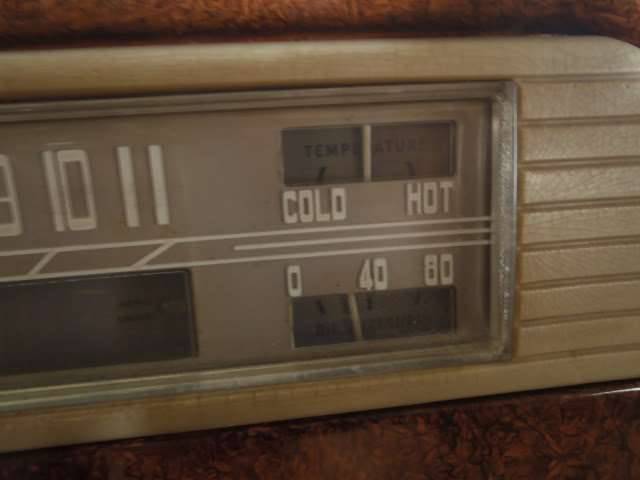
Posted on: 2015/10/18 4:41
|
|||
|
Mal
/o[]o\ ==== Bowral, Southern Highlands of NSW, Australia "Out of chaos comes order" - Nietzsche. 1938 Eight Touring Sedan - SOLD 1941 One-Twenty Club Coupe - SOLD 1948 Super Eight Limo, chassis RHD - SOLD 1950 Eight Touring Sedan - SOLD What's this? Put your Packard in the Packard Vehicle Registry! Here's how! Any questions - PM or email me at ozstatman@gmail.com |
||||
|
||||
|
Re: Wade's Workshop
|
||||
|---|---|---|---|---|
|
Forum Ambassador
|
Monday, 19th October 2015
Just a little done today. Front hub caps back on, forgot to do that yesterday! And the front bumper back on. This turned out easier than expected, a plastic milk crate being almost the perfect height to rest the bumper assembly, including bumper irons and splash shield, on. It rested there allowing me to slide under to insert and do up the left side rear bolt. Then, with some exertion, lift the bumper assembly while lying there to slot the front bolt into place. Repeated procedure on the right side and viola! the bumper is back on. But still have to connect the turn signal wires. The major job(challenge) still to be done is remounting the bonnet(hood). Although I managed to remove it myself, it was with difficulty, and I doubt if I can lift it up and reposition it myself. Have a plan figured out and hope to put that into effect tomorrow. Attach file: (35.07 KB)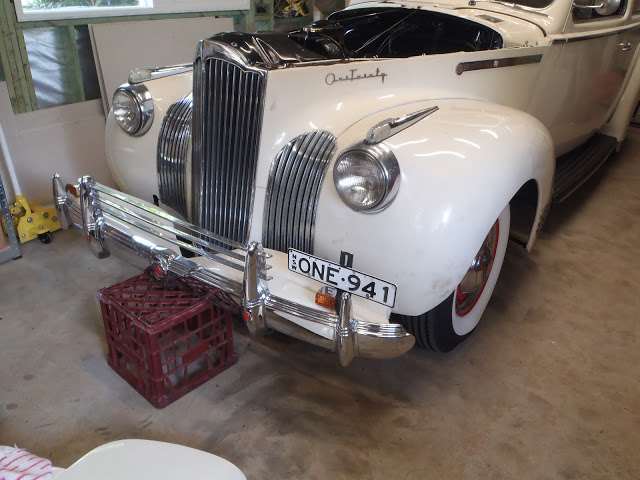 (35.82 KB) (35.82 KB) (37.57 KB) (37.57 KB)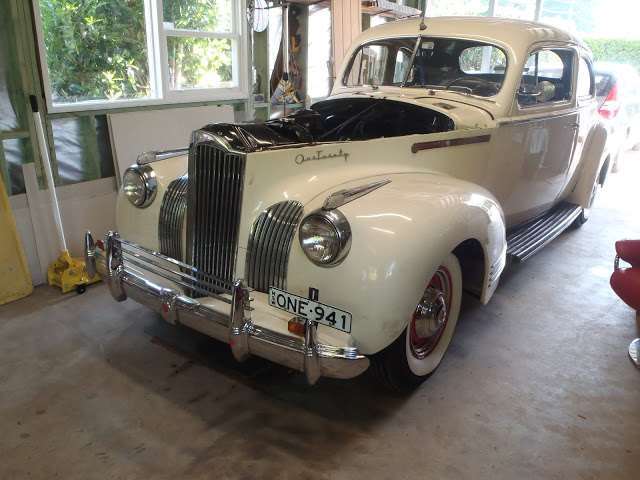
Posted on: 2015/10/19 1:36
|
|||
|
Mal
/o[]o\ ==== Bowral, Southern Highlands of NSW, Australia "Out of chaos comes order" - Nietzsche. 1938 Eight Touring Sedan - SOLD 1941 One-Twenty Club Coupe - SOLD 1948 Super Eight Limo, chassis RHD - SOLD 1950 Eight Touring Sedan - SOLD What's this? Put your Packard in the Packard Vehicle Registry! Here's how! Any questions - PM or email me at ozstatman@gmail.com |
||||
|
||||
|
Re: Wade's Workshop
|
||||
|---|---|---|---|---|
|
Forum Ambassador
|
Tuesday, 20th October 2015
 for the kind words Terry. for the kind words Terry.With Terry's words in mind, more improvisation was required today. Originally was thinking I'd call upon the services of my son-in-law on a Saturday morning to help me get the bonnet(hood) in place. That was Plan A, but there was also a Plan B, being to enlist the services of some "old guys" a few doors down the road. These "old guys" meet twice a week on Tuesdays and Thursdays as members of the local Bowral Men's Shed. However, on contemplating my options overnight, another means of accomplishing this task came to mind, we'll label that Plan C. Don't know why I didn't think of this earlier, use the chain block to lift the bonnet(hood) up high enough then push the Coupe under it and lower it into place. And so it came to pass, using the same rope as used with the front clip but only one piece needed this time. By the way, I was never a boy scout as my knots will testify. Was worried about the 2 side pieces of the bonnet(hood) being pulled together by the rope but came up with what I think was an innovative solution. This was to call upon the services of one Lightning McQueen! Looking around the garage spied ol' Lightning up on the high shelf, but he was soon down. This Lighning is an inflatable, used as a kids sprinkler for hot days and fun running through the spray! With a towel wrapped around the Goddess of Speed and Lightning at the rear wedged between the two bonnet(hood) sides and held down by the rope crossing over above him, it was a perfect setup. Hauled the bonnet(hood) up, pushed the Coupe forward but it ended up almost right against the old sideboard now used as a bench and storage. Wasn't quite lining up with the holes but a 6" long thin bolt was used as a guide for the descending journey. Finally a little muscle enabled the left cowl bolt to be dropped into place. Turned to the front and using the same technique, of a long thin bolt as a guide, dropped the front down and secured that with the centre bolt. With the bonnet(hood) located in place turned to the part I wasn't looking forward to, under the dash to secure a nut to the cowl bolt. Tried this first from the left side but the angle and the almost immovable impediments(speedo cable, OD cable, armoured ignition cable and heater air inlet cable) conspired to prevent this happening. So moved to coming in from the right(passenger) side and this time with a big puffy outdoor chair cushion. The old thin, although folded, blanket just wasn't providing sufficient cushioning from the seat bottom framing, much better. Also used a block of wood the hold the windscreen demister(defroster) back. Now I could clearly see where and what needed to be done. Managed to start the nut on the bolt, but of course the bolt started turning too! Even an orangutan wouldn't have been any good in this situation. Tried wedging a ring spanner(wrench) against the bonnet(hood) side but it slipped off when the nut turned the bolt. Another spanner(wrench), this time an open-ender and another spanner(wrench) under the end away from the bolt to provide the angle needed, together with a brick laid on top to give weight to the occassion. A cloth was used during this to provide paint protection. First attempt the planets, or rather the brick, wasn't aligned allowing the bolt to slip up and rotate. Second attempt, after some fine tuning of brick placement and alignment, success. That folks is how you can get a helping hand when you don't have one! Attach file: (33.85 KB)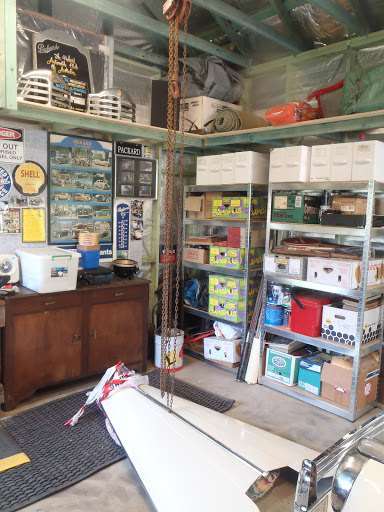 (22.14 KB) (22.14 KB)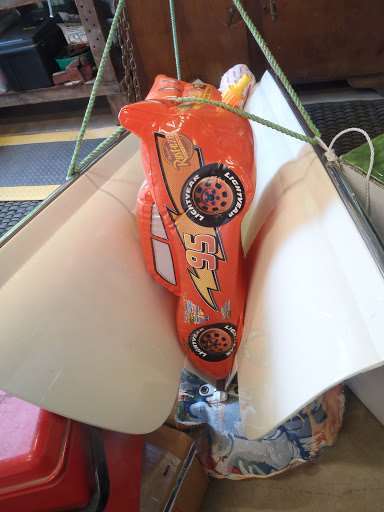 (39.41 KB) (39.41 KB)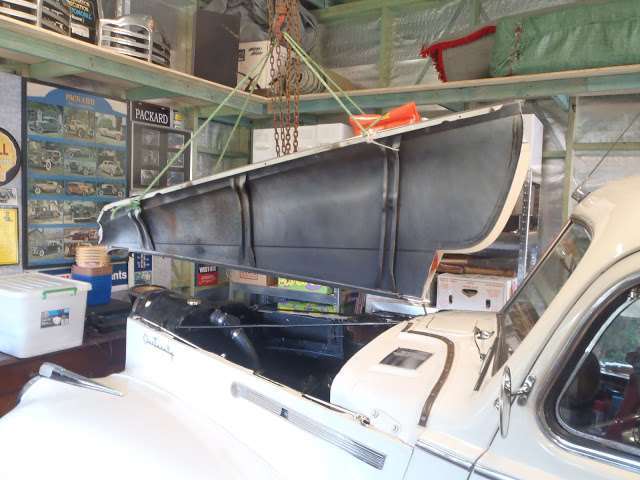 (25.68 KB) (25.68 KB)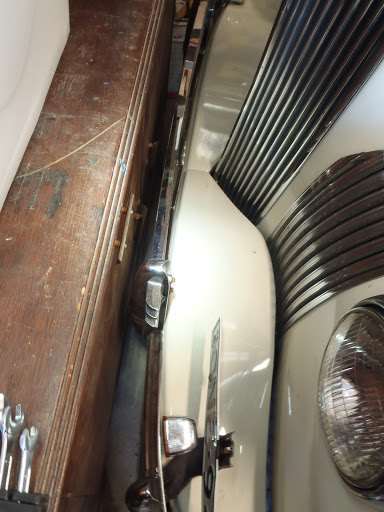 (42.45 KB) (42.45 KB)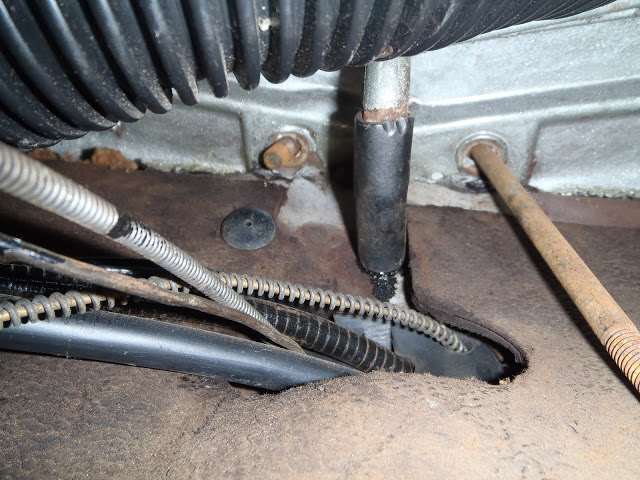 (27.54 KB) (27.54 KB)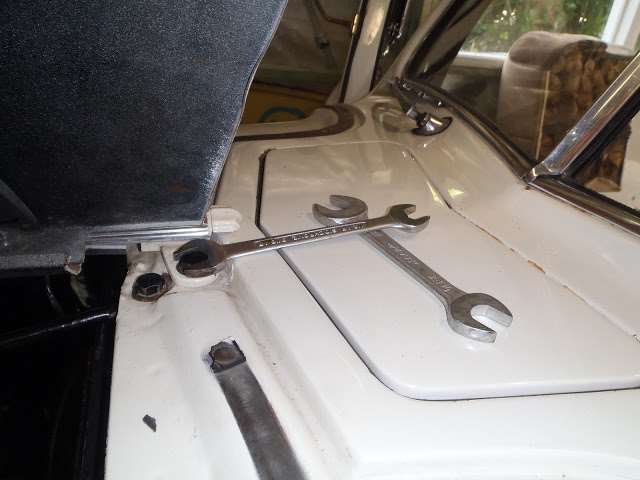 (26.62 KB) (26.62 KB)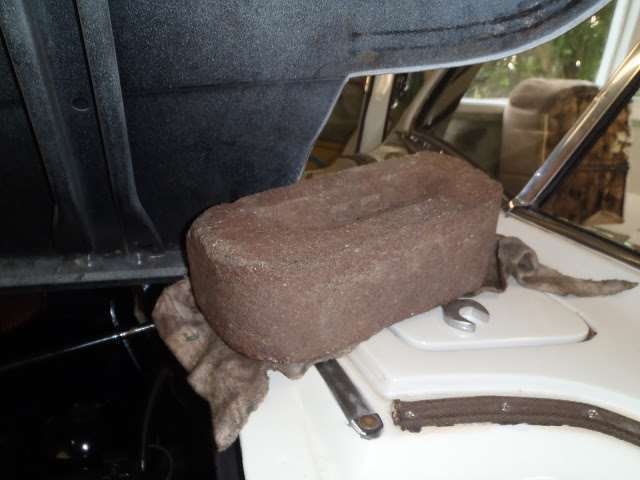
Posted on: 2015/10/20 3:36
|
|||
|
Mal
/o[]o\ ==== Bowral, Southern Highlands of NSW, Australia "Out of chaos comes order" - Nietzsche. 1938 Eight Touring Sedan - SOLD 1941 One-Twenty Club Coupe - SOLD 1948 Super Eight Limo, chassis RHD - SOLD 1950 Eight Touring Sedan - SOLD What's this? Put your Packard in the Packard Vehicle Registry! Here's how! Any questions - PM or email me at ozstatman@gmail.com |
||||
|
||||
|
Re: Wade's Workshop
|
||||
|---|---|---|---|---|
|
Forum Ambassador
|
Saturday, 24th October 2015
Back to the Coupe today where I completed the bonnet(hood) install. And now I know why, almost always, when Wade's working under a Packard dash he's on his back, legs up the front seat back and feet dangling over the top of the seat back. Because, with good lighting, you can see most everything reasonably well and you can reach most things after some contorting. Using a neon tube lead-light and a LED rechargeable torch(flashlight) was able to install the right rear side bonnet(hood) hold down bolt. Required the brick trick again but, after seeing The Martian movie yesterday, feel quite pleased with my innovation. BTW - I really enjoyed the movie, but no Packards in it! Front of the bonnet was straightforward. Tightened up the front bumper bolts and reconnecting the front turn signal wiring. Then the intent was a longer test drive but rain stopped that, however tomorrow is forecast to be fine. Attach file: (39.78 KB)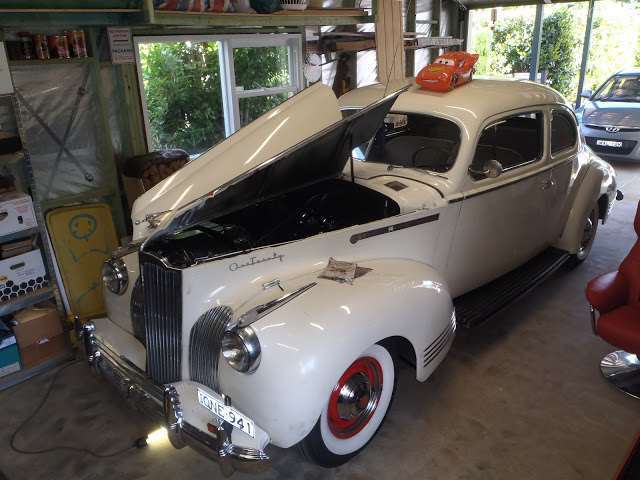
Posted on: 2015/10/24 1:04
|
|||
|
Mal
/o[]o\ ==== Bowral, Southern Highlands of NSW, Australia "Out of chaos comes order" - Nietzsche. 1938 Eight Touring Sedan - SOLD 1941 One-Twenty Club Coupe - SOLD 1948 Super Eight Limo, chassis RHD - SOLD 1950 Eight Touring Sedan - SOLD What's this? Put your Packard in the Packard Vehicle Registry! Here's how! Any questions - PM or email me at ozstatman@gmail.com |
||||
|
||||
|
Re: Wade's Workshop
|
||||
|---|---|---|---|---|
|
Forum Ambassador
|
Sunday, 25th October 2015
Finished things off on the Coupe today, first by installing the kick panels and the front seat bottom. Then some work on the driver's door(left) panel. For quite some time that door's arm rest has been sitting on the rear seat floor! It fell off because the screws holding it to the inner door skin were no longer doing their job, mind you one of them was a wood screw! The upholstery panel had also slipped down a little because half the clips around the outside of it are missing. So, took off the door and window handles, removed the upholstery panel and removed the garnish moulding from the window. The garnish moulding "clamps" against the top of the upholstery panel helping to secure it in place. Besides the lack of clips, at the top rear of the upholstery panel there's a slot into which a clip on the inner door skin fits. The slot had torn and wasn't doing it's locating function. As a temporary(how long that is we'll see) fix used duct tape to re-inforce the slot area and provide something for the clip to get into. Seems to work, but time will tell. With the upholstery panel in place, located by the door handles and held by what clips there were and also the garnish moulding then turned to the arm rest. In my small collection of miscellaneous screws found a couple a little larger in diameter that would do the trick and used them successfully. Well, at least the arm rest hasn't fallen off......yet. Also took the Coupe for a test drive, for about ten minutes, and all went well. Later my wife joined me for another run, but this time there was purpose to it apart from testing out the Coupe. Visited a number of garden centres, looking for decorative pots as a feature for the front of our house. Of course the first garden centre "we" visited was the one with a '58 Lincoln Continental Mark lll that's been sitting mostly under a tarpaulin for almost the length of time we've lived in this part of the world. Huge array of pots available and was used as a reference when we moved on to the next garden centre. This one was a big box hardware store, nowhere near as much variety in pots but at least the prices were reasonable. Moving on again to a real "garden centre" with a good variety of pots with prices commensurate with a smaller business. And they had the pots my wife wanted! I'll pick them up tomorrow because of space limitations in the Coupe. Also tomorrow I'll be cleaning up all the greasy marks left on the Coupe over the last three months and giving it a general clean and polish. Next Sunday our Packard club is having a run down this way so I'll then be ready for that. Attach file: (28.00 KB) (17.16 KB) (17.16 KB)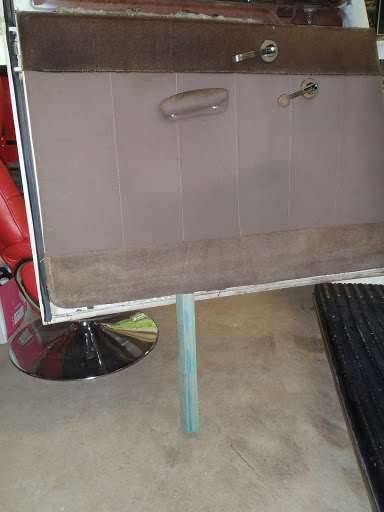 (25.45 KB) (25.45 KB) (40.83 KB) (40.83 KB)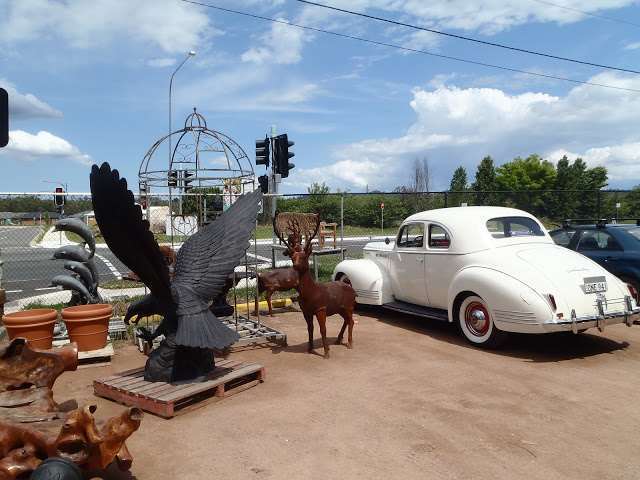 (48.61 KB) (48.61 KB)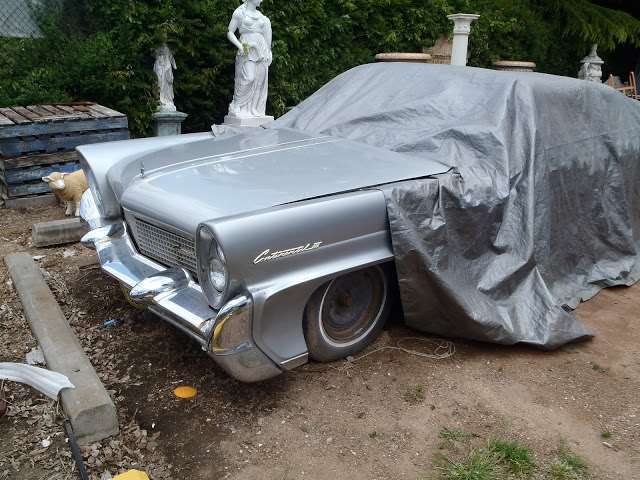
Posted on: 2015/10/25 0:19
|
|||
|
Mal
/o[]o\ ==== Bowral, Southern Highlands of NSW, Australia "Out of chaos comes order" - Nietzsche. 1938 Eight Touring Sedan - SOLD 1941 One-Twenty Club Coupe - SOLD 1948 Super Eight Limo, chassis RHD - SOLD 1950 Eight Touring Sedan - SOLD What's this? Put your Packard in the Packard Vehicle Registry! Here's how! Any questions - PM or email me at ozstatman@gmail.com |
||||
|
||||
|
Re: Wade's Workshop
|
||||
|---|---|---|---|---|
|
Forum Ambassador
|
Sunday, 8th November 2015
Took the Coupe for a leisurely local drive today. But in the week prior to the previous Sunday, when we'd gone on a Packard club run, had attended to a few minor outstanding items reinstalling the badge bar and the fire extinguisher. The badge bar was updated to include badges from the last two Australian National Packard Rallys. To accommodate these 2 Rally badges another pair of badges had to be sacrificed, being the PAC and PI badges. These had given honourable service over the course of the last 6 years but being an Aussie, Aussie badges do have preference. Also replaced the right(passengers) side outside mirror which was 2nd hand, rusty and getting rustier. Replaced with another 2nd hand mirror with a dent, but at least it's not rusty! The Packard Club run was a small affair with only 4 Packards in attendance being mine, Noel's '39 120 Touring Sedan, Jeff's '52 200 Deluxe Touring Sedan and Chris's '54 Clipper Super Club Sedan. Coupe went well, meeting up with the others at a truck stop at Pheasants Nest. Convoyed from there on an Antique Store crawl followed by a nice lunch at the Mittagong RSL Club's dining room. With the Coupe running well, thought I must have done something right in the previous few months! But todays drive had a nasty little surprise, fortunately at it's end. On investigating a rattle from the front of the car, found 2 of the left front wheel lug bolts were floating around inside the hubcap! Obviously didn't tighten them sufficiently, but those and every other lug bolt have now been checked and tightened and re-tightened. After patting myself on the back for last Sunday I had to castigate myself today for not doing such a good job after all.   Attach file: (40.33 KB) (50.63 KB) (50.63 KB)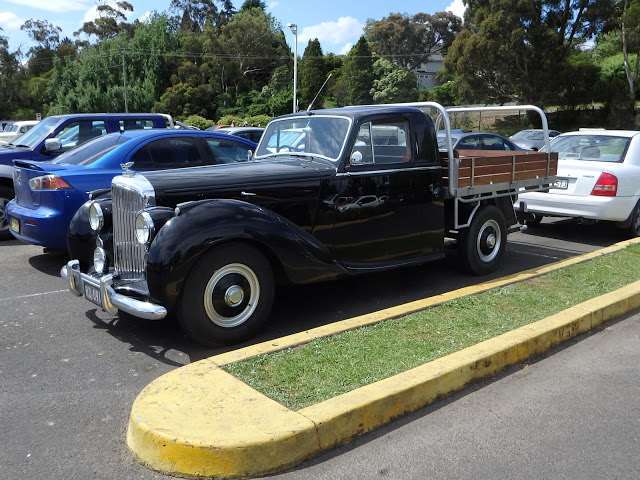 (47.03 KB) (47.03 KB)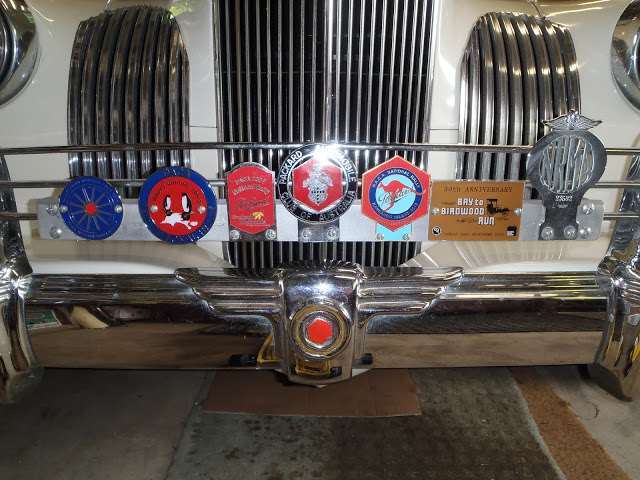 (43.71 KB) (43.71 KB)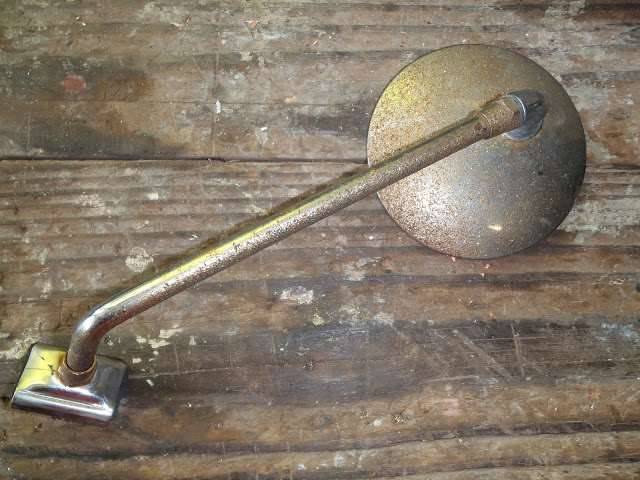 (26.22 KB) (26.22 KB)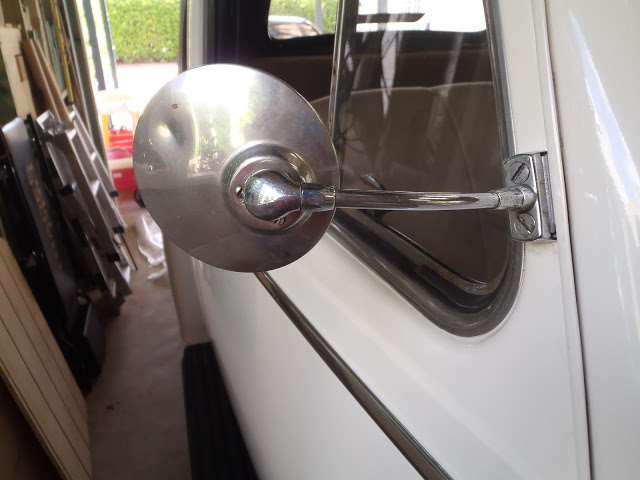 (31.78 KB) (31.78 KB) (24.65 KB) (24.65 KB)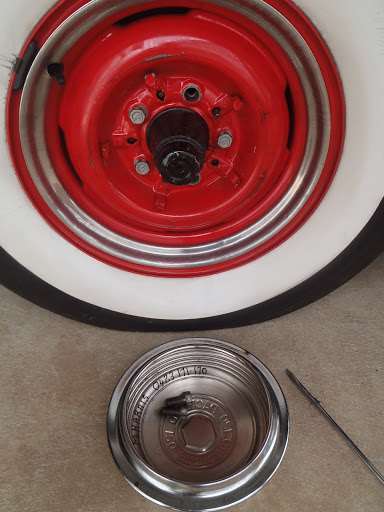
Posted on: 2015/11/8 18:59
|
|||
|
Mal
/o[]o\ ==== Bowral, Southern Highlands of NSW, Australia "Out of chaos comes order" - Nietzsche. 1938 Eight Touring Sedan - SOLD 1941 One-Twenty Club Coupe - SOLD 1948 Super Eight Limo, chassis RHD - SOLD 1950 Eight Touring Sedan - SOLD What's this? Put your Packard in the Packard Vehicle Registry! Here's how! Any questions - PM or email me at ozstatman@gmail.com |
||||
|
||||
Register To PostTopic is Locked


