|
Re: The Duchess Project: 1940 Super 8 Convertible Sedan
|
||||
|---|---|---|---|---|
|
Home away from home

|
Thanks much, Howard.
Posted on: 2018/1/25 16:49
|
|||
|
||||
|
Re: The Duchess Project: 1940 Super 8 Convertible Sedan
|
||||
|---|---|---|---|---|
|
Home away from home
|
I keep reminding myself. Patience is a virtue.
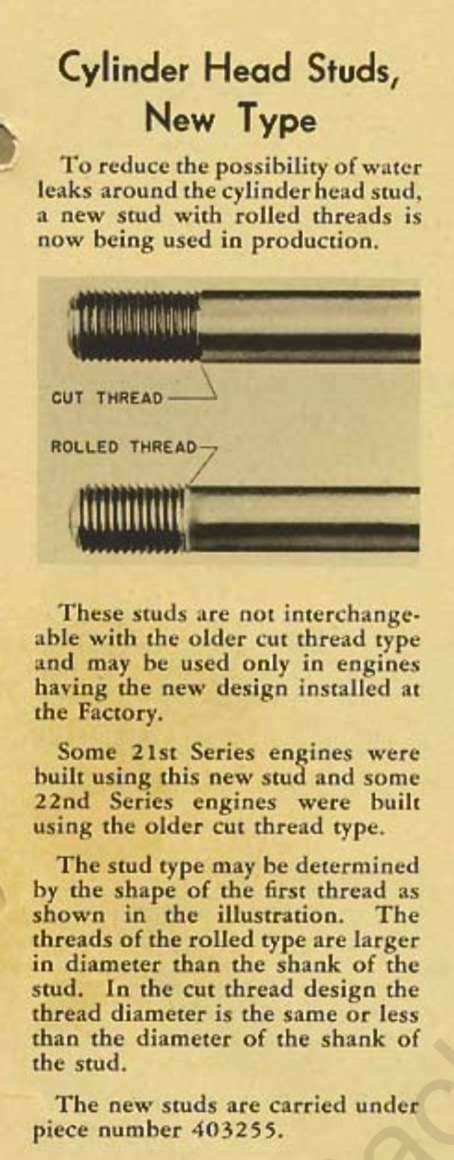
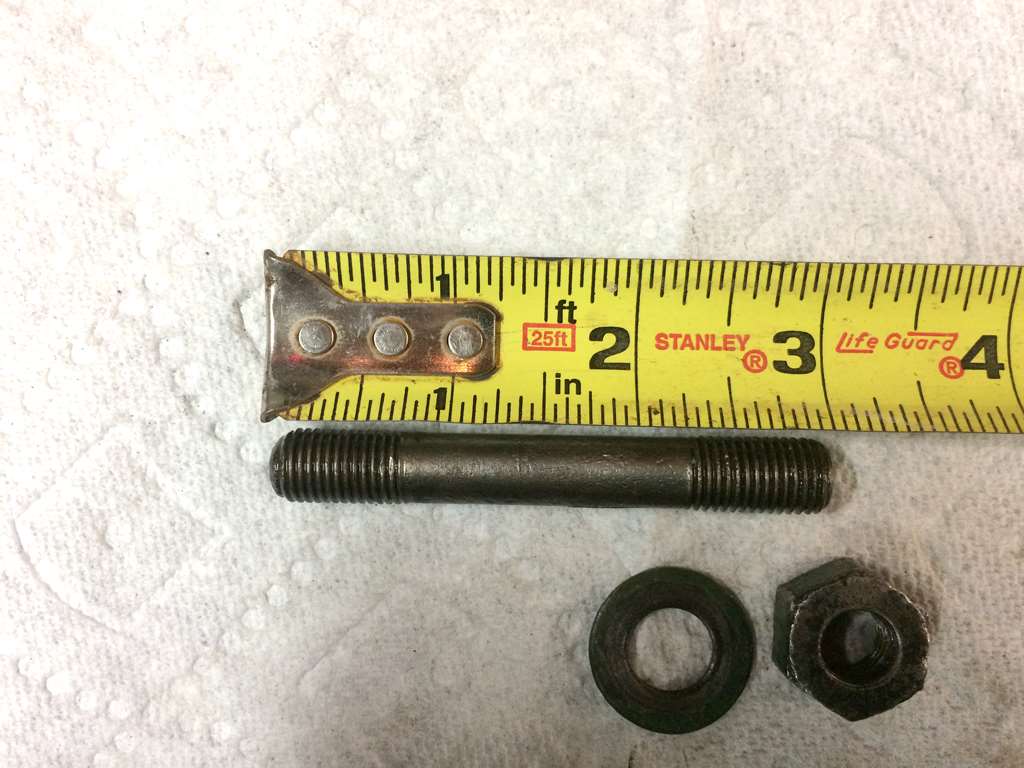
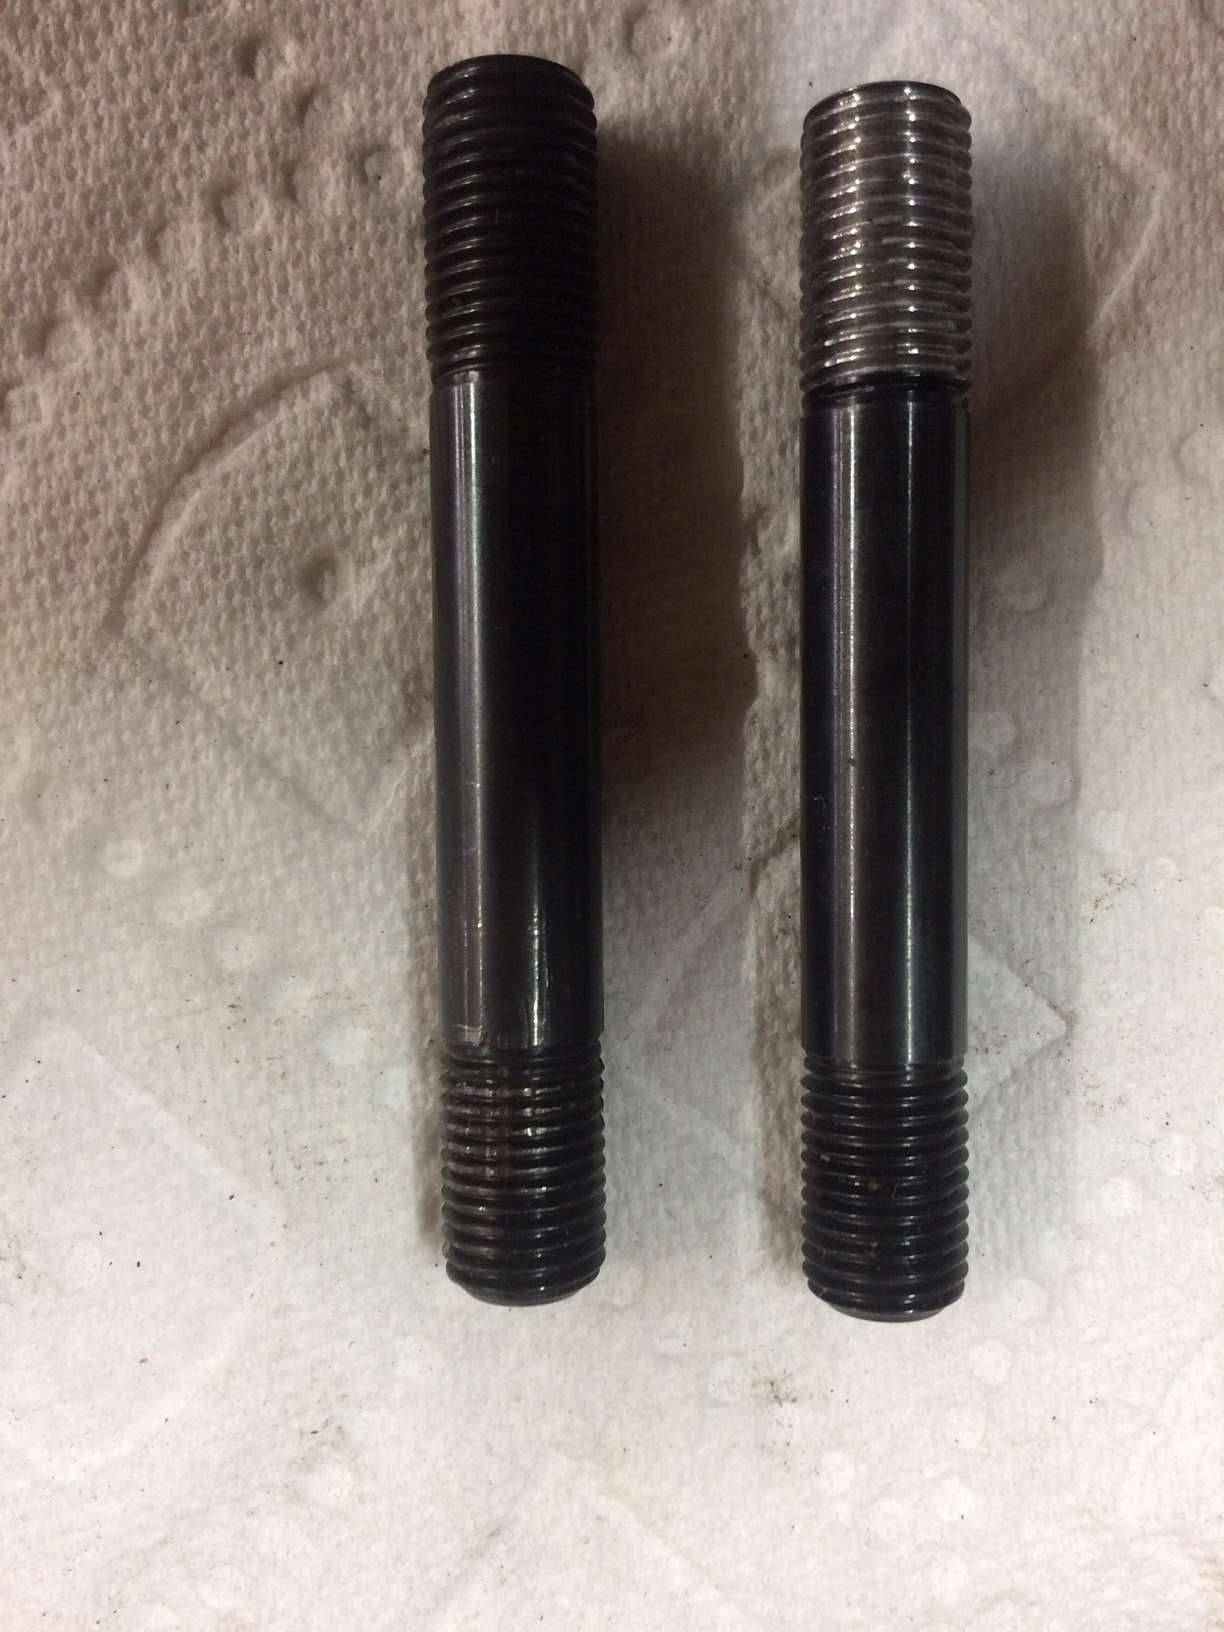
We're having problems getting all the studs to go all the way down, far enough so we only need to use one washer. About half go down to where they should be. We have washers that are .06 (specs call for .07 in the Packard parts book). Thicker ones were suggested, so we found some metric SS washers that are the right diameter and much thicker. These are the noticeably thicker ones in the attached photo. Also reposting a photo of the original stud net to ruler, plus the new one (along side one that was threaded for a different application). The original studs are #403255 studs. 7/16-20 3-3/32" for 1948 Just a reminder about the Packard service note also. The pitch diameter of the new studs is purposely .0005 oversized so it fits tight. Is that what is causing the problem we're experiencing? My son is afraid he'll bust the stud if he goes any tighter. They are definitely in tight. John, btw, owns a crane company. He's restored a 65 Mustang, 62 Corvette and 34 Ford pickup - all mechanically tops and gorgeous. He is getting very frustrated with my car, which he grew up in. We're wondering what the best solution is. I guessing we'll pull the head again tomorrow and get another (third) head gasket. We'll remove the studs and then what? Has anyone had this problem? John thinks we may have to gently run a tap, since the Old rolled threads Did go all the way, there's enough thread in the block, but clogged? We're reluctant to run the tap because we just hate having filings in the engine now that the machining is finished. If the solution is a tap, what type, brand, size should we use? Staying calm.
Posted on: 2018/2/2 15:25
|
|||
|
||||
|
Re: The Duchess Project: 1940 Super 8 Convertible Sedan
|
||||
|---|---|---|---|---|
|
Forum Ambassador

|
Can't help you with the studs, I never found it necessary to replace more than one or two strays over the years due to corrosion on the shank which I thought made them questionable.
No reason to use a new headgasket to replace one that was torqued down, but never put into service. Good luck, hope you find an easy solution.
Posted on: 2018/2/2 15:49
|
|||
|
||||
|
Re: The Duchess Project: 1940 Super 8 Convertible Sedan
|
||||
|---|---|---|---|---|
|
Home away from home
|
Thanks, Dave. Using the copper sealer, plus having to install and remove the gasket, which is tight, is hard on the gasket. With everything we've put in so far, we decided to order another coming Wednesday.
By the time I got Bruce Blevins' suggestion to freeze the studs first, John had removed them, spun out the block threads by hand with a tap, and wire-wheeled the bottom threads of the studs, removing that part of the oxide. The studs went in as they should, good and tight, to the bottom. He needed 2-3/8" above the block for this 356 engine, gasket and head. Because of the acorn nuts, he may need to use 2 washers to have enough thread to torque the head a couple of times, but it will be consistent with all studs at the same level.
Posted on: 2018/2/2 22:20
|
|||
|
||||
|
Re: The Duchess Project: 1940 Super 8 Convertible Sedan
|
||||
|---|---|---|---|---|
|
Forum Ambassador
|
Glad to hear all that, sounds like you're on the home stretch!
Posted on: 2018/2/2 23:06
|
|||
|
||||
|
Re: The Duchess Project: 1940 Super 8 Convertible Sedan
|
||||
|---|---|---|---|---|
|
Home away from home
|
The engine is back together and started, but the thermostat didn't open. New thermostat and retaining ring. We think there is air trapped in the return spigot because it is only a little warm, the engine is hot, and the radiator is cold. We're letting it cool down and will try again. Then we'll try to jack up the rear of the car to get the back of the engine higher than the front to get the air to the back away from the return pipe .
Any other suggestions? Is their a trick with cooling system when you start up for the first time? And remember their are no dumb questions. EDItT. Restarting after cooling did the trick. T
Posted on: 2018/2/7 19:12
|
|||
|
||||
|
Re: The Duchess Project: 1940 Super 8 Convertible Sedan
|
||||
|---|---|---|---|---|
|
Forum Ambassador

|
A bit late now but some have suggested drilling a small -- maybe 1/16 or so -- hole in the thermostat flange so air doesn't get trapped. The hole allows air to pass but is still small enough that water flowing thru doesn't amount to enough to defeat the purpose.
Posted on: 2018/2/7 19:17
|
|||
|
Howard
|
||||
|
||||
|
Re: The Duchess Project: 1940 Super 8 Convertible Sedan
|
||||
|---|---|---|---|---|
|
Home away from home
|
Thanks again, Howard. It's running beautifully.
Posted on: 2018/2/7 23:28
|
|||
|
||||
|
Re: The Duchess Project: 1940 Super 8 Convertible Sedan
|
||||
|---|---|---|---|---|
|
Home away from home
|
My daughter Molly drove to Salem with me and brought her camera.
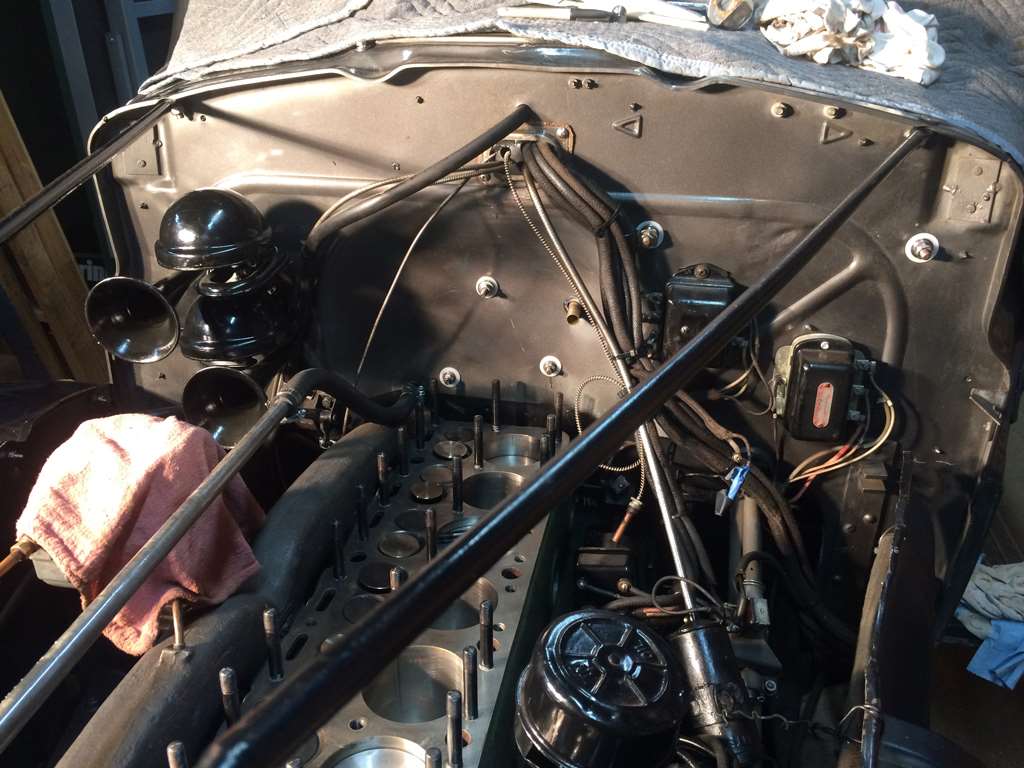
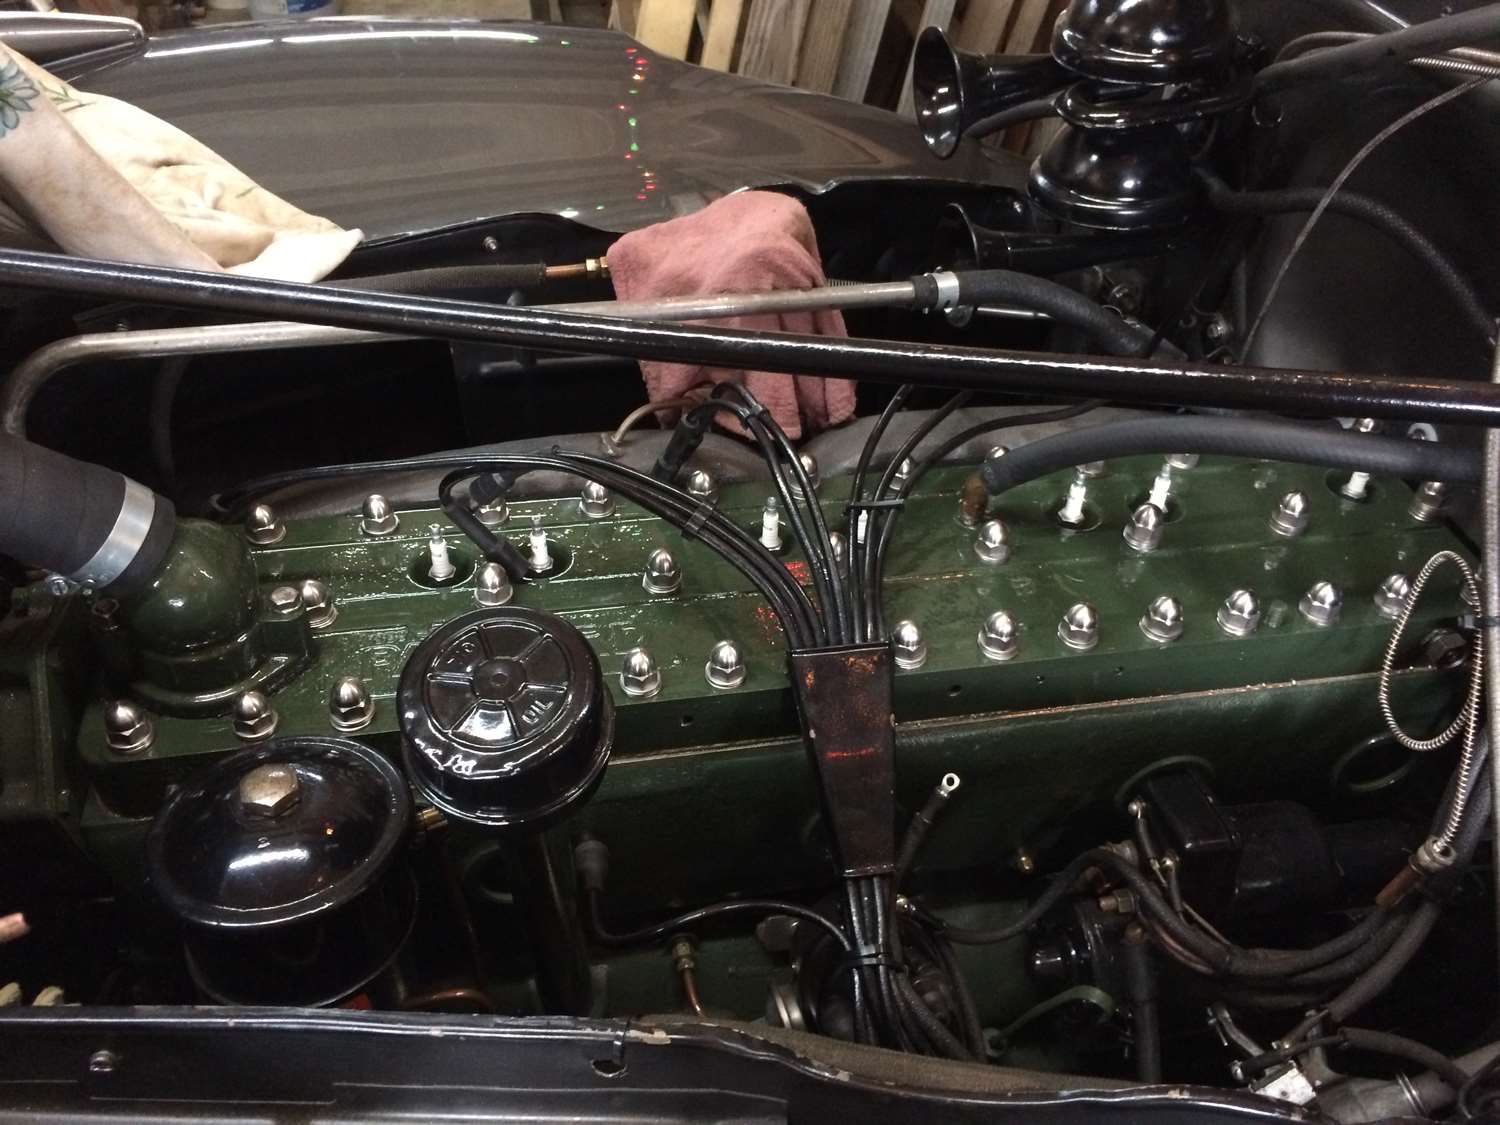
STUDS: 400-degree F. sealer was applied to the new studs which were tightened as far as they would go and still be set to the same height. SS ACORN HEAD NUTS & WASHERS: We had standard head nuts that can be tightened down until you run out of thread on the stud. Not so with acorn nuts, beautiful as they are. John made sure the acorn had enough thread to handle several torquings without bottoming out. If not, we'd add another thick washer. HEAD AND GASKET: The head and block were wiped down. Some of the holes in the '48 356 gasket are smaller than the holes in the '47 gasket we removed. The gasket was sprayed with copper sealer and fitted over the studs and seated. Sealant was added to the stud threads. Thick SS washers were distributed and the acorn nuts hand tightened. Head was torqued in order to 20 lbs., then again in order to 40, then again to 63 lbs. Attach file:  (34.65 KB) (34.65 KB)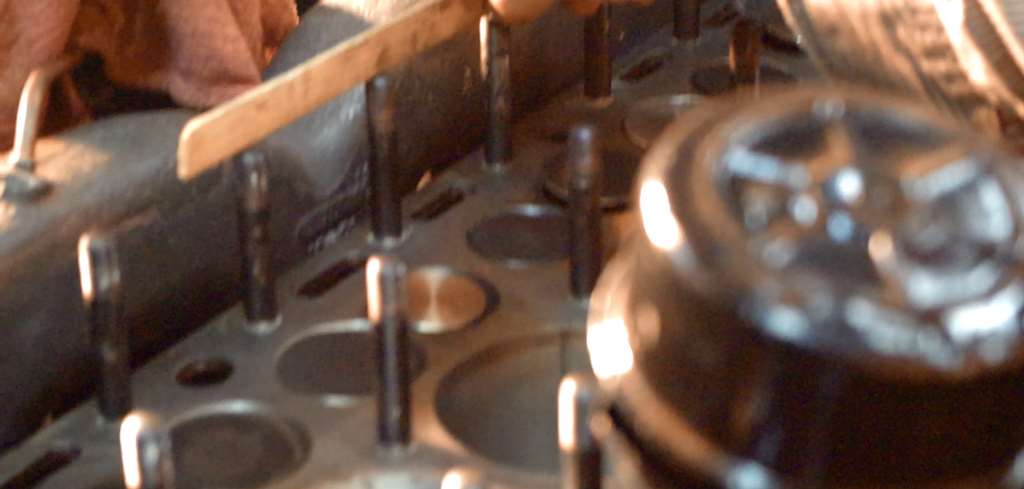 (36.89 KB) (36.89 KB)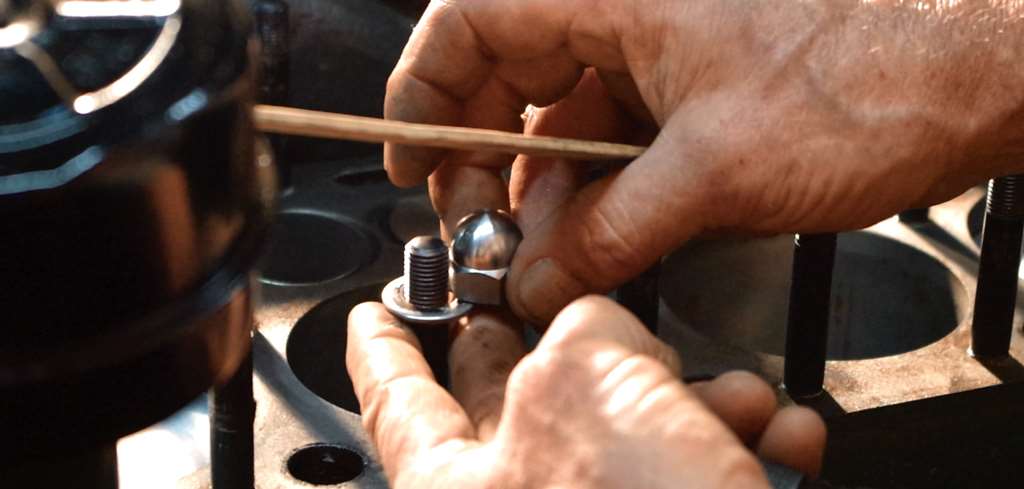 (46.23 KB) (46.23 KB)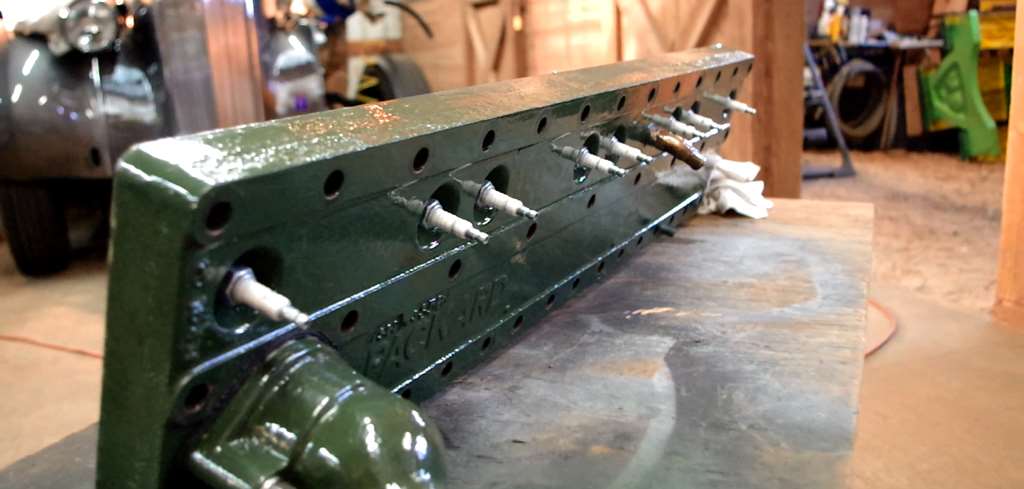 (49.85 KB) (49.85 KB)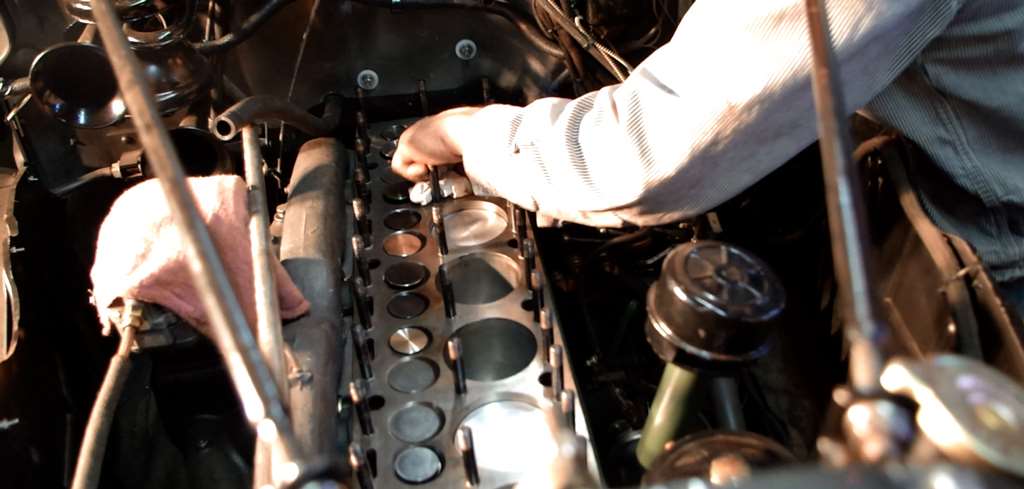 (34.73 KB) (34.73 KB)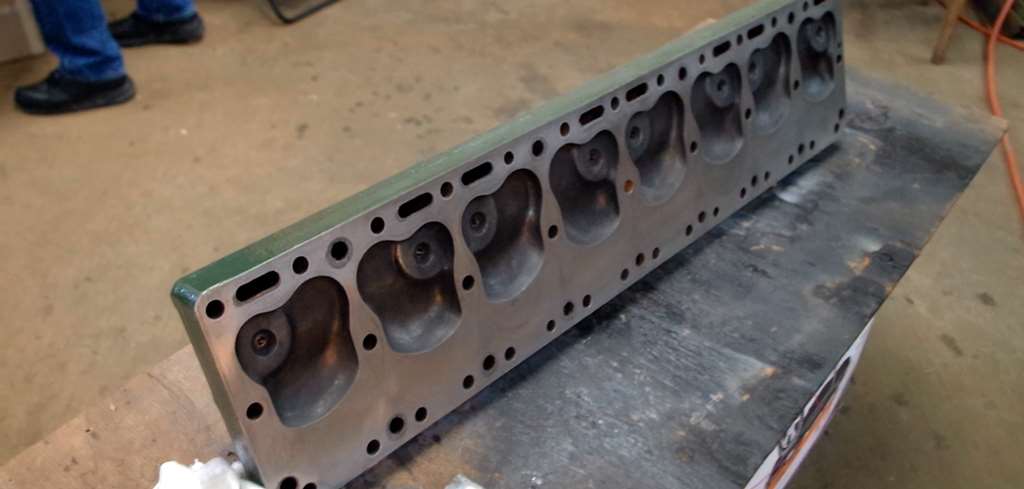 (58.60 KB) (58.60 KB)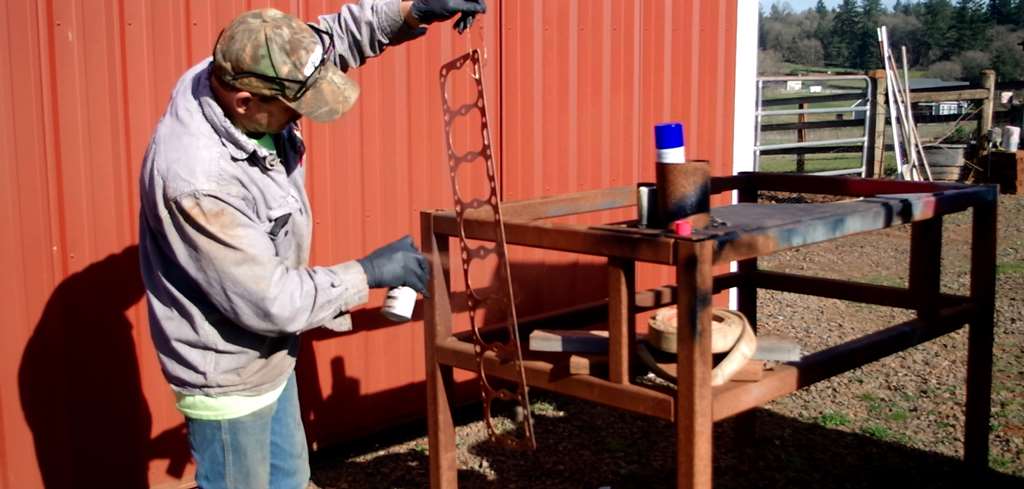 (45.94 KB) (45.94 KB)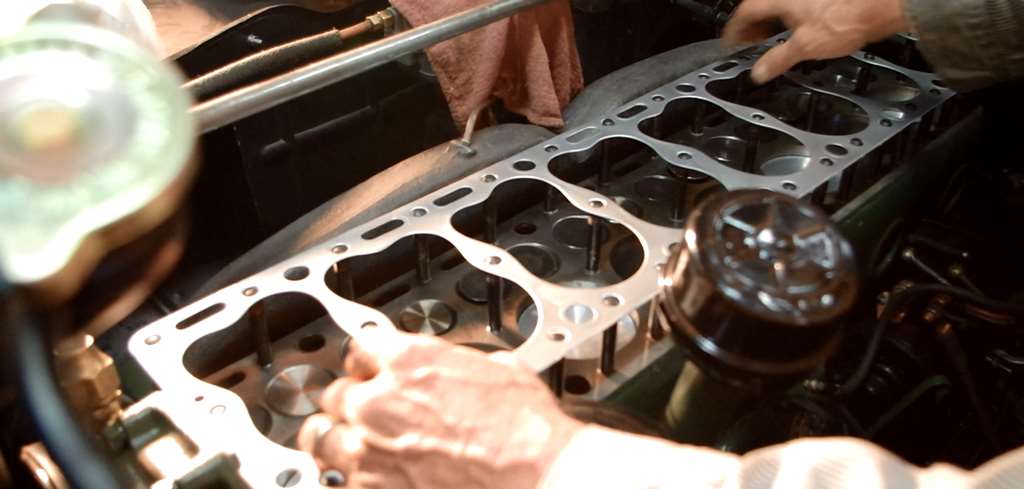 (51.38 KB) (51.38 KB)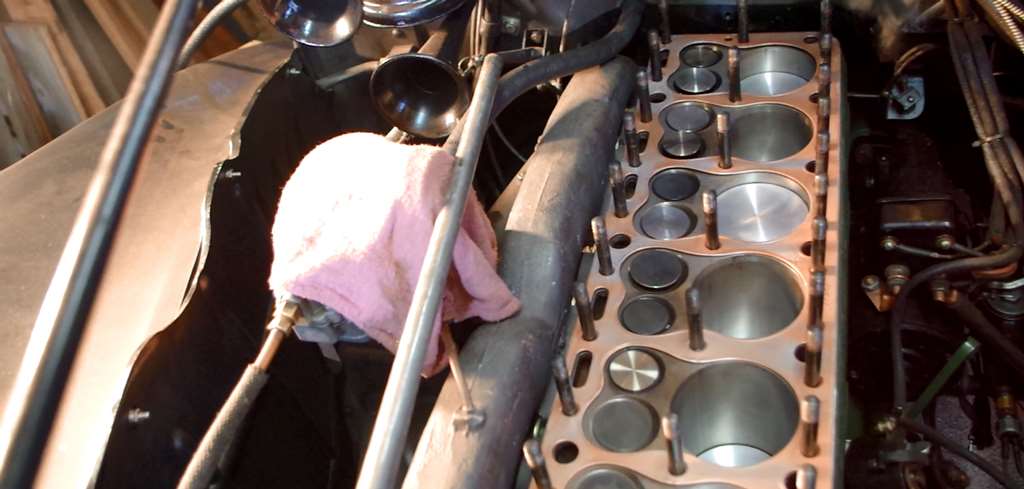 (47.56 KB) (47.56 KB)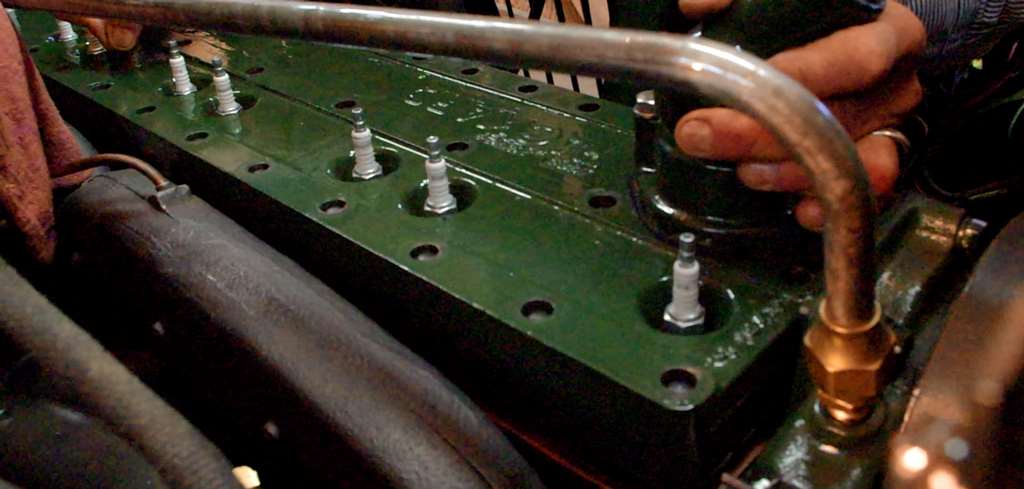 (39.30 KB) (39.30 KB)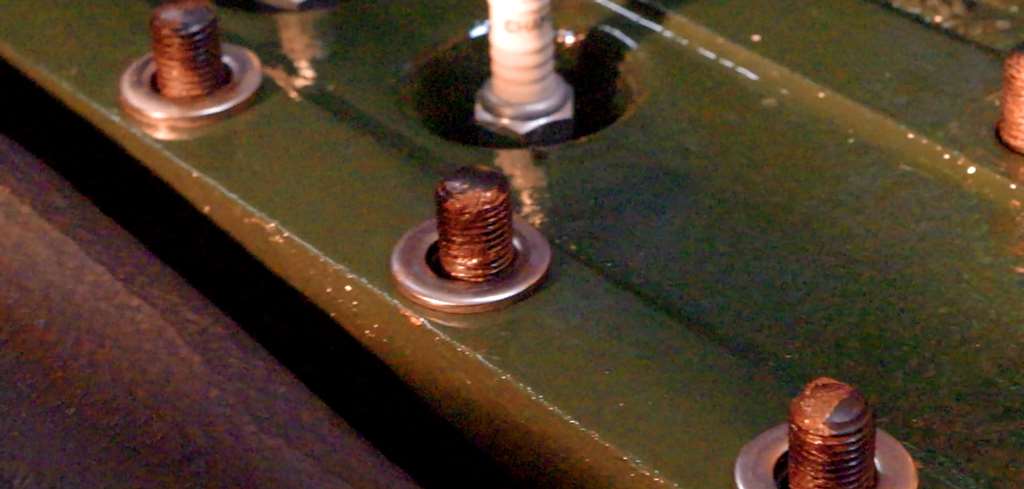 (59.94 KB) (59.94 KB)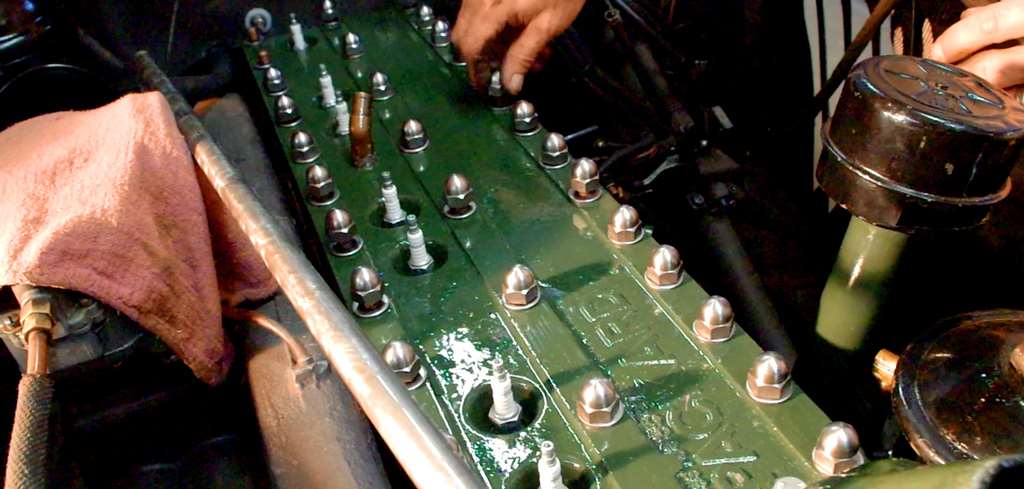 (33.64 KB) (33.64 KB)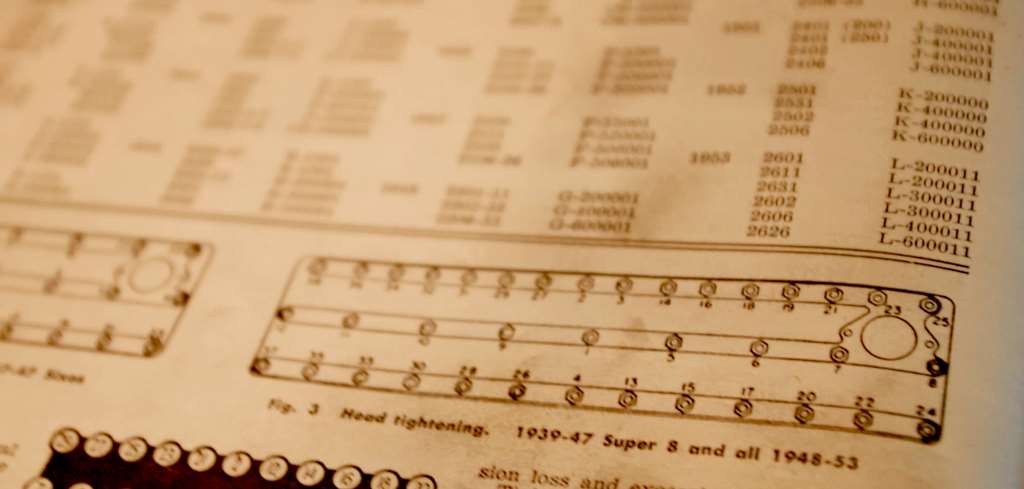 (48.49 KB) (48.49 KB)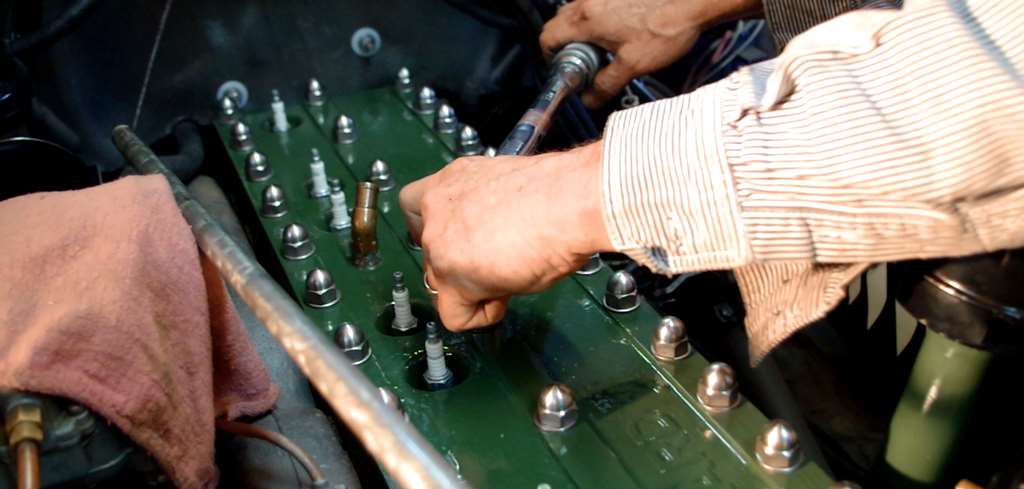
Posted on: 2018/2/9 17:46
|
|||
|
||||


