|
Re: BigKev's 1954 Packard Clipper Deluxe Sedan
|
||||
|---|---|---|---|---|
|
Webmaster

|
Good advice John!
Posted on: 2010/6/12 18:54
|
|||
|
-BigKev
1954 Packard Clipper Deluxe Touring Sedan -> Registry | Project Blog 1937 Packard 115-C Convertible Coupe -> Registry | Project Blog |
||||
|
||||
|
Re: BigKev's 1954 Packard Clipper Deluxe Sedan
|
||||
|---|---|---|---|---|
|
Webmaster
|
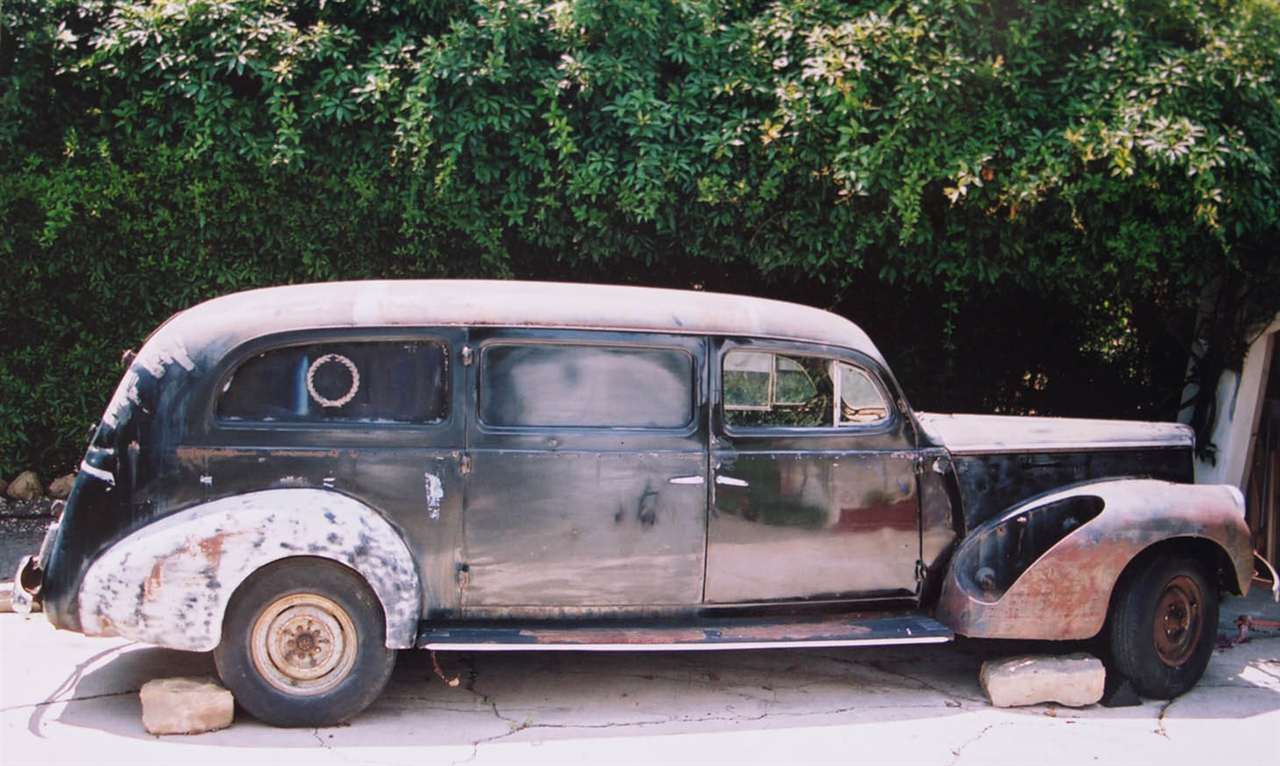
Started some work on rebuilding the seats. So first I took the spring unit (the industry term for a bare seat), and and wire brushed off the loose rust. Then I sprayed the spring unit down with some rattle-can gloss gray paint.
Once the paint was dry, then I moved on to the first stages of rebuilding the seat. Originally the first layer of the seat was a double layer of burlap that had thin wire layered in it. The purpose of these wires is to spread the load across multiple springs. The burlaps actual purpose is the keep the foam from getting cut, and pushed through the springs. So after some searching online looking for that "wire-infused" burlap, I can across an upholstery site that recommend thick canvas in place of the the wired-burlap. I used a double thick layer of heavy canvas, and this was hog ringed to the outer parameter of the spring surround. The idea is to pull the canvas so it is nice and tight all the way around. This help to spread the load on a single spring across the neighboring springs. Just make sure it's hog-ringed to the flexible outer spring support and not the frame. You want the entire canvas and springs to move together. If it was hog-ringed to a rigid location like the frame, then the canvas would tear. So I after the laying the double layer of canvas on the spring unit I trimmed it to fit allowing about 4 inches of overhang on all sides. Then I first hog-ringed the middle of each side, while pulling the canvas tight. You want to wrap the over-hang around the outer parameter so when you installed the hog-ring you are clamping the top skin and the over-hang piece together. Then I did the corners and worked around the parameter in adding on ring to each side at a time to even out the tension (like putting on lug-nuts). With the canvas on, the entire spring unit is already much more firm. Once I add the medium density foam layer, it should really start coming together. Attach file:  (41.11 KB) (41.11 KB)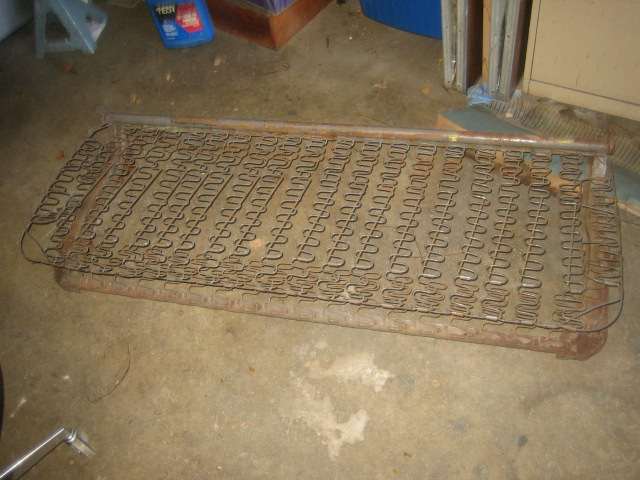 (42.37 KB) (42.37 KB)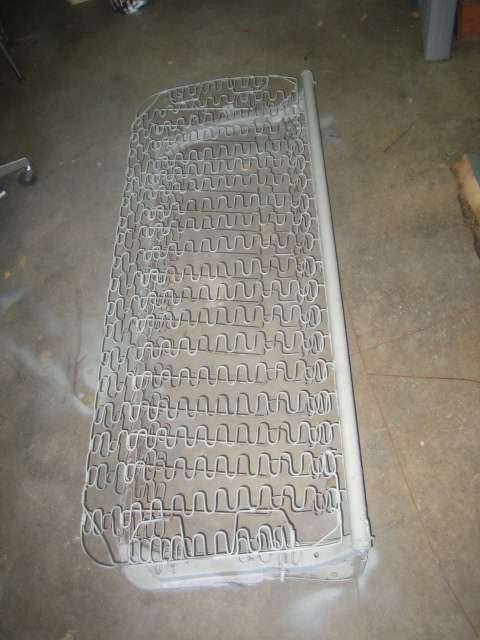 (20.06 KB) (20.06 KB) (20.13 KB) (20.13 KB) (21.27 KB) (21.27 KB)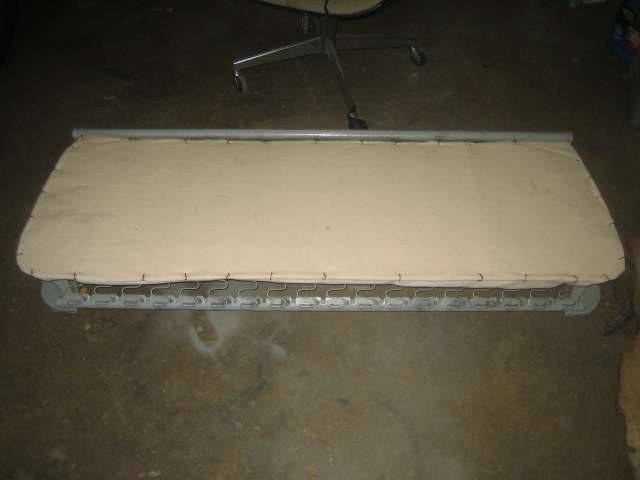
Posted on: 2010/6/14 21:52
|
|||
|
-BigKev
1954 Packard Clipper Deluxe Touring Sedan -> Registry | Project Blog 1937 Packard 115-C Convertible Coupe -> Registry | Project Blog |
||||
|
||||
|
Re: BigKev's 1954 Packard Clipper Deluxe Sedan
|
||||
|---|---|---|---|---|
|
Home away from home

|
Houshold carpet remenants can be used in place of the burlap/foam. Place the burlap backing of the carpet against the springs. THe finish side of the carpet provides the softness of fooam rubber. A bit more expensive to use carpet remanants but provides a custom slightly over-stuffed and luxurous seat to sit on. Lasts about 20-50 years longer too.
Posted on: 2010/6/15 5:30
|
|||
|
VAPOR LOCK demystified: See paragraph SEVEN of PMCC documentaion as listed in post #11 of the following thread:f
https://packardinfo.com/xoops/html/modules/newbb/viewtopic.php?topic_id=7245 |
||||
|
||||
|
Re: BigKev's 1954 Packard Clipper Deluxe Sedan
|
||||
|---|---|---|---|---|
|
Webmaster
|
Seat rebuilding supplies procured. Thick high-density foam for the seat bottoms, and thinner foam for the seat backs. Also dacron batting that will go over the foam. Bought enough materials to be able to rebuild both the front and rear seats.
Just need to go buy some spray adhesive. Attach file: (18.92 KB) (21.89 KB) (21.89 KB)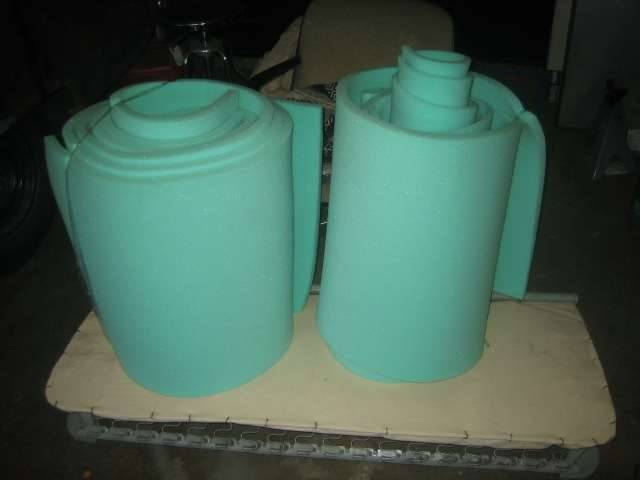
Posted on: 2010/6/15 21:42
|
|||
|
-BigKev
1954 Packard Clipper Deluxe Touring Sedan -> Registry | Project Blog 1937 Packard 115-C Convertible Coupe -> Registry | Project Blog |
||||
|
||||
|
Re: BigKev's 1954 Packard Clipper Deluxe Sedan
|
||||
|---|---|---|---|---|
|
Webmaster
|
Onto the next stages of seat rebuilding. I could not find 2 inch thick foam in long lengths, so I had to buy 1 inch thick foam sheet and glue two sheets together.
This was done by putting the two sheets together and gluing one half then the other with 3M Super 90 spray adhesive. If you use a different adhesive, test it on a piece of scrap foam before spraying your large expensive pieces. Some glues will dissolve the foam on contact. Not good. The Super 90 passed the test and worked just fine. With this glue you spray both parts to be matted, let sit for about 2 minutes, and the press together. The hold is instant at that point. So with the two foam sheets glued together, next it was laid over the seat bottom and trimmed to fit. I left the factory edge on the front and driver's side, and trimmed the excess from the back edge, and passenger side edge. I also rounded of the front corners to match the shape of the spring unit. Once the foam was trimmed to size, then it was glued to the burlap in the same manner. With it glued in place, next came the dacron batting. This was glue to the top of the foam with 4 inches over over lap on the sides to allow for wrapping. Use a lighter coat of adhesive here as you dont want to get the batting saturated. With all the underlayment work done, I simple laid the cover over the seat for to check it for fit. Tomorrow I will install the listing rods and stretch and hog ring the cover in place. Attach file: (17.89 KB)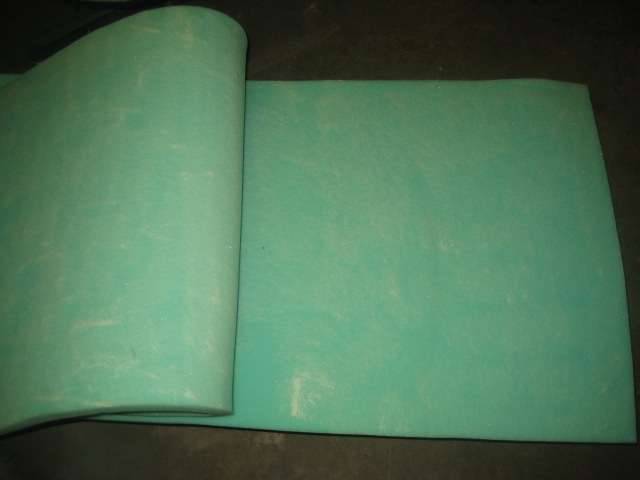 (20.12 KB) (20.12 KB) (21.33 KB) (21.33 KB)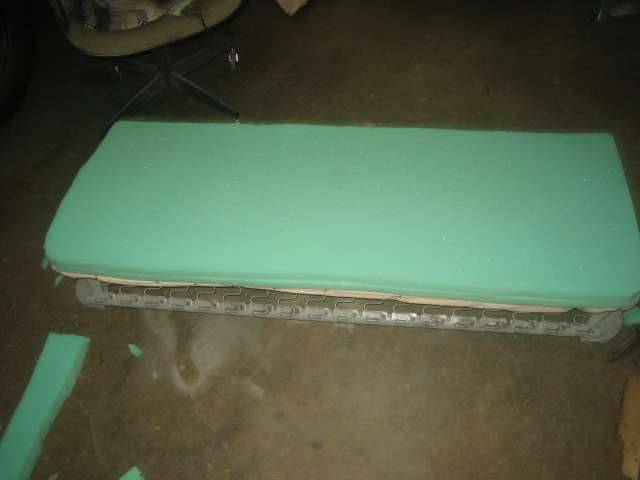 (22.17 KB) (22.17 KB)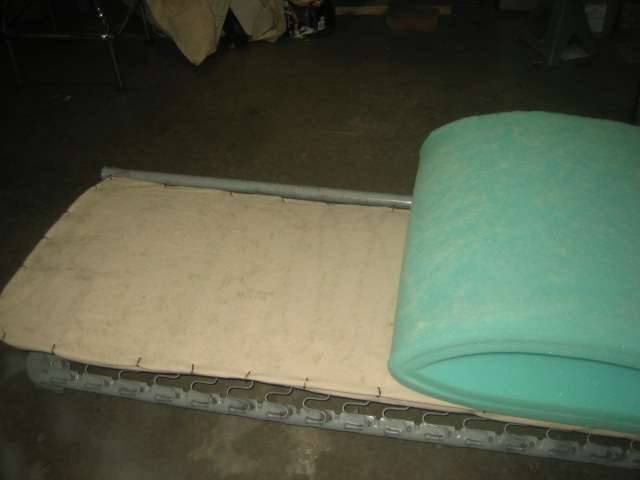 (25.03 KB) (25.03 KB) (24.12 KB) (24.12 KB)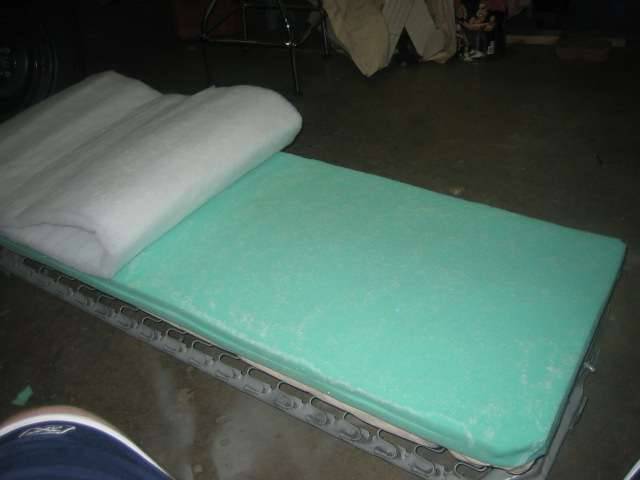 (17.75 KB) (17.75 KB)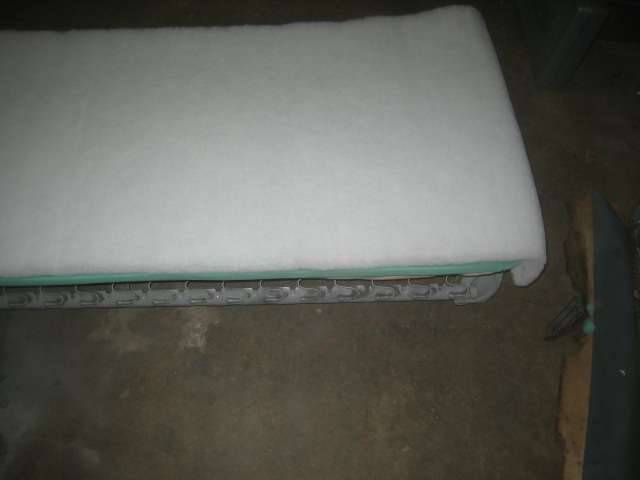 (42.97 KB) (42.97 KB)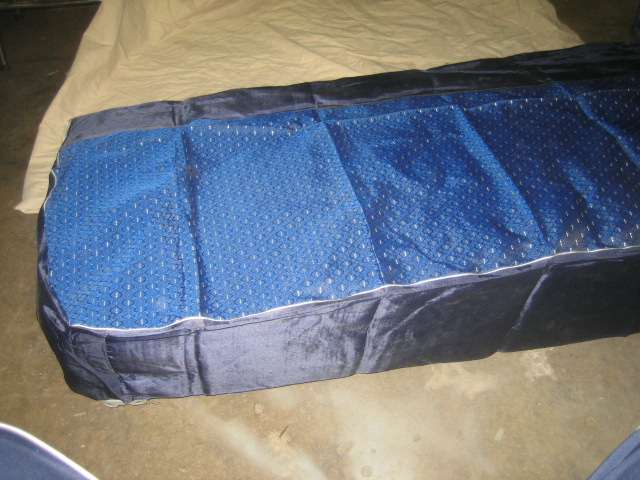
Posted on: 2010/6/16 23:50
|
|||
|
-BigKev
1954 Packard Clipper Deluxe Touring Sedan -> Registry | Project Blog 1937 Packard 115-C Convertible Coupe -> Registry | Project Blog |
||||
|
||||
|
Re: BigKev's 1954 Packard Clipper Deluxe Sedan
|
||||
|---|---|---|---|---|
|
Forum Ambassador

|
Your seat covering endeavors are very interesting. This is one of those things that I would normally send out and never put much thought into. It is very enlightening to see how a seat is built up from the springs.
I will have to test those seats on the way to the brew-pub.  Where did you learn to do this? Jim
Posted on: 2010/6/17 0:41
|
|||
|
||||
|
Re: BigKev's 1954 Packard Clipper Deluxe Sedan
|
||||
|---|---|---|---|---|
|
Webmaster
|
Jim I just did lots of browsing on the internet and paid attention as I took the old seats apart. I think the difficult part would be sewing the correct covers. That's going to come much later in the project. For now my 50's era aftermarket covers will have to fit the bill.
Here is a picture of the complete bottom. Since all the cutting and glueing was complete, I brought the seat bottom inside the house so I could work on it in the A/C, and also so I would not get the cover dirty while I had it flipped over. It took a lot of figuring to get the cover on as tight as possible. This is not a "Packard" specific cover, but a 50's era bench seat cover that was designed to fit several different makes. Technically it is supposed to go over the factory seat material to protect it. But I am using it as the actual material for now. One of the challenges is there are not fabric pouches in the seat cover for the listing wires. So I had to get creative. The side pieces of the cover had a very narrow hem sewed along the bottom. So I cut the end of each hem so I could slide in the listing wire and use the hem to support the wire. With that in place it was just going around and stretching the fabric and hog-ringing the cover/listing wire the frame. It looks pretty good and feels pretty comfortable so far. The creases in the picture below are from where the seat covers were folded in a box for 50 years. They should relax over time. Attach file: (33.64 KB)
Posted on: 2010/6/17 21:35
|
|||
|
-BigKev
1954 Packard Clipper Deluxe Touring Sedan -> Registry | Project Blog 1937 Packard 115-C Convertible Coupe -> Registry | Project Blog |
||||
|
||||
|
Re: BigKev's 1954 Packard Clipper Deluxe Sedan
|
||||
|---|---|---|---|---|
|
Forum Ambassador

|
I wonder if ironing them first would have helped.
Posted on: 2010/6/17 23:16
|
|||
|
1937 Packard 138-CD Deluxe Touring Limousine
Maroon/Black 1090-1021 [url=https://packardinfo.com/xoops/html/modules/registry/View.php?ID=232]1955 Packard |
||||
|
||||
|
Re: BigKev's 1954 Packard Clipper Deluxe Sedan
|
||||
|---|---|---|---|---|
|
Webmaster
|
Well they are made of a "nylon" type material. So not sure if an iron would be suitable. But this weekend I may leave it out in the sun for a couple of hours and see if they relax. I'm not to worried about it.
Posted on: 2010/6/17 23:21
|
|||
|
-BigKev
1954 Packard Clipper Deluxe Touring Sedan -> Registry | Project Blog 1937 Packard 115-C Convertible Coupe -> Registry | Project Blog |
||||
|
||||


