 (107.97 KB)
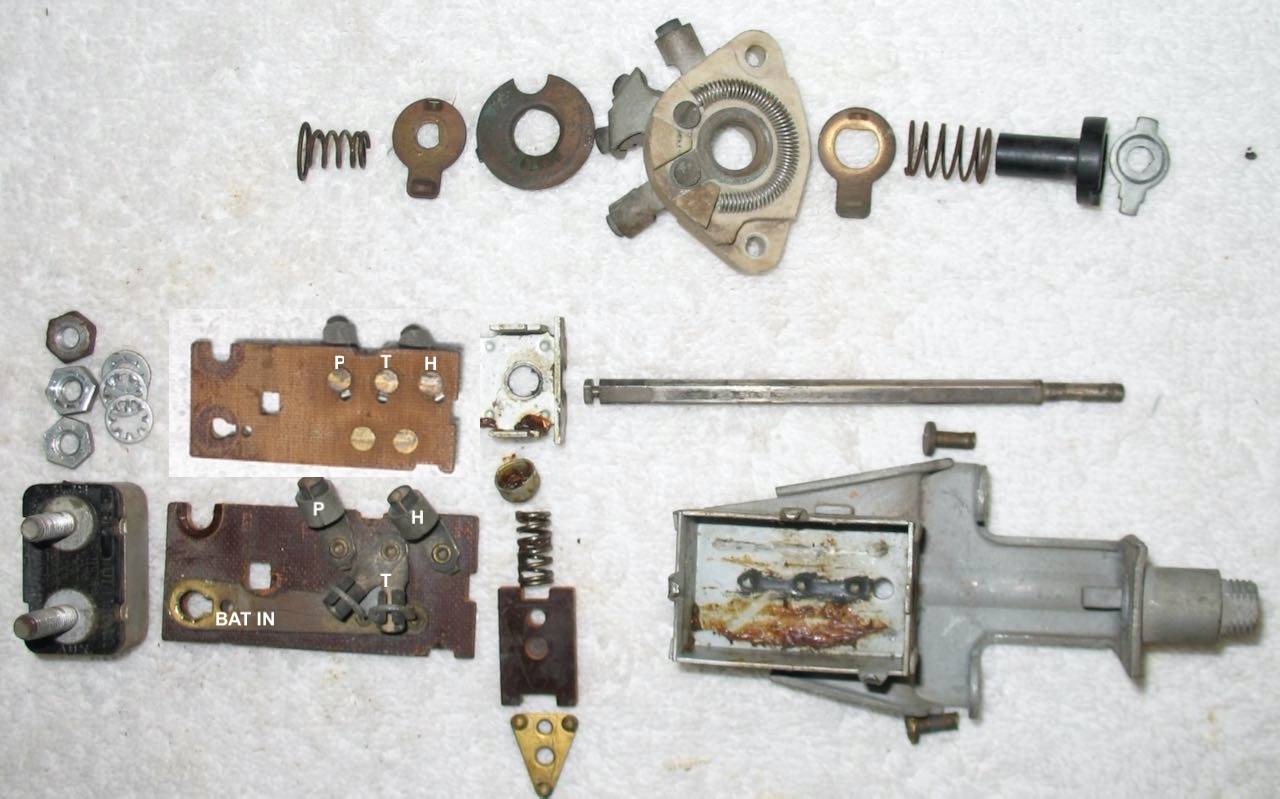
|
Re: KPack's 1954 Panama
|
||||
|---|---|---|---|---|
|
Home away from home

|
Howard, those pictures are incredibly helpful. I took care of the ignition switch today, and pictures and story will follow later.
First I have a totally unrelated question. Is it normal on these engines to have vapor/steam coming out of the oil fill tube after the engine has been warmed up and ran? The few times I've had the car started, warmed up, and test run, it has run relatively well (at least I think). It quiets down and runs smoother after warming up, though with a hesitation on initial acceleration. There is a slight tick sometimes when first started (lifter?) but quiets down. I don't know exactly how warm the engine is getting, I'm not sure I totally trust the temperature gauge. The needle moves, but I don't have high confidence in it. After stopping I note that vapor comes out of the fill tube (through the filler cap) and continues for several minutes until the engine cools down. It does not smell burnt, the oil looks completely normal, as does the antifreeze. Maybe has a slight gas-like smell?? Is this a normal occurrence or am I looking at a problem? Attach file:  (160.85 KB) (160.85 KB)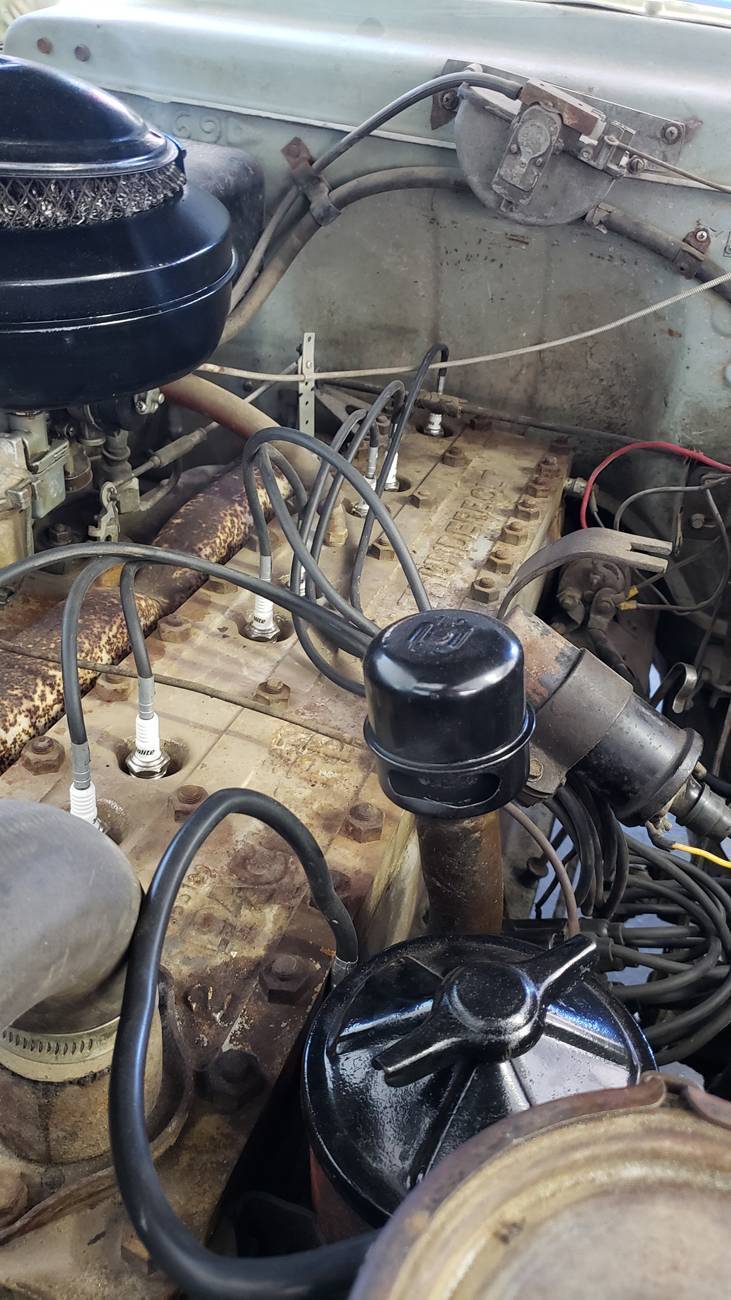
Posted on: 2020/8/22 19:49
|
|||
|
||||
|
Re: KPack's 1954 Panama
|
||||
|---|---|---|---|---|
|
Home away from home

|
The easy answer is that that's why it's vented but the more complicated answer is that it would depend on how much and what it actually smells like. I wouldn't worry too much about it right now but frequently check the oil level and make a note of how often and how much it needs.
When driving, air is pushed into the slot on the breather (filler) and the vapors exit through the pipe attached to the rear valve cover but at idle or when stopped they come through the breather cap.
Posted on: 2020/8/22 19:59
|
|||
|
||||
|
Re: KPack's 1954 Panama
|
||||
|---|---|---|---|---|
|
Forum Ambassador

|
There is always a bit of leakage past the rings and out of the cylinders but could be the rings are bit worn and you are getting more blowby than usual. Unless it gets really heavy and you also start seeing blue smoke from the exhaust there is no immediate cause for concern.
When the engine is running air is forced thru the cap blowing any vapors down the fill tube and toward the breather tube. With the car in motion, suction created by the moving air over the end of the breather tube also tends to pull the vapor out that end where it dissipates under the car. When the car or engine stops and there is no forced pressure in thru the cap or any suction effect the vapor normally rises where it will tend to come out the fill tube and cap. Even in more modern cars it is present but with positive crankcase ventilation you would rarely see the vapor.
Posted on: 2020/8/22 20:02
|
|||
|
Howard
|
||||
|
||||
|
Re: KPack's 1954 Panama
|
||||
|---|---|---|---|---|
|
Home away from home
|
Don and Howard - thank you both. That is what I assumed, but wanted to be sure. I'm used to modern vehicles with positive crankcase ventilation, so seeing vapor coming out was a little concerning. I've checked the oil several times since I dropped the pan and changed the oil, and it hasn't dropped at all. I also haven't run it very much though, so I'll keep an eye on it as I go forward.
I'm sure the rings are a bit worn, though I hope with some running things start clearing up a bit. We'll see. -Kevin
Posted on: 2020/8/22 20:20
|
|||
|
||||
|
Re: KPack's 1954 Panama
|
||||
|---|---|---|---|---|
|
Home away from home
|
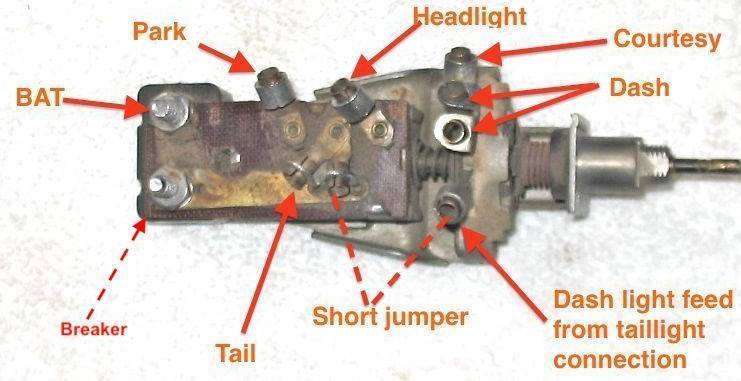
As promised, here are the pictures of the headlight switch renewal. The pictures that Howard shared are very helpful when doing this.
First step was to label all the wires so that I didn't mix anything up, using the photos from Howard as a guide. Then remove the small Allen key from the knob, slide the knob off. Then unscrew the face plate, and the switch can be removed from behind the dash. Upon inspection on the bench top, I found all the contacts, wipers, and plugs corroded. I removed the circuit breaker, then carefully bent the tabs on the box to remove the board. The spring inside has some tension and will pop the contact slider out (per Howard's warning). I found the box with quite a bit of sand in it. I was honestly surprised at how much. All the grease had sand in it, covering every component. I cleaned all the internal parts, and removed all the old grease. When I reassembled, I used a bit of dielectric grease on the floor of the box to allow the parts to slide without difficulty. The corroded contacts were cleaned with a small screwdriver and a small strip of fine sandpaper wrapped across the head of the screwdriver. That way it acted like a very fine file and I was able to easily clean off the corrosion. I used some abrasive tooth paste on the wipers and cycled the switch back and forth a bunch of times, but the effect was less than desirable. In the end, I used the screwdriver/sandpaper trick to carefully and gently clean off the wiper surfaces. I then used the same fine sandpaper, slid it between the wiper plates and the wiper points, and allowed the wiper points to slide across it while I cycled the switch. It cleaned everything up nicely. When I was all done, I reassembled everything, put just a touch of dielectric grease on the wire plugs, and plugged everything back in. The switch is buttery smooth now. Headlights work as expected, as do the gauge lights. The rear lights come on when the switch is engaged. I have some things to work on though. The park/indicator lights are not hooked up (previous owner cut the wires when removing the grill) and neither are the rear license plate lights. The brake lights do not change when pressing the brake pedal. The back up lights do not work. The front courtesy light does not work (under the dash). The rear pillar lights also do not work. I will need to test for continuity there and start tracking down the problem. -Kevin Attach file: (59.95 KB)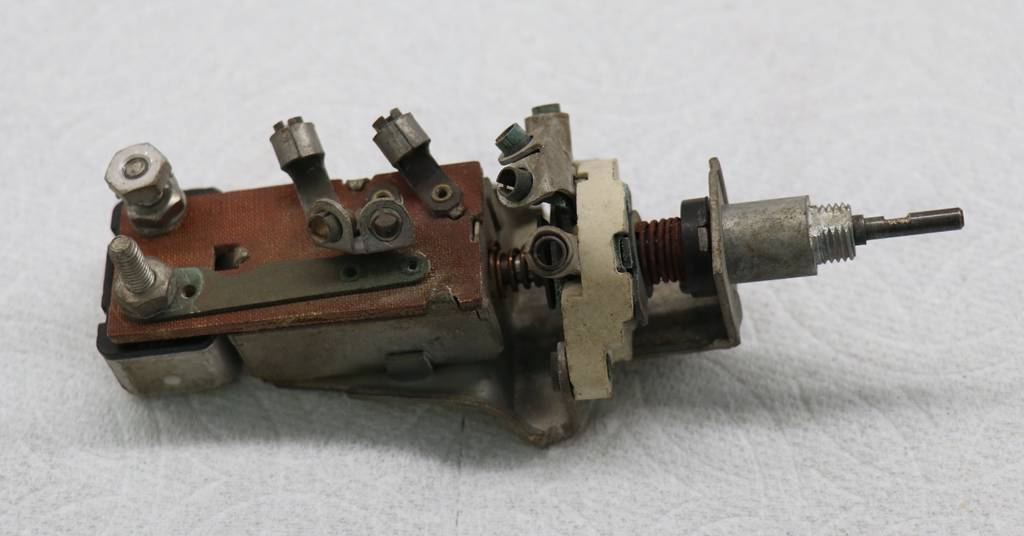 (65.14 KB) (65.14 KB)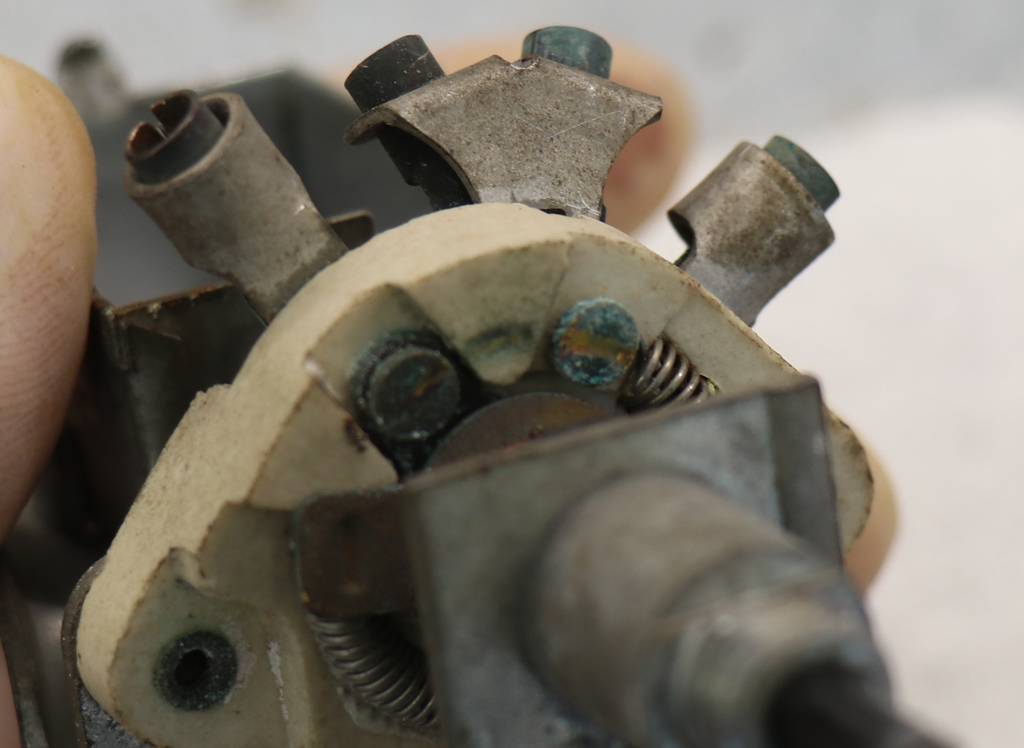 (83.17 KB) (83.17 KB)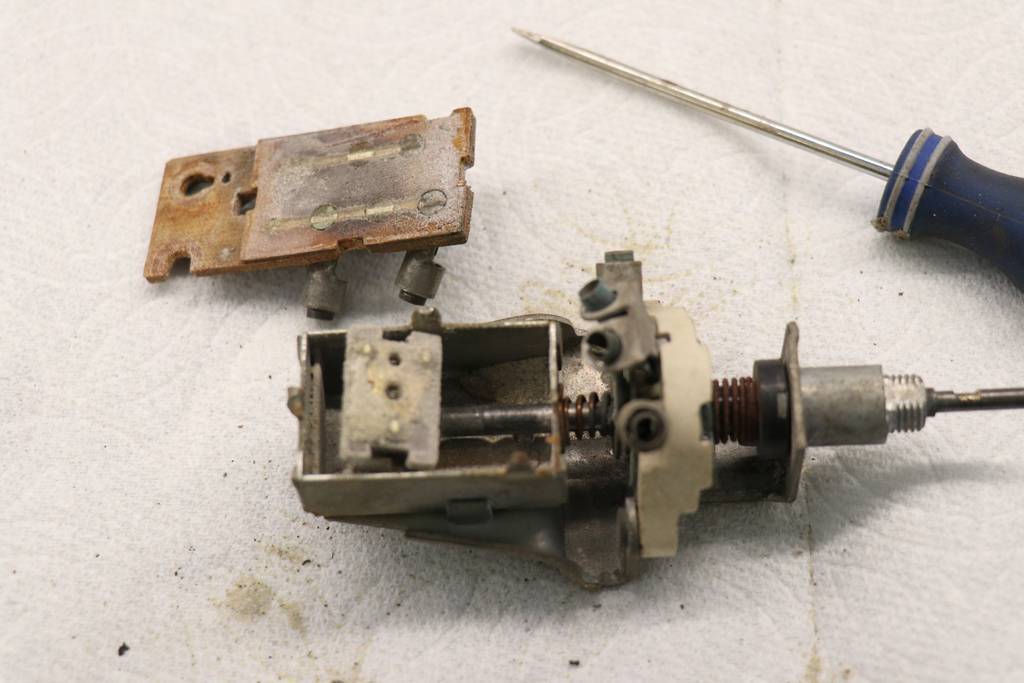 (67.11 KB) (67.11 KB)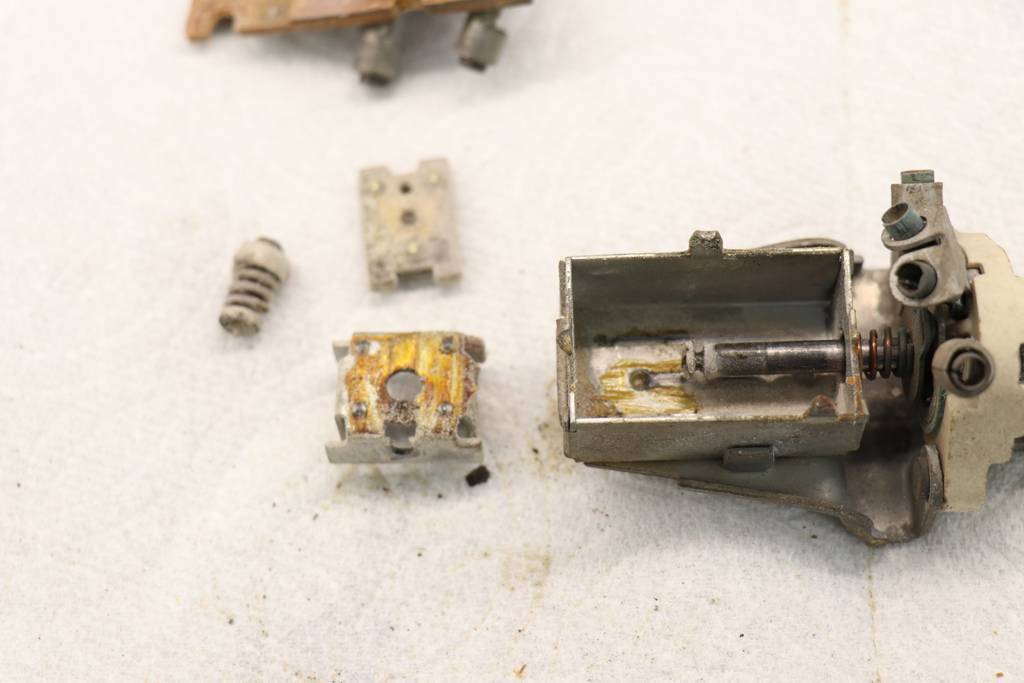 (77.21 KB) (77.21 KB)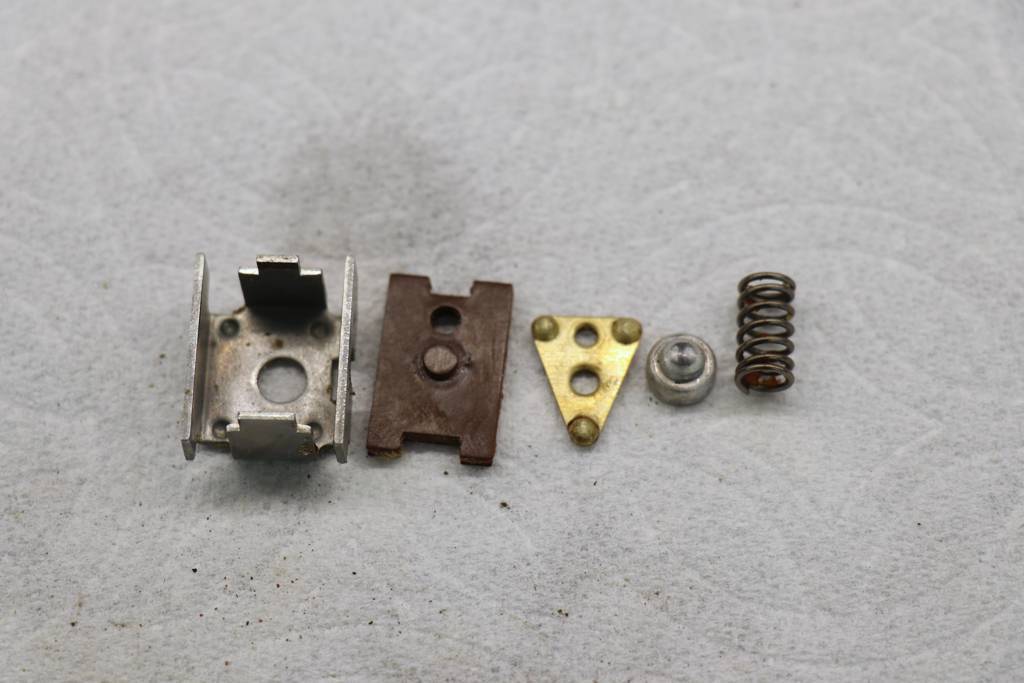 (57.85 KB) (57.85 KB)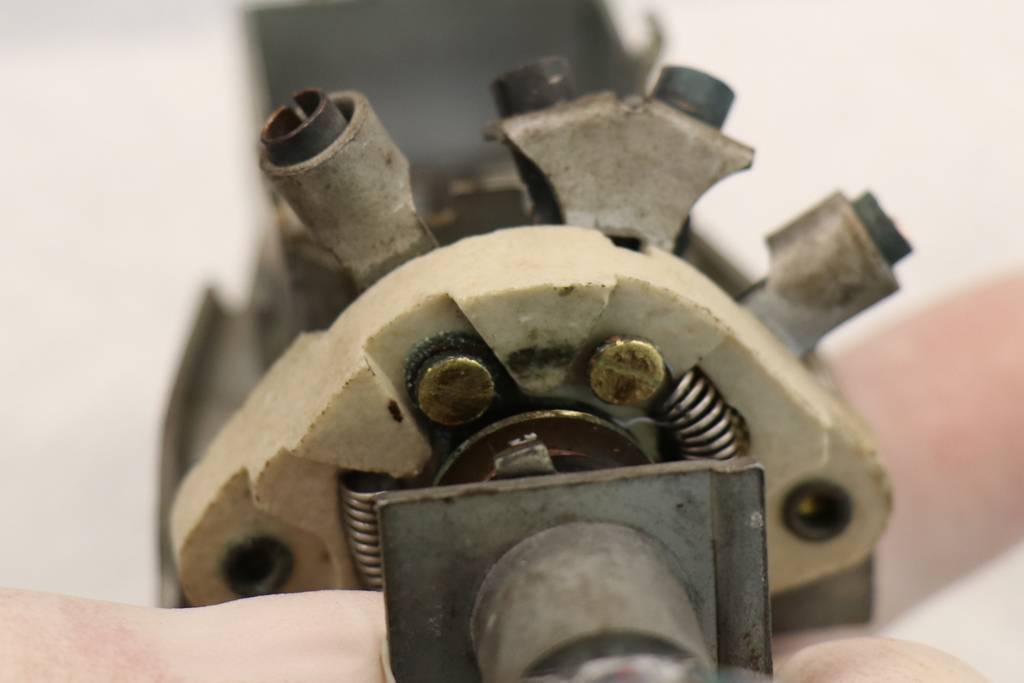 (65.84 KB) (65.84 KB)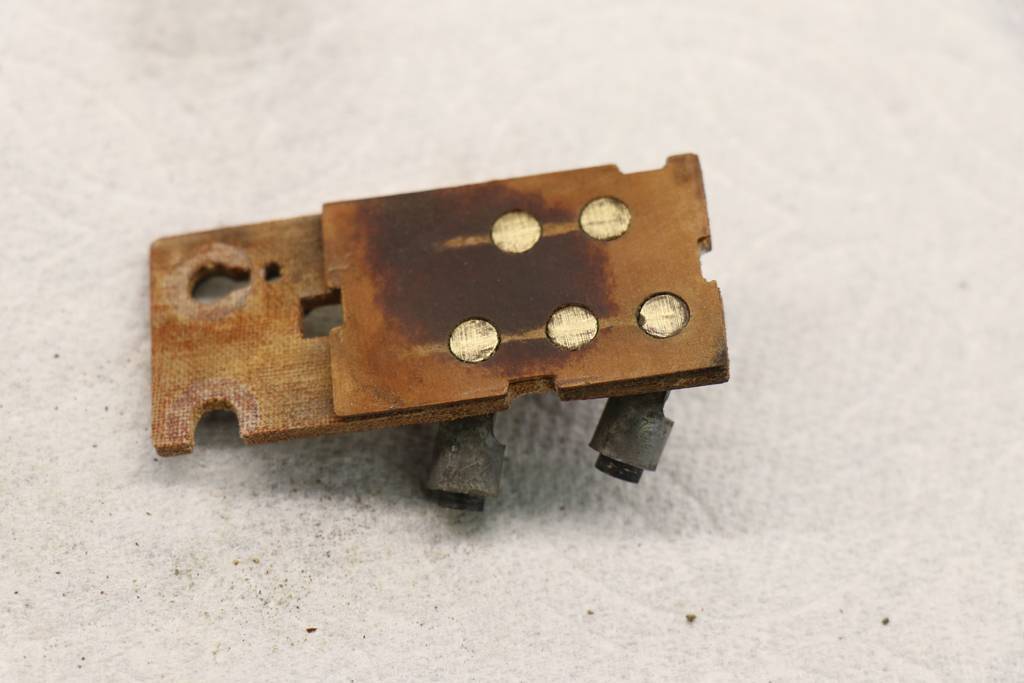 (60.75 KB) (60.75 KB)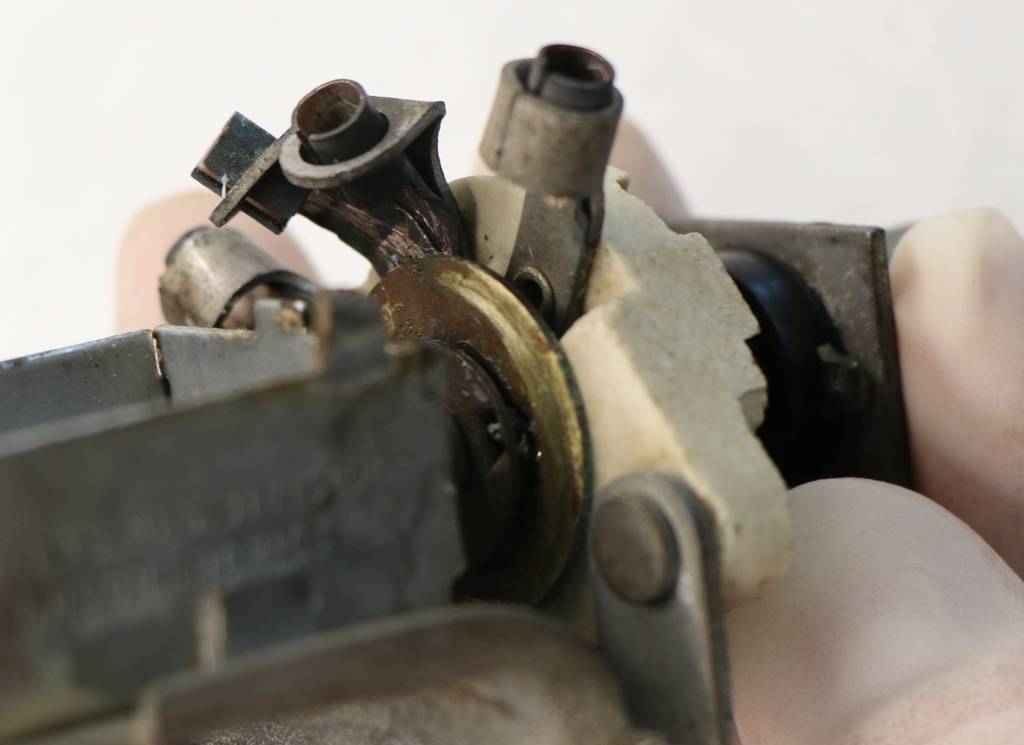 (81.39 KB) (81.39 KB)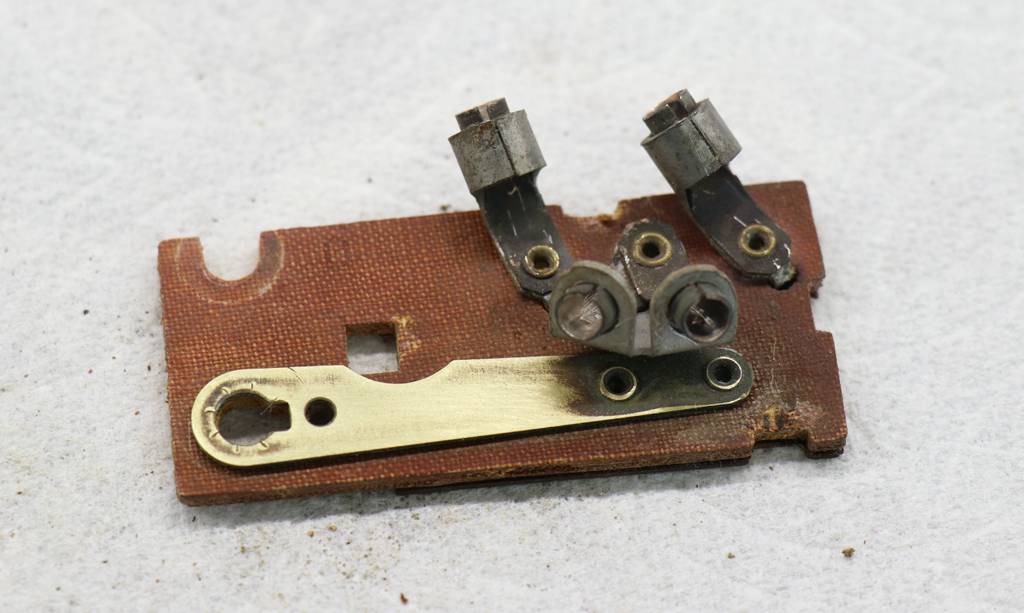 (72.16 KB) (72.16 KB)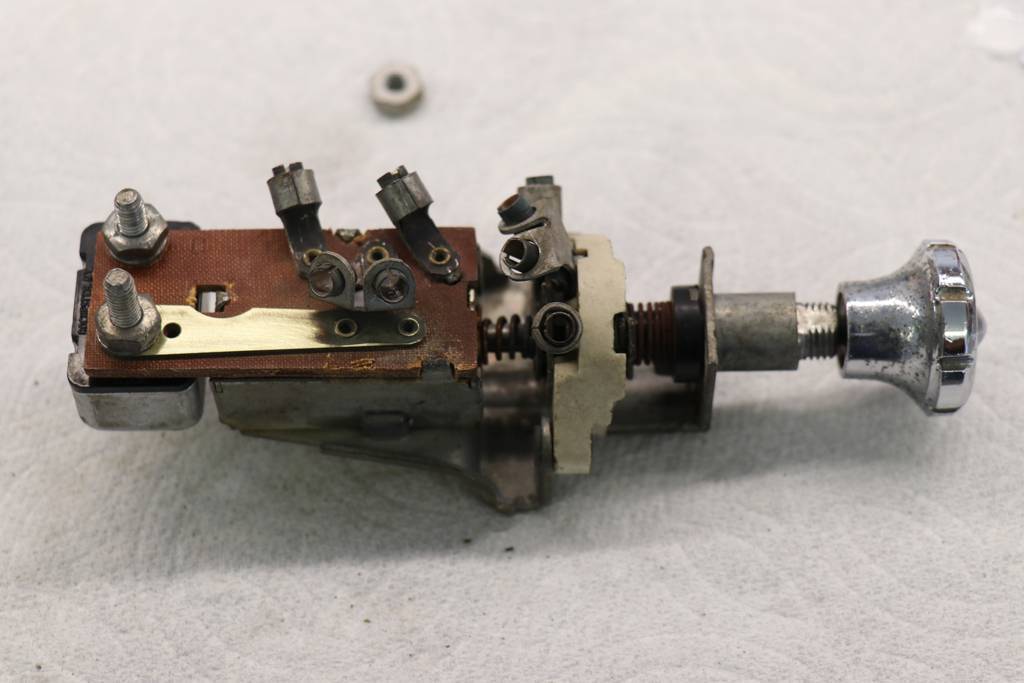 (72.68 KB) (72.68 KB) (73.10 KB) (73.10 KB)
Posted on: 2020/8/23 0:46
|
|||
|
||||
|
Re: KPack's 1954 Panama
|
||||
|---|---|---|---|---|
|
Home away from home
|
Quote:
My wife's first ride in my first Packard was similar! I found that wine helps her bleed brakes :)
Posted on: 2020/8/23 6:42
|
|||
|
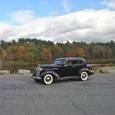
1937 120 1092 - Original survivor for driving and continued preservation.
https://packardinfo.com/xoops/html/modules/newbb/viewtopic.php?topic_id=16514&forum=10 1937 115 1082 - Total basket case, partial restoration, sold Hershey 2015 https://packardinfo.com/xoops/html/modules/newbb/viewtopic.php?start=0&topic_id=6550&order=ASC&status=&mode=0 |
||||
|
||||
|
Re: KPack's 1954 Panama
|
||||
|---|---|---|---|---|
|
Home away from home
|
Rust repair is finally underway. Working on the floors right now. Cut out a few sections and my friend made up some panels to fit out of 18 gauge steel. So far welding is going well. I'll be working on the remainder of the floor the rest of the week (with any luck I won't screw it up....only welded twice before in my life). Next week we will install the windshield header and put all the support back together.
More pictures will follow as I make progress. -Kevin Attach file: (99.15 KB)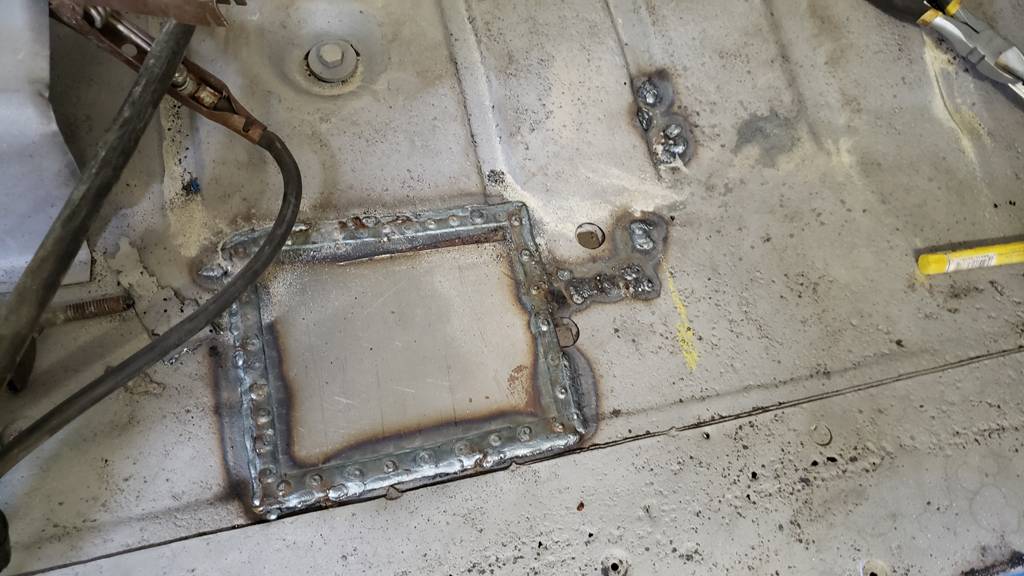
Posted on: 2020/8/24 22:39
|
|||
|
||||
|
Re: KPack's 1954 Panama
|
||||
|---|---|---|---|---|
|
Home away from home
|
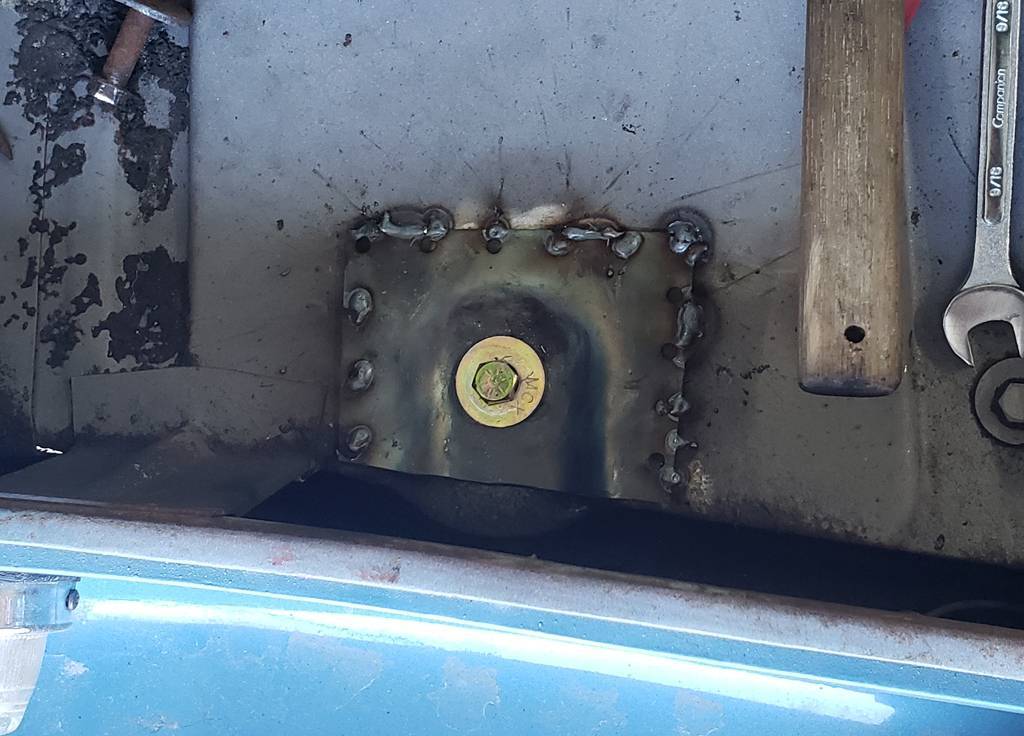
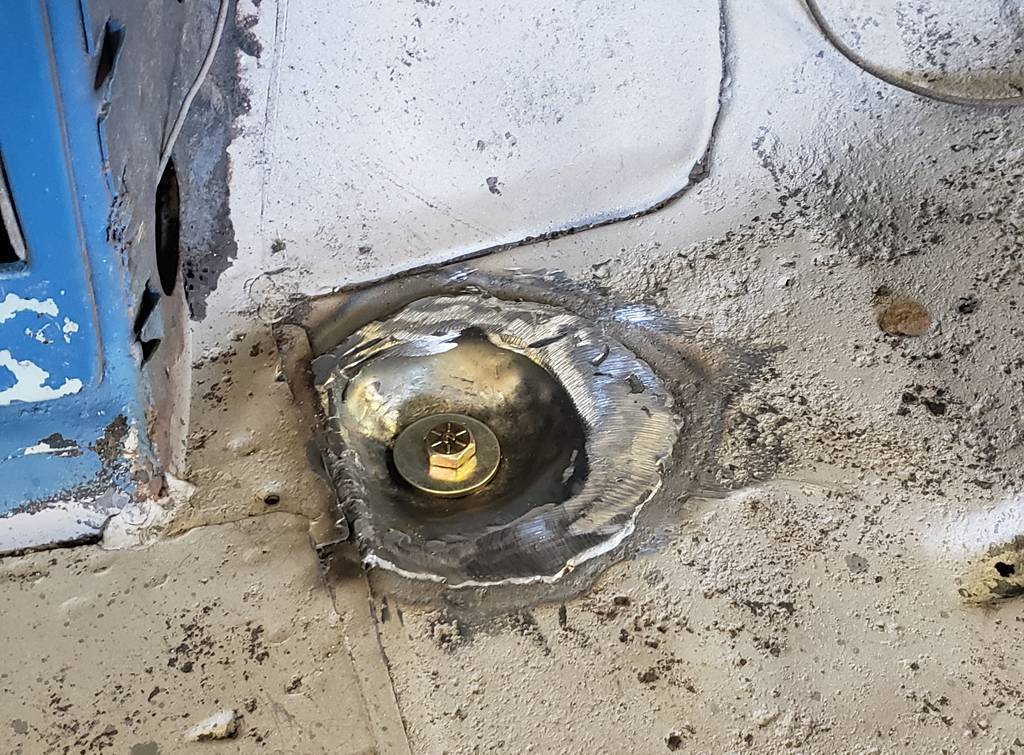
Floor repair continues. Close to being done now. I cut out the rotted body mounts (one driver, two passenger, one in the trunk). Prior to that I formed replacements with 18 gauge steel. They aren't perfect, but are the same general shape.
I tacked in the new patches, drilled through them for the mounting bolts, and used new grade 8 hardware when the old bolts were unusable. I will have to wait for my friend to finish burning them in because he's far better at welding. He finished the driver's side body mount, and I cleaned it up. The others will all be totally welded in on Monday. We hope to get the header installed on Monday too. Getting close to wrapping up the floor....once the welding is done I can clean everything up and prep for primer. -Kevin
Posted on: 2020/8/29 20:09
|
|||
|
||||

|
Re: KPack's 1954 Panama
|
||||
|---|---|---|---|---|
|
Home away from home
|
Metal work continues very slowly. The floors are basically done with all the new patches completely burned in. Just a few spots to touch up and some grinding to do.
Started getting the header in last night, but then we ran out of wire for the welder. We test fit it, confirmed center with a plumb, then used kleco's to hold it in place while we tack welded a couple areas. The plan is to drill holes up through the header, then used those to spot-weld to the remaining roof flange, similar to how it was done originally. But I'm reliant on my friend's schedule, which means the header won't be done for at least another couple weeks. So in the meantime I have a list to tackle: 1. Compression test 2. Repair cut wires to backup lights, parking lights 3. Figure out what's wrong with the interior lights 4. Pull front drums and check brakes (rear drums when I find a puller) -Kevin Attach file: (72.69 KB)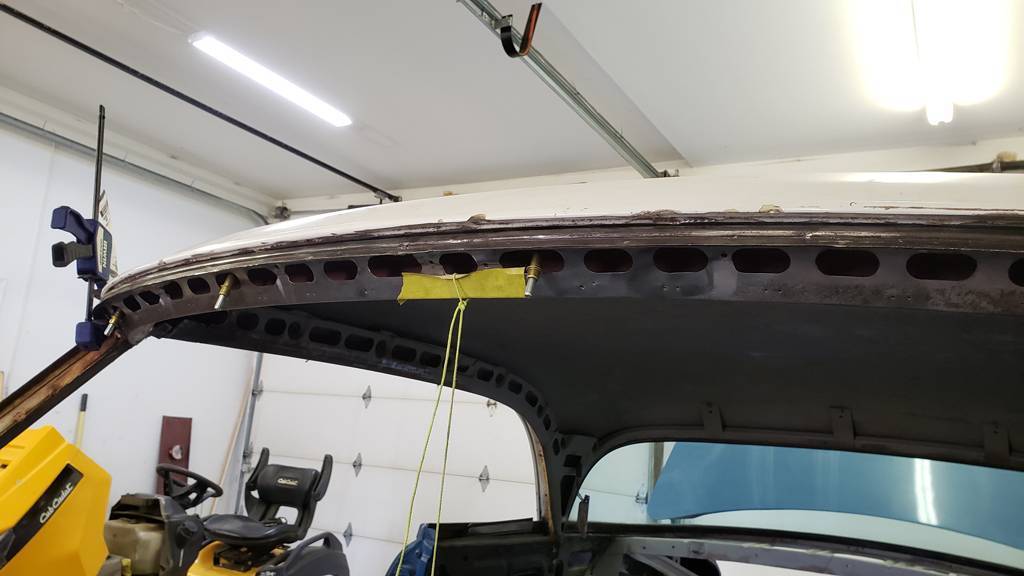
Posted on: 2020/9/1 12:15
|
|||
|
||||


