|
Re: Wade's Workshop
|
||||
|---|---|---|---|---|
|
Forum Ambassador

|
Monday 4th February 2013
Last Friday Wade had continued working on Roy, finishing off the king pin re-installation with new end caps and a good greasing. Had also re-installed the front backing plates and installed new front wheel cylinders. That brings up another point in relation to the brakes, Roy had front wheel cylinders on the rear and rear wheel cylinders on the front! Wade had also taken Roy's diff centre to Award Diffs at Seven Hills for it to be attended to. But today, first thing was to get Noel's Chassis onto the trailer ready for it's trip over to Fineline at Moorebank. Fired up the chassis via another great Optima battery assisted by a can of Start-U-B@$t@rd and Wade then drove it out into the carpark at the front of the workshop. Then up to the rooftop parking area where the car trailer was hooked up to Wade's Ute after taking off the removable tyre rack from the trailers front. Down to the parking area outside the workshop where Wade drove the Chassis up onto the trailer. A bit of fiddling to get it to fit, deflating front tyres helped, then it was strapped down. I was also given a quick course in Wade's keyless starting system. This comprises 2 wires, one with an alligator type clip, the other a wire with a bare end applied to a head nut. And it works! At Fineline it was then the reverse of getting the Chassis on the trailer, only this time I was driving! Sorry Noel, I drove your Coupe before you did although I did it when it was fully air conditioned, ie no body. But because of that it probably doesn't really count, does it? The keyless start worked a treat but getting behind the wheel discovered a problem, it was locked between gears. Bit of fiddling with the levers on the bottom of the column found neutral then was able to select reverse and back off the trailer. Been over 40 years since I've operated a car only using a hand throttle, my '29 Ford A Model Tudor Sedan, and the lapse since then was apparent. Kept going for the non existent foot pedal but eventually got the hang of it. Parked the chassis outside and then it was my turn for real driving action, backing the car trailer so I could exit Fineline. Only took about 4, or was that 5, shuffles backwards and forwards turning the steering every which way, except apparently the right way, before I was in a suitable position to exit. That done, back to the workshop and returned the trailer to the rooftop. There, with some help from Graham, unhooked it and maneuvered it into position. Also returned the tyre rack to its place at the front of the trailer. Downstairs, found Wade had reassembled the front brakes and was about to remove the master cylinder. I'd been talking to Richard, Roy's owner, yesterday at PACA's AGM and he advised the engine had been rebuilt about 4 years ago. Mentioned this to Wade today but he thinks it was longer ago than that. Reason I mention this is because of lack of compression in a number of cylinders. Thought is, it's probably sticking valves because Roy sees little active service and sits for long periods between runs, hope so. Left Wade to it as I needed to catch up with my secretarial duties following yesterdays AGM. Wasn't successful in finding someone Attach file:  (41.00 KB) (41.00 KB)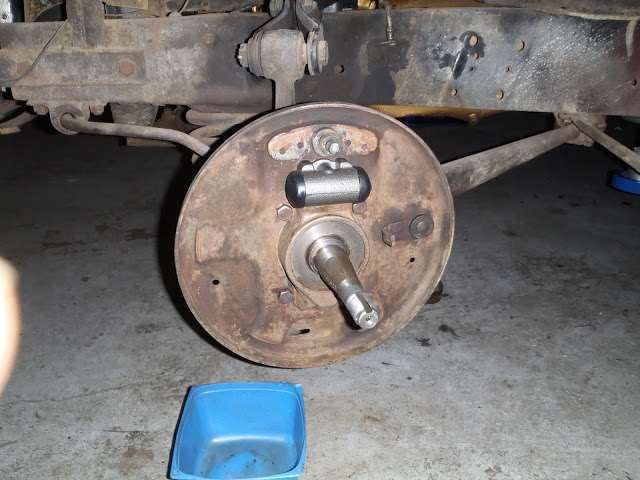 (50.69 KB) (50.69 KB)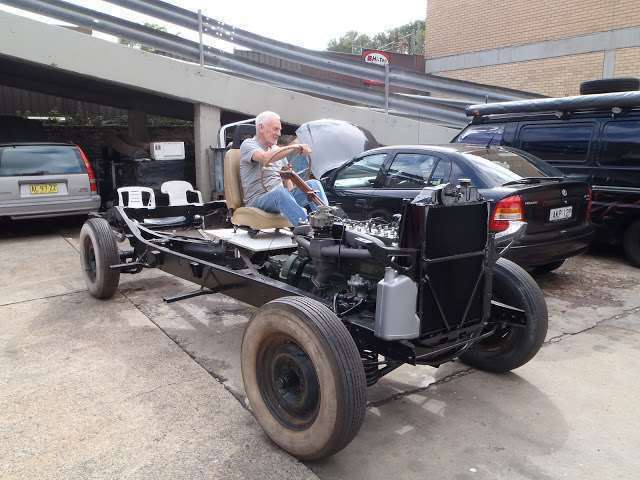 (47.40 KB) (47.40 KB)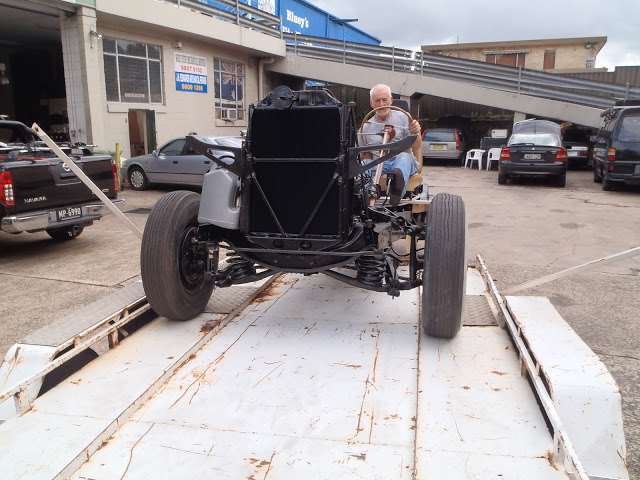 (56.27 KB) (56.27 KB)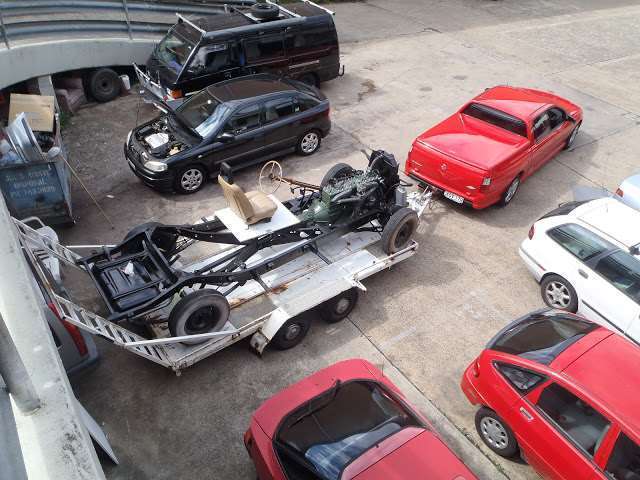 (50.01 KB) (50.01 KB)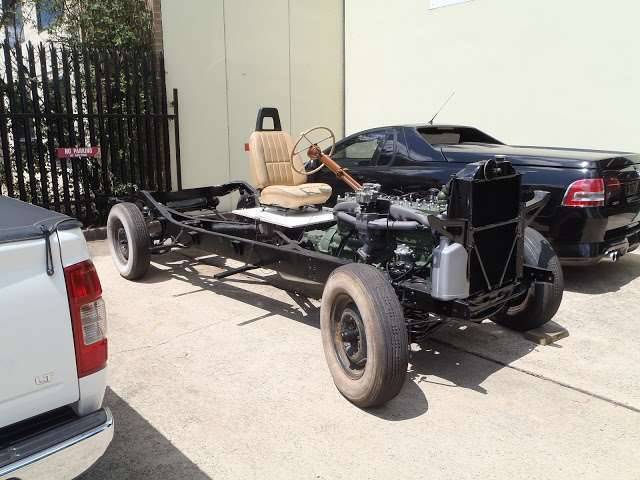 (38.05 KB) (38.05 KB)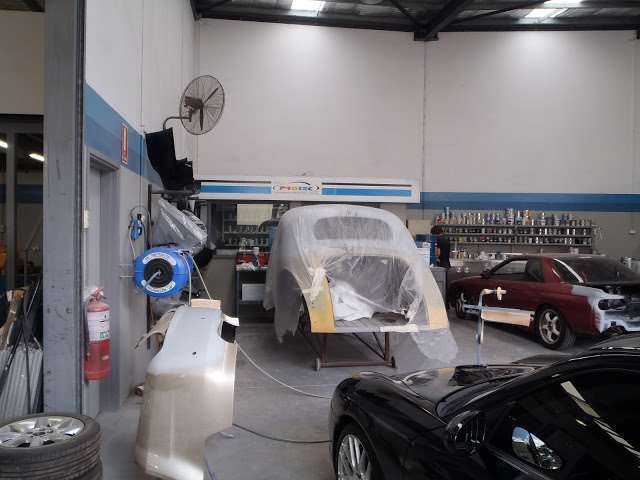
Posted on: 2013/2/4 0:47
|
|||
|
Mal
/o[]o\ ====  Bowral, Southern Highlands of NSW, Australia "Out of chaos comes order" - Nietzsche. 1938 Eight Touring Sedan - SOLD 1941 One-Twenty Club Coupe - SOLD 1948 Super Eight Limo, chassis RHD - SOLD 1950 Eight Touring Sedan - SOLD What's this?  Put your Packard in the Packard Vehicle Registry! Here's how! Any questions - PM or email me at ozstatman@gmail.com |
||||
|
||||
|
Re: Wade's Workshop
|
||||
|---|---|---|---|---|
|
Forum Ambassador
|
Wednesday 6th February 2013
While Wade set to work removing the inner mudguard(fender) panel on Roy, in preparation for checking the tappets, I engaged in cleaning up the diff housing in preparation for when the diff centre returns and that, rear axles and brakes can go back together. Thought Wade would be finished long before I was, but it was not to be. By the time I'd cleaned the accumulation of dirt, grease, oil, exhaust and whatever else had accumulated from the housing, and cleaned up the housing ends Wade was still, literally, wrestling with the panel. At this point, to finish the rear end clean up, Wade used a slide hammer to remove the axle seals from both sides so we could then concentrate on the front of the car. Back to the front where, besides undoing and moving the panel, Wade had also removed the carburettor to help with the panel removal process. But that still didn't give enough clearance to squeeze the panel out. Next step was to drain the radiator so the thermostat housing and radiator inlet hose could be removed. Still not enough room so next impediment removed was the fan, which also had a little surprise in store for us. There was a spacer in the fan blade and impeller hub setup. From the looks of things the impeller hub had been pressed too far on in a previous rebuild and to correct this a spacer was added! But with this final piece out of the way there was now enough room to twist, turn and manoeuvre the panel across the top of the engine and out. Panel out, next thing was to remove the fuel/vacuum pump. Easier said than done. With the inner panel out access is still limited and necessitated bolt loosening in very small increments together with removal of all lines. Even then took a number of tries and different positionings before it was dropped out, but out it was. Next were the tappet covers and these were relatively straight forward. That done the remote starter switch was rigged up and the engine turned over. All valves appeared to be opening and closing without any sticking evident. With sticking valves as a possible cause of the hard starting and rough running symptoms just about eliminated Wade checked the clearances on the tappets for #1 & #2 cylinders in case they were too tight. And they were, with very little or no clearance. The 4 valves in question were then set to 0.009" inlet & 0.012" exhaust, about 0.002" more than the hot clearances recommended. That done, and before checking and resetting the valve clearances on the rest of the tappets, a compression test was done on #1 = 35 & #2 = 100. #2 appears reasonable but does not. Also checked the compression on #3 -> #6 with varying results, some good, some horrible. Not wanting to waste more time resetting the rest of the tappets the head was pulled and like many a thing on Roy even this had a complication. 3 of the head nuts were 11/16" while the remainder were 3/4" which they all should be. Head off it was apparent that greater things were afoot with, I call them light, scores in a number of the bores. That's where things were left for the day, Wade will take up the running again tomorrow while I play with the granddaughters! But during the course of all this, between the removal of the inner mudguard(fender) panel and the fuel/vacuum pump removal we had a visit from Mat, packard34. Mat was there because the radio in his '34 was playing up and Wade is going to don his other hat of radio repairer to see if he can repair it. I think I'll put my money on Wade to fix it. Mat brought a big box with Dynamotor, Speaker, Radio Box and Radio Head, there's quite a lot of equipment when compared to modern units, so Wade has the lot and can find and fix any problems. And taking with Mat over lunch I was reminded of MrBumble's Seeking My Clipper's History thread. Mat has 2 Packards, a '34 Eight Sedan and a '55 Caribbean Convertible Coupe. Mat has been able to trace the ownership of the '34 from the day it was sold and was able to recite a chronological list of former owners. In fact he'd been able to meet a female relative of the 2nd owner, who co-incidentally lives in reasonable proximity to Mat. This lady has an uncommon surname and Mat, when he met her, asked the question of whether she was related to the second owner, a doctor. She was and turned out to be his niece! Mat though has given up any hope of tracing the original owner of the '34, only knows it was a Mr Brown which opens up quite a wide field for investigation especially with the passing of 79 years since it first sold. On the other side Mat doesn't know anything about the '55 Caribbean's history. Even though when Mat was in the US a few years ago he attempted to meet the guy he purchased it from only to be completely cold shouldered in the attempt. I'm sure Mat identifies with MrBumbles experiences in that regard. Note - Over 2 years ago I promised Jerry, Yesterdays Radio that, when Roy came back to the workshop, I would take more pic's of the under running board radio aeriels. If there are specific shots or features required Jerry please let me know? Attach file: (22.71 KB)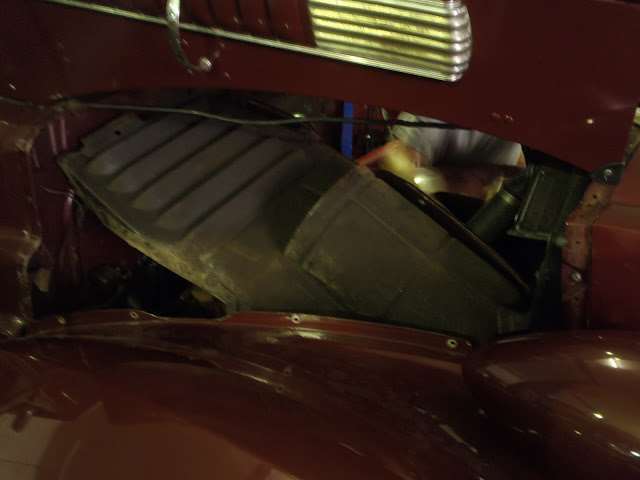 (54.15 KB) (54.15 KB)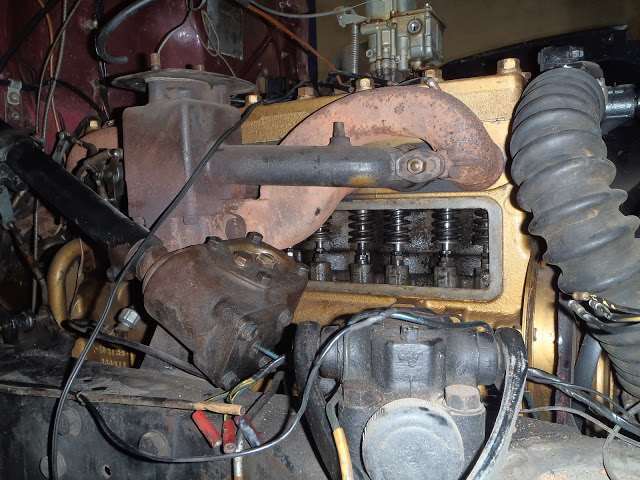 (41.79 KB) (41.79 KB)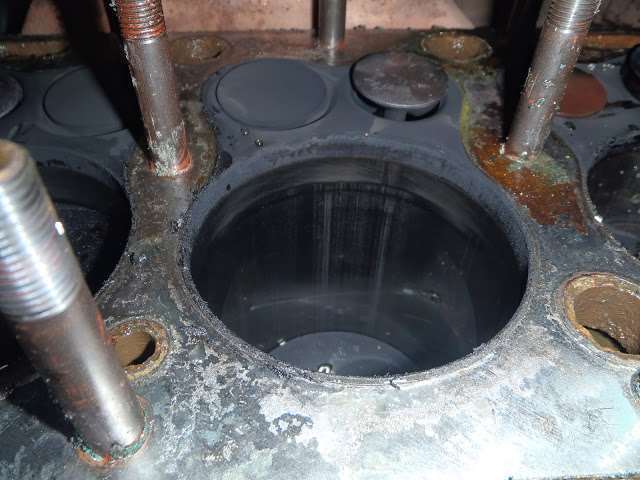 (44.17 KB) (44.17 KB)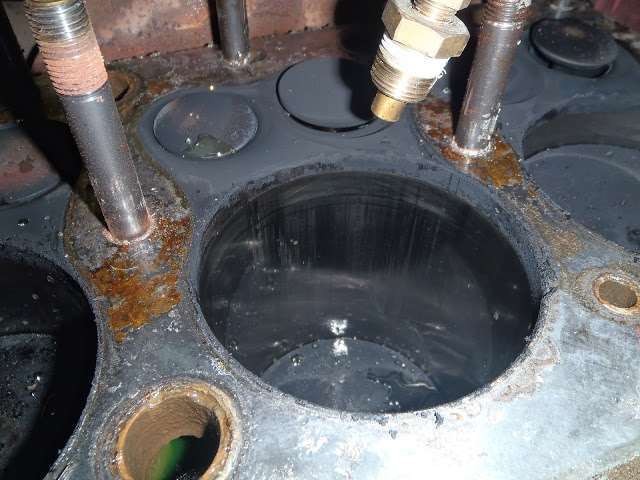 (69.09 KB) (69.09 KB)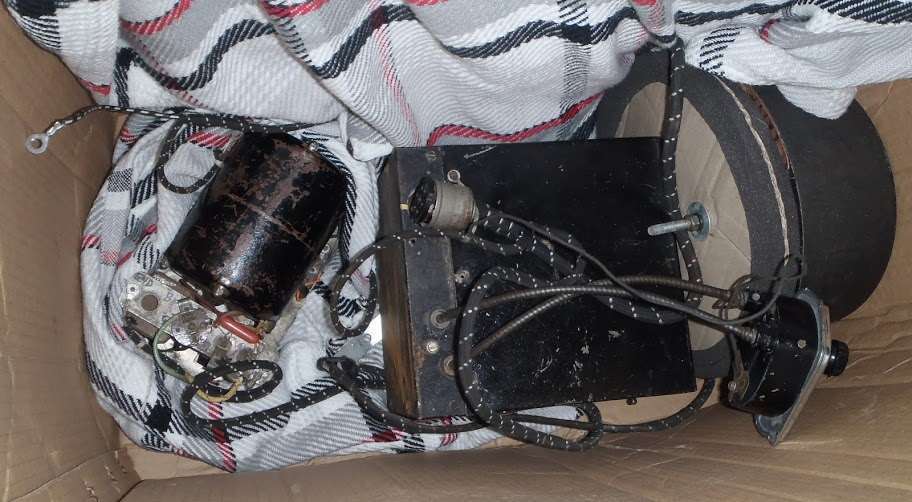 (29.66 KB) (29.66 KB)
Posted on: 2013/2/7 0:33
|
|||
|
Mal
/o[]o\ ==== Bowral, Southern Highlands of NSW, Australia "Out of chaos comes order" - Nietzsche. 1938 Eight Touring Sedan - SOLD 1941 One-Twenty Club Coupe - SOLD 1948 Super Eight Limo, chassis RHD - SOLD 1950 Eight Touring Sedan - SOLD What's this? Put your Packard in the Packard Vehicle Registry! Here's how! Any questions - PM or email me at ozstatman@gmail.com |
||||
|
||||
|
Re: Wade's Workshop
|
||||
|---|---|---|---|---|
|
Forum Ambassador
|
Peter, now you tell us!

Posted on: 2013/2/7 2:47
|
|||
|
Mal
/o[]o\ ==== Bowral, Southern Highlands of NSW, Australia "Out of chaos comes order" - Nietzsche. 1938 Eight Touring Sedan - SOLD 1941 One-Twenty Club Coupe - SOLD 1948 Super Eight Limo, chassis RHD - SOLD 1950 Eight Touring Sedan - SOLD What's this? Put your Packard in the Packard Vehicle Registry! Here's how! Any questions - PM or email me at ozstatman@gmail.com |
||||
|
||||
|
Re: Wade's Workshop
|
||||
|---|---|---|---|---|
|
Home away from home
|
Actually, I always wondered how hard it would be to remove that inner panel through the engine bay.......now that I know...I am not going to try it. Wade has so much more patience than myself....I would probably have cut the @!!!$5#ing inner panel in half with a disc grinder and tech screwed or Mig welded it back together during re-assembly. PT
Posted on: 2013/2/7 6:11
|
|||
|
I like people, Packards and old motorbikes
|
||||
|
||||
|
Re: Wade's Workshop
|
||||
|---|---|---|---|---|
|
Home away from home
|
Hi all especially Mal, With regard to the marks in # 5 bore, they are not really scores, they are merely the equivalent of wrinkles on a pensioner. Those marks caused by hard carbon particles displaced from the head/piston would not be very significant in loss of compression etc and would have less effect than a piston ring gap. Valve sealing would be the main culprit and anything over 80 PSI on an all plugs out compression test for an ageing Packard 39 Six would be quite adequate for normal driving and 70 mph performance. It is after all a 70 year old 4 litre motor and does not need the perfect lungs of a 5 year old 2 litre motor to perform adequately. Packard was generous in motor capacity and I am always amazed at how well my 1927/28 533 runs at 50 mph pulling bike trailers, with 4.85 to 1 compression ratio. Most pensioners after a decent curry and onion mix could fart with more compression than that old girl. PT
Posted on: 2013/2/7 6:31
|
|||
|
I like people, Packards and old motorbikes
|
||||
|
||||
|
Re: Wade's Workshop
|
||||
|---|---|---|---|---|
|
Forum Ambassador
|
Friday 8th February 2013
Yesterday Wade had pulled the remainder of the valves. This entailed further dismantling in order to be able to use his clamp type valve spring compressor. The inlet/exhaust manifolds needed to be removed but in order to do that the steering box needs to be swung out of the way, it is after all a RHD Packard. Valves out and cleaned up Wade tells me all the seats needed refinishing. Plus all the valves were marked with a cylinder number on both the inlet and exhaust. Only trouble was they were all over the place, not resident to the cylinders specified! Valves went round to Brookers Brake Service for machining of the faces while Wade borrowed some valve seat cutting equipment to recut the seats. So, after Wade finished cleaning the block top and intake/exhaust manifold surfaces, that's what Wade did for most of the morning, re-cutting valve seats. However there are still marks/pits in the exhaust valve seats and Wade is of the opinion they are suffering from valve seat recession. He's planning on getting one of the guys from Brookers to come round to give an expert opinion. Meanwhile I was doing, what else, cleaning. Cleaned the head including the combustion chambers of carbon and also the head gasket surface. Another matter wasn't cleaning but chasing or running a tap through the head nuts, including 3 to replace the 11/16" b@$t@rds, so they can be torqued down cleanly when the time comes. Took some time to do this, after all there's only 23 of 'em. Also cleaned the intake/exhaust manifold surfaces, the tappet cover gasket surfaces and sundry various fasteners and small parts. Want to have everything ready when it's time to put it back together again. In that regard waiting on gaskets, wheel bearing seals and other parts to be able to do so. Also waiting on word about what ails the diff. Also yesterday, after the granddaughters returned home I visited with Peaches at the beauty salon, or in Packardspeak, saw my Coupe at Col's the body and paint man who is doing the touch up work on it. Progressing with panel work on most of the body, fender and door completed. Col tells me he hopes to have primer on all those areas today. Col is still to tackle the boot lid, he's going to realign it because it's slightly skewiff which is causing the chipping around the edges. Quote: Peter Packard wrote:...With regard to the marks in # 5 bore, they are not really scores, they are...marks caused by hard carbon particles displaced from the head/piston would not be very significant in loss of compression etc and would have less effect than a piston ring gap. Valve sealing would be the main culprit and anything over 80 PSI on an all plugs out compression test for an ageing Packard 39 Six would be quite adequate for normal driving and 70 mph performance...PT Good to know about the "scores". And, from what I understand, this engine was rebuilt some years ago so should be relatively healthy and not a coughing, wheezing, worn out unit. Quote: Peter Packard wrote:...Most pensioners after a decent curry and onion mix could fart with more compression than that old girl.PT Careful, I resemble that remark! Quote: Peter Packard wrote:...The side panels are more easily removed from under the guard..Try it during the assembly phase... Wade said he tried the under guard removal but without success. However we will try that route again during reassembly. Attach file: (19.85 KB)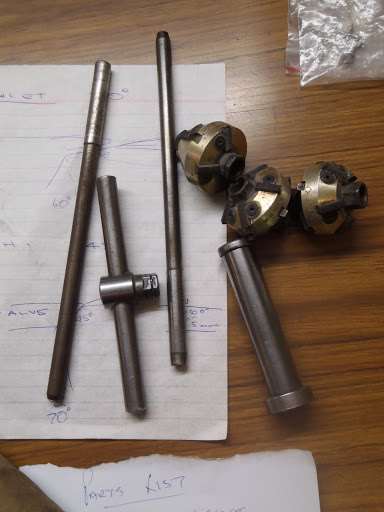 (42.36 KB) (42.36 KB)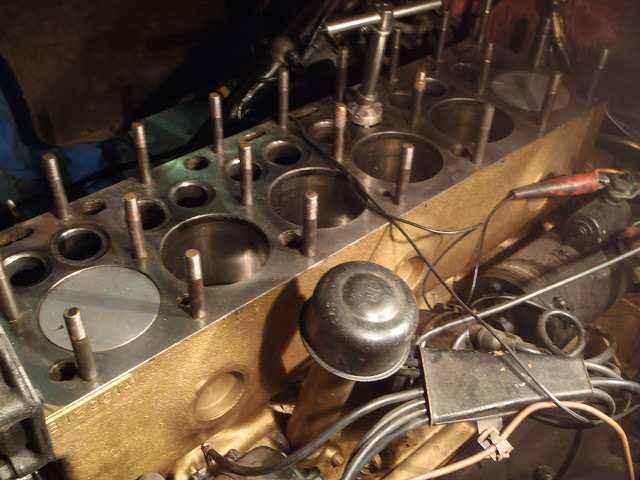 (26.97 KB) (26.97 KB) (19.47 KB) (19.47 KB)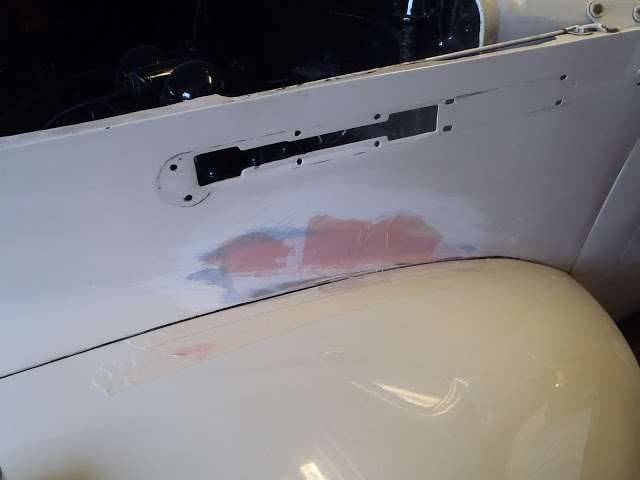
Posted on: 2013/2/8 1:22
|
|||
|
Mal
/o[]o\ ==== Bowral, Southern Highlands of NSW, Australia "Out of chaos comes order" - Nietzsche. 1938 Eight Touring Sedan - SOLD 1941 One-Twenty Club Coupe - SOLD 1948 Super Eight Limo, chassis RHD - SOLD 1950 Eight Touring Sedan - SOLD What's this? Put your Packard in the Packard Vehicle Registry! Here's how! Any questions - PM or email me at ozstatman@gmail.com |
||||
|
||||
|
Re: Wade's Workshop
|
||||
|---|---|---|---|---|
|
Home away from home
|
Hi all, The manifolds are removeable without touching the steering box. I have just replaced the manifold gaskets on my RHD 38 Six and it is tight but doable. There is no need to remove the carby and the hand throttle linkage is held out of the way with a piece of wire. PT
Posted on: 2013/2/8 5:44
|
|||
|
I like people, Packards and old motorbikes
|
||||
|
||||
|
Re: Wade's Workshop
|
||||
|---|---|---|---|---|
|
Forum Ambassador
|
Wednesday 13th February 2013
On arrival at the workshop we were met by the sight of a comfort package from Max. Package contained gaskets(head, manifold and tappet covers), master cylinder kit, thermostat and retainer and front axle seals. Wade set to work repacking front wheel bearings, installing them and the new seals in the front brake drums and re-installing them on Roy. Then attention was turned to Roy's dual action fuel pump, a rebuild kit for which had previously been sourced. The pump had a bad fuel leak and when pulled down was found to be very dirty inside, as well as outside. Also found the lip around the dome cap for the fuel pump section had a chunk missing! This might be an explanation for the leak. Fortunately, in the fuel pump "junk box", there was a replacement piece available which was pressed into service. Funny thing too, earlier in the midst of greasing bearings and installing new seals, Noel arrived bearing gifts. And what were the gifts he was bearing? Why axle seals! Noel had said a little while ago he had a number of these but didn't lay his hands on them until recently. Most were for rear axles but there were one pair for front axles. Late in the day Brendan from Brookers Brakes came round. Besides brakes they do other work and were refacing Roys valves. But......had found 2 exhaust and 1 inlet were bent! Only becoming evident when in the refacing machine and Wade was able to supply some 'good' used valves from the shelf as replacements. After leaving the workshop I called in upon my girl, Peaches, to check on her progress. I can say she's coming along nicely with bodywork done on all areas except the boot(trunk) lid which will be tackled in the next day or so. Has paint on most of the panels being worked but not all, weather here hasn't been conducive to spray painting being damp and expected to remain that way for a while. Col has done more than requested finding a number of additional areas needing work, and fixing most of them as he's gone round the car. But there have been other areas, too big for an easy fix, which Peaches will require further beauty treatment for, but that'll be be another time. I'm sure Peaches will be looking forward to her next appointment at the Beauticians! Apologies for the picture quality. Fooling around with the camera and settings and the results weren't as good as hoped. Attach file: (30.30 KB) (29.47 KB) (29.47 KB)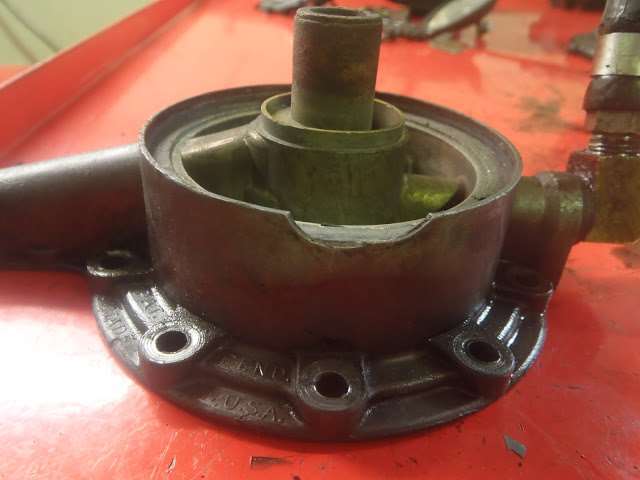 (33.15 KB) (33.15 KB)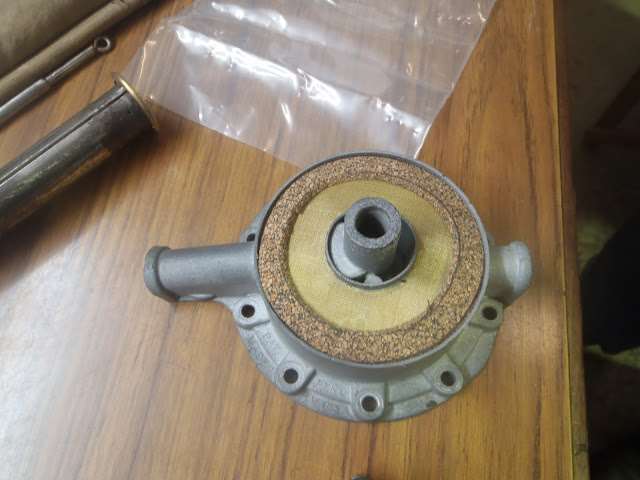 (35.30 KB) (35.30 KB)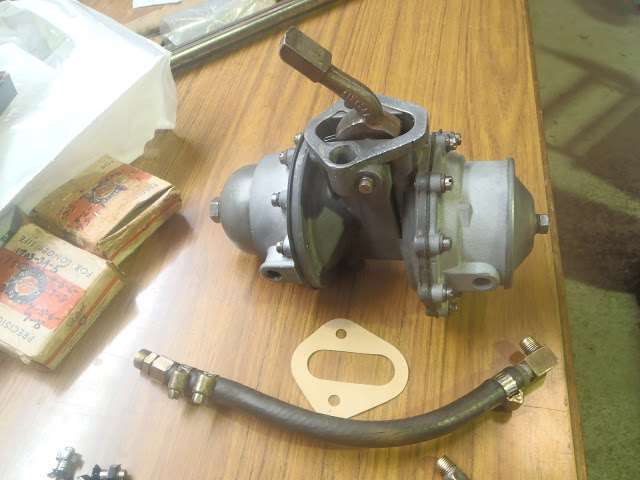 (33.12 KB) (33.12 KB)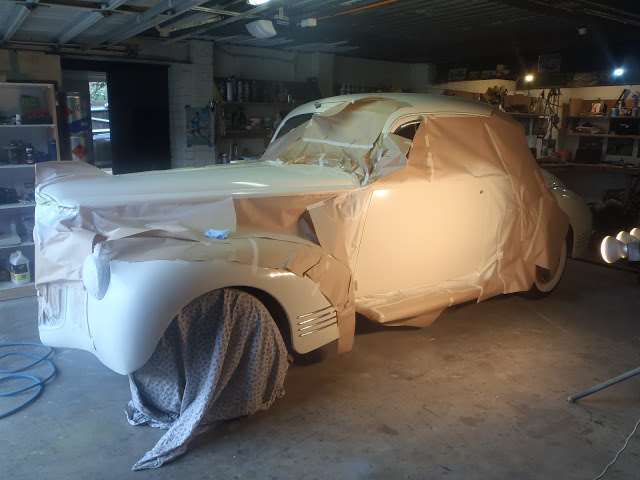 (24.43 KB) (24.43 KB)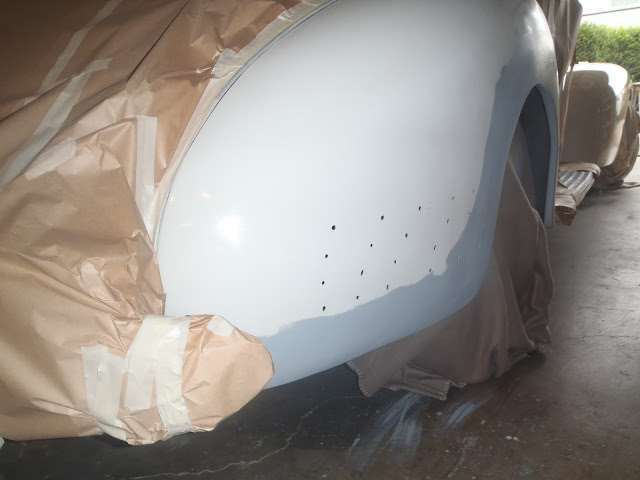 (31.11 KB) (31.11 KB) (22.98 KB) (22.98 KB)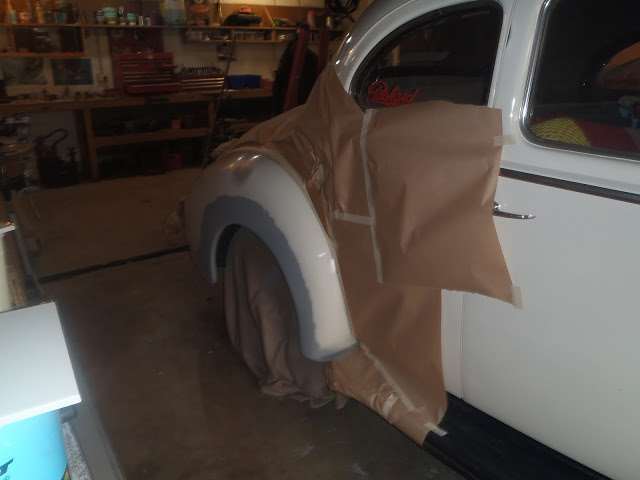 (30.54 KB) (30.54 KB) (25.90 KB) (25.90 KB) (18.57 KB) (18.57 KB) (38.99 KB) (38.99 KB) (24.37 KB) (24.37 KB) (41.36 KB) (41.36 KB)
Posted on: 2013/2/13 14:33
|
|||
|
Mal
/o[]o\ ==== Bowral, Southern Highlands of NSW, Australia "Out of chaos comes order" - Nietzsche. 1938 Eight Touring Sedan - SOLD 1941 One-Twenty Club Coupe - SOLD 1948 Super Eight Limo, chassis RHD - SOLD 1950 Eight Touring Sedan - SOLD What's this? Put your Packard in the Packard Vehicle Registry! Here's how! Any questions - PM or email me at ozstatman@gmail.com |
||||
|
||||
|
Re: Wade's Workshop
|
||||
|---|---|---|---|---|
|
Forum Ambassador
|
Friday 15th February 2013
Yesterday Wade had recut #5 & #6 exhaust valve seats following inspection by Brendan the previous day. He'd also lapped in all the valves he had in hand and did so by the cylinder numbers on their heads. That left #1 & #2 exhaust and #5 inlet valves which I found Wade in the midst of lapping in this morning. Now that ALL valves have excellent seats there shouldn't be any reason that ALL cylinders wont have good compression. Also yesterday I'd paid Peaches a further visit. The girl has some colour(color) back in her cheeks now with paint covering areas which previously were in primer. Still needs work on the boot(trunk) lid as well as a few other areas requiring paint. Brought home the filler/splash/stoneguard panels that fit between the front bumper and the body. Will fit these up to the bumper irons so the complete bumper unit can be slipped into place once Peaches returns home. There will be a short interlude before I return to the workshop on the 25th. I'll be spending time with my Dad up on the Gold Coast next week. Attach file: (47.19 KB) (37.61 KB) (37.61 KB)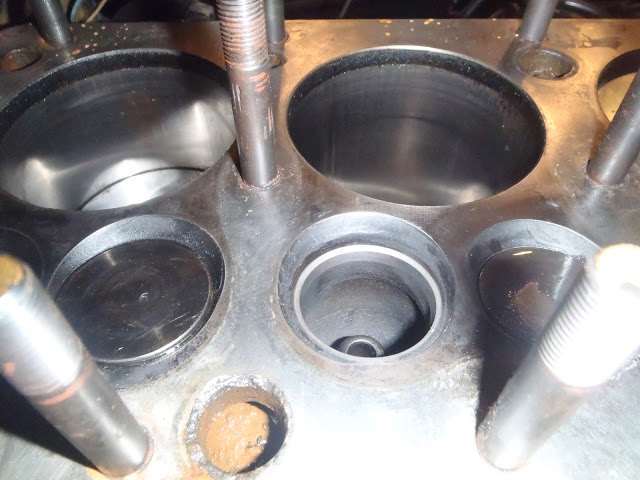 (28.12 KB) (28.12 KB)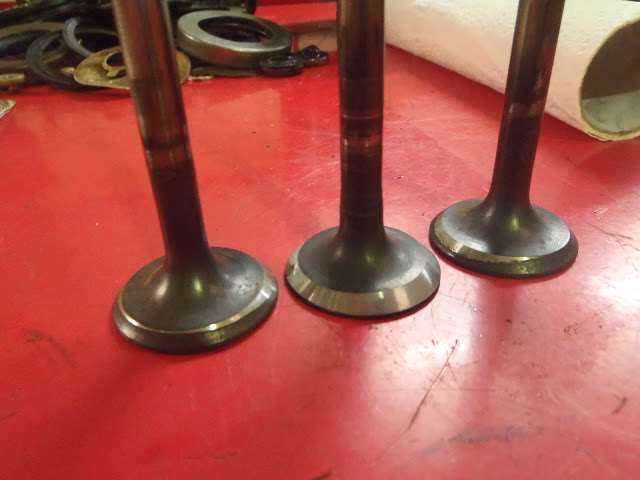 (39.44 KB) (39.44 KB)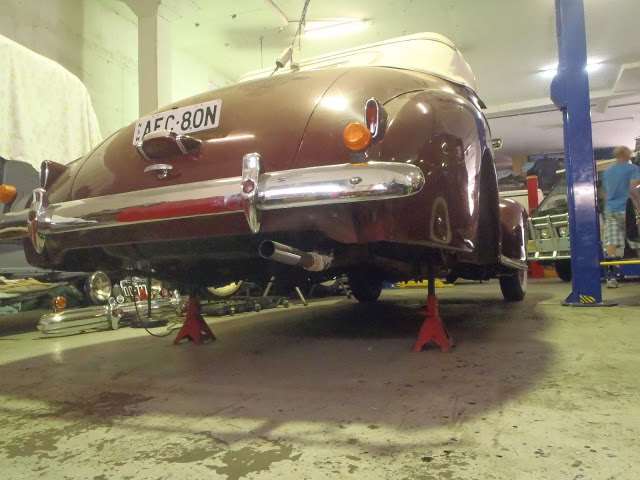 (32.56 KB) (32.56 KB) (24.35 KB) (24.35 KB) (26.55 KB) (26.55 KB)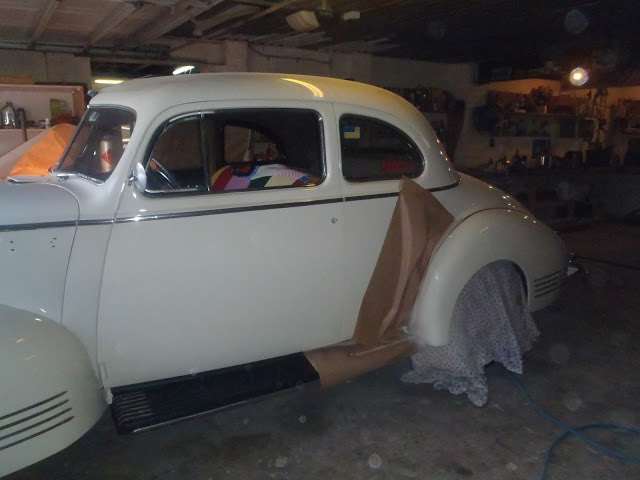 (26.76 KB) (26.76 KB)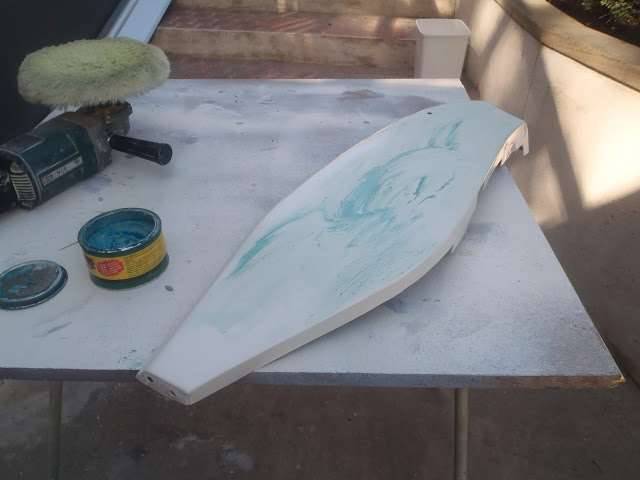 (18.93 KB) (18.93 KB)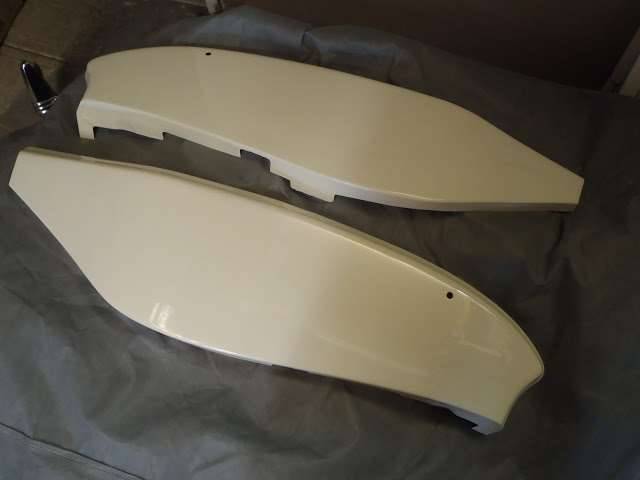
Posted on: 2013/2/15 0:59
|
|||
|
Mal
/o[]o\ ==== Bowral, Southern Highlands of NSW, Australia "Out of chaos comes order" - Nietzsche. 1938 Eight Touring Sedan - SOLD 1941 One-Twenty Club Coupe - SOLD 1948 Super Eight Limo, chassis RHD - SOLD 1950 Eight Touring Sedan - SOLD What's this? Put your Packard in the Packard Vehicle Registry! Here's how! Any questions - PM or email me at ozstatman@gmail.com |
||||
|
||||
Register To PostTopic is Locked


