|
Re: Wade's Workshop
|
||||
|---|---|---|---|---|
|
Forum Ambassador

|
Friday, 16th October 2015
Incremental progress only. Reinstalled the upper and lower radiator hoses and refilled the radiator, etc with coolant. Haven't yet put the fan or fanbelt back on, but, as a leakage test, ran the engine for a couple of minutes after the coolant was added with the temp gauge coming up to about the 1/4 mark. All looks good, so far, with no apparent leaks either coolant or oil. Will leave overnight and check again tomorrow. Attach file:  (23.68 KB) (23.68 KB)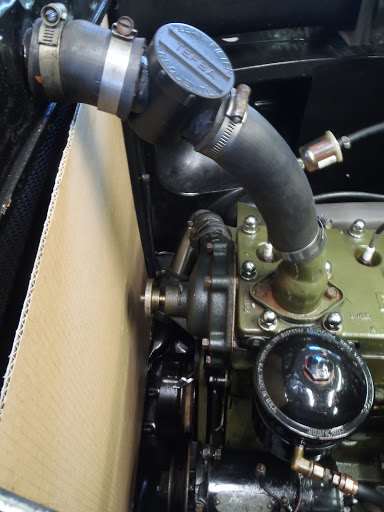 (23.31 KB) (23.31 KB)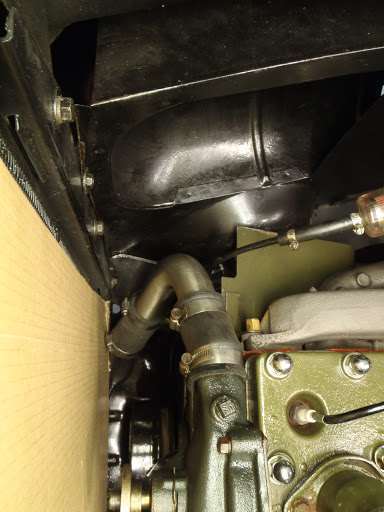
Posted on: 2015/10/15 22:17
|
|||
|
Mal
/o[]o\ ====  Bowral, Southern Highlands of NSW, Australia "Out of chaos comes order" - Nietzsche. 1938 Eight Touring Sedan - SOLD 1941 One-Twenty Club Coupe - SOLD 1948 Super Eight Limo, chassis RHD - SOLD 1950 Eight Touring Sedan - SOLD What's this?  Put your Packard in the Packard Vehicle Registry! Here's how! Any questions - PM or email me at ozstatman@gmail.com |
||||
|
||||
|
Re: Wade's Workshop
|
||||
|---|---|---|---|---|
|
Home away from home
|
Mal, looks great!
BDC, I asked the same question about two months ago. From Mal then: It's a commercially available Tefba in-line filter. http://www.tefba.com/
Posted on: 2015/10/16 9:14
|
|||
|
1937 120 1092 - Original survivor for driving and continued preservation. Project blog / Registry
1937 115 1082 - Total basket case, partial restoration, sold Hershey 2015 Project blog / Registry |
||||
|
||||
|
Re: Wade's Workshop
|
||||
|---|---|---|---|---|
|
Home away from home
|
Sounds like a dangerous device to me if you don't keep it clean.
Posted on: 2015/10/16 9:20
|
|||
|
I can explain it to you but I can't understand it for you
 Bad company corrupts good character! Farming: the art of losing money while working 100 hours a week to feed people who think you are trying to kill them |
||||
|
||||
|
Re: Wade's Workshop
|
||||
|---|---|---|---|---|
|
Forum Ambassador
|
Saturday, 17th October 2015
More progress , but not fully there yet. But, should be able to go on a test drive tomorrow. First up was a visible inspection for leaks and...... there were none, so good start. Then, once again, was back under the Coupe. First to secure a nut and bolt holding the right side lower inner mudguard(fender) rubber strip to the inner mudguard(fender). This originally would have been a fabric like material but I replaced mine with rubber strips back in 2008. Will never be judged, and if anyone is that close to be able to discern what it is they deserve a poke in the eye for their efforts! Then put the headlight loom cabling back into it's clips. Next was the fan pulley, fan and fanbelt. Last few times doing that I've used a golf tee for alignment of the pulley and fan but used something different this time, a straight plastic rawl plug. The golf tee was a little short for ease of use and in looking around found a 5mm x 37mm rawl plug to be perfect for this task, it's been added to the toolbox. Once the fan was on, the fanbelt was installed and the generator, with the commensurate tension on the fanbelt, tightened up. Then reconnected the wiring, glad I took pictures back in June when it came apart, There were only 6 wires to hook up but, for me, the pic's certainly helped. Oh oh, just remembered haven't hooked up the turn signals! Part of the problem with the wiring is that there's a ground(I think) on the side of the wiring bracket "thingie" on the left inner mudguard(fender) which bolts through to the outside of that panel. Last time had to get Kath to help in undoing this but this time managed to tighten it up on my ownsome, reaches round and pats himself on the back! Still not finished but far enough along to be able to start up and run for further testing. Ran it for over ten minutes, getting up to operating temp and again without signs of leaks. Didn't have time for more with grandkid sitting duties tonight. "Sounds like a dangerous device to me if you don't keep it clean." BDC, You're right in saying that, but it certainly catches debris which would otherwise end up clogging the radiator. Will be keeping a watchful eye on it to ensure it doesn't get clogged itself. Attach file: (41.17 KB)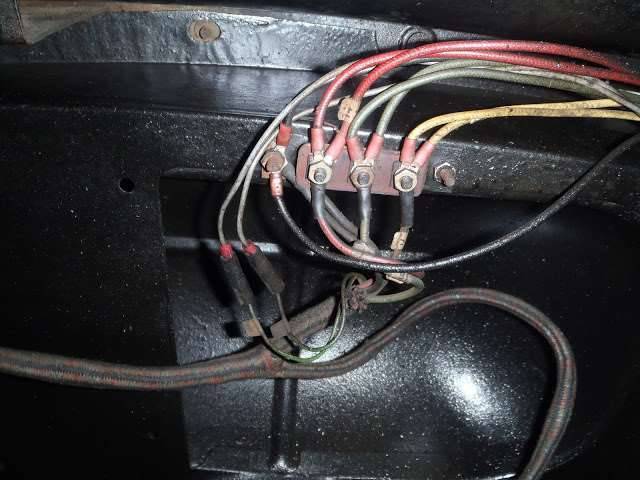 (19.31 KB) (19.31 KB)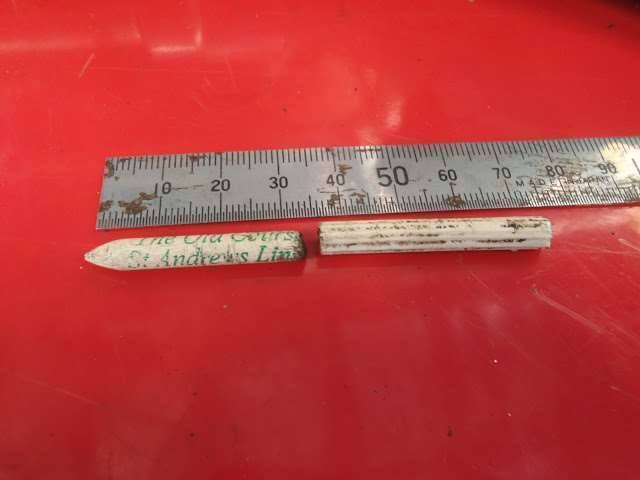 (39.18 KB) (39.18 KB)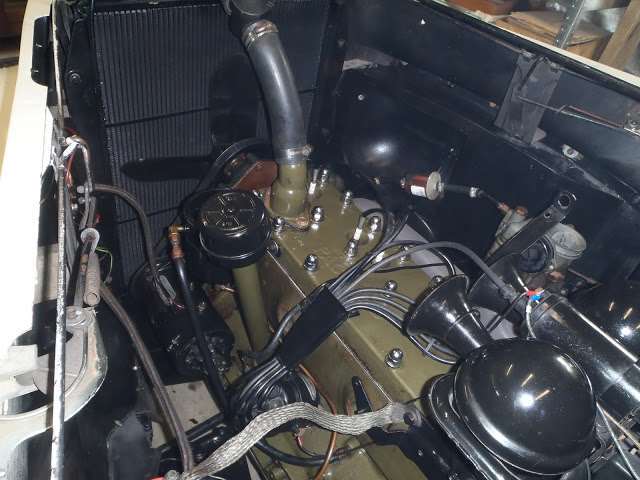 (21.21 KB) (21.21 KB)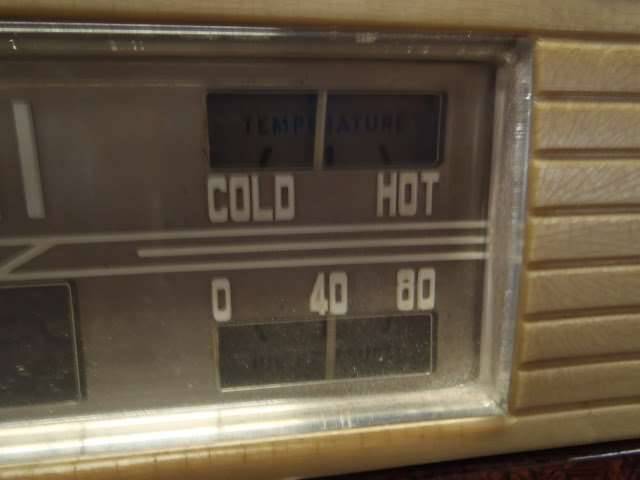 (26.22 KB) (26.22 KB)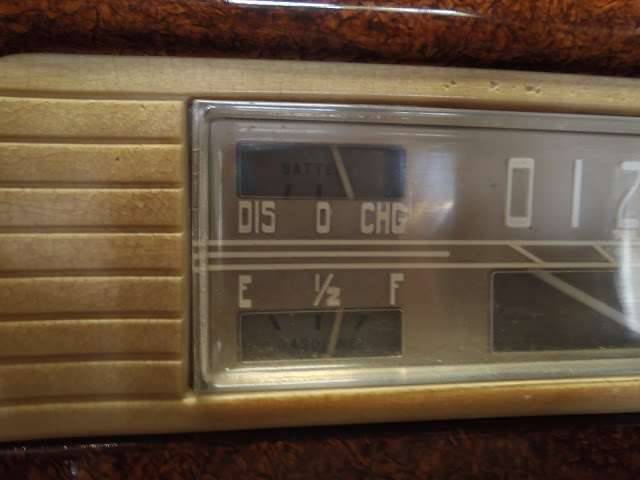
Posted on: 2015/10/16 23:46
|
|||
|
Mal
/o[]o\ ==== Bowral, Southern Highlands of NSW, Australia "Out of chaos comes order" - Nietzsche. 1938 Eight Touring Sedan - SOLD 1941 One-Twenty Club Coupe - SOLD 1948 Super Eight Limo, chassis RHD - SOLD 1950 Eight Touring Sedan - SOLD What's this? Put your Packard in the Packard Vehicle Registry! Here's how! Any questions - PM or email me at ozstatman@gmail.com |
||||
|
||||
|
Re: Wade's Workshop
|
||||
|---|---|---|---|---|
|
Home away from home
|
Looking good! Why didn't you just put the fan on before installing the radiator?
Posted on: 2015/10/17 7:13
|
|||
|
1937 120 1092 - Original survivor for driving and continued preservation. Project blog / Registry
1937 115 1082 - Total basket case, partial restoration, sold Hershey 2015 Project blog / Registry |
||||
|
||||
|
Re: Wade's Workshop
|
||||
|---|---|---|---|---|
|
Forum Ambassador
|
G'day Ken,
Doing it on my own it was "easier" to do it this way. With the '41, in taking the front clip off and putting it back on, with the new radiator in it's collar, I didn't want to take any chances I'd damage the radiator. Placed 2 layers of cardboard against the radiator as protection during the reinstall process. With the fan on, 1) there'd be very little margin for error in the clip reinstall process, and 2) I wouldn't be able to reinstall the lower radiator hose. Well maybe you could but with the tall sides of the '41's engine compartment, coupled with my decidedly unathletic body I couldn't. I know Packard mechanics, back in the day, must have done that sort of thing routinely and I salute their ability.
Posted on: 2015/10/17 17:30
|
|||
|
Mal
/o[]o\ ==== Bowral, Southern Highlands of NSW, Australia "Out of chaos comes order" - Nietzsche. 1938 Eight Touring Sedan - SOLD 1941 One-Twenty Club Coupe - SOLD 1948 Super Eight Limo, chassis RHD - SOLD 1950 Eight Touring Sedan - SOLD What's this? Put your Packard in the Packard Vehicle Registry! Here's how! Any questions - PM or email me at ozstatman@gmail.com |
||||
|
||||
|
Re: Wade's Workshop
|
||||
|---|---|---|---|---|
|
Forum Ambassador
|
Sunday, 18th October 2015
Saturday, 17th October 2015 ".....should be able to go on a test drive tomorrow" And so it came to pass, but took most of the day to be able to do so. Reinstalled the air cleaner, reinstalled the bracing bars between the radiator collar and the firewall. Then started on the front seat, Some time ago I'd pushed the front seat back and it had stuck in that position. Tried numerous times to get it to go forward again, even enlisted Wade's advice, without it moving a millimetre. I'd taken the seat bottom out at the start of this saga back in July, almost three months ago, so today took out the seat structure itself. When I did the same thing back in 2008 it wasn't easy but it was easier back then, having a somewhat younger and stronger body then helped. Now have to employ more "scientific methods" like principles of leverage to make it easier. With the seat structure out it was a perfect time to vacuum the interior, especially under the seat. Then turned to the seat structure, in particular the forward/aft movement mechanism and why it wouldn't work. It was very apparent, the rod with cog gear wheels on each end between the runners on each side had come adrift from it's proper positioning. Closer examination revealed the runner structures on both sides, housing the slots on which the cog gears run, were loose. Tightened the nuts holding the runners to the seat frame and this firmed things up considerably. Again, using leverage rather than pure brute force, got the seat structure back in the Coupe's cabin. Now came the fun part getting everything aligned so that the structure could be bolted in again. Dispensed with reconnecting the large tension spring initially left that to later in the process. Because the seat structure has a propensity to tip backwards, when not secured, had to improvise to keep it in place, or as close to in place as I could manage, started at the left front hold-down bolt. Improvisation meant using a boxed electric lawnmower as a counterweight on the right front bottom of the seat frame, boxes of different sizes and shapes behind either the driver or passenger side seat backs and a length of timber on the right side to push and hold that side back. Initially it was the boxed mower with a box behind the passengers seat while I aligned the left front seat frame, wood mounting pieces(recent thread on this subject) and the captive nut in the chassis underneath all this. Not a really difficult task, is it? Well yes it is, you can't see the holes directly so, thin screwdrivers, various pieces of wire and an allen key were co-opted for alignment assessment purposes. You'll be pleased to know this worked...........but only after 2 hours of trying! Then, after getting the bolt started and moving to the other side of the seat, to get that sides front bolt started found the bl@@dy cog geared rod had come adrift! Removed the left front bolt but, rather than take the seat structure out of the Coupe, left it in situ and found by sliding the bottom of the structure back against the back seat squab could then swing the bottom structure up to work on it, using a prop to hold it up. Moved the cog gear rod back into place on each side and started the seat reinstall all over again. My 2 hours of attempts the first time must have had some effect, I got the left front bolt in first time! But.......the cog gear rod had come adrift again, GRRRRRR!!! Repeated the previous in-car repair process but this time wedged a block of timber between the seat structure and the runner structure on both sides, there was still play allowing side to side movement of the cog gear rod. Repeated the previous reinstall and again a first time success, so it wasn't a fluke! Then installed the left rear bolt before moving the the right(passengers) side. Before starting on that side reconnected the large tensioning spring under the middle of the seat. Did that by pushing the right side forward, there was enough movement available because the left side bolts weren't tight. Still difficult but doable. Then came a fun time getting the right side back against the force of the spring. I think I narrowly avoided breaking my left thumb during one attempt when the rightside seat back tipped back and my thumb was trapped between the metal seat back bottom and the seat frame, phew. However, after a number of attempts, got things wedged, propped and with a bit of persuasion nudged everything into alignment. Both bolts were easy to insert and tighten up. Back to the left side tightened up those bolts then reinstalled the seat bottom. With the end of the working day coming to a close, moved the daily driver out of the way, started up the Coupe, backed her out and went for about a 20 minute drive. No problems, oil pressure and cooling system temperature good and no leaks on inspection on return. Attach file: (25.47 KB)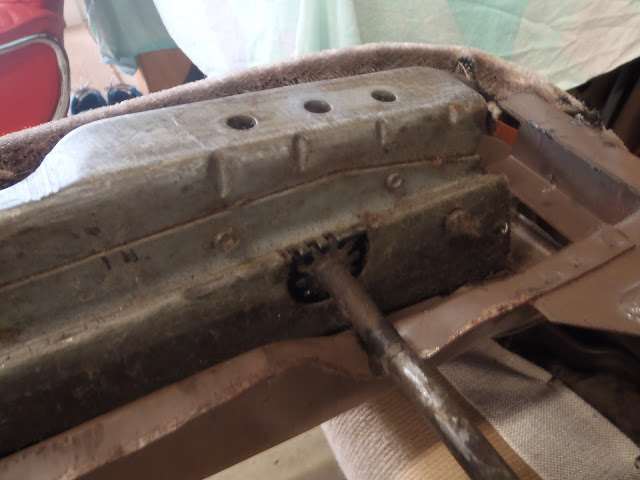 (37.86 KB) (37.86 KB)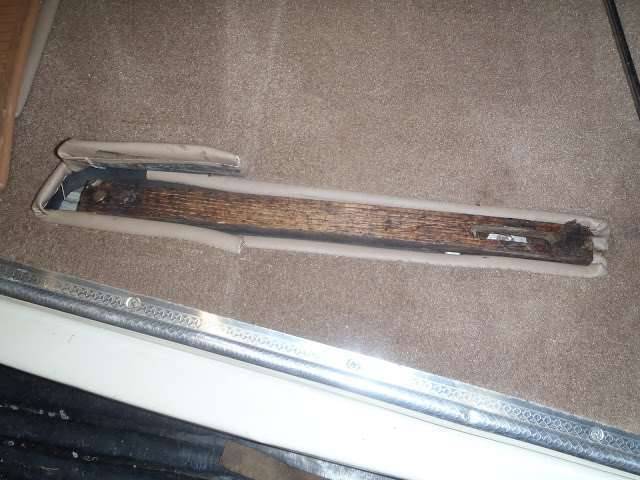 (28.18 KB) (28.18 KB)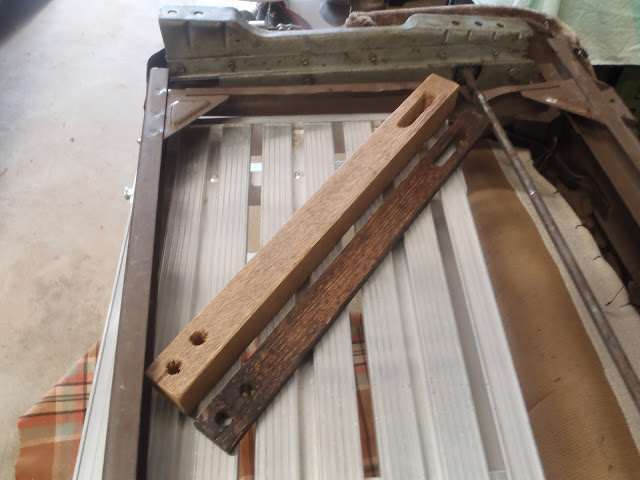 (31.10 KB) (31.10 KB)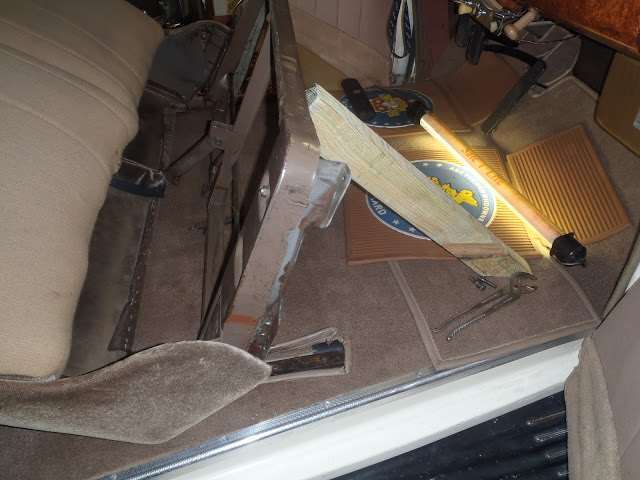 (39.73 KB) (39.73 KB) (38.63 KB) (38.63 KB)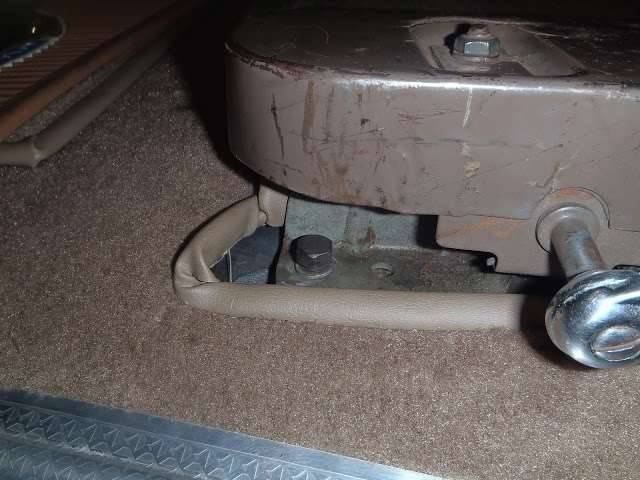 (35.70 KB) (35.70 KB) (30.30 KB) (30.30 KB) (37.58 KB) (37.58 KB)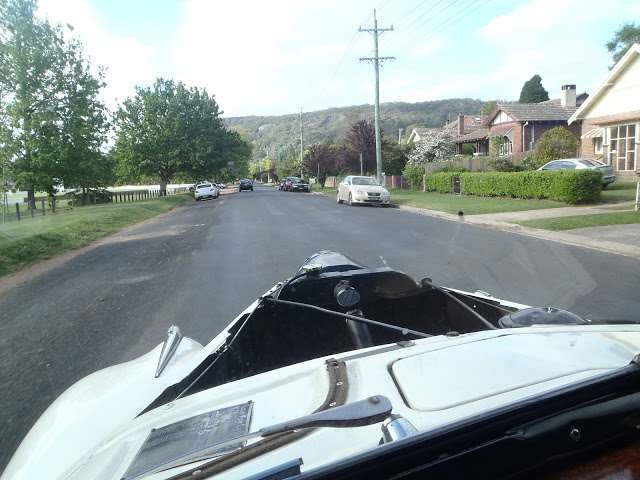 (20.46 KB) (20.46 KB)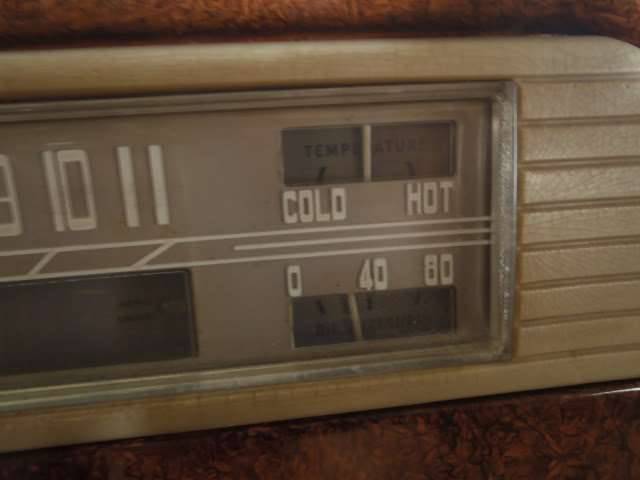
Posted on: 2015/10/18 4:41
|
|||
|
Mal
/o[]o\ ==== Bowral, Southern Highlands of NSW, Australia "Out of chaos comes order" - Nietzsche. 1938 Eight Touring Sedan - SOLD 1941 One-Twenty Club Coupe - SOLD 1948 Super Eight Limo, chassis RHD - SOLD 1950 Eight Touring Sedan - SOLD What's this? Put your Packard in the Packard Vehicle Registry! Here's how! Any questions - PM or email me at ozstatman@gmail.com |
||||
|
||||
|
Re: Wade's Workshop
|
||||
|---|---|---|---|---|
|
Forum Ambassador
|
Monday, 19th October 2015
Just a little done today. Front hub caps back on, forgot to do that yesterday! And the front bumper back on. This turned out easier than expected, a plastic milk crate being almost the perfect height to rest the bumper assembly, including bumper irons and splash shield, on. It rested there allowing me to slide under to insert and do up the left side rear bolt. Then, with some exertion, lift the bumper assembly while lying there to slot the front bolt into place. Repeated procedure on the right side and viola! the bumper is back on. But still have to connect the turn signal wires. The major job(challenge) still to be done is remounting the bonnet(hood). Although I managed to remove it myself, it was with difficulty, and I doubt if I can lift it up and reposition it myself. Have a plan figured out and hope to put that into effect tomorrow. Attach file: (35.07 KB)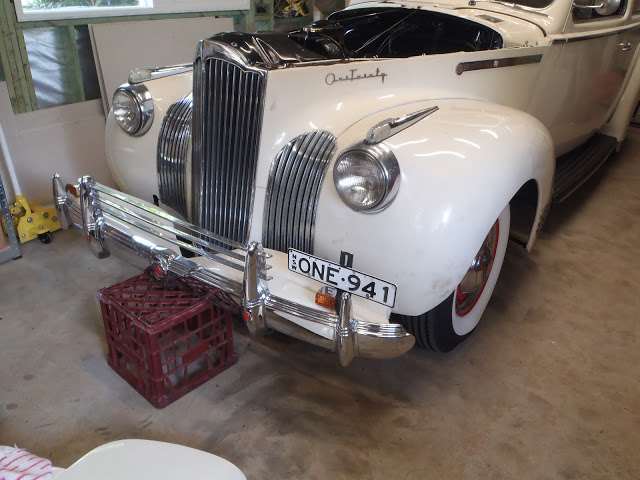 (35.82 KB) (35.82 KB) (37.57 KB) (37.57 KB)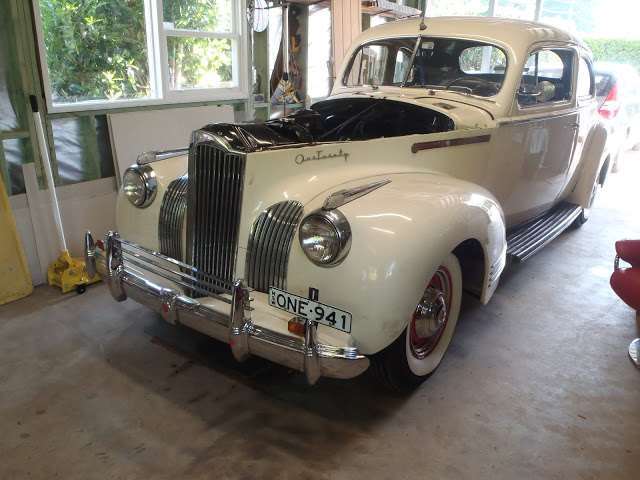
Posted on: 2015/10/19 1:36
|
|||
|
Mal
/o[]o\ ==== Bowral, Southern Highlands of NSW, Australia "Out of chaos comes order" - Nietzsche. 1938 Eight Touring Sedan - SOLD 1941 One-Twenty Club Coupe - SOLD 1948 Super Eight Limo, chassis RHD - SOLD 1950 Eight Touring Sedan - SOLD What's this? Put your Packard in the Packard Vehicle Registry! Here's how! Any questions - PM or email me at ozstatman@gmail.com |
||||
|
||||
|
Re: Wade's Workshop
|
||||
|---|---|---|---|---|
|
Home away from home
|
Well Mal,
Isn't amazing now that you've lost your offside how the brain comes up with ideas to get you out of trouble. I love the way that you've steamed in and got things fixed on your own without too many what you describe as Mal disasters. Good on yer and keep up the good work Best regards Terry
Posted on: 2015/10/19 3:20
|
|||
|
||||
Register To PostTopic is Locked


