|
Re: Mike's 53 Clipper
|
||||
|---|---|---|---|---|
|
Home away from home

|
Well, was able to do some more little things over the last weeks. A few small parts sandblasted, and por15 painted. Got the headlight buckets with the euro H4 halogen bulbs put together. Body panels are stripped, but still waiting to go for final sandblasting and primer. I'll wait until I get the 1/4 fender from Gerry at southwest packards and that is welded in. Then the rest of the body parts can go for clean and primer all at one time.
I think the next big job that I want to tackle is the wiring. I'm still on the fence about if I want to do it myself or not. Gregor gave me a 'hotrod' wire harness, so I have most of the cable that I would need. Most of the lines and connectors I am also not too worried about. But what do I do with the connector for the turn signal harness, and the light sockets? Are these 'point crimp connecters' available? I'll take a look at the suppliers in germany, hope I don't have to get these from the US or make my own. Have an inquiry to potomac about a complete harness, will see what they say, but I may do it myself since shipping and import taxes would add another 30% at least onto the price.... Also, what about the terminals ending on the little bulbs for the dashboard lights? Just solder a 'button' on the end of the wire? That is what the original looked like to me.
Posted on: 2014/2/23 14:55
|
|||
|
1953 Clipper Delux Club Sedan, 1953 Caribbean, 1969 912, 1990 Miata
|
||||
|
||||
|
Re: Mike's 53 Clipper
|
||||
|---|---|---|---|---|
|
Home away from home

|
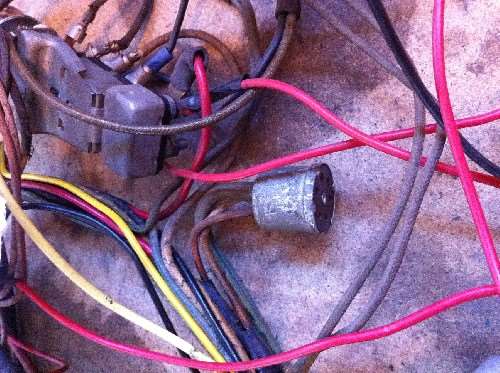
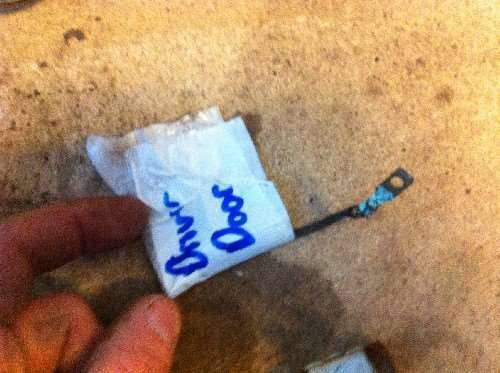
Is this a "GM Wade" connector? This one is from the door courtesy light switch, but this terminal style seems to be used often for the turn signals, fuel gauge and a few other places. If I do the harness myself I would at least like to retain as many original type connectors as possible.
Posted on: 2014/2/23 15:24
|
|||
|
1953 Clipper Delux Club Sedan, 1953 Caribbean, 1969 912, 1990 Miata
|
||||
|
||||
|
Re: Mike's 53 Clipper
|
||||
|---|---|---|---|---|
|
Home away from home

|
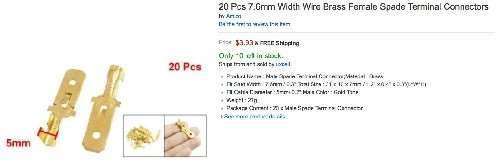
Next question, anybody know if the 'small brass button' is what one uses in the light sockets? This screen shot is from RI wire.
Attach file:  (22.26 KB) (22.26 KB)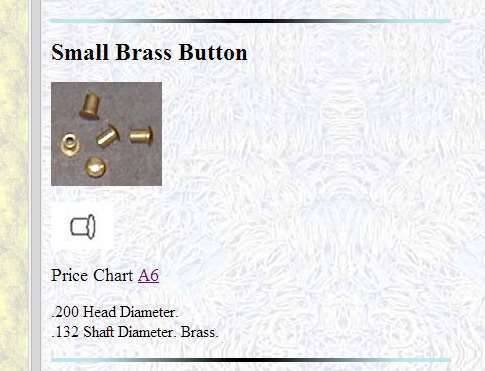
Posted on: 2014/2/23 15:35
|
|||
|
1953 Clipper Delux Club Sedan, 1953 Caribbean, 1969 912, 1990 Miata
|
||||
|
||||
|
Re: Mike's 53 Clipper
|
||||
|---|---|---|---|---|
|
Home away from home

|
I did not check if you are, but if you are keeping 6v, make sure the "hot rod" harness is the heavier gauge wire. For the connector for the turn signals, I just cut and spliced into the old wires. My connector was in good shape so easy to reuse. I also reused my sockets by cutting the wire by the socket, but leaving enough to connect and cover with heat shrink tubing. My sockets and "button" cleaned up easily with steel wool.
Posted on: 2014/2/24 21:30
|
|||
|
[url=h
|
||||
|
||||
|
Re: Mike's 53 Clipper
|
||||
|---|---|---|---|---|
|
Home away from home

|
The car has been 12v for many years, so I'm going to stay with that. Also makes The harness easier to handle with smaller wires. On my way to St Petersburg for work. Yikes! First time in Russia. Will keep my eyes open for zis and zil! With your guys advice, making The harness doesn't seem too daunting. -Mike
Posted on: 2014/2/25 1:50
|
|||
|
1953 Clipper Delux Club Sedan, 1953 Caribbean, 1969 912, 1990 Miata
|
||||
|
||||
|
Re: Mike's 53 Clipper
|
||||
|---|---|---|---|---|
|
Home away from home
|
If you want to replace the wiring into the turn signal plug there are four small metal tabs that you can carefully 'unbend' to release the phenolic cover. Then 're-bend them when you're finished.
I made a complete wiring harness for my '51 and have covered some of the points on my project blog at Larry51's Project Blog If you make a 'former' from a long length (14 feet) of PVC pipe split in half (2 inch diameter is ok) you can lay the wires into it, lace them temporarily (with cable ties) and that helps a lot. Restoration Specialties and YnZ Yesterday Parts have a lot of suitable replacement items like the correct rubber (non-sticky) wrapping tape and 'friction tape' same as originally used. It was fairly time-consuming even though I had the old harness to use as a model. But very satisfying and you can save a lot of moolah doing it yourself. I will say though that the price that suppliers of new harnesses charge isn't unreasonable, given the time it takes and the cost of cloth-covered wire, terminals, etc etc!
Posted on: 2014/3/1 7:34
|
|||
|
1951 Packard Club Sedan | [url=ht
|
||||
|
||||
|
Re: Mike's 53 Clipper
|
||||
|---|---|---|---|---|
|
Home away from home

|
Thanks for the advice so far. I printed the wire diagram on some large paper, and started making a shopping list of what terminals I will need for the job. I'll be in the garage tomorrow evening, and can open the blinker main connector to see what is in there. Using the right tape I understand is also important. Larry, I read that entry of your blog back when you first wrote it. This will also allow me to integrate my extra wires for 4way flasher, extra fuses and german headlamp circuits into the harness so that they don't look like the 'add ons' that they were before.
Posted on: 2014/3/4 15:12
|
|||
|
1953 Clipper Delux Club Sedan, 1953 Caribbean, 1969 912, 1990 Miata
|
||||
|
||||
|
Re: Mike's 53 Clipper
|
||||
|---|---|---|---|---|
|
Home away from home

|
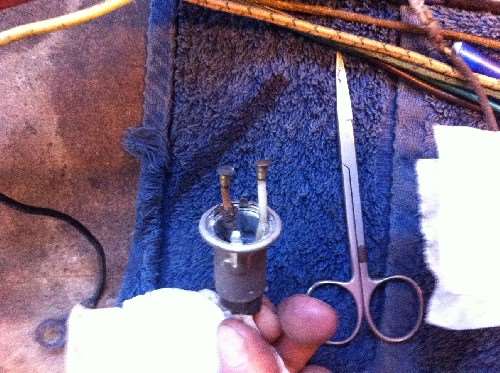
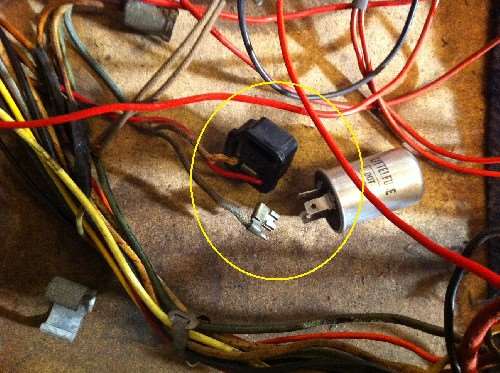
OK, made my list of the connectors I will be needing, and came to a total of about 40bucks from RI wire. The two things that I do not know if I can get new are the terminals for the flasher base and the round connector for the turn signals. See the picture for the flasher base terminals. Anybody have a source for these?
I would also like to get a new "round cinch 1 inch diameter 6 pole female connector" for the connector that attaches turn signals to the steering column. I opened mine up, and the wires are crimped and soldered on there. If I can get a new one, I think it will be cleaner than taking apart the old one and re-using. One more question, is there a trick to pulling wires out of the wade connectors? Some come out easily, and others the terminal is stuck in there so good. When I got the terminal out, the two little spring/contacts in the connector also came out. grrr.
Posted on: 2014/3/6 7:09
|
|||
|
1953 Clipper Delux Club Sedan, 1953 Caribbean, 1969 912, 1990 Miata
|
||||
|
||||
|
Re: Mike's 53 Clipper
|
||||
|---|---|---|---|---|
|
Forum Ambassador
|
It won't look quite the same but you might try an ordinary 3 wire sealed beam headlight socket. A 3 tab aftermarket flasher that looks like yours plugs into a replacement headlight socket without problems. If your headlight sockets are accessible, take the flasher and see if your flasher will plug in. If so then those sockets should be available many places.
The round connector is another story. I don't know of any readily available replacements offhand. If there is a brand name on the plug, possibly something could be found but they don't resemble available Amphenol or Leslie connectors. If your old socket has removable terminals, wonder if common non insulated bullet style male/female terminals could be substituted. Those come in two or three different diameters.
Posted on: 2014/3/6 10:36
|
|||
|
Howard
|
||||
|
||||

