|
Re: Mal's '41 120 Coupe
|
||||
|---|---|---|---|---|
|
Forum Ambassador
|
September 23rd 2008
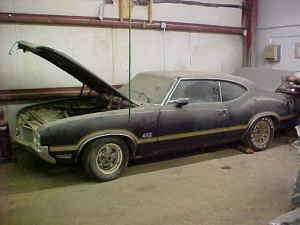
While browsing the AACA Forum found the following post "Hi, I am posting this, and hope that I am doing this right. My father, who is ill, (but don't tell him I told you so), and has now lost his job. (but don't tell him I told you that either), is now selling all his antique cars. He does not have a computer, and posted this car on craigs list. If anyone is interested in it please contact him. 1970 Oldsmoblie 442 W-30 Selling to the highest bidder Middleton, Idaho Randy Day 1-208-585-2159 He is the original owner to the car. The sight on Craig's list is:boise.craigslist.org/cto/847356544.html If you can not pull it up, just go to craigslist Idaho, boise, and type in 1970 olds. Thanks for looking! Cathy" The guy selling the Olds 442 is the guy I bought my Coupe from. I've responded to the post and will call Randy tomorrow morning Sydney time when the Planets, as well as time differences, are better aligned. Below are some extracts from my original entry starting this Blog. Quote:
Posted on: 2008/9/23 7:06
|
|||
|
Mal
/o[]o\ ====  Bowral, Southern Highlands of NSW, Australia "Out of chaos comes order" - Nietzsche. 1938 Eight Touring Sedan - SOLD 1941 One-Twenty Club Coupe - SOLD 1948 Super Eight Limo, chassis RHD - SOLD 1950 Eight Touring Sedan - SOLD What's this?  Put your Packard in the Packard Vehicle Registry! Here's how! Any questions - PM or email me at ozstatman@gmail.com |
||||
|
||||
|
Re: Mal's '41 120 Coupe
|
||||
|---|---|---|---|---|
|
Forum Ambassador
|
Wednesday 24th September 2008
Quote:
Rang Randy this morning, Wednesday @ 6:00am Sydney time, probably about mid afternoon Tuesday, Middleton Idaho time. Had a good talk with Randy who's just retired because the RV manufacturer he worked for is going bust. He's selling up his old cars and he's also going to forward the horn wire for the Coupe now that I've been able to give him my Address as he'd lost my contact details. It was good to hear his voice and recall the memories of my time in Idaho last year.
Posted on: 2008/9/23 16:00
|
|||
|
Mal
/o[]o\ ====  Bowral, Southern Highlands of NSW, Australia "Out of chaos comes order" - Nietzsche. 1938 Eight Touring Sedan - SOLD 1941 One-Twenty Club Coupe - SOLD 1948 Super Eight Limo, chassis RHD - SOLD 1950 Eight Touring Sedan - SOLD What's this?  Put your Packard in the Packard Vehicle Registry! Here's how! Any questions - PM or email me at ozstatman@gmail.com |
||||
|
||||
|
Re: Mal's '41 120 Coupe
|
||||
|---|---|---|---|---|
|
Forum Ambassador
|
Friday 26th September 2008
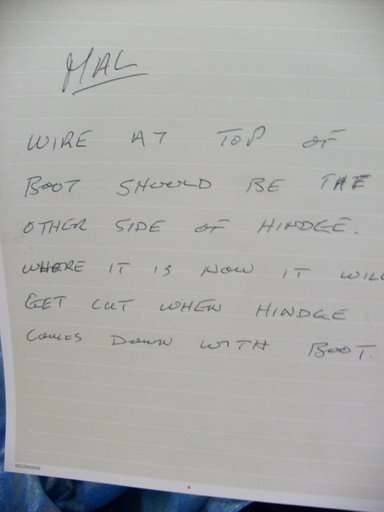
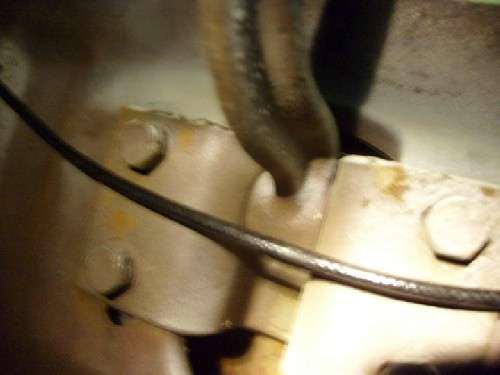
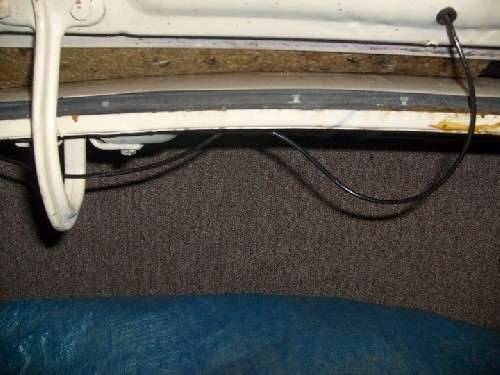
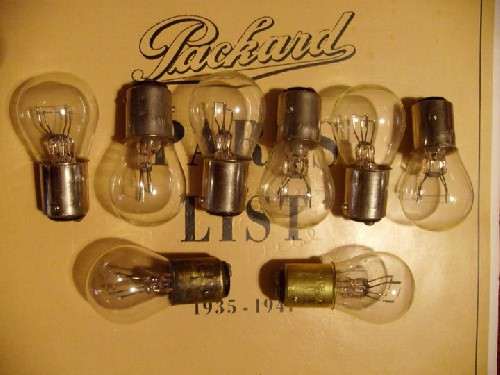
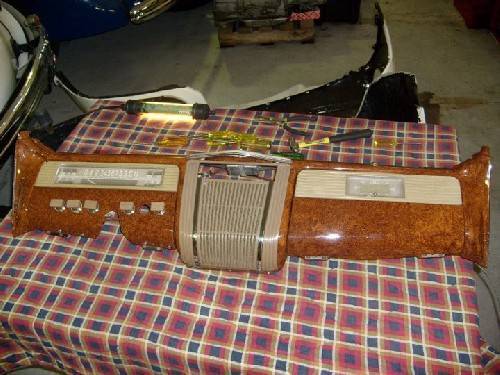
First time back to the workshop since Wade left, and it's funny, since Wade's been gone a number of other matters have popped up which would have prevented me going there anyway. Wade told me before going that he left a note hanging from the number plate light wire pointing out the error of my ways with it. The way I ran the wire it would have been severed by the trunk hinge when the trunk was closed! So hooked up the old wire to the new and dragged it through the trunk skin, then unhooked it and repositioned the new wire so it ran forward of the trunk hinge. Reconnected both wires and dragged the new one back through only to find I'd dragged the rubber grommet into the trunk lid skin space. This necessitated doing the whole procedure over again as well as installing a new rubber grommet. Next was installing the re-chromed stop/taillight bezels and glass lenses. First though I had to find the missing stop/taillight bulb and found this with the parts for the front fender lights which use the same bulb. But one bulb had a broken filament, so I needed a new one anyway. Then started on the right side light only to find the glass lens "rattled" inside the bezel and that the gasket I made for that side wasn't thick enough. So Made By Mal Industries sprung into action again and another gasket, using the MBM original as a pattern, was cut from thicker rubber. And again, Steele's need fear not. The left taillight also rattled, so swapped the glass lenses from one side to the other and eliminated that problem. On the way home detoured to Metrolpolatan Motor Cycle Spares and picked up 1/2 dozen 6V dual filament stop/taillight bulbs to suit. During the week I'd had a call from John about whether the trans for his '39 110 Sedan had arrived. It hasn't, and as the last time I spoke to the shipper was 4 weeks ago, sent an email today enquiring as to it's estimated time of arrival. I'd also had an email from Baz, the President of the Packard Club here, enquiring about the dash re-woodgraining as he'd heard it on the grapevine (Sounds like a 60's song I hear you say). So emailed Baz the Dash pictures Id taken.
Posted on: 2008/9/25 23:48
|
|||
|
Mal
/o[]o\ ====  Bowral, Southern Highlands of NSW, Australia "Out of chaos comes order" - Nietzsche. 1938 Eight Touring Sedan - SOLD 1941 One-Twenty Club Coupe - SOLD 1948 Super Eight Limo, chassis RHD - SOLD 1950 Eight Touring Sedan - SOLD What's this?  Put your Packard in the Packard Vehicle Registry! Here's how! Any questions - PM or email me at ozstatman@gmail.com |
||||
|
||||
|
Re: Mal's '41 120 Coupe
|
||||
|---|---|---|---|---|
|
Forum Ambassador
|
Monday 3rd November 2008
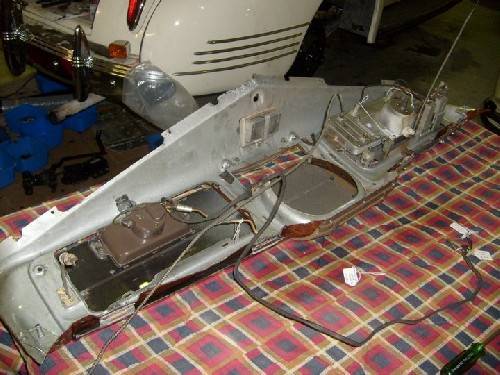
I'm back, but more importantly Wade's back, it's certainly been a while as Wade left mid September and it's now the beginning of November. Was told yesterday by some people that they missed the almost daily updates on the '41's progress and the various matters that I linked in with it. Can't believe anyone wants to share my ego trip but if that's to be, then so be it. A brief update of some recent happenings. The gearbox for John's '39 110 arrived in Newcastle last week and is ready to be picked up. The plan is that Barry Smith from Tamworth is coming to Sydney in the near future and has some stuff of his own to collect from the shipper so will deliver it to Wade then. And I bought a 3 speed gearbox and tailshaft for the '38 Eight from Harvey for AU$120.00, about US$80.00 at current exchange rates. But, back to the chase! Arrived at the workshop to find that Rick has lost 20kg, about 44lbs, now looks like a racing greyhound. The weight loss was so he do a parachute jump while they were on the Gold Coast for the Indy car race there a couple of weeks ago. But on the nominated day of the jump it was too windy and they couldn't do it, so another day is being planned for the jump do it it at Camden instead. John was his bright cheerful self and the menagerie of Misty the dog and Charlie the sulphur crested Cockatoo were in their usual fine form. After a discussion about Hershey, Packards and other related matters it was into Kevin's '35. Wade had rebuilt the carburettor and fuel pump on the '35 last week and had also pulled the sideplate off the engine and was now ready to re-install it. This followed from before he left, when re-filling the '35 with water, a leak from the sideplate was observed. The leak is now fixed, but a new gasket for the sideplate was required which I helped to install. The theory being to finish Kevin's car then be able to concentrate on the '41 until the gearbox for the '39 arrives. Wade will return to Kevin's '35 tomorrow and aims to start it up if all goes to plan. After re-installing the sideplate we turned to the '41 and at Wade's suggestion started re-assembling the dash. Went along fairly smoothly, a few little hiccups here and there because of parts not being labeled during disassembly, disassembly being 10 months ago and the affects of "old-timers" disease on yours truely. All up not a very helpful combination. Anyway in spite of these the dash came together well, helped in a large part by Wade's methodical and reasoned approach to the task. Along the way had to shorten some bolts because the originals were missing from the dash when it was disassembled and clean the dash plastic inserts. The cleaning of the dash plastic was accomplished by using toothpaste and a toothbrush and drying afterwards with compressed air. Also cleaned the clear face of the instrument panel and now it is clear! Surprising what a little soap and water can accomplish.
Posted on: 2008/11/3 3:02
|
|||
|
Mal
/o[]o\ ====  Bowral, Southern Highlands of NSW, Australia "Out of chaos comes order" - Nietzsche. 1938 Eight Touring Sedan - SOLD 1941 One-Twenty Club Coupe - SOLD 1948 Super Eight Limo, chassis RHD - SOLD 1950 Eight Touring Sedan - SOLD What's this?  Put your Packard in the Packard Vehicle Registry! Here's how! Any questions - PM or email me at ozstatman@gmail.com |
||||
|
||||
|
Re: Mal's '41 120 Coupe
|
||||
|---|---|---|---|---|
|
Forum Ambassador
|
Wednesday 5th November 2008
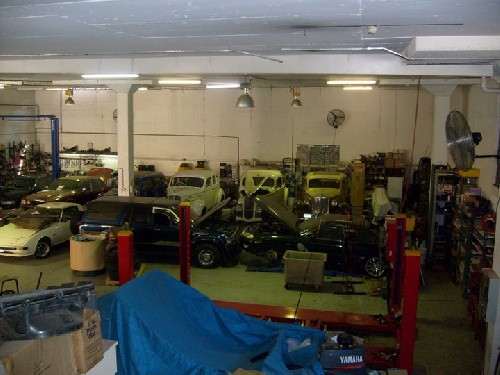
Arrived at the workshop to find Wade working on Kevin's '35. Yesterday he had the '35 running but couldn't get the idle speed down by adjusting the mixture screws so was now trying to troubleshoot it. Took the carburettor off, then on the bench took the top off the carb. Thought the float level might be too high, although he set it as per spec, so proceeded to reset it lower. Put the carb body back on the '35, connected up the fuel line and throttle linkage and started it up. Although Wade said, while doing this, that the car would run without the top on the carb I wasn't that inclined to believe him. But as he said, it started and ran, and ran well. Smoothly although there is a miss which Wade thinks is points needing cleaning and richly because the mixture adjustment is out of whack, But best of all silently, with good oil pressure, and no noises or dramas following the rebuild. Next thing Wade will look at is the Economiser Valve in the carb which can be an area of concern apparently. Next turned to the '41 and commenced to install some bigger rubber bumpstops for the glove box door. I'd bought some bumpstops yesterday from Grippy Rubber to replace the small ones inserted on Monday. But the new ones although stopping the metal-to-metal contact between door and dash didn't take up all the slack. Instead I need to find out whether the glove box lock assembly is "correct " or not and I strongly suspect it is either not correct or has been modified. It doesn't have a catch part(like a hook) at the end of the tongue just a small slot that corresponds with the thickness of the catch bar mounted on the clock. Then on to attaching the wires from the new harness to the instruments and switches on the dash. Used the wiring diagram in the '41 manual together with the accompanying coded wire listing as well as a few rough diagrams of our own from the dis-assembly stage and with reference to the old harness which was returned with the new one as the old harness had been tagged during dis-assembly with descriptions rather than numbers. Along the way tested various dash light bulbs where there were bulbs, and the ammeter to determine which terminal was which because it wasn't marked. During the course of this Kevin arrived with the 2 gas tanks for his Daimler V12 which John is getting into running order. The gas tanks were full of crap so Kevin had had them cleaned, internally and externally, and lined and painted with POR-15 products. And don't they look good. So much so that John's talking about getting the tank for his Mazda RX7 done by the same people. Wade was able to bring Kevin up to date on the '35 and also started it up, without the top on the carb, so Kevin could see and hear it running. Suffice to say he was impressed with how smoothly and silently it was now to how it had been previously. Kevin had also brought over Robert Neal's book Packards at Speed for Wade to read, a very impressive tome. After Kevin left returned to the dash and finished connecting all the wires that could be done so up to that point. However Wade was worried there was a terminal on the instrument light switch which didn't have anything connected to it. So after re-reading the wiring diagram and wire listing it seemed we were missing the map light connection. And funny it turned out to be this as we'd been puzzling over the small fitting, shade and wire which we couldn't remember what it was for. Turned out to be the map light, but where did it go? No illustrations so turned to the dash and after turning it over worked out it fits under the brow of the top plastic dash piece. But before installing it had to rebuild it because although the bulb tested OK by itself, when in its fitting it didn't work. Turned out to be a bad contact between the bulb housing and the piece it clips into to be screwed into place on the dash. Fixed that and also replaced the wire which had also seen better days. Turned to the interior of the car, mainly the dash area which still had some wires in place, mostly for the interior light and the courtesy lights. First the interior light, hooked it up, didn't work. Tested the bulb, it works! Released the switch from the right side B pillar but left it connected and by-passed it, the light works! Disconnected the switch from the wiring, which was held to the terminals by looping the wires, no connectors. Tested the switch on the bench, didn't work. Cleaned the switch including a good dose of Rick's Magic Electronic Spray Cleaner and......it works! Wade crimped new connectors to the wires then it was my turn to get involved. Now, trying to hold, position connectors and tighten up tiny screws is no fun let me tell you. And in spite of myself I managed it, but not before dropping about 4 screws, changing my own position twice and the liberal use of "magic words" in an exasperating situation. Second was the courtesy lights and these are activated by switches in each A pillar. The courtesy lights themselves were located under the lower corners of the dash. Testing them in situ produced the usual result, nothing. I had some expectations here because one, the right side, was working when I got the car. Testing each separately brought the same result, although it was apparent why the left side wasn't working, with only one wire connected and not two. So off to the bench with the switches and lights. Here the main drama was dis-assembling the glass and bezel from the body of the light. There appeared to be three tabs at the back of the bezel needing to be straightened to release the glass. Not to be, although Wade managed to lever up one tab the rest remained defiant. Then in a stroke of genius Wade pulled at the Bezel/glass and it released from the body. A 'click' fit, easy when you know but otherwise difficult to determine. Found the one globe was a dud, the left one while the other tested OK. Then cleaned the muck around the switches and the contacts, but still unresponsive. But, after a very good dose of Rick's Magic Electronic Spray Cleaner and......they both work! Replaced the switches in the A pillars but held off on the courtesy lights. With the kick panels removed it is obvious there is provision for them in the kick panel area themselves. So they'll be relocated there when the dash goes back in place. And will look much better than hanging off the bottom of the dash. That was about all that could be accomplished without further wiring connections and mounting of the dash. But there were a couple of things to be done before that can happen. One is installing the new cowl vent gasket and reconnecting the cowl vent operating mechanism. Glued the new cowl vent gasket into the channel on the cowl with contact cement, placing the cowl vent on top with the vent weighted down to ensure the cement and gasket adhere properly to the cowl. I'll connect the vent operating mechanism on Friday while there is still reasonable room to move under the dash. And the other is replacing the demister vent tubes running from the heater to the dash outlets. There was only one tube there today, the left side one, so have to find a tee piece and some heater duct tubing to make it all connect up as it should. Quite a saga in the telling, although the visible results aren't spectacular (we are talking about wiring here), it's the piece of mind in knowing that it'll work when it's all back together. And it was a great practical lesson in showing the importance of having good clean contacts for electrical connections. Sorry to say I can't post any pic's of today's effort as I can't upload to my PC at the moment. When tech support (AKA eldest son) comes over on the weekend I'll catch up with that then. In the meantime these words will suffice.
Posted on: 2008/11/5 4:50
|
|||
|
Mal
/o[]o\ ====  Bowral, Southern Highlands of NSW, Australia "Out of chaos comes order" - Nietzsche. 1938 Eight Touring Sedan - SOLD 1941 One-Twenty Club Coupe - SOLD 1948 Super Eight Limo, chassis RHD - SOLD 1950 Eight Touring Sedan - SOLD What's this?  Put your Packard in the Packard Vehicle Registry! Here's how! Any questions - PM or email me at ozstatman@gmail.com |
||||
|
||||
|
Re: Mal's '41 120 Coupe
|
||||
|---|---|---|---|---|
|
Forum Ambassador
|
Thursday 6th November 2008
Dug around in the garage this morning and found: 1) The two packets of small instrument and other lightbulbs I'd bought off eBay over a year ago. 2) The column mounted turn signal unit I'd bought off eBay almost as long ago' Took both items to the workshop and determined the bulbs were OK for those needing replacement. In fact we'll replace all the dash light bulbs because of the current easy access we have at present. Wade was working on the distributor out of Kevin's '35 on the bench. Seems he's almost solved the carburettor problem but needs to eliminate the miss caused by the crappy points before he can adjust the idle properly. And he'll use the pair of points he found in Kevin's glovebox to do the job. Left Wade to it and headed off to Grippy Rubber where I bought a length of hose/tubing to replace the heater to demister pieces. Will install them tomorrow. And again no pic's, the fix is not yet in. EDIT - Caught up with Wade tonight at the monthly Packard Club meeting and he tells me the carb is off again and now with a carb expert to sort out the gremlins.
Posted on: 2008/11/6 2:48
|
|||
|
Mal
/o[]o\ ====  Bowral, Southern Highlands of NSW, Australia "Out of chaos comes order" - Nietzsche. 1938 Eight Touring Sedan - SOLD 1941 One-Twenty Club Coupe - SOLD 1948 Super Eight Limo, chassis RHD - SOLD 1950 Eight Touring Sedan - SOLD What's this?  Put your Packard in the Packard Vehicle Registry! Here's how! Any questions - PM or email me at ozstatman@gmail.com |
||||
|
||||
|
Re: Mal's '41 120 Coupe
|
||||
|---|---|---|---|---|
|
Forum Ambassador
|
Friday 7th November 2008
At the workshop yesterday Wade had put the front wheels and sidemount spares back on Kevin's '35 and it was sitting again on all four tyres on the shop floor. First time I'd seen it like that, had gotten used to it over the past year being much higher than it is now. All that needs to be done now is replace the carb, once it's back from the carb specialist, drain the fuel tank, check it for any contamination and, presuming it's OK, refill it with fresh fuel. Then Kevin, you can drive her home! But back to the '41. First up checked that the cowl vent gasket was sealing properly as it had been sitting there since Wednesday with a heavy weight on the vent to ensure its positioning was right, and it is right. Then onto re-connecting the cowl vent with the hinge mechanism. This is held together by five small nut/bolts/washers, two in the shorter left side, and three in the right side. And a pivot bolt, with shoulder holding the two hinges in conjunction with the end of the opening lever mechanism. First though, had to do my usual clean up of POR-15 overpaint, a light application of grease to the hinge pivot areas, then cleaning up the nuts and bolts to make re-installation as easy as possible. No point in struggling with cantankerous threads upside down in a confined space. Went together well with Wade offering advice and grease where required. Result - works like a charm! Next, was re-installation of the left side hood prop assembly. Someone had literally pulled it out of its firewall mounting and it was a twisted metal contraption when I got it. Early in the dis-assembly process Wade had straightened it out and it now closely mirrored the one on the right side. I'd also POR-15'd it along the way. But to get it back in, even with the dash removed was still a daunting prospect. I didn't want to disturb the internal firewall insulation as trying to take it out would lead to its fragmentation with the ravages of time at play. However if the insulation could be left relatively alone it would be fine, but how to do that? The short bolt holding the bottom hinge against the firewall is held by a nut with a 'D' shaped head which fits into a correspondingly shaped depression in the firewall metal. Can't get to it at all, so drilled through the insulation with the intention of using a longer bolt, large washers and a regular nut and split washer to pull through the insulation up tight to the firewall at the prop's lower anchor point. Ended up having to cut a small hole in the firewall insulation to be able to reach the bolt when it was inserted. Not pretty, but practical, and discreet, being well up under the dash. Then on to the demister hoses. The '41 has an aftermarket heater/demister installed under the right side dash. But there was only one hose running from the demister blower motor atop the heater box across to the left side demister outlet. The right side demister outlet at the base of the windscreen wasn't connected to anything. Needed to replace the demister hose as it was brittle after deteriorating over the course of time. It was suggested by John that flexible plastic tubing as used in swimming pool cleaning might be a practical replacement in lieu of the fibre unobtainable originals together with a PVC 'T' plumbing fitting. A visit yesterday to Grippy Rubber found some suitable tubing of 1&3/4" ID, and from Bunnings (Australia's largest hardware store chain), the 'T' piece. The first piece of tubing for the left side to 'T' piece was cut after trial fitting, measurement and marking in situ. Then, because the ends of the 'T' piece are a slightly bigger diameter than the tube, the end of the tubing was immersed in hot water which softened it sufficiently to allow it to be forced over the 'T' piece, a great "shrink" fit. The right side to 'T' piece and demister blower to 'T' piece sections of tubing were similarly measured, marked, cut and fitted. Result - Although not "correct", an operative demister system. There have been concerns raised by some that the hot air in the tubing could cause it to deform but I'm prepared to take that chance. The heater controls are located in a steel mounting bracket under the centre of the dash and comprise a 3 speed switch for the heater fan, an on/off switch for the demister fan and a manual cable pull knob for the heater air intake in the engine compartment. While Wade cleaned the switches up, I cleaned up the mounting bracket, taking off the old black paint, prepping the metal then spraying it gold with the same rattle can I used on the heater box. Will fit in "better" than the black I think. Wade had all the switches working well including a liberal application of Rick's Magic Electronic Spray Cleaner. Next the wires powering the switches were gone over, one piece being twice as long as necessary, new bullet connectors crimped on and two wires joined into one to tidy it all up. There had also been some tidy up of the courtesy light wiring, rejoining and soldering where required and then retesting and everything still works! Also tested the wiper motor worked, it's electric in the '41, and it does work giving both a low and high speed. However there is a piece broken off in the wiring onto it and Wade is cogitating how he'll go about fixing that and the scrappy looking wires attached. I have a pair of wiper blades, but they are pretty perished! So - I'm looking for wiper blades for a '41 120. And again, no pic's, so maybe next week.
Posted on: 2008/11/7 17:29
|
|||
|
Mal
/o[]o\ ====  Bowral, Southern Highlands of NSW, Australia "Out of chaos comes order" - Nietzsche. 1938 Eight Touring Sedan - SOLD 1941 One-Twenty Club Coupe - SOLD 1948 Super Eight Limo, chassis RHD - SOLD 1950 Eight Touring Sedan - SOLD What's this?  Put your Packard in the Packard Vehicle Registry! Here's how! Any questions - PM or email me at ozstatman@gmail.com |
||||
|
||||
|
Re: Mal's '41 120 Coupe
|
||||
|---|---|---|---|---|
|
Forum Ambassador
|
Monday 10th November 2008
After yesterdays run up to the Twin Lakes Classic Car Club's Show and Shine at Wyong Racecourse arrived at the workshop early this afternoon to find Wade fixing, of all things, an electric paper shredder! He's a man of many talents! And I will post some pic's of the Show and Shine in the General Forum once my PC is fixed. Anyway, once Wade had finished his office machine repairman impersonation we turned to Kevin's '35. Earlier in the morning Wade had drained the old fuel out, over 40 litres (Approx 10US Gallons), and replaced it with fresh fuel. The old fuel didn't have particles or debris in it but was discoloured and didn't smell right. I then assisted Wade in replacing the left hand sidemount spare. Remaining work on the '35 is re-installing the carb, adjusting the idle, re-installing the air-cleaner, re-installing one horn trumpet and re-installing the right hand sidemount spare. Wade then plans to drive the '35 for a couple of days to start running in the re-built engine and to ensure it is running properly before Kevin comes and picks it up. Turned to the '41 with Wade checking the behind dash wiring in the car for any matters still requiring attention. Located the cross dash wires up behind the upper lip of the body dash frame so they weren't hanging free. Then to the newly installed demister tubing. To ensure it wouldn't interfere with the wiring, radio or anything else a couple of plastic cable ties were enlisted to hold the tubing up to the steering column bracket at the firewall and near the centre where it was tied to the cowl vent drainage tube. Next was the wiper motor. It had a small piece 'broken' off what turned out to be the, and this is my terminology, return to rest switch and there was also a bare wire here. First Wade unscrewed two terminals and then de-soldered the bare wire from the wiper motor housing. Wade made up a short section of insulated wire and soldered this to the 'return to rest switch', cleaned up the rest of the switch re-installed it and soldered the new wire to the wiper motor. Result, the wiper motor works with low and high speeds and returns to rest when switched off during a sweep cycle. What more could you want? Strange you ask but I'm still looking for wiper blades for a '41 120, so that's what more! And Wade is going to mount a relay to run the heater motors, radio and turn signals from, rather than have them all routed directly through the ignition. Next, as all the leg work that could be done outside the car on the dash was now complete, was re-installing the re-woodgrained, re-wired and cleaned up dash in the '41. First step was carefully laying it face down on small sheets of rubber foam, then wrapping it in bubble wrap and taping this protective shield together. The tail of the harness not connected to dash instruments or controls was coiled up outside the wrapped dash structure. Next was transporting it, and it could be described as "the mummy" from its swaddled appearance, from the bench to the interior of the '41. Then, with Wade on the left side and me inside the cabin guiding the right side, manouvering of the swaddled dash and clearing cables and wires managed to replace it from whence it came. Almost the hardest part of this was removing the bubble wrap and foam from the dash itself. The tape used to stick it together was very effective and resisted mightily when we tried to remove it. Then came the part Wade had been dreading, and I'm glad he told me this after it was done, threading the new wiring harness through the firewall. Because the location of the access hole in the firewall for the wiring harness is right up behind the instrument cluster it's not exactly readily accessible. Combined with a 'hood' as part of it's structure where it enters the engine compartment it tends to catch most of the wires fed in, rather than help funnel them through! And Wade also said later he thought the new harness might be slightly thicker because he thought the insulation on modern wires was marginally beefier than that from days of old! So, with Wade on his back under the dash and me armed with a pair of long nose pliers on the engine side of the firewall, the process commenced. With Wade feeding wires through and me gripping them as they emerged into the half light of the workshop it was a slow process. Through the course of it a couple of breaks were taken so Wade could catch his breath as it's surprising the amount of energy you expend while lying on your back fighting with things in confined spaces. There was juggling of wires side to side, pushing over, up, down, to the sides, whatever gave a clearer path for the next wire. At the end of it Wade and I were mightily pleased, especially Wade with his unspoken misgivings about the process. Another thing I'll mention was young Mat, packard34 on Packardinfo, arriving to pick up a spare crank that Wade gave him for his '34 engine re-build. He also told us his '55 Caribbean is now registered for road use but there are a few things to do to it before he takes it out on the road. Pity I forgot to take a pic of Mat and his brother Scott while they were at the workshop. But with my current pic upload problem, posting pic's is really neither here nor there at the moment.
Posted on: 2008/11/10 3:45
|
|||
|
Mal
/o[]o\ ====  Bowral, Southern Highlands of NSW, Australia "Out of chaos comes order" - Nietzsche. 1938 Eight Touring Sedan - SOLD 1941 One-Twenty Club Coupe - SOLD 1948 Super Eight Limo, chassis RHD - SOLD 1950 Eight Touring Sedan - SOLD What's this?  Put your Packard in the Packard Vehicle Registry! Here's how! Any questions - PM or email me at ozstatman@gmail.com |
||||
|
||||
|
Re: Mal's '41 120 Coupe
|
||||
|---|---|---|---|---|
|
Forum Ambassador
|
Tuesday 11th November 2008
Made a couple of thicker wooden tracks for the front seat so the seat is elevated slightly from stock. Did this in the garage at home cut a length of square timber to size, marked and drilled the bolt holes and cut the slotted hole with a jig-saw. Next chased around for a 6V 'flasher' can with 3 terminals to use with the new wiring harness in the '41. First tried the local Repco shop, Australian auto parts chain - result no 6V flasher cans. Then a specialist auto electrician, Tibby Rose - same result. Last Performance Engineering, a specialist volkswagen repair business - same again, although the guy said he might have one but wasn't prepared to search for it as he was too busy at present!  !!!!!!!!!!! !!!!!!!!!!!Anyway, arrived at the workshop late morning and started by taking out the metal pedal/steering column plate and cleaned it up ready for painting. Then looked at the headlight buckets one of which has some rust around the edge but is still serviceable, I think. Need to discuss this with Wade, but because he wasn't in today will catch him tomorrow about this and some other matters. Next was modifying the front kick panels so that the courtesy lights, rather than hanging from the lower edges of the dashboard, were fitted into stamped holes located perfectly in the lower structure of the body bracing there. Now, I'm not great when it comes to fabrication type work, but I understand the best way to do things like this is carefully by measuring at least twice and cutting once. So there was a LOT of measurements taken on the left kick panel as well as carefully eyeballing it and the holes it clips into and the hole in the structure where the courtesy lamp body will sit. Back to the bench and careful marking on the fibre back of the kick panel to find the centre of the hole to be punched through the fibre and upholstery. Wade has a great punch set of various sizes up to 1" as well as a few custom made punches for larger sizes, Determined the 1" size would be perfect for the job at hand and a couple of good solid whacks later - a nice hole. Back to the '41 then my jaw dropped, somewhere between the measurements and marking them on the back I'd turned the kick board around! After I picked my jaw off the floor of the '41's cabin what was there to do? Why carry on of course, but this time cut it in the correct position! Didn't have another kick panel so this customised one with a 'ventilation hole' will suffice to start with. This time managed to cut the hole in the correct place! But on trial fitting the light and the kickboard found the hole needed to be larger because the bezel and glass won't clip through the depth of the fibreboard and upholstery. And as well I had to cut a square piece out of the top of the fibreboard to accommodate the tail on the body of the light. Accomplished all this then turned to the right side kickboard and I'm pleased to say I did learn from my earlier mistake. It'll be good to see Wade back tomorrow. Although even he couldn't have saved me from my self inflicted SNAFU!           
Posted on: 2008/11/11 3:32
|
|||
|
Mal
/o[]o\ ====  Bowral, Southern Highlands of NSW, Australia "Out of chaos comes order" - Nietzsche. 1938 Eight Touring Sedan - SOLD 1941 One-Twenty Club Coupe - SOLD 1948 Super Eight Limo, chassis RHD - SOLD 1950 Eight Touring Sedan - SOLD What's this?  Put your Packard in the Packard Vehicle Registry! Here's how! Any questions - PM or email me at ozstatman@gmail.com |
||||
|
||||
|
Re: Mal's '41 120 Coupe
|
||||
|---|---|---|---|---|
|
Forum Ambassador
|
Pic's for Wednesday 5th November
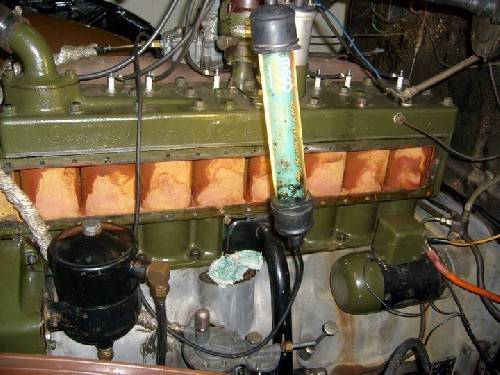
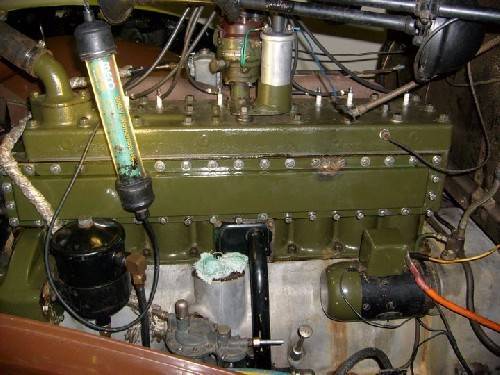
Attach file:  (52.86 KB) (52.86 KB)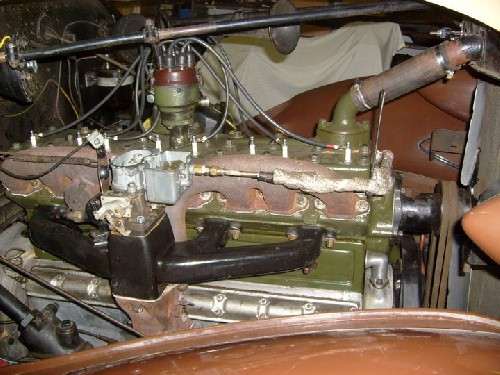  (34.96 KB) (34.96 KB)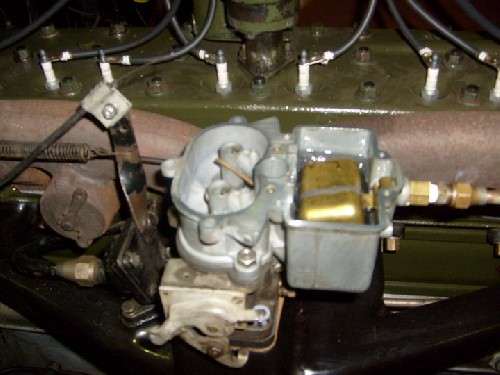  (40.54 KB) (40.54 KB)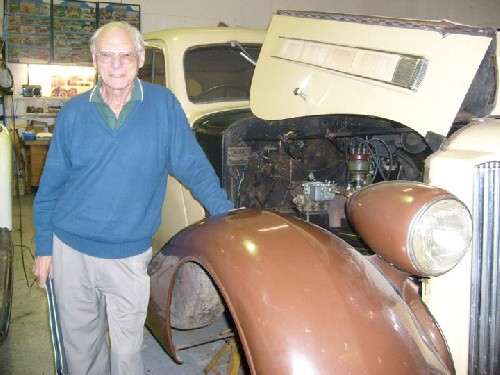  (39.87 KB) (39.87 KB)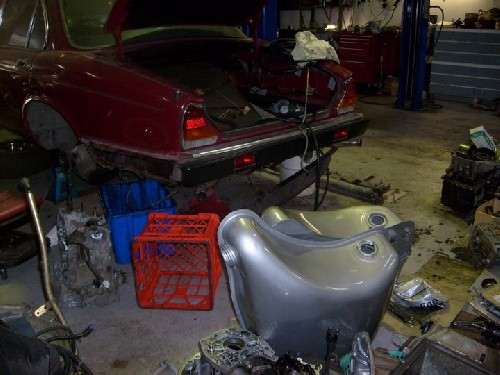  (20.66 KB) (20.66 KB)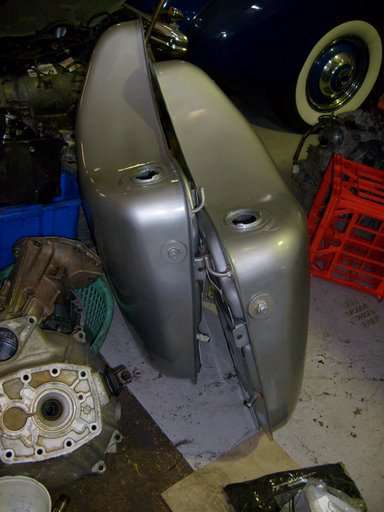  (51.14 KB) (51.14 KB)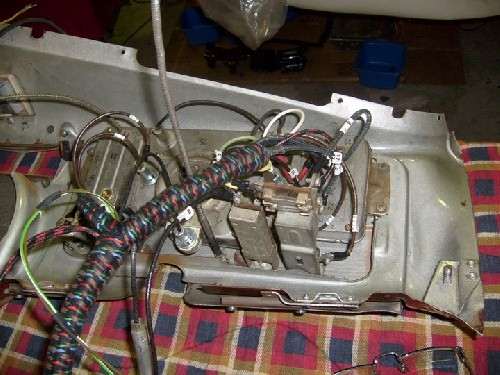  (43.64 KB) (43.64 KB)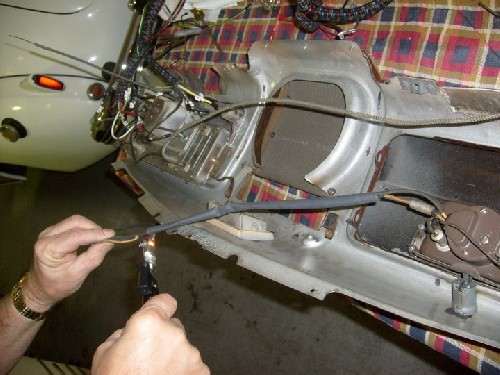  (59.38 KB) (59.38 KB)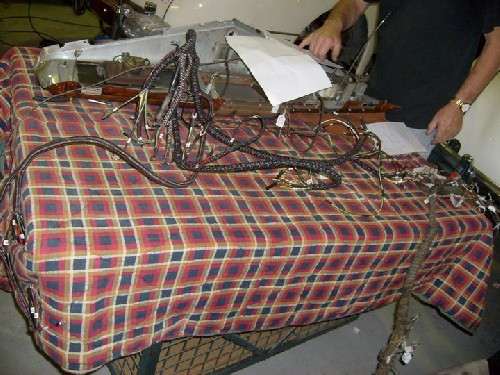  (27.66 KB) (27.66 KB)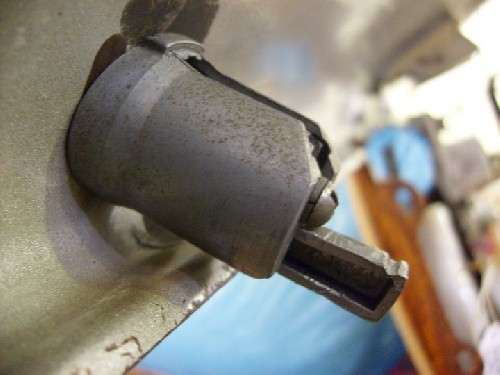  (36.43 KB) (36.43 KB)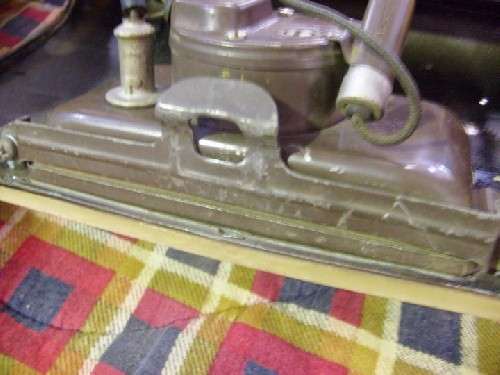
Posted on: 2008/11/12 0:40
|
|||
|
Mal
/o[]o\ ====  Bowral, Southern Highlands of NSW, Australia "Out of chaos comes order" - Nietzsche. 1938 Eight Touring Sedan - SOLD 1941 One-Twenty Club Coupe - SOLD 1948 Super Eight Limo, chassis RHD - SOLD 1950 Eight Touring Sedan - SOLD What's this?  Put your Packard in the Packard Vehicle Registry! Here's how! Any questions - PM or email me at ozstatman@gmail.com |
||||
|
||||
Register To PostTopic is Locked

