|
Re: 1924 Sport 136
|
||||
|---|---|---|---|---|
|
Home away from home

|
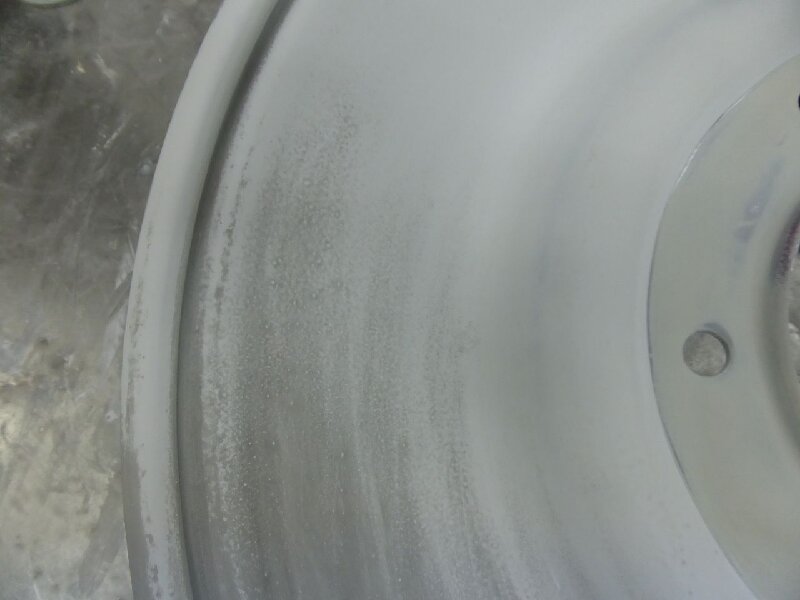
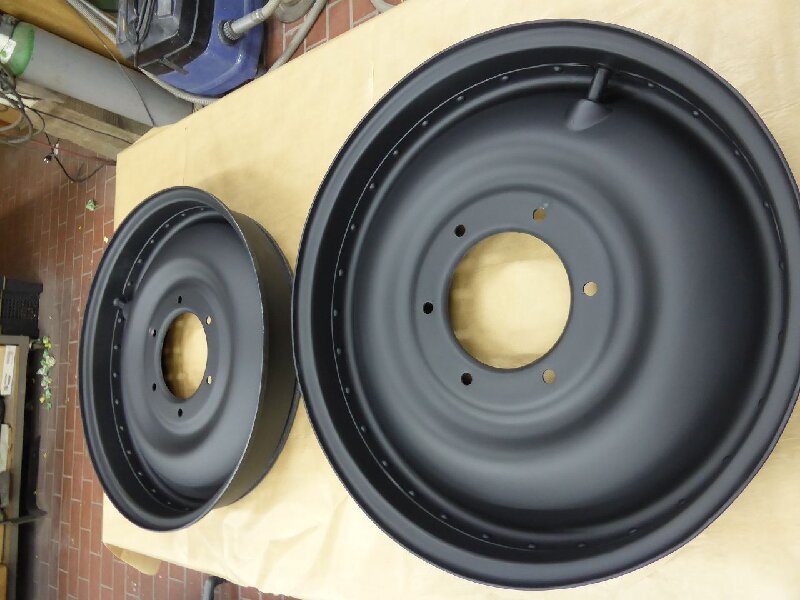
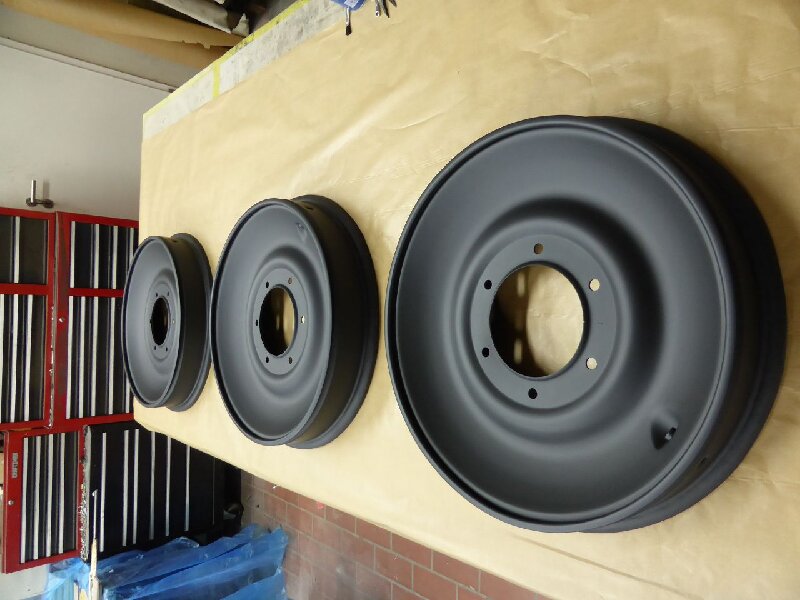
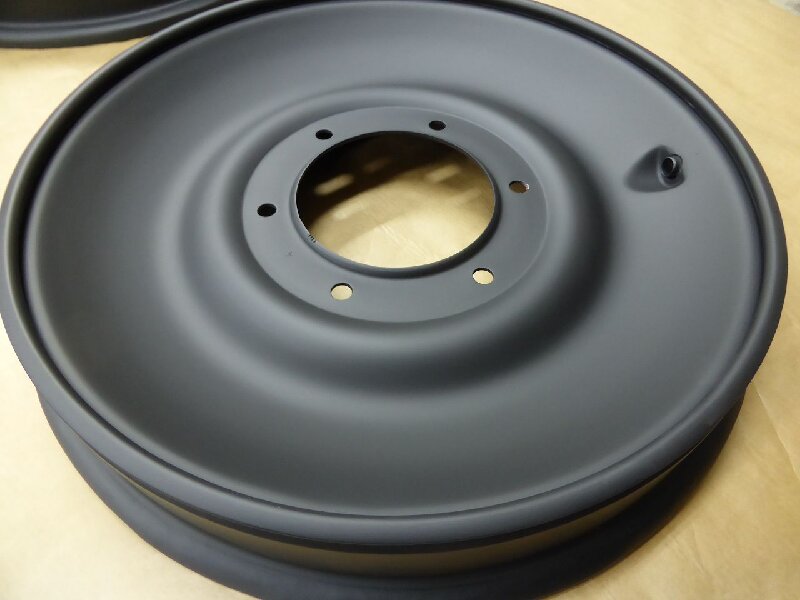
The next step has been done and the rims are now painted with a dark gray filler. Next up is the work I hate the most during a restoration process. …. sanding by hand !!!! ….. When you look at the pictures you think the surface is smooth and ready for painting. But a foam rubber pad with 600 grit that you push over the surface with light pressure shows how "rough" this surface still is. I dry sand the surfaces that have been painted with the “Filler before Top Paint” with 800 grit. To ensure that these concave and convex shaped surfaces have an optimal result ... they can only be sanded by hand. So that this doesn't take too much time, I start with 600 grit to remove the largest unevenness. These can be clearly seen if you occasionally remove dust from the surfaces using silicone remover. The sanding should be done yourself, especially with 600 grit, using only light pressure. The relatively thinly applied filler is quickly sanded through and the 600 grit can be seen in the top coat.
Karl
Posted on: 2024/6/13 10:15
|
|||
|
||||
|
Re: 1924 Sport 136
|
||||
|---|---|---|---|---|
|
Home away from home

|
With a lot of patience and a good friend with the right contacts, one of the last problems in the restoration of a component that was important to me was finally solved. I was looking for the original silencer. All inquiries in the last 2 years were initially unsuccessful. It also seemed unlikely to me that a silencer from 1924 could even be found. These components are the first to fall victim to rust. And it's common for owners of these 1920s models lines to opt for the replicas that fit the bill and are offered multiple times in the United States. However, it was important to me that the silencer corresponds to the original and ultimately reproduces the original sound of this model. Even though I couldn't get an original silencer anymore, I wanted a replica of the original that was at least very close in terms of construction and sound. The photos of the components from the spare parts lists show that this construction, which is delivered in individual parts, can certainly be rebuild. Also, I tried to find out the dimensions and details of this silencer. I had enlarged the photos from the spare parts list on my PC monitor so, that I could see the known diameter of the pipe... after the exhaust manifold (57mm >> 2 ¼")... could decrease at a suitable scale. Using this reference measurement I have I determined all other dimensions of the silencer based on the images that I copied from YouTube videos, showing the attachment points/brackets of the silencer to the frame and thus the length of the component. The measurement was very close to the measurement. I determined the number and arrangement of the holes in the inner pipes was very difficult because they were relatively small on the Parts List page. Since I still didn't get any feedback from the internet, I decided to build the silencer anyway based on the dimensions I found and continued to try to get the data on the important resonance pipes with the holes, the number and position of which in the silencer are crucial for the function and sound of the silencer... the very things that were essentially important to me.
Unfortunately, attempts by friends here in the forum were also unsuccessful, although there was someone who had this data but didn't give it out because he copied and sold this silencer. He believed that sharing the data could harm his company. Now, I don't know how many 1924-25 models there are whose owners still need this original exhaust, or how many of them would be able and willing to recreate this exhaust themselves. I think you could count them on one one hand for the next decades. Anyway... at a classic car meeting here in Germany I told my friend about my problems with this silencer. He owns two Packards of the 30th here in Germany and is very active in the US Packard scene on the West Coast. Prof. Wolfgang Eisert is a regular guest at the Packard International Meetings and also a judge at these on the West Coast. deref-gmx.net/mail/client/EclqIBj6p-8/de ... asts-to-hyatt-regency-newport-beach He used his contacts and asked someone who is also known here in this forum. He couldn't get the data for this muffler, but he knew someone who had some cars from the 1920s and who he believed still had parts for these cars. In fact, it turned out that this acquaintance actually had one of these mufflers. Thanks Haven…. complete, albeit in a pitiful condition, but therefore also perfect to save the missing data and thus enable me to create an actual “original replica”. My friend Wolfgang quickly packed the Muffler into his suitcase on his next visit to California and brought it with him to Germany. But it gets even better !!! I immediately disassembled the muffler to find out how closely it would fit with the components I had already purchased for my own replica. And it's hard to believe that the original covers on the ends of the muffler fit exactly over/into the pipes that I determined and bought myself based on the calculated dimensions. So I was very accurate to the original with my measurements. I would not have expected that. Here are the first pictures. I will further describe the construction of the muffler here in my blog and show it in the picture. Of course, I will also make all the data for the components available here in the blog so that anyone who has the ambition can recreate the original muffler themselves. Because I believe this information should be available to all Packard Enthusiasts seeking to preserve these historically significant vehicles of this era. Everything else will come soon, when the rims are finished and the frame is back on the wheels, allowing the engine to be installed and tested. Karl Attach file:  k-P1040492.JPG (175.06 KB) k-P1040492.JPG (175.06 KB)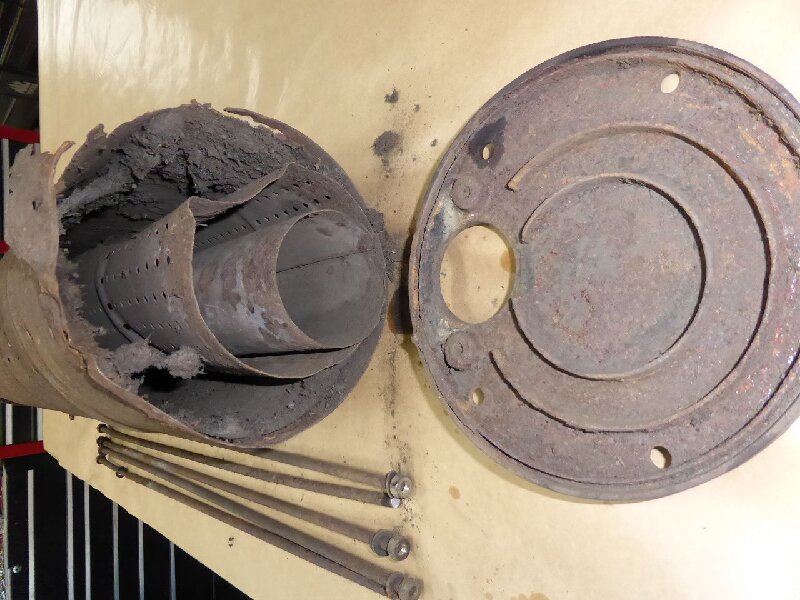  k-P1040493.JPG (185.01 KB) k-P1040493.JPG (185.01 KB)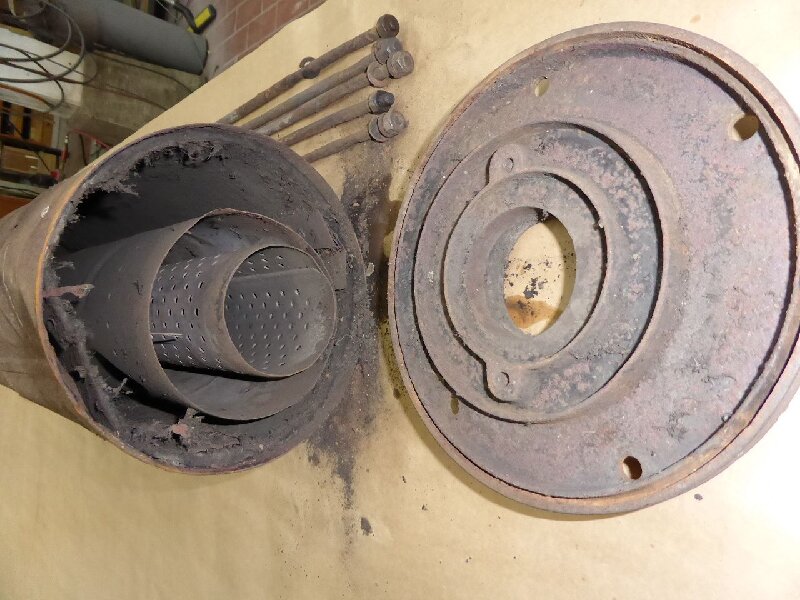  k-P1040494.JPG (160.42 KB) k-P1040494.JPG (160.42 KB)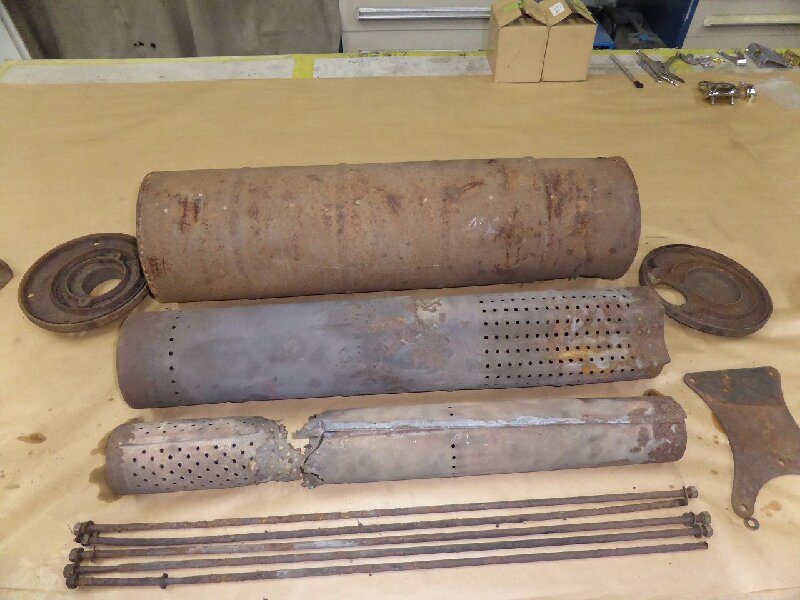  k-P1040495.JPG (138.11 KB) k-P1040495.JPG (138.11 KB)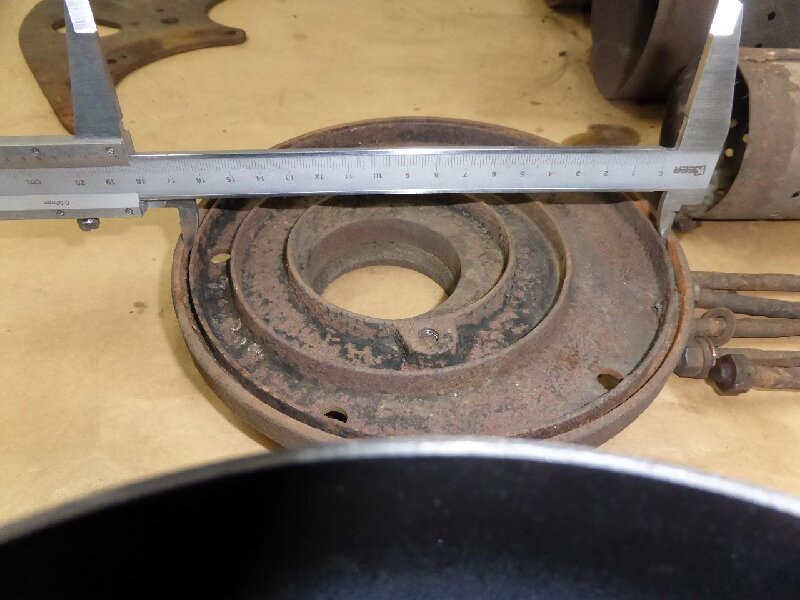  k-P1040498.JPG (116.91 KB) k-P1040498.JPG (116.91 KB)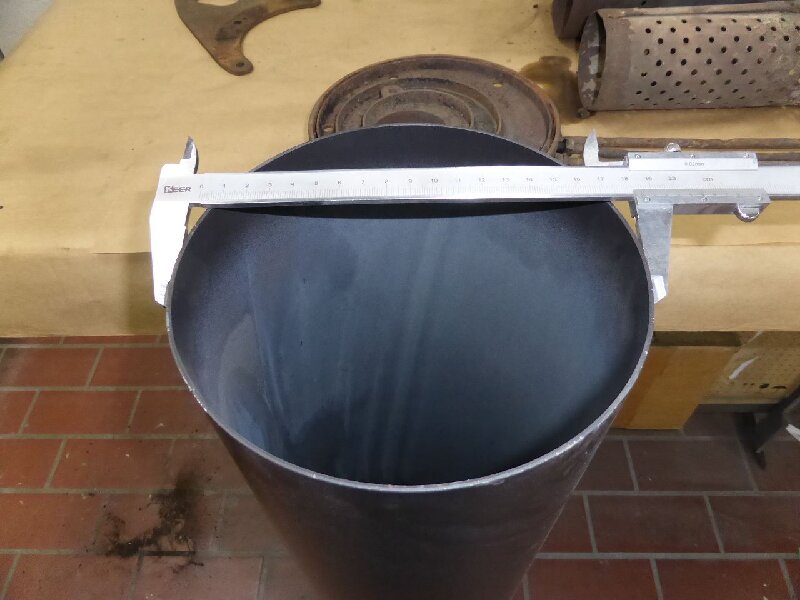  k-P1040501.JPG (124.02 KB) k-P1040501.JPG (124.02 KB)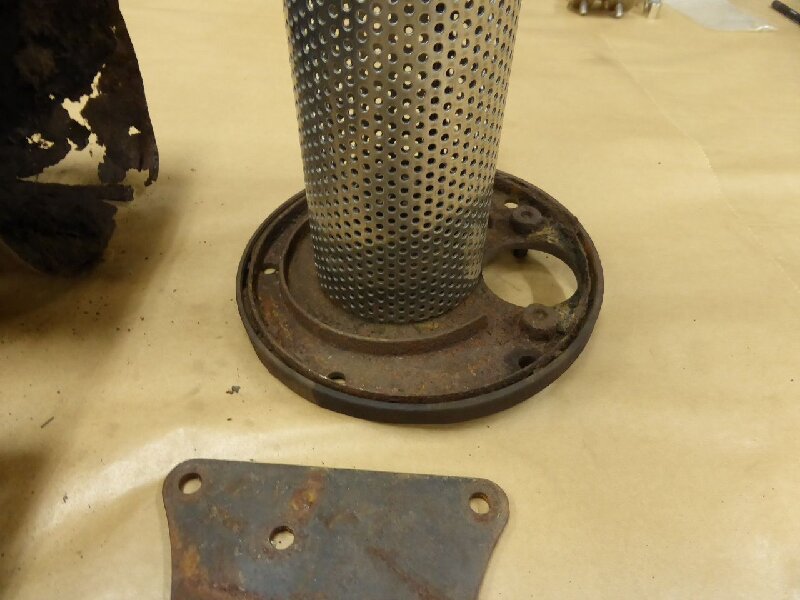  k-Page 80 .jpg (207.68 KB) k-Page 80 .jpg (207.68 KB)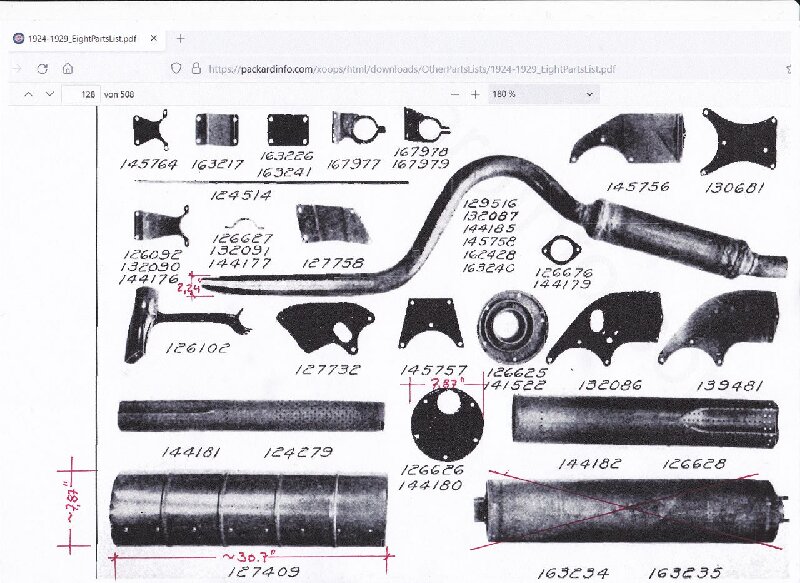
Posted on: 2024/6/14 6:52
|
|||
|
||||
|
Re: 1924 Sport 136
|
||||
|---|---|---|---|---|
|
Home away from home

|
maybe this will work ... ?
latimes.com/socal/daily-pilot/news/story ... asts-to-hyatt-regency-newport-beach
Posted on: 2024/6/14 6:55
|
|||
|
||||
|
Re: 1924 Sport 136
|
||||
|---|---|---|---|---|
|
Home away from home
|
Thanks for the update, Karl. Very interesting.
I'm not sure I understand your question though.
Posted on: 2024/6/14 7:25
|
|||
|
1955 400 | Registry | Project Blog
1955 Clipper Deluxe | Registry | Project Blog 1955 Clipper Super Panama | Registry Email (Parts/service inquiries only, please. Post all questions on the forum.) service@ultramatic.info |
||||
|
||||
|
Re: 1924 Sport 136
|
||||
|---|---|---|---|---|
|
Home away from home

|
Hi human.. if you mean my last post #94 .... that means, that the link in my post #93 doesnt work ... so I post an other one in #94 this works for me. Hope for all other too.
Karl
Posted on: 2024/6/14 7:49
|
|||
|
||||
|
Re: 1924 Sport 136
|
||||
|---|---|---|---|---|
|
Home away from home
|
That link works although the site seems to require a subscription. The problem with posting links directly instead of putting the link over some text (such as link here) is that sometimes links have a space in them (no link should have a space but whoever creates news and other sites does not know that) so with the space, the link stops at the space leaving the remainder off. Posting a link as a link eliminates the problem! You simply highlight the text you want linked, then click the little chain icon at the top of the editor, paste the link in, then continue typing after it!
Posted on: 2024/6/14 13:48
|
|||
|
All generalities are false.
Once I thought I was wrong but I was mistaken. Don Pierson Packard / IMPERIAL page CA DMV Licensed Vehicle VIN Verification 1951 Henney-Packard 3-Door Long Wheelbase Air Force Ambulance The 1951 Henney-Packard is For Sale! 1954 Packard Patrician 1954 Packard Patrician Parts Car 1956 Clipper Custom Sedan |
||||
|
||||
|
Re: 1924 Sport 136
|
||||
|---|---|---|---|---|
|
Home away from home

|
The last picture of the rims showed the dark filler before the final dark red paint. The filler was then sanded with an 800 grit foam pad and of course…. everything sanded by hand. The next picture (…0511) shows the rim painted in the vehicle color. For me... the top coat is as it should be. The next picture (...512) shows the next step... sanding the top coat like the filler with an 800 grit foam pad. For the final sanding I use a special abrasive fleece called "Super Assilex" from the company "Kovax". In the picture I show the 600 grit fleece...but I also used 800 for the finishing touches. Together with the foam pad... same company... you can achieve a very good result for the surface and the final clear coat. The fleece is also very soft and allows the edges to be sanded very carefully without sanding through. But be careful anyway... the fleece has a very sharp grain and one edge is quickly worn out. After thoroughly cleaning with silicone remover, I taped off the pinstriping area. To do this, I mounted the rims on my balancing machine and determined the position of the rings with a movable 0.5 mm black permanent marker on a tripod. ...Why I didn`t get a pinstripe guy and him apply the rings with a drag brush?? …. Well, there aren't too many people over here in Germany who have really mastered this art. And when you find one, he's reluctant to come over and work on five rims. Furthermore, the cost required relative to the work is… outrageous. The picture….0509 shows how I solved the problem. I applied the color that I chose myself using my Sata Minijet. Instead of 10%, mix with 30% thinner and paint in 2 layers. I then smoothed the edges of the line adhesive tape that were created despite the thinned paint using the 800 “KOVAX” fleece on the foam pad with very light finger pressure. So prepared, I took the rims to the paint shop and had the clear coat applied. The result is shown in the last image (…. 0516) on this topic. I only have 2 small holes on 5 rims and you can feel no steps at the strips. I am very happy with the result, especially considering the initial condition of the rims.
By the way...David,...I was thinking about using the color of the pinstripes for the bumper brakes and possibly the grease cups too. Do you remember... we talked about this in the "Pre-War Forum". Were the Grease Cups actually always and fundamentally painted in that familiar bright red??? The next work will be interesting. The aim is to get the snap rings over the rims without damaging the edges. I'll try it and report back here. Karl Attach file:  k-P1040511.JPG (159.62 KB) k-P1040511.JPG (159.62 KB)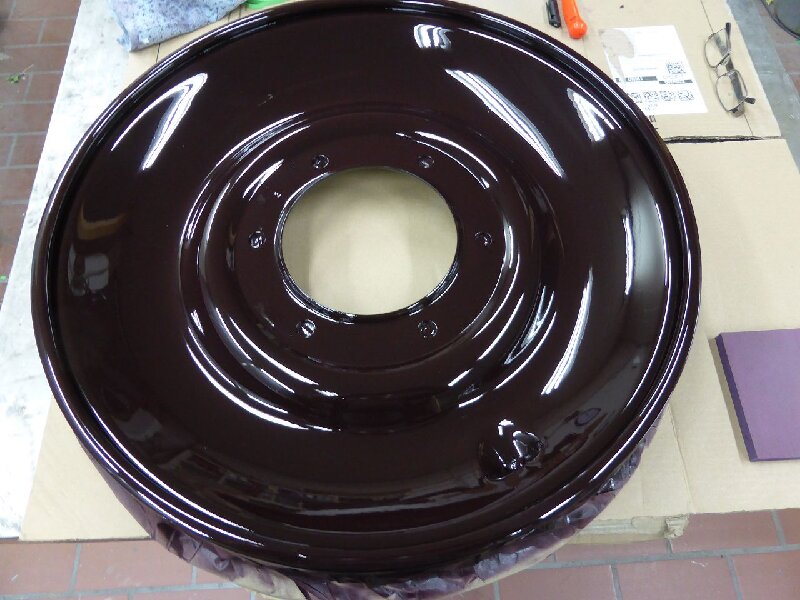  k-P1040512.JPG (124.78 KB) k-P1040512.JPG (124.78 KB)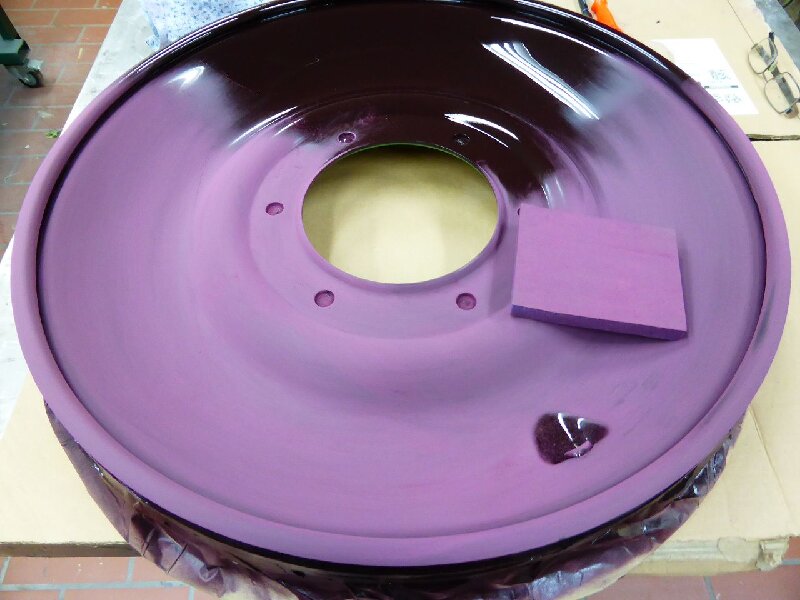  k-P1040513.JPG (150.01 KB) k-P1040513.JPG (150.01 KB)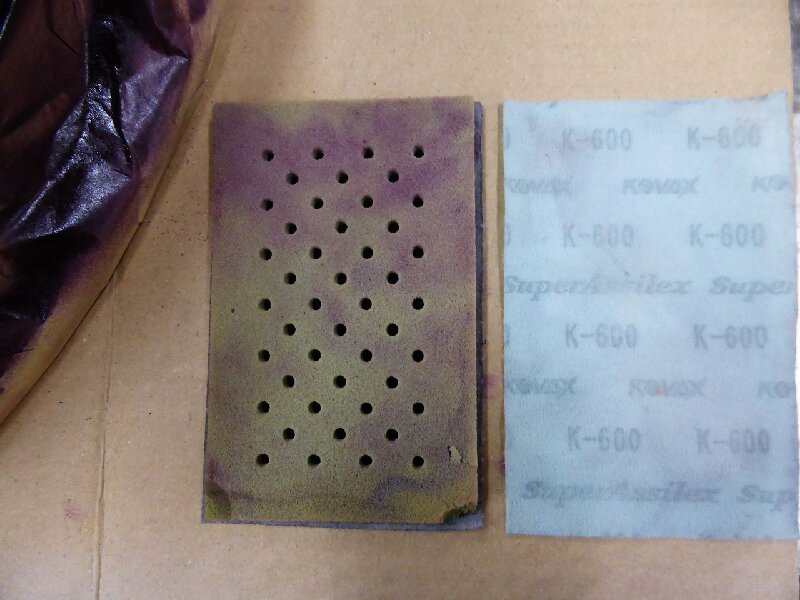  k-P1040514.JPG (107.21 KB) k-P1040514.JPG (107.21 KB)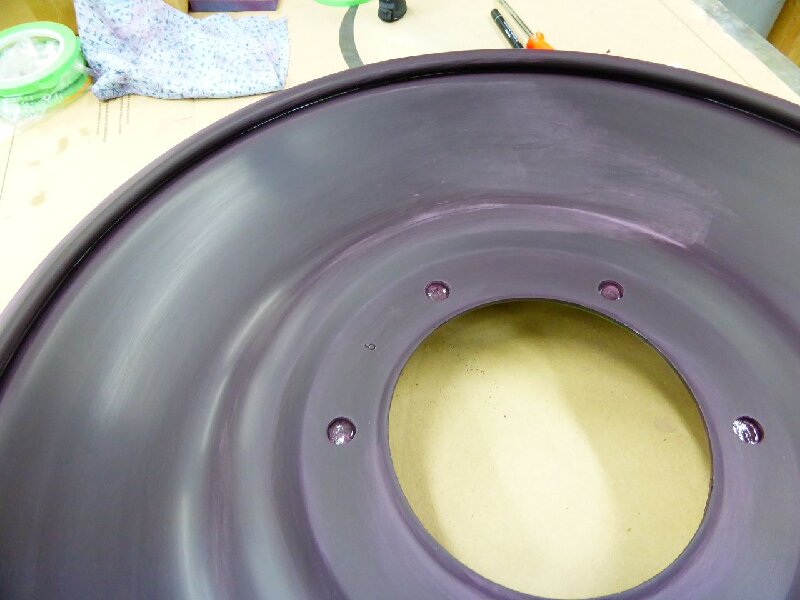  k-P1040509.JPG (162.50 KB) k-P1040509.JPG (162.50 KB)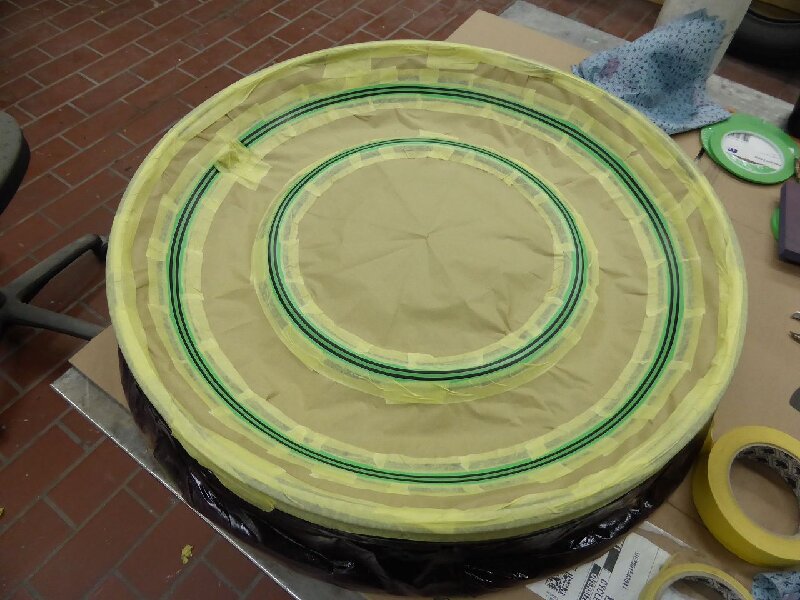  k-P1040515.JPG (133.79 KB) k-P1040515.JPG (133.79 KB)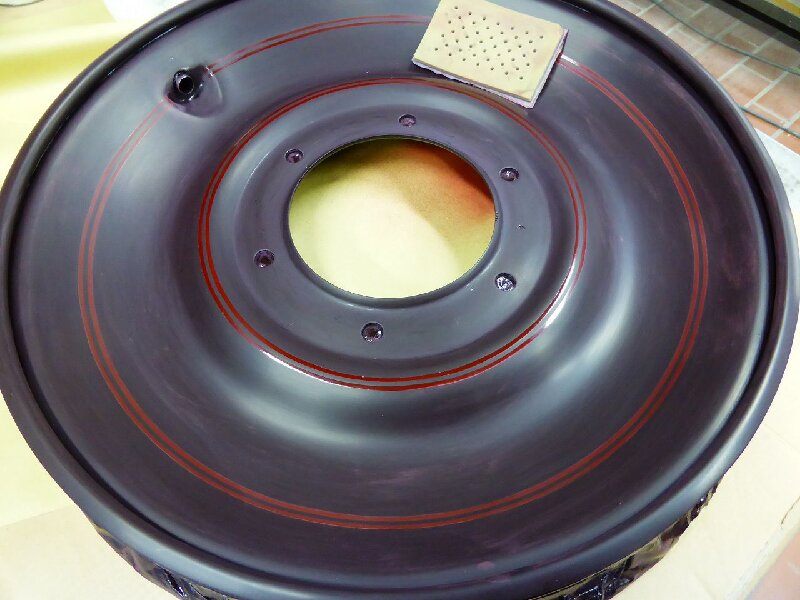  k-P1040516.JPG (165.45 KB) k-P1040516.JPG (165.45 KB)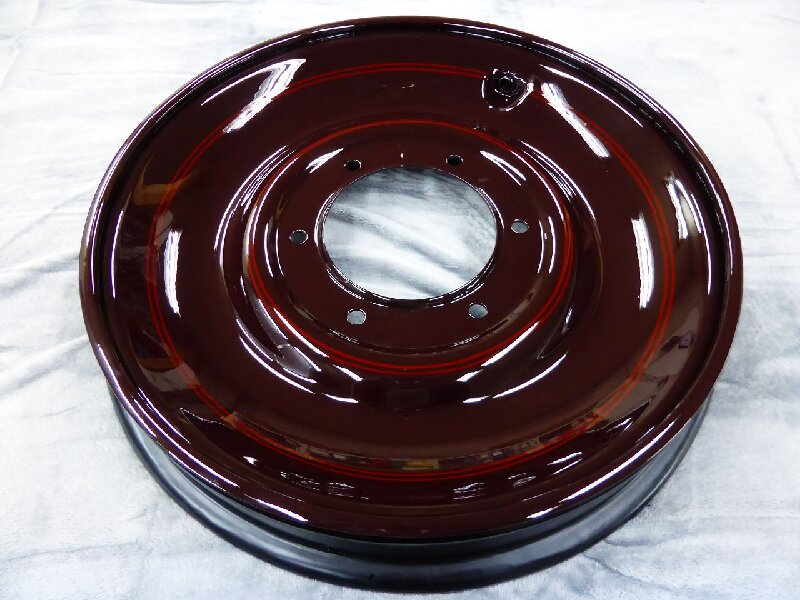
Posted on: 2024/7/12 13:43
|
|||
|
||||
|
Re: 1924 Sport 136
|
||||
|---|---|---|---|---|
|
Home away from home
|
That’s just amazing! Considering what you started with, I can’t believe it looks so beautiful now as you have the patience to do it.
Posted on: 2024/7/12 14:18
|
|||
|
All generalities are false.
Once I thought I was wrong but I was mistaken. Don Pierson Packard / IMPERIAL page CA DMV Licensed Vehicle VIN Verification 1951 Henney-Packard 3-Door Long Wheelbase Air Force Ambulance The 1951 Henney-Packard is For Sale! 1954 Packard Patrician 1954 Packard Patrician Parts Car 1956 Clipper Custom Sedan |
||||
|
||||
|
Re: 1924 Sport 136
|
||||
|---|---|---|---|---|
|
Home away from home

|
In the time between painting, I did the necessary work to mount the tires on the rims. For this I need the snap rings. But they are still chrome plated. And I need them nickel plated. So I prepared and assembled all the missing parts that still needed to be nickel plated and then had everything electroplated. Little by little there were still a few parts to work on. The clothes rail behind the front seat was still missing. The turn signal lights were not yet assembled and still needed work. In the Packard Accessories Catalog No. 52 on page 8 you could see these very suitable parking lights that can be used very well as turn lights. The problem was... where can I find two that fit? Surely there would have been some somewhere... at some point. But I don't have time to wait for it. So the only option was to recreate these lamps. The two cover rings of the lamps, in which the glass and the rear cover are housed, reminded me very much of the indicators on my Jaguar XK 140. It's good that I have such a vehicle in my workshop. It belongs to a friend of mine and is awaiting carburetor service. In any case, visually they are very similar to the Packard parking lights of the early 1920s.
All that was left was the housing. Based on the dimensions of the Jaguar lights, I looked for suitable brass tubes and found them from model makers who build steam machine models or steam-powered model trains. Not only did I find a pipe that was roughly the dimensions I was looking for, but it was also the exact size I was looking for. This also includes the lids that the model makers use to close the kettle. It was ideal for covering the parking light. The pictures explain the rest. So I ordered two Jaguar indicators, which ended up fitting perfectly into the replica housings. The biggest problem was the soldering work with silver solder. Joining thin brass parts with silver solder takes some practice and I haven't had that for a long time. Ultimately everything led to a good result. The rail robe was an accessory that I really wanted to have in my sport. But here too, building it yourself was the easiest way to get this component. I found the brackets online and modified them for my rail robe and joined them together with silver solder. The pipes are made of stainless steel. I shaped them with the acetylene flame and welded them together with stainless steel wire. I am very satisfied with the result. Karl Attach file:  k-IMG_20240712_0001.jpg (282.78 KB) k-IMG_20240712_0001.jpg (282.78 KB)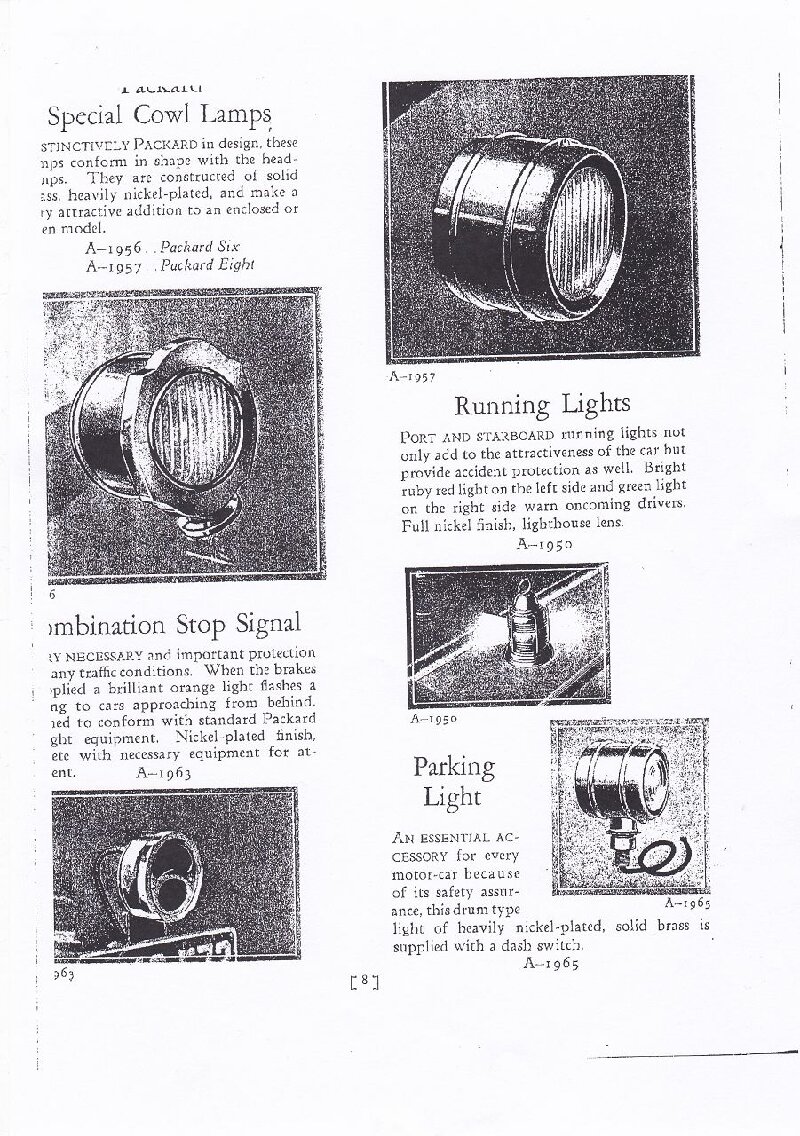  k-P1030083.JPG (105.02 KB) k-P1030083.JPG (105.02 KB)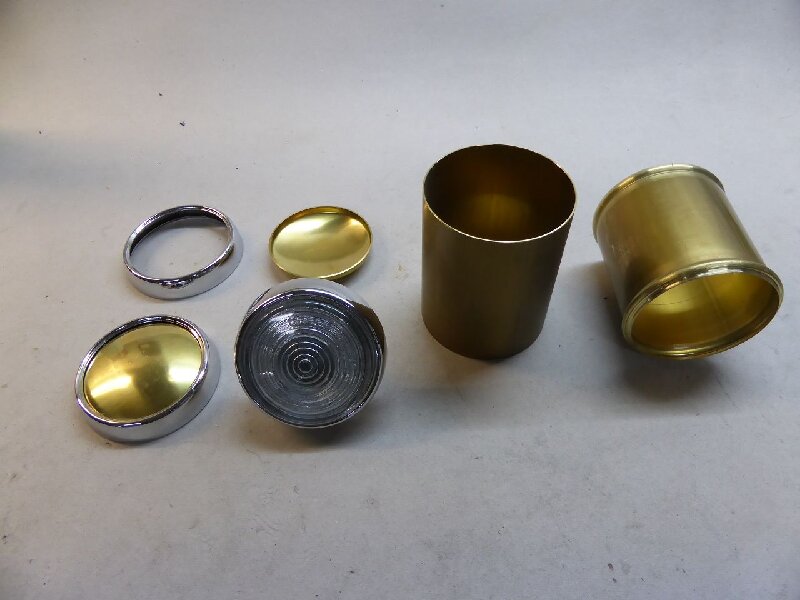  k-P1030084.JPG (140.80 KB) k-P1030084.JPG (140.80 KB)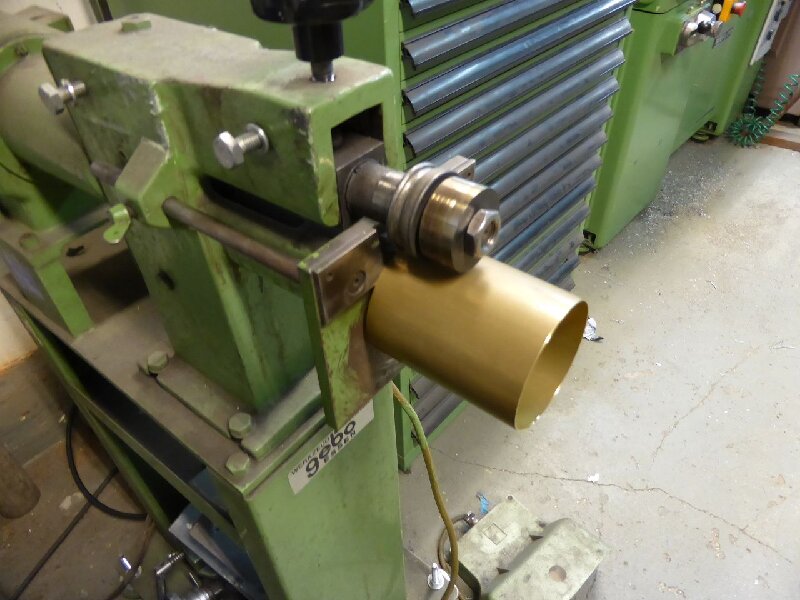  k-P1030085.JPG (99.94 KB) k-P1030085.JPG (99.94 KB)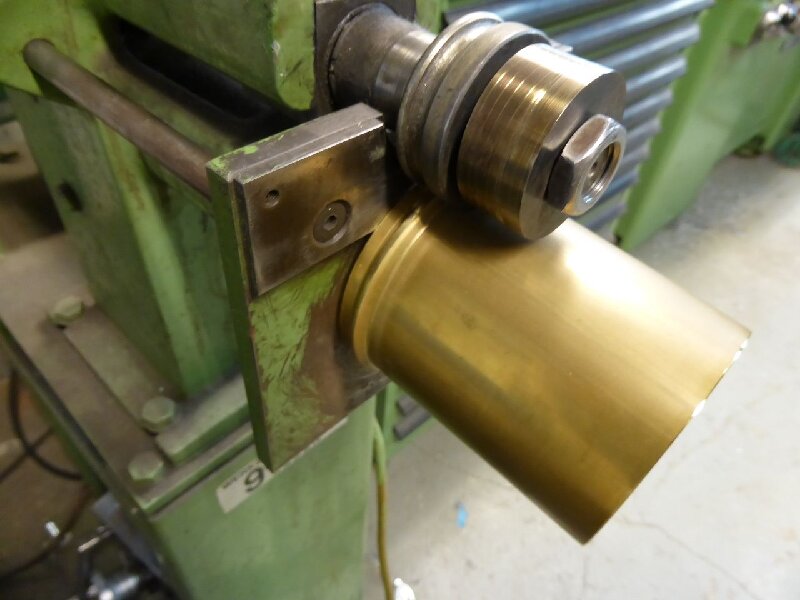  k-P1040504.JPG (121.62 KB) k-P1040504.JPG (121.62 KB)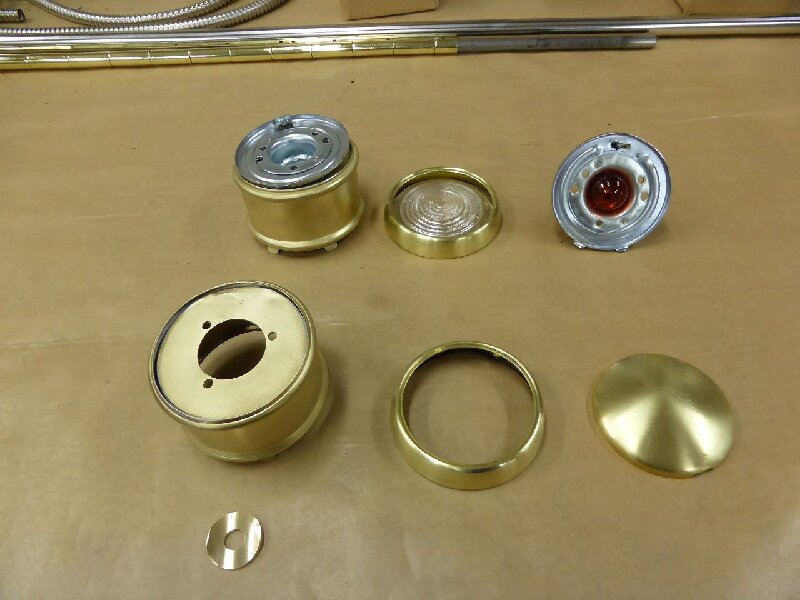  k-P1040505.JPG (100.63 KB) k-P1040505.JPG (100.63 KB)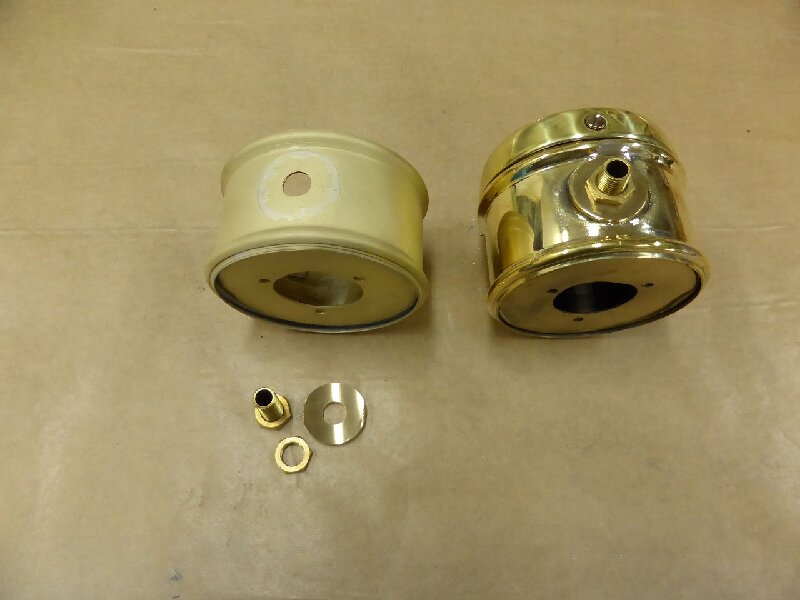  k-P1040506.JPG (97.10 KB) k-P1040506.JPG (97.10 KB)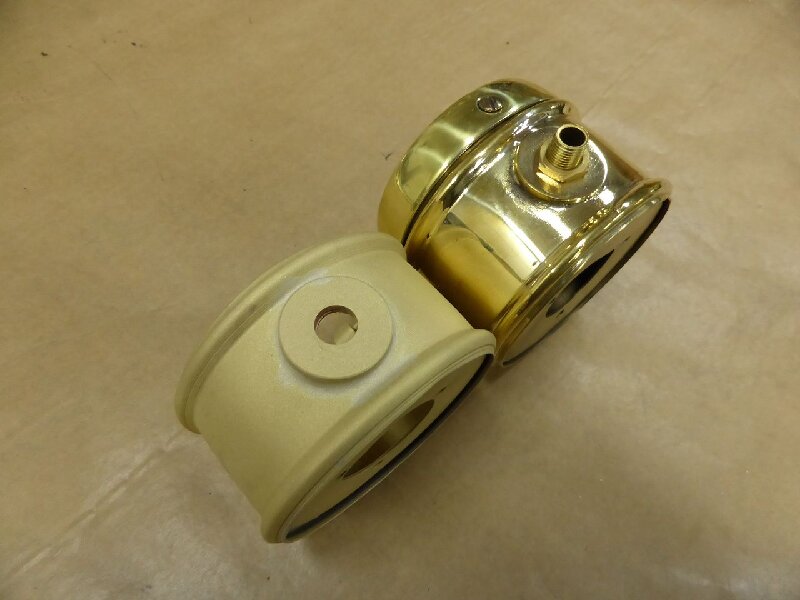  k-P1040521.JPG (168.22 KB) k-P1040521.JPG (168.22 KB)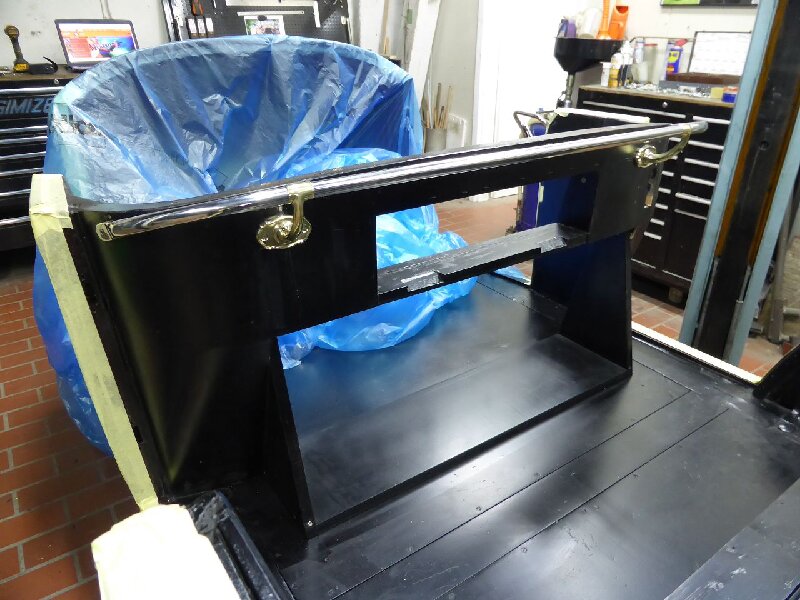  k-P1040522.JPG (180.63 KB) k-P1040522.JPG (180.63 KB)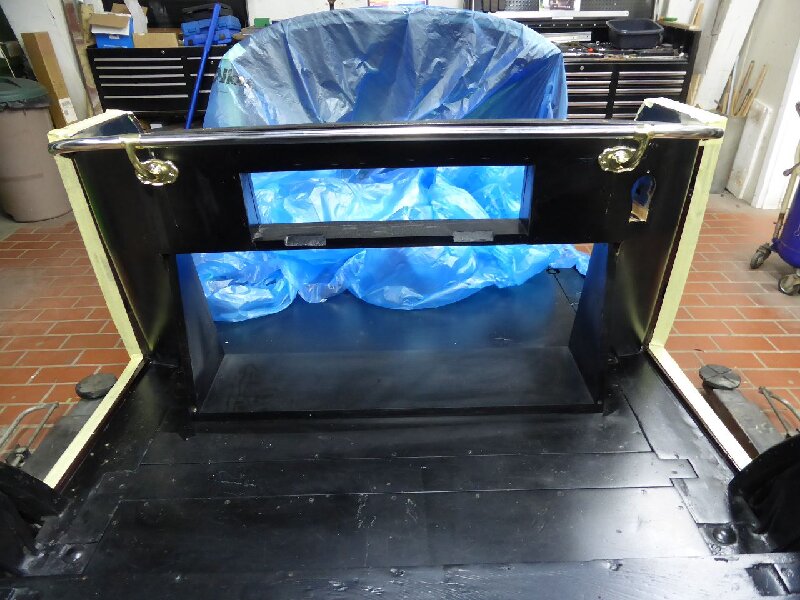  k-P1040527.JPG (105.12 KB) k-P1040527.JPG (105.12 KB)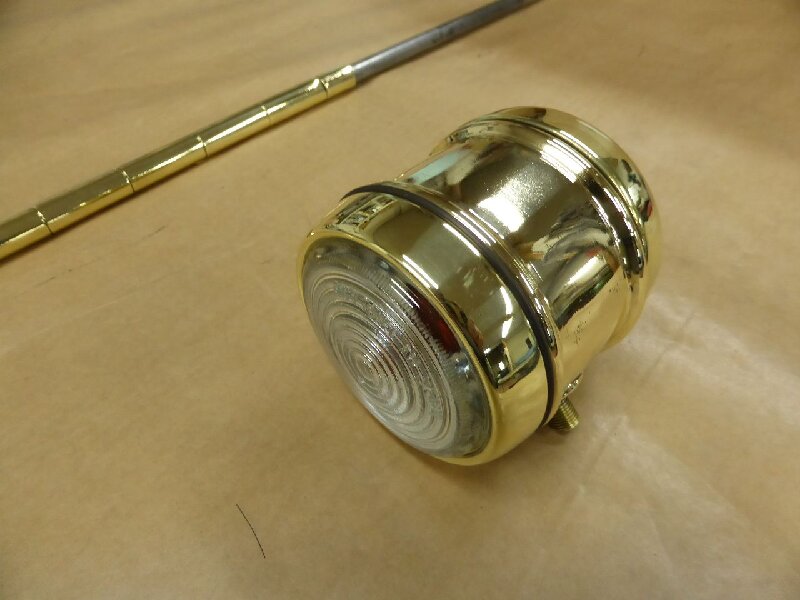  k-P1040528.JPG (108.12 KB) k-P1040528.JPG (108.12 KB)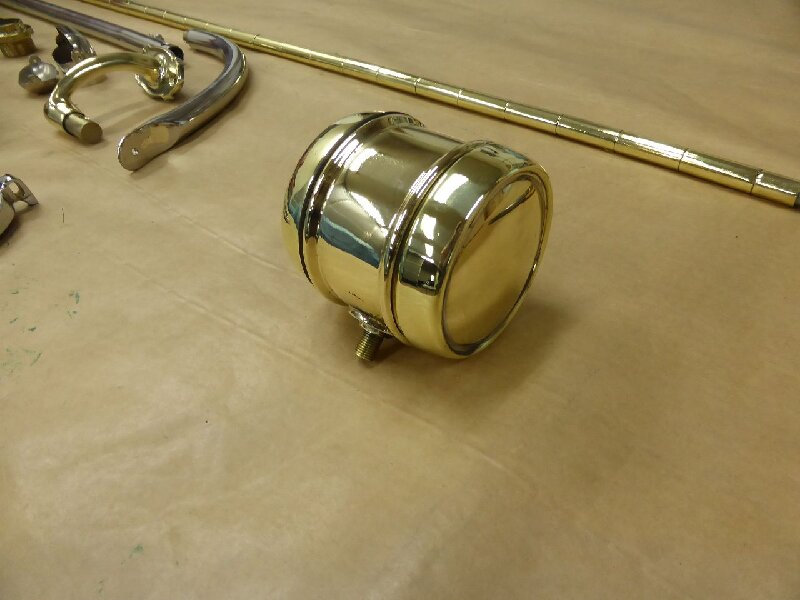  k-P1040525.JPG (108.97 KB) k-P1040525.JPG (108.97 KB)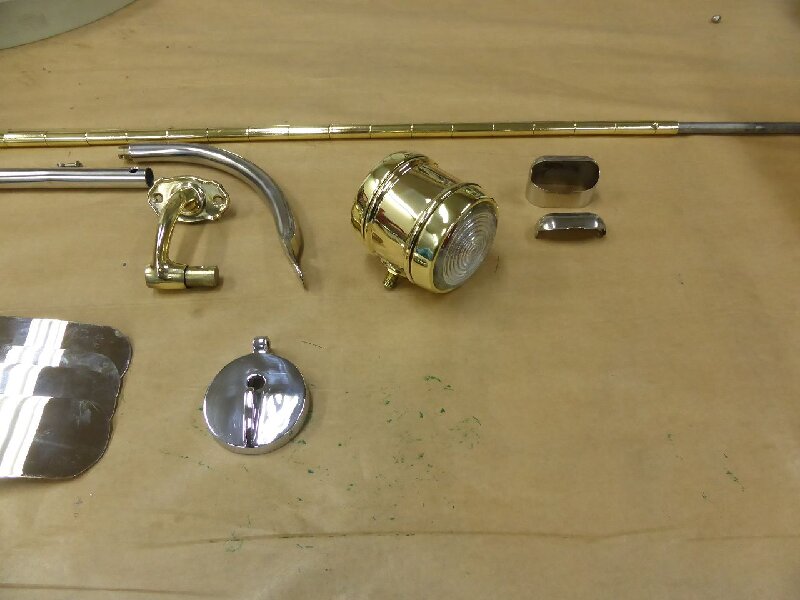  k-P1040526.JPG (132.56 KB) k-P1040526.JPG (132.56 KB)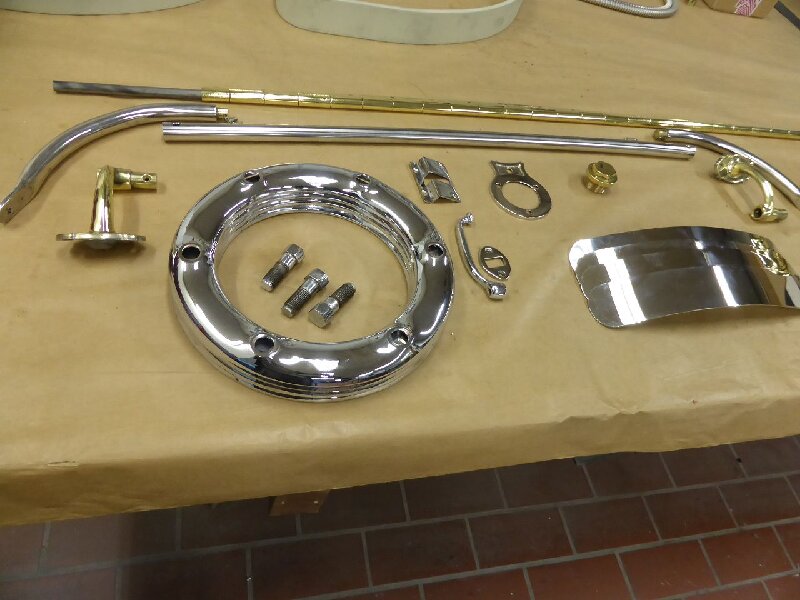  k-P1040503.JPG (139.38 KB) k-P1040503.JPG (139.38 KB)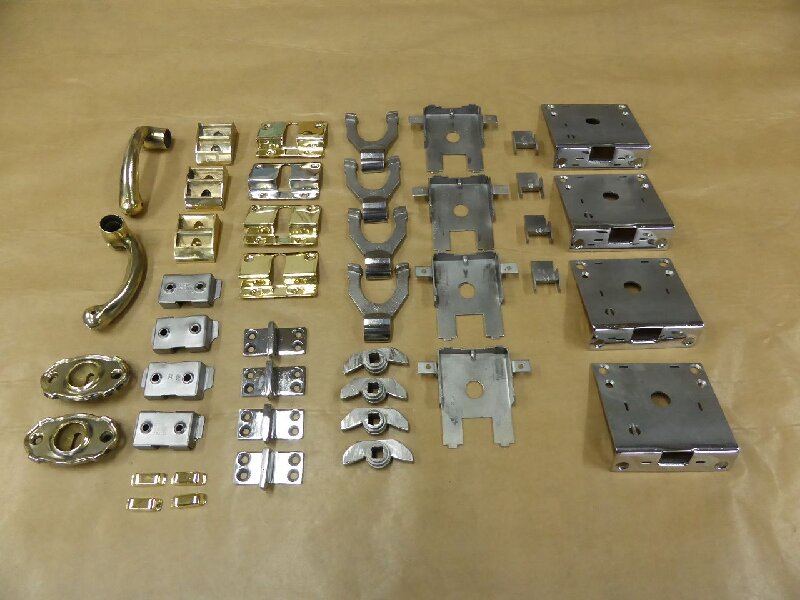
Posted on: 2024/7/12 15:48
|
|||
|
||||

