|
Re: Henry's 55 Constellation
|
||||
|---|---|---|---|---|
|
Forum Ambassador
|
Goes to a tee fitting in area of treadlevac. Here is illustration of a 52 but your 55 is very similar --although hose lengths may differ because of carb & tank locations.
Attach file:  (14.05 KB) (14.05 KB)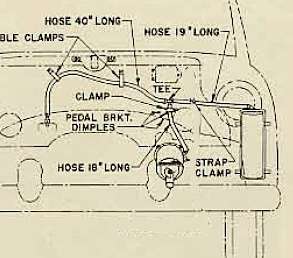
Posted on: 2008/8/14 17:39
|
|||
|
||||
|
Re: Henry's 55 Constellation
|
||||
|---|---|---|---|---|
|
Home away from home

|
Congrats on the great work!
Seeing your progress makes me want to dive right into my restoration.
Posted on: 2008/8/14 18:39
|
|||
|
||||
|
Re: Henry's 55 Constellation
|
||||
|---|---|---|---|---|
|
Webmaster
|
Just a word of caution. I notice you have the hood on the roof. When the bodies left Briggs in '54 without the glass in place. Briggs used a block of wood in the font and rear window opening to keep the roof square. The windows actually give alot of stucture to the roof when they are in place. I am sure the packard built bodies in 55/56, they did the similar thing as the bodies are very close in design.
Also the wood you have in the door may work to prevent the door gap from sagging inward, but what about outward? That is why either welding/bolting some square tube would be benifical. It controls movement in both directions. Also some people weld in a x brace from side to side to control twist. Is the wood bolted in to prevent an outward sag? Just words of caution. You wouldnt want body sag problems later on.
Posted on: 2008/8/14 23:03
|
|||
|
-BigKev
1954 Packard Clipper Deluxe Touring Sedan -> Registry | Project Blog 1937 Packard 115-C Convertible Coupe -> Registry | Project Blog |
||||
|
||||
|
Re: Henry's 55 Constellation
|
||||
|---|---|---|---|---|
|
Forum Ambassador

|
HH56
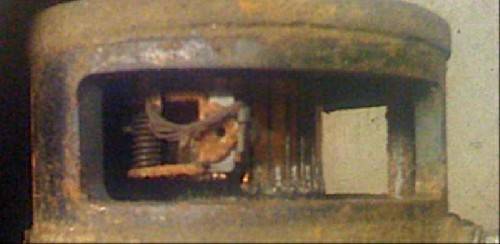
i disconnected the solenoids from the poles on the electric motor. then i hooked up positive to the frame and then negative to one of the poles comming out the side of the electric motor. nothing happened, so i connected negative to the other pole comming out of the electric motor, and again nothing happened. probably a stupid thing to do, but i connected positive to one pole on the electric motor and negative to the other and the motor tried to move. the copper coil piece inside the magnetic field moved towards the front of the car and tried to turn, but it starting getting hot on the wires and there was some smoke, so i quite. i can turn the copper coiled piece by hand through the inspection plate opening, so i don't know what is going on. i thought maybe i didn't have a good frame connection, so i wire brushed everything and still nothing would work. what am i doing wrong. if it will turn by hand, why not 12v thanks, Hank
Posted on: 2008/8/14 23:03
|
|||
|
1937 Packard 138-CD Deluxe Touring Limousine
Maroon/Black 1090-1021 [url=https://packardinfo.com/xoops/html/modules/registry/View.php?ID=232]1955 Packard |
||||
|
||||
|
Re: Henry's 55 Constellation
|
||||
|---|---|---|---|---|
|
Forum Ambassador
|
At this point any number of things. When it didn't rotate in either direction, and after looking at your pictures again, suspect the brushes not making good contact with armature or a broken connection to the brushes somewhere.
One of the brushes connects to motor case or ground, the other connects to the 2 field coils. The other end of the field coils connects to the terminals outside. I really can't tell much from picture but from top of brush, it looks like motor has either been submerged in water or the condensation over years has messed things up, so a dirty or broken connection somewhere is a real possibility. The armature turning is a good thing for starters, lets try cleaning brushes a bit. First, GENTLY lift up (don't pull the fine copper wire) against the spring pressure and make sure both brushes have some tension. Look carefully for any broken wires. If good so far, then suggest starting with a can of contact cleaner from Radio Shack or electronics store and spraying the brush and commutator (copper bar area) & turning armature at same time to get under brushes. Blow it dry and then get a strip of fine sandpaper (300 grit or so) narrow enough to fit on the copper bar area. Be sure it's sandpaper, NOT emery cloth. GENTLY lift up the brush and put it on copper, grit up against brushes and GENTLY pull through to clean brush, do the other, then turn over and clean all copper bars. Spray more contact cleaner and blow dry again. Then connect jumper cables, POS to frame, neg to ONE terminal and try again. By connecting both terminals before, it connected field coils in series. Hopefully it wasn't on long enough to do any damage, but smoke is never a good thing unless it's in a fireplace. If cleaning doesn't help, then you'll have to remove motor section and have repaired or replaced but try this first.
Posted on: 2008/8/15 8:42
|
|||
|
||||
|
Re: Henry's 55 Constellation
|
||||
|---|---|---|---|---|
|
Forum Ambassador

|
i lifted up the brush you can see last night and it just stayed up. it seems like the spring is not able to push it back down unless i push it myself. i rubbed the contact part of the brush with the side of my flat head screwdrive to get the crud off. i also sprayed it down with some carb cleane (probably shouldn't have done that). the smoke was from the oils on the terminal burning off from the getting hot. i stopped after that. i thought maybe i didn't have a good frame contact on the battery, so wire brushed a part of the frame really clean to help, but still nothing.
how can i get this motor out to work on it easier. i don't see any bolts to take it off with. i can clean it all really good if it was off the car and i could get a better look at it. the inspection strap was still on the motor tight and covered with dirt when i took it off. the coiled wired does look pretty bad though. the copper looks okay, but the brushes have a bunch of flakey rusty build up on them. it is probably just a tired old electric motor that is the problem. i was suprised to hear the solenoids clicking, so i am lucky so far. the car was in a field for MANY years, but it wasn't sunk into the ground, so i don't if water got into it or not, but it is certainly possible. sucks though, i was kind of excited to see it move, but it didn't. will update more later, thanks for your help ;0) Hank
Posted on: 2008/8/15 15:38
|
|||
|
1937 Packard 138-CD Deluxe Touring Limousine
Maroon/Black 1090-1021 [url=https://packardinfo.com/xoops/html/modules/registry/View.php?ID=232]1955 Packard |
||||
|
||||
|
Re: Henry's 55 Constellation
|
||||
|---|---|---|---|---|
|
Forum Ambassador
|
First off, don't use carburetor cleaner or strong solvent on anything electrical --especially motors. Use only a contact cleaner or 99% isopropyl alcohol--not rubbing alcohol or anything with water. A little solvent on OUTSIDE to clean grease is OK as long as it doesn't go inside. Motor wires have a varnish enamel coating that is the only insulation. The carb cleaner may have already dissolved it.
To take the motor off, there should be 2 long bolts on the end that go all the way through the motor and screw into the coned piece at front. If the frame will allow, you can loosen those and then the motor should pull out a bit to disengage the armature from the worm gear & then tilt it out. Watch out for any pieces that might fall out. Look in the parts or service manual suspension section to get an idea of how it goes & fits together.
Posted on: 2008/8/15 15:56
|
|||
|
||||
|
Re: Henry's 55 Constellation
|
||||
|---|---|---|---|---|
|
Forum Ambassador

|
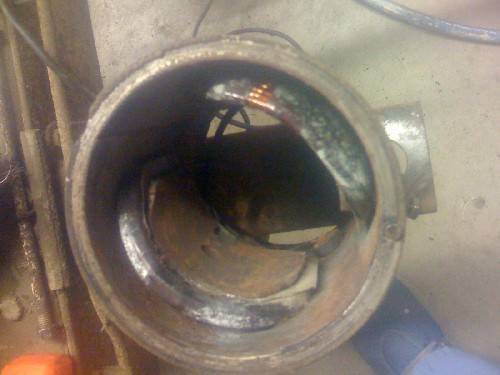
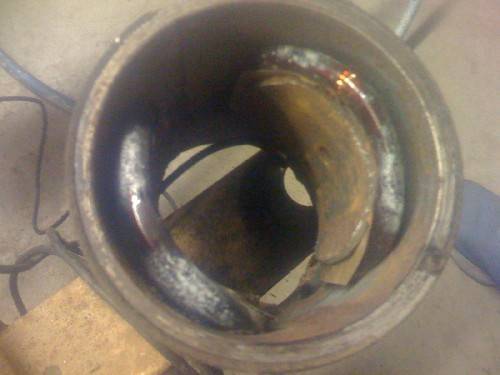
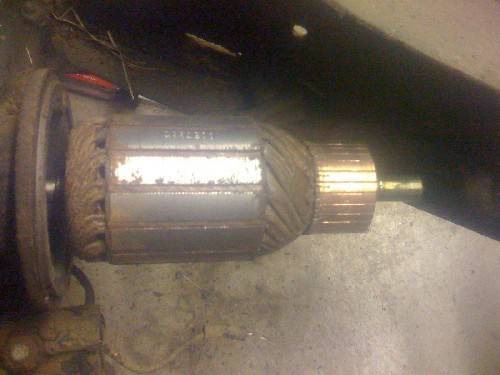
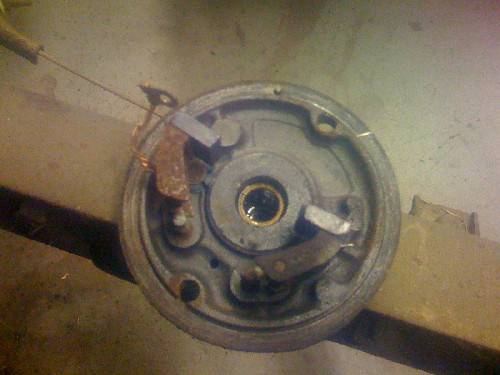
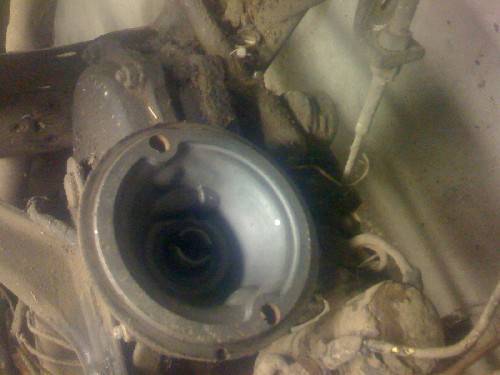
took the compensator motor off the torsion level suspension. yeah to say the least it is pretty nasty in there. lots of surface rust and corrosion. it will need a rebuild for sure.
enjoy. i think this project blog has to be the most informative picture archive ever. i don't think i have seen a 55 in this many stages of pictures before, especially not all the components taken apart, so you can see what they look like. hope it helps others one day. later, Hank
Posted on: 2008/8/28 9:38
|
|||
|
1937 Packard 138-CD Deluxe Touring Limousine
Maroon/Black 1090-1021 [url=https://packardinfo.com/xoops/html/modules/registry/View.php?ID=232]1955 Packard |
||||
|
||||
|
Re: Henry's 55 Constellation
|
||||
|---|---|---|---|---|
|
Forum Ambassador
|
Are you thinking professionally rebuilt or doing yourself.
It's a modified Autolite generator so any good but old time shop should be able to handle the electrical part IF they're willing. Without the front nose piece though, they won't be able to test run and you won't be able to give them that. The biggest issue I see is the condition of brushes and mounts. I'd suggest freeing, cleaning, lubing those up, check for any wiring that looks damaged, shorted etc. Blow out the gunk from field coils and remove what rust you can but DO NOT DISSAMBLE anything else. Clean the commutator, lubricate bearings and put back together and see what happens. If it still, doesn't co-operate then it's time for professionals.
Posted on: 2008/8/28 15:43
|
|||
|
||||


