|
Re: Saving the original paintwork and trunk emblem - 1951 200 barn findand
|
||||
|---|---|---|---|---|
|
Forum Ambassador
|
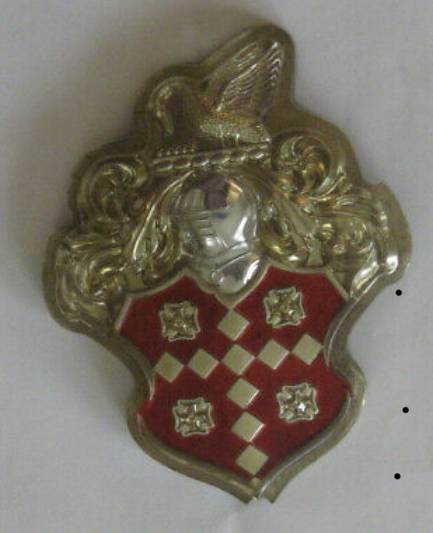
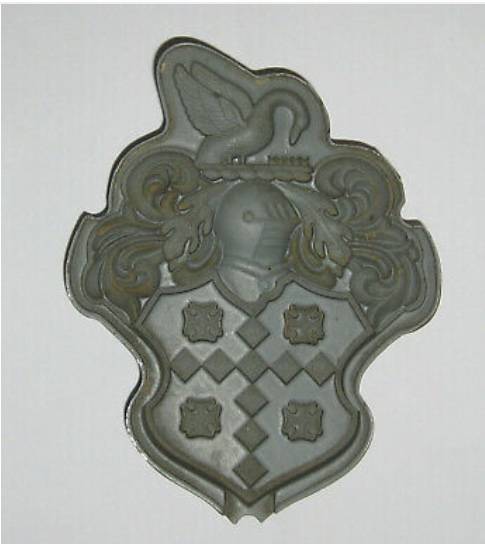
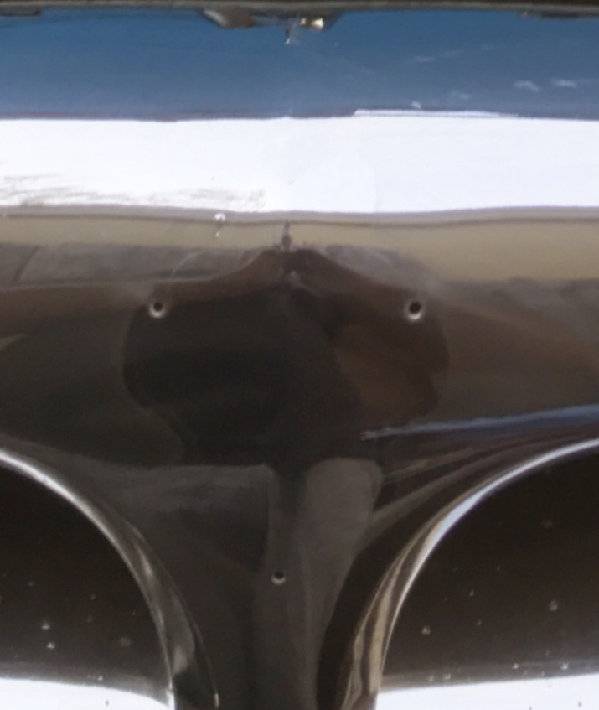
There is a chrome bezel surround for the plastic piece that has the pins. It is a thin metal stamped piece the exact shape of the emblem. The plastic slips inside and is held to the grill by the bezel. There is a picture of the bezel in this ebay listing but the pins appear to be broken off. The pins usually break when people try to pry the emblem off not realizing there are speednuts behind the grill that need to be carefully removed from the pins first.
Posted on: 2019/5/26 17:03
|
|||
|
Howard
|
||||
|
||||
|
Re: Saving the original paintwork and trunk emblem - 1951 200 barn findand
|
||||
|---|---|---|---|---|
|
Home away from home
|
I have the proper 1951 surround in case you still want me to check it out for you. I'm going to my Oregon shop next week.
Posted on: 2019/5/26 18:31
|
|||
|
||||
|
Re: Saving the original paintwork and trunk emblem - 1951 200 barn findand
|
||||
|---|---|---|---|---|
|
Home away from home

|
Howard - AHA! I knew I had to be missing something - had me scratching my head.
Don, unfortunately I didn't end up winning the auction for emblem - Thanks much for the offer!
Posted on: 2019/6/13 14:38
|
|||
|
1951 200 Deluxe Sedan Valiant Green Metallic
Vehicle #:2462 8372 |
||||
|
||||
|
Re: Saving the original paintwork and trunk emblem - 1951 200 barn findand
|
||||
|---|---|---|---|---|
|
Home away from home

|
I started the 12v conversion yesterday, I can see why many discourage this as it takes a lot to do this correct for the average Joe who isn't well versed on the Packard nuances. I've read BigKevs build post a few times and its been a great help, Thanks Kev!
If anyone sees me doing anything wrong or has any help on my current open items below your knowledge sharing is much appreciated! Current open items #1: the turn signal indicator seems to have play on either far end of the up (right) or down (left) movement. I need to figure out how to disassemble to column to get to it. #2. the headlight switch cuts in and out - based on what I've read it seems like the rheostat may need cleaning. Trying to figure out how to get the entire switch out. Looks like I need a very small allen wrench to get the knob off and the very fine needle nose to fit into the slot of the bezel the mates to the dash to turn (loosen it). #3: oil sending unit: I found a new unit for a 55-56, I wondering if this an option for my 1951? From what I have read i need a unit the kicks of at <20 psi. #4 Oil / fuel Sending units: I still haven't identified a viable fuel sending option and I cant find the oil sending unit referenced here on the site. I and am wondering if a oil sending unit with 20 psi, 1/8 in.-27 will work PN ALL99059 (All Star) summitracing.com/parts/aaf-all99059 #5: I'm trying to find a starter Solenoid because I can't find the one listed in parts X for sale #6: Wondering is the 12v Cig lighter elemen from a 55/56 senior will fit #7 Still undecided on which 3 wire 10si Alternator, due to the pulley - need to find one with v groove 7/16 pulley I believe I've read that the resistor in the 51 instrument panel will work with a 12v input. I will be testing with a 12v source in and see what comes out and report back with my findings Is there anything unique I should stay aware of for the ignition connection, or anything else for this conversion So far I have accounted for the below: - External Ballast Resistor PNAL-795(Duralast) Autozone-$5.69 -Ignition Points PNDR1074MV (Duralast) Autozone $5.95 - Condensor U1511 (Duralast) Autozone $13.49 - turn signal flasher - Coil IC12 (Echlin) NAPA $42.99 Bulbs Area / Candle Power (cp) / Bulb # Map Light (6cp) 90 Glove Box (2cp) 57 Ignition Switch (2cp) 57 Turn indicator light (1cp) 53 Direction signal (2cp) 57 Oil pressure n (2cp) 57 Selector indicator (1cp) 53 Instrument light (2cp) 57 License Plate (2cp) 57 Park and turn (front) (21/3cp) 1157 (amber) Stop and tail (3cp) 1034 Trunk (6cp) 98 Back up (32cp) 1129? Headlights H6024
Posted on: 2019/6/16 17:22
|
|||
|
1951 200 Deluxe Sedan Valiant Green Metallic
Vehicle #:2462 8372 |
||||
|
||||
|
Re: Saving the original paintwork and trunk emblem - 1951 200 barn findand
|
||||
|---|---|---|---|---|
|
Forum Ambassador
|
To get the turn signal switch out you remove the steering wheel. The switch is screwed to a couple of mounting pads on the shroud and the lever unscrews from the switch. Disconnect the 6 pin plug coming out of the column at the edge of the dash and the pins should be able to be pulled out of the rubber base. Keep track of which pin goes where and try not to be rough as the old rubber could be hard and brittle. I believe most of the bases have slots around the side the wires fit into but it has been a long time since I had one apart and memory could have failed. After the plug base, lever, and mounting screws are off the switch and wires will pull up out of the shroud. It is tight pulling around the wiper switch so there may need to be a bit of finesse. Getting them back down is more fun.
Headlight switch has a self resetting circuit breaker on the end and that is probably what is cutting in and out. The breaker could have aged and not be able to hold the rated current anymore but more likely is a direct short has caused the breaker to trip, reset after a few seconds and if the short is still present trip again. It will keep doing this until the short is fixed or the breaker fails. The problem can be anywhere as the headlights, park lights, dash lights and tail lights all come off the breaker. A wire with old insulation falling off is the most likely problem but who knows where. You will just have to search carefully for a wire touching metal. The rheostat at the other end of the switch usually just affects the dash lights in that they won't turn on or if they come on turning the knob just a tiny bit kills them again. Shorts in dash lights can happen if the insulation shrinks back and the center wire touches the socket base as it exits the shell. The 51 oil light needs a switch type sender not the gauge sender for 55-6 that was discussed a few days ago. A Napa OP 6742 turns off the light at 6psi and is probably a good choice. For a higher safety point since the light will come on earlier but probably more flicker and the light most likely coming on at idle speed the OP 6741 is a 15psi switch. Both are 1/8-27 pipe thread. Kanter may still have repro fuel senders or if not some of the 57 Ford senders will work but you need to watch arm length on those because of the different tank capacities. You can also get a fairly inexpensive Ford universal sender and do the work to cut the float arm to fit the tank and modify the mounting plate. You need an ohm range of around 75 empty to 10 full. Before Kanter had the repros I did this on my car and there is a how to adapt a modern sender instruction in the literature section.
Posted on: 2019/6/16 17:59
|
|||
|
Howard
|
||||
|
||||
|
Re: Saving the original paintwork and trunk emblem - 1951 200 barn findand
|
||||
|---|---|---|---|---|
|
Home away from home

|
Hi Howard - When I turn the headlight switch to engage the dash lights they turn on, maybe not right away but at some point in the revolution of the knob they turn on and then will flutter and turn off if you turn a little more. This is impacting all interior lights - Due to the wiring being in such poor condition (especially once it leaves the cabin into the engine bay) I have disconnected the headlights so I don't know if what I am experiencing with the switch also impacts the headlights.
I'm leaving now to try to find some tiny allen wrenches to remove the knob (maybe eye glass repair tools?). Then get a small needle nose in the notch of the bezel holding the switch to the dash to see if I can get the switch off. Then use some grinding compound to clean them up and hope for the best As always, thank you Sir!
Posted on: 2019/6/16 18:09
|
|||
|
1951 200 Deluxe Sedan Valiant Green Metallic
Vehicle #:2462 8372 |
||||
|
||||
|
Re: Saving the original paintwork and trunk emblem - 1951 200 barn findand
|
||||
|---|---|---|---|---|
|
Forum Ambassador
|
The rheostat itself should not impact the headlights or any other lights as they come off a totally separate terminal on the switch. The rheostat and dash light problem is well known but if the dash lights are shorting and tripping the breaker then yes the headlights, tail and parking lights would also be affected. On the other side of the ceramic holding the rheostat the courtesy lights do have a section that gets grounded to turn them on but are powered separately from the other lights.
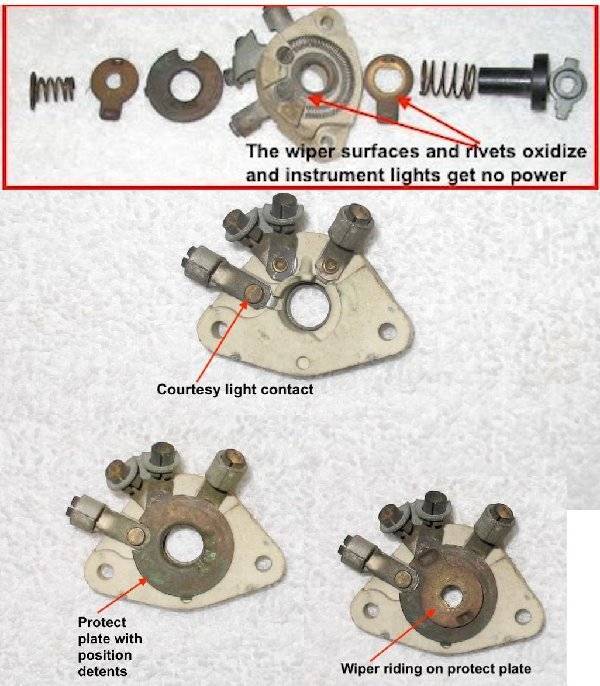
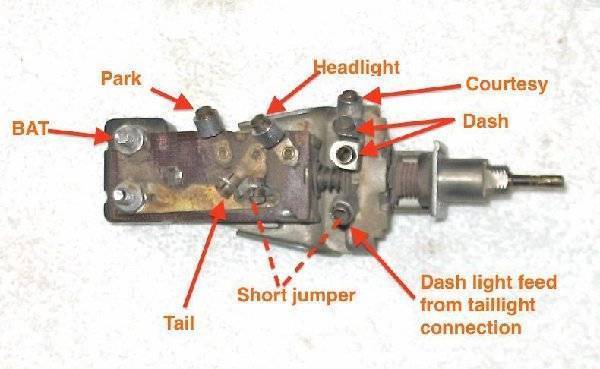
Here is a breakdown of the switch showing where to concentrate the cleaning for the flaky dash lights. I don't recall anyone trying grinding compound before and since the rheostat section will not come off the switch easily it may be worth seeing what it will do in getting between and cleaning the inaccessible wiper plate areas. Just be careful not to get any in the rest of the switch and use something like contact cleaner to get it completely out and off of the switch once it has done its abrasive or polishing job.
Posted on: 2019/6/16 18:39
|
|||
|
Howard
|
||||
|
||||
|
Re: Saving the original paintwork and trunk emblem - 1951 200 barn findand
|
||||
|---|---|---|---|---|
|
Home away from home

|
Howard- those images are absolutely AMAZING- thank you so much for ALL information!!
I cannot take the credit for the Idea to use grinding compound, this advice was given by Ross and found here on the site, below is a direct quote from Ross "My favorite method to clean up those rheostats and all the little contact discs down around the center of the shaft is to daub them with valve lapping compound then work them back and forth for a while. Afterwards blast everything clean with brake cleaner and then lube with a touch of white lube. Works really well"
Posted on: 2019/6/16 20:19
|
|||
|
1951 200 Deluxe Sedan Valiant Green Metallic
Vehicle #:2462 8372 |
||||
|
||||
|
Re: Saving the original paintwork and trunk emblem - 1951 200 barn findand
|
||||
|---|---|---|---|---|
|
Forum Ambassador
|
Thanks. I don't remember seeing Ross's comment so it is a tried and proven method and should work well. One place it might not work is if corrosion has set up where rivets pass thru the ceramic to connect terminals to the other items. Sometimes when the wires are carelessly removed the terminals are twisted and the rivet is loosened. Once that happens there is no easy way to tighten things so good contact is restored and if corrosion sets in it just seems to keep coming back.
Posted on: 2019/6/16 20:37
|
|||
|
Howard
|
||||
|
||||

 (23.07 KB)
 (139.11 KB)