|
Re: KPack's 1954 Panama
|
||||
|---|---|---|---|---|
|
Home away from home

|
Hi Kevin,
Great addition that blast cabinet. It is nice to see parts go from rusty and crusty to bare metal, then to shiny paint. It will help you a lot with getting things looking nice. I had the same problem with my "hot air choke tube" I just ran a new metal tube to the top of the hole on the manifold, reduced the diameter of the end of the tube and jammed it in the broken off tube, and put some exhaust sealer putty around it. It is a pragmatic fix, but works. -I think there are pics in my blog from a few years ago. Drilling out that old tube and then pressing a new one into the manifold is going to be a lot of work, and I would not do it.
Posted on: 2021/1/7 5:11
|
|||
|
1953 Clipper Delux Club Sedan, 1969 912, 1990 Miata, 2009 Ford S-Max.
|
||||
|
||||
|
Re: KPack's 1954 Panama
|
||||
|---|---|---|---|---|
|
Home away from home

|
Thanks both of you for the suggestions. Ross, are you saying use the 1/4" bit to open up the center of the tube and not remove all of it? So I should make a tapered fit like Mike did? Seems like 1/4" would be too small to remove all the remnants of the tube, which is why I ask.
While I'm on the subject, what diameter is the original tube? I'll need to find something I can use at NAPA. -Kevin
Posted on: 2021/1/7 11:00
|
|||
|
||||
|
Re: KPack's 1954 Panama
|
||||
|---|---|---|---|---|
|
Home away from home

|
Use a 1/4" bit as it is a 1/4" tube.
Posted on: 2021/1/7 13:23
|
|||
|
||||
|
Re: KPack's 1954 Panama
|
||||
|---|---|---|---|---|
|
Home away from home
|
Exactly, I just went out and measured mine...As Ross wrote, it is a 1/4 inch tube. The end of the tube that goes into the carb is flared, you can flare the tube yourself if you have the equipment, or buy a lenght of tube from Napa and cut to fit.
Posted on: 2021/1/7 13:31
|
|||
|
1953 Clipper Delux Club Sedan, 1969 912, 1990 Miata, 2009 Ford S-Max.
|
||||
|
||||
|
Re: KPack's 1954 Panama
|
||||
|---|---|---|---|---|
|
Home away from home
|
Well that was a nice easy job. Ross was right...though it took me closer to 10 seconds. 1/4" drill bit straight down. Really easy to tell if you're drilling the steel or touching the iron. Going to grab a piece of tubing from NAPA tomorrow, then bend, cut and install. Waiting for a replacement choke thermostat (replacement carb's choke thermostat housing is falling apart) then the new carb goes on.
Thanks for the help! Attach file:  (122.72 KB) (122.72 KB)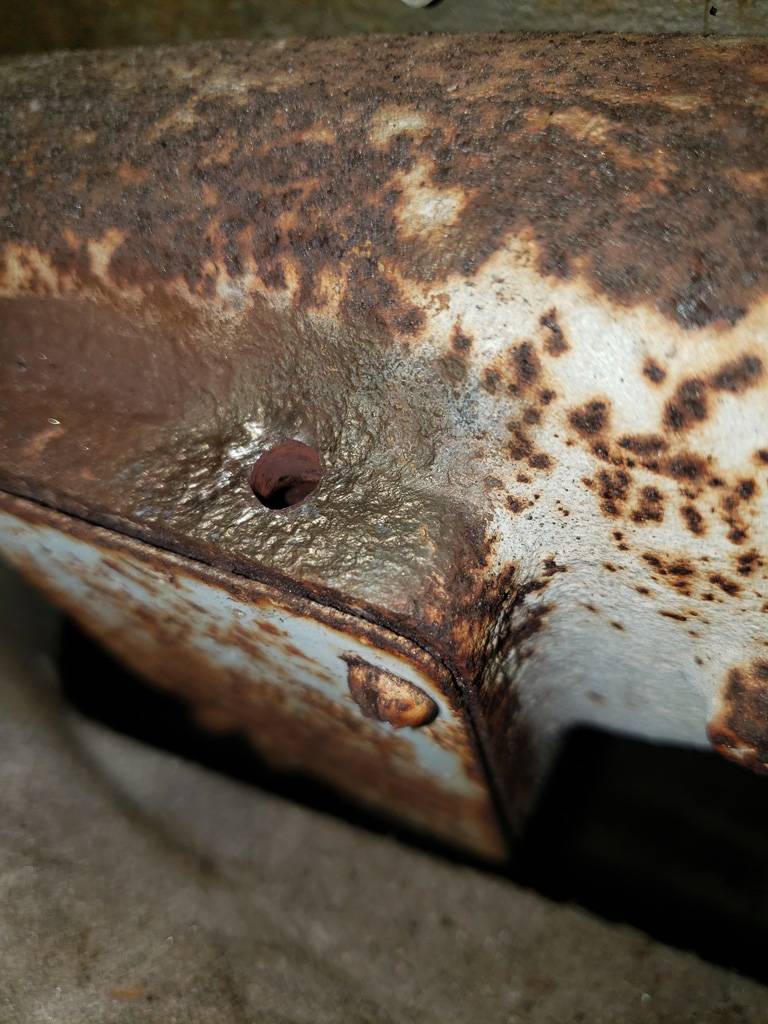
Posted on: 2021/1/8 0:13
|
|||
|
||||
|
Re: KPack's 1954 Panama
|
||||
|---|---|---|---|---|
|
Home away from home
|
Great work! glad you brought this up, now I will have to drill mine out and make a better repair than what I have. I didn't know that the tube was just stuck in a little bit.
Posted on: 2021/1/8 8:57
|
|||
|
1953 Clipper Delux Club Sedan, 1969 912, 1990 Miata, 2009 Ford S-Max.
|
||||
|
||||
|
Re: KPack
|
||||
|---|---|---|---|---|
|
Home away from home
|
Some progress on the Panama over the past week. I've been getting things ready for eventually getting a new windshield installed. As part of that process I am doing a bit of body work on the strip right above the windshield flange and below the drip rail to smooth it out and make it as nice as possible. I also removed all the old seam sealer from the drip rail. Most of it had surface rust underneath it that was bleeding through the white paint. With it out the way I used a wire brush on a Dremel and cleaned it as best I could. Then applied some Ospho with a small brush and let it sit for a day. Reapplied Ospho and immediately cleaned it off with water (supposed to be the only way that you can get the acid off). Then mixed up some epoxy primer and painted it into the seam. I'll apply new seam sealer soon.
Fabric samples came from SMS. They are very good. The seat fabric is right on. My original fabric is definitely faded. The headliner sample they sent is not correct though. The original headliner (confirmed with other Panama's) is smooth, like the center sample. Compared to the scraps of the original that I have left, it looks like a good match. So the headliner is now being made and should hopefully be here in a couple weeks. Now I have to learn how to install a headliner. I had previously wire wheeled, applied Ospho, and primed all the headliner bows. I went back and scuffed them up and painted them with a gray enamel (easier to see against the black when installing) and put them back in place to test the fit. All good. It's amazing to see the difference on the roof from when I first got the car. 6 months ago I pulled down the original headliner to reveal a disaster. Now I'm getting ready to install a new one, and the roof is rust-free, epoxied, painted, insulated, and clean. Too bad it will never be seen again. I took the lower interior windshield trim and cleaned it up. This was another of the pieces that had been covered in fake wood vinyl sticker at some point in the past. I'm glad it was because it kept the chrome almost pristine. Removing all the glue gunk was a pain, but they polished up very nicely. This next week I will finish the body work above the windshield, seam seal the drip rail, and learn all about headliners. -Kevin Attach file: 1059_600665b8c3266.jpg (66.19 KB)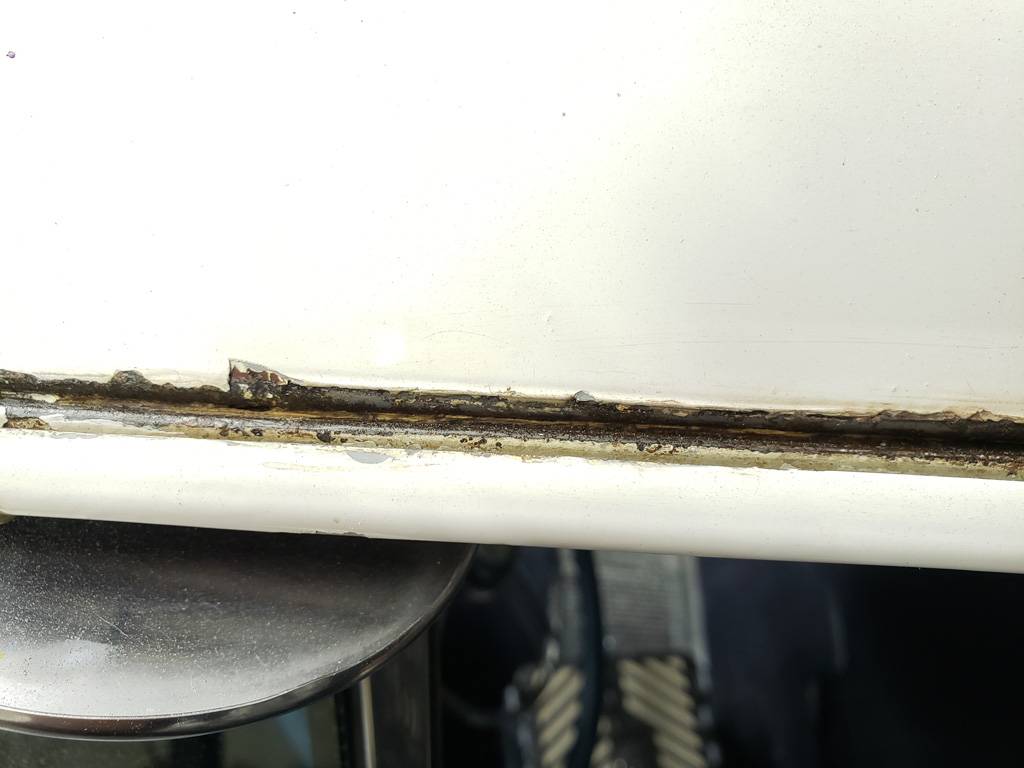 1059_600665d4b3195.jpg (113.03 KB) 1059_600665d4b3195.jpg (113.03 KB) 1059_600665edbaa32.jpg (100.48 KB) 1059_600665edbaa32.jpg (100.48 KB)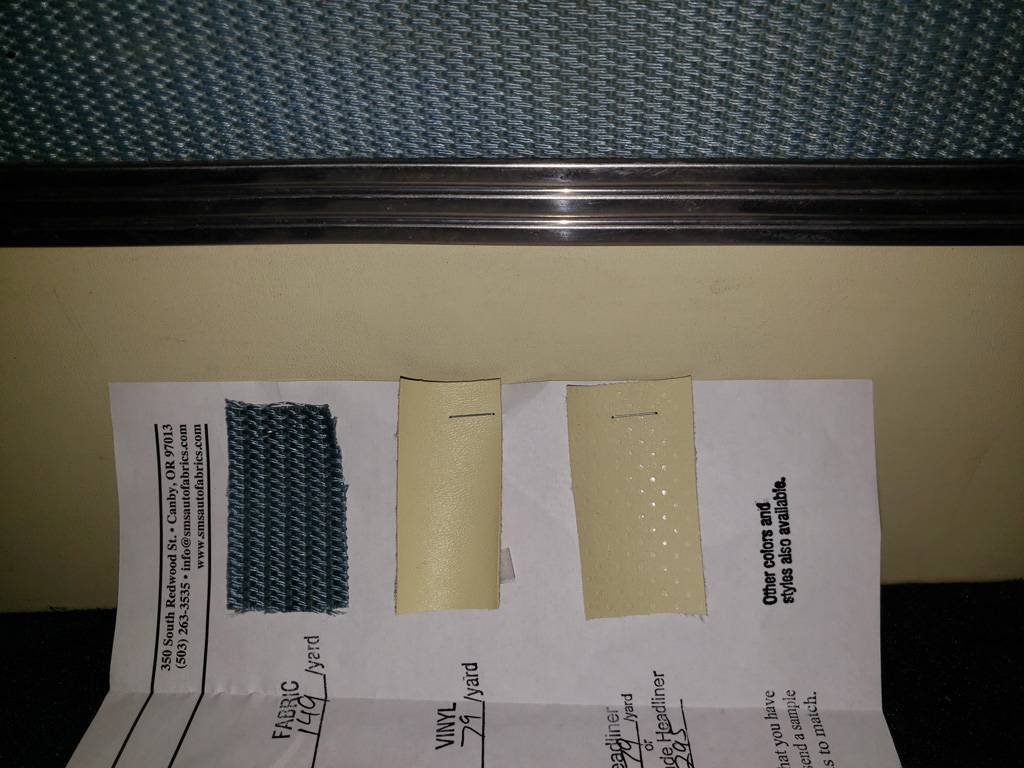 1059_600666086deae.jpg (125.72 KB) 1059_600666086deae.jpg (125.72 KB)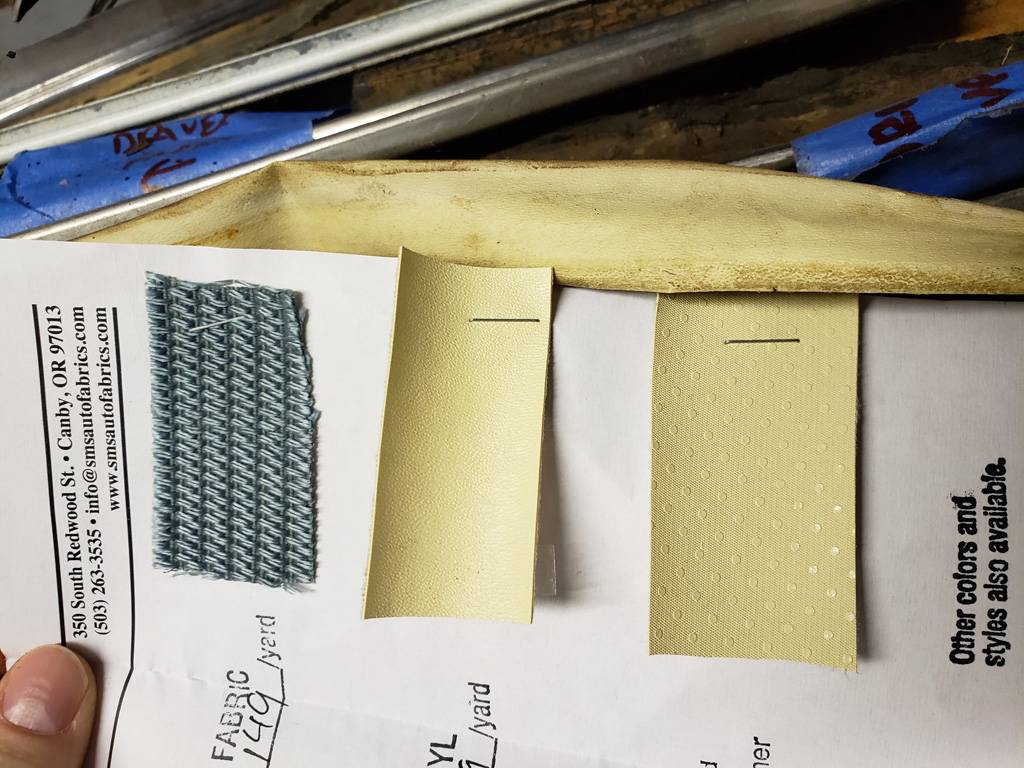 1059_6006663b3d9cd.jpg (119.46 KB) 1059_6006663b3d9cd.jpg (119.46 KB)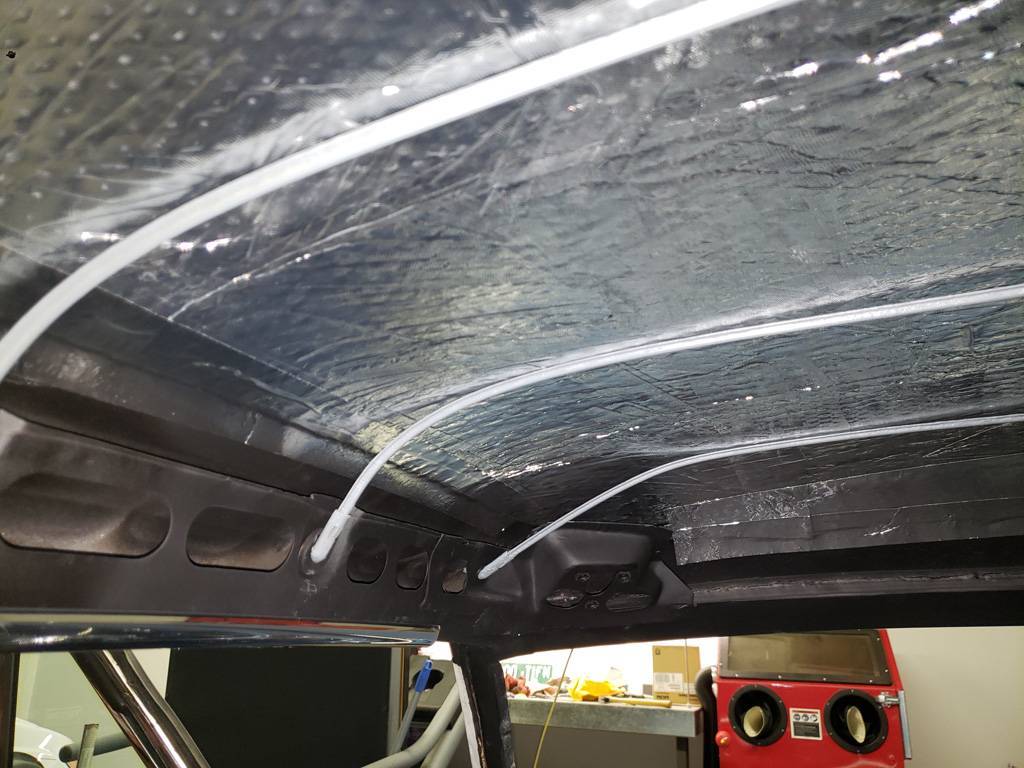 1059_6006667a221d5.jpg (140.79 KB) 1059_6006667a221d5.jpg (140.79 KB)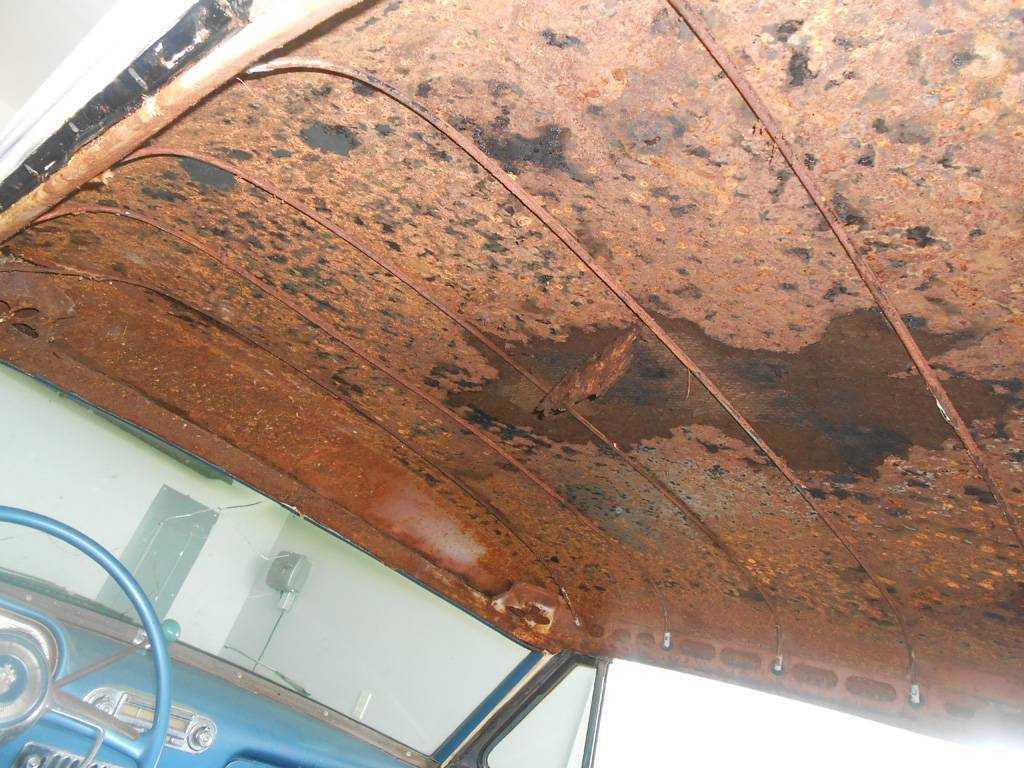 1059_6006669bbe2f1.jpg (178.90 KB) 1059_6006669bbe2f1.jpg (178.90 KB)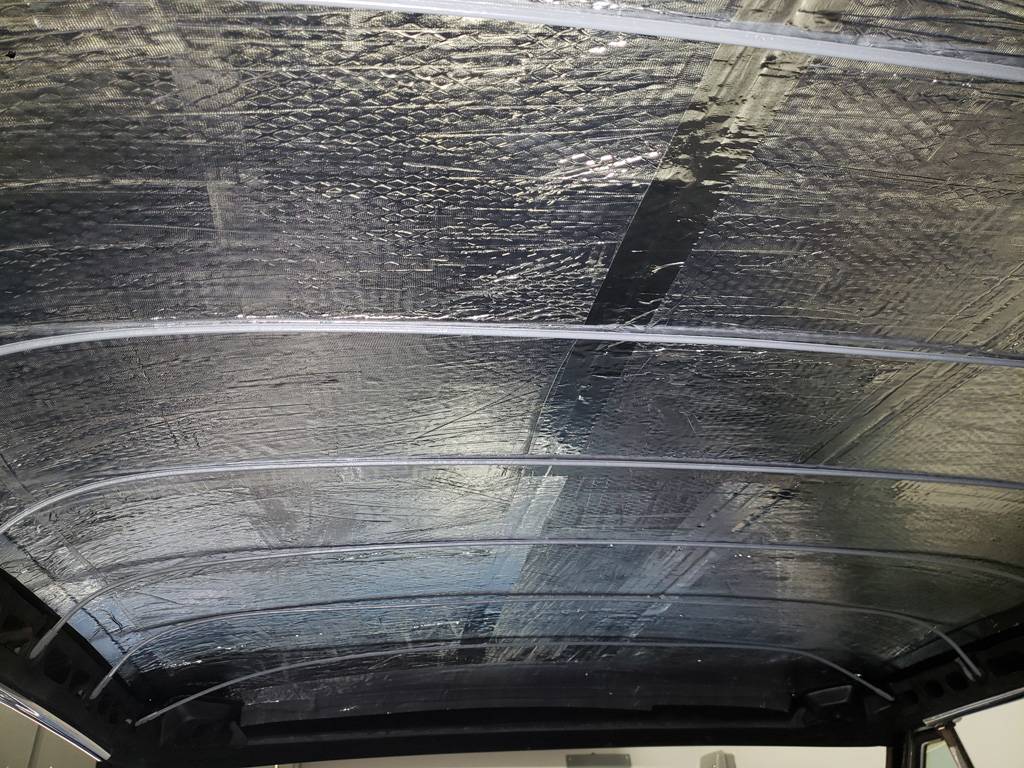 1059_600666e48dec3.jpg (75.36 KB) 1059_600666e48dec3.jpg (75.36 KB)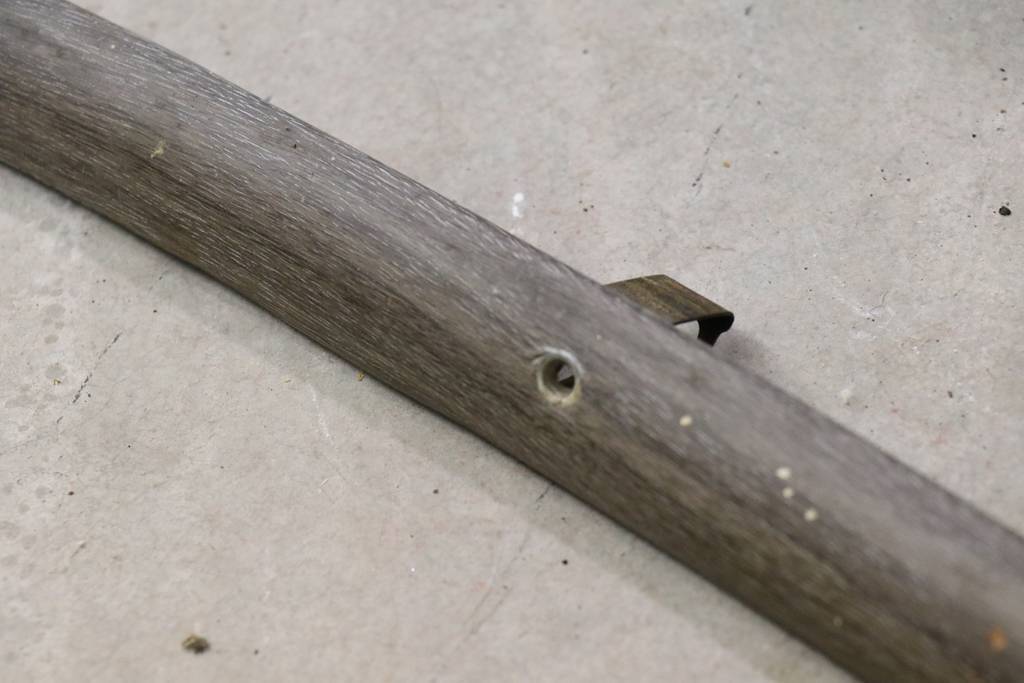 1059_6006670465d83.jpg (102.38 KB) 1059_6006670465d83.jpg (102.38 KB)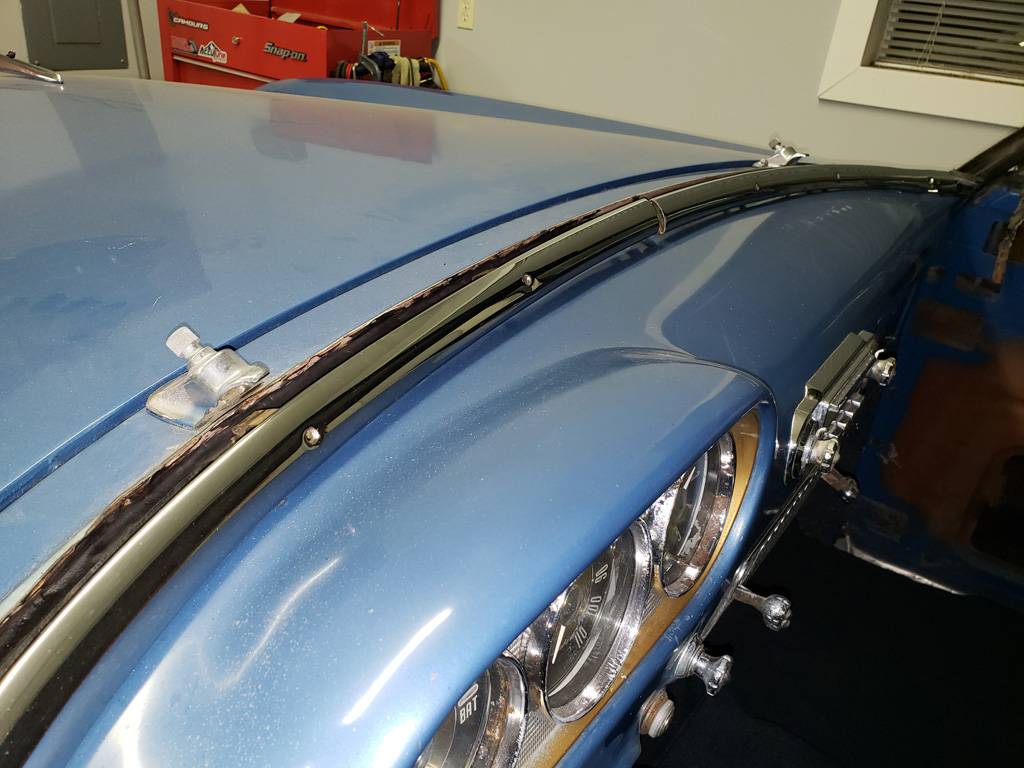
Posted on: 2021/1/17 19:59
|
|||
|
||||
|
Re: KPack's 1954 Panama
|
||||
|---|---|---|---|---|
|
Home away from home
|
Alright, got the photos up from before. They lost their file names though. No big deal though.
Had some time to work today, and I focused on the replacement carb I picked up from Ross. I had previously completely disassembled it and cleaned every component. It already been rebuilt at some point in the past, and those rebuild components were still in good condition. The threads on the heat riser tub were cross-threaded, so I corrected that. Then removed the original carb and installed the new one. Put some fuel in the float bowl and car started right up. However, it was somewhat rough, and died after a few minutes. Started it up again, was a bit better, but then died again. Tons of smoke, no oil smell...just super rich. After it died the second time I saw that there was gas dripping out from the throttle plate shaft bushing. Looking down the throat showed that it was super wet inside the carb. My guess is the float either has a hole, or the needle and seat are bad. I knew that the original carb worked, and it had brand new rebuild parts on it. So I opened them both up and swapped the float and needle/seat from the original carb into the new carb. Reassembled everything and installed the new carb back into the car. Car started right up and seems to work fine. The choke plate opens up slowly when getting warm, though never reached fully open. Not sure how this normally acts. Accelerator pump seems to work better. I noticed that the car has a hard time returning to normal idle after taking my foot off the gas. It did this before I swapped carbs. I have to manually move the gas pedal to get the idle back to normal....it sticks high. Problem in the throttle linkage? Sticking pedal? Should I lube the throttle plate shaft on the carb? -Kevin
Posted on: 2021/1/19 0:09
|
|||
|
||||
|
Re: KPack's 1954 Panama
|
||||
|---|---|---|---|---|
|
Home away from home

|
Kevin, in general, the steps I take with a sticking throttle would be as follows:
1) Compare your linkage setup to the parts manual - do you have all the correct pieces? Especially verify that you have the correct return springs and that they are connected in the correct locations. I always stay away from aftermarket return springs -- get NOS ones or good used. Are all the little clips that the springs anchor to in place? 2) Disconnect the linkage from the carb, and make sure the various linkage on the carb itself works freely. 3) With the linkage still disconnected from the carb, see if the rest of the linkage works freely. If it doesn't, one by one disconnect each linkage piece to see if the binding frees up. Go all the way back to the pedal. Check all the joints for wear, signs of binding, etc. Repair/replace as required. 4) Is the linkage rubbing on something that it shouldn't be rubbing on - non-stock parts, engine not in correct location due to bad engine/trans insulators, etc? 5) Properly lube and replace all components. 6) Perform any linkage adjustments per the Shop Manual I'm sure that Ross and others that have specific experience with '54s will chime in here. There may be common wear issues or even design issues that were later addressed with Service Letters. Unfortunately, I don't have much experience with Packards (yet!), but just tried to lay out how I would generally troubleshoot a sticking linkage issue. Keep us informed on what you find!
Posted on: 2021/1/19 8:30
|
|||
|
Paul
www.studebakerskytop.com |
||||
|
||||


