|
Re: KPack
|
||||
|---|---|---|---|---|
|
Home away from home

|
Work continues. Mostly non-critical things at the moment.
I restored the front emblem a while back (though still haven't installed), and the rear one was just as bad. Really poor spray paint job on it. I removed the trunk lock, chrome, and emblem. The trunk lock got cleaned up, the chrome is terribly pitted and non-usable. I have a better one coming in a few days. The emblem went through the same process I did for the front one. It came out looking much better, though definitely not perfect. I can't get the really reflective metallic gold look that the originals have. And there is a good amount of crazing within the plastic itself, which I can't remove. But at least it's better than it was. Next I sealed the seams on the roof and drip rail. I'm not happy with how it turned out. I applied just to the actual seam, which was really hard to do. The outcome is too rough, and it's going to be a bear to try and smooth it out when I repaint the roof. I've seen some YouTube videos of guys just filling up the drip rail with seam sealer...but these drip rails are deep and really tall....I would think it would look really odd to have them filled up. Thoughts? The door latch hardware has always annoyed me. The previous owner just painted over everything on the door jams. And also didn't use any primer, or prep the surface at all. You can see the paint flaking off. Eventually that will have to get addressed, but I wanted to at least clean up the stuff that's supposed to not be painted. My oldest daughter wanted to help so I taught her how to use the sandblaster. She cleaned everything up nicely and I reinstalled. While I was working on the door I tried to figure out the windows. All the beltline strips and window channel run will need to be replaced, so I will have to figure out how to remove the windows to do it. The convertible and hardtop rear windows are different from the sedans, and the service manual doesn't go over them at all. I have no idea how to get the windows out. Also I'm struggling to figure the front ones out as well. I also need to know how to adjust the rear windows because neither of them go forward far enough to actually form any sort of a seal with the door window. Again, I can't find anything about this in the service manual. Looking at the window issues, I'm thinking I need to get that taken care of before I get too much further. -Kevin Attach file:  Trunk emblem before restoration.jpg (118.92 KB) Trunk emblem before restoration.jpg (118.92 KB)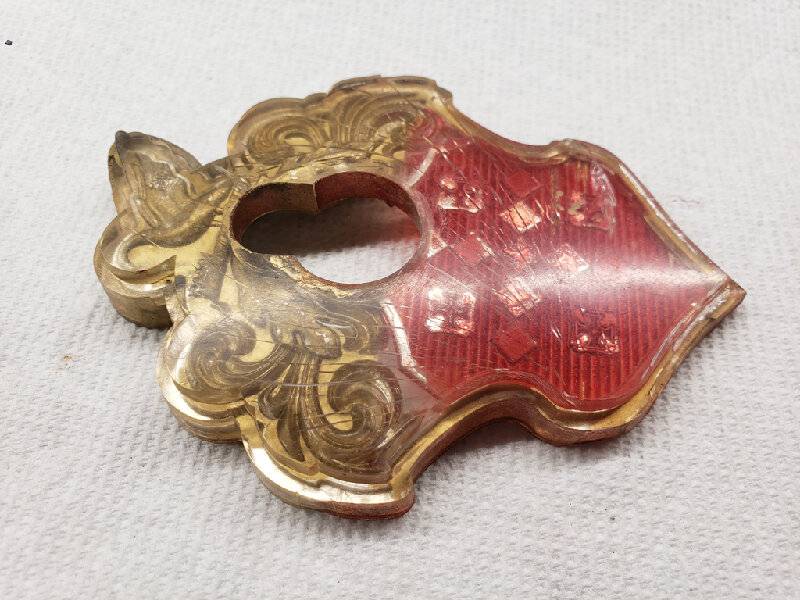  Trunk emblem and lock after restoration.jpg (114.49 KB) Trunk emblem and lock after restoration.jpg (114.49 KB)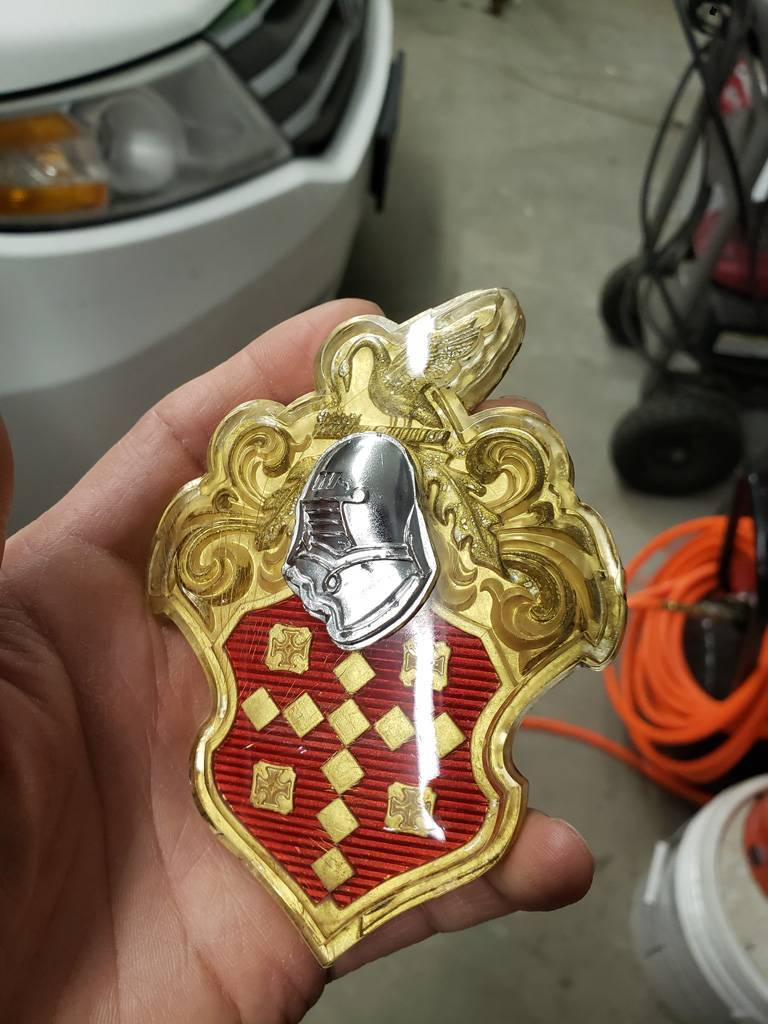  Roof seam sealing.jpg (54.81 KB) Roof seam sealing.jpg (54.81 KB)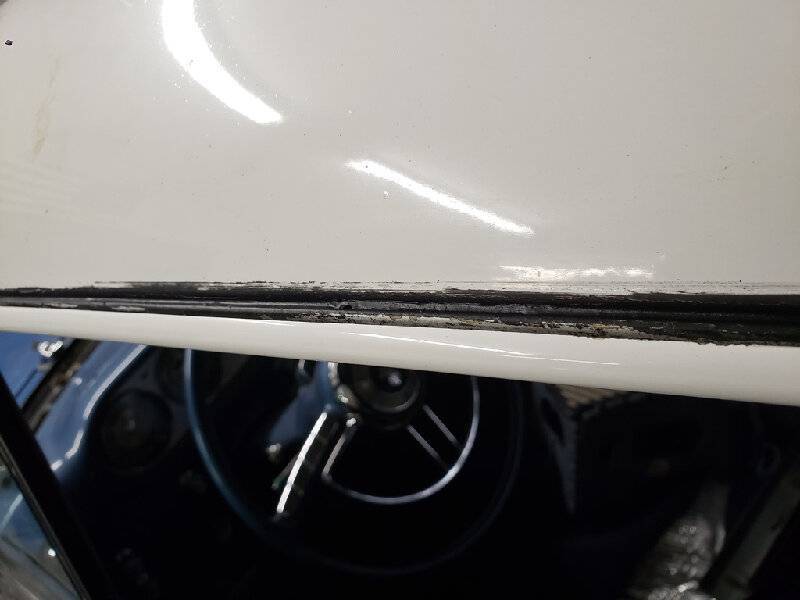  Roof seam sealing front.jpg (55.15 KB) Roof seam sealing front.jpg (55.15 KB)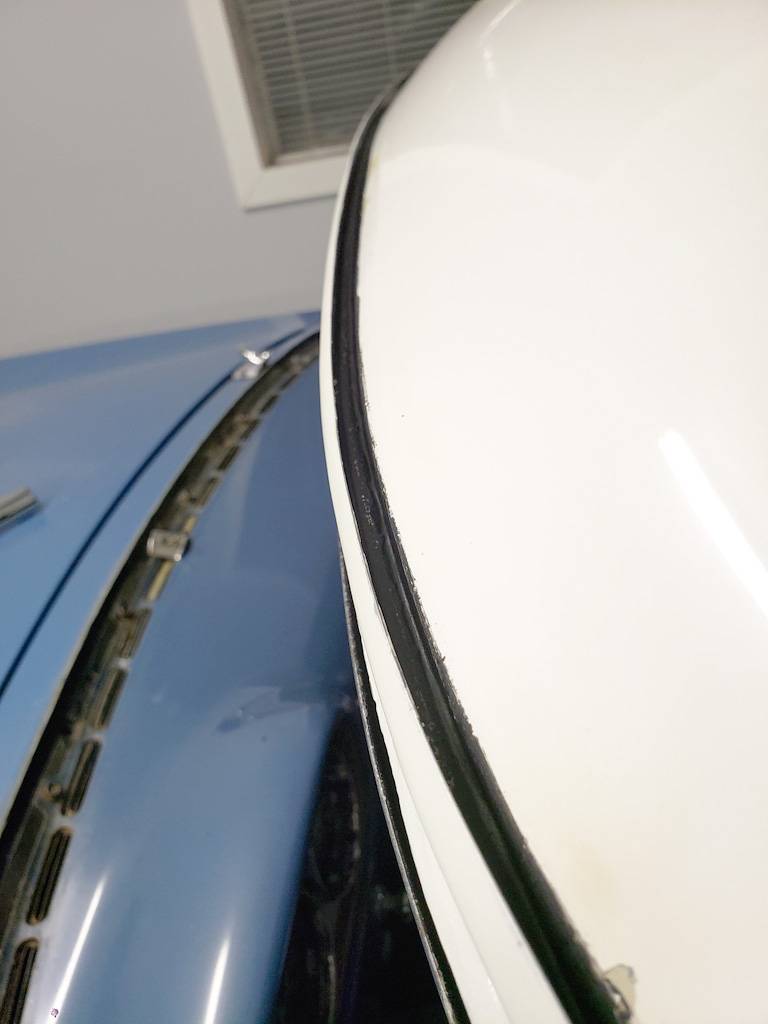  Door hardware painted over (and a pretty bad paint job).jpg (98.09 KB) Door hardware painted over (and a pretty bad paint job).jpg (98.09 KB)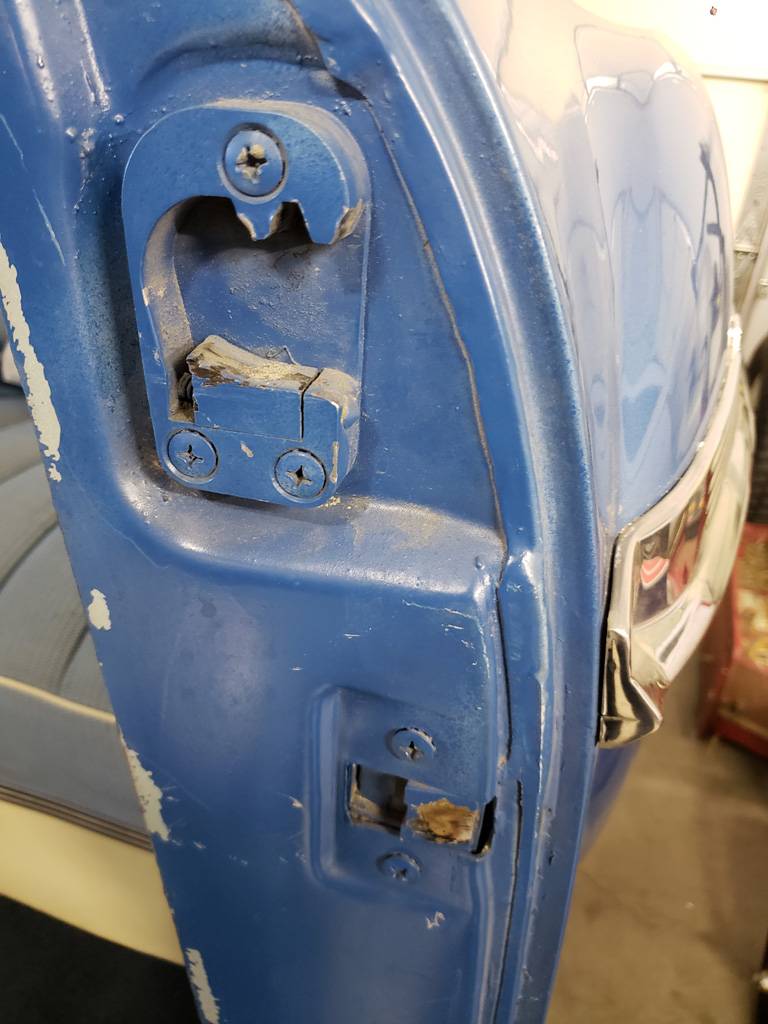  Family work time.jpg (75.13 KB) Family work time.jpg (75.13 KB)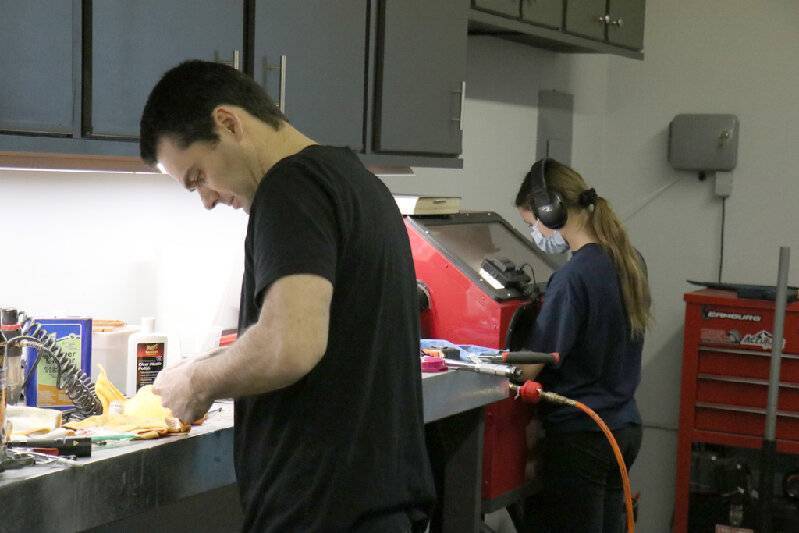  Freshly sandblasted and reinstalled.jpg (98.31 KB) Freshly sandblasted and reinstalled.jpg (98.31 KB)  Ruined beltline.jpg (89.97 KB) Ruined beltline.jpg (89.97 KB)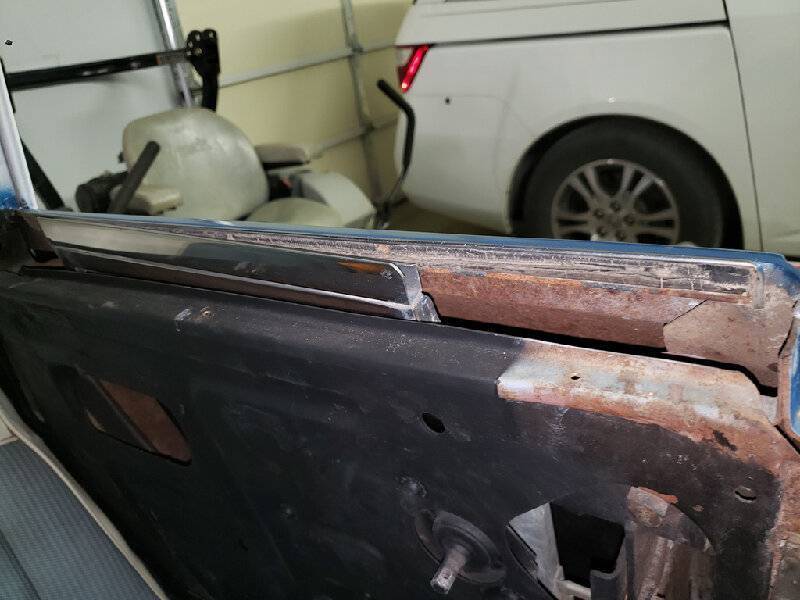  Window adjusting hardware.jpg (94.48 KB) Window adjusting hardware.jpg (94.48 KB)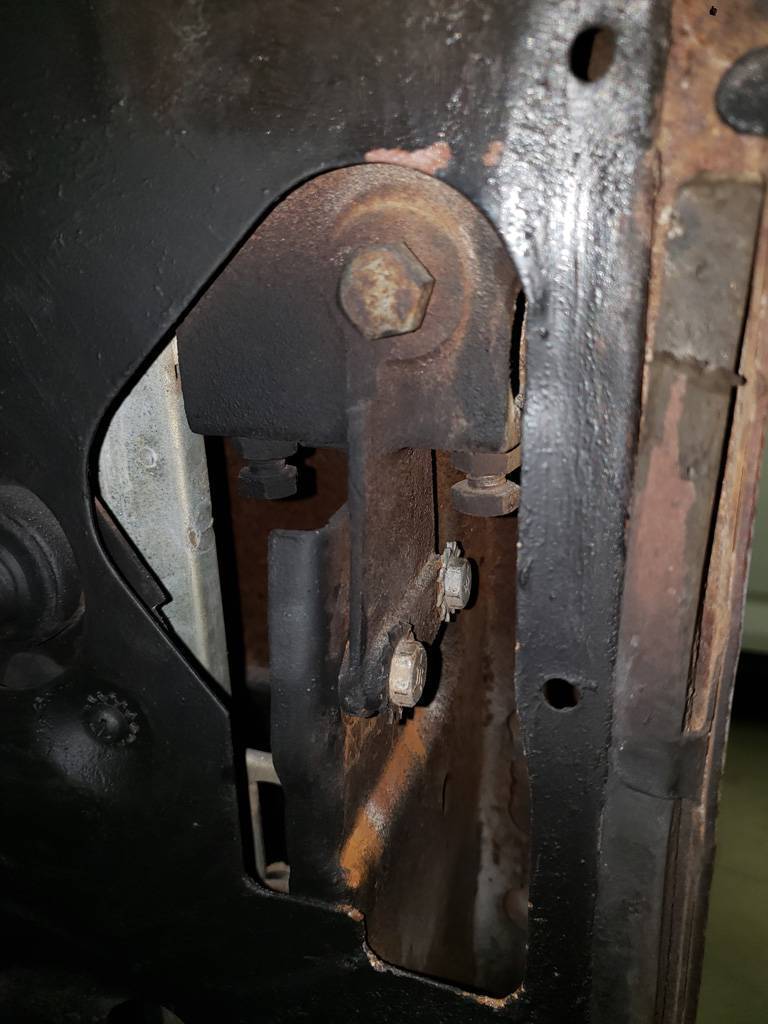  Windows not lining up.jpg (91.38 KB) Windows not lining up.jpg (91.38 KB)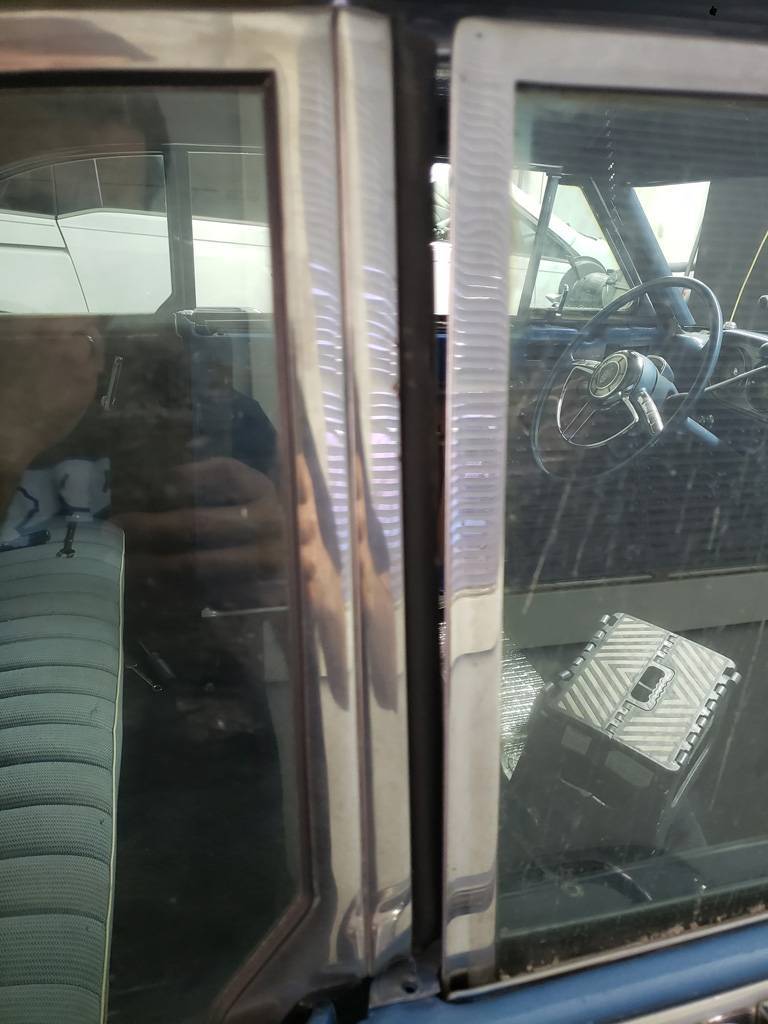
Posted on: 2021/2/7 1:38
|
|||
|
||||
|
Re: KPack's 1954 Panama
|
||||
|---|---|---|---|---|
|
Home away from home
|
The emblem looks beautiful and it appears you have a whole production line set up and running there! On the emblems, they are available as reproductions in case you want them to look perfect. Let me know and I will connect you as I would have to look up the name.
Posted on: 2021/2/7 3:26
|
|||
|
All generalities are false.
Once I thought I was wrong but I was mistaken. Don Pierson Packard / IMPERIAL page CA DMV Licensed Vehicle VIN Verification 1951 Henney-Packard 3-Door Long Wheelbase Air Force Ambulance The 1951 Henney-Packard is For Sale! 1954 Packard Patrician 1954 Packard Patrician Parts Car 1956 Clipper Custom Sedan |
||||
|
||||
|
Re: KPack
|
||||
|---|---|---|---|---|
|
Home away from home

|
Don - I've seen the reproduction emblems and they are nice. But also expensive, and I need to be spending that kind of money on things that are more essential. Eventually I might swap the emblems for the repro's, but only after the car is on the road and I'm enjoying it.
Joe - I wasn't sure how the 2-part systems would work on the curved down portions of the drip rail. I was assuming it would flow down and make a mess. Also, on the sides of the roof, the seam between the roof and drip rail is way up high....like at the level of the top of the drip rail. So I would have to fill the entire drip rail up with the 2-part system for it to actually cover the seam. At least I think that's how that stuff works. Small progress today. Busy with other things, and somehow hurt my shoulder so I can't lift my arm up high. Makes it hard to do much. I found the adjustments for the rear quarter window. Turns out the 55-56 Service Manual is way better than the 51-54 manual for some things. Pictures are way better and so are explanations. Much of the body is shared between those years, and they had a good writeup in the 55-56 manual for the windows. Reference my picture. The rear screw adjusts the down stop, the front screw adjusts the up stop, and the two lower screws allow you to tilt the window in or out of the car to line up in the window slot better. The center bolt is the pivot that the windows tilts on. Easy adjustments (though my bolts required some PB Blaster and some gentle coaxing). Now both rear quarter windows line up perfectly with the door windows. Once I get new gaskets they will be nice and sealed. I still need to figure out how to get the glass out though. I don't think I can move the glass far enough down to get to the beltline strip to replace it. Ordered a replacement trunk emblem surround, thinking it would be in better shape than the one that came off the car. In some ways it is better, but it's basically the same pitted mess that my original one was. The original is on the right and the replacement is on the left. Worth a shot....it was only $30. Looked better in the pictures. Oh well, eventually it will need to get rechromed, along with my bumpers, and the dashboard gauge surrounds. -Kevin Attach file:  Rear quarter window adjustments.jpg (147.77 KB) Rear quarter window adjustments.jpg (147.77 KB)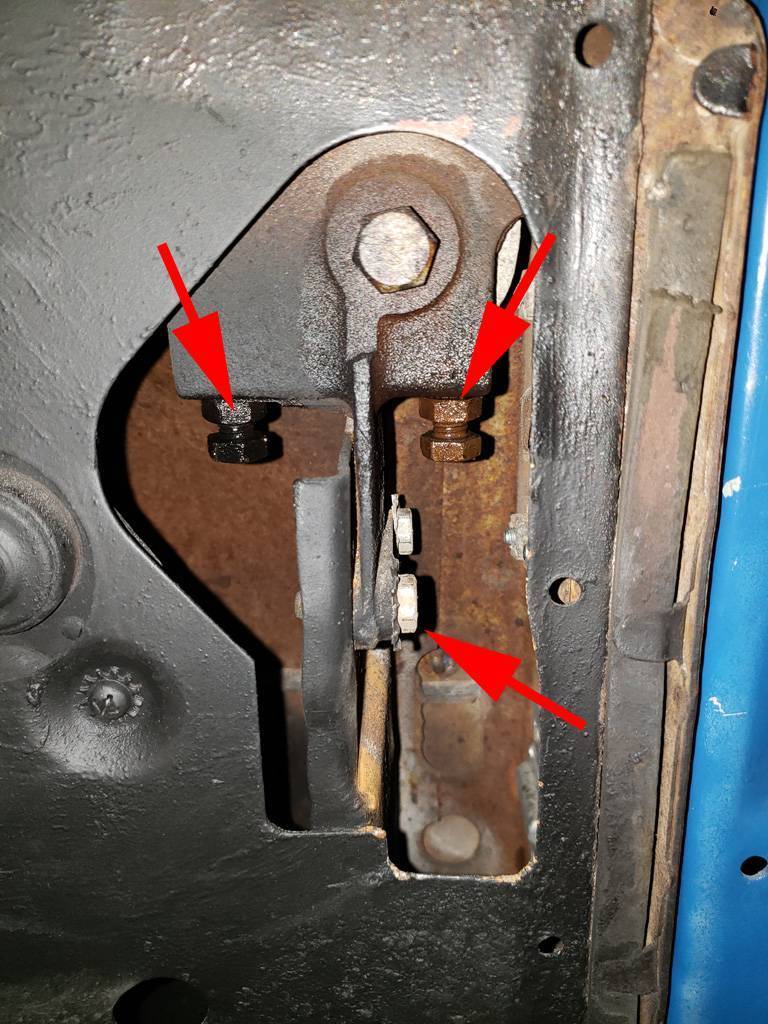  Windows aligned.jpg (93.42 KB) Windows aligned.jpg (93.42 KB)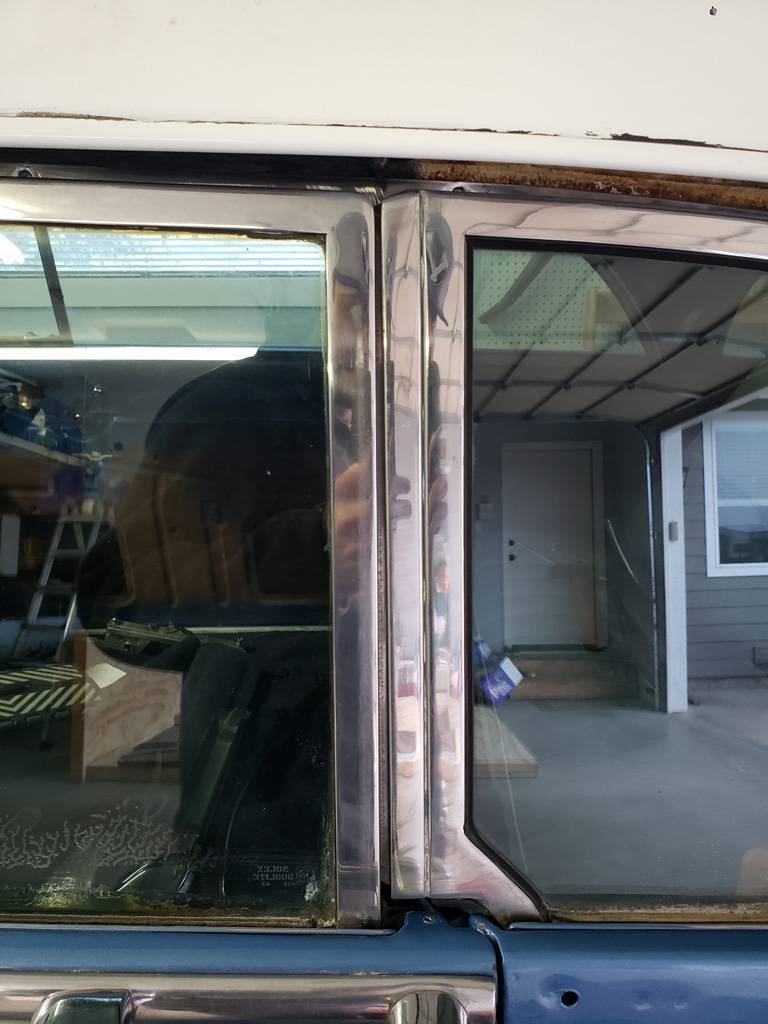  Rear chrome surround comparison.jpg (160.54 KB) Rear chrome surround comparison.jpg (160.54 KB)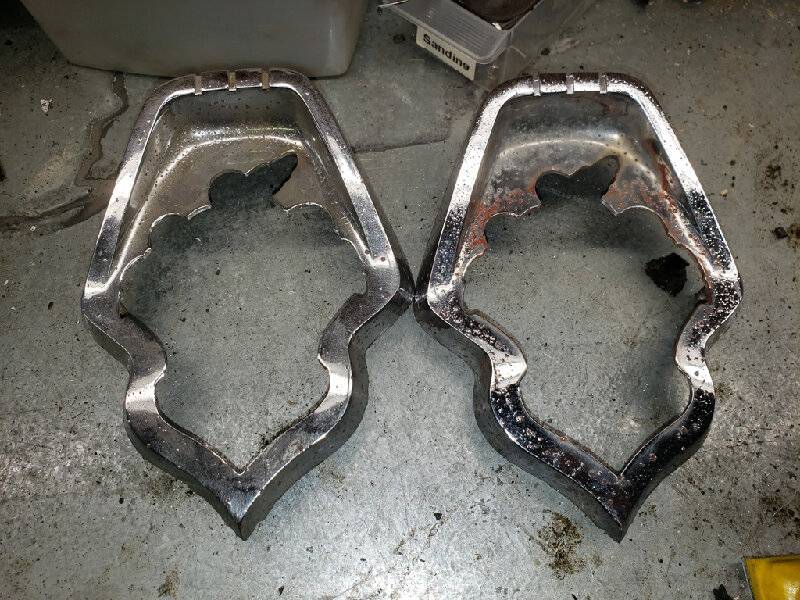  Both are bad.jpg (127.28 KB) Both are bad.jpg (127.28 KB)
Posted on: 2021/2/9 0:39
|
|||
|
||||
|
Re: KPack
|
||||
|---|---|---|---|---|
|
Webmaster
|
Take a look through the Service Index here on the website as well. There maybe supplemental information that could help with the windows. Also take a look at the adjustment for the some models with quarterwindows, like the convertibles. Lastly it may be needed insert shims where items bolt to the body. I had to do this with one of my doors. I had to shim the one of the hinges to bring a door back into alignment.
Posted on: 2021/2/9 8:16
|
|||
|
-BigKev
1954 Packard Clipper Deluxe Touring Sedan -> Registry | Project Blog 1937 Packard 115-C Convertible Coupe -> Registry | Project Blog |
||||
|
||||
|
Re: KPack
|
||||
|---|---|---|---|---|
|
Home away from home

|
BigKev - yes, the Service Counselors had some good bits of info on windows for the convertibles and hardtops. They told what height to set the adjustments at to prevent damage to the beltine trim and for better sealing. They didn't go over how to make the adjustments, but I found that in the 55-56 manual. The 51-54 manual only went over sedans and 2-door coupes. The hardtops and convertibles are different, as you know.
One other thing I found is that the 55-56 manual was much more clear on the removal of the door windows. Labeled pictures helped quite a bit. Still haven't taken them out yet, but I will need to do so to replace the window channels and beltline. You mentioned shims as well. I'll need to put some more on the passenger side door latch at some point. It barely engages the edge of the lock wheel. Should be a pretty simple fix. -Kevin
Posted on: 2021/2/9 13:48
|
|||
|
||||
|
Re: KPack
|
||||
|---|---|---|---|---|
|
Home away from home

|
SMS shipped out the headliner to me and it arrived the other day. Took just about a month to the day from when I ordered to when I had it in hand. That's pretty good from what I hear.
Material is the correct smooth vinyl in Ivory (confirmed with another Panama with the same paint and interior codes). The pictures wash it out and make it look white, when it is a definite ivory. Seems to be well made. They helpfully labeled the front as well as the centerline. I had previously cleaned up and primed/painted all the bows. They are stamped from the factory with the number that they go in. Some of mine were a bit weathered out, but I was still able to see enough to know what the number was. I carefully slid them through each of the listings in order. The most difficult was #7, which is the most curved of all of them. Once the bows were all installed I took the whole assembly to the car and started putting everything in place. The last bow (#8) attaches into three clips that hold it in place. I started with that one and worked my way forward, making sure that all the bows stayed upright. Currently the headliner is all hung, but I have not started any stretching or gluing. I found a local guy is a professional upholsterer, and we was kind enough to give me a lot of tips on the install. He is booked out until end of April (as are all the other upholsterers anywhere near me) so I'll be attempting to do this on my own. He sold me a bottle of the professional grade contact cement he uses (Weldwood by DAP). The procedure he outlined is as follows: -pull towards the front on the centerline (rearmost bow is locked in place to allow you to pull against it). Glue on the center -Pull and work the front edge a little at a time towards the sides, stop a couple inches short of the pillars. -Move to the rear and do the same....centerline to the outside -Pull and glue the rear side panels -Work the sides out a little at a time from front to back. -Trim the listings back a bit as needed...The listings will bunch up on the ends of the bows as you stretch and pull from the center to the outside. He said it needs to be at least 65 degrees in the workspace for the material to relax and be easy to pull. The contact cement also needs to be about that temperature. Unfortunately it's been in the teens and 20's here, so I can only get the garage up to 55 with my little heater. Should be warmer next week. -Kevin Attach file:  SMS headliner show side.jpg (95.04 KB) SMS headliner show side.jpg (95.04 KB)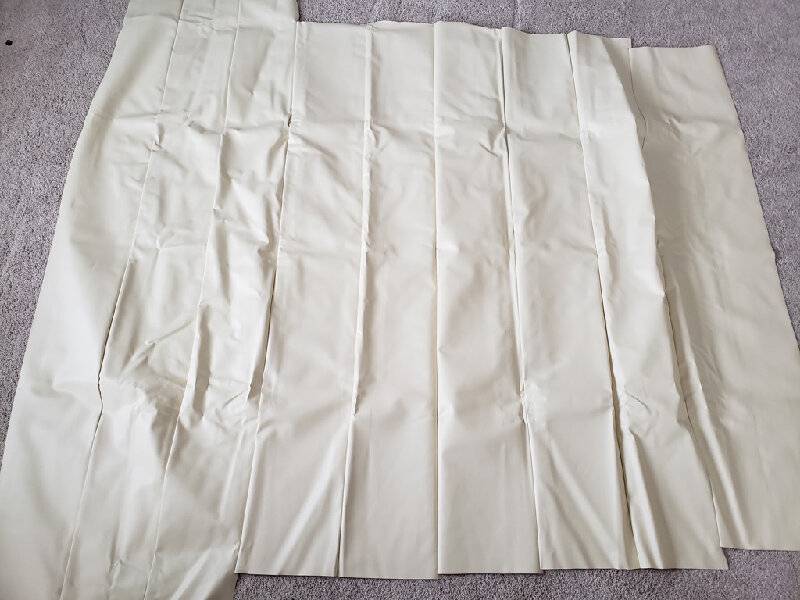  SMS headliner underside.jpg (145.46 KB) SMS headliner underside.jpg (145.46 KB)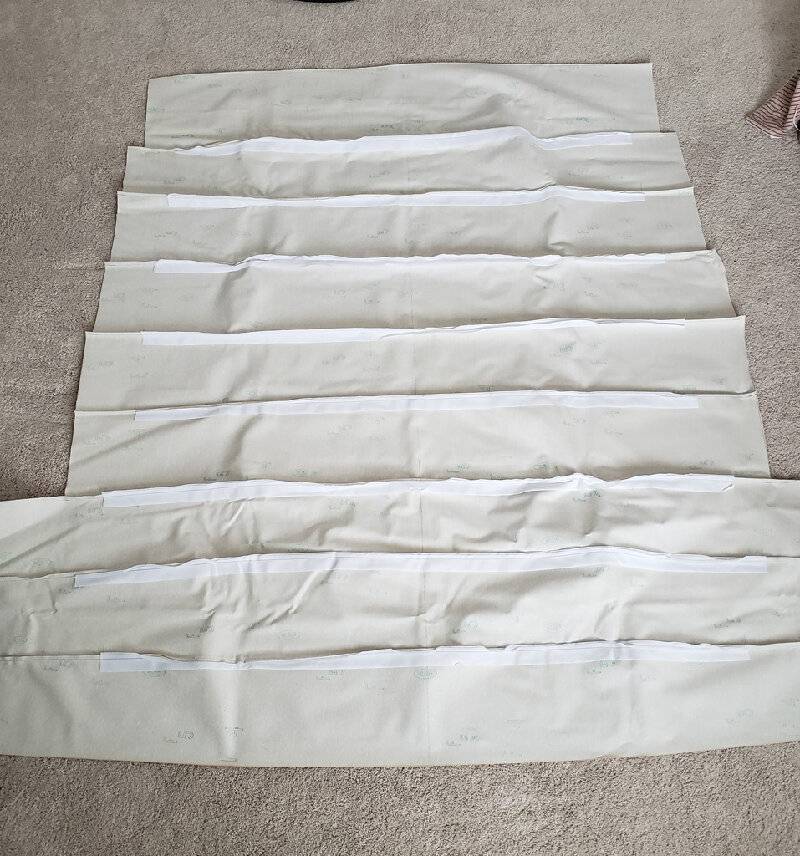  Headliner bows installed.jpg (82.47 KB) Headliner bows installed.jpg (82.47 KB)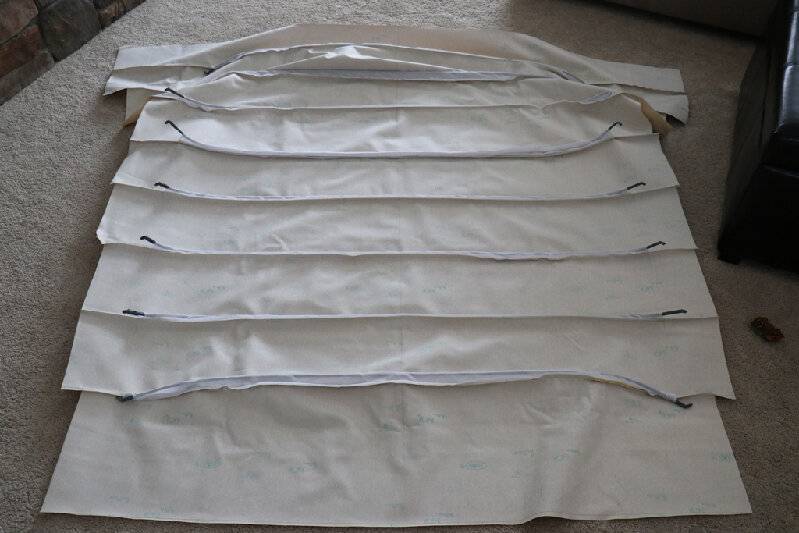  Headliner installation.jpg (94.88 KB) Headliner installation.jpg (94.88 KB)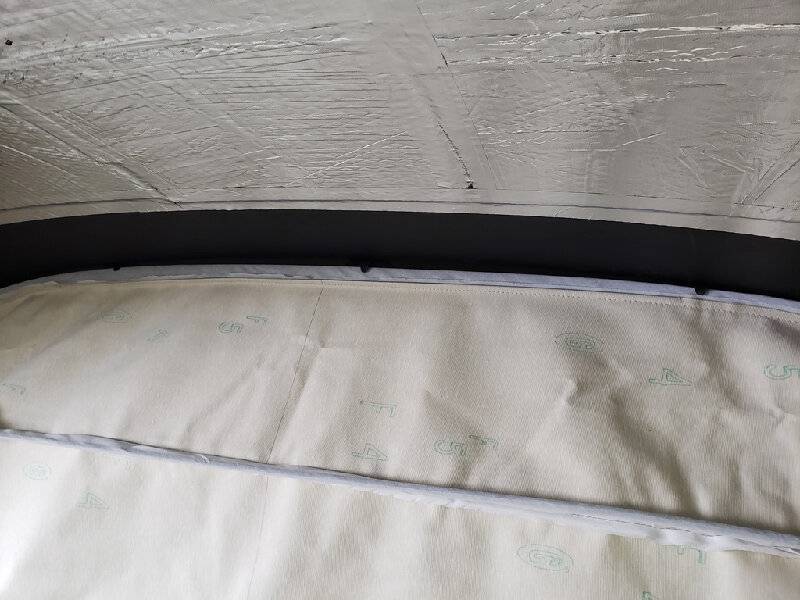  Headliner bow retainer clip.jpg (59.92 KB) Headliner bow retainer clip.jpg (59.92 KB)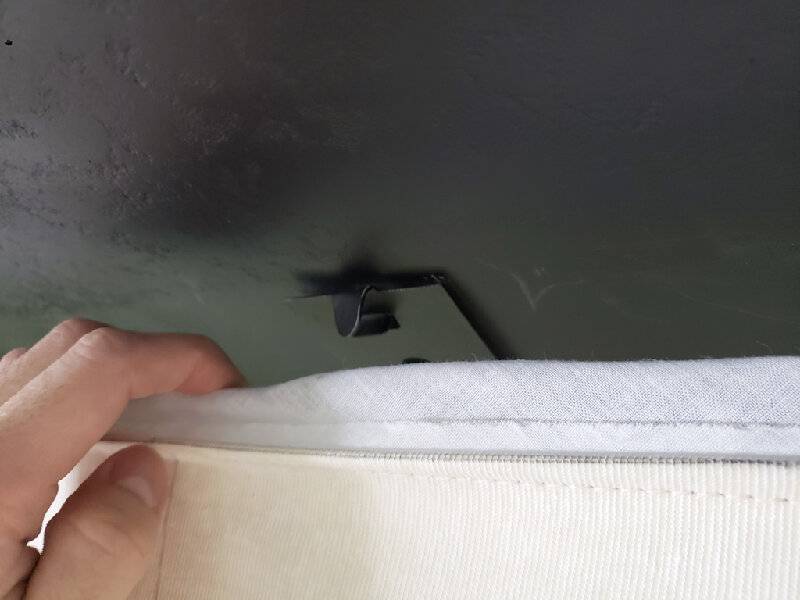  Headliner hung.jpg (69.47 KB) Headliner hung.jpg (69.47 KB)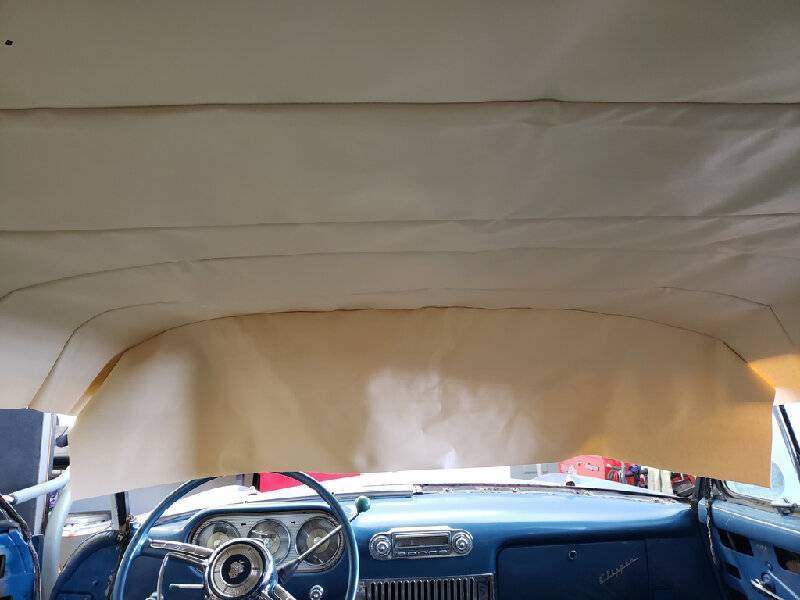  Professional contact cement.jpg (102.99 KB) Professional contact cement.jpg (102.99 KB)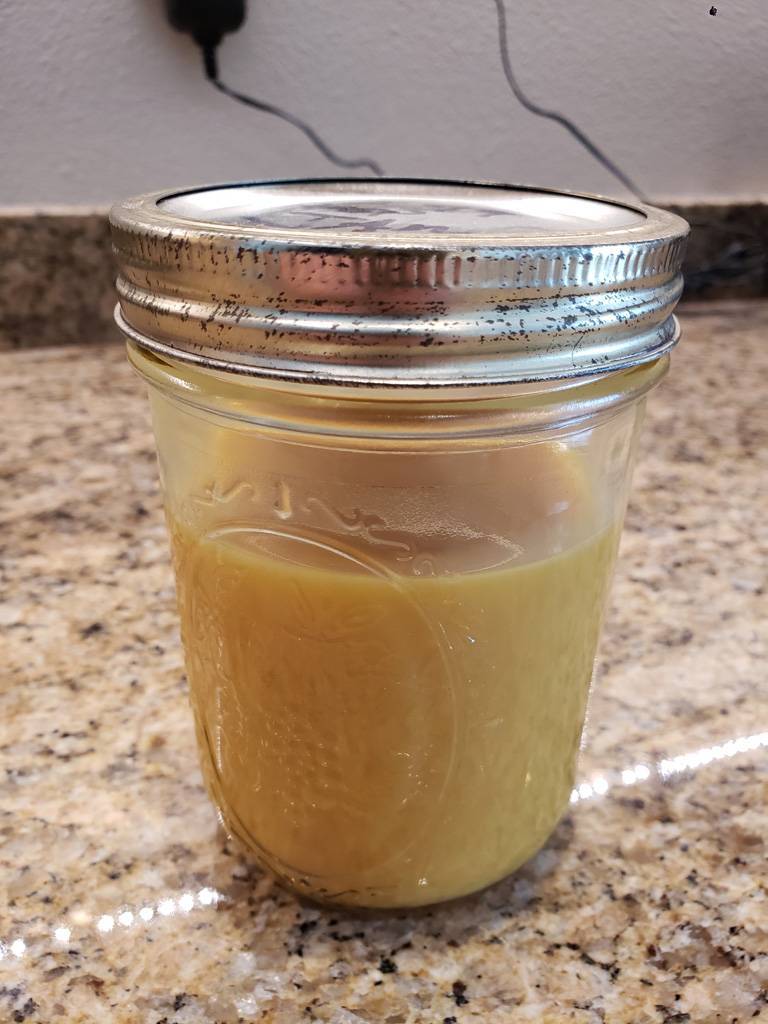  Temperature not warm enough.jpg (108.12 KB) Temperature not warm enough.jpg (108.12 KB)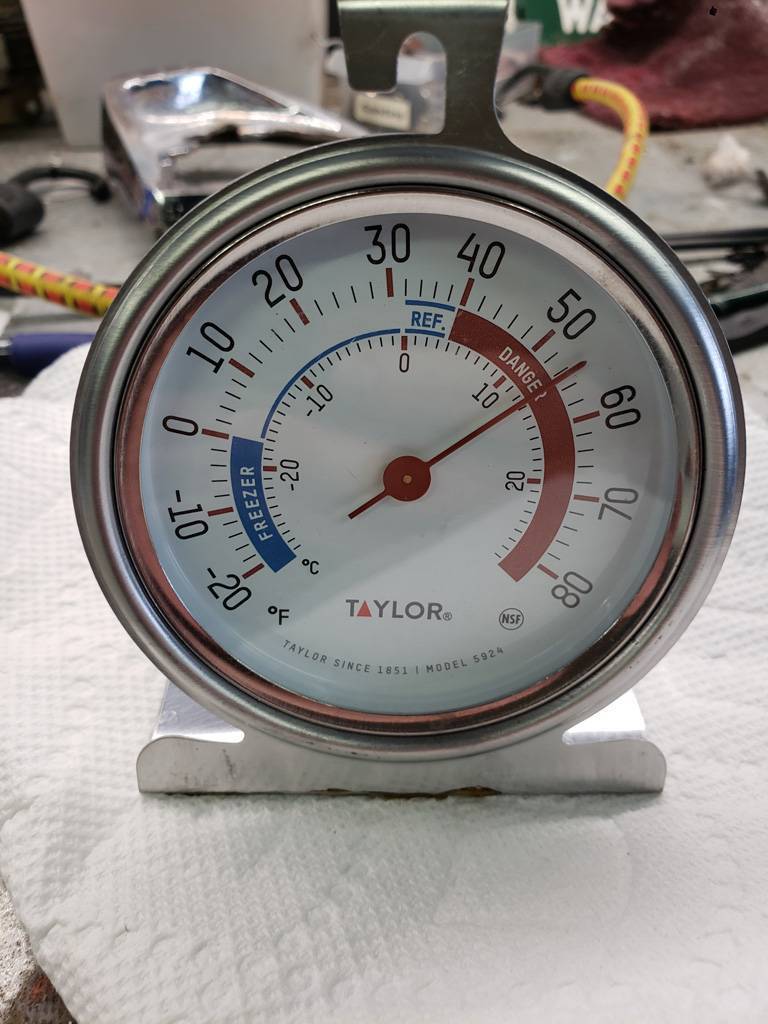
Posted on: 2021/2/13 18:46
|
|||
|
||||
|
Re: KPack's 1954 Panama
|
||||
|---|---|---|---|---|
|
Home away from home

|
Looking forward to you documenting the headliner install process Kevin. I have done cloth headliners, but I believe those are more forgiving than vinyl.
Posted on: 2021/2/14 6:44
|
|||
|
Paul
www.studebakerskytop.com |
||||
|
||||
|
Re: KPack
|
||||
|---|---|---|---|---|
|
Home away from home

|
Well, the Panama took a huge blow today.
After months of searching, I finally found a replacement windshield (NOS) at Tucson Packard. Remember that the windshields for hardtops and convertibles are different than sedans. This windshield was the only one I was able to find after calling dozens of places. Imagine my disappointment when I opened the crate to find this. The windshield is completely destroyed. And I mean complete. It is in several different pieces with dozens of cracks on the remaining pieces. I have no idea how packaging for glass is normally done, but this packaging doesn't look great to me. I would've thought there would be far more padding. Looks like the shippers weren't kind to it either, as several of the interior wood supports are broken, though no obvious exterior damage is seen on the box. $700+ up in smoke. Now I can handle the wasted money. But what I can't handle is the fact that this incredibly rare, NOS piece of glass is ruined. There is no replacement for this windshield unless I find a "unicorn" parts car. Without the windshield the car is dead in the water. This is a blow that this project may not recover from. This completely took the wind out of my sails. At this point there really is no reason to continue the restoration unless another replacement glass can be found. Now, in Tucson Packard's defense I have not contacted them yet (just opened it up 30 minutes ago at 10PM) to discuss. I'm sure they'll make it right as far as the money goes. But they won't be able to replace a windshield that has no replacements. -Kevin ***edited original post after more closely investigating the box Attach file:  This is immediately after opening the crate.jpg (127.47 KB) This is immediately after opening the crate.jpg (127.47 KB)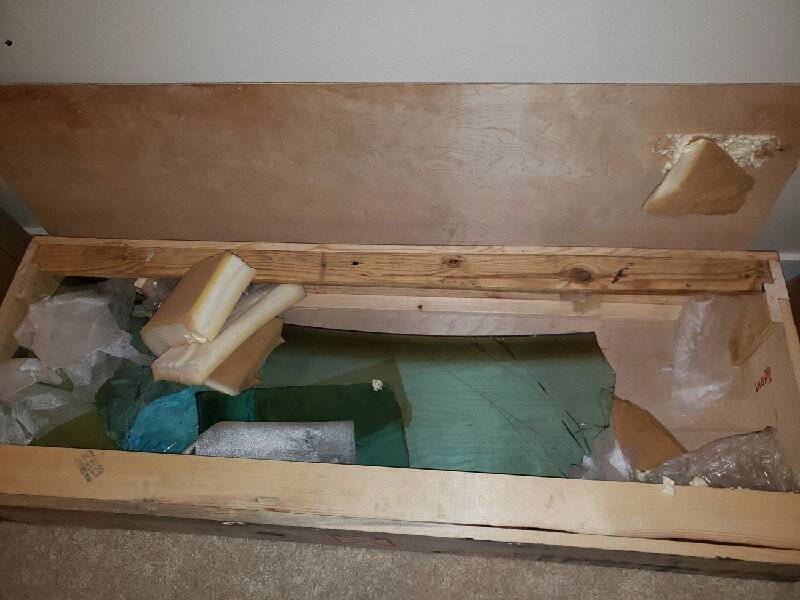  Windshield completely destroyed.jpg (146.71 KB) Windshield completely destroyed.jpg (146.71 KB)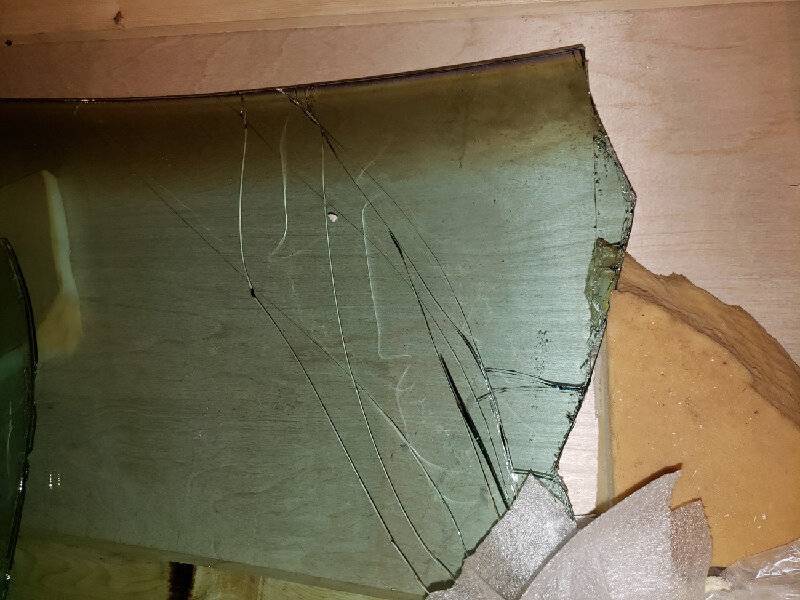  Utter destruction.jpg (184.02 KB) Utter destruction.jpg (184.02 KB)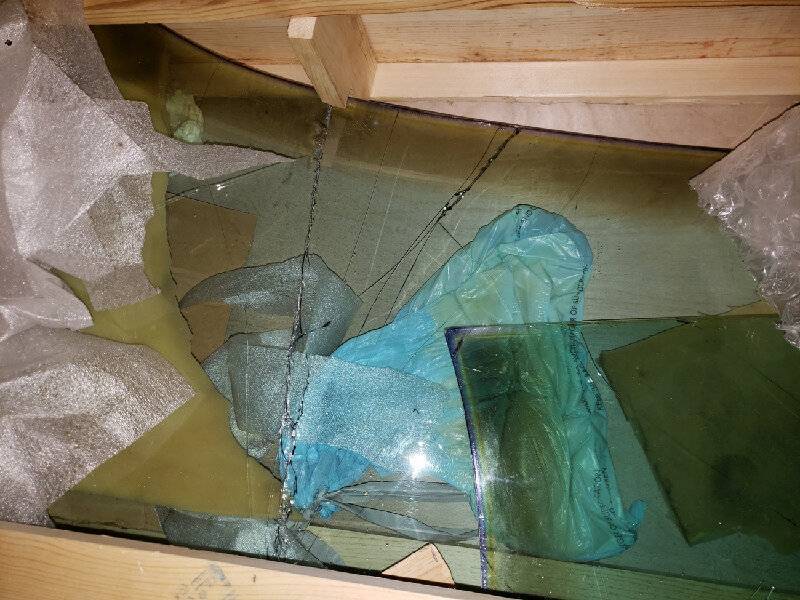  Total ruins.jpg (162.34 KB) Total ruins.jpg (162.34 KB)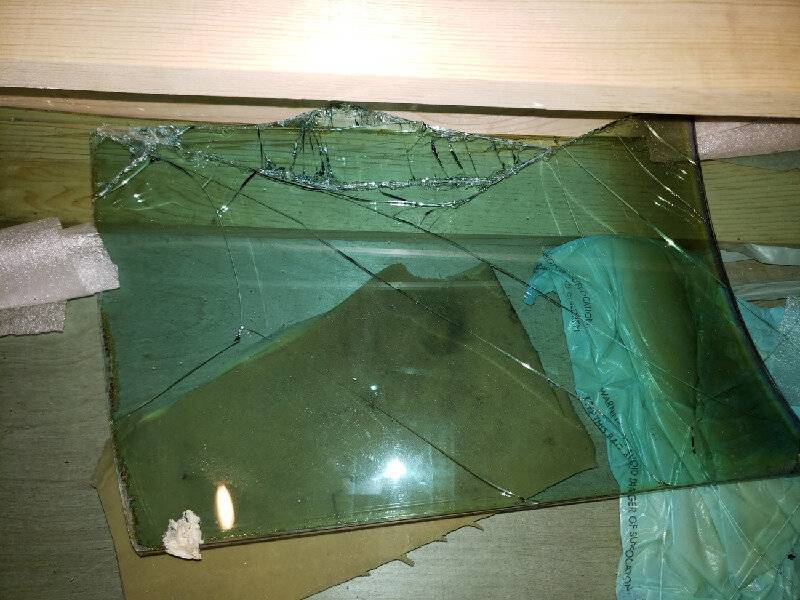
Posted on: 2021/2/18 1:47
|
|||
|
||||
|
Re: KPack's 1954 Panama
|
||||
|---|---|---|---|---|
|
Home away from home

|
Kevin, I'm so sorry to hear this! I do feel your pain, I have had rare NOS parts destroyed in shipping also. However, unlike your situation they were not parts that would keep me from driving the car.
Posted on: 2021/2/18 8:17
|
|||
|
Paul
www.studebakerskytop.com |
||||
|
||||


