|
Re: KPack's 1954 Panama
|
||||
|---|---|---|---|---|
|
Home away from home
|
WOW the bumper really cleaned up nice. What steps did you use to get it that way??
Posted on: 2021/6/8 9:27
|
|||
|
||||
|
Re: KPack
|
||||
|---|---|---|---|---|
|
Home away from home

|
More small progress. I'm working my way through replacing all the beltline trim (window fuzzies) because the original stuff was trashed. Most of them had no mohair left, and all the rubber was hardened and falling apart. This allowed the windows to rattle like crazy.
I removed the old stuff, all held in with small screws. Some were very difficult to remove so I began spraying all of them with PB Blaster preemptively. After they they came out fine. I used this stuff from Restoration Specialties https://www.restorationspecialties.com/YM93-96-FLEXIBLE-PILE-LINING-RUBBER-COVERED-CHANNEL_p_36170.html. It's definitely not the same height as the original, though it says that is works for 51-57 Packard's on their website. But they seem to work. And it was cheaper than Steele. I clamped the new onto the old, then used the original drill holes as a pattern for the new. This allowed me to get them mounted up just about perfect. When I mounted them back on I made sure the screw heads were as deep as possible to avoid scraping the window. The glass no longer rattles and the car looks a bit more finished. I will eventually need to redo the window run channels, but that's a lower priority right now. I will also need to repaint all the interior trim....the original paint is pitted and flaking off everywhere as seen in the picture. I have the paint already but need to find the time to remove all the bad trim, sand it down, prime and paint. Again, not super high on the priority list. -Kevin Attach file:  Clamping the old and new beltine.jpg (110.19 KB) Clamping the old and new beltine.jpg (110.19 KB)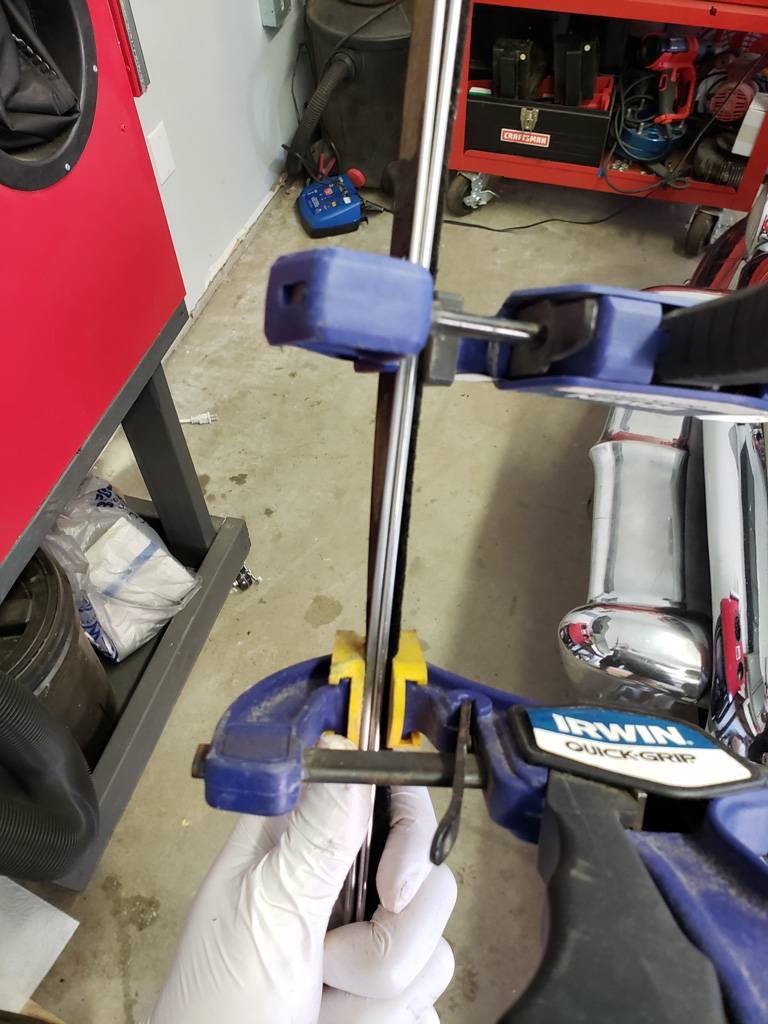  Using the original holes as guides for the new.jpg (92.85 KB) Using the original holes as guides for the new.jpg (92.85 KB)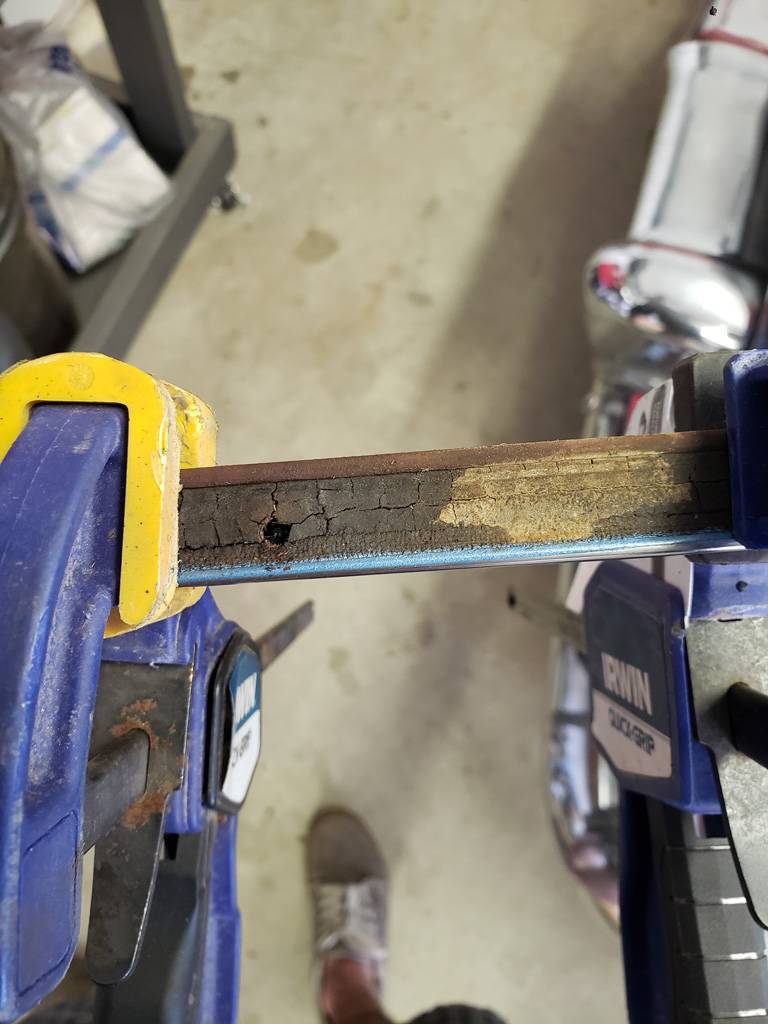  New beltine installed.jpg (94.01 KB) New beltine installed.jpg (94.01 KB)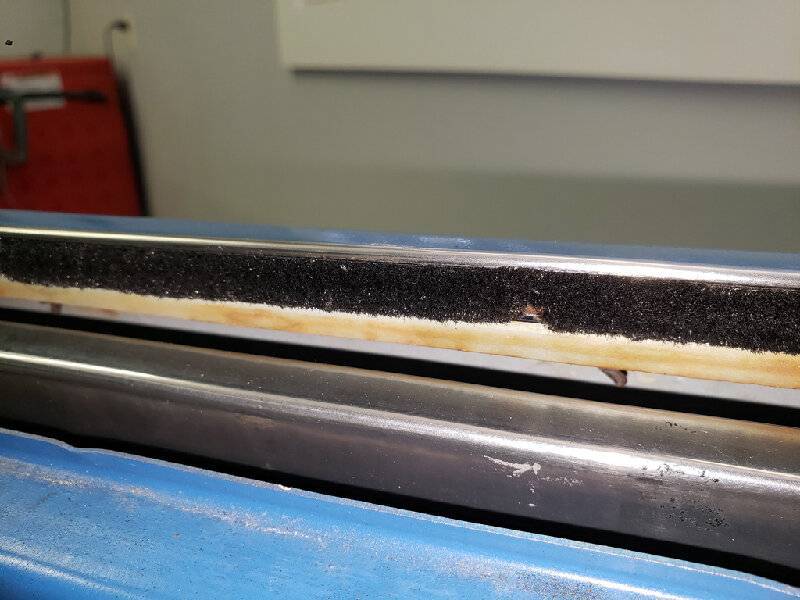  No more rattling windows.jpg (121.31 KB) No more rattling windows.jpg (121.31 KB)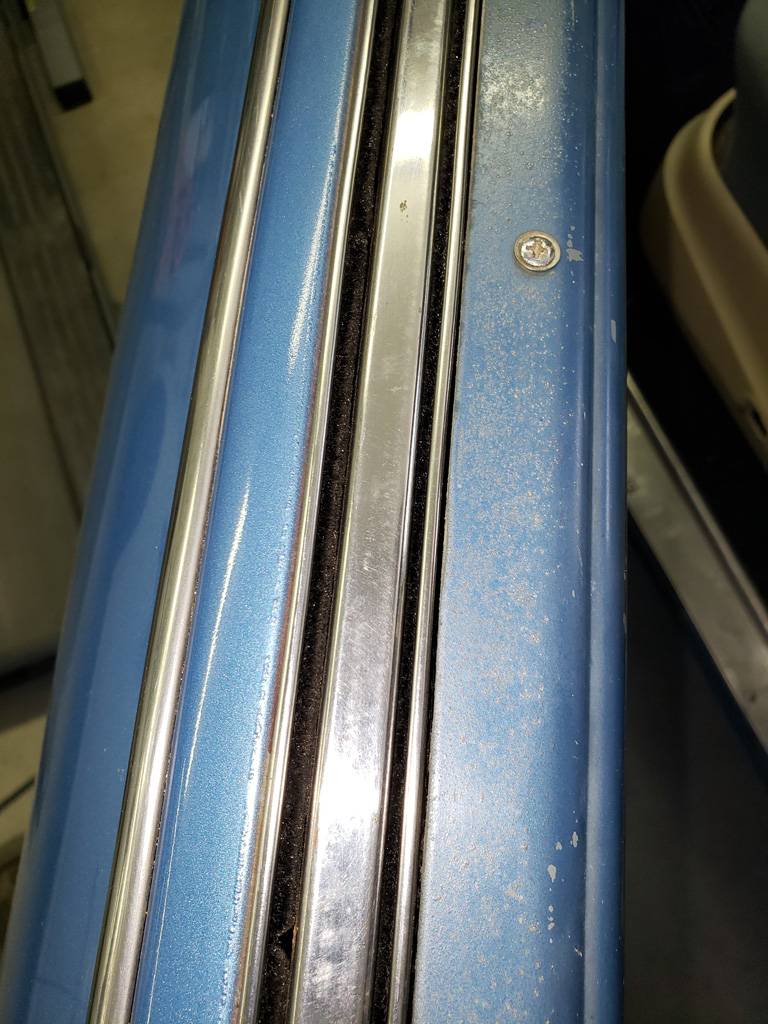
Posted on: 2021/6/9 10:39
|
|||
|
||||
|
Re: KPack
|
||||
|---|---|---|---|---|
|
Home away from home

|
Finally got around to having the sunshades recovered. The old ones were really bad, almost brown. SMS sent me extra vinyl to use on the sunshades when I ordered the headliner.
I was hoping to do them myself, but after watching videos and doing some reading I learned that it requires an industrial sewing machine, which I don't have. So I took the old sunshades and new vinyl to an upholstery shop and had them do it. Originally the sunshades had light blue border (appears to be made of a plastic type material) and three shops I checked at couldn't replicate it. So I had them redo the sunshades the way that most of them are done. They removed the old vinyl and fiberboard from the old ones, and used them as a pattern for the new hardboard. Then that was used to cut the new vinyl. They cut about 1.5" larger on the vinyl to allow it to be stretched. Spray adhesive (the real stuff) held the vinyl to the hardboard, then it was stretched over, making sure there was enough to allow the whole thing to fold in half. Once everything was glued, the excess vinyl was trimmed and the original hardware (chrome, stainless, and wood) was placed between the two halves. The new cover was folded over, held in place with clamps, then sewn up. I cleaned up the old chrome and stainless (it was really bad), and used new mounting screws. The old ones were completely rusted out. I marked the mounting holes on the headliner, punched through and mounted the shades back up. Though they aren't 100% original (no blue banding) they really help to make the headliner look finished. It's a nice touch. -Kevin Attach file:  Original sunshade and headliner.jpg (58.32 KB) Original sunshade and headliner.jpg (58.32 KB)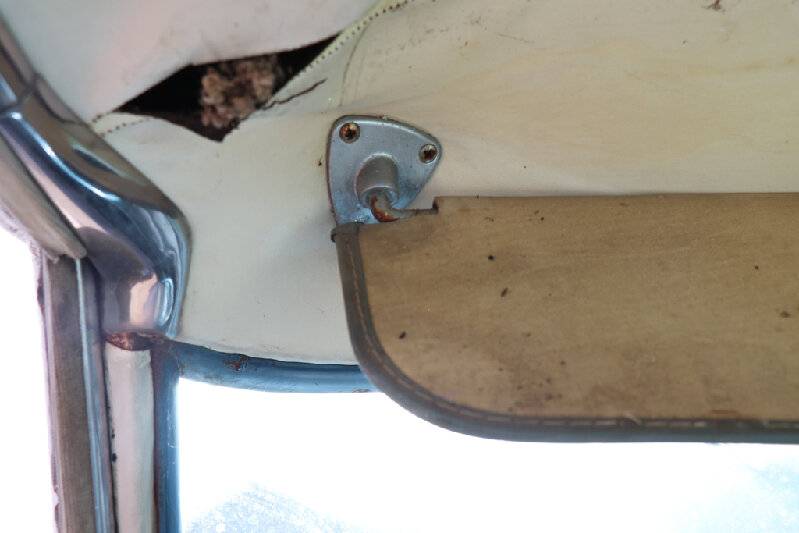  Original sunshades and headliner.jpg (75.47 KB) Original sunshades and headliner.jpg (75.47 KB)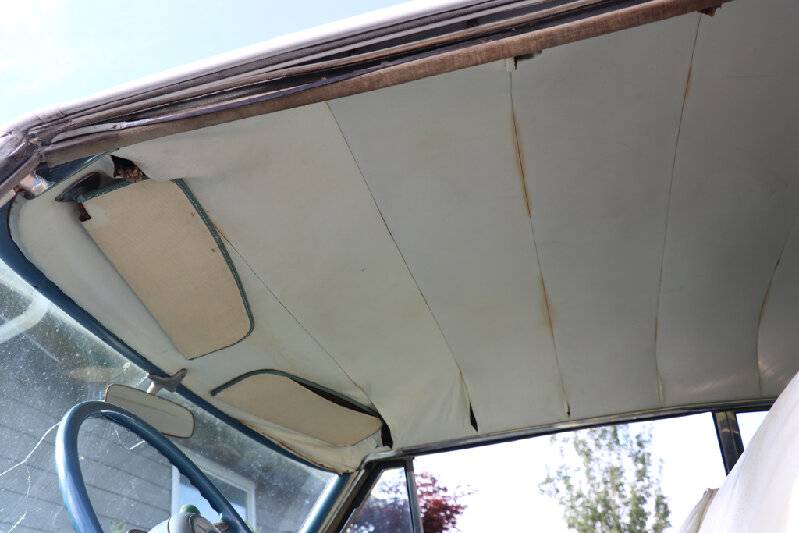  Sunshade pattern.jpg (113.23 KB) Sunshade pattern.jpg (113.23 KB)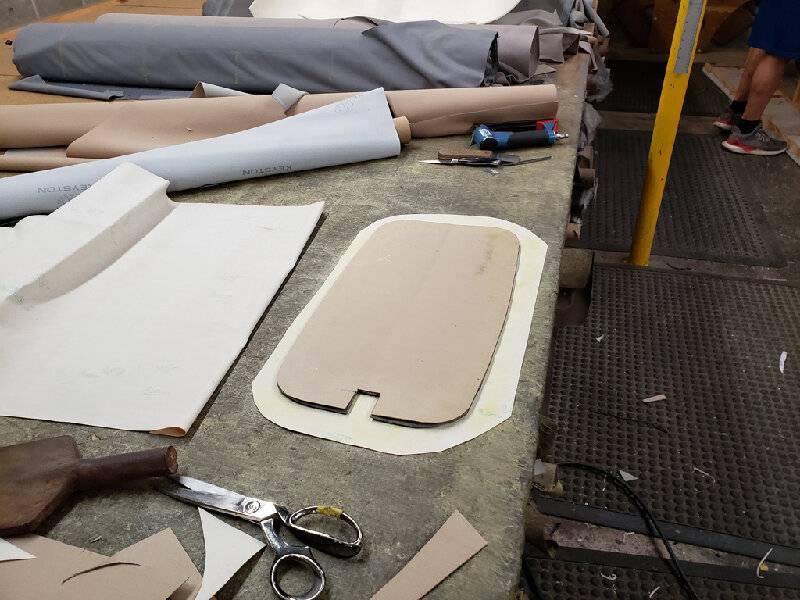  Sunshade gluing vinyl to backing.jpg (119.75 KB) Sunshade gluing vinyl to backing.jpg (119.75 KB)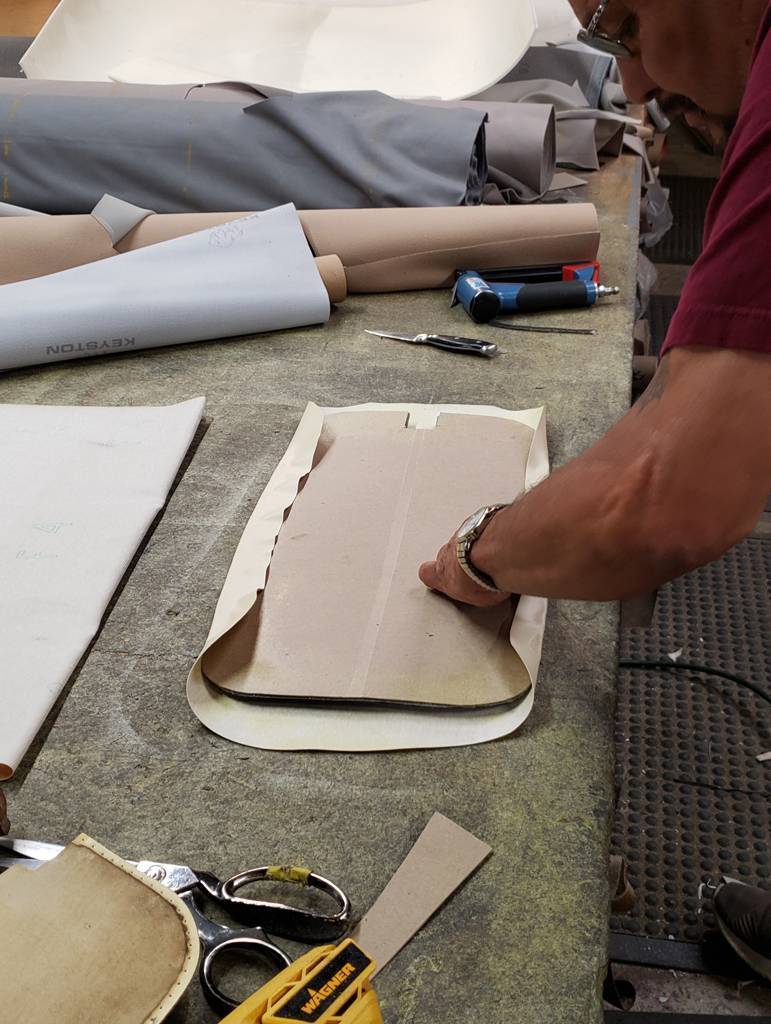  Sunshade new vinyl and hardboard, with original wood.jpg (122.17 KB) Sunshade new vinyl and hardboard, with original wood.jpg (122.17 KB)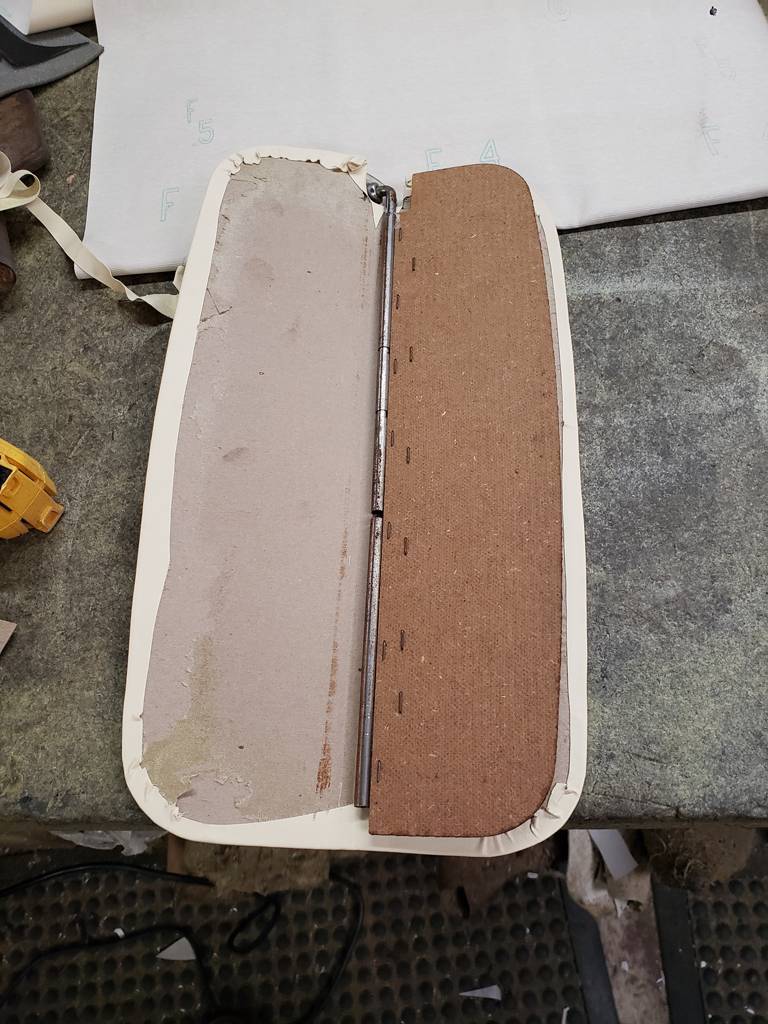  Sewing new sunshades.jpg (114.45 KB) Sewing new sunshades.jpg (114.45 KB)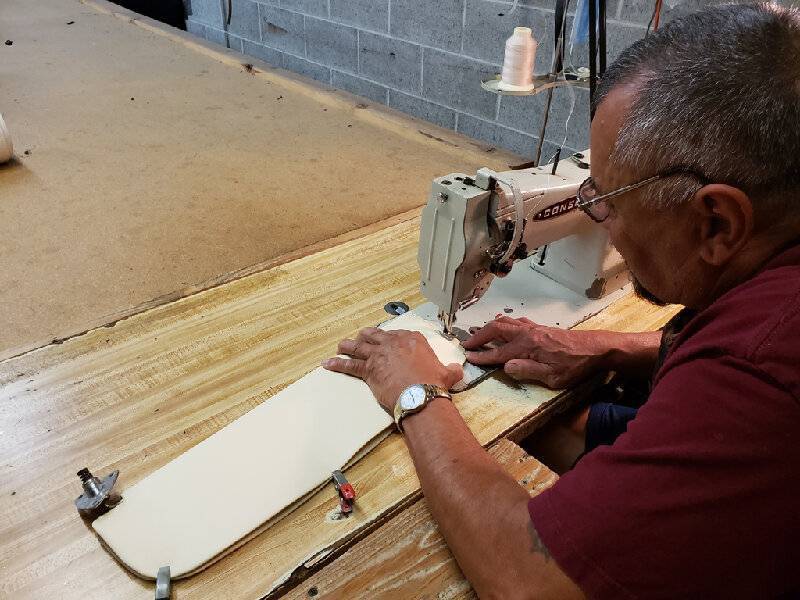  New sunshades installed.jpg (87.59 KB) New sunshades installed.jpg (87.59 KB)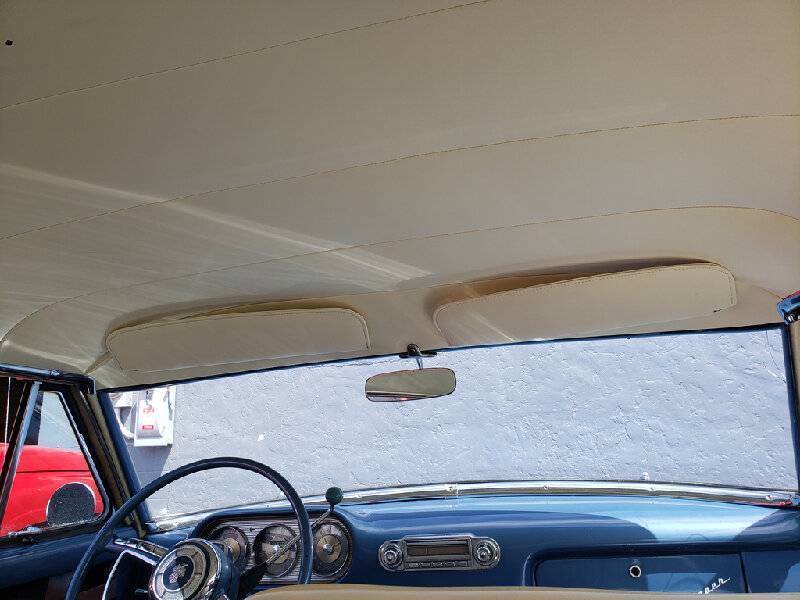
Posted on: 2021/6/22 13:58
|
|||
|
||||
|
Re: KPack
|
||||
|---|---|---|---|---|
|
Just can't stay away
|
Kevin,
You are turning that into one sharp car. Kudos on all the hard work.
Posted on: 2021/6/22 15:56
|
|||
|
- Anthony
1955 Packard Clipper Custom 1951 Kaiser Deluxe |
||||
|
||||
|
Re: KPack's 1954 Panama
|
||||
|---|---|---|---|---|
|
Home away from home

|
Thanks Anthony. It's coming along slowly but surely.
One of the next things I need to do is the exhaust. The car didn't come with the back half of the exhaust, and the tailpipe hangar is gone as well. Anyone have an extra one I could buy? I *think* it's part #446868. -Kevin
Posted on: 2021/6/22 18:49
|
|||
|
||||
|
Re: KPack's 1954 Panama
|
||||
|---|---|---|---|---|
|
Home away from home
|
It sounds like a '54-only part and not sure if my parts car has it or not. If no one else pipes up, I'll check when I'm there next.
Posted on: 2021/6/22 18:58
|
|||
|
||||
|
Re: KPack's 1954 Panama
|
||||
|---|---|---|---|---|
|
Home away from home

|
Kevin, on the sunvisors - how did the upholsterer attach the new hardboard to the metal part of the visor?
Posted on: 2021/6/23 5:27
|
|||
|
Paul
www.studebakerskytop.com |
||||
|
||||
|
Re: KPack
|
||||
|---|---|---|---|---|
|
Just can't stay away
|
Quote:
I figured you already checked this, but in the off chance you haven't, I believe this part should work: parts123.com/parts123/yb.dll?parta~dyndetail~Z5Z5Z50000022d~Z5Z5Z53939~P35.00~~~~S62X0LR23Z17256421630c~Z5Z5Z5~Z5Z5Z50000022D EDIT: The above is marked for all models except the Caribbean convertible. I couldn't find the part number you posted in the parts list. Max Merritt shows the part number from the parts list below, 455014. Below that is the Body and Chassis number index from Vol 28, No 4 Service Counselor, which shows, if I am understanding correctly, parts fitting Body 5467 will be listed as fitting 5411, the number listed in the parts list. Attach file:  1954PackardExhaustSupport.PNG (84.57 KB) 1954PackardExhaustSupport.PNG (84.57 KB)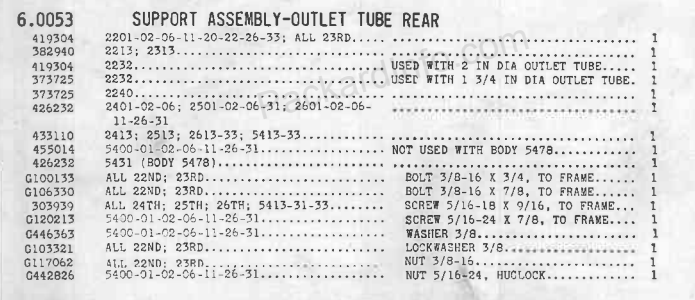  54ChassisNumberIndex.PNG (466.29 KB) 54ChassisNumberIndex.PNG (466.29 KB)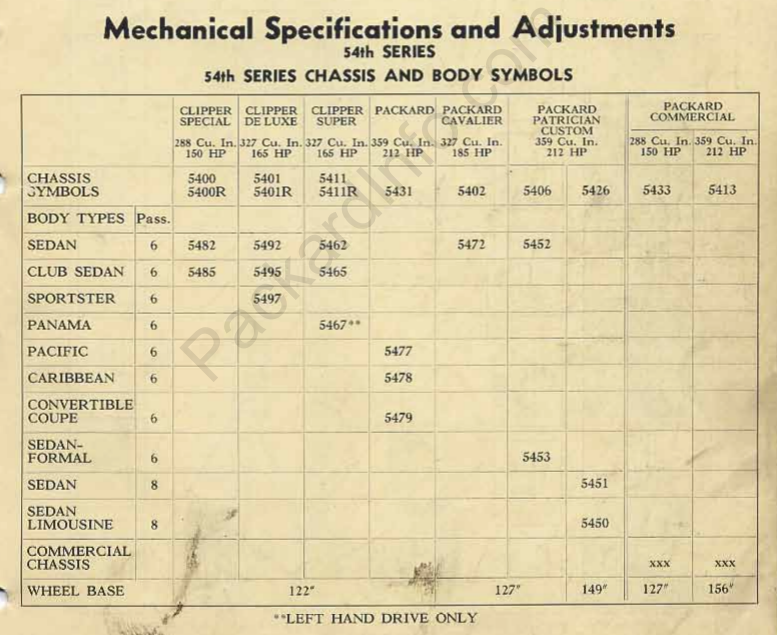
Posted on: 2021/6/23 9:11
|
|||
|
- Anthony
1955 Packard Clipper Custom 1951 Kaiser Deluxe |
||||
|
||||
|
Re: KPack's 1954 Panama
|
||||
|---|---|---|---|---|
|
Home away from home

|
Don - thanks, let me know if you find something that will work.
Paul - The vinyl is attached to a cardboard type material (I probably shouldn't have said "hardboard"). That assembly is then wrapped over the original metal and wood parts, and sewn up. It is not sewn through the wood....the whole thing is tight enough to keep it from moving around. That's how the original ones were made: no attachment between the wood and the cardboard/vinyl. Anthony - Thanks! It looks like I was looking at the wrong part (must have been the loop that goes around the tailpipe). The number you have is correct. And I didn't even think to check Max Merritt, so that's good to know. I'll get it touch to see if they have one in stock. -Kevin
Posted on: 2021/6/23 10:25
|
|||
|
||||


