|
Re: The Duchess Project: 1940 Super 8 Convertible Sedan
|
||||
|---|---|---|---|---|
|
Forum Ambassador
|
Quote:
I am not sure there is a ready made inline connector in anything other than the female to female configuration. You might need to use two individual terminals of the type you need and join them together with a short wire butting end to end on as a short extension cable. When I used the yellow inlines, I covered them with black heat shrink and at a quick glance they appear as stock as the round Douglass connectors Packard had in some years. You could also cover a regular bullet with the heat shrink for a similar look to the thin black rubber sleeve Packard used on their terminals.
Posted on: 2022/4/25 14:32
|
|||
|
Howard
|
||||
|
||||
|
Re: The Duchess Project: 1940 Super 8 Convertible Sedan
|
||||
|---|---|---|---|---|
|
Home away from home
|
The 1/8" refers to a tapered pipe thread or NPT
1/8" pipe has an outside diameter of 0.405 inches
Posted on: 2022/4/25 15:55
|
|||
|
||||
|
Re: The Duchess Project: 1940 Super 8 Convertible Sedan
|
||||
|---|---|---|---|---|
|
Home away from home

|
Yes, I could do that, but I will wait for Kanter to reply.
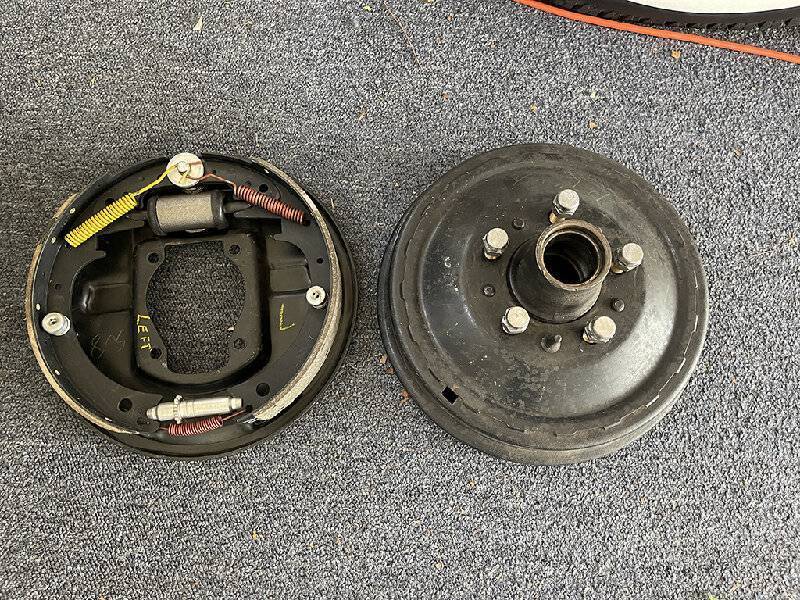
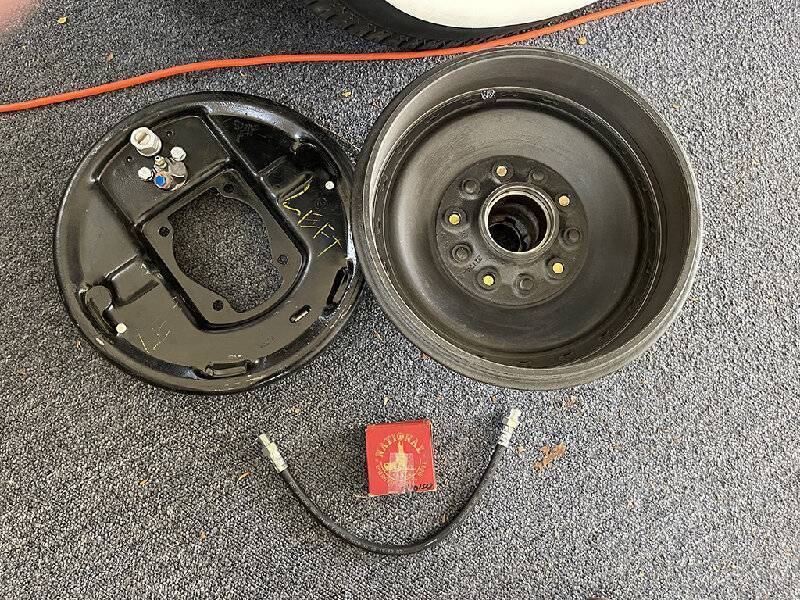
FRONT BRAKES In the meantime, the front brakes of my dreams arrived from Jeff at Moose Motors. They are beautiful and ready to bolt up. Shoes are fitted to drums. Check out the new lug bolts with custom mega heads. I'm going to mic the wheel holes when we take them off. If the remaining wheels holes are worn out of spec, I might need a set of 1940 160 wheels, which fit '40s and '41s. I should measure for them 5" width PN# 338700 and not 4-1/2" PN# 324640 before anyone digs through the shed. In the meantime, the new setup (standard compared to the studs welded into the old hubs with big lug nuts) should be a major improvement. The old hub/drums served me well, but as mentioned, they are 2" instead of the correct 2-1/4". Here are some numbers stamped on the parts: Backing Plate: Right 42270. Left 42210 (Parts Book # 351480 Shoe set: 14215661 (Parts Book# 371121) Hub: 31174-R (Parts Book# 351422) Seals: Nat'l 15101548 So much for Parts Book numbers. I have a spare set of 2" wide replacement shoes for when these wear out: Bendix 34351 Happy as a pig in mud, at this point.
Posted on: 2022/4/25 16:04
|
|||
|
||||
|
Re: The Duchess Project: 1940 Super 8 Convertible Sedan
|
||||
|---|---|---|---|---|
|
Home away from home

|
BRAKE DRUMS. Local Classic Muscle Car shop, Bruno's in Rockville, packed and installed the bearings and seals in the new drums.
WHEEL HOLES AND LUG BOLTS: My wheel holes are measuring 0.60 to .065 ID. I think I do need new wheels, if that's too much wear. If someone could mic a good wheel, that would be a help in deciding. The lug bolts Jeff customized by welding a big lug nut on to the bolt measure 0.86 OD. BACKING PLATES: I removed the left side and cleaned reusable parts up, painted a couple things. Picked up some cotter pins for the castle nuts on the back side of the plates and for the end of the hub. No now I'll remove the right side. STOPLIGHT SWITCH: Kanter is replacing the stoplight switch with female terminals used on 1941 and up PN 362862 with the correct PN 340254 with male terminals. I also ordered 2 MPE SL 134SB from NAPA as backup stoplight switches. Kanter also had NOS brass block connector between the master cylinder and the stoplight switch to replace my torqued up one, whicrh is probably the eason for the drip under pressure. I will post pix.
Posted on: 2022/4/27 12:09
|
|||
|
||||
|
Re: The Duchess Project: 1940 Super 8 Convertible Sedan
|
||||
|---|---|---|---|---|
|
Home away from home

|
BRAKE DRUMS. Local Classic Muscle Car shop, Bruno's in Rockville, packed and installed the bearings and seals in the new drums.
WHEEL HOLES AND LUG BOLTS: My wheel holes are measuring 0.60 to .065 ID. I think I do need new wheels, if that's too much wear. QUESTION: If someone could mic a good wheel, that would be a help in deciding. The lug bolts Jeff customized by welding a big lug nut on to the bolt measure 0.86 OD. These holes or worn from years of tire shops using pneumatic wrenches in tightening the original lug bolts. BACKING PLATES: I removed the left side and cleaned reusable parts up, painted a couple things. Picked up some cotter pins for the castle nuts on the back side of the plates and for the end of the hub. No now I'll remove the right side. STOPLIGHT SWITCH: Kanter is replacing the stoplight switch with female terminals used on 1941 and up PN 362862 with the correct PN 340254 with male terminals. I also ordered 2 MPE SL 134SB from NAPA as backup stoplight switches. Kanter also had NOS brass block connector between the master cylinder and the stoplight switch to replace my torqued up one, whicrh is probably the eason for the drip under pressure. I will post pix. Attach file:  WheelHubBearingSeal.jpg (121.39 KB) WheelHubBearingSeal.jpg (121.39 KB)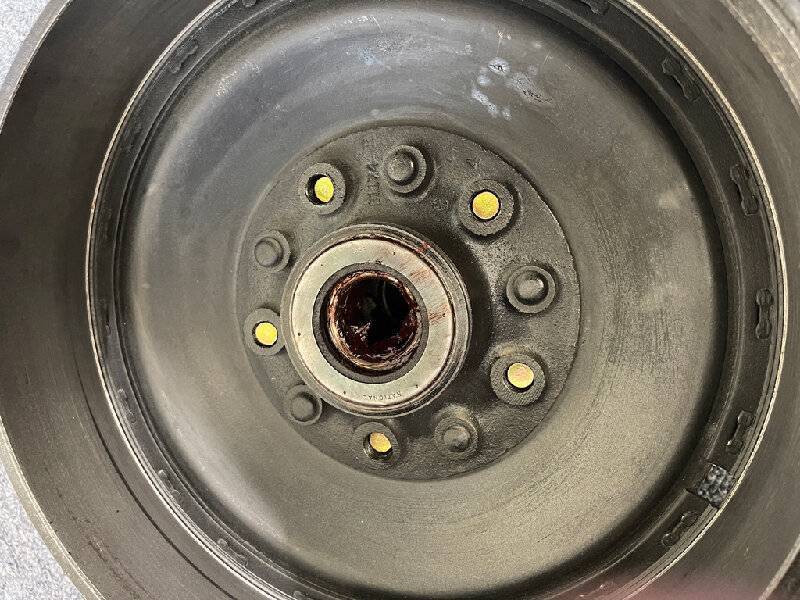  WornBoltHoles.jpg (111.41 KB) WornBoltHoles.jpg (111.41 KB)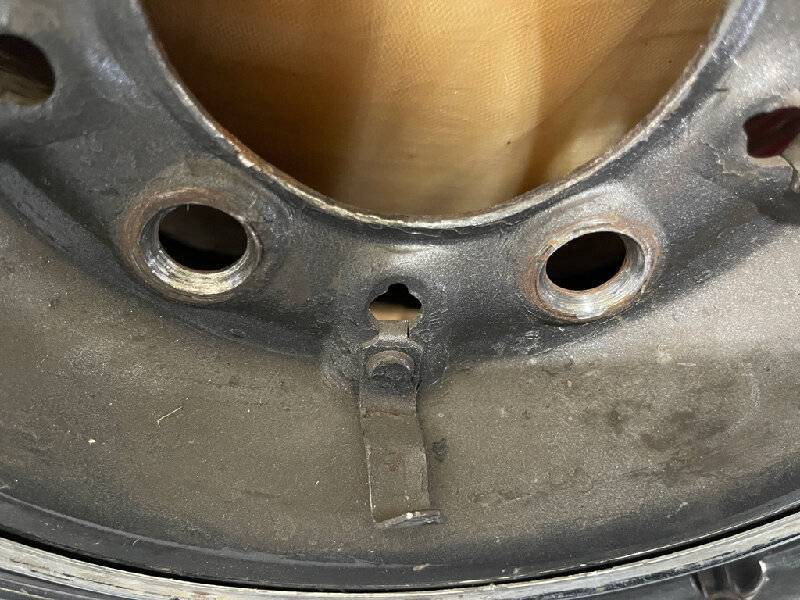  Wornwheelhole060to065.jpg (72.15 KB) Wornwheelhole060to065.jpg (72.15 KB)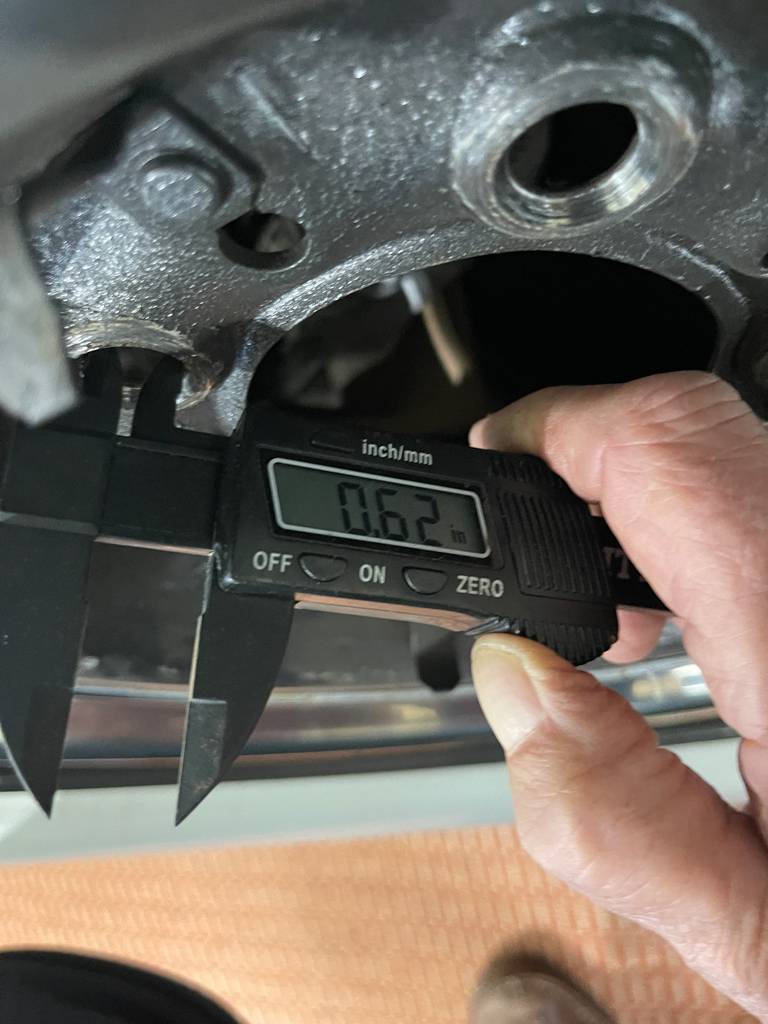  Nutwelded2Lugbolt.jpg (59.43 KB) Nutwelded2Lugbolt.jpg (59.43 KB)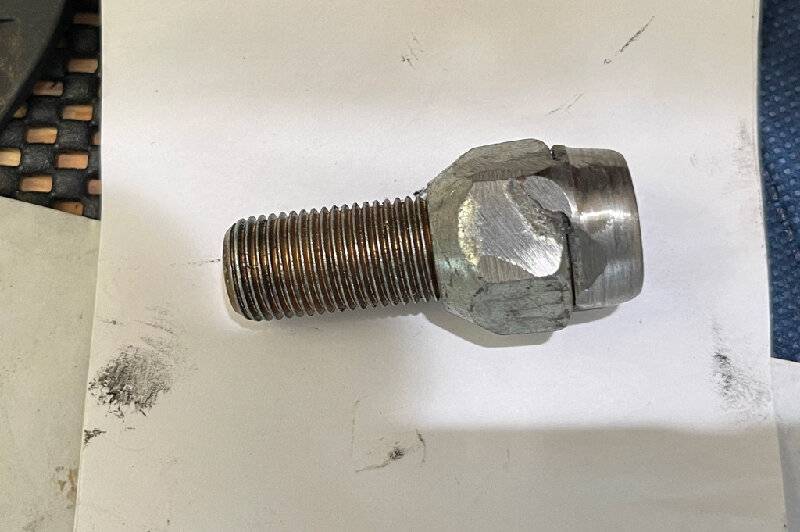  LugboltNutsize.jpg (60.23 KB) LugboltNutsize.jpg (60.23 KB)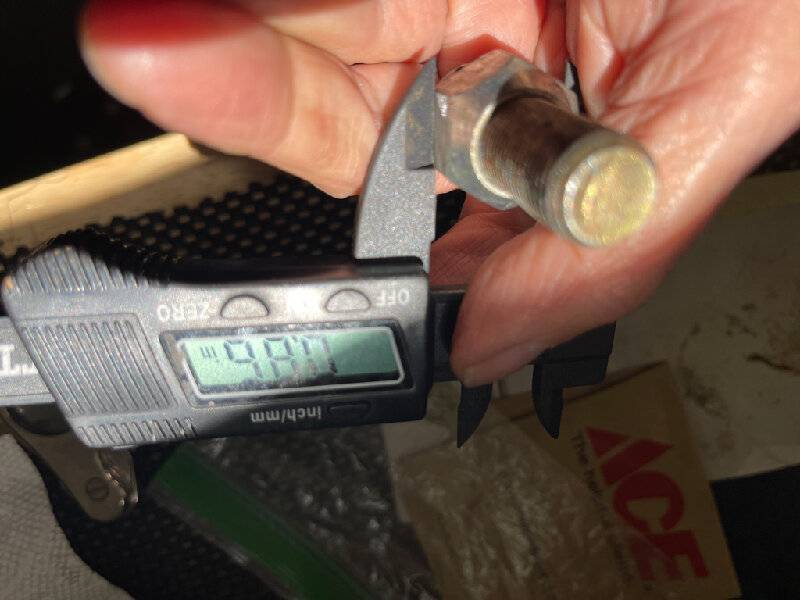  OldRF120BrakePlsateShoes.jpg (95.81 KB) OldRF120BrakePlsateShoes.jpg (95.81 KB)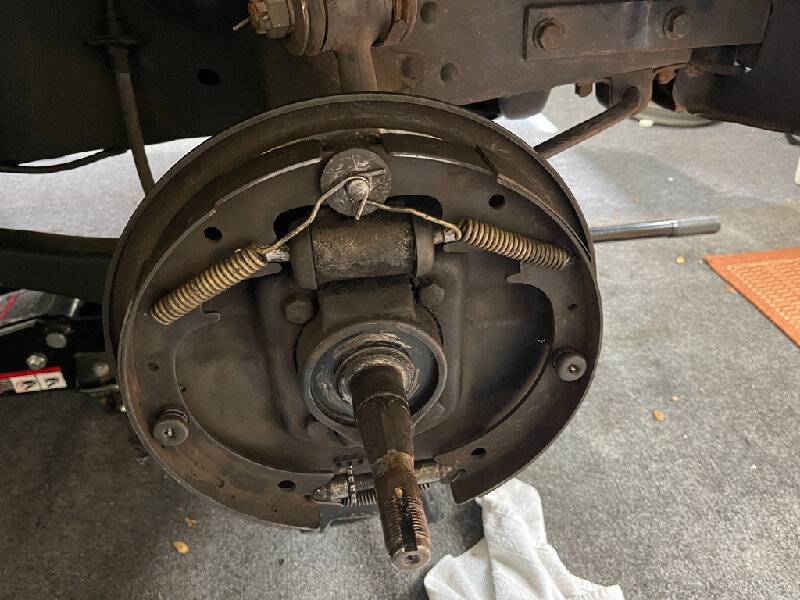  OldLF120PlateShoes.jpg (77.99 KB) OldLF120PlateShoes.jpg (77.99 KB)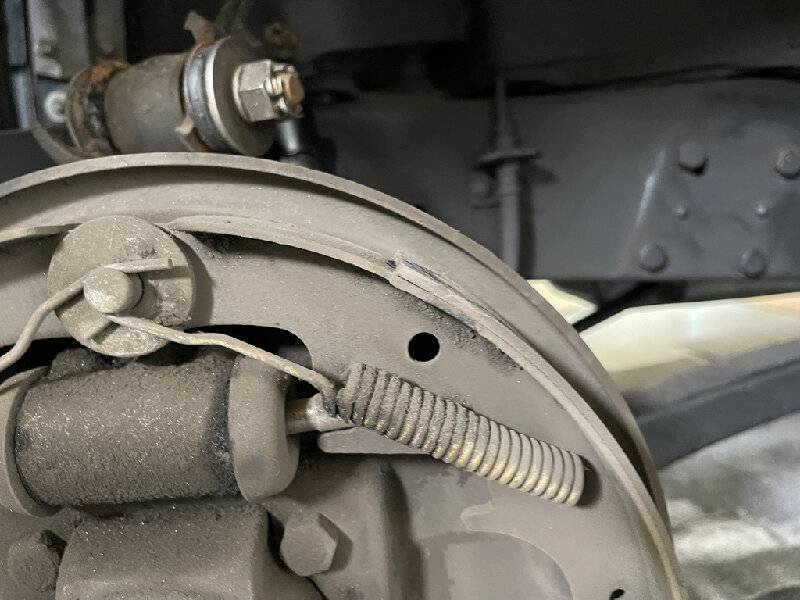  OldLF120BrakeAssembly.jpg (178.93 KB) OldLF120BrakeAssembly.jpg (178.93 KB)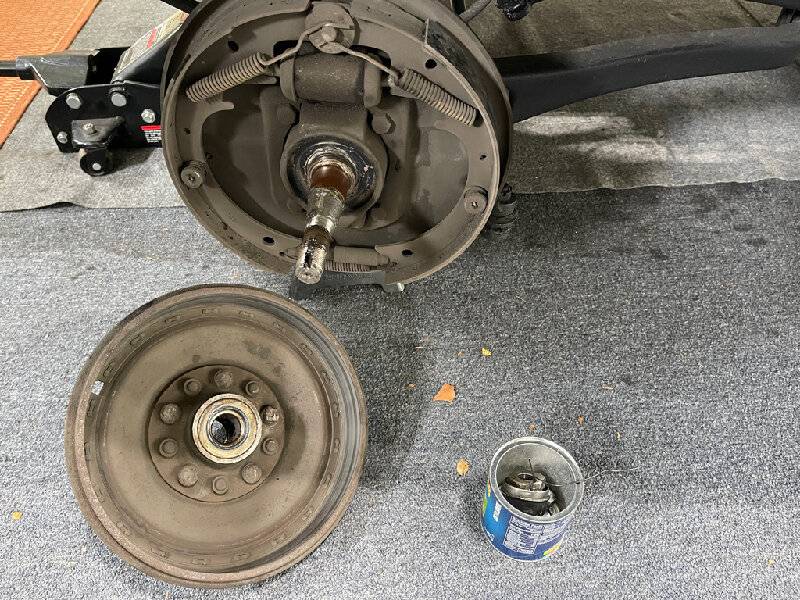
Posted on: 2022/4/27 12:09
|
|||
|
||||
|
Re: The Duchess Project: 1940 Super 8 Convertible Sedan
|
||||
|---|---|---|---|---|
|
Home away from home

|
I'm not a bad wordsmith, but, God, I'm a lousy mechanic!
I removed the right front backing plate successfully (did not break anything or hurt myself) and proceeded to cleanup the frame and fender underside, the nuts and bolts. I managed to mount the new RF backing plate. I slipped the drum and hub over the steering knuckle, but the drum wouldn't quite close into the backing plate. I thought the shoes were holding it back and needed to loosen the adjustment and it took me awhile using the old plate to figure out which way to turn the adjustment. (You plunge the brake tool through the hole and under that star and push downward to bring the shoes in toward the center. There was hardly any adjustment to begin with, there were a few clicks before I hit bottom. That seemed to help, but the drum just wouldn't close up, like they do (the backing plate and drum) when they are not on the steering knuckle. I tightened the nut with the poker against the bearing, added the special washer with the holes and the beveled nut. It comes very close to allowing me to get the cotter pin in, but not close enough and I can't turn the hub much at all. I had to quit. I took an Aleve but my joints are so sore from squatting down, I couldn't do any more. I'm off maybe a few 32nds. I don't think Packard would use a different steering knuckle that close in size, but now I wonder. I'll try again tomorrow. Attach file:  DrumNotAll the way.jpg (118.26 KB) DrumNotAll the way.jpg (118.26 KB)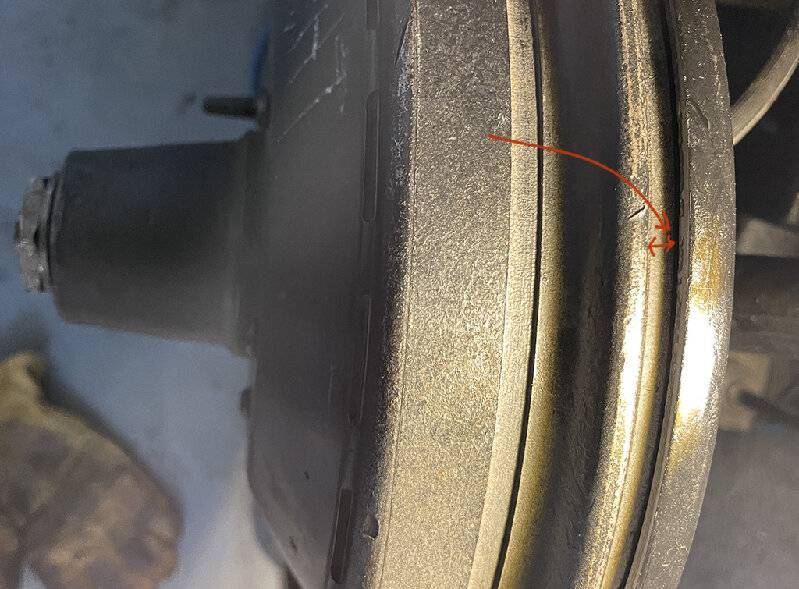  HowCloseBut Tight.jpg (85.36 KB) HowCloseBut Tight.jpg (85.36 KB)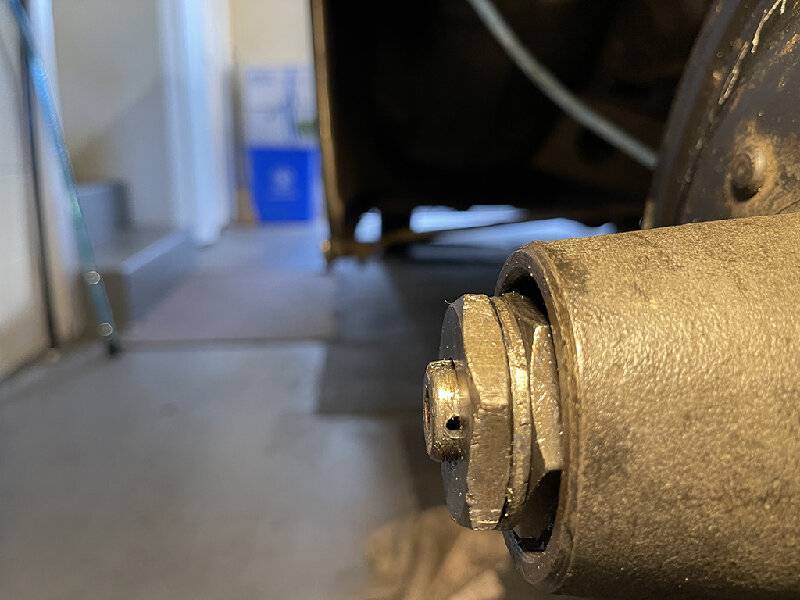  backandHubnotmounted.jpg (124.46 KB) backandHubnotmounted.jpg (124.46 KB)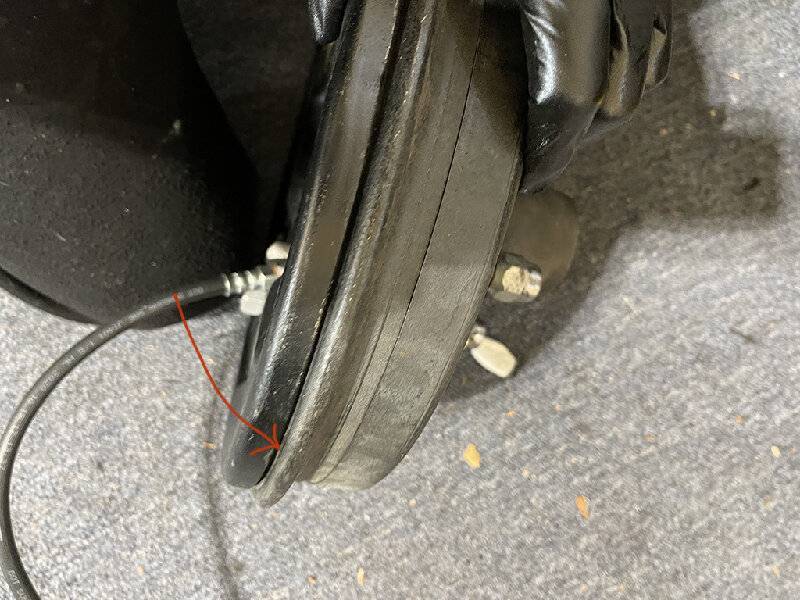
Posted on: 2022/4/27 20:30
|
|||
|
||||
|
Re: The Duchess Project: 1940 Super 8 Convertible Sedan
|
||||
|---|---|---|---|---|
|
Home away from home
|
The mount that the shoes and springs set against at the top is an eccentric bolt, most of the time it is necessary to loosen the nut and turn the bolt to center the shoes. Only needs to turn a little one way or the other to center, when you get the drum to turn use brake spoon to tighten shoes and recenter. Tighten large nut and use spoon to loosen till drum just touches when turned. If shoes have been arced to the drum you should be good to go. Also make sure the backing plate is flush with spindel face.
Posted on: 2022/4/27 21:58
|
|||
|
35-1200 touring sedan 42-110 convertible coupe 48-2293 station sedan |
||||
|
||||
|
Re: The Duchess Project: 1940 Super 8 Convertible Sedan
|
||||
|---|---|---|---|---|
|
Home away from home

|
Thanks, Jon, I'm going to try it again this morning. It usually takes me 4 times to reassemble something correctly.
Earlier in the thread I mentioned that Jeff Adkins at Moose Motors in Penngrove put together the backing plates for me, matched the drums and arced the new shoes, and I have been very careful to mark the drums and keep them matched. I know it must be something simple. The problem I have with so many things mechanical is that my mind finds logic for the opposite of what's right. For instance, that little star adjuster. Normally righty tighty (clockwise) lefty loosey (counterclockwise), right? Because that bottom spring holds it, you need the brake spoon to turn the star, so the motion is now up and down. Positioning the spoon under the star and pressing down turns the star left/counter-clockwise. Positioning the spoon at the top of the star and pushing up turns the star clockwise. The more you turn it clockwise the more the adjuster Unscrews itself. And it takes a real leap of faith in my mind to believe that the more it unscrews, the tighter the brakes will be. I know it seems simple to most people, but I have to really think about it. And it's counterintuitive to me that cone-shaped outer bearings should NOT follow the same angle as the hub. The hub gets smaller to the outside, but the bearing gets smaller toward the inside. My mind has trouble grasping that and of course in the parts manual there's no cutaway illustration of the front brake assembly. Anyway, I know it's my problem, so I'm going out there again (it's like winter here 44 degrees now, up from 36) and do try #2. Only 2 more to go.
Posted on: 2022/4/28 9:32
|
|||
|
||||
|
Re: The Duchess Project: 1940 Super 8 Convertible Sedan
|
||||
|---|---|---|---|---|
|
Forum Ambassador
|
There is a cutaway view in the 35-41 parts book suspension section (page 310) but it shows everything including the wheel and hubcap so is a bit overlaid and hard to follow. There is a less congested sequence of the bearing layout on the spindle in the 47 and 51-4 manuals -- also in suspension sections. While the later cars do not have the same type suspension, the spindle and bearing portions are virtually the same.
Posted on: 2022/4/28 10:40
|
|||
|
Howard
|
||||
|
||||


