|
Re: 1938 Super 8 1605 - adventures with a newbie
|
||||
|---|---|---|---|---|
|
Webmaster

|
An OHM meter will tell the tale!
Posted on: 2024/6/19 19:16
|
|||
|
-BigKev
1954 Packard Clipper Deluxe Touring Sedan -> Registry | Project Blog 1937 Packard 115-C Convertible Coupe -> Registry | Project Blog |
||||
|
||||
|
Re: 1938 Super 8 1605 - adventures with a newbie
|
||||
|---|---|---|---|---|
|
Webmaster
|
Wire diagram should be in the literature section, probably in there service letters under specifications.
As far as circuitry, it shouldn't be that much different than my 37. The fuel gauge is the only gauge that needed a voltage step down. The others are mechanical and the Amp meter doesn't care. I'd go through the fuel gauge testing in the service manual. It's important that gauge itself is grounded or it won't read correctly. I small 12v bench too power supply that I use to check all my electric items and bulbs before they go in the car. I have a 12v-6v runtz installed on the back of the gauge. Which also needed to be grounded. I always treat unknown wiring and brakes like my arch-enemy last worked on them. Original wiring at this point should be considered past its prime and unsafe.
Posted on: 2024/9/4 6:36
|
|||
|
-BigKev
1954 Packard Clipper Deluxe Touring Sedan -> Registry | Project Blog 1937 Packard 115-C Convertible Coupe -> Registry | Project Blog |
||||
|
||||
|
Re: 1938 Super 8 1605 - adventures with a newbie
|
||||
|---|---|---|---|---|
|
Home away from home

|
Thanks Kev, found the wiring diagram for '38. I need to check the Literature Archive more....I've been going to Model Information mostly but it doesn't have all the other documents listed there.
I have been reading through the service manual and ran the tests they said for the gauge, which is why I'm perplexed. The gauge responded the first time I grounded it out and never again after that. Gauge itself should be grounded but I guess I can check that too. To fix the wiring under the dash all the modern additions will need to be deleted (A/C, air handler, etc). It would be a monumental task and I'm hesitant to even attempt it. But the way it is now I can't make sense of what anything is or where it goes. There are at least 6 additional switches, rheostats, and buttons mounted under the dash that I'm clueless as to what they are for. Tracing the wires is impossible. -Kevin
Posted on: 2024/9/4 11:08
|
|||
|
||||
|
Re: 1938 Super 8 1605 - adventures with a newbie
|
||||
|---|---|---|---|---|
|
Forum Ambassador

|
According to both the 37-8 (page 92) and 38-9 (page 90) service manuals the gauge is a Motor Meter magnetic type and if the conversion has powered it directly with 12v and you hit it with straight ground, there is a good chance you burned out a coil -- or maybe both coils depending on where the connection was made.
To verify if there is damage you might disconnect the gauge completely and then check the coils with an ohmmeter. Between the battery post and ground there should be continuity for the potential coil (left coil in drawing) and between the sender terminal and battery terminal would check the series coil (right side coil). Between ground and sender terminal will put both coils in series so there should still be a reading but slightly more resistance. Typically coils of that type show very little resistance so depending on several factors and meter sensitivity it might appear to be a dead short when reading thru the coils or maybe a bit of resistance in the leads. If the meter is capable of such small measurements it will show more resistance reading thru both coils in series. An open or no reading at all would indicate a burned out coil. The way the gauge works in this SM illustration is the full time or potential coil always provides a bias or slight pull on the needle to force it to the empty end of the gauge. The changing resistance in the sender varies the strength in the series coil to work against the always present bias and when tank is full, sender has minimal resistance which makes the series coil stronger so needle moves toward full on the gauge. The varying strength between the two coils will cause needle movement needed to change the reading. Different brand magnetic gauges will work the same way but depending on brand there could be different methodology. One brand might have the series coil be stronger and the sender change weakens it while another does the opposite. One brand might bias the needle always toward empty and another might bias it toward full. 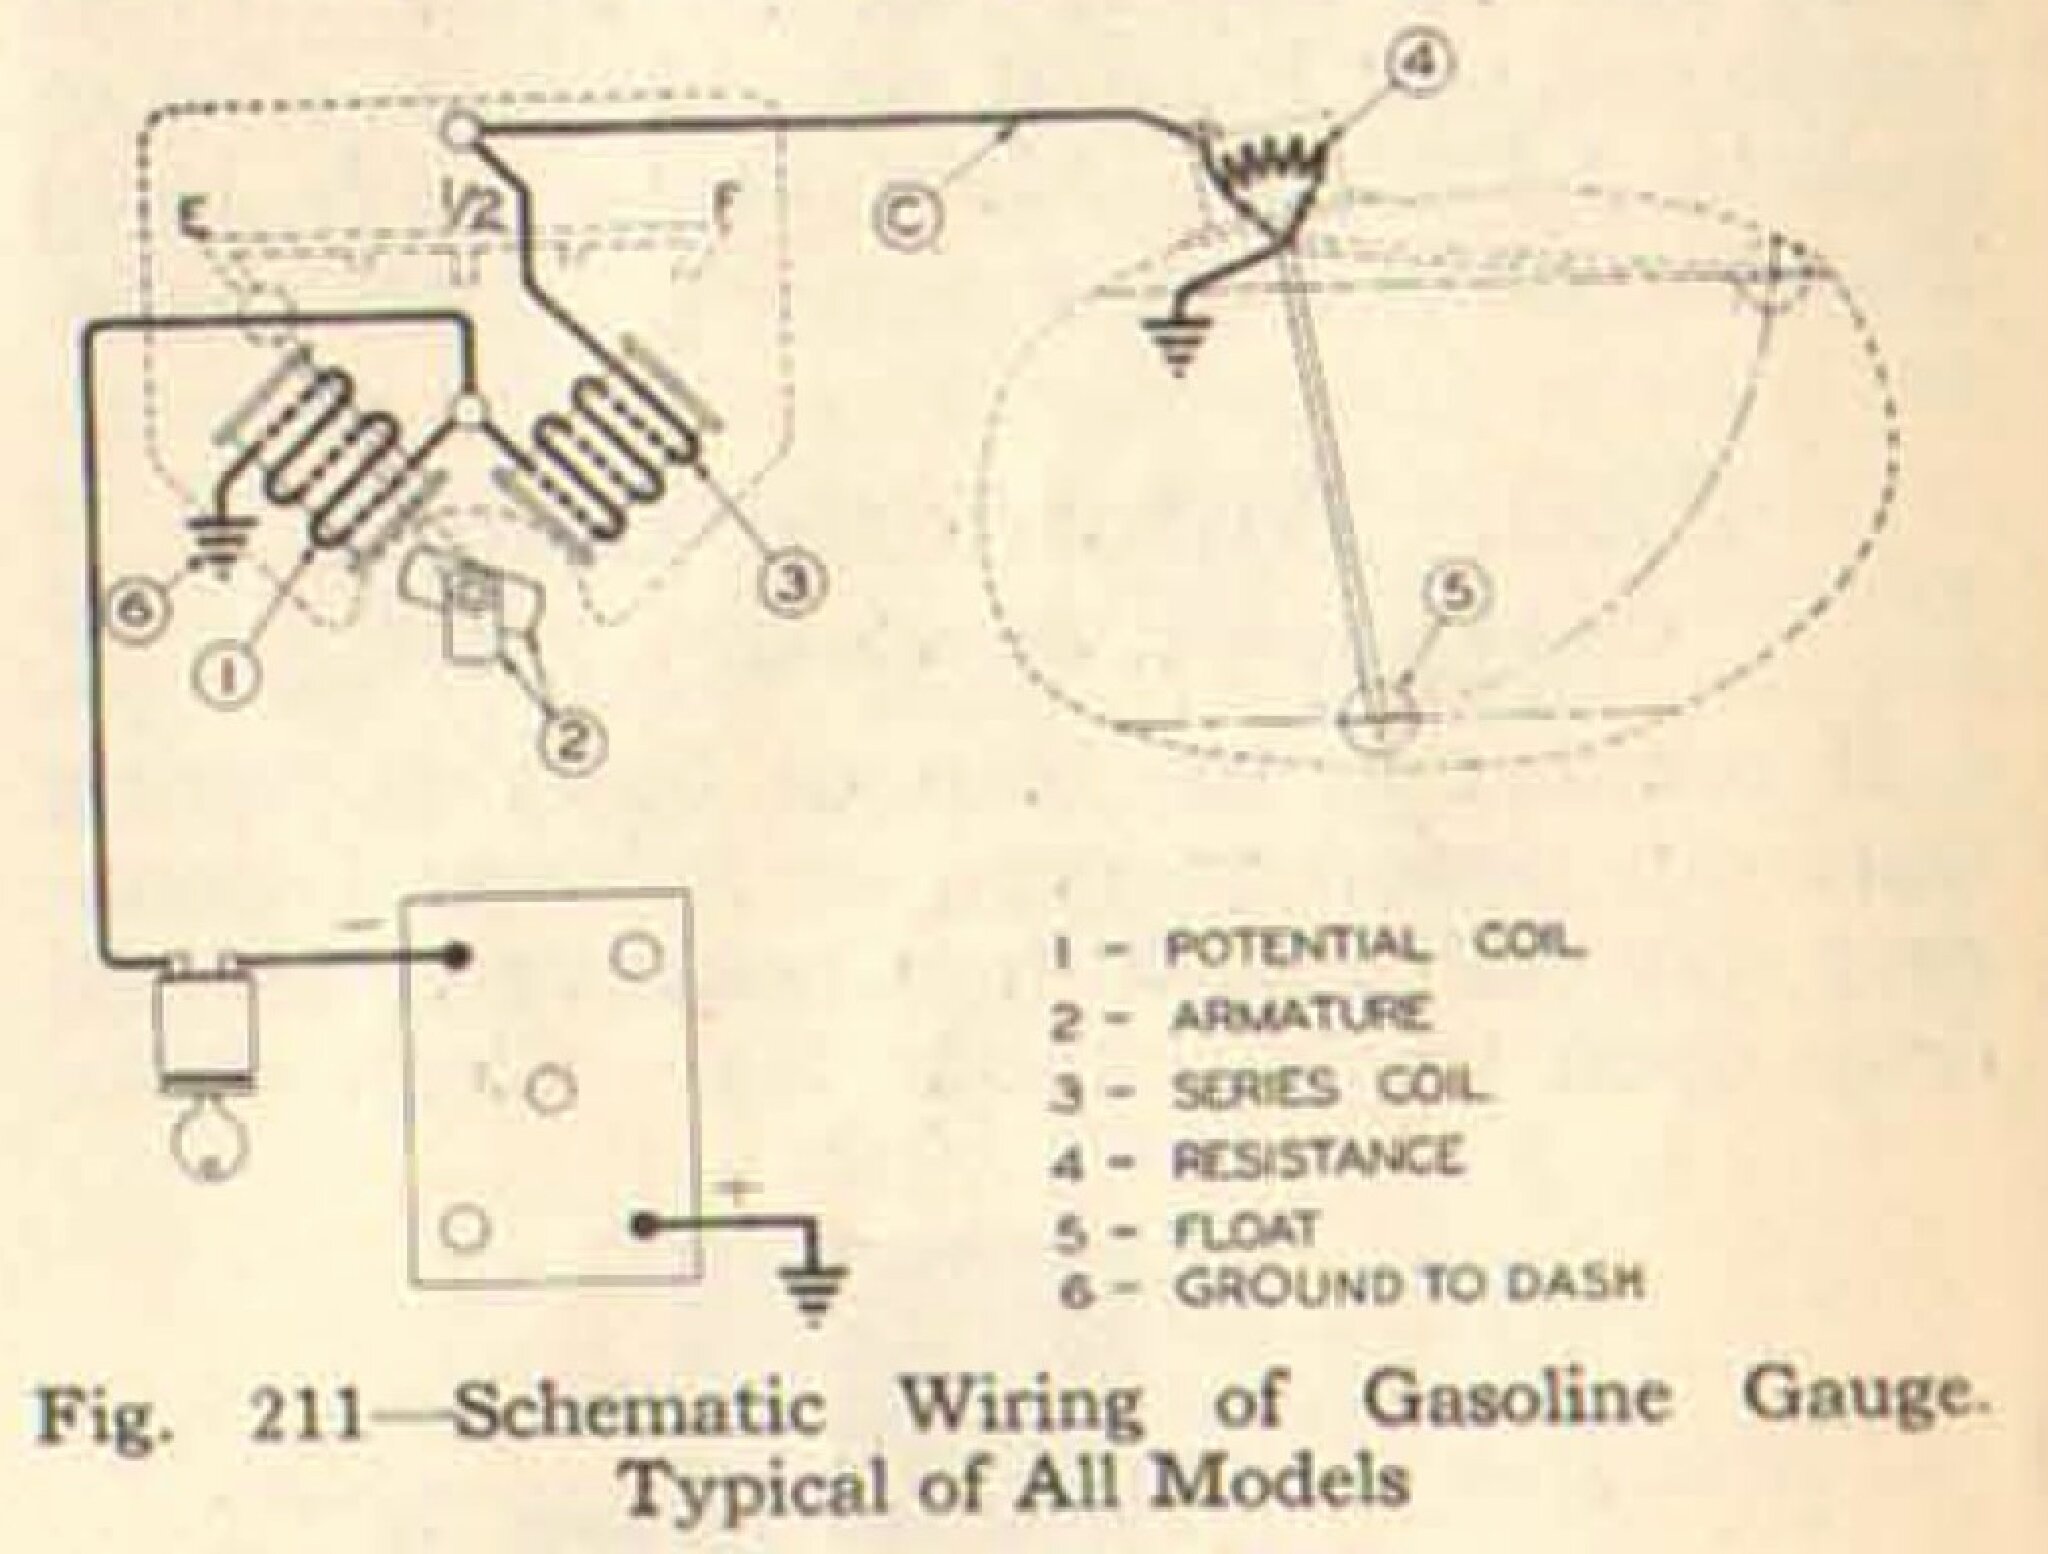
Posted on: 2024/9/4 11:59
|
|||
|
Howard
|
||||
|
||||
|
Re: 1938 Super 8 1605 - adventures with a newbie
|
||||
|---|---|---|---|---|
|
Home away from home
|
Howard - that's the diagram I was looking at in the manual. It's a much different design than my '54 so it took me a minute to figure out where things connected. With the car being 12V, I don't know how I could've tested the gauge without damaging it. The manual says to ground the sender wire, which is essentially the same thing that I did. So either way the gauge would've received a full 12V.
If the gauge is blown, how do I remove it? Does the whole instrument cluster come out in one piece or do I remove each gauge face separately? If I can get the whole cluster out easily then I wouldn't mind digging into it this winter and cleaning up the wiring horror show behind it. But I'd like to get the car back on the road before then and get some other problems sorted out. -Kevin
Posted on: 2024/9/4 17:49
|
|||
|
||||
|
Re: 1938 Super 8 1605 - adventures with a newbie
|
||||
|---|---|---|---|---|
|
Forum Ambassador
|
Wish I could help with instructions on gauge removal but I haven't messed around much with prewar cars so am not that familiar with the ins and outs of accessing the cluster or gauges. Info from someone with a similar car would be your best option there.
You are correct in that the gauges on the 54 models are quite different -- actually all models from 48 on are quite different but except for the 22-23 series senders they operate similarly. With the 22nd series Packard went to King-Seeley bimetal type gauges instead of the various brand magnetic types used in most of the prior models. 48-50 senders are unique in that they also have a second heater and bimetal strip in the sender to work a contact set which opens and closes to ground. The gauges see pulses of on or off straight 6v. How fast and how long the contact stays grounded to send a pulse and work the gauge heater depends on fuel level, temp, or pressure. The fluid sensing changes mechanisms which control the amount of pressure on the bimetal strip so the heater has to work harder or work less hard to bend the strip and work the contact. The 51 and later gauges are also King-Seeley but slightly different requirements in that the senders are the familiar straight variable resistance type. The 48-56 bimetal gauge mechanisms all work the same way by having a short length of resistance wire wrapped around the bimetal strip with the wire working as a heater. The more current thru the wire as determined by the changing sender resistance causes the temperature of the heater to change as it works on the bimetal strip to bend it. The free end of the strip is attached to the needle so the more it bends, the higher the needle moves on the gauge. Here is what a typical bimetal type gauge looks like inside. 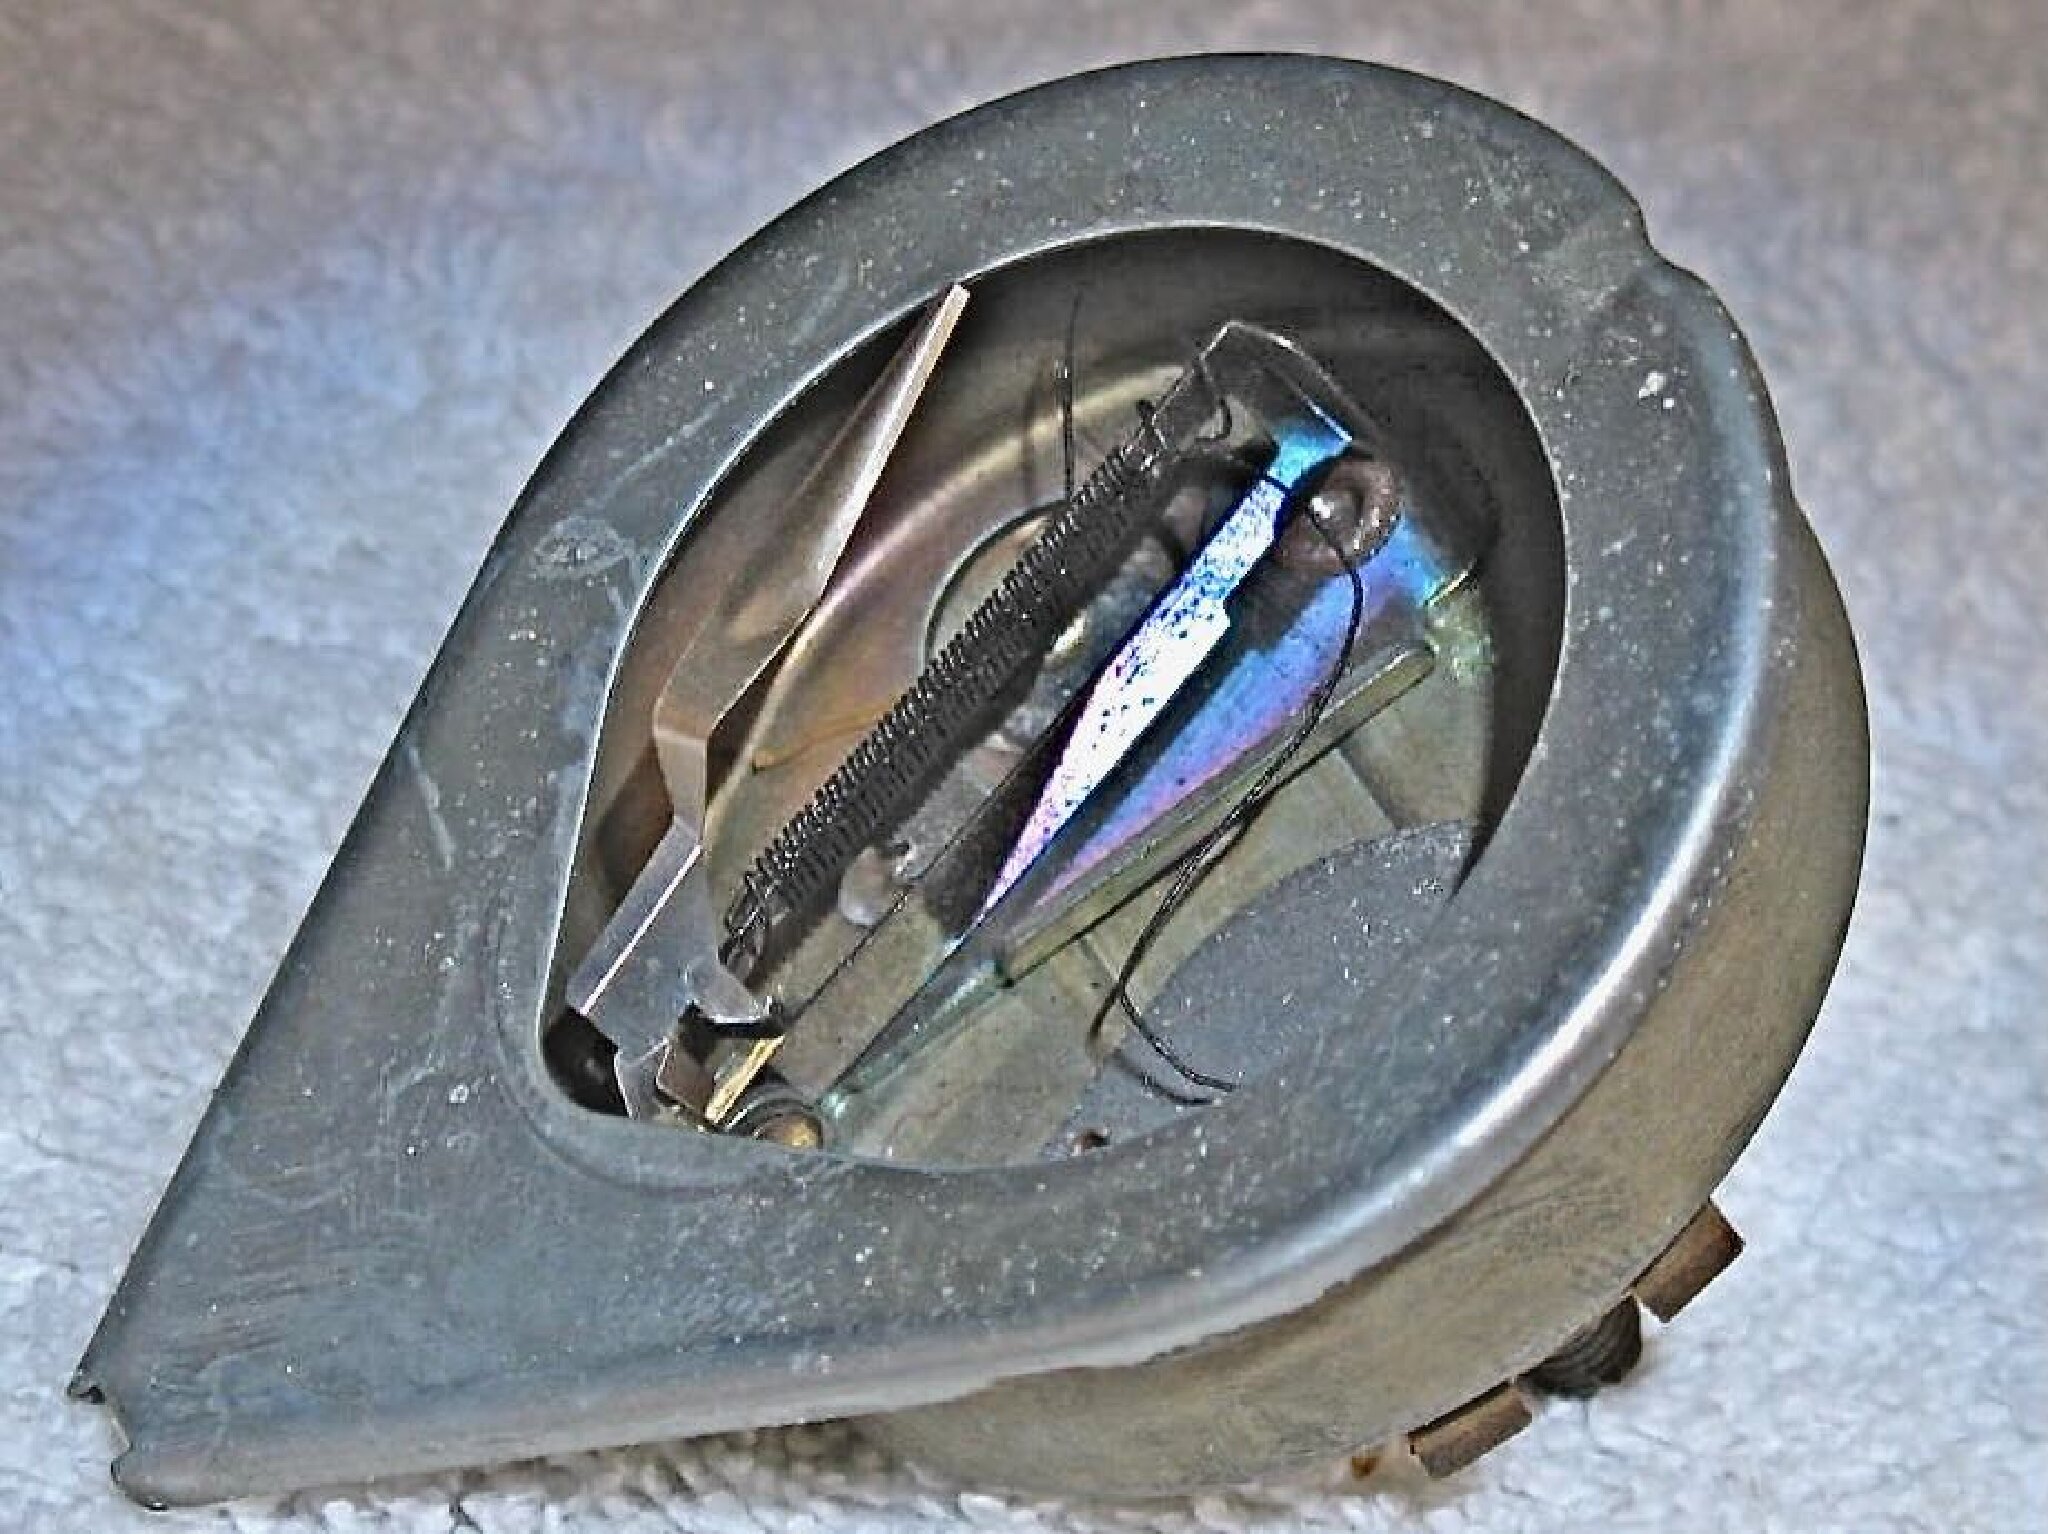
Posted on: 2024/9/4 18:21
|
|||
|
Howard
|
||||
|
||||
|
Re: 1938 Super 8 1605 - adventures with a newbie
|
||||
|---|---|---|---|---|
|
Home away from home
|
No progress on the gauge. I'm not sure where to go from here on it....to pull the gauge out and test it looks like it's going to be a good amount of work to get things out of the way.
I went back through and rechecked all the ignition stuff to see if I could figure out what's causing it to miss. Rechecked the points, found them a bit tight so loosened them up to spec. Recharged the battery (dead) and got the car started. Starts to have a random miss after it starts to warm up. Timing was a bit advanced, so backed it off a touch. Timing seems to bounce around some so hard to get it right on. Shaking in the shifter remains when accelerating in 2nd and 3rd gear. The engine still continues to cut out sometimes when coming to a stop also. My guess is the distributor needs to be worked on, and probably the carb also. Something does not feel right with either one and I'm not knowledgeable enough to know how to fix it. At this point I'm considering sending the carb off to someone like Parker's Packards because they know the older generation of Packards well. And I'm probably going to send the dizzy off for a rebuild. I can't trust the car enough to take it more than a few miles at this point, and that needs to change. -Kevin
Posted on: 2024/9/11 17:11
|
|||
|
||||
|
Re: 1938 Super 8 1605 - adventures with a newbie
|
||||
|---|---|---|---|---|
|
Webmaster
|
If ignition timing is bouncing around, then that could be a worn distributor bushings. Also look at the breaker plate.
Take a look at the Servicemen's Training Manual on the Ignition System. It may have some helpful tips/ideas. Lots of points of potential failure and thing that can act up with heat. But generally not that much different than your 54. Same goes with the carb. Usually a fresh rebuild kit solves everything. Unless you have a warped casting, or worn shaft holes.
Posted on: 2024/9/11 20:38
|
|||
|
-BigKev
1954 Packard Clipper Deluxe Touring Sedan -> Registry | Project Blog 1937 Packard 115-C Convertible Coupe -> Registry | Project Blog |
||||
|
||||
|
Re: 1938 Super 8 1605 - adventures with a newbie
|
||||
|---|---|---|---|---|
|
Home away from home
|
With squirrely behavior like that, I would access the timing chain and push on it...if it moves or flexes significantly you could be getting erratic valve timing relative to the distributor...seems like that should be checked first before working on the distributor.
Posted on: 2024/9/11 20:42
|
|||
|
||||


