|
Re: Trunk Seal Replacement
|
||||
|---|---|---|---|---|
|
Home away from home

|
I need to order the trunk seal also. It's a project I've been putting off for a long time. I almost never open the trunk and the car never sees water except for when I wash it. But it does need to be done because I'm getting a ton of dust in there. I live on the end of a long gravel lane and dust gets everywhere, even if I'm barely crawling along.
Posted on: 7/9 12:09
|
|||
|
Kevin
1954 Clipper Super Panama "Van Halen" | Registry | Project Blog 1938 Super 8 1605 | Registry | Project Blog 1953 Clipper Deluxe Club Sedan "Rusty McRustface" | Registry | Project Blog 1956 Packard The Four Hundred "Tanner" | Registry | Project Blog |
||||
|
||||


|
Re: Trunk Seal Replacement
|
||||
|---|---|---|---|---|
|
Home away from home

|
Well if the weatherstrip is sealing properly then that seam is on the inside of the car. That's why it was placed there and not on the opposite side of the groove. So seeing that would require some proper investigation as to where the water is actually flowing.
Posted on: 7/9 12:52
|
|||
|
1955 400 | Registry | Project Blog
1955 Clipper Deluxe | Registry | Project Blog 1955 Clipper Super Panama | Registry Email (Parts/service inquiries only, please. Post all questions on the forum.) service@ultramatic.info |
||||
|
||||
|
Re: Trunk Seal Replacement
|
||||
|---|---|---|---|---|
|
Home away from home
|
The trunk seal is not exactly the same profile as the original seal, but the density seems good and I think it's going to work well. (Restoration Specialties) I haven't water tested it yet, but it appears to be making good contact all the way around. Even better now that I repaired one of the loose pins on my trunk hinge.
  
Posted on: 7/20 23:10
|
|||
|
||||
|
Re: Trunk Seal Replacement
|
||||
|---|---|---|---|---|
|
Home away from home
|
After a bit of work, I've managed to get my car waterproof..........almost. I'm still struggling with the trunk seal. I haven't glued it in yet thinking I may have to do a bit of shimming, but I'm also thinking that I will not be able to get it to seal until it is glued in.
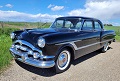
I've looked in the service manual, but don't see anything about replacing the trunk seal. My thought is that maybe I need to lay a bead of sealer on the bottom, probably closer to the outside corner, all the way around and then push the seal into it.  My hesitation is that once I do this I'm committed! My hesitation is that once I do this I'm committed! Thoughts and advice welcome! All the leak testing gave me a good opportunity to clean up the Cavalier. Such a handsome car!  
Posted on: Yesterday 0:20
|
|||
|
||||
|
Re: Trunk Seal Replacement
|
||||
|---|---|---|---|---|
|
Forum Ambassador

|
If you have not already checked it out, there are a couple of pages regarding identifying and fixing various trunk leaks in this service counselor. There was an earlier article in another counselor on dust and air leaks around the boxed piece where the gas tank filler pipe is located but that was probably only applicable to the early models.
Posted on: Yesterday 8:52
|
|||
|
Howard
|
||||
|
||||
|
Re: Trunk Seal Replacement
|
||||
|---|---|---|---|---|
|
Home away from home
|
I think you may have your seal installed backwards. On the original, and according to Steele's directions, thicker part goes to the inside of the trunk and the smaller part goes to the outside. So in the picture below the left side of the seal is towards the trunk, the right side is towards the exterior of the car. From your picture it looks like yours is flipped around. Not sure if it will make any difference, but it's worth investigating.

Posted on: Yesterday 8:59
|
|||
|
Kevin
1954 Clipper Super Panama "Van Halen" | Registry | Project Blog 1938 Super 8 1605 | Registry | Project Blog 1953 Clipper Deluxe Club Sedan "Rusty McRustface" | Registry | Project Blog 1956 Packard The Four Hundred "Tanner" | Registry | Project Blog |
||||
|
||||
|
Re: Trunk Seal Replacement
|
||||
|---|---|---|---|---|
|
Home away from home
|
Quote:
This is a great SC, thank you! Figure 3 is of particular interest as I think that may be the area I have water entering. I hadn't considered manipulating the body to correct the alignment and help it seal. I feel like I have a course of action that will get things correct, along with addressing KP's observation.  
Posted on: Yesterday 9:59
|
|||
|
||||
|
Re: Trunk Seal Replacement
|
||||
|---|---|---|---|---|
|
Home away from home
|
Quote:
   OMG!!! You are exactly correct, it is backwards!!!! In general I don't enjoy people pointing out that I'm a moron, but in this case I'll make an exception!  When I compared the two seals I recognized how the new one should go compared to the old one and then I went ahead and installed the new one backwards!!! I'm sure changing it will make a difference as it will create a channel for the water to escape quicker, which is probably half the battle, no water, no leaks. It should also press down more over the seam in the channel. I sealed that seam, but I'm going to give that a leak test without the seal in and make sure it's not part of the problem.  This is the original trunk seal.  The trunk is the last place to fix leaks, and they are going to get fixed!!!
Posted on: Yesterday 10:21
|
|||
|
||||
|
Re: Trunk Seal Replacement
|
||||
|---|---|---|---|---|
|
Home away from home
|
SUCCESS!!! Thanks to Kevin and Howard!
Installing the seal the correct way made a big difference, both for sealing and creating a channel so water could escape quickly. Then adjusting the fenders as in fig 3 of the SC Howard shared fixed up what were the real problem areas. My seal is sealing without having to glue it in. I figure if it is sealing now with me dumping water on it, it will only get better as it settles into place. Channel for seal cleaned, painted and the seam on the bottom has been sealed.  This area is quite springy, I had to jack it quite a bit past where I wanted it to be and then give it a few hits with the hammer to help it move.  Putting the seal in the correct way creates this nice channel for the water to quickly escape. The water doesn't reach the top of the seal unless, there's heavy rain, you're washing your car, or you're testing for leaks.  Over the past few days, after getting everything sealed up, I put my interior back in! Other than replacing manifold gaskets, the Cavalier needs to go on a road trip!  
Posted on: Yesterday 19:40
|
|||
|
||||


