|
Re: BigKev's 1954 Packard Clipper Deluxe Sedan
|
||||
|---|---|---|---|---|
|
Home away from home

|
No turning back now! Looks like a good start. Glad your floor braces are in decent shape.
Posted on: 2011/8/17 7:21
|
|||
|
[url=h
|
||||
|
||||
|
Re: BigKev's 1954 Packard Clipper Deluxe Sedan
|
||||
|---|---|---|---|---|
|
Webmaster

|
Ross, thanks for the feedback. I though the track supports were bolted to the floor stringers?
Are you suggesting I weld the track supports to the floor stringers for additional strength? If so I will do that. A lot of the bolts are going to have to get replace as they are pretty rust damaged. On the passenger side one, water pooled in the floor depression were the body bolt was and completely rusted the bolt head away to the point where the bolt fell through and out at some point. The rubber spacer is still there, just off centered in the hole at the moment. Any suggestion on the size and type of replacement bolt? What is interesting is you look at the floor from the underside it looks pretty good. All this floor rust is from wet carpets (top down), and not from road salt or anything like that.
Posted on: 2011/8/17 11:50
|
|||
|
-BigKev
1954 Packard Clipper Deluxe Touring Sedan -> Registry | Project Blog 1937 Packard 115-C Convertible Coupe -> Registry | Project Blog |
||||
|
||||
|
Re: BigKev's 1954 Packard Clipper Deluxe Sedan
|
||||
|---|---|---|---|---|
|
Home away from home
|
Did you have any data and pictures of the door weather stripping on your 54? My coupe has had all the rubber removed when it was painted and it is not with the car. I have no idea where the stripping goes and what type I will need. Is it necessary to have Packard or can I use modern style? Most important where does it get mounted?
Posted on: 2011/8/17 14:33
|
|||
|
||||
|
Re: BigKev's 1954 Packard Clipper Deluxe Sedan
|
||||
|---|---|---|---|---|
|
Home away from home

|
I actually meant that those fore and aft stringers should be welded to the side to side stringers, not the seat tracks at all. The body bolts are just 3/8-24 bolts by about 2 1/2 long or so. Nothing special as they are not highly stressed.
Posted on: 2011/8/17 15:14
|
|||
|
||||
|
Re: BigKev's 1954 Packard Clipper Deluxe Sedan
|
||||
|---|---|---|---|---|
|
Webmaster
|
Ross, yes understood about underfloor seat track supports. That is what I meant, not the seat tracks themselves. Thanks.
Posted on: 2011/8/17 15:39
|
|||
|
-BigKev
1954 Packard Clipper Deluxe Touring Sedan -> Registry | Project Blog 1937 Packard 115-C Convertible Coupe -> Registry | Project Blog |
||||
|
||||
|
Re: BigKev's 1954 Packard Clipper Deluxe Sedan
|
||||
|---|---|---|---|---|
|
Webmaster
|
Willis, I don't have any pics of the weather stripping in place on my car as half of it was missing or rotted when I got it. Hence the wet carpets and rusty floors.
Posted on: 2011/8/17 15:40
|
|||
|
-BigKev
1954 Packard Clipper Deluxe Touring Sedan -> Registry | Project Blog 1937 Packard 115-C Convertible Coupe -> Registry | Project Blog |
||||
|
||||
|
Re: BigKev's 1954 Packard Clipper Deluxe Sedan
|
||||
|---|---|---|---|---|
|
Webmaster
|
More progress tonight on the passenger side floor rust repair. First I sprayed down the floor supports with some metal prep to kill off any remaining rust.
Then using the remnants of the old pan I laid it on top of the new pan and used it as a trace temple. I extended the trace line out about 5/16" to accommodate the flange I am putting on the new pan. Then I used a pair of airshears to trim the pan to shape. Once the pan was trimmed to shape, then I used a pneumatic flanging tool to put a step flange around the exterior of the new pan. The reason for this is that I am doing a lap weld on the pan. Less change of burn-thru for my beginner welding skills, and also it give me a some thing to temporarily screw the pan in place with. Which is really needed since the contour on the pan is not a perfect match. Once the pan was trimmed and flanged, then it was test fit on the floor. With the fitting looking good, I then painted the floor supports. Also I used a hammer and dolly to level the floor pan cut area all the way about. I also resided to cut out another section of rust on the transmission hump that was outside the coverage of the replacement pan. The renew pan was then refit, and is being held in place with 4 small self tapping screws to hold the pan in place for welding. I still need to go over the edges of the new pan and remove the primer coating before welding. And lastly I just rough cut piece of scrap metal to replace the other rust area. Still needs some trimming, but the dinner bell rang, and that was a the end of the work day. Attach file:  (85.81 KB) (85.81 KB) (70.97 KB) (70.97 KB) (53.10 KB) (53.10 KB)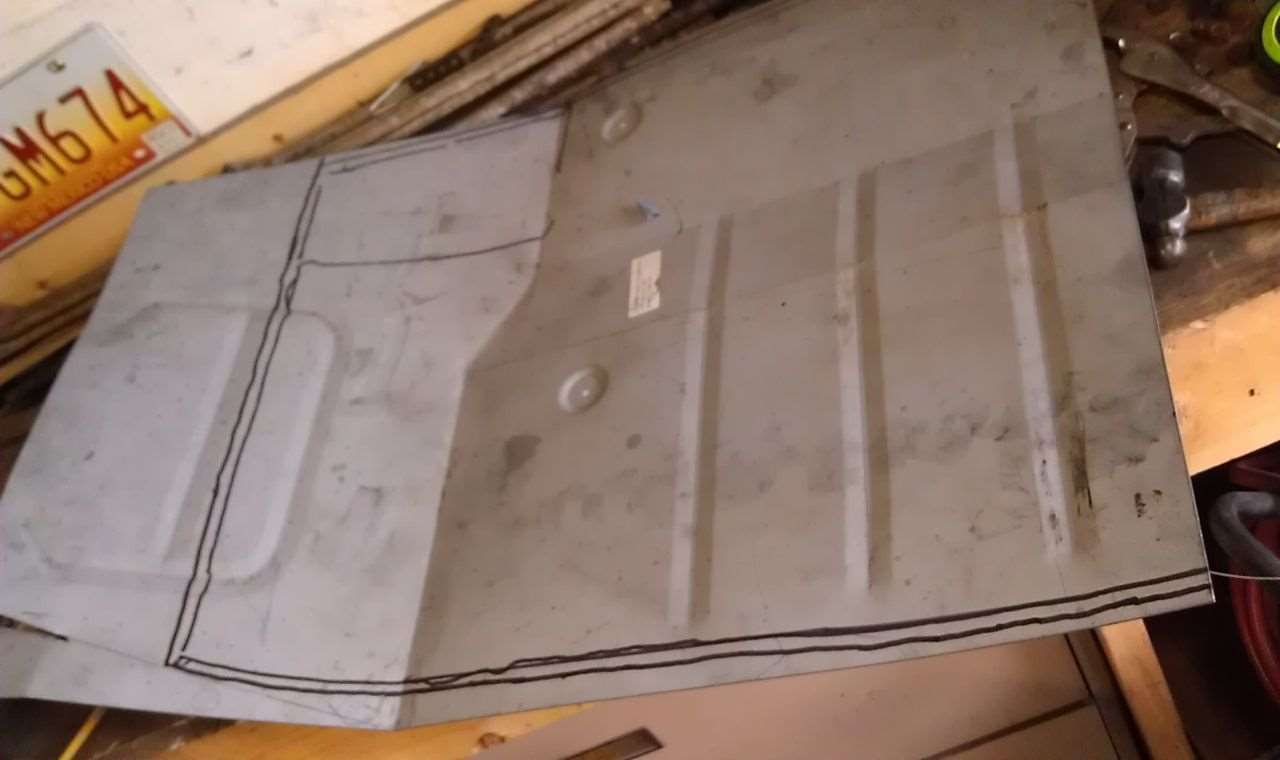 (56.94 KB) (56.94 KB) (53.17 KB) (53.17 KB)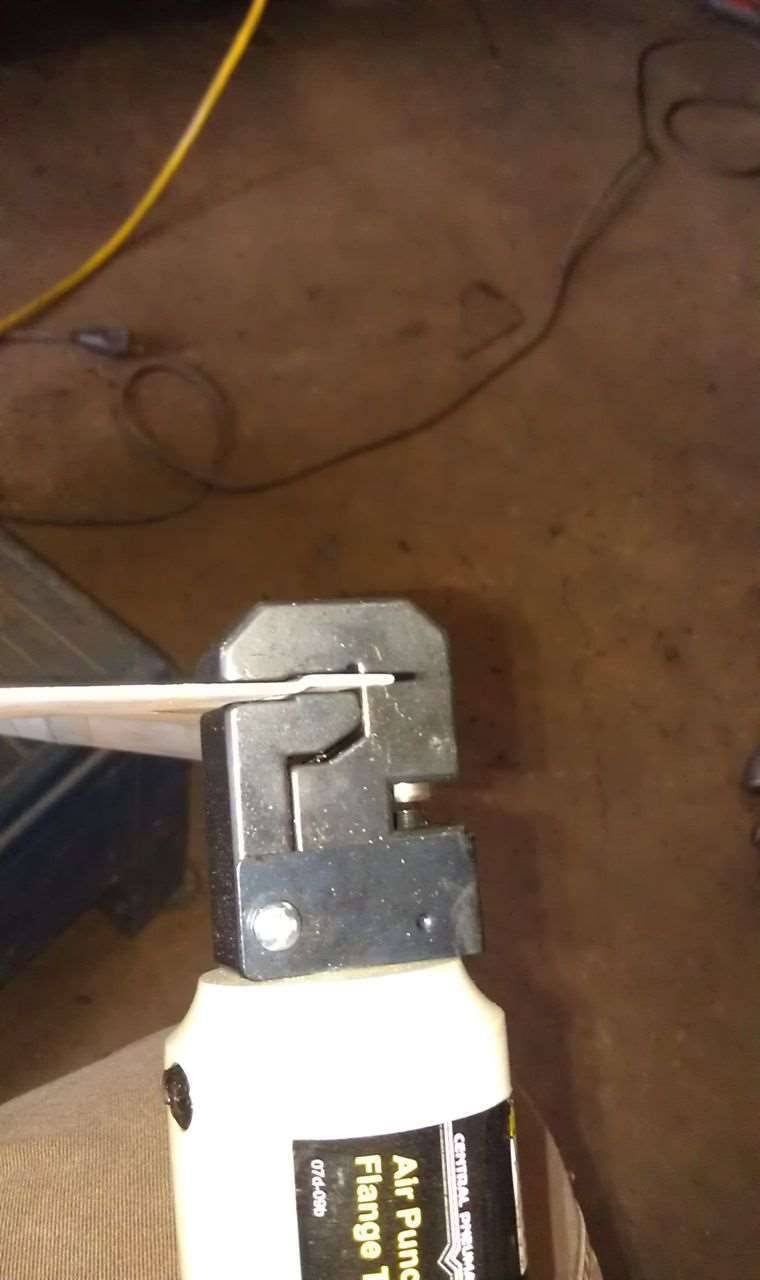 (76.39 KB) (76.39 KB) (67.19 KB) (67.19 KB) (73.42 KB) (73.42 KB) (79.48 KB) (79.48 KB)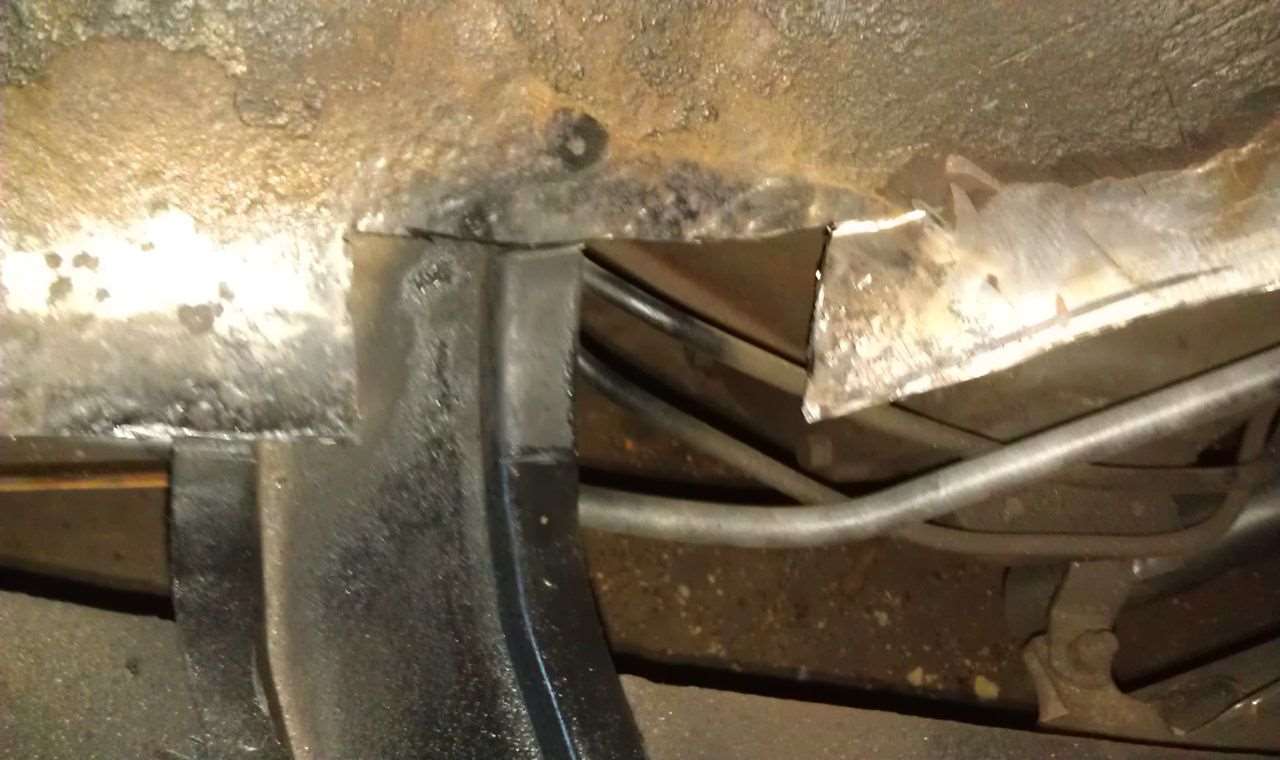 (88.56 KB) (88.56 KB) (62.79 KB) (62.79 KB) (87.81 KB) (87.81 KB)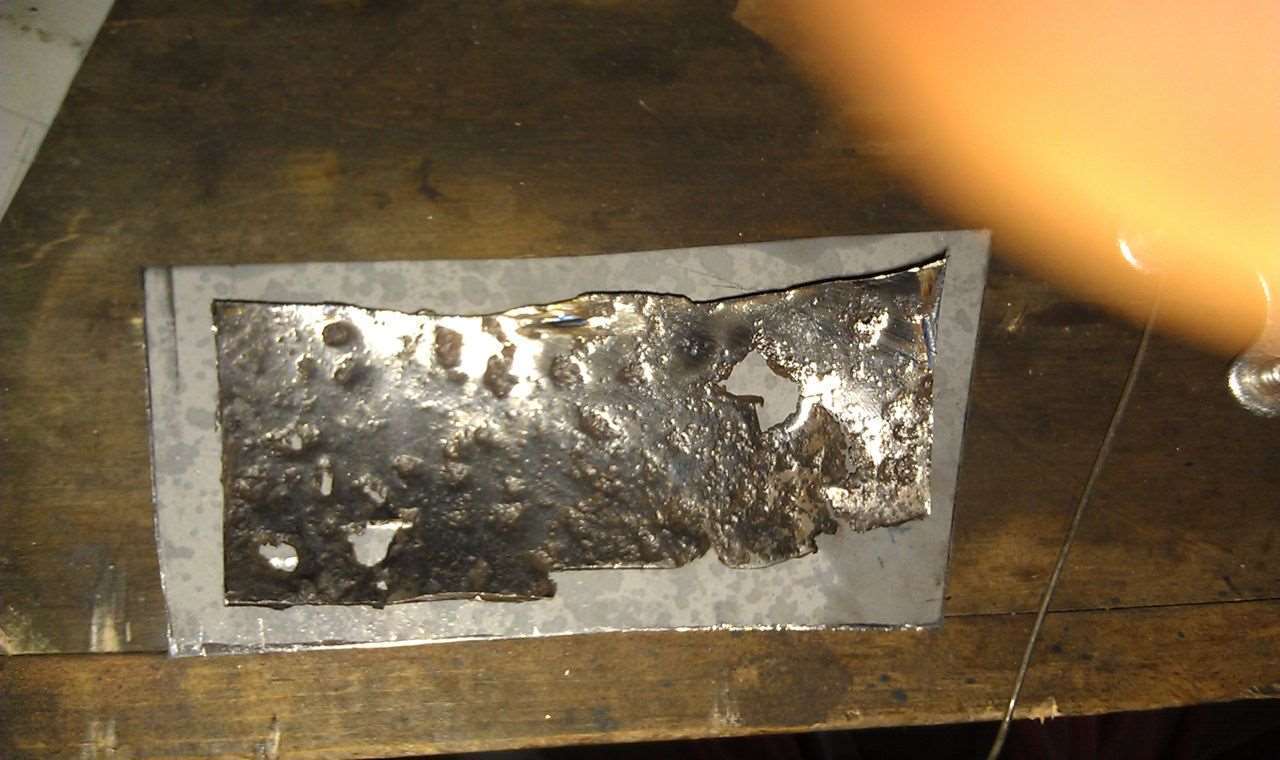
Posted on: 2011/8/17 22:25
|
|||
|
-BigKev
1954 Packard Clipper Deluxe Touring Sedan -> Registry | Project Blog 1937 Packard 115-C Convertible Coupe -> Registry | Project Blog |
||||
|
||||
|
Re: BigKev's 1954 Packard Clipper Deluxe Sedan
|
||||
|---|---|---|---|---|
|
Forum Ambassador

|
Really enjoy seeing this part of the project, as the floor pan in one of my Patricians (originally from southern OH), though not as bad as yours, will need similar repair to the driver's side.
Looks like the C2C panels will work fairly well; glad to see they are embossed as original for the body mount locations. Noticed your flanger also has punch. Have you considered punching the flange of the new panel and plug-welding (in lieu of spot-welding) to the existing floor? You might try backing up the plug-weld location with a copper welding spoon to help preven burn-out, if a problem arises When finished, you could seal the joint, from both sides with flexible seam sealer. Vehcile manufacturers have been following similar practice in production for decades. Also, you might be able to punch out the original spot-weld locations on the cross-bracing and plug-weld to new panel - though that will require working upside down. BTW, I've no expereince in welding but in researching MIG welders some years ago, there was a weld-through primer that could be applied (over clean metal) prior to assembly, to protect the joint from rusting, yet permit electric welding - similar to a cold galvanizing compound. I'd still apply seam sealer, after welding is complete. Just remember the old rule - measure twice, cut (and weld) once).
Posted on: 2011/8/18 9:12
|
|||
|
||||
|
Re: BigKev's 1954 Packard Clipper Deluxe Sedan
|
||||
|---|---|---|---|---|
|
Webmaster
|
Brian,
The C2C panels are about 85% correct to the floor in my Clipper. The bead dies they are using are not a 100% match for the OEM ones. And the shape on the floor where the drop down is a little to one side from the original floor. Also the transition from the floor to the toe board is a sharp bend, and not a radiused bend. But all of these are fixable with a little adjusting and a hammer. You can tell by the pencil marks on the panel that it was formed using a brake and a bead roller as opposed to stamping. So I think unless someone has at the skill and tools to make a pan from scratch, these are about as close of a replacement pan as one is going to get. I am actually going to seam weld the entire pan into place using a "skip" weld technique to prevent warpage. So that is the reason I didn't punch the flange. Once welded, I will get up under the car and body hammer any lip from the original metal flat with the bottom of the new pan, and then apply seam sealer and paint. The plan was to drill down through the new pan over the floor braces, and then plug weld them to the floor braces to reproduce the spot welds close to were they were originally. There are a couple of spots on the back floor were the body mount locations are rusted out in the floor pan from water pooling in those low areas. But the rest of the surrounding metal is good. So I need to figure out how to create that embossed depression in some sheet metal so I can cut those out and replace them. Perhaps I can create a hammerform using a stack of large washers or something
Posted on: 2011/8/18 10:29
|
|||
|
-BigKev
1954 Packard Clipper Deluxe Touring Sedan -> Registry | Project Blog 1937 Packard 115-C Convertible Coupe -> Registry | Project Blog |
||||
|
||||


