|
Re: BigKev's 1954 Packard Clipper Deluxe Sedan
|
||||
|---|---|---|---|---|
|
Webmaster
|
Thanks JW, slowly but surely the old gal is getting her make over.
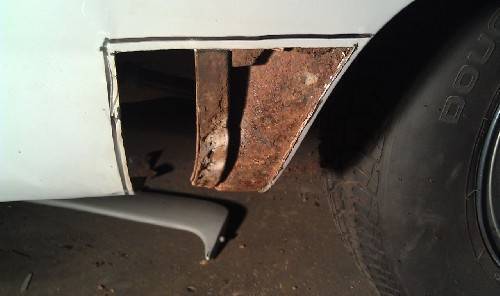
Still have a lot of rust repair to go. 2 rear fender well corners, the other dog leg, the rear bottom trunk floor gutter, and about 5 areas were there is perforated pin hole rust. Both front door skins have a little bit of pin hole rust about 1" up from the bottom. This is from clogged drains in the door. Also there is pin hole rust above the wheels wells, and it the very back corner of the trunk where the trunk floor meets the quarter panels. Depending on how bad the pin hole rust is and how thick the surrounding metal is, either I will drill them out to good metal, and then weld closed, or cut a patch to replace a section of bad metal. Hoping to get it all down before PI Meet in January. At least my welding is getting better every time. Huge different between welding on clean good metal, vs trying to weld to the pitted metal that was on the floors. Also took Ross's advice and am doing lots of little tacks instead of trying to lay longer beads. This really helps to prevent distortion, and burn through, and makes grinding the welds down far easier.
Posted on: 2011/11/3 11:21
|
|||
|
-BigKev
1954 Packard Clipper Deluxe Touring Sedan -> Registry | Project Blog 1937 Packard 115-C Convertible Coupe -> Registry | Project Blog |
||||
|
||||
|
Re: BigKev's 1954 Packard Clipper Deluxe Sedan
|
||||
|---|---|---|---|---|
|
Webmaster
|
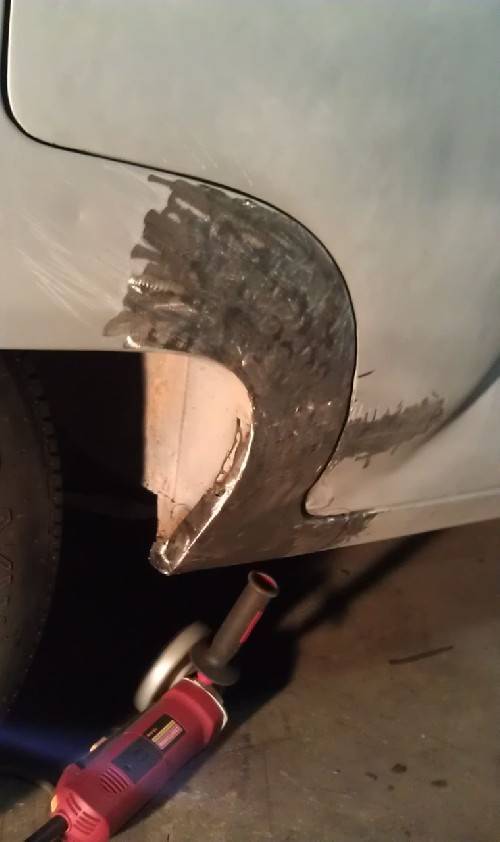
More progress tonight, but didn't get that many pictures. I finished welding and grinding the dog leg. Just when I though I was done, I found an area of the door jam that was bad near the bottom of the portion of the dog leg. So I cut that bad area out and formed a replacement piece and welded that in. Then everything was ground down level.
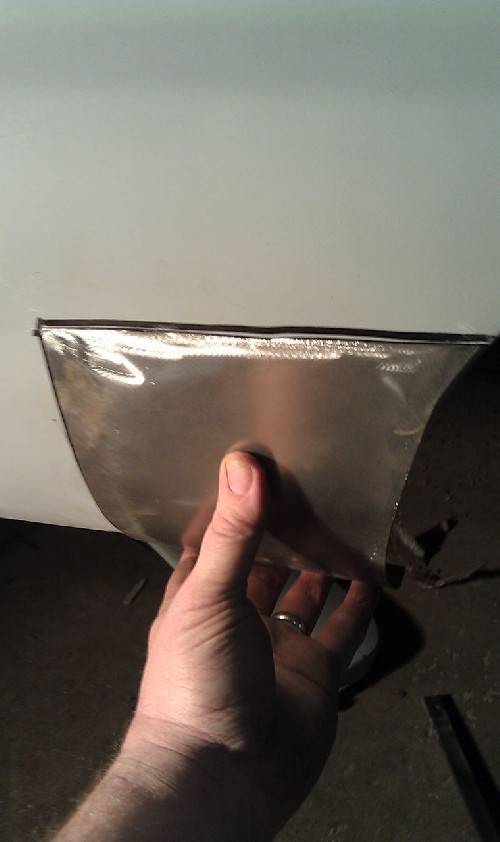
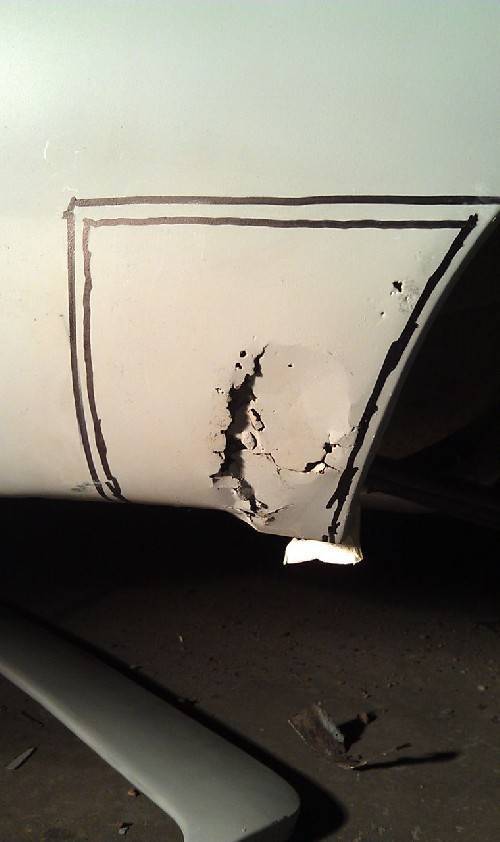
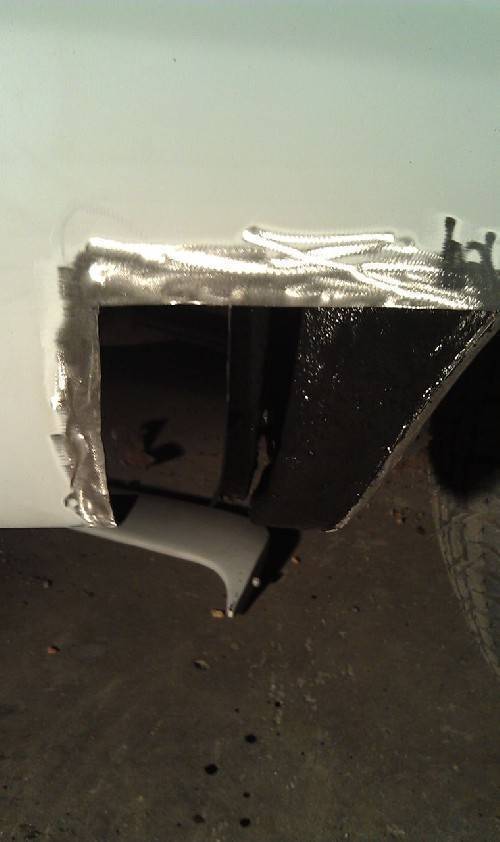
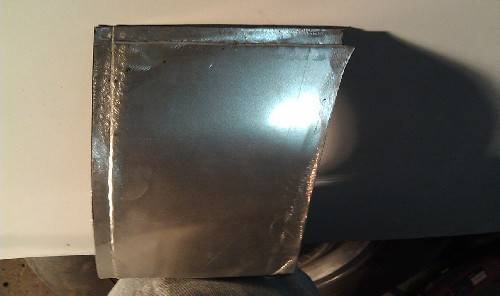
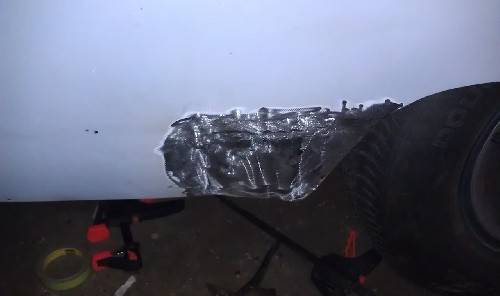
With the dog leg done, I moved on the rear corner of the wheel well. Much like the dog leg, a paper template was made and then traced on to 18ga cold rolled and then cut out. The patch was then bent by hand to get the correct general shape. The metal patch was then traced onto the quarter panel, and then the another line was traced inside on that to mark the cut line. Using a cut off wheel it was then completely cut out. Along the bottom a air chisel was used to break the spot weld to the under brace. A step flange was then added to the rear and top of the patch. This allows it to slip under the existing panel along those edges. The panel was then fitted, and minor bend adjustments made, and then it was clamped into place and tack welded all around. Then clamps were then removed, and the space between the tacks was filled with more tack until the entire seam was welded. Then it was fit was the die grinder. And that is where we are at currently. A little touch up welding is still needed to fill some pinhole gaps in the welds that was exposed during grinding.
Posted on: 2011/11/4 0:42
|
|||
|
-BigKev
1954 Packard Clipper Deluxe Touring Sedan -> Registry | Project Blog 1937 Packard 115-C Convertible Coupe -> Registry | Project Blog |
||||
|
||||
|
Re: BigKev's 1954 Packard Clipper Deluxe Sedan
|
||||
|---|---|---|---|---|
|
Webmaster
|
Well back at work on the Clipper today. Mostly just cleaning up some stuff. Also had to address a transmission pan leak that I had been putting off. Car was put on jackstands in the front, and I slid under to see what was going on. Just needed to tighten down the pan bolts in one corner a little bit more. Problem solved.
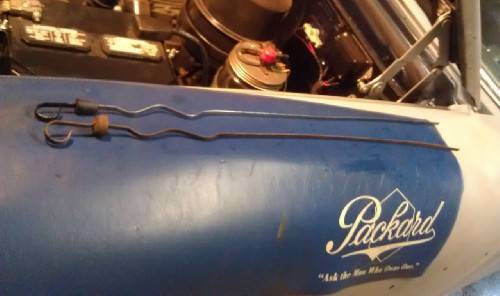
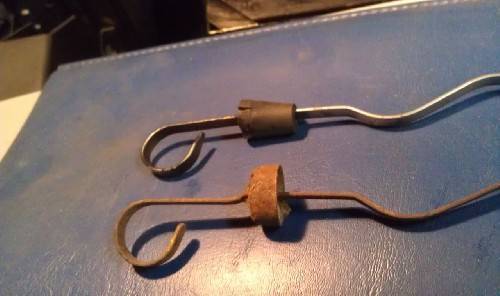
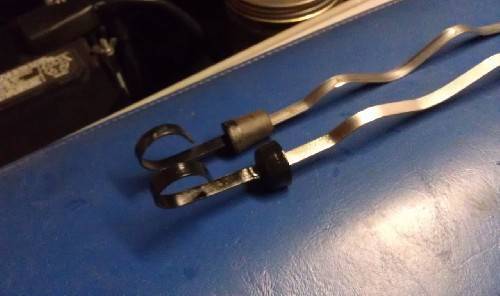
While I was checking and topping off the transmission fluid I noticed the dipstick looked exactly like one hanging on the wall that came out of the Yocum parts pile. So I compared them and sure enough, the one from the Yocum stash was a Gear Start dipstick. But unlike mine, it has NOT missing the tube cap, I had just been using a rubber stopped on mine. So into the media blaster it went for derusting. Then a quick hit with some black paint on the handle, and into the car it went. Love it when things just like that work out. So with the leak fixed, fluid topped off, it was time to take the Clipper on a little drive. So drove it about 5 miles. First time in the dark as it is basically pitch black by 5:30pm now. I soon realized that next time I need to put the rear-view mirror back on the car. No problems with the drive, but kinda weird not being able to see what is behind me. On a positive note, all the lights worked.
Posted on: 2011/11/14 22:27
|
|||
|
-BigKev
1954 Packard Clipper Deluxe Touring Sedan -> Registry | Project Blog 1937 Packard 115-C Convertible Coupe -> Registry | Project Blog |
||||
|
||||
|
Re: BigKev's 1954 Packard Clipper Deluxe Sedan
|
||||
|---|---|---|---|---|
|
Home away from home

|
Great News! Bravo! Your work is an inspiration to many if not all of us!

Posted on: 2011/11/14 22:51
|
|||
|
||||
|
Re: BigKev's 1954 Packard Clipper Deluxe Sedan
|
||||
|---|---|---|---|---|
|
Webmaster
|
Thanks, I appreciate the kind words!
Posted on: 2011/11/14 23:03
|
|||
|
-BigKev
1954 Packard Clipper Deluxe Touring Sedan -> Registry | Project Blog 1937 Packard 115-C Convertible Coupe -> Registry | Project Blog |
||||
|
||||
|
Re: BigKev's 1954 Packard Clipper Deluxe Sedan
|
||||
|---|---|---|---|---|
|
Webmaster
|
Back in the car-hole for another night. I was doing some finish welding and grinding on the rear corner patch. Also I tack welded the patch on the inside to the under brace support. This stiffened up the entire area of the quarter panel dramatically.
Ordered some supplies today so I really get going with the body work. Also need to go refill the welding gas bottle...again. I really need a larger bottle.
Posted on: 2011/11/15 23:03
|
|||
|
-BigKev
1954 Packard Clipper Deluxe Touring Sedan -> Registry | Project Blog 1937 Packard 115-C Convertible Coupe -> Registry | Project Blog |
||||
|
||||
|
Re: BigKev's 1954 Packard Clipper Deluxe Sedan
|
||||
|---|---|---|---|---|
|
Webmaster
|
Got the welding bottled refilled, and back to work on the rust repairs.
Cut out the driverside dogleg made the replacement patch and welded it in. Still need to do some grinding and finish welding.no pictures as my phone SD card took a dump on me.
Posted on: 2011/11/17 23:05
|
|||
|
-BigKev
1954 Packard Clipper Deluxe Touring Sedan -> Registry | Project Blog 1937 Packard 115-C Convertible Coupe -> Registry | Project Blog |
||||
|
||||
|
Re: BigKev's 1954 Packard Clipper Deluxe Sedan
|
||||
|---|---|---|---|---|
|
Webmaster
|
Making progress in the garage today. First a picture of the passenger side with all the patch panels welded in.
First I finished the work on the Driver's side patch panel. Then it was onto replacing the rear cover that was bad. Much like the other panels it went like this. Paper (thin cardboard) template, which was transferred to a piece of 18ga steel. This was then cut out with a cut off wheel, and dressed with the die grinder. Then the two edges that are being welded into the existing panel had a step flange added to them. The old panel was then cut out. About 1 lb of dirt was packed in behind the panel. The interior of the cavity was then sprayed with some paint to ward off rust, and then new panel was then welded on with tack welds. This was then dressed with a grinder. Pretty much down with with major rust panel replacement. Still have a few small spots that need attention. With those done I move onto some of the dent removal that was needed. The car was rear-ended at one point and the area under the drive side tail light was needed some work. So using a hammer and a dolly I down the stress ridges (high spots), and using a bulls eye pic brought up the low spots. There were a couple of areas were using the pic or the hammer was not possible, so I had to use the stud gun to pull the low spots out. Also started to do some of the block sanding on the drivers side. Attach file:  (51.01 KB) (51.01 KB)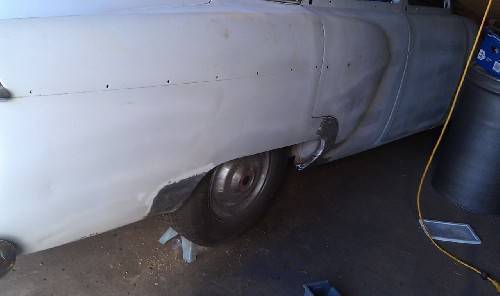  (41.99 KB) (41.99 KB)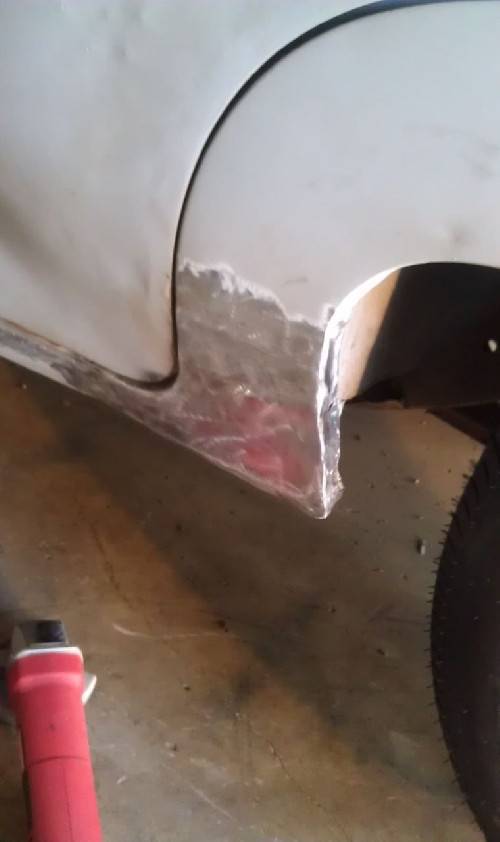  (50.96 KB) (50.96 KB)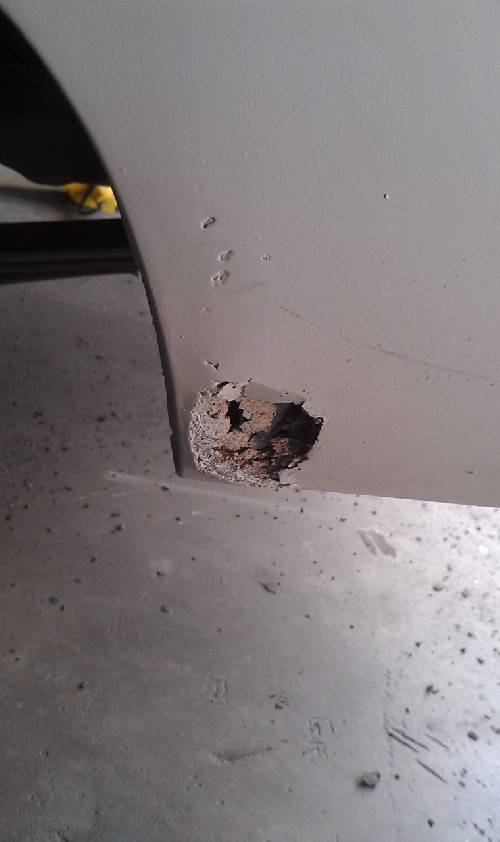  (46.90 KB) (46.90 KB)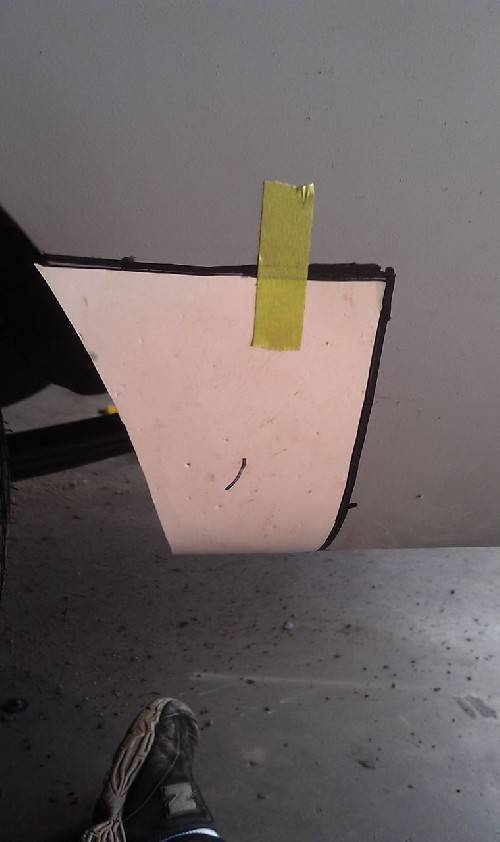  (58.05 KB) (58.05 KB)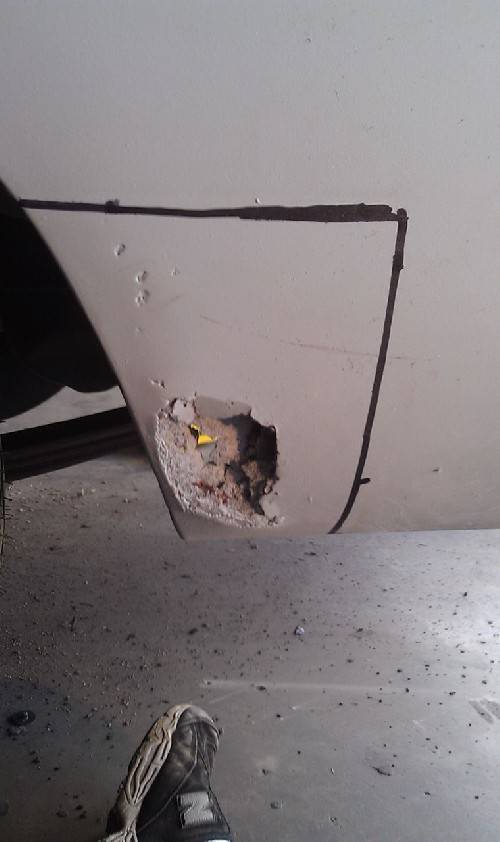  (83.50 KB) (83.50 KB)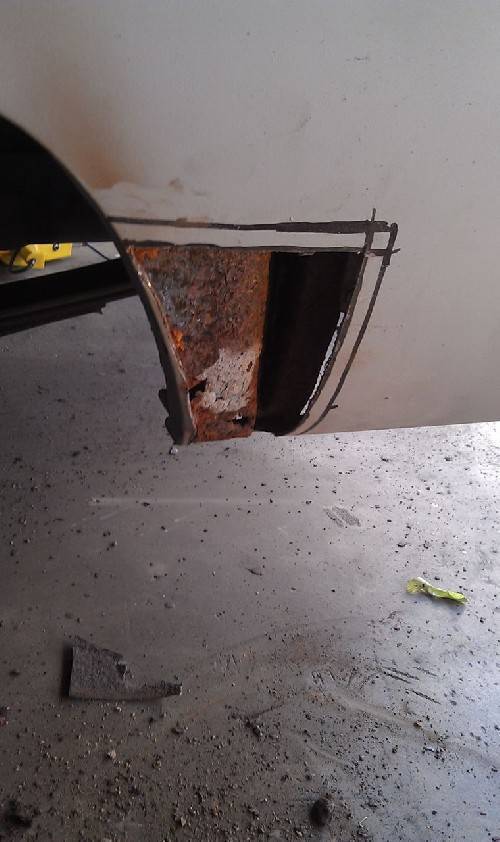  (94.56 KB) (94.56 KB)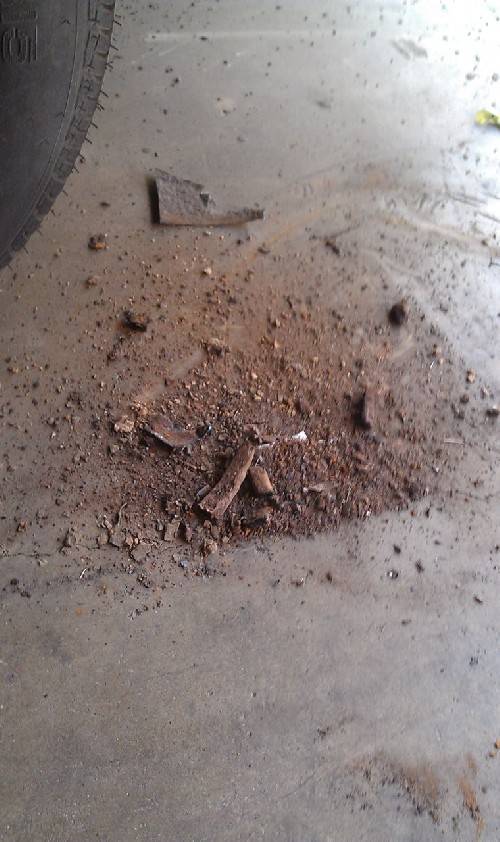  (67.37 KB) (67.37 KB)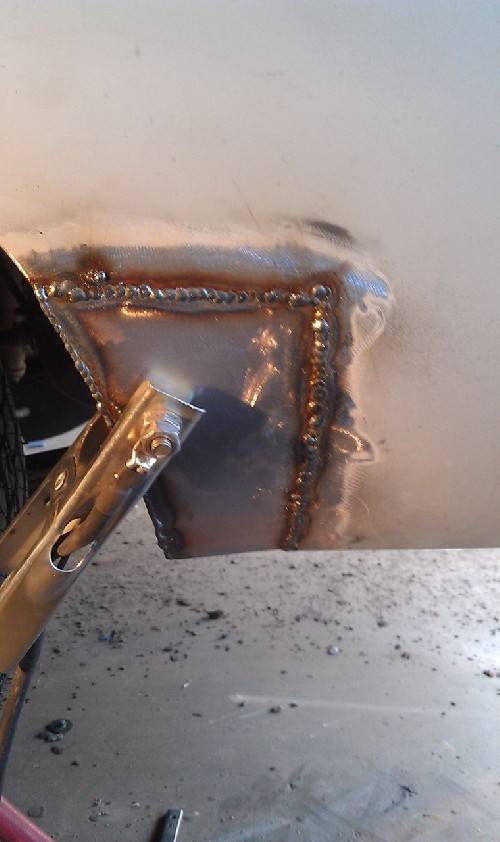  (78.22 KB) (78.22 KB)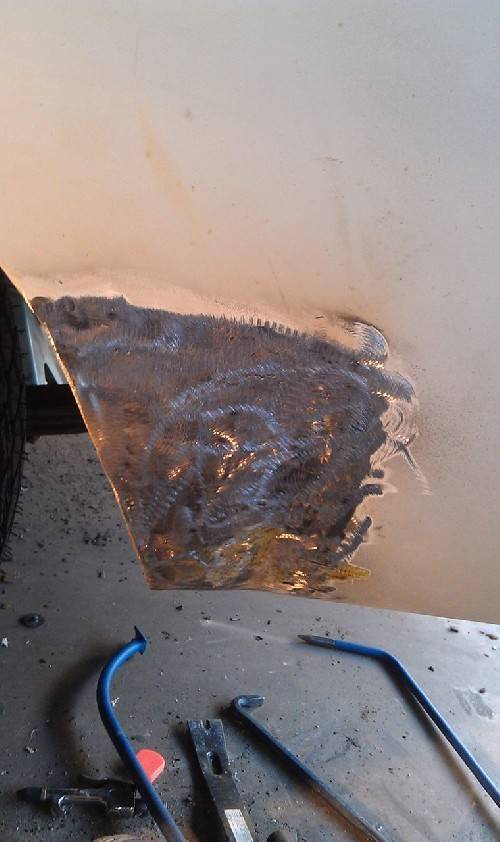
Posted on: 2011/11/23 22:44
|
|||
|
-BigKev
1954 Packard Clipper Deluxe Touring Sedan -> Registry | Project Blog 1937 Packard 115-C Convertible Coupe -> Registry | Project Blog |
||||
|
||||
|
Re: BigKev's 1954 Packard Clipper Deluxe Sedan
|
||||
|---|---|---|---|---|
|
Home away from home

|
Kev,
Your patience and craftsmanship are well-nigh unbelievable. Never again will I look at a car body as being beyond repair. You could use your photos and step-by-step guides in a body repair manual and instruction book for vocational schools--seriously!
Posted on: 2011/11/24 2:03
|
|||
|
Guy
[b]Not an Expert[/ |
||||
|
||||

