|
Re: 1940 front door window mechanism
|
||||
|---|---|---|---|---|
|
Home away from home

|
This did not work at all. The window would only roll half way.
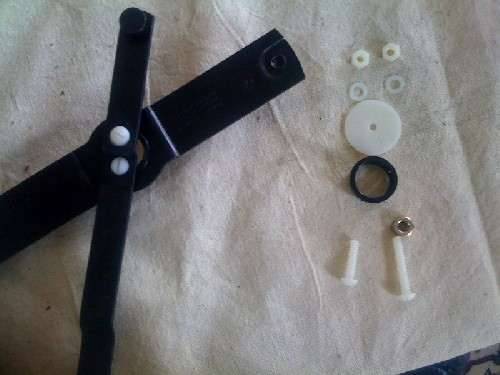
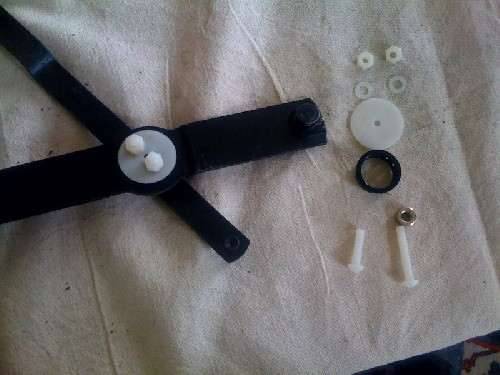
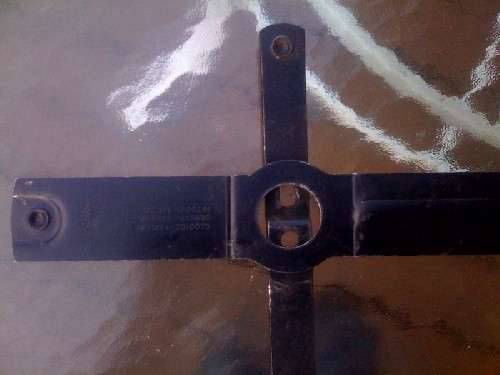
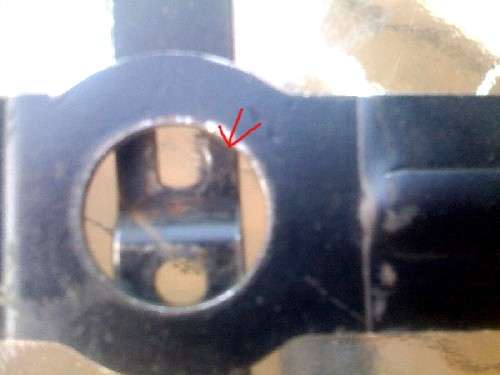
I've struggled for 3 nights with this. Flattening the heads of screws. Putting the screws pointing in and pointing out. Nothing works. I set the entire thing on the floor with the window. The small arm has to swing past the large arm to provide enough travel for the window to go all the way down. I tried putting it together to match the Parts Manual drawing. I'm missing some parts that go in the big round hole in the primary arm and I don't know what they are.
Posted on: 2011/7/8 15:43
|
|||
|
||||
|
Re: 1940 front door window mechanism
|
||||
|---|---|---|---|---|
|
Forum Ambassador
|
Are the two arms hitting together or is it the bar at the bottom of window hitting the screws when trying to pass that is holding things up.
No idea at the moment if the arms without seeing the action but if it is the bar, then a guess is probably something along the lines you have made but without the bolts-- a shouldered center the thickness of both arms with either a slot the depth of the second arm or possibly something less thick but bosses fitting into the holes in the other arm. Maybe a 1/16 or so thick flange holding the arm on the one side. Threaded for countersunk flat head screws and those screws coming from the other side holding a washer also with countersunk holes large enough to keep the other arm sandwiched. Whole assy would need to be fairly flat. Probably a piece of felt somewhere to keep the arms from rattling. If you can't find a real one, a machine shop or friend with a lathe or mill should be able to make something fairly easily.
Posted on: 2011/7/8 16:35
|
|||
|
Howard
|
||||
|
||||
|
Re: 1940 front door window mechanism
|
||||
|---|---|---|---|---|
|
Home away from home

|
Thanks, Howard. That's encouraging.
Posted on: 2011/7/8 17:08
|
|||
|
||||
|
Re: 1940 front door window mechanism
|
||||
|---|---|---|---|---|
|
Home away from home

|
I spent 3 more hours trying to figure this out. Nothing works, even when loose as a goose.
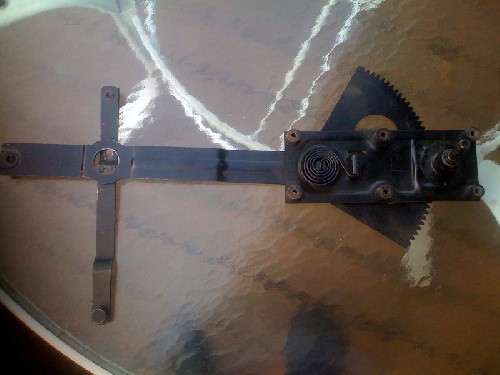
The wheel that rides in the channel of the window that's on the end of the shorter end of the secondary pivoting arm should be in the same plane as the wheel on the primary arm. They need to be facing the same direction, toward the outside of the door and fit into the window channel at the same level when the longer end of the secondary arm is in the fixed channel on the inside of the door. The primary arm has to pass from the top of the door when the window is raised, past the channel with the longer end of the secondary arm in it, to the bottom where the support for the vertical channel comes across. Whatever it is that attaches the arms positions the wheels in the same plane and keeps the secondary arm pivoting in a way that allows the primary arm to travel that distance. It took patented engineering genius to design it. For me it's a nightmare. I missed my cousin's wedding in St Helena, my son and daughter-in-law's 5th anniversary party in Santa Cruz, probably the local concours on the 17th because of this. No windows, no doors, no car. The only solution is the actual part(s).
Posted on: 2011/7/10 0:14
|
|||
|
||||
|
Re: 1940 front door window mechanism
|
||||
|---|---|---|---|---|
|
Forum Ambassador
|
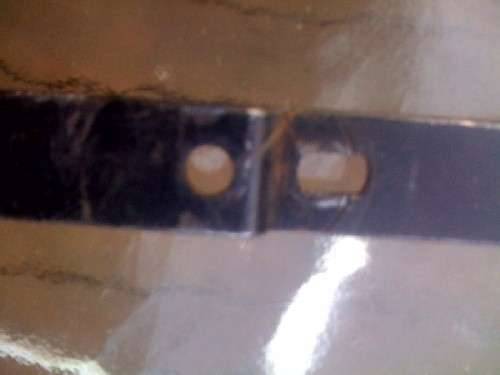
What is interesting is the arm lengths are different in your picture in post 3--actually on all of them. I'm not familiar enough with your mechanism, but if you look at every other window or mechanism picture in all the different parts manuals including different mechanisms in the 35-41 manual, the arms going to the window are the same length. They do seem to have a varying length on the side which mates with the door slide though. Can't tell for sure where the "button" is on the main arm of the one you are working on in the manual but it shows two same length arms on the top and right. Unless it's camera angle, don't see that in your pictures. Any way to move, rotate, reverse, swap sides or pieces on yours so the two arms to the window are equal and yet still bolt up?
Posted on: 2011/7/10 14:49
|
|||
|
Howard
|
||||
|
||||
|
Re: 1940 front door window mechanism
|
||||
|---|---|---|---|---|
|
Home away from home

|
Thanks, again, Howard. I took a rest from it yesterday. In the parts book, 35-41, the illustration for 30.386 on page 22 of DOORS looks just like mine. The arms are not the same length. The whole assembly must be riveted because there is no breakdown to smaller parts (except the screws for attaching the regulator to the door), the same rivets used to hold the buttons.
I may just have to buy a set of regulators to find out how these work. Same with the crank shafts on my rear doors. I have the regulator, handle, escutcheon, spring, but no shaft which goes into the regulator. I really appreciate your sitting in the pit with me on this one. But I am at wit's end to know what parts are on the back side of where the arms come together. I'll take more pics and post them.
Posted on: 2011/7/11 8:48
|
|||
|
||||
|
Re: 1940 front door window mechanism
|
||||
|---|---|---|---|---|
|
Home away from home

|
Quote:
...Whatever it is that attaches the arms positions the wheels in the same plane and keeps the secondary arm pivoting in a way that allows the primary arm to travel that distance... Joe, for weeks I remained silent on this as I'm still worried about my English but all of your pics seem to show the same mistake. Perhaps my suggestion is trivial but you have to thread the bars into one another. I will look for a suitable pic if you like.
Posted on: 2011/7/11 9:30
|
|||
|
The story of ZIS-110, ZIS-115, ZIL-111 & Chaika GAZ-13 on www.guscha.de
|
||||
|
||||
|
Re: 1940 front door window mechanism
|
||||
|---|---|---|---|---|
|
Home away from home

|
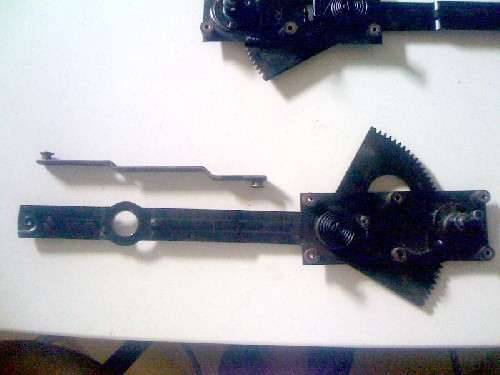
On the other secondary arm I noticed some wear, as you mentioned earlier.
So I think there is a bushing with a slot for the closer part of the secondary arm to slip through that allows the arm to rotate 180 degrees both directions and keeps the button on the shorter end in the same plane as the button on the primary arm. Is that what you already described to me? (probably, I'm guessing)
Posted on: 2011/7/11 9:33
|
|||
|
||||
|
Re: 1940 front door window mechanism
|
||||
|---|---|---|---|---|
|
Home away from home

|
Joe, just put one arm through the hole of the other arm.
Posted on: 2011/7/11 9:38
|
|||
|
The story of ZIS-110, ZIS-115, ZIL-111 & Chaika GAZ-13 on www.guscha.de
|
||||
|
||||

 (64.26 KB)